oil level SUBARU LEGACY 2012 5.G Owners Manual
[x] Cancel search | Manufacturer: SUBARU, Model Year: 2012, Model line: LEGACY, Model: SUBARU LEGACY 2012 5.GPages: 474, PDF Size: 17.45 MB
Page 22 of 474

&Warning and indicator lights
Mark Name Page
Seatbelt warning light 3-9
Front passenger ’s
seatbelt warning light 3-9
SRS airbag system
warning light3-11
CHECK ENGINE warn-
ing light/Malfunction in-
dicator light3-12
Coolant temperature
low indicator light/Cool-
ant temperature high
warning light3-13
Charge warning light 3-14
Oil pressure warning light
3-14
Engine oil level warning light3-14
AT OIL TEMP warning
light (AT and CVT mod- els)3-14
/ABS warning light 3-16 Mark Name Page
/Brake system warning light
3-17
Hill Holder indicator light3-19
Door open indicator light
3-19
Low fuel warning light 3-19
All-Wheel Drive warn-
ing light (AT and CVT models)3-20
Vehicle Dynamics Con-
trol warning light/Vehi-
cle Dynamics Control
operation indicator light3-20
Vehicle Dynamics Con-
trol OFF indicator light
3-21
Security indicator light 3-21
Turn signal indicator lights
3-22
High beam indicator light3-22
Front fog light indicator
light (if equipped)3-23Mark Name Page
Cruise control indicator light
3-23
Cruise control set indi-
cator light3-23
Headlight indicator light 3-23
Low tire pressure
warning light
(U.S. spec. models)3-15
/Front passenger
’s fron-
tal airbag ON indicator light 3-11
/Front passenger
’s fron-
tal airbag OFF indicator light 3-11
Shift-up indicator 3-22
Windshield washer fluid
warning light
3-1919
Page 120 of 474
Ignition switch..................................................... 3-3
LOCK .................................................................. 3-3
Acc..................................................................... 3-4
ON...................................................................... 3-4
START ................................................................ 3-4
Key reminder chime ............................................ 3-4
Ignition switch light ............................................. 3-4
Hazard warning flasher ....................................... 3-5
Meters and gauges. ............................................. 3-5
Combination meter illumination ........................... 3-5
Canceling the function for meter/gauge needle movement upon turning on the ignition switch ............................................................... 3-5
Speedometer ....................................................... 3-6
Odometer ............................................................ 3-6
Double trip meter ................................................ 3-6
Tachometer ......................................................... 3-7
Fuel gauge .......................................................... 3-7
ECO gauge ......................................................... 3-8
Warning and indicator lights .............................. 3-9
Seatbelt warning light and chime ......................... 3-9
SRS airbag system warning light ........................ 3-11
Front passenger ’s frontal airbag ON and OFF
indicators ......................................................... 3-11
CHECK ENGINE warning light/Malfunction indicator light ................................................... 3-12
Coolant temperature low indicator light/Coolant temperature high warning light ......................... 3-13
Charge warning light .......................................... 3-14
Oil pressure warning light .................................. 3-14
Engine low oil level warning light ....................... 3-14AT OIL TEMP warning light (AT and CVT
models) ........................................................... 3-14
Low tire pressure warning light (U.S. spec. models) ........................................................... 3-15
ABS warning light .............................................. 3-16
Brake system warning light ................................ 3-17
Hill Holder indicator light ................................... 3-19
Low fuel warning light ....................................... 3-19
Door open indicator light ................................... 3-19
Windshield washer fluid warning light ................ 3-19
All-Wheel Drive warning light (AT and CVT models) ........................................................... 3-20
Vehicle Dynamics Control warning light/Vehicle Dynamics Control operation indicator light .. ..... 3-20
Vehicle Dynamics Control OFF indicator light ..... 3-21
Security indicator light ....................................... 3-21
Select lever/gear position indicator ..................... 3-22
Turn signal indicator lights ................................. 3-22
High beam indicator light ................................... 3-22
Cruise control indicator light .............................. 3-23
Cruise control set indicator light ........................ 3-23
Headlight indicator light ..................................... 3-23
Front fog light indicator light (if equipped) ..... ..... 3-23
Clock .................................................................. 3-23
Multi function display ........................................ 3-24
Outside temperature indicator .. .......................... 3-24
Average fuel consumption ................................. 3-25
Current fuel consumption .................................. 3-26
Driving range on remaining fuel ......................... 3-26
Light control switch ........................................... 3-27
Headlights ......................................................... 3-27
Instruments and controls
3
Page 128 of 474

Warning and indicator lights
Several of the warning and indicator lights
illuminate momentarily and then go out
when the ignition switch is initially turned
to the“ON ”position. This permits check-
ing the operation of the bulbs.
Apply the parking brake and turn the
ignition switch to the “ON ”position. For
the system check, the following lights
illuminate and turn off after several sec-
onds or after the engine has started:
: Seatbelt warning light (The seatbelt warning light turns off
only when the driver fastens the seatbelt.)
: Front passenger ’s seatbelt warning
light
(The seatbelt warning light turns off
only when the front seat passenger
fastens the seatbelt.)
: SRS airbag system warning light
ON /
: Front passenger ’s frontal airbag
ON indicator light
/: Front passenger ’s frontal airbag
OFF indicator light
: CHECK ENGINE warning light/Mal- function indicator light
: Coolant temperature high warning light
: Charge warning light
: Oil pressure warning light
: Engine low oil level warning light
: Windshield washer fluid warning light
: AT OIL TEMP warning light(AT and CVT models)
/: ABS warning light
: Vehicle Dynamics Control warning light/Vehicle Dynamics Control opera-
tion indicator light
: Vehicle Dynamics Control OFF indica-
tor light
/: Brake system warning light
: Hill Holder indicator light
: All-Wheel Drive warning light (AT andCVT models)
: Low tire pressure warning light (U.S. spec. models)
: Low fuel warning light
: Door open indicator light
: Cruise control indicator light
: Cruise control set indicator light
: Select lever/gear position indicator
If any lights fail to illuminate, it indicates a
burned-out bulb or a malfunction of the
corresponding system.
Consult your authorized SUBARU dealer
for repair. & Seatbelt warning light
and chime
Your vehicle is equipped with a seatbelt
warning device at the driver ’s and front
passenger ’s seat, as required by current
safety standards.
With the ignition switch turned to the “ON ”
position, this device reminds the driver
and front passenger to fasten their seat-
belts by the warning lights in the locations
indicated in the following illustration and achime. Instruments and controls
3-9
– CONTINUED –
Page 133 of 474
3-14Instruments and controls
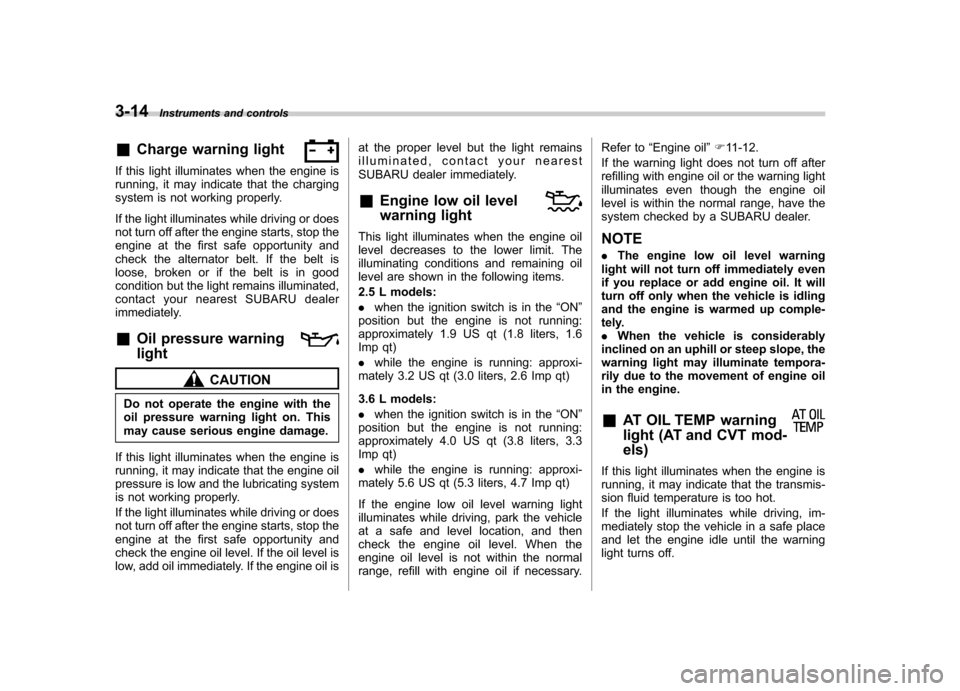
&Charge warning light
If this light illuminates when the engine is
running, it may indicate that the charging
system is not working properly.
If the light illuminates while driving or does
not turn off after the engine starts, stop the
engine at the first safe opportunity and
check the alternator belt. If the belt is
loose, broken or if the belt is in good
condition but the light remains illuminated,
contact your nearest SUBARU dealer
immediately. &Oil pressure warning light
CAUTION
Do not operate the engine with the
oil pressure warning light on. This
may cause serious engine damage.
If this light illuminates when the engine is
running, it may indicate that the engine oil
pressure is low and the lubricating system
is not working properly.
If the light illuminates while driving or does
not turn off after the engine starts, stop the
engine at the first safe opportunity and
check the engine oil level. If the oil level is
low, add oil immediately. If the engine oil is at the proper level but the light remains
illuminated, contact your nearest
SUBARU dealer immediately.
& Engine low oil level
warning light
This light illuminates when the engine oil
level decreases to the lower limit. The
illuminating conditions and remaining oil
level are shown in the following items.
2.5 L models:.when the ignition switch is in the “ON ”
position but the engine is not running:
approximately 1.9 US qt (1.8 liters, 1.6
Imp qt) . while the engine is running: approxi-
mately 3.2 US qt (3.0 liters, 2.6 Imp qt)
3.6 L models: . when the ignition switch is in the “ON ”
position but the engine is not running:
approximately 4.0 US qt (3.8 liters, 3.3
Imp qt) . while the engine is running: approxi-
mately 5.6 US qt (5.3 liters, 4.7 Imp qt)
If the engine low oil level warning light
illuminates while driving, park the vehicle
at a safe and level location, and then
check the engine oil level. When the
engine oil level is not within the normal
range, refill with engine oil if necessary. Refer to
“Engine oil ”F 11-12.
If the warning light does not turn off after
refilling with engine oil or the warning light
illuminates even though the engine oil
level is within the normal range, have the
system checked by a SUBARU dealer.
NOTE . The engine low oil level warning
light will not turn off immediately even
if you replace or add engine oil. It will
turn off only when the vehicle is idling
and the engine is warmed up comple-
tely.. When the vehicle is considerably
inclined on an uphill or steep slope, the
warning light may illuminate tempora-
rily due to the movement of engine oil
in the engine. & AT OIL TEMP warning
light (AT and CVT mod-els)
If this light illuminates when the engine is
running, it may indicate that the transmis-
sion fluid temperature is too hot.
If the light illuminates while driving, im-
mediately stop the vehicle in a safe place
and let the engine idle until the warning
light turns off.
Page 134 of 474
!Transmission control system warn- ing
If the “AT OIL TEMP ”warning light flashes
after the engine has started, it may
indicate that the transmission control
system is not working properly. Contact
your nearest SUBARU dealer for service
immediately.
& Low tire pressure
warning light (U.S. spec. models)
When the ignition switch is turned to the “ON ”position, the low tire pressure warn-
ing light will illuminate for approximately 2
seconds to check that the tire pressure
monitoring system (TPMS) is functioning
properly. If there is no problem and all tires
are properly inflated, the light will go out.
Each tire, including the spare (if provided),
should be checked monthly when cold
and inflated to the inflation pressure
recommended by the vehicle manufac-
turer on the vehicle placard or tire inflation
pressure label. (If your vehicle has tires of
a different size than the size indicated on
the vehicle placard or tire inflation pres-
sure label, you should determine the
proper tire inflation pressure for thosetires.)
As an added safety feature, your vehicle has been equipped with a tire pressure
monitoring system (TPMS) that illuminates
a low tire pressure telltale when one or
more of your tires is significantly under-
inflated. Accordingly, when the low tire
pressure telltale illuminates, you should
stop and check your tires as soon as
possible, and inflate them to the proper
pressure. Driving on a significantly under-
inflated tire causes the tire to overheat and
can lead to tire failure. Under-inflation also
reduces fuel efficiency and tire tread life,
and may affect the vehicle
’s handling and
stopping ability.
Please note that the TPMS is not a
substitute for proper tire maintenance,
and it is the driver ’s responsibility to
maintain correct tire pressure, even if
under-inflation has not reached the level
to trigger illumination of the TPMS low tire
pressure telltale.
Your vehicle has also been equipped with
a TPMS malfunction indicator to indicate
when the system is not operating properly.
The TPMS malfunction indicator is com-
bined with the low tire pressure telltale.
When the system detects a malfunction,
the telltale will flash for approximately one
minute and then remain continuously
illuminated. This sequence will continue
upon subsequent vehicle start-ups as long
as the malfunction exists. When the malfunction indicator is illuminated, the
system may not be able to detect or signal
low tire pressure as intended. TPMS
malfunctions may occur for a variety of
reasons, including the installation of re-
placement or alternate tires or wheels on
the vehicle that prevent the TPMS from
functioning properly. Always check the
TPMS malfunction telltale after replacing
one or more tires or wheels on your
vehicle to ensure that the replacement or
alternate tires and wheels allow the TPMS
to continue to function properly.
Should the warning light illuminate stea-
dily after blinking for approximately one
minute, have the system inspected by
your nearest SUBARU dealer as soon as possible.
WARNING
If this light does not illuminate
briefly after the ignition switch is
turned ON or the light illuminates
steadily after blinking for approxi-
mately one minute, you should have
your Tire Pressure Monitoring Sys-
tem checked at a SUBARU dealer as
soon as possible.
If this light illuminates while driving,
never brake suddenly and keep
driving straight ahead while gradu- Instruments and controls
3-15
– CONTINUED –
Page 285 of 474
7-8Starting and operating
NOTE
Engine oil, engine coolant, brake fluid,
washer fluid and other fluid levels
should be checked daily, weekly or at
fuel stops. Starting the engine
CAUTION
Do not operate the starter motor
continuously for more than 10 sec-
onds. If the engine fails to start after
operating the starter for 5 to 10
seconds, wait for 10 seconds or
more before trying again.
& MT models
1. Apply the parking brake.
2. Turn off unnecessary lights and ac- cessories.
3. Depress the clutch pedal to the floor
and shift the shift lever into neutral. Hold
the clutch pedal to the floor while starting
the engine. The starter motor will only
operate when the clutch pedal is de-
pressed fully to the floor.
4. Turn the ignition switch to the “ON ”
position and check the operation of the
warning and indicator lights. Refer to“ Warning and indicator lights ”F 3-9.
5. Turn the ignition switch to the “START ”
position without depressing the accelera-
tor pedal. Release the key immediately
after the engine has started.
If the engine does not start, perform the following procedure.
(1) Turn the ignition switch to the “LOCK ”position and wait for at least
10 seconds. After checking that the
parking brake is applied, turn the
ignition switch to the “START ”position
while depressing the accelerator pedal
slightly (approximately a quarter of the
full stroke). Release the accelerator
pedal as soon as the engine starts.
(2) If this fails to start the engine, turn
the ignition switch back to the “LOCK ”
position and wait for at least 10
seconds. Then fully depress the accel-
erator pedal and turn the ignition
switch to the “START ”position. If the
engine starts, quickly release the
accelerator pedal.
(3) If this does not start the engine,
turn the ignition switch again to the“ LOCK ”position. After waiting for 10
seconds or longer, turn the ignition
switch to the “START ”position without
depressing the accelerator pedal.
(4) If the engine still refuses to start,
contact your nearest SUBARU dealer
for assistance.
Page 299 of 474
7-22Starting and operating
turns off.
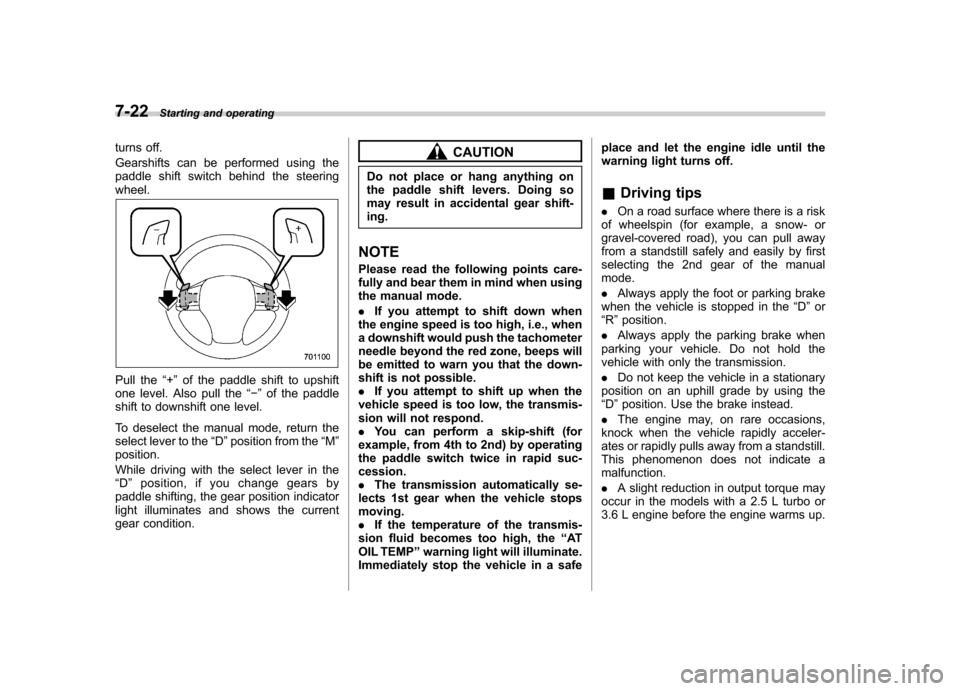
Gearshifts can be performed using the
paddle shift switch behind the steeringwheel.
Pull the “+ ” of the paddle shift to upshift
one level. Also pull the “� ” of the paddle
shift to downshift one level.
To deselect the manual mode, return the
select lever to the “D ”position from the “M ”
position.
While driving with the select lever in the “ D ” position, if you change gears by
paddle shifting, the gear position indicator
light illuminates and shows the current
gear condition.
CAUTION
Do not place or hang anything on
the paddle shift levers. Doing so
may result in accidental gear shift-ing.
NOTE
Please read the following points care-
fully and bear them in mind when using
the manual mode. . If you attempt to shift down when
the engine speed is too high, i.e., when
a downshift would push the tachometer
needle beyond the red zone, beeps will
be emitted to warn you that the down-
shift is not possible.. If you attempt to shift up when the
vehicle speed is too low, the transmis-
sion will not respond.. You can perform a skip-shift (for
example, from 4th to 2nd) by operating
the paddle switch twice in rapid suc-cession.. The transmission automatically se-
lects 1st gear when the vehicle stopsmoving.. If the temperature of the transmis-
sion fluid becomes too high, the “AT
OIL TEMP ”warning light will illuminate.
Immediately stop the vehicle in a safe place and let the engine idle until the
warning light turns off. &
Driving tips
. On a road surface where there is a risk
of wheelspin (for example, a snow- or
gravel-covered road), you can pull away
from a standstill safely and easily by first
selecting the 2nd gear of the manualmode. . Always apply the foot or parking brake
when the vehicle is stopped in the “D ”or
“ R ”position.
. Always apply the parking brake when
parking your vehicle. Do not hold the
vehicle with only the transmission. . Do not keep the vehicle in a stationary
position on an uphill grade by using the “ D ”position. Use the brake instead.
. The engine may, on rare occasions,
knock when the vehicle rapidly acceler-
ates or rapidly pulls away from a standstill.
This phenomenon does not indicate amalfunction. . A slight reduction in output torque may
occur in the models with a 2.5 L turbo or
3.6 L engine before the engine warms up.
Page 356 of 474
Engine overheating
WARNING
Never attempt to remove the radia-
tor cap until the engine has been
shut off and has fully cooled down.
When the engine is hot, the coolant
is under pressure. Removing the
cap while the engine is still hot
could release a spray of boiling hot
coolant, which could burn you very
seriously.
If the engine overheats, pull off the road
safely and stop the vehicle in a safe place. & If steam is coming from the
engine compartment
Turn off the engine and get everyone
away from the vehicle until it cools down. & If no steam is coming from
the engine compartment
NOTE
For details about how to check the
coolant level or how to add coolant,
refer to “Engine coolant ”F 11-17.
1. Keep the engine running at idlingspeed. 2. Open the hood to ventilate the engine
compartment. Refer to
“Engine hood ”
F 11-7.
Confirm that the cooling fan is turning. If
the fan is not turning, immediately turn off
the engine and contact your authorized
dealer for repair.
3. After the engine coolant temperature
has dropped, turn off the engine.
If the coolant temperature high warning
light illuminates, turn off the engine. Referto “Coolant temperature low indicator light/
Coolant temperature high warning light ”
F 3-13.
4. After the engine has fully cooled down,
check the coolant level in the reserve tank.
If the coolant level is below the “LOW ”
mark, add coolant up to the “FULL ”mark.
5. If there is no coolant in the reserve
tank, add coolant to the reserve tank.
Then remove the radiator cap and fill the
radiator with coolant.
If you remove the radiator cap from a hot
radiator, first wrap a thick cloth around the
radiator cap, then turn the cap counter-
clockwise slowly without pressing down
until it stops. Release the pressure from
the radiator. After the pressure has been
fully released, remove the cap by pressing
down and turning it. TowingWARNING
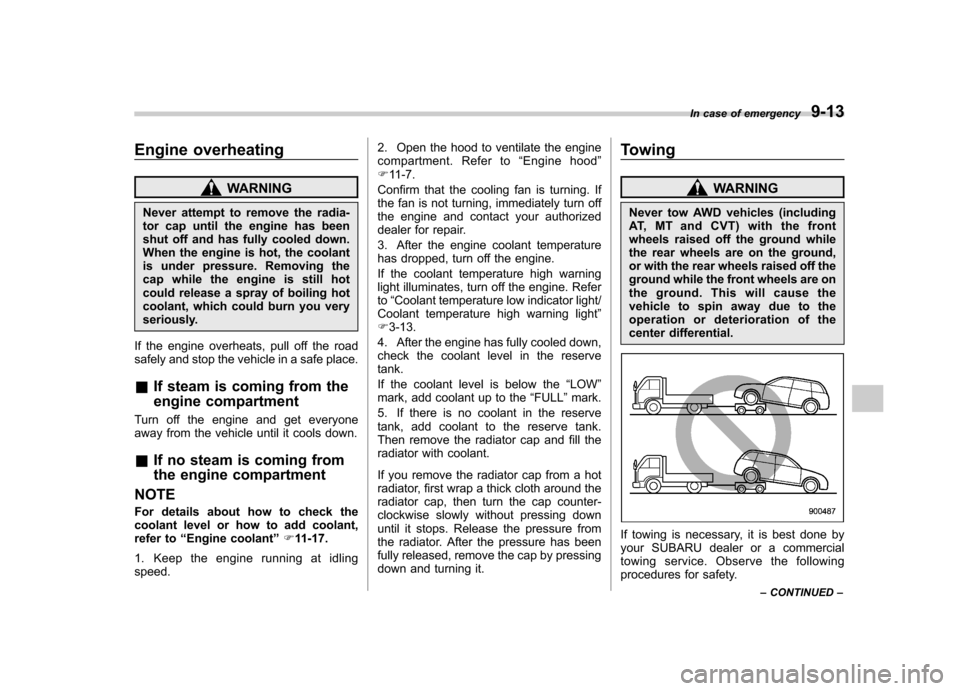
Never tow AWD vehicles (including
AT, MT and CVT) with the front
wheels raised off the ground while
the rear wheels are on the ground,
or with the rear wheels raised off the
ground while the front wheels are on
the ground. This will cause the
vehicle to spin away due to the
operation or deterioration of the
center differential.
If towing is necessary, it is best done by
your SUBARU dealer or a commercial
towing service. Observe the following
procedures for safety. In case of emergency
9-13
– CONTINUED –
Page 372 of 474
Maintenance schedule....................................... 11-3
Maintenance precautions ................................... 11-3
Before checking or servicing in the engine compartment .................................................... 11-4
When checking or servicing in the engine compartment (2.5 L non-turbo models) .. ........... 11-4
When checking or servicing in the engine compartment while the engine is running .......... 11-5
Maintenance tips ................................................ 11-5
Removing and reinstalling clips .......................... 11-5
Removing air intake duct .................................... 11-7
Pulling off the fender lining ................................ 11-7
Engine hood ....................................................... 11-7
Engine compartment overview .......................... 11-9
2.5 L non-turbo models ...................................... 11-9
2.5 L turbo models ........................................... 11-10
3.6 L models .................................................... 11-11
Engine oil .......................................................... 11-12
Checking the oil level ....................................... 11-12
Changing the oil and oil filter ............................ 11-14
Recommended grade and viscosity .................. 11-16
Synthetic oil ..................................................... 11-16
Cooling system ................................................ 11-16
Cooling fan, hose and connections ................... 11-17
Engine coolant ................................................. 11-17
Air cleaner element .......................................... 11-18
Replacing the air cleaner element ..................... 11-18
Spark plugs ...................................................... 11-20
Recommended spark plugs .............................. 11-20
Drive belts ........................................................ 11-21 Manual transmission oil
.................................. 11-21
Recommended grade and viscosity .................. 11-21
Automatic transmission fluid .......................... 11-21
Checking the fluid level .................................... 11-21
Recommended fluid ......................................... 11-22
Continuously variable transmission fluid ...... 11-23
Front differential gear oil (AT and CVT models) .......................................................... 11-23
Checking the oil level ...................................... 11-23
Recommended grade and viscosity .................. 11-24
Rear differential gear oil .................................. 11-24
Recommended grade and viscosity .................. 11-24
Power steering fluid ........................................ 11-24
Checking the fluid level .................................... 11-24
Recommended fluid ......................................... 11-25
Brake fluid ........................................................ 11-25
Checking the fluid level .................................... 11-25
Recommended brake fluid ............................... 11-26
Clutch fluid (MT models) ................................. 11-26
Checking the fluid level .................................... 11-26
Recommended clutch fluid ............................... 11-27
Brake booster .................................................. 11-27
Brake pedal ...................................................... 11-28
Checking the brake pedal free play .................. 11-28
Checking the brake pedal reserve distance....... 11-28
Clutch pedal (MT models) ............................... 11-29
Checking the clutch function ............................ 11-29
Checking the clutch pedal free play .................. 11-29
Replacement of brake pad and lining ............ 11-29
Breaking-in of new brake pads and linings ....... 11-30 Maintenance and service
11
Page 380 of 474

Engine compartment overview &2.5 L non-turbo models1) Power steering fluid reservoir
(page 11-24)
2) Clutch fluid reservoir (page 11-26)
3) Brake fluid reservoir (page 11-25)
4) Fuse box (page 11-44)
5) Battery (page 11-43)
6) Windshield washer tank (page 11-37)
7) Engine oil filler cap (page 11-12)
8) Engine coolant reservoir (page 11-17)
9) Radiator cap (page 11-17)
10) Engine oil level gauge (page 11-12)
11) Air cleaner case (page 11-18) Maintenance and service
11-9
– CONTINUED –