change time SUBARU LEGACY 2013 5.G Navigation Manual
[x] Cancel search | Manufacturer: SUBARU, Model Year: 2013, Model line: LEGACY, Model: SUBARU LEGACY 2013 5.GPages: 112, PDF Size: 9.2 MB
Page 2 of 112
80 Navigation
Before Using the Navigation System
WA R N I N G
Read this manual first
Read this manual carefully before using the navigation
system. We are not liable for accidents or other problems
resulting from failure to follow the instructions in this
manual.
Follow all road signs and traffic rules
When driving using guidance from the navigation system,
be sure to follow the actual road signs and traffic
regulations. If road signs and traffic regulations are
changed, the data on the SD card may be out of date. Also,
the data on the map SD card does not take into account
factors such as weather, time zones, and occurrences such as
differences in congestion situations and temporary road
closures due to construction work. Always give precedence
to road signs and traffic rules over instructions from the
navigation system.
Not following the road signs and traffic rules could lead to
injury or traffic violations.
Drive safely
• Before following instructions from the navigation system
(changing lanes and so on), ch eck that you can carry out the
maneuver safely given the current traffic conditions. Always
put safety first before following any instructions.
• Do not watch the navigation screen while driving.
Ignoring surrounding traffic could lead to an accident. If you
need to look at the screen whil e driving, make sure you only
glance at the screen.
• You should stop the vehicle in a safe place before operating
the navigation system. For safety's sake, some of the
navigation system's buttons and functions cannot be used
unless the vehicle is stationary.
• When you need to look at the navigation screen, do so for
the shortest time possible. Looking away from the road for
too long could lead to an accident.
• Make sure this system is installed in a position legally
allowed in the country where you intend to use it. Some
countries and regions do not allow video screens to be
installed within the driver's line of sight.
Page 5 of 112
Navigation 83
Read First
This software is designed for optimum performance when
used for car navigation. It does not need a stylus for
operation. You can easily use buttons and maps on the screen
by touching them with the tip of your finger.
When you start the navigation software for the first time, the
initial settings screen is automatically displayed. Follow the
steps below to use the initial settings screen.
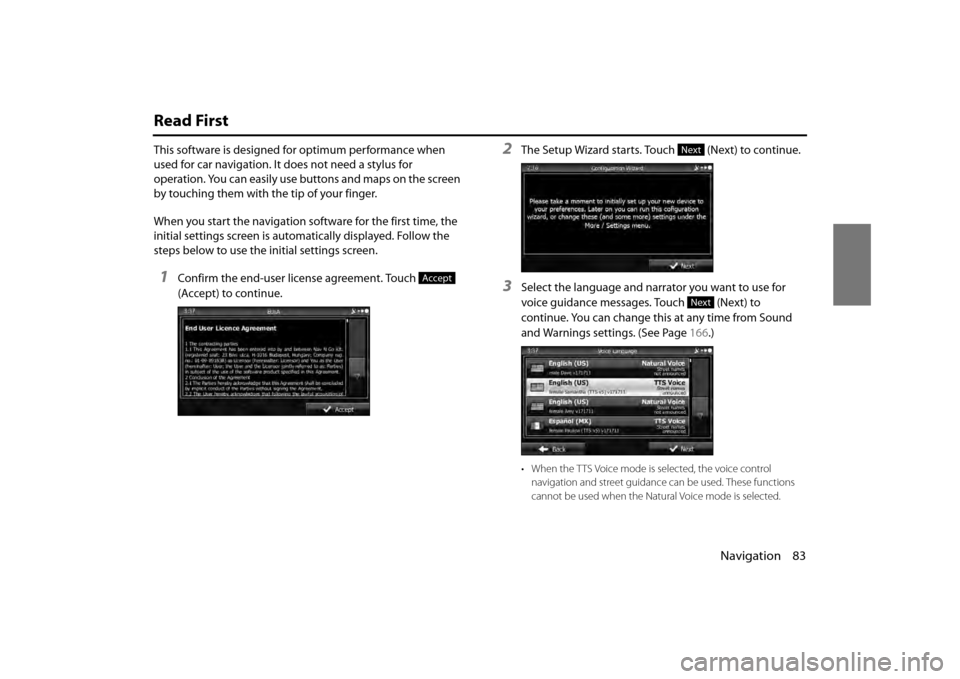
1Confirm the end-user license agreement. Touch
(Accept) to continue.
2The Setup Wizard starts. Touch (Next) to continue.
3Select the language and narrator you want to use for
voice guidance messages. Touch (Next) to
continue. You can change this at any time from Sound
and Warnings settings. (See Page 166.)
• When the TTS Voice mode is selected, the voice control
navigation and street guidance can be used. These functions
cannot be used when the Natural Voice mode is selected.
Accept
Next
Next
Page 6 of 112
84 Navigation
Read First
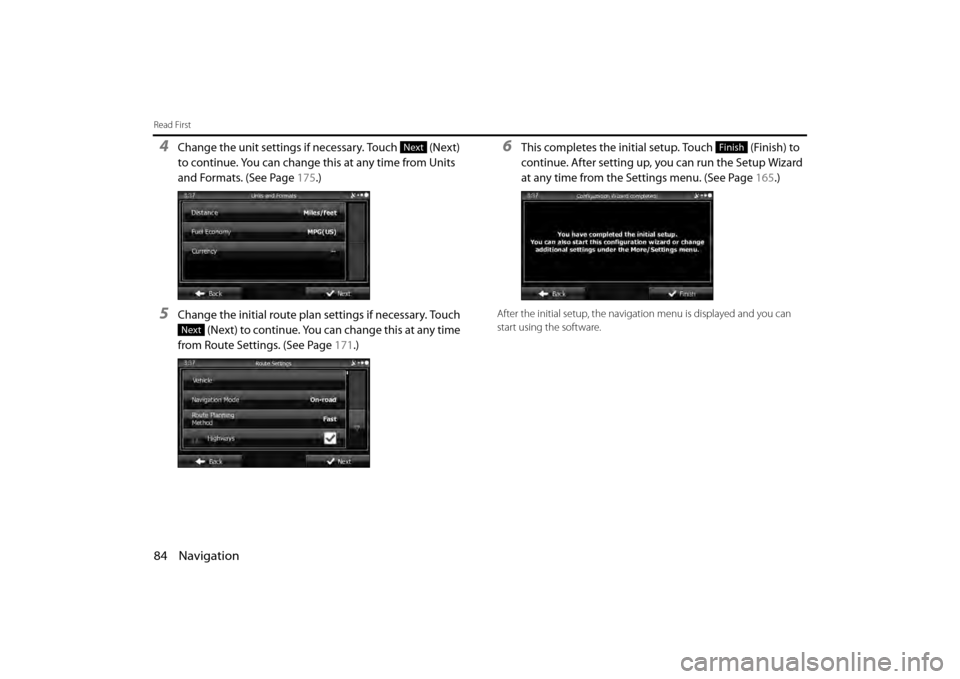
4Change the unit settings if necessary. Touch (Next)
to continue. You can change this at any time from Units
and Formats. (See Page 175.)
5Change the initial route plan settings if necessary. Touch
(Next) to continue. You can change this at any time
from Route Settings. (See Page 171.)
6This completes the initial setup. Touch (Finish) to
continue. After setting up, you can run the Setup Wizard
at any time from the Settings menu. (See Page 165.)
After the initial setup, the navigati on menu is displayed and you can
start using the software.
Next
Next
Finish
Page 13 of 112
Navigation 91
Read First
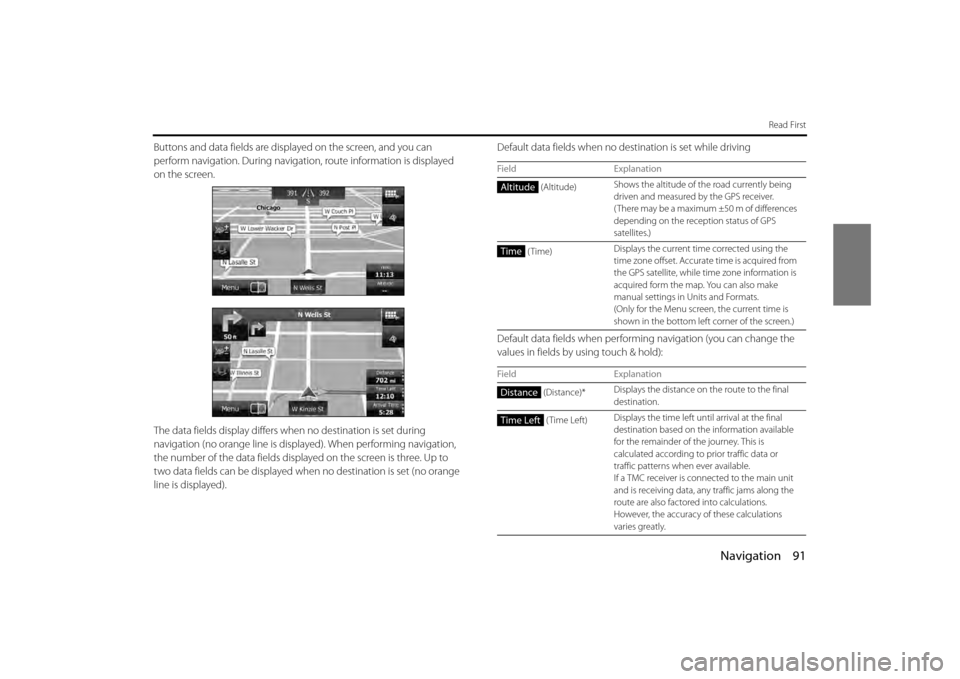
Buttons and data fields are displayed on the screen, and you can
perform navigation. During navigati on, route information is displayed
on the screen.
The data fields display differs wh en no destination is set during
navigation (no orange line is displayed). When performing navigation,
the number of the data fields displa yed on the screen is three. Up to
two data fields can be displayed when no destination is set (no orange
line is displayed). Default data fields when no de
stination is set while driving
Default data fields when performing navigation (you can change the
values in fields by using touch & hold):
Field Explanation
(Altitude) Shows the altitude of the road currently being
driven and measured by the GPS receiver.
( There may be a maximum ±50 m of differences
depending on the rece
ption status of GPS
satellites.)
(Time) Displays the current time corrected using the
time zone offset. Accurate
time is acquired from
the GPS satellite, while ti me zone information is
acquired form the map. You can also make
manual settings in Units and Formats.
(Only for the Menu screen, the current time is
shown in the bottom left corner of the screen.)
Field Explanation
(Distance)* Displays the distance on
the route to the final
destination.
(Time Left) Displays the time left un
til arrival at the final
destination based on th e information available
for the remainder of the journey. This is
calculated according to prior traffic data or
traffic patterns when ever available.
If a TMC receiver is connected to the main unit
and is receiving data, an y traffic jams along the
route are also factored into calculations.
However, the accuracy of these calculations
varies greatly.
Altitude
Time
Distance
Time Left
Page 18 of 112
96 Navigation
Read First
■Items displayed during route navigation
The route is displayed using the following methods.
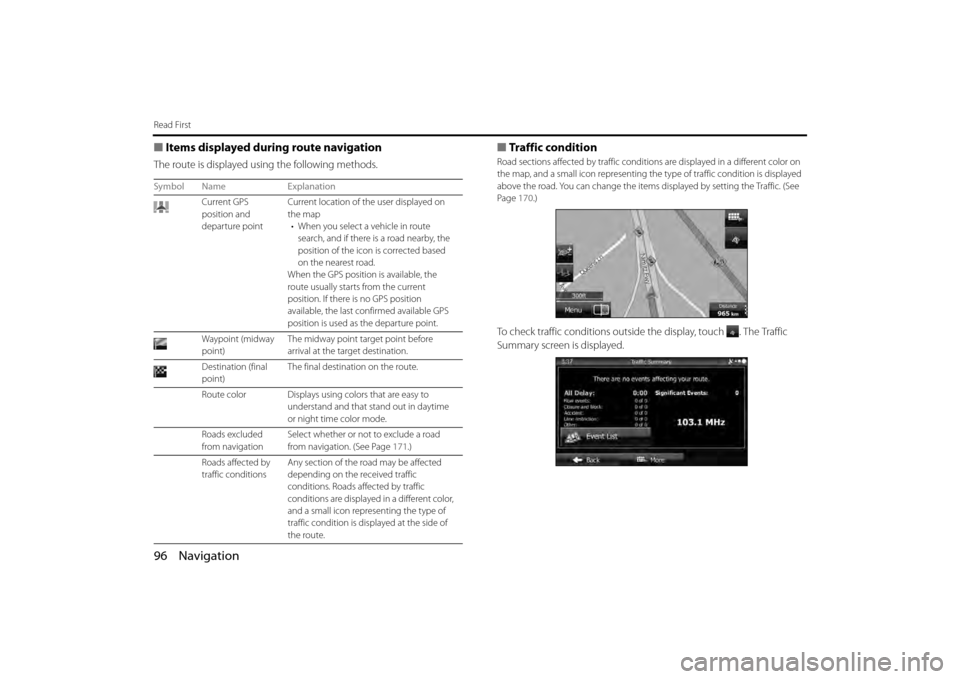
■Traffic condition
Road sections affected by traffic conditions are displa yed in a different color on
the map, and a small icon re presenting the type of traffic condition is displayed
above the road. You can change the items displayed by setting the Traffic. (See
Page 170.)
To check traffic conditions outside the display, touch . The Traffic
Summary screen is displayed.
Symbol Name Explanation
Current GPS
position and
departure point Current location of th
e user displayed on
the map • When you select a vehicle in route search, and if there is a road nearby, the
position of the icon is corrected based
on the nearest road.
When the GPS position is available, the
route usually starts from the current
position. If there is no GPS position
available, the last confirmed available GPS
position is used as the departure point.
Waypoint (midway
point) The midway point target point before
arrival at the target destination.
Destination (final
point) The final destination on the route.
Route color Displays using colors that are easy to understand and that stand out in daytime
or night time color mode.
Roads excluded
from navigation Select whether or not to exclude a road
from navigation. (See Page
171.)
Roads affected by
traffic conditions Any section of the road may be affected
depending on the received traffic
conditions. Roads af
fected by traffic
conditions are displayed in a different color,
and a small icon representing the type of
traffic condition is disp layed at the side of
the route.
Page 20 of 112
98 Navigation
Read First
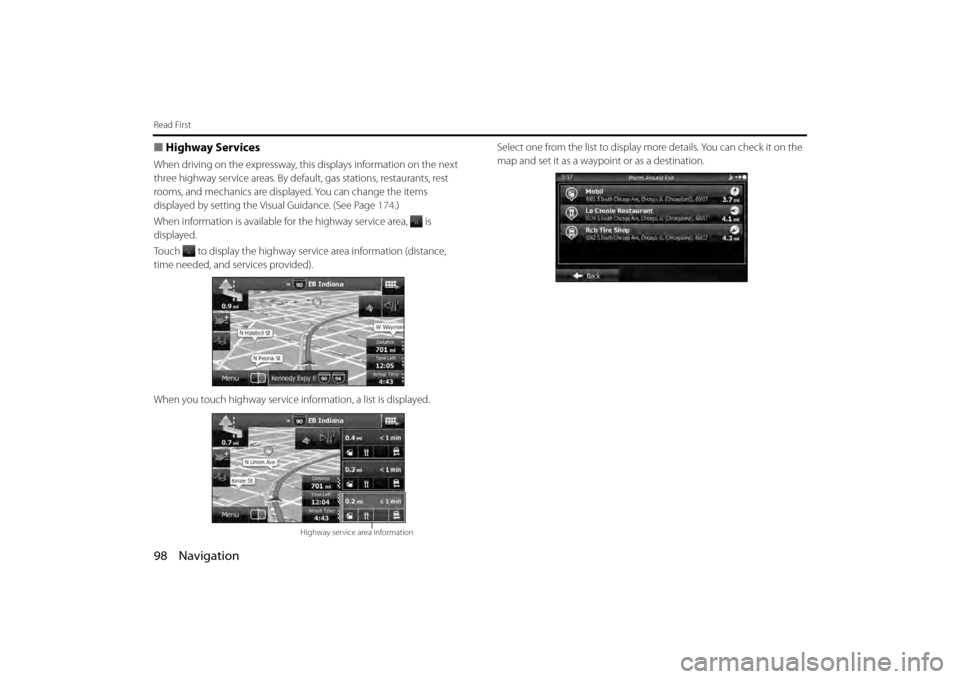
■Highway Services
When driving on the expressway, this displays information on the next
three highway service areas. By defaul t, gas stations, restaurants, rest
rooms, and mechanics are displa yed. You can change the items
displayed by setting the Visual Guidance. (See Page 174 .)
When information is available for the highway service area, is
displayed.
Touch to display the highway service area information (distance,
time needed, and services provided).
When you touch highway service in formation, a list is displayed. Select one from the list to display mo
re details. You can check it on the
map and set it as a waypoi nt or as a destination.
Highway service area information
Page 60 of 112
138 Navigation
Navigation
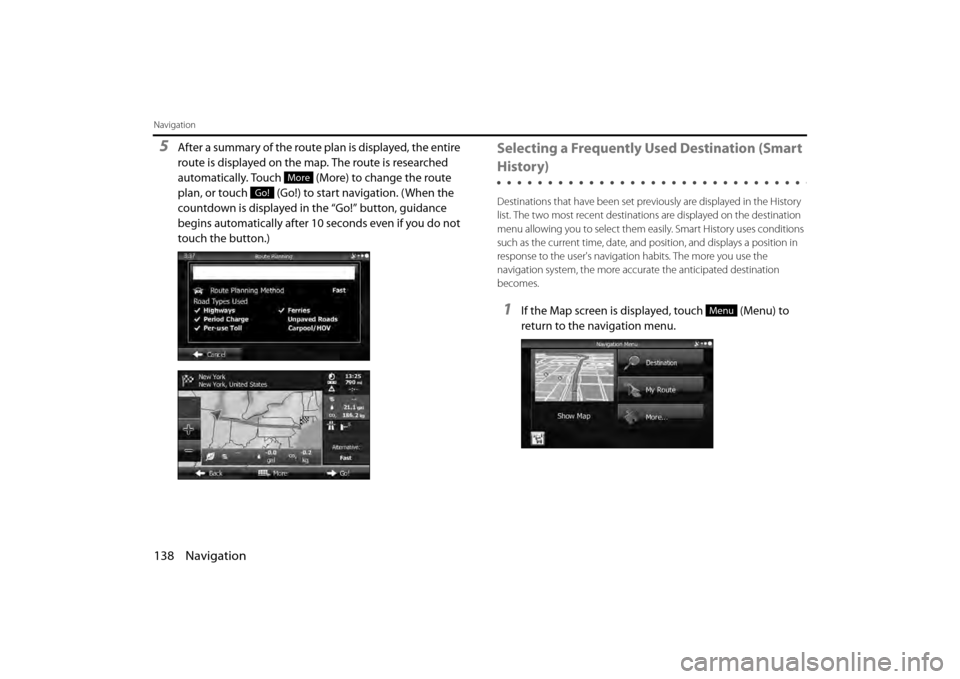
5After a summary of the route plan is displayed, the entire
route is displayed on the map. The route is researched
automatically. Touch (More) to change the route
plan, or touch (Go!) to start navigation. (When the
countdown is displayed in the “Go!” button, guidance
begins automatically after 10 seconds even if you do not
touch the button.)Selecting a Frequently Used Destination (Smart
History)
Destinations that have been set previously are displayed in the History
list. The two most recent destinatio ns are displayed on the destination
menu allowing you to select them easily. Smart History uses conditions
such as the current time, date, and position, and displays a position in
response to the user's navigati on habits. The more you use the
navigation system, the more accu rate the anticipated destination
becomes.
1If the Map screen is displayed, touch (Menu) to
return to the navigation menu.
More
Go!
Menu
Page 62 of 112
140 Navigation
Navigation
Selecting a Recent Destination from History
Destinations that have been set previously are displayed in the History
list.
1Use the History function as follows.
• If the Map screen is displayed, touch and then touch (History). (Only when registered to the Quick Menu.)
• If the Map screen is displayed, touch (Menu), (Destination) and then touch (History).
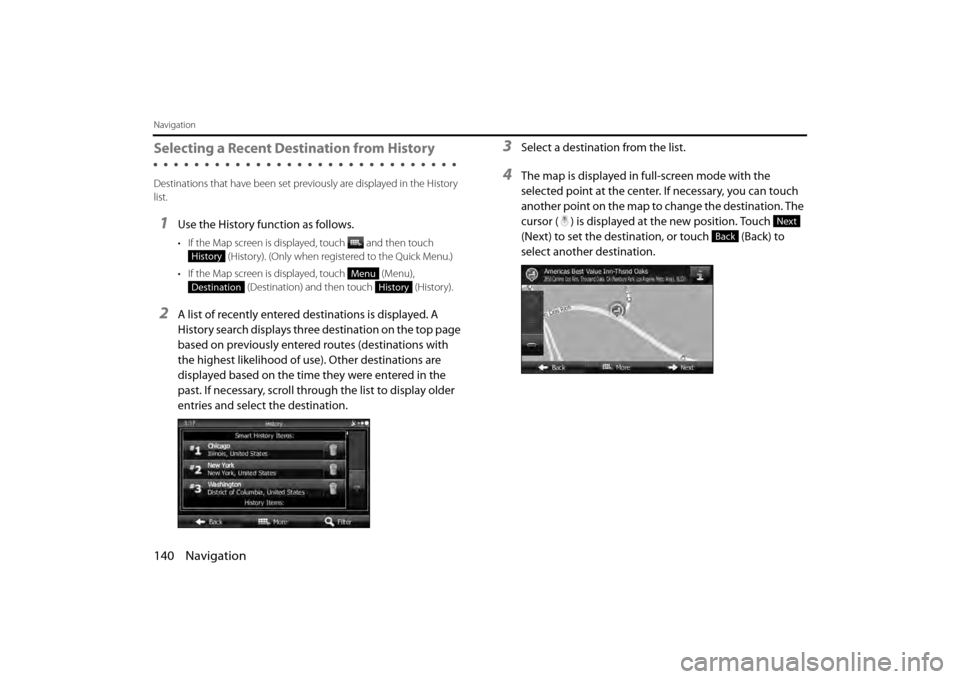
2A list of recently entered destinations is displayed. A
History search displays three destination on the top page
based on previously entered routes (destinations with
the highest likelihood of use). Other destinations are
displayed based on the time they were entered in the
past. If necessary, scroll through the list to display older
entries and select the destination.
3Select a destination from the list.
4The map is displayed in full-screen mode with the
selected point at the center. If necessary, you can touch
another point on the map to change the destination. The
cursor ( ) is displayed at the new position. Touch
(Next) to set the destination, or touch (Back) to
select another destination.
History
Menu
DestinationHistory
Next
Back
Page 66 of 112
144 Navigation
Navigation
Confirming Route Settings and Calling Route Related Functions
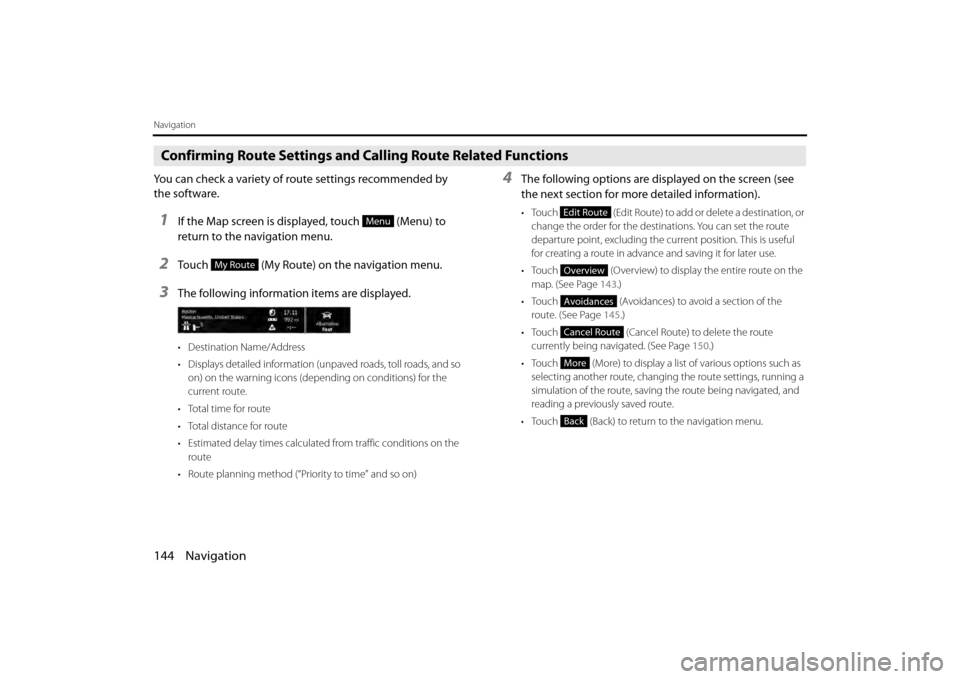
You can check a variety of route settings recommended by
the software.
1If the Map screen is displayed, touch (Menu) to
return to the navigation menu.
2Touch (My Route) on the navigation menu.
3The following information items are displayed.
• Destination Name/Address
• Displays detailed information (unpaved roads, toll roads, and so on) on the warning icons (depending on conditions) for the
current route.
•Total time for route
• Total distance for route
• Estimated delay times calculated from traffic conditions on the route
• Route planning method (“Priority to time” and so on)
4The following options are displayed on the screen (see
the next section for more detailed information).
• Touch (Edit Route) to add or delete a destination, or
change the order for the destinations. You can set the route
departure point, excluding the current position. This is useful
for creating a route in advance and saving it for later use.
• Touch (Overview) to display the entire route on the map. (See Page 143.)
• Touch (Avoidances) to avoid a section of the
route. (See Page 145.)
• Touch (Cancel Route) to delete the route
currently being navigated. (See Page 150.)
• Touch (More) to display a li st of various options such as
selecting another route, changing the route settings, running a
simulation of the route, saving the route being navigated, and
reading a previously saved route.
• Touch (Back) to return to the navigation menu.Menu
My Route
Edit Route
Overview
Avoidances
Cancel Route
More
Back
Page 81 of 112
Navigation 159
Reference Data
The following pages explain the software's various features and menu screens.
Feature
Smart Zoom
Smart zoom offers a large improvement over standard zoom functions.
• While driving the route: When approaching an intersection, the
screen is enlarged and the viewpoint raised so that you can easily
see which way to drive at the next intersection. After navigating the
intersection, the screen is reduced and the angle lowered to check
the road in front.
• When driving without route navigation: The screen is enlarged as
you slow down and reduced as you speed up.
Switching between Day and Night Screens
For the Map screen and menu screen, the colors differ between day and
night. • During daytime, the screen's colo rs are the same as those of a
printed map, and the menu is brighter.
• At night, the screen uses dark co lors for large objects and reduces
the overall brightness of the screen.
The screen's color scheme differs be tween day and night. When Link to
Day/Night View on the Settings screen is set to “Headlight” (See Page
31.), day view or night vi ew is selected based on whether the lights
(sidelights, tail lights, license plate light) are on or off, to make it easier to
view the screen. When “Time” is set (See Page 31.), the view changes at
the set time. Also, when set to “None” (See Page 32.), you can manually
switch to a day view or a night view screen at any time.