SUBARU LEGACY 2013 5.G Navigation Manual
Manufacturer: SUBARU, Model Year: 2013, Model line: LEGACY, Model: SUBARU LEGACY 2013 5.GPages: 112, PDF Size: 9.2 MB
Page 51 of 112
Navigation 129
Navigation
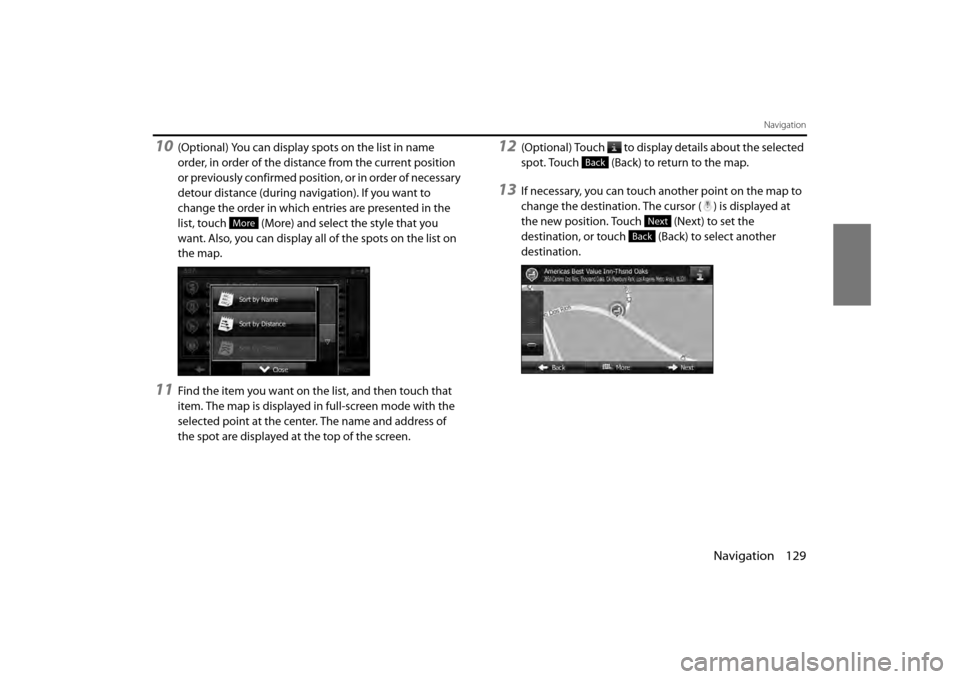
10(Optional) You can display spots on the list in name
order, in order of the distance from the current position
or previously confirmed position, or in order of necessary
detour distance (during navigation). If you want to
change the order in which entries are presented in the
list, touch (More) and select the style that you
want. Also, you can display all of the spots on the list on
the map.
11Find the item you want on the list, and then touch that
item. The map is displayed in full-screen mode with the
selected point at the center. The name and address of
the spot are displayed at the top of the screen.
12(Optional) Touch to display details about the selected
spot. Touch (Back) to return to the map.
13If necessary, you can touch another point on the map to
change the destination. The cursor ( ) is displayed at
the new position. Touch (Next) to set the
destination, or touch (Back) to select another
destination.
More
Back
Next
Back
Page 52 of 112
130 Navigation
Navigation
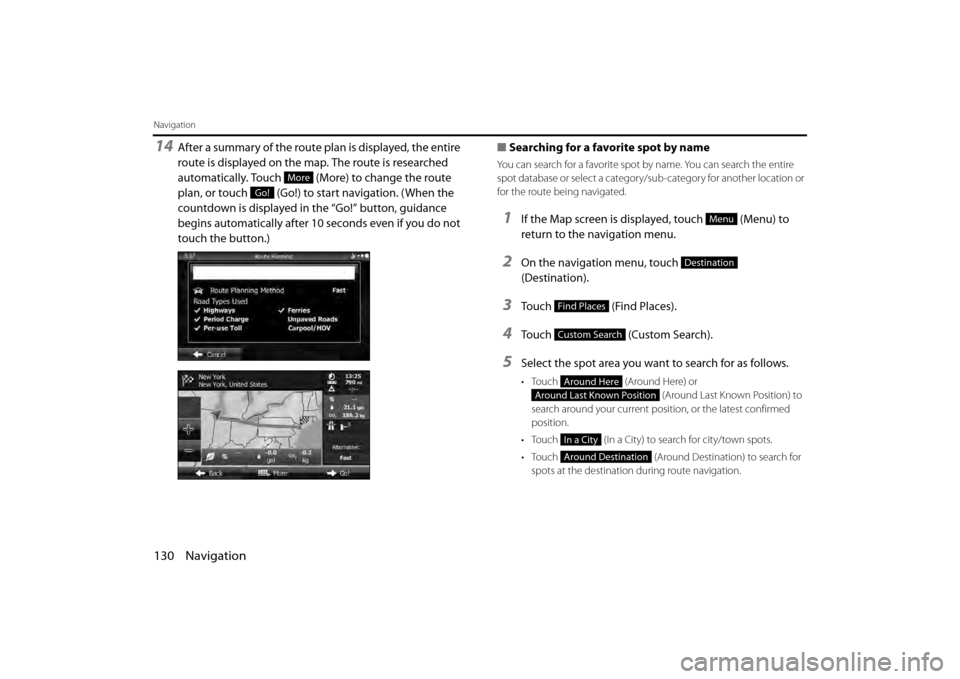
14After a summary of the route plan is displayed, the entire
route is displayed on the map. The route is researched
automatically. Touch (More) to change the route
plan, or touch (Go!) to start navigation. (When the
countdown is displayed in the “Go!” button, guidance
begins automatically after 10 seconds even if you do not
touch the button.)■
Searching for a favorite spot by name
You can search for a favorite spot by name. You can search the entire
spot database or select a category/sub-category for another location or
for the route being navigated.
1If the Map screen is displayed, touch (Menu) to
return to the navigation menu.
2On the navigation menu, touch
(Destination).
3Touch (Find Places).
4Touch (Custom Search).
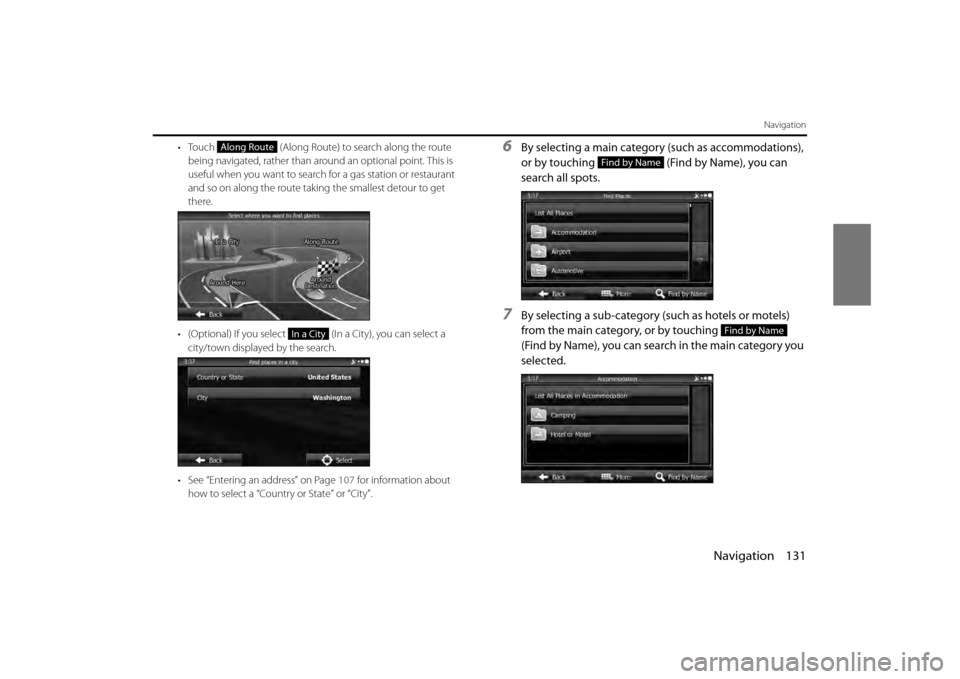
5Select the spot area you want to search for as follows.
• Touch (Around Here) or
(Around Last Known Position) to
search around your current position, or the latest confirmed
position.
• Touch (In a City) to search for city/town spots.
• Touch (Around Destination) to search for
spots at the destination during route navigation.
More
Go!
Menu
Destination
Find Places
Custom Search
Around Here
Around Last Known Position
In a City
Around Destination
Page 53 of 112
Navigation 131
Navigation
• Touch (Along Route) to search along the route
being navigated, rather than around an optional point. This is
useful when you want to search for a gas station or restaurant
and so on along the route taking the smallest detour to get
there.
• (Optional) If you select (In a City), you can select a city/town displayed by the search.
• See “Entering an address” on Page 107 for information about
how to select a “Country or State” or “City”.6By selecting a main category (such as accommodations),
or by touching (Find by Name), you can
search all spots.
7By selecting a sub-category (such as hotels or motels)
from the main category, or by touching
(Find by Name), you can search in the main category you
selected.
Along Route
In a City
Find by Name
Find by Name
Page 54 of 112
132 Navigation
Navigation
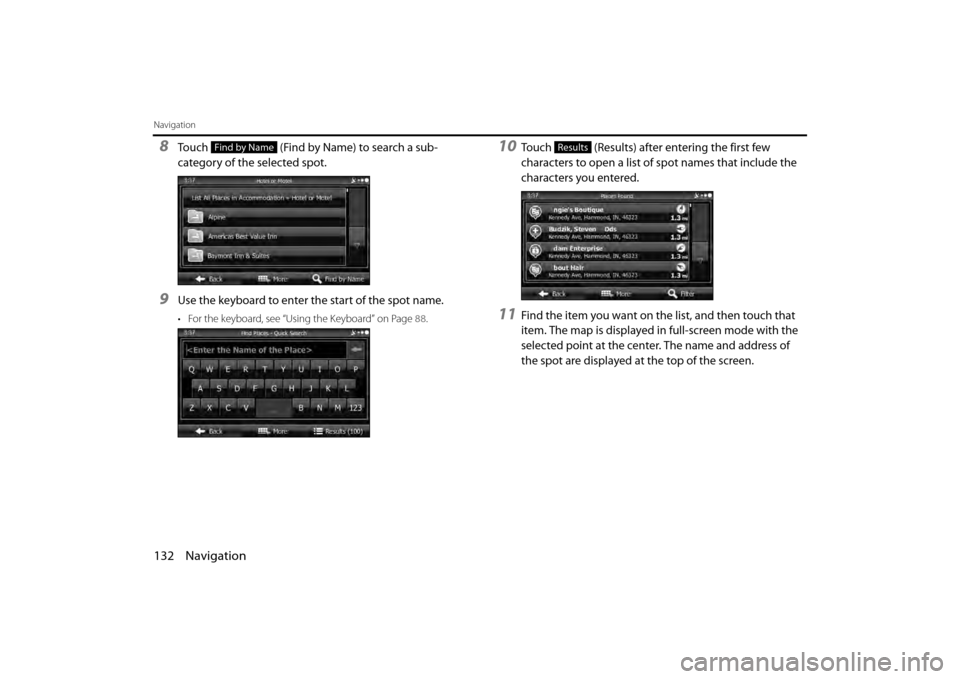
8Touch (Find by Name) to search a sub-
category of the selected spot.
9Use the keyboard to enter the start of the spot name.
• For the keyboard, see “Using the Keyboard” on Page 88.
10Touch (Results) after entering the first few
characters to open a list of spot names that include the
characters you entered.
11Find the item you want on the list, and then touch that
item. The map is displayed in full-screen mode with the
selected point at the center. The name and address of
the spot are displayed at the top of the screen.
Find by NameResults
Page 55 of 112
Navigation 133
Navigation
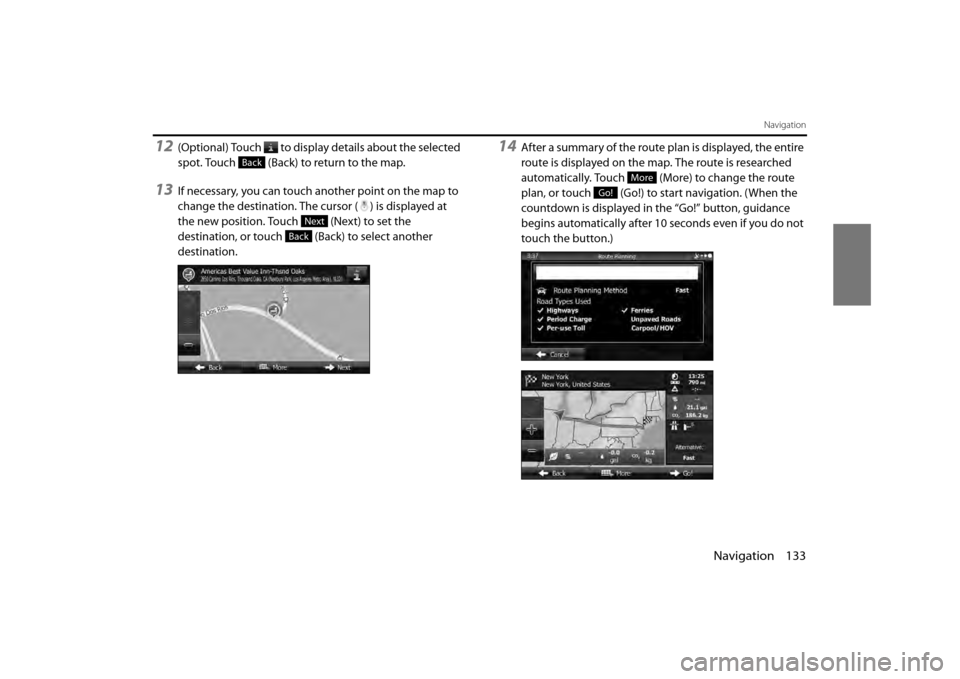
12(Optional) Touch to display details about the selected
spot. Touch (Back) to return to the map.
13If necessary, you can touch another point on the map to
change the destination. The cursor ( ) is displayed at
the new position. Touch (Next) to set the
destination, or touch (Back) to select another
destination.
14After a summary of the route plan is displayed, the entire
route is displayed on the map. The route is researched
automatically. Touch (More) to change the route
plan, or touch (Go!) to start navigation. (When the
countdown is displayed in the “Go!” button, guidance
begins automatically after 10 seconds even if you do not
touch the button.)
Back
Next
Back
More
Go!
Page 56 of 112
134 Navigation
Navigation
■Using “Where Am I?” to select the closest assistance
service
You can search for the closest assist ance service by using the “Where
Am I?” screen.
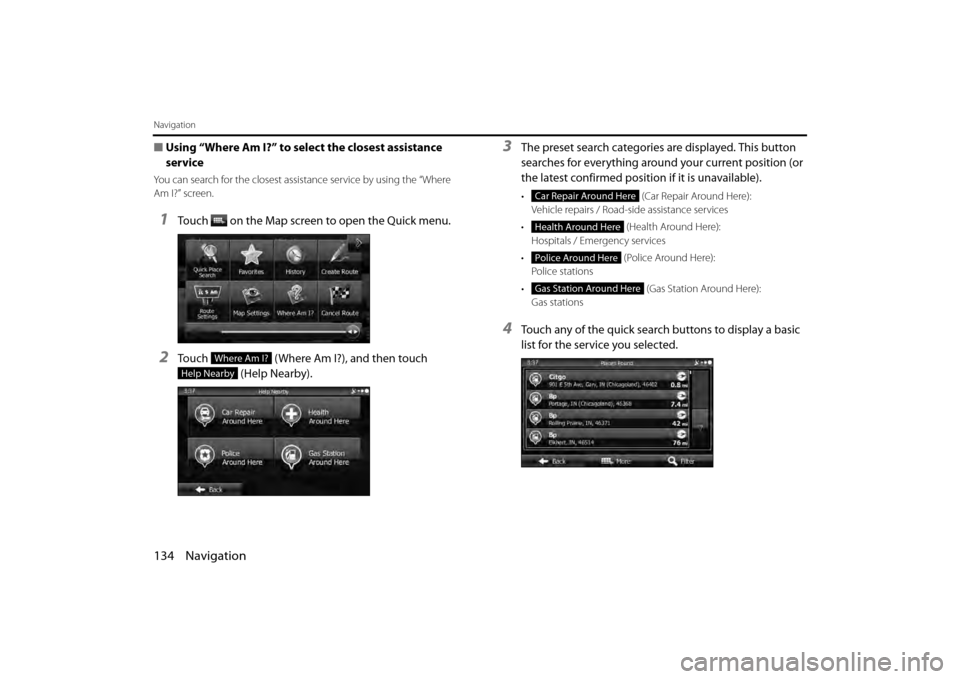
1Touch on the Map screen to open the Quick menu.
2Touch (Where Am I?), and then touch
(Help Nearby).
3The preset search categories are displayed. This button
searches for everything around your current position (or
the latest confirmed position if it is unavailable).
• (Car Repair Around Here):
Vehicle repairs / Road-side assistance services
• (Health Around Here):
Hospitals / Emergency services
• ( Po lic e A ro un d H ere ):
Police stations
• (Gas Station Around Here):
Gas stations
4Touch any of the quick search buttons to display a basic
list for the service you selected.
Where Am I?
Help Nearby
Car Repair Around Here
Health Around Here
Police Around Here
Gas Station Around Here
Page 57 of 112
Navigation 135
Navigation
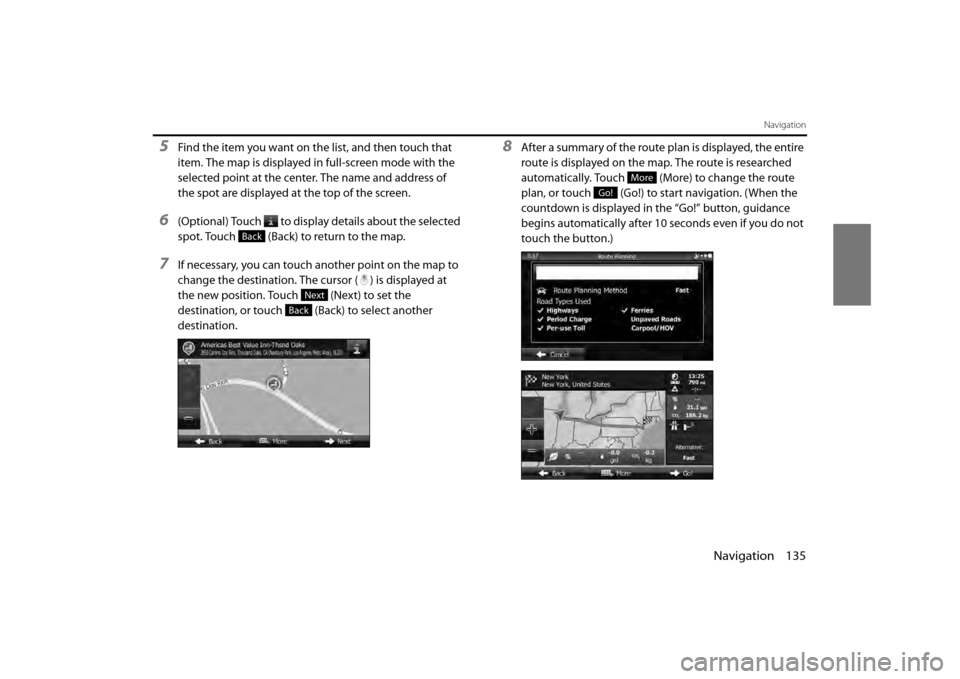
5Find the item you want on the list, and then touch that
item. The map is displayed in full-screen mode with the
selected point at the center. The name and address of
the spot are displayed at the top of the screen.
6(Optional) Touch to display details about the selected
spot. Touch (Back) to return to the map.
7If necessary, you can touch another point on the map to
change the destination. The cursor ( ) is displayed at
the new position. Touch (Next) to set the
destination, or touch (Back) to select another
destination.
8After a summary of the route plan is displayed, the entire
route is displayed on the map. The route is researched
automatically. Touch (More) to change the route
plan, or touch (Go!) to start navigation. (When the
countdown is displayed in the “Go!” button, guidance
begins automatically after 10 seconds even if you do not
touch the button.)
Back
Next
Back
More
Go!
Page 58 of 112
136 Navigation
Navigation
Selecting a Map Position as the Destination
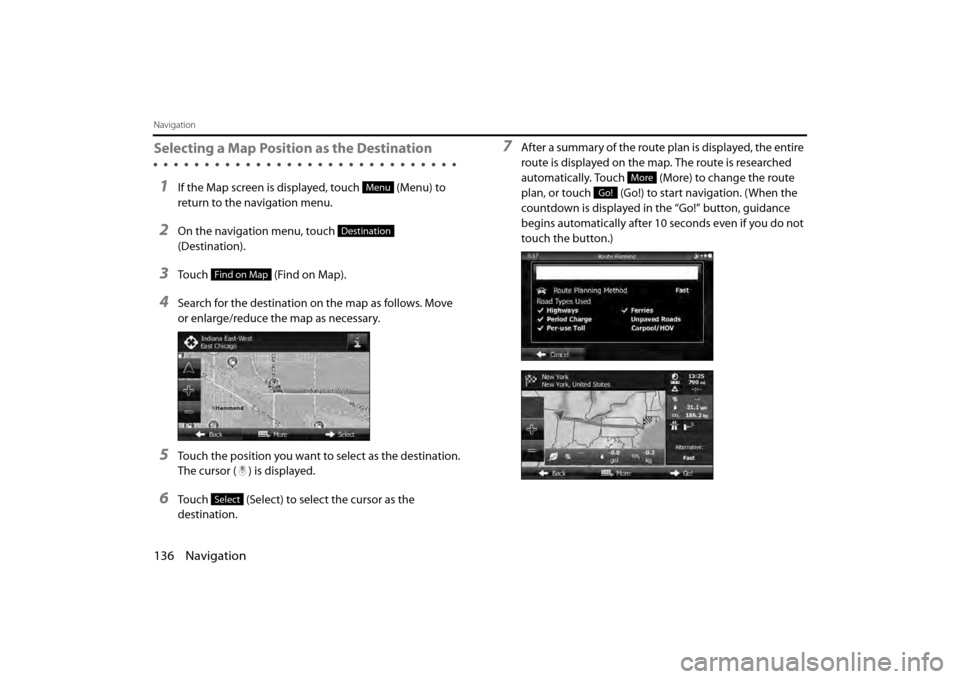
1If the Map screen is displayed, touch (Menu) to
return to the navigation menu.
2On the navigation menu, touch
(Destination).
3Touch (Find on Map).
4Search for the destination on the map as follows. Move
or enlarge/reduce the map as necessary.
5Touch the position you want to select as the destination.
The cursor ( ) is displayed.
6Touch (Select) to select the cursor as the
destination.
7After a summary of the route plan is displayed, the entire
route is displayed on the map. The route is researched
automatically. Touch (More) to change the route
plan, or touch (Go!) to start navigation. (When the
countdown is displayed in the “Go!” button, guidance
begins automatically after 10 seconds even if you do not
touch the button.)
Menu
Destination
Find on Map
Select
More
Go!
Page 59 of 112
Navigation 137
Navigation
Selecting the Destination from the Destination
List
You can set a position that has been saved in the destination list as the
destination.
See “Editing the Destination List (Route Editing)” on Page 149 for more
details on registering a positi on to the destination list.
1Display the destination list as follows.
• If the Map screen is displayed, touch and then touch
(Favorites). (Only when registered to the Quick
Menu.)
• If the Map screen is displayed, touch (Menu), (Destination) and then touch
(Favorites).
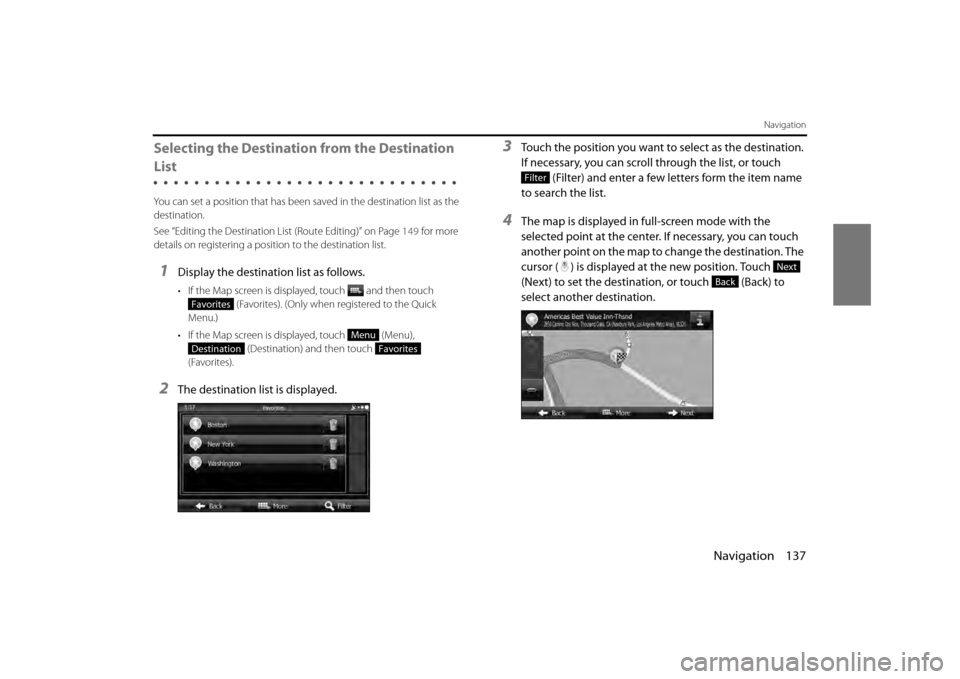
2The destination list is displayed.
3Touch the position you want to select as the destination.
If necessary, you can scroll through the list, or touch
(Filter) and enter a few letters form the item name
to search the list.
4The map is displayed in full-screen mode with the
selected point at the center. If necessary, you can touch
another point on the map to change the destination. The
cursor ( ) is displayed at the new position. Touch
(Next) to set the destination, or touch (Back) to
select another destination.
Favorites
Menu
DestinationFavorites
Filter
Next
Back
Page 60 of 112
138 Navigation
Navigation
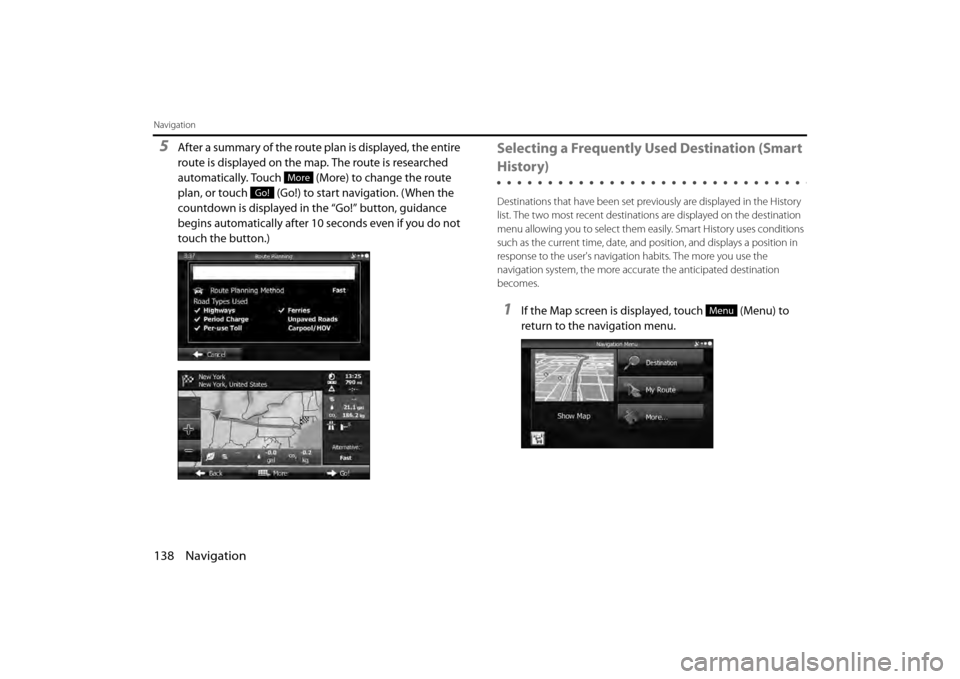
5After a summary of the route plan is displayed, the entire
route is displayed on the map. The route is researched
automatically. Touch (More) to change the route
plan, or touch (Go!) to start navigation. (When the
countdown is displayed in the “Go!” button, guidance
begins automatically after 10 seconds even if you do not
touch the button.)Selecting a Frequently Used Destination (Smart
History)
Destinations that have been set previously are displayed in the History
list. The two most recent destinatio ns are displayed on the destination
menu allowing you to select them easily. Smart History uses conditions
such as the current time, date, and position, and displays a position in
response to the user's navigati on habits. The more you use the
navigation system, the more accu rate the anticipated destination
becomes.
1If the Map screen is displayed, touch (Menu) to
return to the navigation menu.
More
Go!
Menu