SUBARU LEGACY 2017 6.G Owners Manual
Manufacturer: SUBARU, Model Year: 2017, Model line: LEGACY, Model: SUBARU LEGACY 2017 6.GPages: 610
Page 211 of 610
Instruments and controls/Front fog light switch
Front fog light switch
(if equipped)
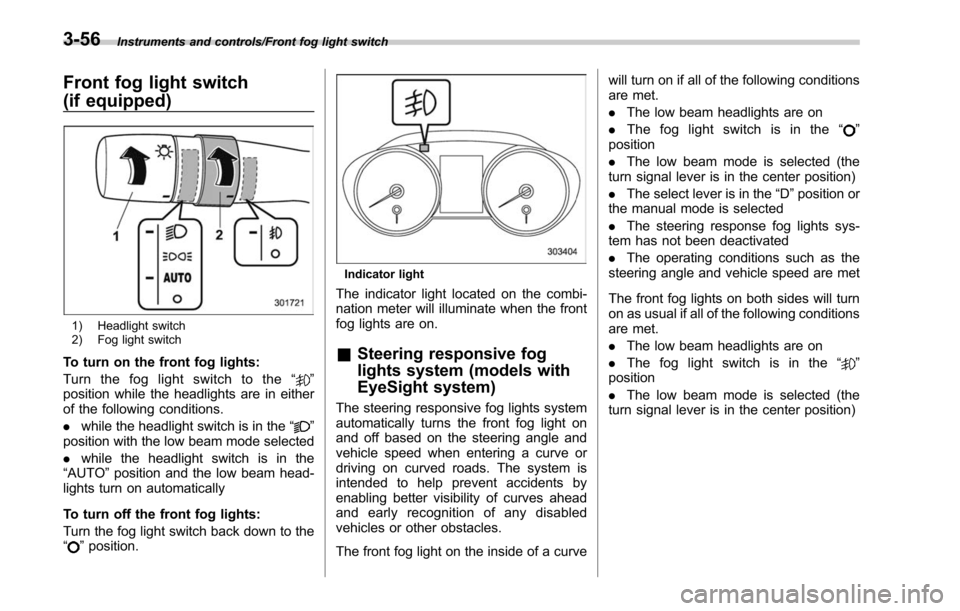
1) Headlight switch
2) Fog light switch
To turn on the front fog lights:
Turn the fog light switch to the“
”
position while the headlights are in either
of the following conditions.
. while the headlight switch is in the “
”
position with the low beam mode selected
. while the headlight switch is in the
“AUTO ”position and the low beam head-
lights turn on automatically
To turn off the front fog lights:
Turn the fog light switch back down to the
“
” position.
Indicator light
The indicator light located on the combi-
nation meter will illuminate when the front
fog lights are on.
& Steering responsive fog
lights system (models with
EyeSight system)
The steering responsive fog lights system
automatically turns the front fog light on
and off based on the steering angle and
vehicle speed when entering a curve or
driving on curved roads. The system is
intended to help prevent accidents by
enabling better visibility of curves ahead
and early recognition of any disabled
vehicles or other obstacles.
The front fog light on the inside of a curve will turn on if all of the following conditions
are met.
.
The low beam headlights are on
. The fog light switch is in the “
”
position
. The low beam mode is selected (the
turn signal lever is in the center position)
. The select lever is in the “D”position or
the manual mode is selected
. The steering response fog lights sys-
tem has not been deactivated
. The operating conditions such as the
steering angle and vehicle speed are met
The front fog lights on both sides will turn
on as usual if all of the following conditions
are met.
. The low beam headlights are on
. The fog light switch is in the “
”
position
. The low beam mode is selected (the
turn signal lever is in the center position)
3-56
Page 212 of 610
!Steering responsive fog lights OFF
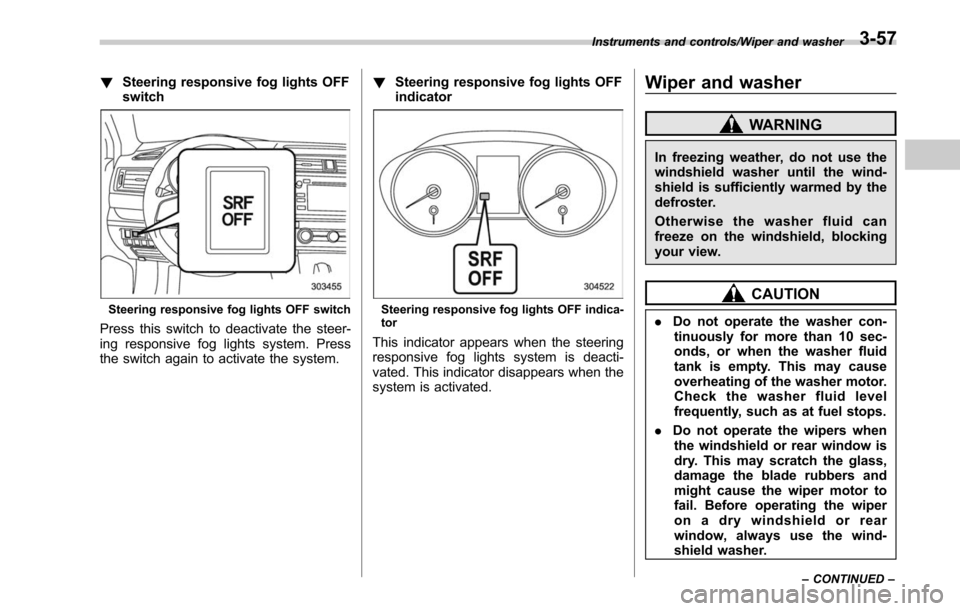
switch
Steering responsive fog lights OFF switch
Press this switch to deactivate the steer-
ing responsive fog lights system. Press
the switch again to activate the system. !
Steering responsive fog lights OFF
indicator
Steering responsive fog lights OFF indica-
tor
This indicator appears when the steering
responsive fog lights system is deacti-
vated. This indicator disappears when the
system is activated.
Wiper and washer
WARNING
In freezing weather, do not use the
windshield washer until the wind-
shield is sufficiently warmed by the
defroster.
Otherwise the washer fluid can
freeze on the windshield, blocking
your view.
CAUTION
.Do not operate the washer con-
tinuously for more than 10 sec-
onds, or when the washer fluid
tank is empty. This may cause
overheating of the washer motor.
Check the washer fluid level
frequently, such as at fuel stops.
. Do not operate the wipers when
the windshield or rear window is
dry. This may scratch the glass,
damage the blade rubbers and
might cause the wiper motor to
fail. Before operating the wiper
on a dry windshield or rear
window, always use the wind-
shield washer.
Instruments and controls/Wiper and washer
–CONTINUED –3-57
Page 213 of 610
Instruments and controls/Wiper and washer
.In freezing weather, be sure that
the blade rubbers are not frozen
to the windshield or rear window
before switching on the wipers.
Attempting to operate the wiper
with the blade rubbers frozen to
the window glass could cause
not only the blade rubbers to be
damaged but also might cause
the wiper motor to fail. If the
blade rubbers are frozen to the
window glass, be sure to operate
the defroster, windshield wiper
deicer (if equipped) or rear win-
dow defogger before turning on
the wiper.
. If the wipers stop during opera-
tion because of ice or some other
obstruction on the window, this
might cause the wiper motor to
fail even if the wiper switch is
turned off. If this occurs,
promptly stop the vehicle in a
safe location, turn the ignition
switch to the “LOCK ”/“ OFF ”po-
sition and clean the window
glass to allow proper wiper op-
eration.
. Use clean water if windshield
washer fluid is unavailable. In
areas where water freezes in
winter, use SUBARU Windshield Washer Fluid or the equivalent.
Refer to
“Windshield washer
fluid ”F 11-32.
Also, when driving the vehicle
when there are freezing tempera-
tures, use non-freezing type wi-
per blades.
. Do not clean the wiper blades
with gasoline or a solvent, such
as paint thinner or benzine. This
will cause deterioration of the
wiper blades.
NOTE
. The windshield wiper motor is pro-
tected against overloads by a circuit
breaker. If the motor operates continu-
ously under an unusually heavy load,
the circuit breaker may trip to stop the
motor temporarily. If this happens, park
your vehicle in a safe location, turn off
the wiper switch, and wait for approxi-
mately 10 minutes. The circuit breaker
will reset itself, and the wipers will
again operate normally.
. Clean your blade rubbers and win-
dow glass periodically with a washer
solution to prevent streaking, and to
remove accumulations of road salt or
road film. Operate the windshield
washer for at least 1 second so that washer solution will be sprinkled all
over the windshield or rear window.
.
Grease, wax, insects or other mate-
rial on the windshield or the blade
rubbers results in jerky wiper operation
and streaking on the glass. If you
cannot remove those streaks after
operating the washer or if the wiper
operation is jerky, clean the outer sur-
face of the windshield or rear window
and the blade rubbers using a sponge
or soft cloth with a neutral detergent or
mild abrasive cleaner. After cleaning,
rinse the window glass and blade
rubbers with clean water. The glass is
clean if no beads form on the glass
when you rinse with water.
. If you cannot eliminate the streaking
even after following this procedure,
replace the wiper blades (or blade
rubbers) with new ones. For replace-
ment instructions, refer to “Replace-
ment of wiper blades ”F 11-33.
3-58
Page 214 of 610
&Windshield wiper and washer
switches
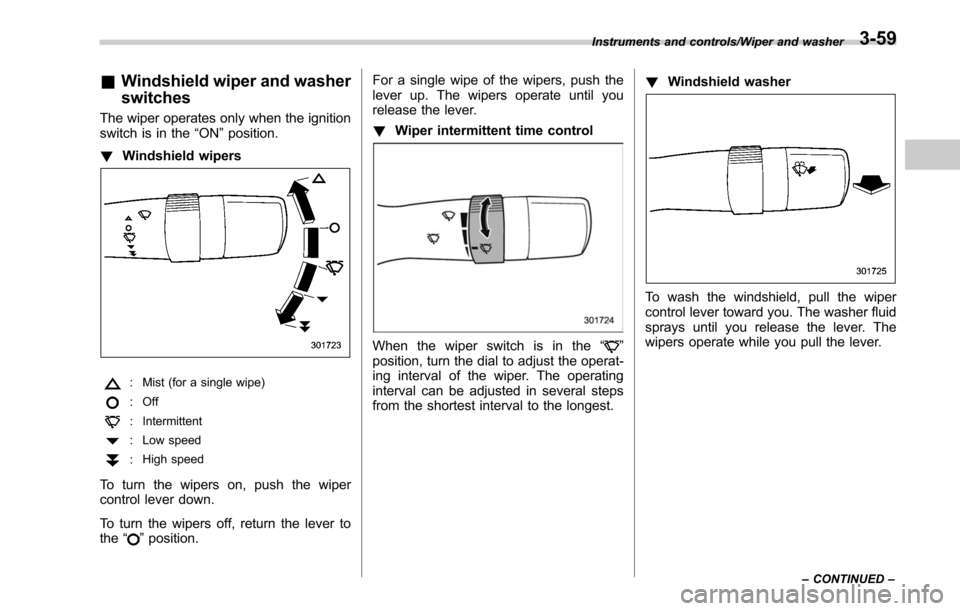
The wiper operates only when the ignition
switch is in the “ON”position.
! Windshield wipers
: Mist (for a single wipe)
: Off
: Intermittent
: Low speed
:High speed
To turn the wipers on, push the wiper
control lever down.
To turn the wipers off, return the lever to
the
“
”position. For a single wipe of the wipers, push the
lever up. The wipers operate until you
release the lever.
!
Wiper intermittent time control
When the wiper switch is in the “”
position, turn the dial to adjust the operat-
ing interval of the wiper. The operating
interval can be adjusted in several steps
from the shortest interval to the longest. !
Windshield washer
To wash the windshield, pull the wiper
control lever toward you. The washer fluid
sprays until you release the lever. The
wipers operate while you pull the lever.
Instruments and controls/Wiper and washer
–CONTINUED –3-59
Page 215 of 610
Instruments and controls/Wiper and washer
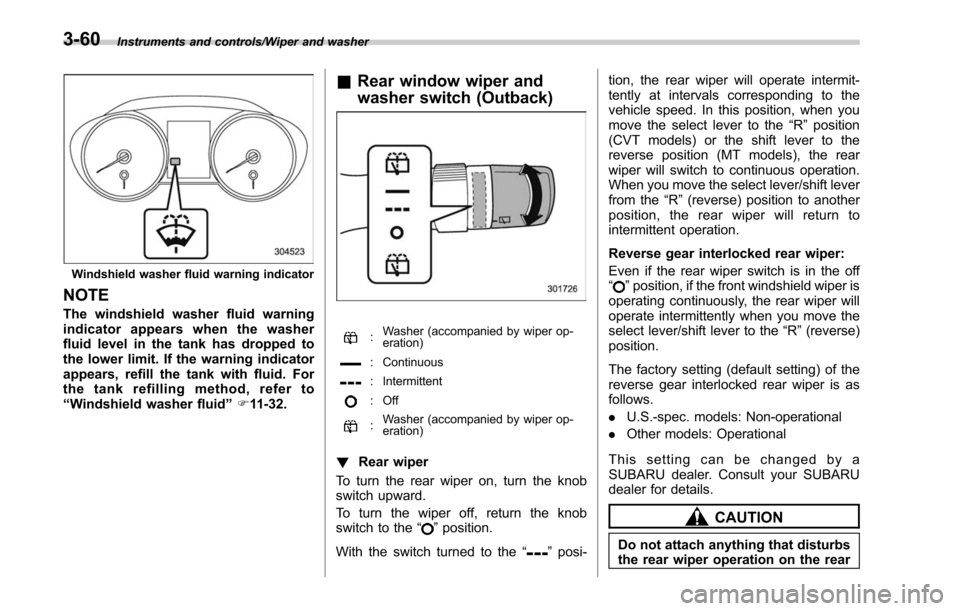
Windshield washer fluid warning indicator
NOTE
The windshield washer fluid warning
indicator appears when the washer
fluid level in the tank has dropped to
the lower limit. If the warning indicator
appears, refill the tank with fluid. For
the tank refilling method, refer to
“Windshield washer fluid ”F 11-32.
& Rear window wiper and
washer switch (Outback)
:Washer (accompanied by wiper op-
eration)
: Continuous
: Intermittent
: Off
:Washer (accompanied by wiper op-
eration)
!
Rear wiper
To turn the rear wiper on, turn the knob
switch upward.
To turn the wiper off, return the knob
switch to the “
”position.
With the switch turned to the “
”posi- tion, the rear wiper will operate intermit-
tently at intervals corresponding to the
vehicle speed. In this position, when you
move the select lever to the
“R”position
(CVT models) or the shift lever to the
reverse position (MT models), the rear
wiper will switch to continuous operation.
When you move the select lever/shift lever
from the “R”(reverse) position to another
position, the rear wiper will return to
intermittent operation.
Reverse gear interlocked rear wiper:
Even if the rear wiper switch is in the off
“
” position, if the front windshield wiper is
operating continuously, the rear wiper will
operate intermittently when you move the
select lever/shift lever to the “R”(reverse)
position.
The factory setting (default setting) of the
reverse gear interlocked rear wiper is as
follows.
. U.S.-spec. models: Non-operational
. Other models: Operational
This setting can be changed by a
SUBARU dealer. Consult your SUBARU
dealer for details.
CAUTION
Do not attach anything that disturbs
the rear wiper operation on the rear
3-60
Page 216 of 610
gate. Doing so may damage the rear
wiper when it operates.
! Washer
To wash the rear window while the rear
wiper is operating, turn the knob switch
upward to the “
”position. The washer
fluid sprays until you release the knob.
To wash the rear window when the rear
wiper is not in use, turn the knob switch
downward to the “
”position. The washer
fluid sprays and the wiper operates until
you release the knob.
NOTE
When the amount of washer fluid is
getting low, the rear washer fluid will
first be stopped. This means that the
amount of washer fluid is low, and it
should be added immediately.
Defogger and deicer
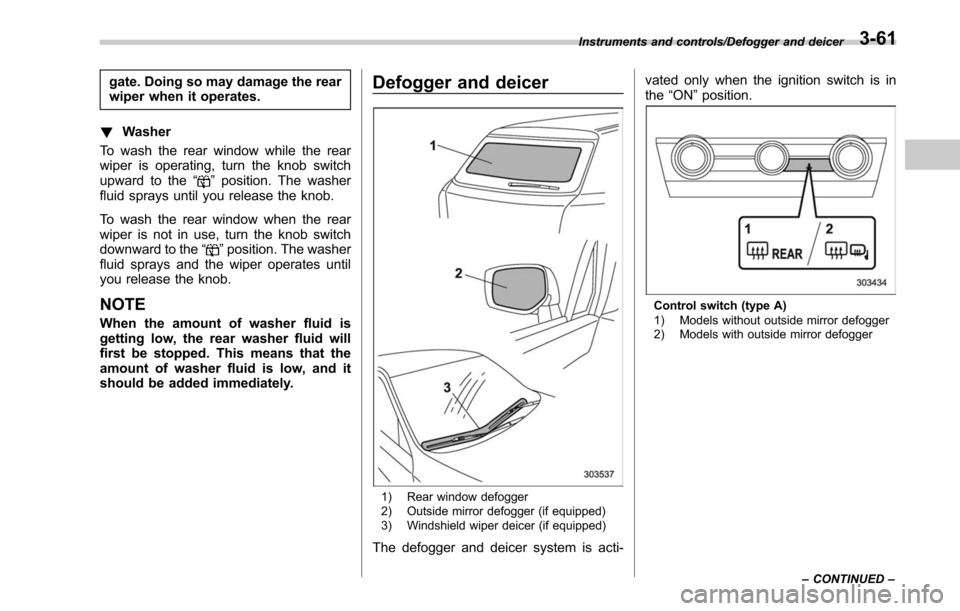
1) Rear window defogger
2) Outside mirror defogger (if equipped)
3) Windshield wiper deicer (if equipped)
The defogger and deicer system is acti- vated only when the ignition switch is in
the
“ON ”position.
Control switch (type A)
1) Models without outside mirror defogger
2) Models with outside mirror defogger
Instruments and controls/Defogger and deicer
–CONTINUED –
3-61
Page 217 of 610
Instruments and controls/Defogger and deicer
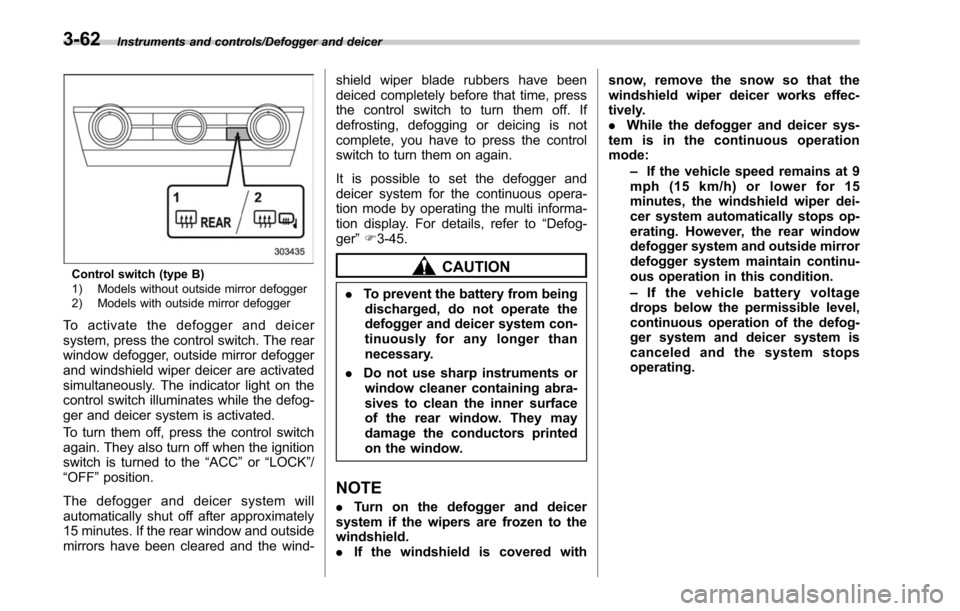
Control switch (type B)
1) Models without outside mirror defogger
2) Models with outside mirror defogger
To activate the defogger and deicer
system, press the control switch. The rear
window defogger, outside mirror defogger
and windshield wiper deicer are activated
simultaneously. The indicator light on the
control switch illuminates while the defog-
ger and deicer system is activated.
To turn them off, press the control switch
again. They also turn off when the ignition
switch is turned to the“ACC”or “LOCK”/
“OFF ”position.
The defogger and deicer system will
automatically shut off after approximately
15 minutes. If the rear window and outside
mirrors have been cleared and the wind- shield wiper blade rubbers have been
deiced completely before that time, press
the control switch to turn them off. If
defrosting, defogging or deicing is not
complete, you have to press the control
switch to turn them on again.
It is possible to set the defogger and
deicer system for the continuous opera-
tion mode by operating the multi informa-
tion display. For details, refer to
“Defog-
ger ”F 3-45.
CAUTION
. To prevent the battery from being
discharged, do not operate the
defogger and deicer system con-
tinuously for any longer than
necessary.
. Do not use sharp instruments or
window cleaner containing abra-
sives to clean the inner surface
of the rear window. They may
damage the conductors printed
on the window.
NOTE
. Turn on the defogger and deicer
system if the wipers are frozen to the
windshield.
. If the windshield is covered with snow, remove the snow so that the
windshield wiper deicer works effec-
tively.
.
While the defogger and deicer sys-
tem is in the continuous operation
mode:
–If the vehicle speed remains at 9
mph (15 km/h) or lower for 15
minutes, the windshield wiper dei-
cer system automatically stops op-
erating. However, the rear window
defogger system and outside mirror
defogger system maintain continu-
ous operation in this condition.
– If the vehicle battery voltage
drops below the permissible level,
continuous operation of the defog-
ger system and deicer system is
canceled and the system stops
operating.
3-62
Page 218 of 610
Mirrors
Always check that the inside and outside
mirrors are properly adjusted before you
start driving.
&Inside mirror (without auto-
dimming function) (if
equipped)
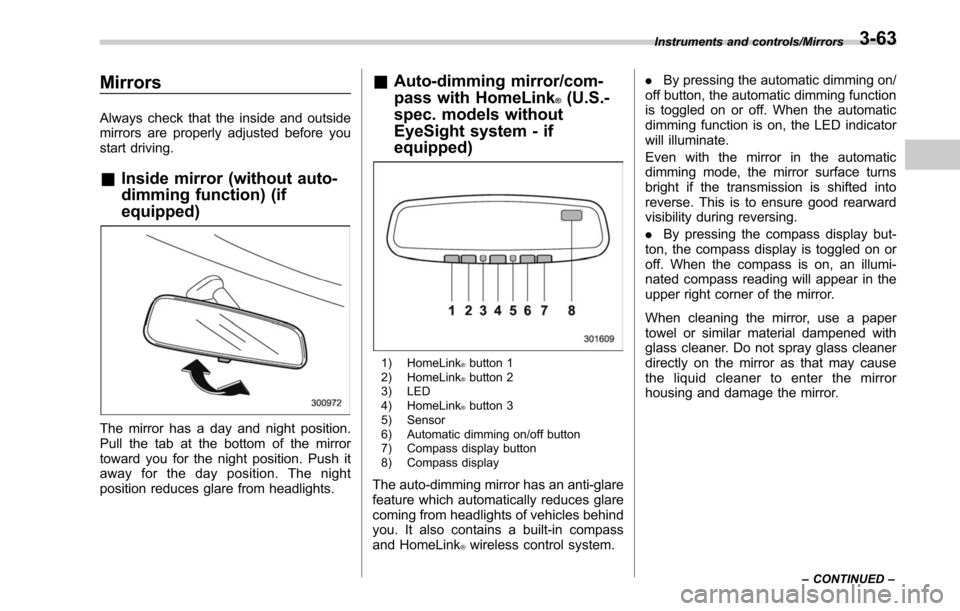
The mirror has a day and night position.
Pull the tab at the bottom of the mirror
toward you for the night position. Push it
away for the day position. The night
position reduces glare from headlights.
&Auto-dimming mirror/com-
pass with HomeLink
®(U.S.-
spec. models without
EyeSight system - if
equipped)
1) HomeLink®button 1
2) HomeLink®button 2
3) LED
4) HomeLink
®button 3
5) Sensor
6) Automatic dimming on/off button
7) Compass display button
8) Compass display
The auto-dimming mirror has an anti-glare
feature which automatically reduces glare
coming from headlights of vehicles behind
you. It also contains a built-in compass
and HomeLink
®wireless control system. .
By pressing the automatic dimming on/
off button, the automatic dimming function
is toggled on or off. When the automatic
dimming function is on, the LED indicator
will illuminate.
Even with the mirror in the automatic
dimming mode, the mirror surface turns
bright if the transmission is shifted into
reverse. This is to ensure good rearward
visibility during reversing.
. By pressing the compass display but-
ton, the compass display is toggled on or
off. When the compass is on, an illumi-
nated compass reading will appear in the
upper right corner of the mirror.
When cleaning the mirror, use a paper
towel or similar material dampened with
glass cleaner. Do not spray glass cleaner
directly on the mirror as that may cause
the liquid cleaner to enter the mirror
housing and damage the mirror.
Instruments and controls/Mirrors
–CONTINUED –3-63
Page 219 of 610
Instruments and controls/Mirrors
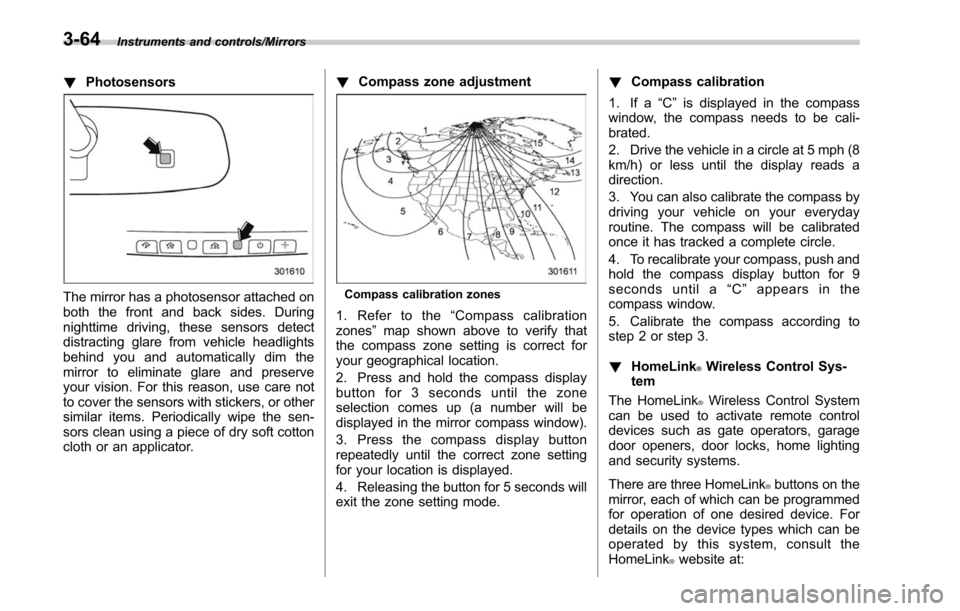
!Photosensors
The mirror has a photosensor attached on
both the front and back sides. During
nighttime driving, these sensors detect
distracting glare from vehicle headlights
behind you and automatically dim the
mirror to eliminate glare and preserve
your vision. For this reason, use care not
to cover the sensors with stickers, or other
similar items. Periodically wipe the sen-
sors clean using a piece of dry soft cotton
cloth or an applicator. !
Compass zone adjustmentCompass calibration zones
1. Refer to the “Compass calibration
zones” map shown above to verify that
the compass zone setting is correct for
your geographical location.
2. Press and hold the compass display
button for 3 seconds until the zone
selection comes up (a number will be
displayed in the mirror compass window).
3. Press the compass display button
repeatedly until the correct zone setting
for your location is displayed.
4. Releasing the button for 5 seconds will
exit the zone setting mode. !
Compass calibration
1. If a “C”is displayed in the compass
window, the compass needs to be cali-
brated.
2. Drive the vehicle in a circle at 5 mph (8
km/h) or less until the display reads a
direction.
3. You can also calibrate the compass by
driving your vehicle on your everyday
routine. The compass will be calibrated
once it has tracked a complete circle.
4. To recalibrate your compass, push and
hold the compass display button for 9
seconds until a “C ” appears in the
compass window.
5. Calibrate the compass according to
step 2 or step 3.
! HomeLink
®Wireless Control Sys-
tem
The HomeLink
®Wireless Control System
can be used to activate remote control
devices such as gate operators, garage
door openers, door locks, home lighting
and security systems.
There are three HomeLink
®buttons on the
mirror, each of which can be programmed
for operation of one desired device. For
details on the device types which can be
operated by this system, consult the
HomeLink
®website at:
3-64
Page 220 of 610
www.homelink.com or call 1-800-355-
3515.
.U.S.-spec. models
FCC ID: NZLPZLHL4
CAUTION
FCC WARNING
Changes or modifications not ex-
pressly approved by the party re-
sponsible for compliance could void
the user ’s authority to operate the
equipment.
This device complies with part 15 of the
FCC Rules. Operation is subject to the
following two conditions: (1) This de-
vice may not cause harmful interfer-
ence, and (2) this device must accept
any interference received, including
interference that may cause undesired
operation. .
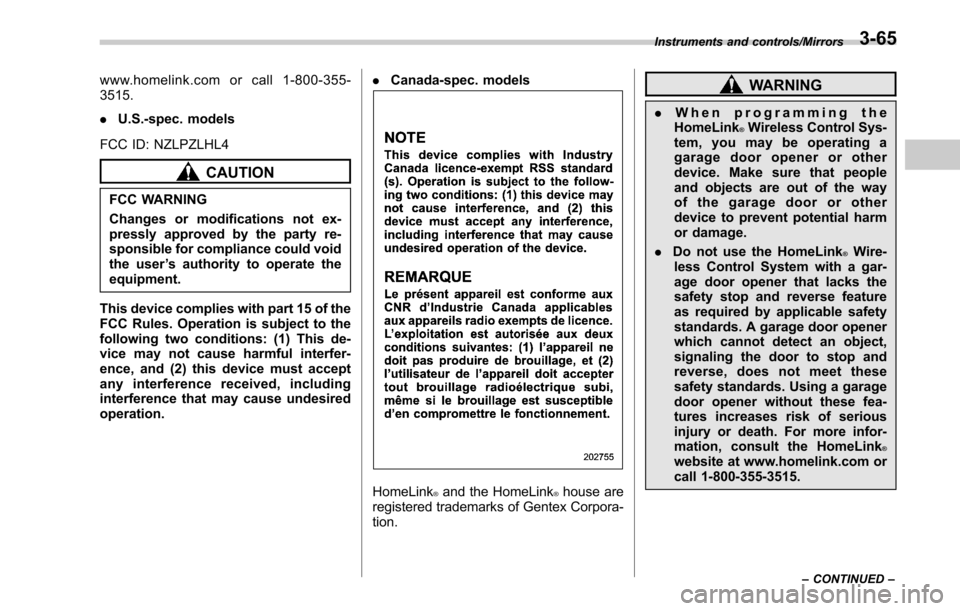
Canada-spec. models
HomeLink®and the HomeLink®house are
registered trademarks of Gentex Corpora-
tion.
WARNING
. When programming the
HomeLink®Wireless Control Sys-
tem, you may be operating a
garage door opener or other
device. Make sure that people
and objects are out of the way
ofthegaragedoororother
device to prevent potential harm
or damage.
. Do not use the HomeLink
®Wire-
less Control System with a gar-
age door opener that lacks the
safety stop and reverse feature
as required by applicable safety
standards. A garage door opener
which cannot detect an object,
signaling the door to stop and
reverse, does not meet these
safety standards. Using a garage
door opener without these fea-
tures increases risk of serious
injury or death. For more infor-
mation, consult the HomeLink
®website at www.homelink.com or
call 1-800-355-3515.
Instruments and controls/Mirrors
–CONTINUED –3-65