AUX SUBARU LEGACY 2020 Getting Started Guide
[x] Cancel search | Manufacturer: SUBARU, Model Year: 2020, Model line: LEGACY, Model: SUBARU LEGACY 2020Pages: 124, PDF Size: 5.53 MB
Page 22 of 124

ACCESSORY CONNECTIONS
Power Outlets (12V)
Power outlets (12V) are located in the front center console. Electrical power is available for
use with in-vehicle electrical appliances with a
maximum power rating of 120W.
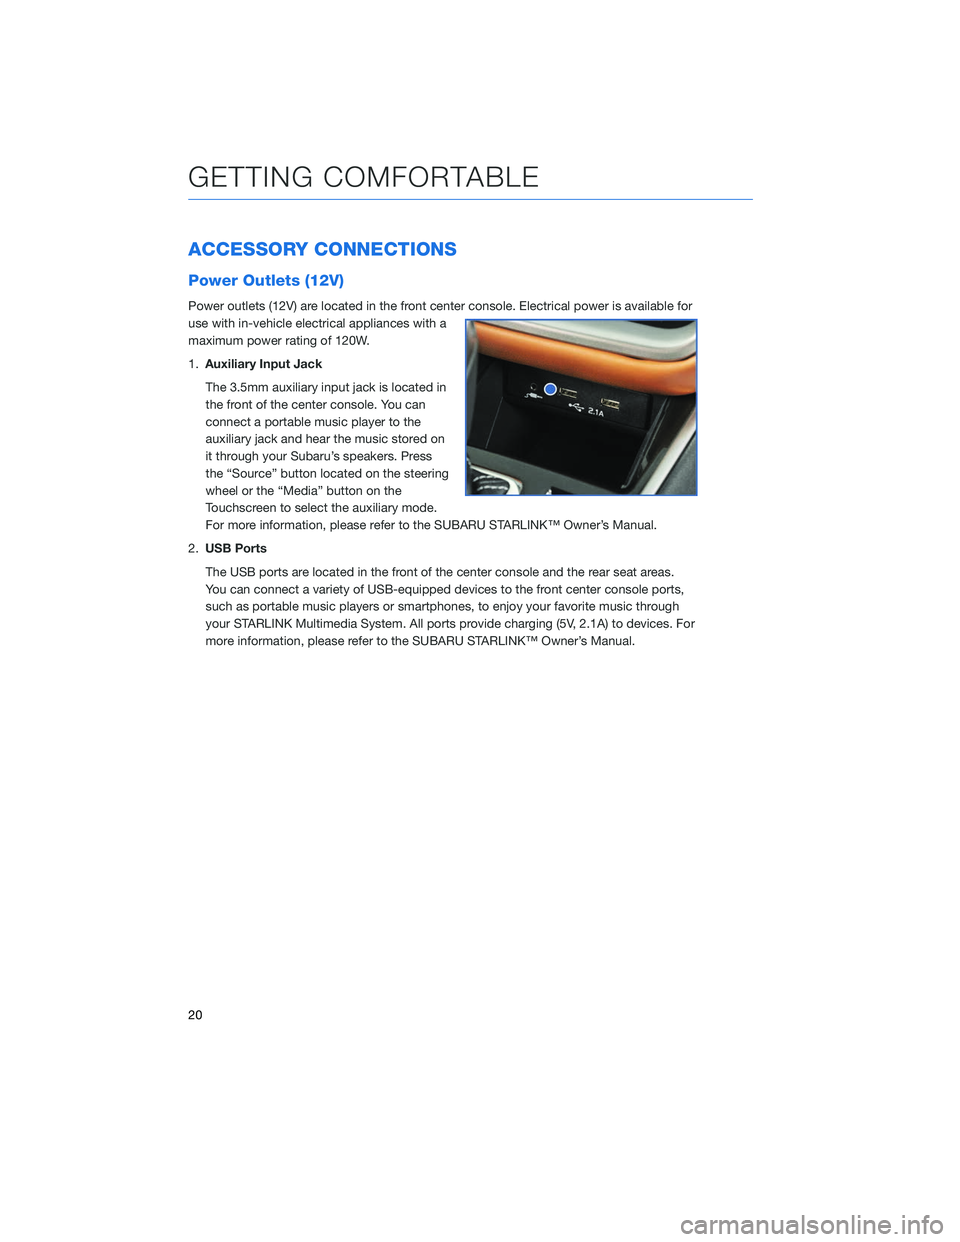
1.Auxiliary Input Jack
The 3.5mm auxiliary input jack is located in
the front of the center console. You can
connect a portable music player to the
auxiliary jack and hear the music stored on
it through your Subaru’s speakers. Press
the “Source” button located on the steering
wheel or the “Media” button on the
Touchscreen to select the auxiliary mode.
For more information, please refer to the SUBARU STARLINK™ Owner’s Manual.
2. USB Ports
The USB ports are located in the front of the center console and the rear seat areas.
You can connect a variety of USB-equipped devices to the front center console ports,
such as portable music players or smartphones, to enjoy your favorite music through
your STARLINK Multimedia System. All ports provide charging (5V, 2.1A) to devices. For
more information, please refer to the SUBARU STARLINK™ Owner’s Manual.
GETTING COMFORTABLE
20
Page 60 of 124

MEDIA
Bluetooth®
Your Subaru has Bluetooth®hands-free technology to manage your phone and audio
systems. Bluetooth-enabled mobile phones link directly through your Touchscreen
automatically, once connected. Receive and initiate calls or play music directly from your
device while keeping it stowed for safety.
To pair a Bluetooth
®device to the Touchscreen, see page 98 for Android devices or page
101 for Apple devices.
CD (if equipped)
The CD player holds a single disc only. To access the CD menu, put a CD in the player or
touch the CD icon on the Touchscreen. Depending on the CD format, it may show the CD
album art work on the Touchscreen.
USB / iPod
The USB connection is below the Center Information Display (CID) in front of the shifter.
You can plug in a USB memory storage device or iPod. This will bring up the media screen
with controls. If using an iPod, make sure to use an Apple certified cable or MFi certified
cable for proper operation.
Aux Input
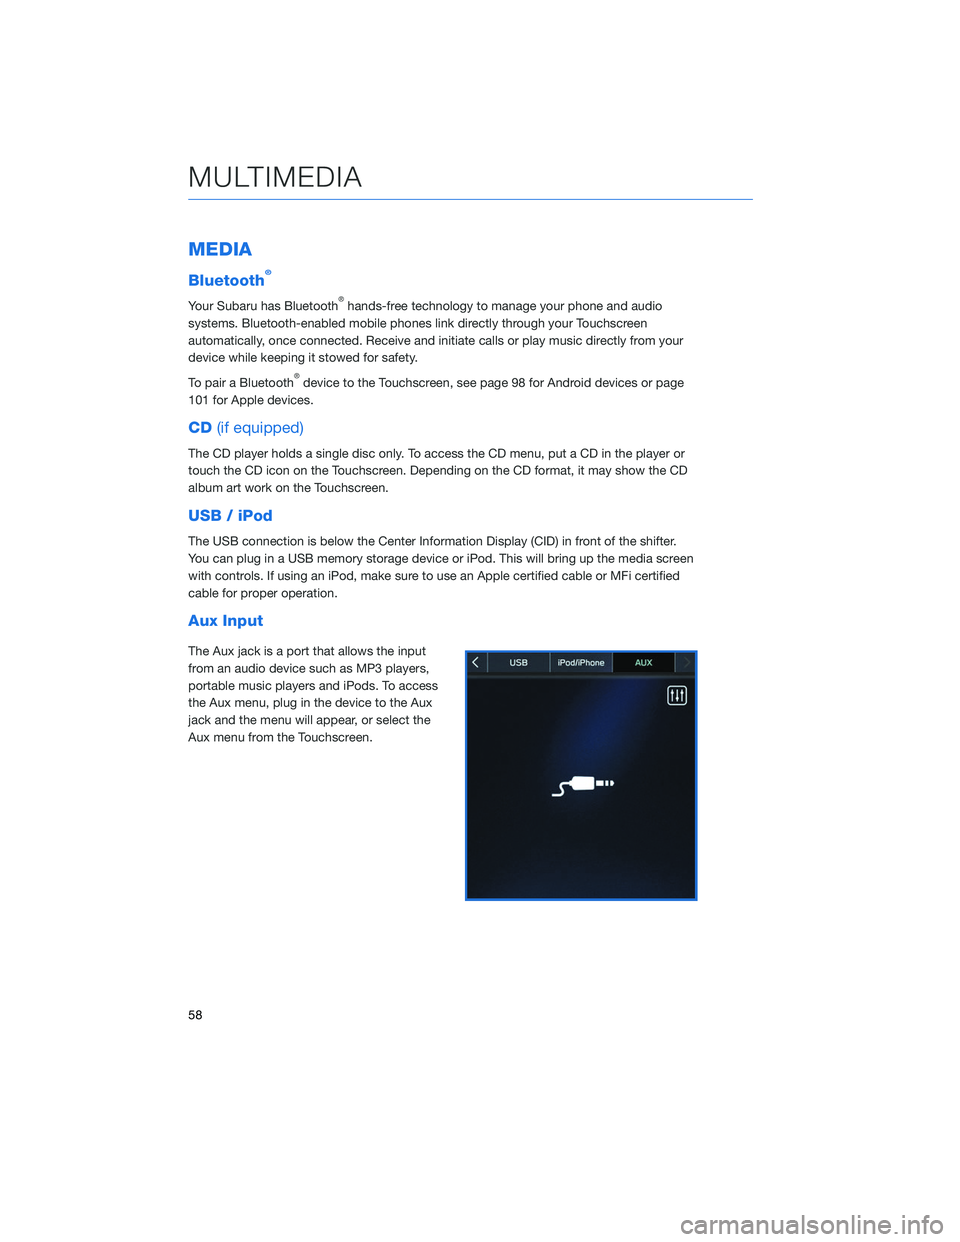
The Aux jack is a port that allows the input
from an audio device such as MP3 players,
portable music players and iPods. To access
the Aux menu, plug in the device to the Aux
jack and the menu will appear, or select the
Aux menu from the Touchscreen.
MULTIMEDIA
58
Page 92 of 124

SOUND
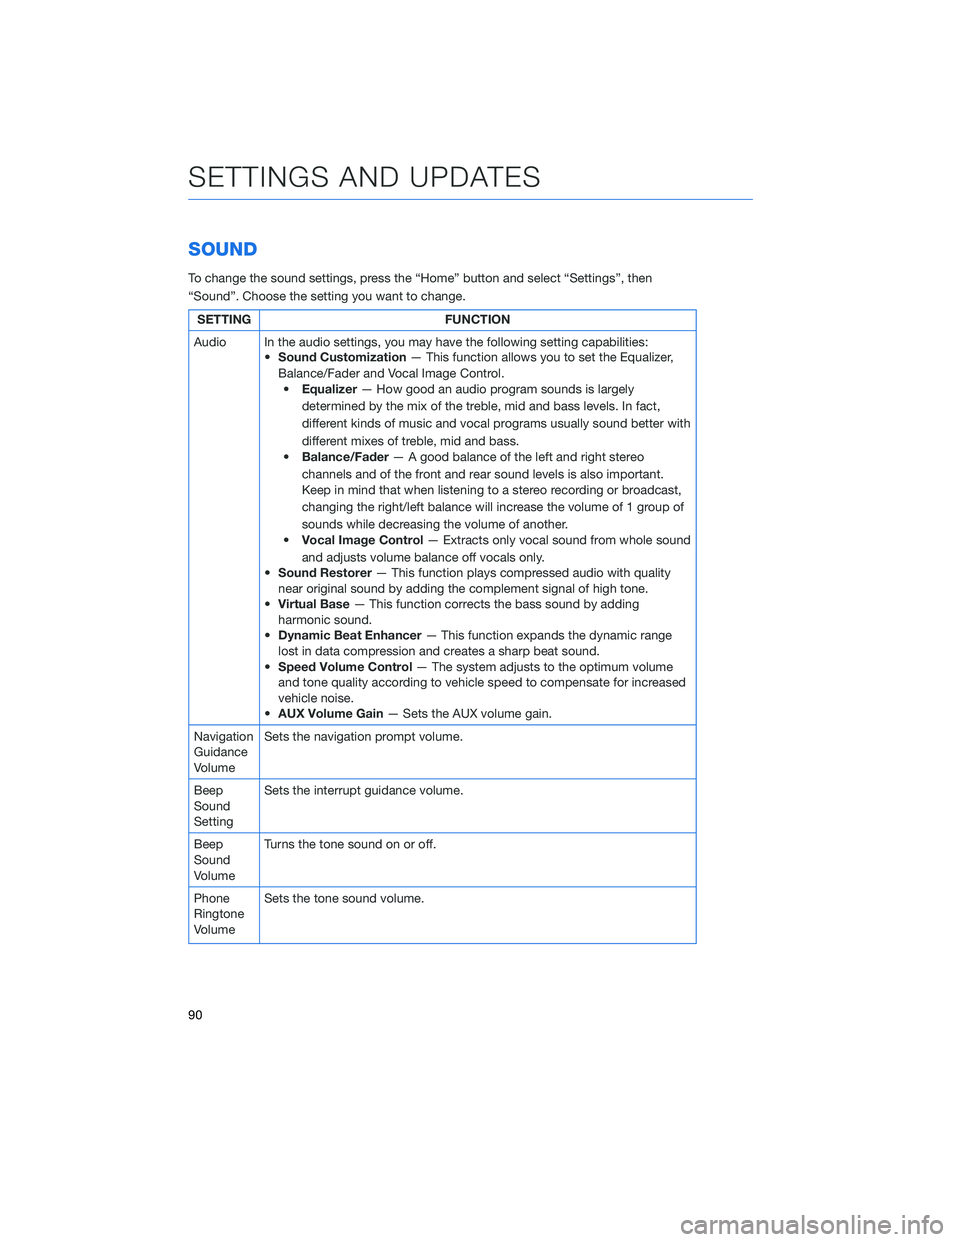
To change the sound settings, press the “Home” button and select “Settings”, then
“Sound”. Choose the setting you want to change.
SETTINGFUNCTION
Audio In the audio settings, you may have the following setting capabilities: •Sound Customization — This function allows you to set the Equalizer,
Balance/Fader and Vocal Image Control. • Equalizer — How good an audio program sounds is largely
determined by the mix of the treble, mid and bass levels. In fact,
different kinds of music and vocal programs usually sound better with
different mixes of treble, mid and bass.
• Balance/Fader — A good balance of the left and right stereo
channels and of the front and rear sound levels is also important.
Keep in mind that when listening to a stereo recording or broadcast,
changing the right/left balance will increase the volume of 1 group of
sounds while decreasing the volume of another.
• Vocal Image Control — Extracts only vocal sound from whole sound
and adjusts volume balance off vocals only.
• Sound Restorer — This function plays compressed audio with quality
near original sound by adding the complement signal of high tone.
• Virtual Base — This function corrects the bass sound by adding
harmonic sound.
• Dynamic Beat Enhancer — This function expands the dynamic range
lost in data compression and creates a sharp beat sound.
• Speed Volume Control — The system adjusts to the optimum volume
and tone quality according to vehicle speed to compensate for increased
vehicle noise.
• AUX Volume Gain — Sets the AUX volume gain.
Navigation
Guidance
Volume Sets the navigation prompt volume.
Beep
Sound
Setting Sets the interrupt guidance volume.
Beep
Sound
Volume Turns the tone sound on or off.
Phone
Ringtone
Volume Sets the tone sound volume.
SETTINGS AND UPDATES
90
Page 115 of 124

G
GAUGES . . . . . . . . . . ........25
GENERAL Connect to Home Wi-Fi ........88
Performing Software Updates .....89
H
HOME SCREEN ICONS . . ........48
HOOD PROP . . . . . . . . ........37
HOW TO CREATE A PROFILE Retrieving a Driver Profile .......52
I
IGNITION SWITCH . . . . . . . . . . . . . 26
IMPORTANT SAFETY INFORMATION . . . 2
IN CASE OF EMERGENCY Subaru Roadside Assistance . . . . . . 3
SUBARU STARLINK™ Safety and
Security . . . . . . . . . . ........3
INSTRUMENT PANEL SWITCHES . . . 23
INTERNAL SAFETY TRUNK RELEASE WITH SELF-ILLUMINATING
HANDLE . . . . . . . . . ........36
I SWITCH . . . . . . . . . . . . . . . . . . 22
K
KEYLESS ACCESS WITH PUSH BUTTON START
Locking Using Door Handles ......5
Opening the Trunk . . . . ........5
Unlock Using Door Handles .......5
KEYLESS ENTRY Automatic Door Locking/Unlocking . . 4
L
LATCH/ANCHOR . . . . . .........35
LIGHT CONTROLS Daytime Running Lights . . . . . . . . 22 Illumination Brightness . . . . . . . . . 22
M
MAKING A CALL . . . ...........59
MAPS/NAVIGATION Checking for Updates . . . . . ....92
Updating Over-the-Air . . . . . . . . . 93
Updating Using Your PC/MAC . . . . 93
MAP UPDATES . . . . . . ........111
MEDIA Aux Input .................58
Bluetooth
®................58
CD ....................58
USB / iPod . . . . . . ..........58
MYSUBARU Service Appointment Scheduler . . . 66
MYSUBARU, MAKING OWNERSHIP EASY ...................68
N
NEW VEHICLE BREAK-IN . . . ......40
O
OVERHEAD PANEL ............24
OVERVIEW . . . . . . . . .........98
OVERVIEW OF YOUR MULTIMEDIA SYSTEM
Screen Layout . . . . . . . . ......43
Various Systems . . . . . . . . . . . . 43
P
PAIRING A PHONE . . . . . . . . . . . . . 59
PHONE . . . ................91
POWER EXTERIOR MIRRORS Power Folding Mirrors . . . . . ....10
POWER MOONROOF Opening/Closing the Moonroof . . . . 13
Tilting the Moonroof . . . . ......13
POWER WINDOWS . . . . . . . . ....13
INDEX
113