fog light SUBARU LEGACY 2020 Getting Started Guide
[x] Cancel search | Manufacturer: SUBARU, Model Year: 2020, Model line: LEGACY, Model: SUBARU LEGACY 2020Pages: 124, PDF Size: 5.53 MB
Page 19 of 124

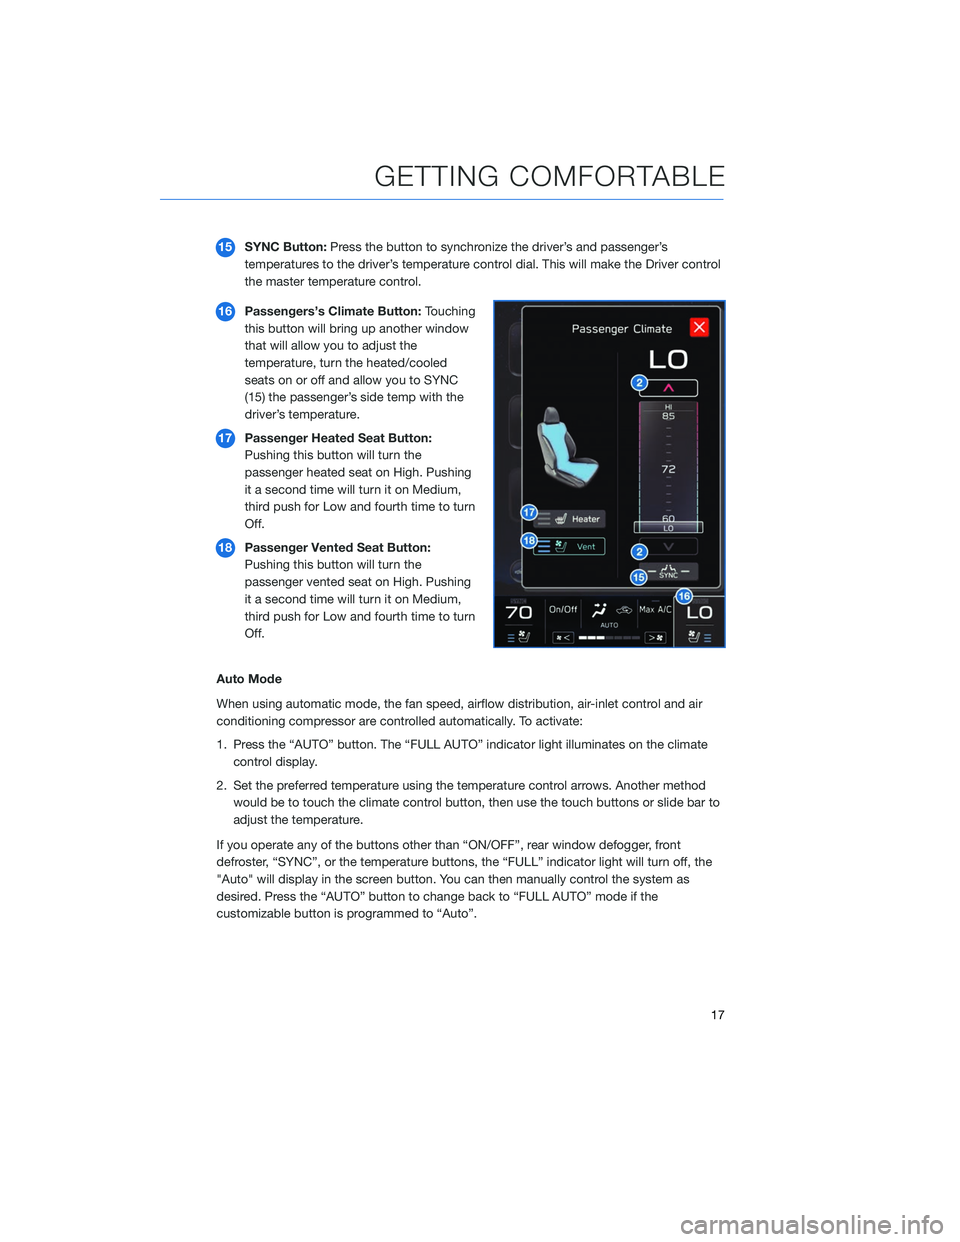
15SYNC Button: Press the button to synchronize the driver’s and passenger’s
temperatures to the driver’s temperature control dial. This will make the Driver control
the master temperature control.
16 Passengers’s Climate Button: Touching
this button will bring up another window
that will allow you to adjust the
temperature, turn the heated/cooled
seats on or off and allow you to SYNC
(15) the passenger’s side temp with the
driver’s temperature.
17 Passenger Heated Seat Button:
Pushing this button will turn the
passenger heated seat on High. Pushing
it a second time will turn it on Medium,
third push for Low and fourth time to turn
Off.
18 Passenger Vented Seat Button:
Pushing this button will turn the
passenger vented seat on High. Pushing
it a second time will turn it on Medium,
third push for Low and fourth time to turn
Off.
Auto Mode
When using automatic mode, the fan speed, airflow distribution, air-inlet control and air
conditioning compressor are controlled automatically. To activate:
1. Press the “AUTO” button. The “FULL AUTO” indicator light illuminates on the climate control display.
2. Set the preferred temperature using the temperature control arrows. Another method would be to touch the climate control button, then use the touch buttons or slide bar to
adjust the temperature.
If you operate any of the buttons other than “ON/OFF”, rear window defogger, front
defroster, “SYNC”, or the temperature buttons, the “FULL” indicator light will turn off, the
"Auto" will display in the screen button. You can then manually control the system as
desired. Press the “AUTO” button to change back to “FULL AUTO” mode if the
customizable button is programmed to “Auto”.
GETTING COMFORTABLE
17
Page 24 of 124

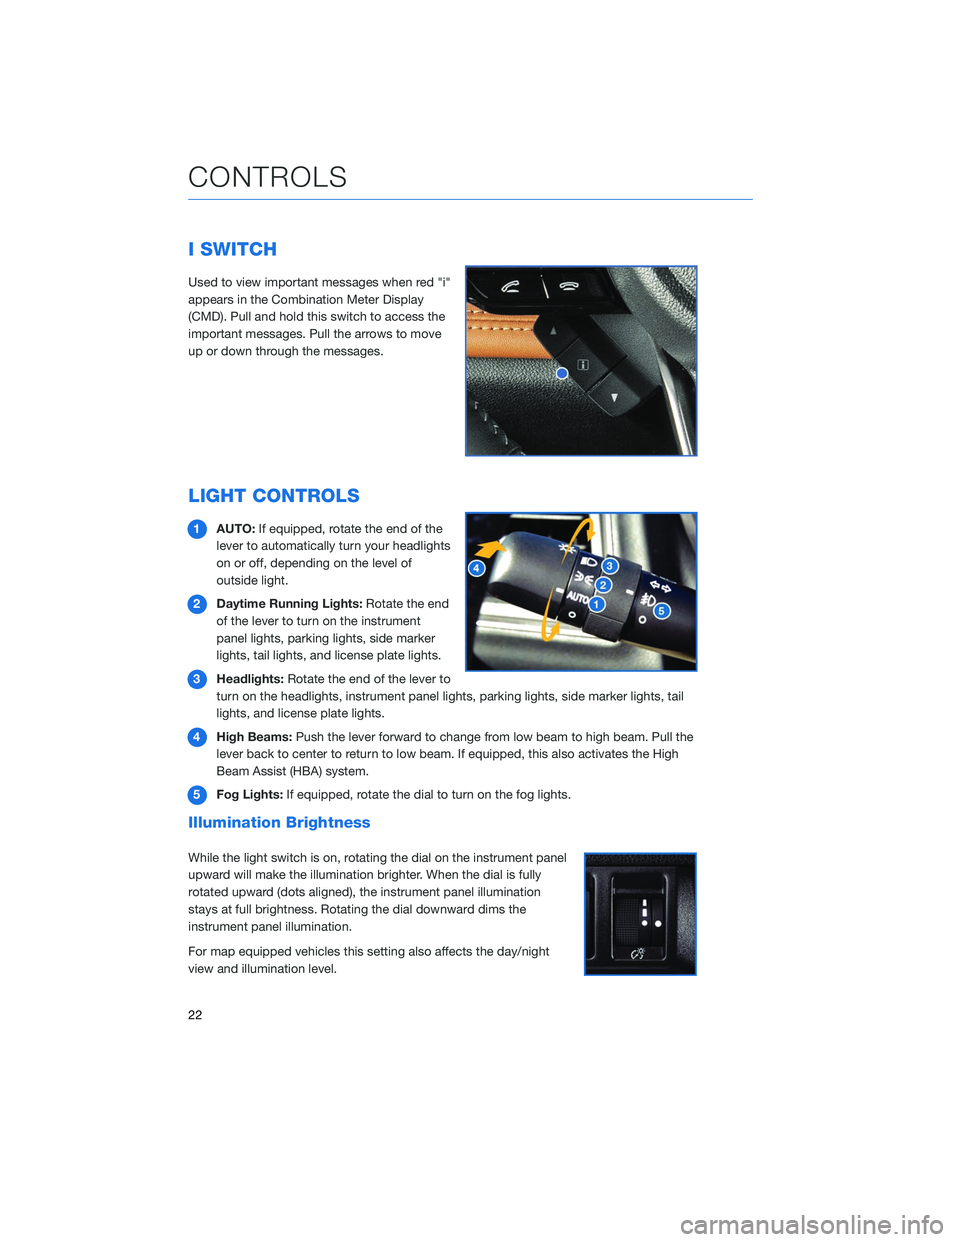
I SWITCH
Used to view important messages when red "i"
appears in the Combination Meter Display
(CMD). Pull and hold this switch to access the
important messages. Pull the arrows to move
up or down through the messages.
LIGHT CONTROLS
1AUTO: If equipped, rotate the end of the
lever to automatically turn your headlights
on or off, depending on the level of
outside light.
2 Daytime Running Lights: Rotate the end
of the lever to turn on the instrument
panel lights, parking lights, side marker
lights, tail lights, and license plate lights.
3 Headlights: Rotate the end of the lever to
turn on the headlights, instrument panel lights, parking lights, side marker lights, tail
lights, and license plate lights.
4 High Beams: Push the lever forward to change from low beam to high beam. Pull the
lever back to center to return to low beam. If equipped, this also activates the High
Beam Assist (HBA) system.
5 Fog Lights: If equipped, rotate the dial to turn on the fog lights.
Illumination Brightness
While the light switch is on, rotating the dial on the instrument panel
upward will make the illumination brighter. When the dial is fully
rotated upward (dots aligned), the instrument panel illumination
stays at full brightness. Rotating the dial downward dims the
instrument panel illumination.
For map equipped vehicles this setting also affects the day/night
view and illumination level.
CONTROLS
22