snow SUBARU OUTBACK 2012 5.G Owners Manual
[x] Cancel search | Manufacturer: SUBARU, Model Year: 2012, Model line: OUTBACK, Model: SUBARU OUTBACK 2012 5.GPages: 474, PDF Size: 17.45 MB
Page 9 of 474
6
They could accidentally injure
themselves or others through
inadvertent operation of the ve-
hicle. Also, on hot or sunny days,
the temperature in a closed ve-
hicle could quickly become high
enough to cause severe or pos-
sibly fatal injuries.
. Help prevent children, adults or
animals from locking themselves
in the trunk. On hot or sunny
days, the temperature in the
trunk could quickly become high
enough to cause death or serious
heat-related injuries including
brain damage to anyone locked
inside, particularly for small chil-dren.
. When leaving the vehicle, close
all windows and lock all doors.
Also make certain that the trunk
is closed.
For instructions and precautions, carefully
read the following sections. . For the seatbelt system, refer to “Seat-
belts ”F 1-12.
. For the child restraint system, refer to
“ Child restraint systems ”F 1-23.
. For the SRS airbag system, refer to
“ *SRS airbag (Supplemental Restraint System airbag)
”F 1-36.
& Engine exhaust gas (carbon monoxide)
WARNING
. Never inhale engine exhaust gas.
Engine exhaust gas contains
carbon monoxide, a colorless
and odorless gas which is dan-
gerous, or even lethal, if inhaled.
. Always properly maintain the en-
gine exhaust system to prevent
engine exhaust gas from enter-
ing the vehicle.
. Never run the engine in a closed
space, such as a garage, except
for the brief time needed to drive
the vehicle in or out of it.
. Avoid remaining in a parked
vehicle for a long time while the
engine is running. If that is
unavoidable, then use the venti-
lation fan to force fresh air into
the vehicle.
. Always keep the front ventilator
inlet grille free from snow, leaves
or other obstructions to ensure
that the ventilation system al-
ways works properly. .
If at any time you suspect that
exhaust fumes are entering the
vehicle, have the problem
checked and corrected as soon
as possible. If you must drive
under these conditions, drive
only with all windows fully open.
. Keep the trunk lid or rear gate
closed while driving to prevent
exhaust gas from entering thevehicle.
& Drinking and driving
WARNING
Drinking and then driving is very
dangerous. Alcohol in the blood-
stream delays your reaction and
impairs your perception, judgment
and attentiveness. If you drive afterdrinking –even if you drink just a
little –it will increase the risk of
being involved in a serious or fatal
accident, injuring or killing yourself,
your passengers and others. In
addition, if you are injured in the
accident, alcohol may increase the
severity of that injury.
Page 45 of 474
1-22Seat, seatbelt and SRS airbags
ping the entire vehicle due to
collision damage or for other
reasons, consult your SUBARU
dealer.
& System monitors
A diagnostic system continually monitors
the readiness of the seatbelt pretensioner
while the vehicle is being driven. The
seatbelt pretensioners share the control
module with the airbag system. Therefore,
if any malfunction occurs in a seatbelt
pretensioner, the SRS airbag system
warning light will illuminate. For details,
refer to “SRS airbag system monitors ”F 1-
62.
& System servicing
WARNING
. When discarding a seatbelt re-
tractor assembly or scrapping
the entire vehicle damaged by a
collision, consult your SUBARU
dealer.
. Tampering with or disconnecting
the system ’s wiring could result
in accidental activation of the
seatbelt pretensioner and/or air-
bag or could make the system inoperative, which may result in
serious injury. Do not use elec-
trical test equipment on any
circuit related to the seatbelt
pretensioner and airbag sys-
tems. For required servicing of
the seatbelt pretensioner, consult
your nearest SUBARU dealer.
CAUTION
The front sub sensors are located in
both front fenders and the airbag
control module including the impact
sensors is located under the center
console. If you need service or
repair in those areas or near the
front seatbelt retractors, have the
work performed by your authorized
SUBARU dealer.
NOTE
If the front part of the vehicle is
damaged in an accident to the extent
that the seatbelt pretensioner does not
operate, contact your SUBARU dealer
as soon as possible. &
Precautions against vehicle modification
Always consult your SUBARU dealer if
you want to install any accessory parts to
your vehicle.
CAUTION
Do not perform any of the following
modifications. Such modifications
can interfere with proper operation
of the seatbelt pretensioners. . Attachment of any equipment
(bush bar, winches, snow plow,
skid plate, etc.) other than genu-
ine SUBARU accessory parts to
the front end.
. Modification of the suspension
system or front end structure.
. Installation of a tire of different
size and construction from the
tires specified on the vehicle
placard attached to the door
pillar or specified for individual
vehicle models in this Owner ’s
Manual.
Page 88 of 474
.Installation of additional electri-
cal/electronic equipment such as
a mobile two-way radio on or
near the SRS airbag system
components and/or wiring
. Modifications on or inside the
front door panels for the purpose
of a speaker replacement or
sound insulation
CAUTION
Do not perform any of the following
modifications. Such modifications
can interfere with proper operation
of the SRS airbag system. . Attachment of any equipment
(bush bar, bullbar, winches, snow
plow, skid/sump plate, etc.) other
than genuine SUBARU acces-
sory parts.
. Modification of the suspension
system or front end structure.
. Installation of a tire of different
size and construction from the
tires specified on the vehicle
placard attached to the driver ’s
door pillar or specified for indivi-
dual vehicle models in this Own- er ’s Manual. .
Attachment of any equipment
(side steps or side sill protectors,
etc.) other than genuine SUBARU
accessory parts to the side body.
Always consult your SUBARU dealer if
you want to install any accessory parts on
your vehicle. Seat, seatbelt and SRS airbags
1-65
Page 117 of 474
2-28Keys and doors
.Never try to check the anti-en-
trapment function by deliberately
placing part of your body in themoonroof.
CAUTION
. Do not sit on the edge of the open
moonroof.
. Do not operate the moonroof if
falling snow or extremely cold
conditions have caused it to
freeze shut.
. The anti-entrapment function
does not operate when the moon-
roof is being tilted down. Be sure
to confirm that it is safe to do so
before tilting the moonroof down.
The moonroof has both tilting and slidingfunctions.
The moonroof operates only when the
ignition switch is in the “ON ”position. &
Moonroof switches
! Tilting moonroof
1) Raise
2) Lower
The raising function will only operate when
the moonroof is fully closed. The lowering
function will only operate when the moon-
roof is raised.
Press the rear side of the “UP/DOWN ”
switch to raise the moonroof.
Press the front side of the “UP/DOWN ”
switch to lower the moonroof.
Release the switch after the moonroof has
been raised or has been lowered com-
pletely. Pressing the switch continuously
may cause damage to the moonroof. NOTE
One-touch operation does not take
place when the moonroof is lowered.
Press the switch continuously to lower
the moonroof. !
Sliding moonroof
1) Open
2) Close
Press the “OPEN/CLOSE ”switch rear-
ward to open the moonroof. The sun
shade will also be opened together with
the moonroof. For Outback, the moonroof
will stop at a position approximately 0.8 in
(2 cm) away from the fully opened posi-
tion. Press the switch again to open the
moonroof completely.
Press the “OPEN/CLOSE ”switch forward
to close the moonroof.
Page 154 of 474
ing, defogging or deicing is not complete,
you have to press the control switch to
turn them on again.
For models with the automatic climate
control system,it is possible for a
SUBARU dealer to set the defogger and
deicer system for the continuous opera-
tion mode. Contact your SUBARU dealer
for details.
CAUTION
. To prevent the battery from being
discharged, do not operate the
defogger and deicer system con-
tinuously for any longer than
necessary.
. Do not use sharp instruments or
window cleaner containing abra-
sives to clean the inner surface
of the rear window. They may
damage the conductors printed
on the window. NOTE .
Turn on the defogger and deicer
system if the wipers are frozen to the windshield.. If the windshield is covered with
snow, remove the snow so that the
windshield wiper deicer works effec-
tively.. While the defogger and deicer sys-
tem is in the continuous operation
mode, if the vehicle speed remains at
9 mph (15 km/h) or lower for 15
minutes, the windshield wiper deicer
automatically stops operating, though
the rear window defogger and outside
mirror defogger maintain continuous
operation in this condition.. While the defogger and deicer sys-
tem is in the continuous operation
mode, if the battery voltage drops
below the permissible level, continu-
ous operation of the defogger and
deicer system is canceled and the
system stops operating. Mirrors
Always check that the inside and outside
mirrors are properly adjusted before you
start driving. &
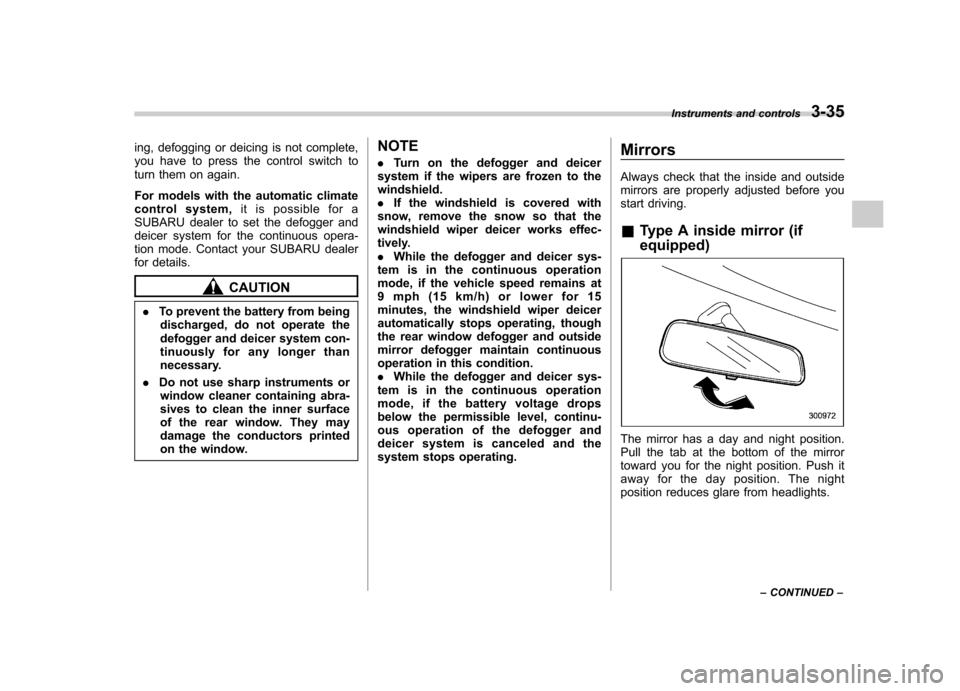
Type A inside mirror (if equipped)
The mirror has a day and night position.
Pull the tab at the bottom of the mirror
toward you for the night position. Push it
away for the day position. The night
position reduces glare from headlights. Instruments and controls
3-35
– CONTINUED –
Page 179 of 474
4-8Climate control
ON position is selected, the indicator light
on the air inlet selection button illuminates.
OFF position (outside air) : Outside air is
drawn into the passenger compartment.
Press the air inlet selection button to the
OFF position when the interior has cooled
to a comfortable temperature and the road
is no longer dusty. The indicator light will
turn off.
WARNING
Continued operation in the ON posi-
tion may fog up the windows. Switch
to the OFF position as soon as the
outside dusty condition clears. Defrosting
Select the desired
“
”mode or “”mode
to defrost or dehumidify the windshield
and front door windows by performing the
following procedures.
For type A: Press the airflow control button
and select the “
”mode or “”mode.
For type B: Press the airflow mode
selection button to select the “
”mode
or press the defroster button to select the “
” mode.
NOTE
When the “
”mode or “”mode is
selected, the air conditioner compres-
sor automatically operates to more
quickly defog the windshield. At the
same time, the air inlet selection is
automatically set to the outside air
mode. For details, refer to “Airflow
mode selection ”F 4-6. Operating tips for heater and
air conditioner &
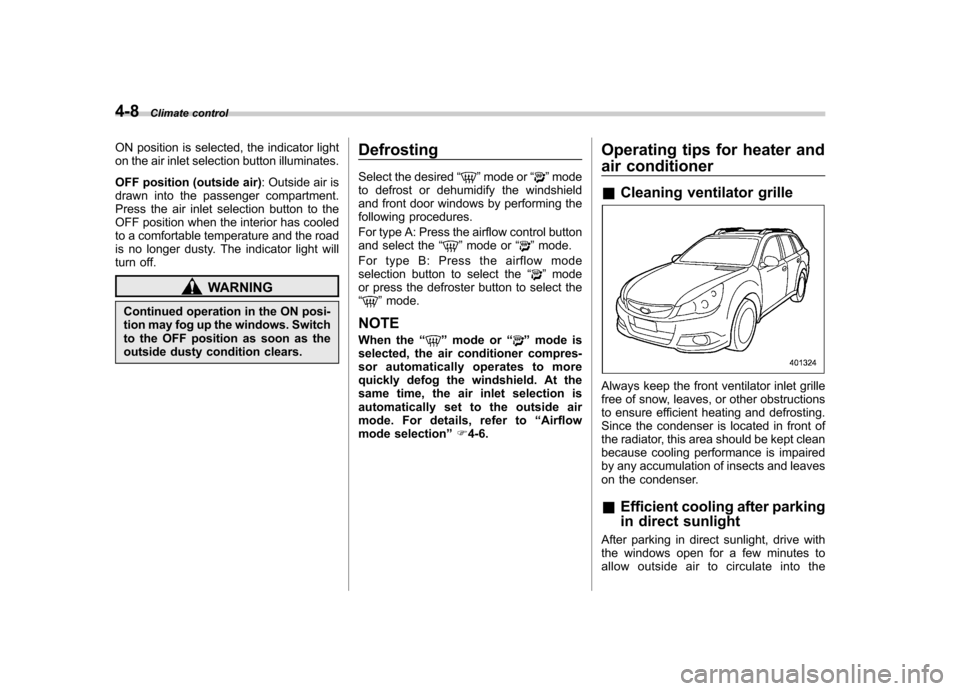
Cleaning ventilator grille
Always keep the front ventilator inlet grille
free of snow, leaves, or other obstructions
to ensure efficient heating and defrosting.
Since the condenser is located in front of
the radiator, this area should be kept clean
because cooling performance is impaired
by any accumulation of insects and leaves
on the condenser. &Efficient cooling after parking
in direct sunlight
After parking in direct sunlight, drive with
the windows open for a few minutes to
allow outside air to circulate into the
Page 272 of 474
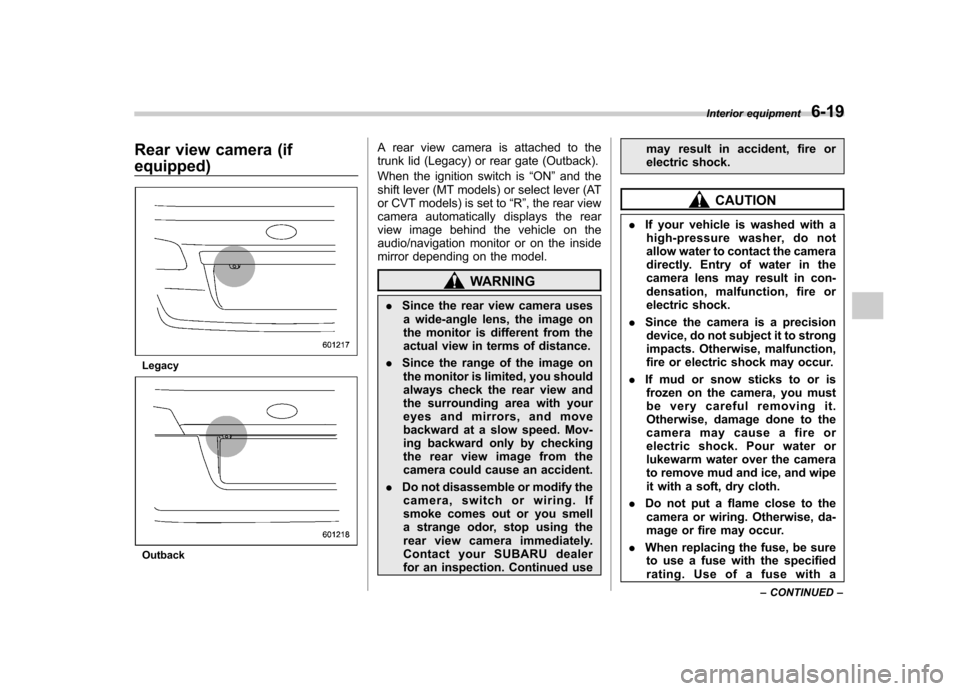
Rear view camera (if equipped)
Legacy
OutbackA rear view camera is attached to the
trunk lid (Legacy) or rear gate (Outback).
When the ignition switch is
“ON ”and the
shift lever (MT models) or select lever (AT
or CVT models) is set to “R ”, the rear view
camera automatically displays the rear
view image behind the vehicle on the
audio/navigation monitor or on the inside
mirror depending on the model.
WARNING
. Since the rear view camera uses
a wide-angle lens, the image on
the monitor is different from the
actual view in terms of distance.
. Since the range of the image on
the monitor is limited, you should
always check the rear view and
the surrounding area with your
eyes and mirrors, and move
backward at a slow speed. Mov-
ing backward only by checking
the rear view image from the
camera could cause an accident.
. Do not disassemble or modify the
camera, switch or wiring. If
smoke comes out or you smell
a strange odor, stop using the
rear view camera immediately.
Contact your SUBARU dealer
for an inspection. Continued use may result in accident, fire or
electric shock.
CAUTION
. If your vehicle is washed with a
high-pressure washer, do not
allow water to contact the camera
directly. Entry of water in the
camera lens may result in con-
densation, malfunction, fire or
electric shock.
. Since the camera is a precision
device, do not subject it to strong
impacts. Otherwise, malfunction,
fire or electric shock may occur.
. If mud or snow sticks to or is
frozen on the camera, you must
be very careful removing it.
Otherwise, damage done to the
camera may cause a fire or
electric shock. Pour water or
lukewarm water over the camera
to remove mud and ice, and wipe
it with a soft, dry cloth.
. Do not put a flame close to the
camera or wiring. Otherwise, da-
mage or fire may occur.
. When replacing the fuse, be sure
to use a fuse with the specified
rating. Use of a fuse with a Interior equipment
6-19
– CONTINUED –
Page 273 of 474

6-20Interior equipment
different rating may result in a malfunction.
. If the rear view camera is used for
a long time while the engine is
not operated, the battery may
become completely discharged.
NOTE . Do not wipe the camera with alcohol,
benzine or paint thinner. Otherwise,
discoloration may occur. To remove
contamination, wipe the camera with a
cloth moistened with a diluted neutral
detergent and then wipe it with a soft,
dry cloth.. When waxing the vehicle, be careful
not to apply the wax to the camera. If it
comes in contact with the camera,
moisten a clean cloth with a diluted
neutral detergent to remove the wax. . The camera lens has hard coating to
help prevent scratches. However, when
washing the vehicle or cleaning the
camera lens, be careful not to scratch
the camera lens. Do not use a washing
brush directly on the camera lens. The
monitor screen may be adversely af-fected.. Strong light shined on the camera
lens may develop white light stripes
around the light source. This is not a malfunction..
Under fluorescent lighting, the dis-
play may flicker. However, this is not amalfunction.. The image of the rear view camera
may be slightly different from the
actual color of the objects.
& How to use the rear view camera
When the shift lever or select lever is set to “R ”, the rear view camera automatically
displays the rear view image from the
vehicle. When the lever is set to other
positions, the image before setting to “R ”
is displayed.
1. Set the ignition switch to “ON ”.
2. Set the shift lever or select lever to “R ”.
NOTE . For models with the genuine
SUBARU navigation system, the image
of the rear view camera has priority
over other screen displays. To operate
other screens, set the shift lever (MT
models) or select lever (AT and CVT
models) to a position other than “R ”.
. The image of the rear view camera is
horizontally reversed as is the case
with the vehicle rearview mirror or the
side view mirror. .
It may be difficult to see the image of
the rearview camera in the following
cases. This is not a malfunction of thecamera.
–The vehicle is in a dark place (at
night, in a tunnel, etc.). – The vehicle is in an extremely hot
or cold place.– An object (such as raindrops,
snow, dirt, etc.) that disturbs the
view of the rear view camera sticks
to the lens of the camera. – Strong light shined directly on
the camera lens (occasionally, there
are vertical lines on the screen).
Page 299 of 474
7-22Starting and operating
turns off.
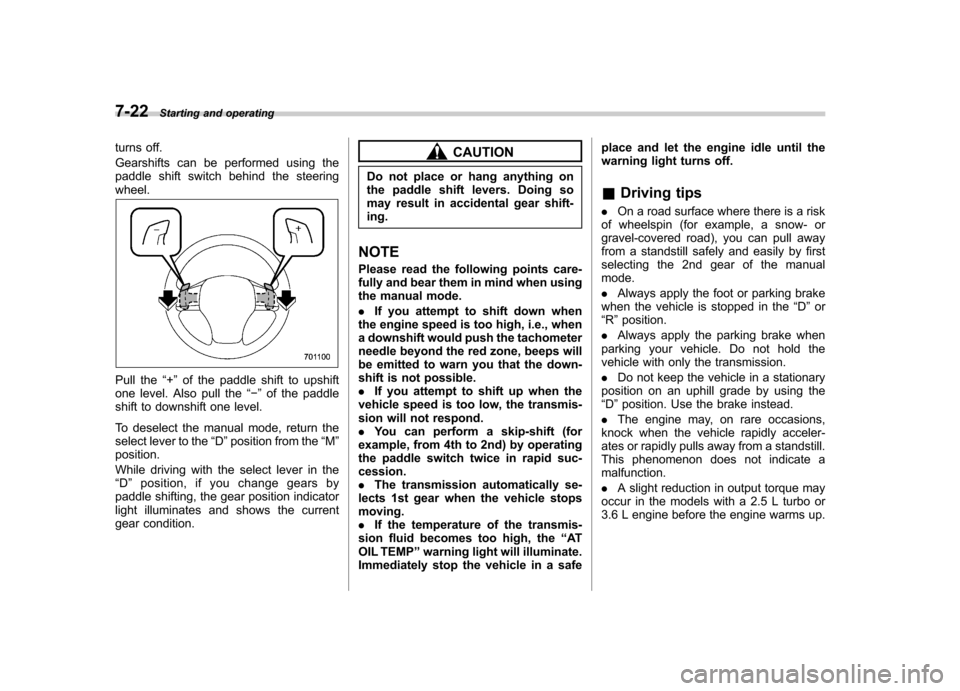
Gearshifts can be performed using the
paddle shift switch behind the steeringwheel.
Pull the “+ ” of the paddle shift to upshift
one level. Also pull the “ ” of the paddle
shift to downshift one level.
To deselect the manual mode, return the
select lever to the “D ”position from the “M ”
position.
While driving with the select lever in the “ D ” position, if you change gears by
paddle shifting, the gear position indicator
light illuminates and shows the current
gear condition.
CAUTION
Do not place or hang anything on
the paddle shift levers. Doing so
may result in accidental gear shift-ing.
NOTE
Please read the following points care-
fully and bear them in mind when using
the manual mode. . If you attempt to shift down when
the engine speed is too high, i.e., when
a downshift would push the tachometer
needle beyond the red zone, beeps will
be emitted to warn you that the down-
shift is not possible.. If you attempt to shift up when the
vehicle speed is too low, the transmis-
sion will not respond.. You can perform a skip-shift (for
example, from 4th to 2nd) by operating
the paddle switch twice in rapid suc-cession.. The transmission automatically se-
lects 1st gear when the vehicle stopsmoving.. If the temperature of the transmis-
sion fluid becomes too high, the “AT
OIL TEMP ”warning light will illuminate.
Immediately stop the vehicle in a safe place and let the engine idle until the
warning light turns off. &
Driving tips
. On a road surface where there is a risk
of wheelspin (for example, a snow- or
gravel-covered road), you can pull away
from a standstill safely and easily by first
selecting the 2nd gear of the manualmode. . Always apply the foot or parking brake
when the vehicle is stopped in the “D ”or
“ R ”position.
. Always apply the parking brake when
parking your vehicle. Do not hold the
vehicle with only the transmission. . Do not keep the vehicle in a stationary
position on an uphill grade by using the “ D ”position. Use the brake instead.
. The engine may, on rare occasions,
knock when the vehicle rapidly acceler-
ates or rapidly pulls away from a standstill.
This phenomenon does not indicate amalfunction. . A slight reduction in output torque may
occur in the models with a 2.5 L turbo or
3.6 L engine before the engine warms up.
Page 301 of 474
7-24Starting and operating
!Brake assist system
WARNING
Do not be overconfident about the
brake assist. It is not a system that
brings more braking ability to the
vehicle beyond its braking capabil-
ity. Always use the utmost care
when driving regarding vehicle
speed and safe distance.
CAUTION
When you need to brake suddenly,
continue depressing the brake pedal
strongly to bring the effect of the
brake assist.
Brake assist is a driver assistance system.
It assists the brake power when the driver
cannot depress the brake pedal strongly
and the brake power is insufficient.
Brake assist generates the brake power
according to the speed at which the driver
depresses the brake pedal. NOTE
When you depress the brake pedal
strongly or suddenly, the following
phenomena occur. However, even
though these occur, they do not indi- cate any malfunctions, and the brake
assist system is operating properly. .
You might feel that the brake pedal
is applied by lighter force and gener-
ates a greater braking force.. You might hear the sound of ABS
operating from the engine compart-ment.
& Disc brake pad wear warning indicators
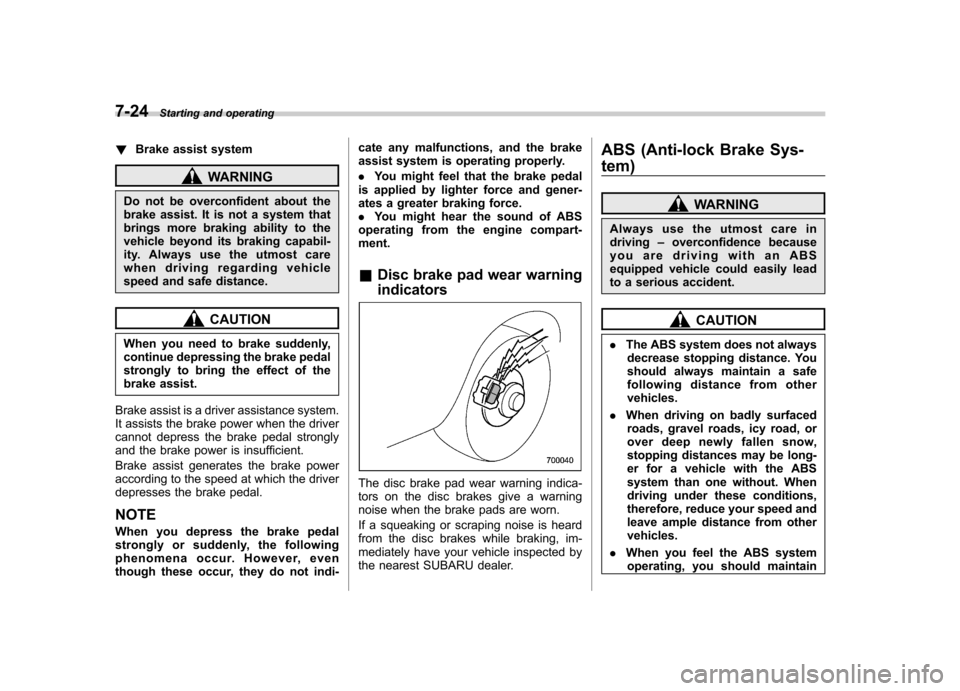
The disc brake pad wear warning indica-
tors on the disc brakes give a warning
noise when the brake pads are worn.
If a squeaking or scraping noise is heard
from the disc brakes while braking, im-
mediately have your vehicle inspected by
the nearest SUBARU dealer. ABS (Anti-lock Brake Sys- tem)
WARNING
Always use the utmost care in driving –overconfidence because
you are driving with an ABS
equipped vehicle could easily lead
to a serious accident.
CAUTION
. The ABS system does not always
decrease stopping distance. You
should always maintain a safe
following distance from othervehicles.
. When driving on badly surfaced
roads, gravel roads, icy road, or
over deep newly fallen snow,
stopping distances may be long-
er for a vehicle with the ABS
system than one without. When
driving under these conditions,
therefore, reduce your speed and
leave ample distance from othervehicles.
. When you feel the ABS system
operating, you should maintain