window SUBARU OUTBACK 2017 6.G Owner's Manual
[x] Cancel search | Manufacturer: SUBARU, Model Year: 2017, Model line: OUTBACK, Model: SUBARU OUTBACK 2017 6.GPages: 610, PDF Size: 10.28 MB
Page 135 of 610
Keys and doors/Alarm system
&Arming the system
NOTE
. The system can be armed even if the
engine hood, the windows and/or
moonroof are open. Always make sure
that they are fully closed before arming
the system.
. When arming the system, if any of
the doors or the rear gate/trunk lid is
not fully closed, an electronic chirp
sounds five times, the hazard warning
flashers flash five times to alert you
that the doors (or the rear gate/trunk
lid) are not properly closed. When you
close the door, doors will automatically
lock and the system will automatically
arm in 30 seconds.
. The 30-second standby time can be
eliminated if you prefer. Have it per-
formed by your SUBARU dealer.
. For Legacy, if you open the trunk
using the access key/remote transmit-
ter ’s “
”button in the surveillance
state (or the standby state), the system
will be temporarily placed in a standby
state. The system will go back to the
surveillance state in 30 seconds upon
locking the trunk.
. The system is in the standby state
for a 30-second period before arming
the system. The security indicator light
will flash at short intervals during this period.
.
If any of the following actions is
done during the standby period, the
system will not switch to the surveil-
lance state.
–Doors (including the rear gate/
trunk lid) are unlocked using the
access key/remote transmitter.
– Doors (including the rear gate/
trunk lid) are unlocked using the
keyless access function (models
with “keyless access with push-
button start system ”).
– Any door (including the rear gate/
trunk lid) is opened.
– The ignition switch is turned to
the “ON ”position (models without
“ keyless access with push-button
start system ”).
– Push-button ignition switch is
turned to the “ACC ”position (mod-
els with “keyless access with push-
button start system ”).
! To arm the system using the access
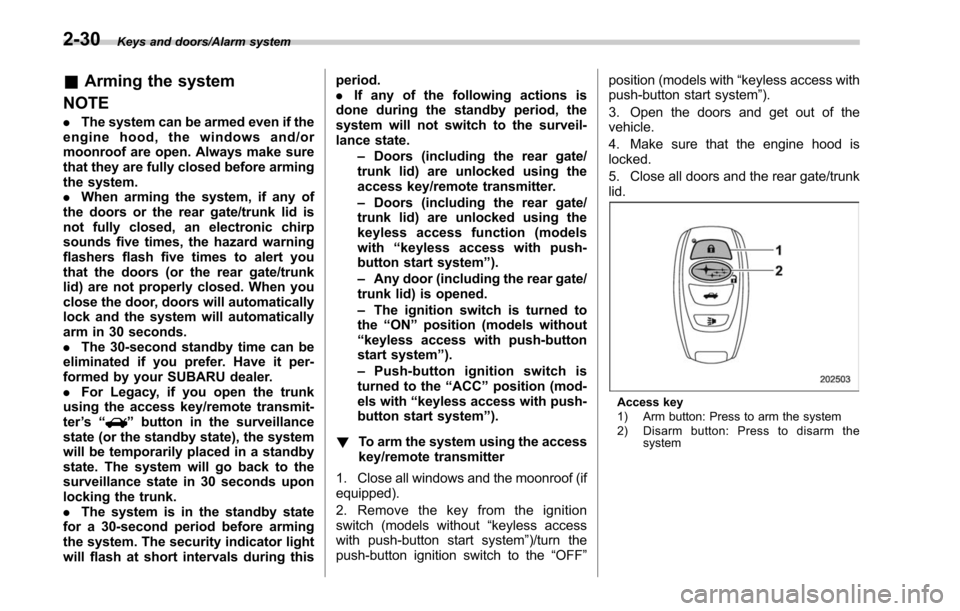
key/remote transmitter
1. Close all windows and the moonroof (if
equipped).
2. Remove the key from the ignition
switch (models without “keyless access
with push-button start system ”)/turn the
push-button ignition switch to the “OFF”position (models with
“keyless access with
push-button start system ”).
3. Open the doors and get out of the
vehicle.
4. Make sure that the engine hood is
locked.
5. Close all doors and the rear gate/trunk
lid.
Access key
1) Arm button: Press to arm the system
2) Disarm button: Press to disarm the system
2-30
Page 136 of 610
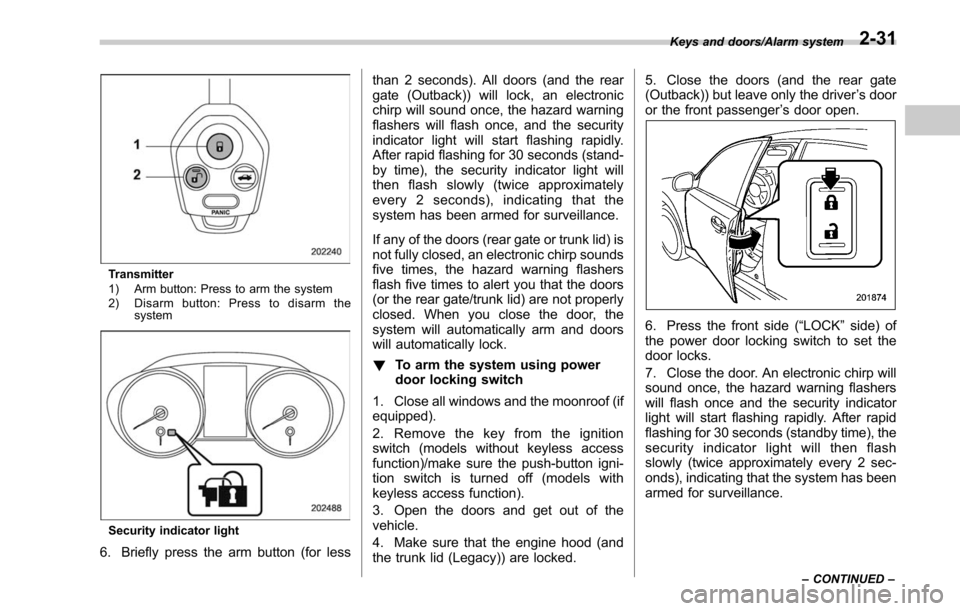
Transmitter
1) Arm button: Press to arm the system
2) Disarm button: Press to disarm thesystem
Security indicator light
6. Briefly press the arm button (for less than 2 seconds). All doors (and the rear
gate (Outback)) will lock, an electronic
chirp will sound once, the hazard warning
flashers will flash once, and the security
indicator light will start flashing rapidly.
After rapid flashing for 30 seconds (stand-
by time), the security indicator light will
then flash slowly (twice approximately
every 2 seconds), indicating that the
system has been armed for surveillance.
If any of the doors (rear gate or trunk lid) is
not fully closed, an electronic chirp sounds
five times, the hazard warning flashers
flash five times to alert you that the doors
(or the rear gate/trunk lid) are not properly
closed. When you close the door, the
system will automatically arm and doors
will automatically lock.
!
To arm the system using power
door locking switch
1. Close all windows and the moonroof (if
equipped).
2. Remove the key from the ignition
switch (models without keyless access
function)/make sure the push-button igni-
tion switch is turned off (models with
keyless access function).
3. Open the doors and get out of the
vehicle.
4. Make sure that the engine hood (and
the trunk lid (Legacy)) are locked. 5. Close the doors (and the rear gate
(Outback)) but leave only the driver
’s door
or the front passenger ’s door open.
6. Press the front side (“LOCK” side) of
the power door locking switch to set the
door locks.
7. Close the door. An electronic chirp will
sound once, the hazard warning flashers
will flash once and the security indicator
light will start flashing rapidly. After rapid
flashing for 30 seconds (standby time), the
security indicator light will then flash
slowly (twice approximately every 2 sec-
onds), indicating that the system has been
armed for surveillance.
Keys and doors/Alarm system
–CONTINUED –2-31
Page 137 of 610
Keys and doors/Alarm system
!To arm the system using the key-
less access function (if equipped)
1. Close all windows and the moonroof (if
equipped)
2. Turn the push-button ignition switch to
the “OFF ”position.
3. Open the doors and get out of the
vehicle.
4. Make sure that the engine hood is
locked.
5. Close all doors and the rear gate/trunk
lid.
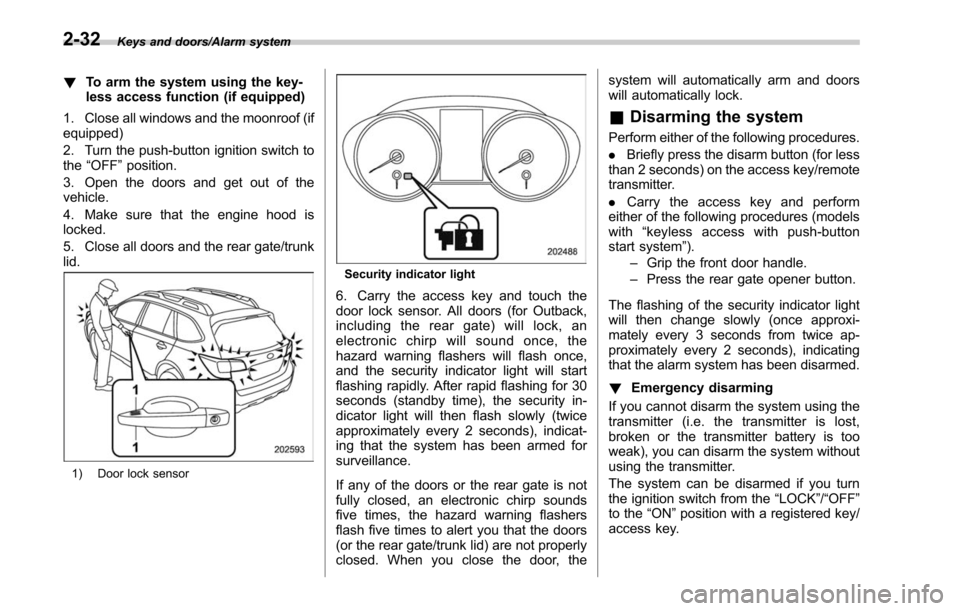
1) Door lock sensor
Security indicator light
6. Carry the access key and touch the
door lock sensor. All doors (for Outback,
including the rear gate) will lock, an
electronic chirp will sound once, the
hazard warning flashers will flash once,
and the security indicator light will start
flashing rapidly. After rapid flashing for 30
seconds (standby time), the security in-
dicator light will then flash slowly (twice
approximately every 2 seconds), indicat-
ing that the system has been armed for
surveillance.
If any of the doors or the rear gate is not
fully closed, an electronic chirp sounds
five times, the hazard warning flashers
flash five times to alert you that the doors
(or the rear gate/trunk lid) are not properly
closed. When you close the door, the system will automatically arm and doors
will automatically lock.
&
Disarming the system
Perform either of the following procedures.
. Briefly press the disarm button (for less
than 2 seconds) on the access key/remote
transmitter.
. Carry the access key and perform
either of the following procedures (models
with “keylessaccesswithpush-button
start system ”).
– Grip the front door handle.
– Press the rear gate opener button.
The flashing of the security indicator light
will then change slowly (once approxi-
mately every 3 seconds from twice ap-
proximately every 2 seconds), indicating
that the alarm system has been disarmed.
! Emergency disarming
If you cannot disarm the system using the
transmitter (i.e. the transmitter is lost,
broken or the transmitter battery is too
weak), you can disarm the system without
using the transmitter.
The system can be disarmed if you turn
the ignition switch from the “LOCK”/“OFF”
to the “ON ”position with a registered key/
access key.
2-32
Page 139 of 610
Keys and doors/Child safety locks
Child safety locks
WARNING
Always turn the child safety locks to
the“LOCK ”position when children
sit on the rear seat. Serious injury
could result if a child accidentally
opens the door and falls out.
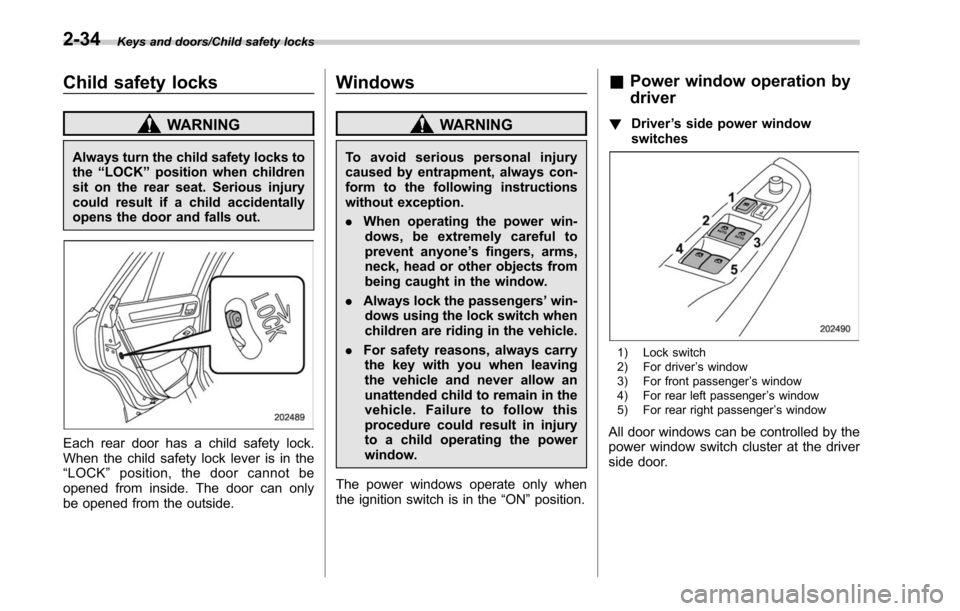
Each rear door has a child safety lock.
When the child safety lock lever is in the
“ LOCK ”position, the door cannot be
opened from inside. The door can only
be opened from the outside.
Windows
WARNING
To avoid serious personal injury
caused by entrapment, always con-
form to the following instructions
without exception.
. When operating the power win-
dows, be extremely careful to
prevent anyone ’s fingers, arms,
neck, head or other objects from
being caught in the window.
. Always lock the passengers ’win-
dows using the lock switch when
children are riding in the vehicle.
. For safety reasons, always carry
the key with you when leaving
the vehicle and never allow an
unattended child to remain in the
vehicle. Failure to follow this
procedure could result in injury
to a child operating the power
window.
The power windows operate only when
the ignition switch is in the “ON”position.
& Power window operation by
driver
! Driver ’s side power window
switches
1) Lock switch
2) For driver ’s window
3) For front passenger ’s window
4) For rear left passenger ’s window
5) For rear right passenger ’s window
All door windows can be controlled by the
power window switch cluster at the driver
side door.
2-34
Page 140 of 610
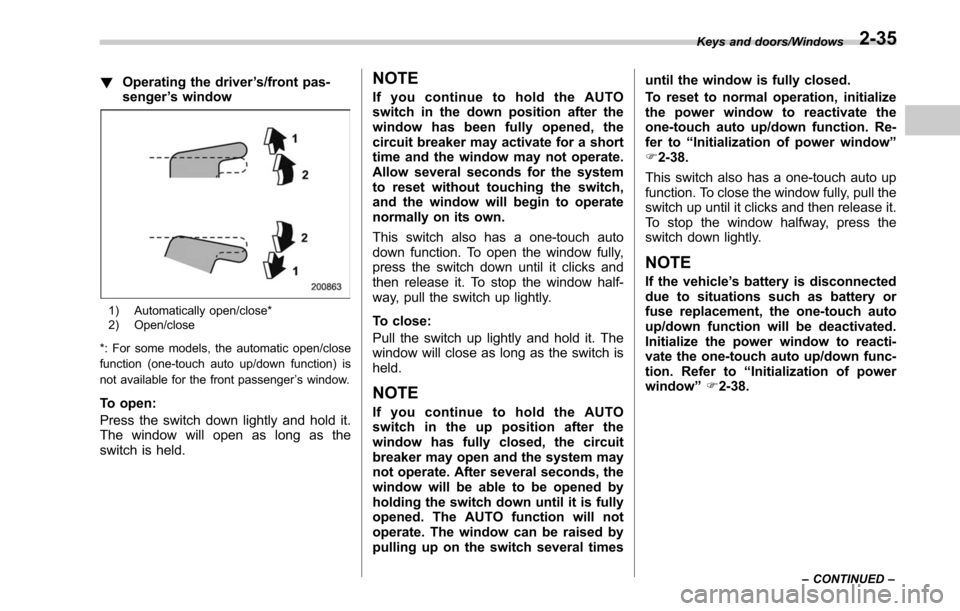
!Operating the driver ’s/front pas-
senger ’s window
1) Automatically open/close*
2) Open/close
*: For some models, the automatic open/close
function (one-touch auto up/down function) is
not available for the front passenger ’s window.
To open:
Press the switch down lightly and hold it.
The window will open as long as the
switch is held.
NOTE
If you continue to hold the AUTO
switch in the down position after the
window has been fully opened, the
circuit breaker may activate for a short
time and the window may not operate.
Allow several seconds for the system
to reset without touching the switch,
and the window will begin to operate
normally on its own.
This switch also has a one-touch auto
down function. To open the window fully,
press the switch down until it clicks and
then release it. To stop the window half-
way, pull the switch up lightly.
To close:
Pull the switch up lightly and hold it. The
window will close as long as the switch is
held.
NOTE
If you continue to hold the AUTO
switch in the up position after the
window has fully closed, the circuit
breaker may open and the system may
not operate. After several seconds, the
window will be able to be opened by
holding the switch down until it is fully
opened. The AUTO function will not
operate. The window can be raised by
pulling up on the switch several times until the window is fully closed.
To reset to normal operation, initialize
the power window to reactivate the
one-touch auto up/down function. Re-
fer to
“Initialization of power window ”
F 2-38.
This switch also has a one-touch auto up
function. To close the window fully, pull the
switch up until it clicks and then release it.
To stop the window halfway, press the
switch down lightly.
NOTE
If the vehicle ’s battery is disconnected
due to situations such as battery or
fuse replacement, the one-touch auto
up/down function will be deactivated.
Initialize the power window to reacti-
vate the one-touch auto up/down func-
tion. Refer to “Initialization of power
window ”F 2-38.
Keys and doors/Windows
–CONTINUED –2-35
Page 141 of 610
Keys and doors/Windows
!Anti-entrapment function
CAUTION
.Never attempt to test this func-
tion using fingers, hands or other
parts of your body.
. The anti-entrapment function
may not operate properly if some
object gets trapped just before
the window fully closes.
NOTE
. If a window detects an impact simi-
lar to that caused by trapping an object
(for example, when the vehicle encoun-
ters a deep pothole), the anti-entrap-
ment function may operate.
. The window cannot be operated for
a few seconds after the anti-entrap-
ment function operates.
. If the vehicle ’s battery is discon-
nected due to situations such as
battery or fuse replacement, the anti-
entrapment function will be deacti-
vated. Initialize the power window to
reactivate the anti-entrapment function.
Refer to “Initialization of power win-
dow ”F 2-38.
While closing with the one-touch auto up
function, if the window senses a substan- tial enough object trapped between the
window and the window frame, it auto-
matically moves down slightly and stops.
!
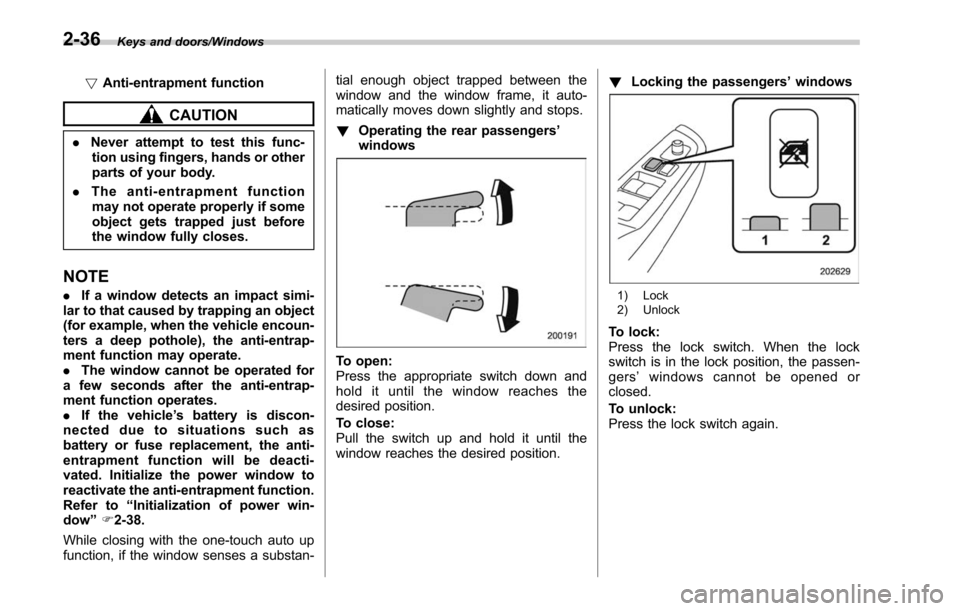
Operating the rear passengers ’
windows
To open:
Press the appropriate switch down and
hold it until the window reaches the
desired position.
To close:
Pull the switch up and hold it until the
window reaches the desired position. !
Locking the passengers ’windows
1) Lock
2) Unlock
To lock:
Press the lock switch. When the lock
switch is in the lock position, the passen-
gers ’windows cannot be opened or
closed.
To unlock:
Press the lock switch again.
2-36
Page 142 of 610
&Power window operation by
passengers
! Passenger ’s side power window
switches
Each passenger window can be controlled
by the power window switch located on
the door. !
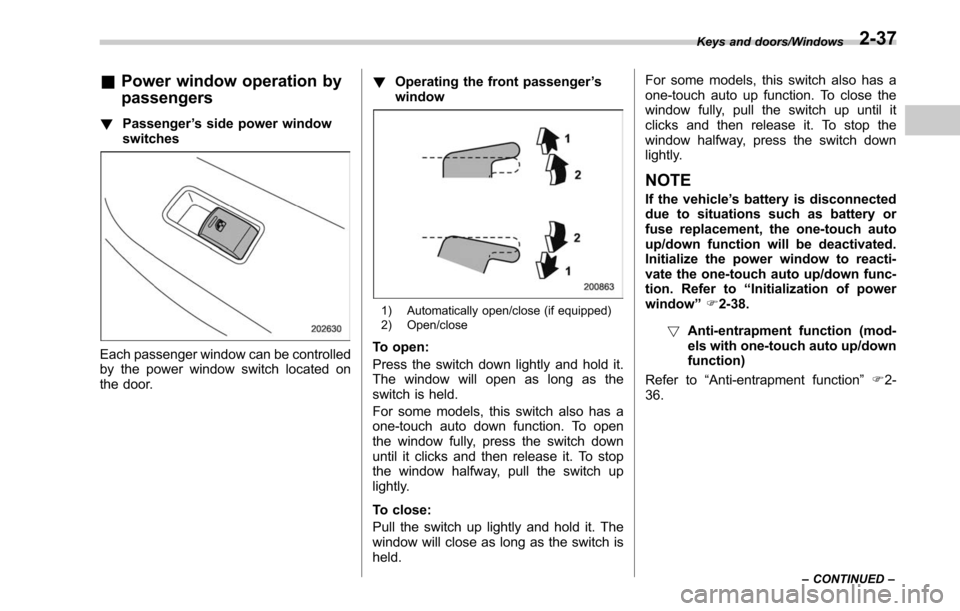
Operating the front passenger ’s
window
1) Automatically open/close (if equipped)
2) Open/close
To open:
Press the switch down lightly and hold it.
The window will open as long as the
switch is held.
For some models, this switch also has a
one-touch auto down function. To open
the window fully, press the switch down
until it clicks and then release it. To stop
the window halfway, pull the switch up
lightly.
To close:
Pull the switch up lightly and hold it. The
window will close as long as the switch is
held. For some models, this switch also has a
one-touch auto up function. To close the
window fully, pull the switch up until it
clicks and then release it. To stop the
window halfway, press the switch down
lightly.
NOTE
If the vehicle
’s battery is disconnected
due to situations such as battery or
fuse replacement, the one-touch auto
up/down function will be deactivated.
Initialize the power window to reacti-
vate the one-touch auto up/down func-
tion. Refer to “Initialization of power
window ”F 2-38.
! Anti-entrapment function (mod-
els with one-touch auto up/down
function)
Refer to “Anti-entrapment function ”F 2-
36.
Keys and doors/Windows
–CONTINUED –2-37
Page 143 of 610
Keys and doors/Trunk lid (Legacy)
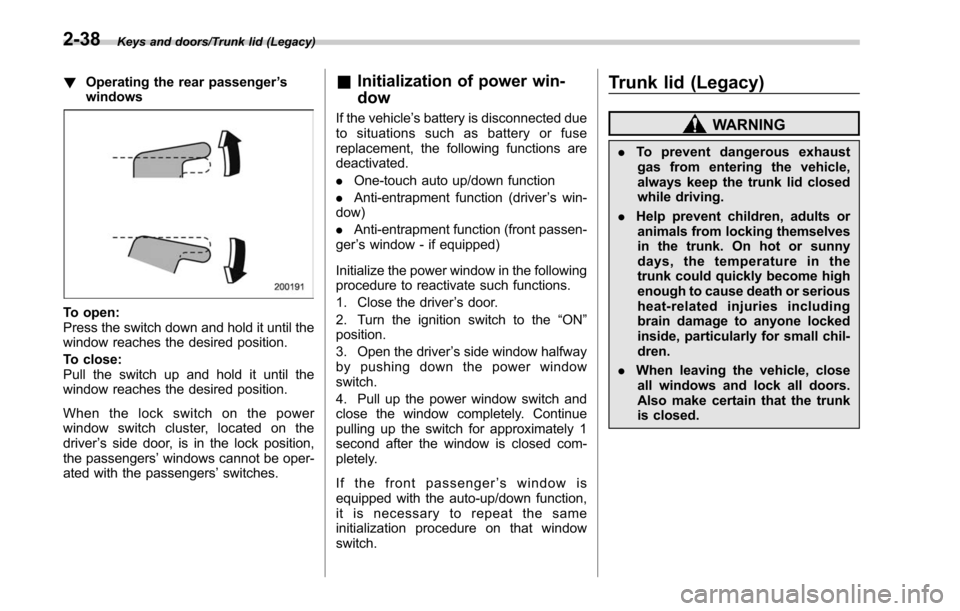
!Operating the rear passenger ’s
windows
To open:
Press the switch down and hold it until the
window reaches the desired position.
To close:
Pull the switch up and hold it until the
window reaches the desired position.
When the lock switch on the power
window switch cluster, located on the
driver ’s side door, is in the lock position,
the passengers’ windows cannot be oper-
ated with the passengers’ switches.
&Initialization of power win-
dow
If the vehicle’ s battery is disconnected due
to situations such as battery or fuse
replacement, the following functions are
deactivated.
. One-touch auto up/down function
. Anti-entrapment function (driver ’s win-
dow)
. Anti-entrapment function (front passen-
ger ’s window - if equipped)
Initialize the power window in the following
procedure to reactivate such functions.
1. Close the driver ’s door.
2. Turn the ignition switch to the “ON”
position.
3. Open the driver ’s side window halfway
by pushing down the power window
switch.
4. Pull up the power window switch and
close the window completely. Continue
pulling up the switch for approximately 1
second after the window is closed com-
pletely.
If the front passenger ’s window is
equipped with the auto-up/down function,
it is necessary to repeat the same
initialization procedure on that window
switch.
Trunk lid (Legacy)
WARNING
. To prevent dangerous exhaust
gas from entering the vehicle,
always keep the trunk lid closed
while driving.
. Help prevent children, adults or
animals from locking themselves
in the trunk. On hot or sunny
days, the temperature in the
trunk could quickly become high
enough to cause death or serious
heat-related injuries including
brain damage to anyone locked
inside, particularly for small chil-
dren.
. When leaving the vehicle, close
all windows and lock all doors.
Also make certain that the trunk
is closed.
2-38
Page 157 of 610
Instruments and controls
High beam assist warning indicator (yellow) (ifequipped) ......................................................... 3-31
Cruise control indicator ...................................... 3-31
Cruise control set indicator ................................ 3-32
Automatic headlight beam leveler warning light (models with HID headlights) ............................ 3-32
Headlight indicator light ..................................... 3-32
Front fog light indicator light (if equipped) .......... 3-32
X-mode indicator (if equipped) ............................ 3-32
Hill descent control indicator (if equipped) .......... 3-32
Steering responsive fog lights OFF indicator (models with EyeSight system) ......................... 3-32
BSD/RCTA warning indicator (if equipped) .......... 3-32
BSD/RCTA OFF indicator (if equipped) ................ 3-32
Icy road surface warning indicator ...................... 3-32
RAB warning indicator (if equipped) ................... 3-33
RAB OFF indicator (if equipped) ......................... 3-33
Sonar audible alarm OFF indicator (if equipped) ......................................................... 3-33
Information display ............................................ 3-33Clock................................................................. 3-34
Climate control mode indicators ......................... 3-35
Outside temperature indicator ............................ 3-35
Multi information display................................... 3-36Basic operation.................................................. 3-36
Welcome screen and Good-bye screen ............... 3-37
Warning screen .................................................. 3-37
Basic screens .................................................... 3-38
Telltale screen .................................................... 3-40
Menu screens .................................................... 3-41
Light control switch ........................................... 3-46
Headlights......................................................... 3-47
High/low beam change (dimmer) ... ..................... 3-49
Headlight flasher ............................................... 3-53
Daytime running light system ............................. 3-53
Headlight beam leveler (models with HID
headlights) ...................................................... 3-54
Turn signal lever ................................................ 3-54
One-touch lane changer ..................................... 3-55
Illumination brightness control ......................... 3-55Auto dimmer cancel function............................. 3-55
Front fog light switch (if equipped) .................. 3-56
Steering responsive fog lights system (models
with EyeSight system) ..................................... 3-56
Wiper and washer.............................................. 3-57Windshield wiper and washer switches .............. 3-59
Rear window wiper and washer switch (Outback) ........................................................ 3-60
Defogger and deicer .......................................... 3-61
Mirrors ................................................................ 3-63
Inside mirror (without auto-dimming function) (if
equipped) ........................................................ 3-63
Auto-dimming mirror/compass with HomeLink
®(U.S.-spec. models without EyeSight system - if
equipped) ........................................................ 3-63
Auto-dimming mirror with HomeLink
®(except
U.S.-spec. models - if equipped) .. ..................... 3-69
Auto-dimming mirror/compass with HomeLink
®(models with EyeSight system) ... ..................... 3-74
Outside mirrors ................................................. 3-81
Page 159 of 610
Instruments and controls/Ignition switch (models without push–button start system)
Ignition switch (models with-
out push-button start sys-
tem)
WARNING
. Never turn the ignition switch to
“ LOCK” while the vehicle is
being driven or towed because
that will lock the steering wheel,
preventing steering control. And
when the engine is turned off, it
takes a much greater effort than
usual to steer.
. Before leaving the vehicle, al-
ways remove the key from the
ignition switch for safety and
never allow an unattended child
to remain in the vehicle. Failure
to follow this procedure could
result in injury to a child or
others. Children could operate
the power windows, the moon-
roof or other controls or even
make the vehicle move.
CAUTION
Do not attach a large key holder or
key case to either key. If it banged against your knees or hands while
you are driving, it could turn the
ignition switch from the
“ON ”posi-
tion to the “ACC ”or “LOCK ”posi-
tion, thereby stopping the engine.
Also, if the key is attached to a
keyholder or to a large bunch of
other keys, centrifugal force may act
on it as the vehicle moves, resulting
in unwanted turning of the ignition
switch.
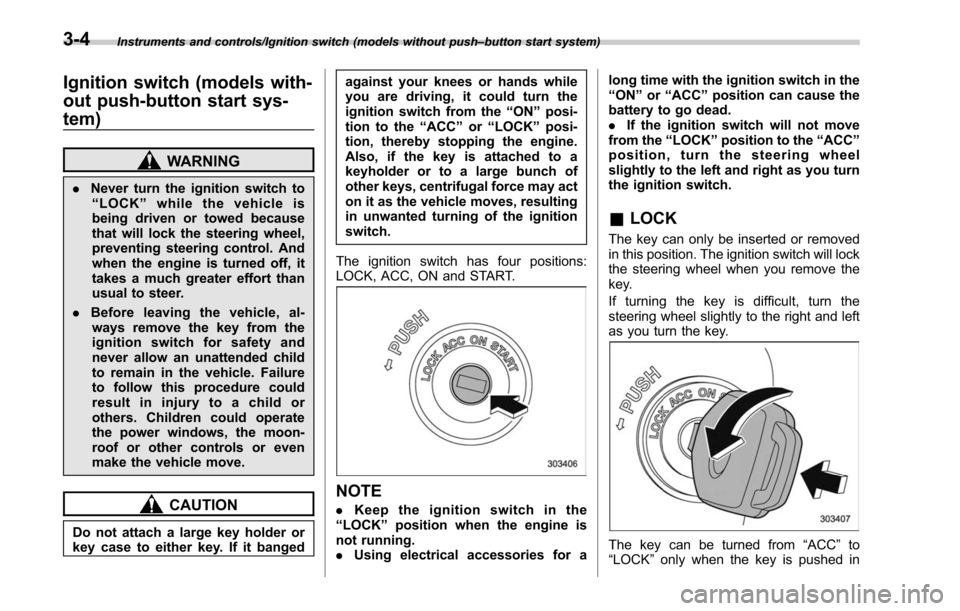
The ignition switch has four positions:
LOCK, ACC, ON and START.
NOTE
. Keep the ignition switch in the
“ LOCK ”position when the engine is
not running.
. Using electrical accessories for a long time with the ignition switch in the
“
ON ”or “ACC ”position can cause the
battery to go dead.
. If the ignition switch will not move
from the “LOCK ”position to the “ACC ”
position, turn the steering wheel
slightly to the left and right as you turn
the ignition switch.
& LOCK
The key can only be inserted or removed
in this position. The ignition switch will lock
the steering wheel when you remove the
key.
If turning the key is difficult, turn the
steering wheel slightly to the right and left
as you turn the key.
The key can be turned from “ACC”to
“LOCK ”only when the key is pushed in
3-4