window SUBARU TRIBECA 2008 User Guide
[x] Cancel search | Manufacturer: SUBARU, Model Year: 2008, Model line: TRIBECA, Model: SUBARU TRIBECA 2008Pages: 409, PDF Size: 5.75 MB
Page 62 of 409
1-38
Seat, seatbelt and SRS airbags
restraint system in your vehicle.
Unsecured child restraint sys-
tems can be thrown around in-
side of the vehicle in a sudden
stop, turn or accident; they can
strike and injure vehicle occu-
pants as well as result in serious
injuries or death to the child.
CAUTION
When you install a child restraint
system, follow the manufacturer’s
instructions supplied with it. After
installing the child restraint system,
check to ensure that it is held
securely in position. If it is not held
tight and secure, the danger of your
child suffering personal injury in the
event of an accident may be in-
creased.
Some types of child restraint systems can
be installed in a rear seating position of
your vehicle without use of the seatbelts.
Such child restraint systems are secured
to the dedicated anchorages provided on
the vehicle body.
The lower and tether anchorages are
sometimes referred to as the LATCH
system (L owerAnchors and Tethers for
CH ildren).
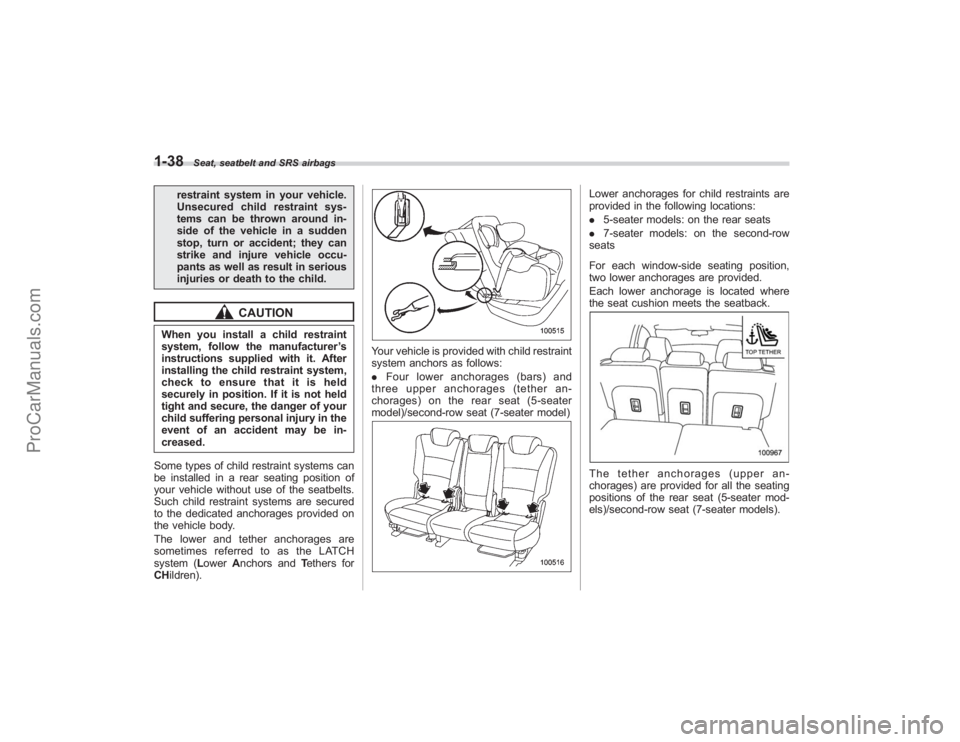
Your vehicle is provided with child restraint
system anchors as follows:
.Four lower anchorages (bars) and
three upper anchorages (tether an-
chorages) on the rear seat (5-seater
model)/second-row seat (7-seater model)
Lower anchorages for child restraints are
provided in the following locations:
. 5-seater models: on the rear seats
. 7-seater models: on the second-row
seats
For each window-side seating position,
two lower anchorages are provided.
Each lower anchorage is located where
the seat cushion meets the seatback.The tether anchorages (upper an-
chorages) are provided for all the seating
positions of the rear seat (5-seater mod-
els)/second-row seat (7-seater models).
ProCarManuals.com
Page 82 of 409
1-58
Seat, seatbelt and SRS airbags
to deploy if the vehicle is struck from the
side or from behind, or if it rolls onto its
side or roof, or if it is involved in a low-
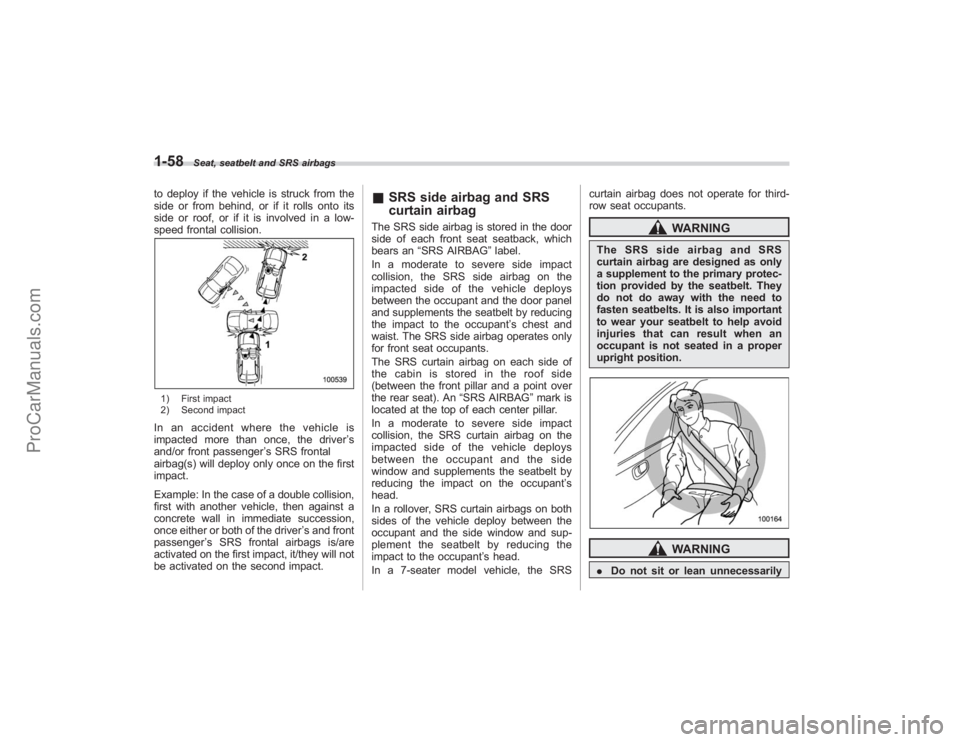
speed frontal collision.1) First impact
2) Second impactIn an accident where the vehicle is
impacted more than once, the driver’s
and/or front passenger ’s SRS frontal
airbag(s) will deploy only once on the first
impact.
Example: In the case of a double collision,
first with another vehicle, then against a
concrete wall in immediate succession,
once either or both of the driver ’s and front
passenger ’s SRS frontal airbags is/are
activated on the first impact, it/they will not
be activated on the second impact.
& SRS side airbag and SRS
curtain airbagThe SRS side airbag is stored in the door
side of each front seat seatback, which
bears an “SRS AIRBAG ”label.
In a moderate to severe side impact
collision, the SRS side airbag on the
impacted side of the vehicle deploys
between the occupant and the door panel
and supplements the seatbelt by reducing
the impact to the occupant ’s chest and
waist. The SRS side airbag operates only
for front seat occupants.
The SRS curtain airbag on each side of
the cabin is stored in the roof side
(between the front pillar and a point over
the rear seat). An “SRS AIRBAG”mark is
located at the top of each center pillar.
In a moderate to severe side impact
collision, the SRS curtain airbag on the
impacted side of the vehicle deploys
between the occupant and the side
window and supplements the seatbelt by
reducing the impact on the occupant ’s
head.
In a rollover, SRS curtain airbags on both
sides of the vehicle deploy between the
occupant and the side window and sup-
plement the seatbelt by reducing the
impact to the occupant ’s head.
In a 7-seater model vehicle, the SRS curtain airbag does not operate for third-
row seat occupants.
WARNING
The SRS side airbag and SRS
curtain airbag are designed as only
a supplement to the primary protec-
tion provided by the seatbelt. They
do not do away with the need to
fasten seatbelts. It is also important
to wear your seatbelt to help avoid
injuries that can result when an
occupant is not seated in a proper
upright position.
WARNING
.
Do not sit or lean unnecessarily
ProCarManuals.com
Page 83 of 409
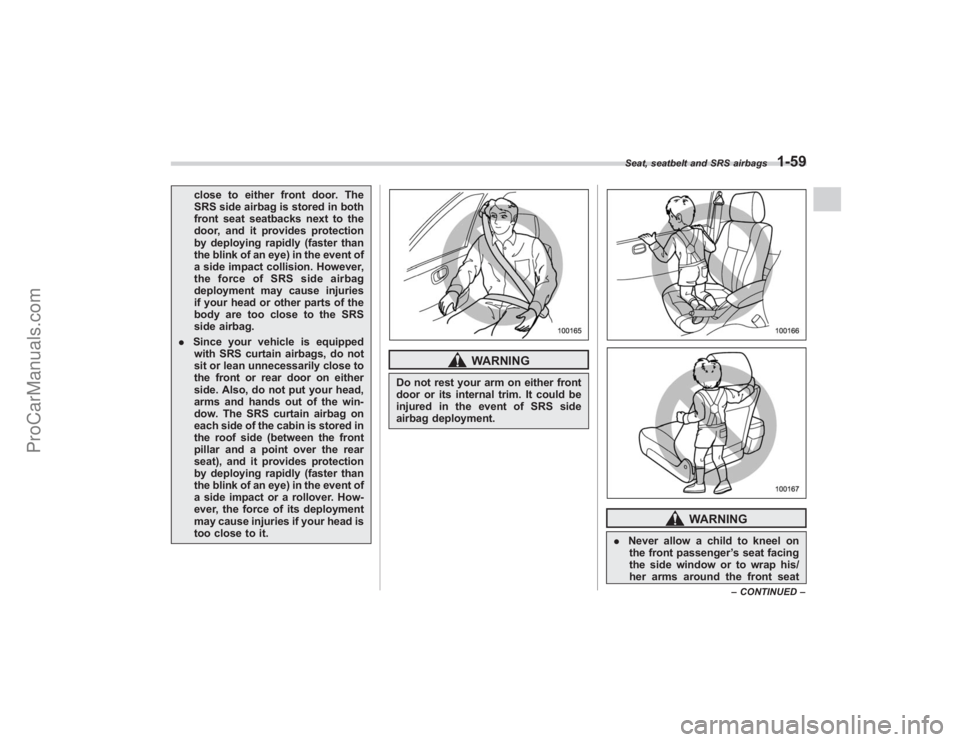
close to either front door. The
SRS side airbag is stored in both
front seat seatbacks next to the
door, and it provides protection
by deploying rapidly (faster than
the blink of an eye) in the event of
a side impact collision. However,
theforceofSRSsideairbag
deployment may cause injuries
if your head or other parts of the
body are too close to the SRS
side airbag.
. Since your vehicle is equipped
with SRS curtain airbags, do not
sit or lean unnecessarily close to
the front or rear door on either
side. Also, do not put your head,
arms and hands out of the win-
dow. The SRS curtain airbag on
each side of the cabin is stored in
the roof side (between the front
pillar and a point over the rear
seat), and it provides protection
by deploying rapidly (faster than
the blink of an eye) in the event of
a side impact or a rollover. How-
ever, the force of its deployment
may cause injuries if your head is
too close to it.
WARNING
Do not rest your arm on either front
door or its internal trim. It could be
injured in the event of SRS side
airbag deployment.
WARNING
. Never allow a child to kneel on
the front passenger ’s seat facing
the side window or to wrap his/
her arms around the front seatSeat, seatbelt and SRS airbags
1-59
– CONTINUED –
ProCarManuals.com
Page 84 of 409
1-60
Seat, seatbelt and SRS airbags
seatback. In the event of an
accident, the force of the SRS
side airbag deployment could
injure the child seriously be-
cause his/her head or arms or
other parts of the body are too
close to the SRS side airbag.
Since your vehicle is also
equipped with a front passen-
ger’s SRS frontal airbag, children
aged 12 and under should be
placed in a rear seat anyway and
should be properly restrained at
all times.
. Never allow a child to kneel on
any passenger ’s seat facing the
side window or put their head,
arms and hands out of the win-
dow. In the event of an accident,
the force of the SRS curtain
airbag deployment could injure
the child seriously because his/
her head is close to the SRS
curtain airbag.
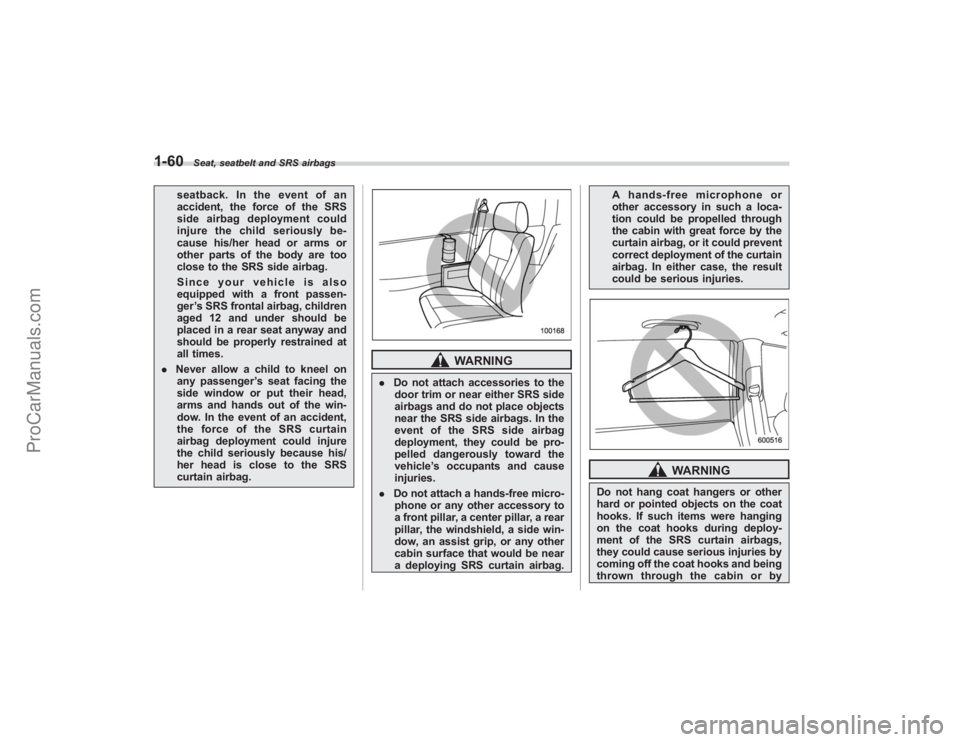
WARNING
. Do not attach accessories to the
door trim or near either SRS side
airbags and do not place objects
near the SRS side airbags. In the
event of the SRS side airbag
deployment, they could be pro-
pelled dangerously toward the
vehicle ’s occupants and cause
injuries.
. Do not attach a hands-free micro-
phone or any other accessory to
a front pillar, a center pillar, a rear
pillar, the windshield, a side win-
dow, an assist grip, or any other
cabin surface that would be near
a deploying SRS curtain airbag. A hands-free microphone or
other accessory in such a loca-
tion could be propelled through
the cabin with great force by the
curtain airbag, or it could prevent
correct deployment of the curtain
airbag. In either case, the result
could be serious injuries.
WARNING
Do not hang coat hangers or other
hard or pointed objects on the coat
hooks. If such items were hanging
on the coat hooks during deploy-
ment of the SRS curtain airbags,
they could cause serious injuries by
coming off the coat hooks and being
thrown through the cabin or by
ProCarManuals.com
Page 94 of 409
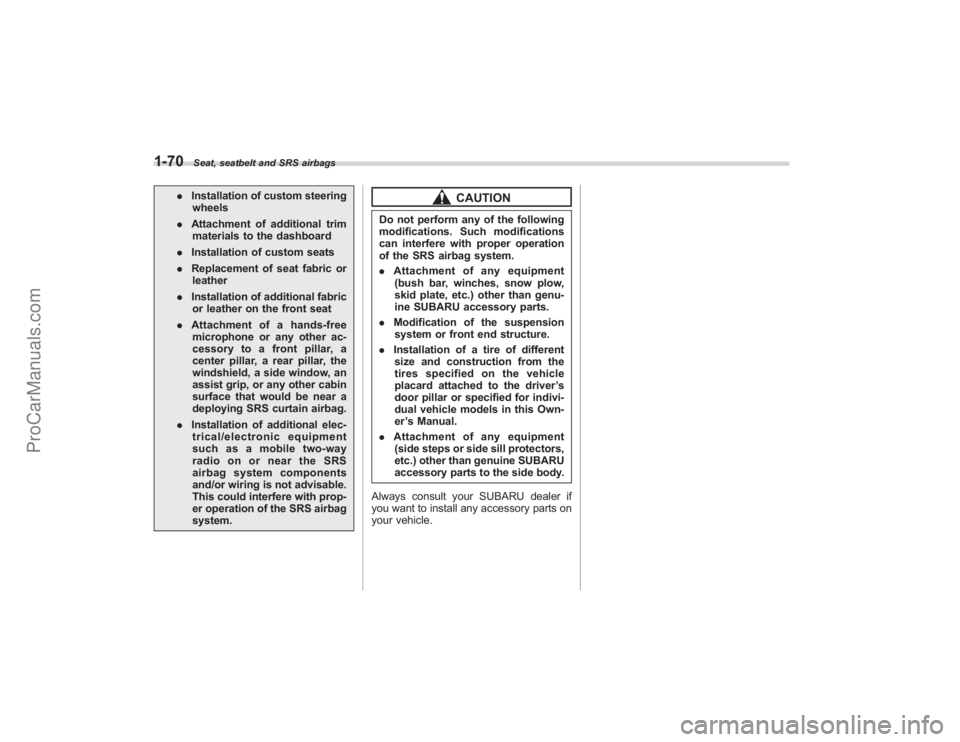
1-70
Seat, seatbelt and SRS airbags
.Installation of custom steering
wheels
. Attachment of additional trim
materials to the dashboard
. Installation of custom seats
. Replacement of seat fabric or
leather
. Installation of additional fabric
or leather on the front seat
. Attachment of a hands-free
microphone or any other ac-
cessory to a front pillar, a
center pillar, a rear pillar, the
windshield, a side window, an
assist grip, or any other cabin
surface that would be near a
deploying SRS curtain airbag.
. Installation of additional elec-
trical/electronic equipment
such as a mobile two-way
radio on or near the SRS
airbag system components
and/or wiring is not advisable.
This could interfere with prop-
er operation of the SRS airbag
system.
CAUTION
Do not perform any of the following
modifications. Such modifications
can interfere with proper operation
of the SRS airbag system.
. Attachment of any equipment
(bush bar, winches, snow plow,
skid plate, etc.) other than genu-
ine SUBARU accessory parts.
. Modification of the suspension
system or front end structure.
. Installation of a tire of different
size and construction from the
tires specified on the vehicle
placard attached to the driver ’s
door pillar or specified for indivi-
dual vehicle models in this Own-
er ’s Manual.
. Attachment of any equipment
(side steps or side sill protectors,
etc.) other than genuine SUBARU
accessory parts to the side body.
Always consult your SUBARU dealer if
you want to install any accessory parts on
your vehicle.
ProCarManuals.com
Page 95 of 409
Keys.................................................................. 2-2
Key number plate ............................................. 2-2
Immobilizer....................................................... 2-3
Security ID plate ............................................... 2-3
Security indicator light ..................................... 2-4
Key replacement .............................................. 2-4
Door locks........................................................ 2-4
Locking and unlocking from the outside .. ......... 2-4
Locking and unlocking from the inside ............. 2-5
Battery drainage prevention function ................ 2-6
Power door locking switches.......................... 2-6
Key lock-in prevention function ........................ 2-7
Remote keyless entry system......................... 2-7
Locking the doors............................................ 2-8
Unlocking the doors ......................................... 2-9
Unlocking the rear gate .................................... 2-9
Illuminated entry .............................................. 2-9
Vehicle finder function ...................................... 2-9
Sounding a panic alarm .................................. 2-10
Selecting audible signal operation .................. 2-10
Replacing the battery ..................................... 2-10
Replacing lost transmitters .............................. 2-11
Alarm system................................................. 2-15
System operation ............................................ 2-15
Activating and deactivating the alarm system ......................................................... 2-15
If you have accidentally triggered the alarm system ......................................................... 2-15
Arming the system ......................................... 2-15
Disarming the system ..................................... 2-17
Valet mode ..................................................... 2-17
Passive arming ............................................... 2-17
Tripped sensor identification ........................... 2-18
Shock sensors (dealer option).. ....................... 2-18
Child safety locks.......................................... 2-19
Windows ......................................................... 2-19
Power windows .............................................. 2-19
Rear gate........................................................ 2-22
Moonroof (if equipped) .................................. 2-23
Tilt function.................................................... 2-24
Sliding function .............................................. 2-24
Anti-entrapment function ................................. 2-24
Sun shade ...................................................... 2-25
Keys and doors
2
ProCarManuals.com
Page 97 of 409
ImmobilizerThe immobilizer system is designed to
prevent an unauthorized person from
starting the engine. Only keys registered
with your vehicle’s immobilizer system can
be used to operate your vehicle. Even if
an unregistered key fits into the ignition
switch and can be turned to the “START”
position, the engine will automatically stop
after several seconds.
Each immobilizer key contains a trans-
ponder in which the key ’s ID code is
stored. When a key is inserted into the
ignition switch and turned to the “ON”
position, the transponder transmits the
key ’s ID code to the immobilizer system ’s
receiver. If the transmitted ID code
matches the ID code registered in the
immobilizer system, the system allows the
engine to be started. Since the ID code is
transmitted and acted upon almost in-
stantly, the immobilizer system does not
impede normal starting of the engine.
If the engine fails to start, pull out the key
once before trying again. Refer to the
“Ignition switch ”section in chapter 3.
This device complies with Part 15 of
the FCC Rules and with RSS-210 of
Industry Canada. Operation is subject
to the following two conditions: (1) This device may not cause harmful inter-
ference, and (2) this device must
accept any interference received, in-
cluding interference that may cause
undesired operation.
Changes or modifications not ex-
pressly approved by the party respon-
sible for compliance could void the
user
’s authority to operate the equip-
ment.
NOTETo protect your vehicle from theft,
please pay close attention to the fol-
lowing security precautions:
. Never leave your vehicle unattended
with its keys inside.
. Before leaving your vehicle, close all
windows and lock the doors and rear
gate.
. Do not leave spare keys or any
record of your key number in the
vehicle.
CAUTION
. Do not place the key under direct
sunlight or anywhere it may
become hot. .
Do not get the key wet. If the key
gets wet, wipe it dry with a cloth
immediately.
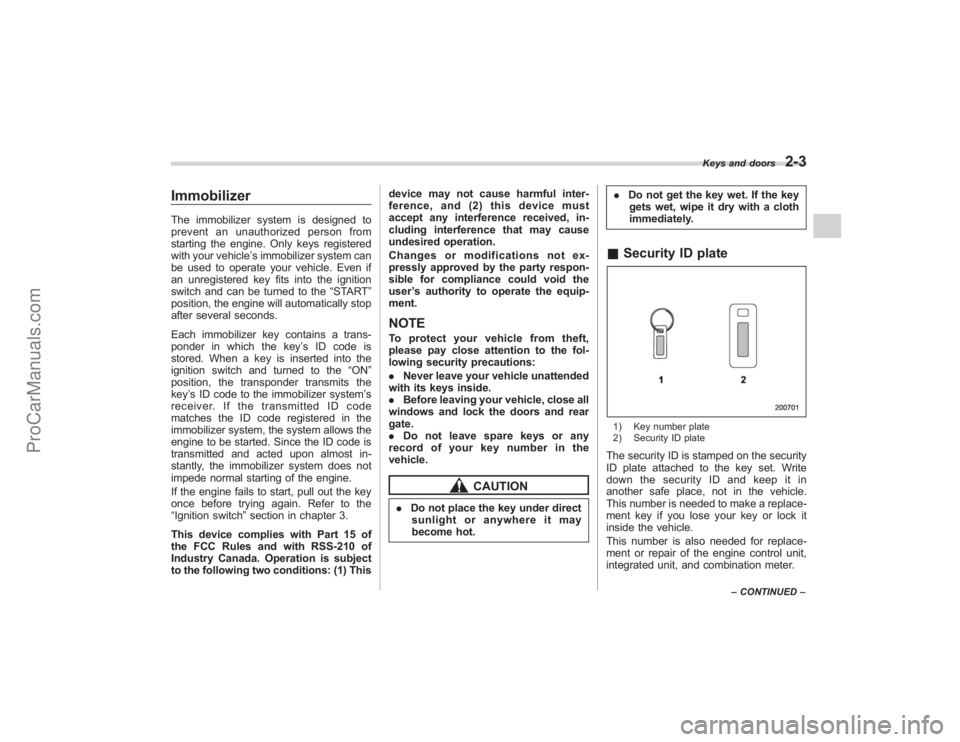
& Security ID plate1) Key number plate
2) Security ID plateThe security ID is stamped on the security
ID plate attached to the key set. Write
down the security ID and keep it in
another safe place, not in the vehicle.
This number is needed to make a replace-
ment key if you lose your key or lock it
inside the vehicle.
This number is also needed for replace-
ment or repair of the engine control unit,
integrated unit, and combination meter.
Keys and doors
2-3
–CONTINUED –
ProCarManuals.com
Page 109 of 409
Alarm systemThe alarm system helps to protect your
vehicle and valuables from theft. The horn
sounds and the turn signal lights flash if
someone attempts to break into your
vehicle.
The system can be armed and disarmed
with the remote transmitter.
The system does not operate when the
key is inserted into the ignition switch.
Your vehicle’s alarm system has been set
for activation at the time of shipment from
the factory. You can set the system for
deactivation yourself or have it done by
your SUBARU dealer.& System operationThe alarm system will give the following
alarms when triggered:
. The vehicle’ s horn will sound and the
turn signal lights will flash for 30 seconds.
. If any door (or the rear gate) remains
open after the 30-second period, the horn
will continue to sound for a maximum of 3
minutes. If the door (or the rear gate) is
closed while the horn is sounding, the
horn will stop sounding with a delay of up
to 30 seconds.
The alarm is triggered by: .
Opening a door or the rear gate
. Physical impact to the vehicle, such as
forced entry (only vehicles with shock
sensors (dealer option))
& Activating and deactivating
the alarm systemTo change the setting of your vehicle’ s
alarm system for activation or deactiva-
tion, do the following.
1. Disarm the alarm system (refer to
“Disarming the system ”in this section).
2. Sit in the driver ’s seat and shut all
doors (and the rear gate).
3. Turn the ignition switch to the “ON”
position.
4. Hold down the UNLOCK side of the
driver ’s power door locking switch, open
the driver ’s door within the following 1
second, and wait 10 seconds without
releasing the switch. The setting will then
be changed as follows:
If the system was previously activated:
The odometer/trip meter screen displays
“ AL oF ”and the horn sounds twice,
indicating that the system is now deacti-
vated.
If the system was previously deacti-
vated:
The odometer/trip meter screen displays “
AL on” and the horn sounds once,
indicating that the system is now acti-
vated.
NOTEYou may have the above setting
change done by your SUBARU dealer.& If you have accidentally trig-
gered the alarm system! To stop the alarm
Do any of the following operations:
. Press any button on the remote trans-
mitter.
. Turn the ignition switch to the “ON”
position.& Arming the system! To arm the system using remote
transmitter
1. Close all windows and the moonroof.
2. Remove the key from the ignition
switch.
3. Open the doors and get out of the
vehicle.
4. Make sure that the engine hood is
locked.
5. Close all doors (and the rear gate).
Keys and doors
2-15
– CONTINUED –
ProCarManuals.com
Page 110 of 409
2-16
Keys and doors
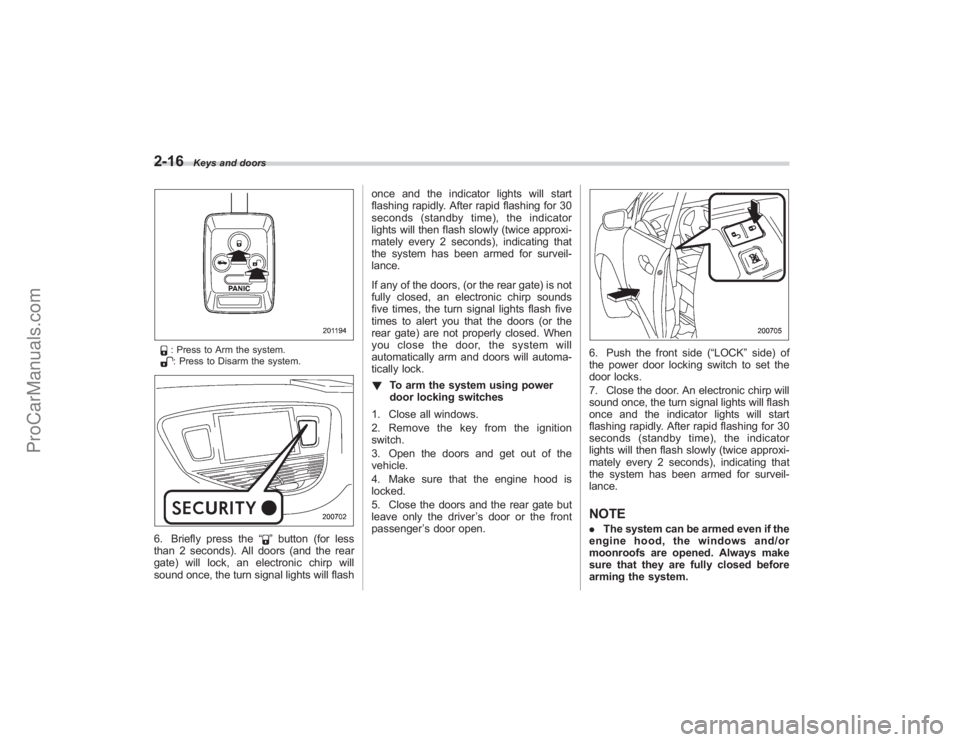
: Press to Arm the system.: Press to Disarm the system.
6. Briefly press the“
”button (for less
than 2 seconds). All doors (and the rear
gate) will lock, an electronic chirp will
sound once, the turn signal lights will flash once and the indicator lights will start
flashing rapidly. After rapid flashing for 30
seconds (standby time), the indicator
lights will then flash slowly (twice approxi-
mately every 2 seconds), indicating that
the system has been armed for surveil-
lance.
If any of the doors, (or the rear gate) is not
fully closed, an electronic chirp sounds
five times, the turn signal lights flash five
times to alert you that the doors (or the
rear gate) are not properly closed. When
you close the door, the system will
automatically arm and doors will automa-
tically lock.
!
To arm the system using power
door locking switches
1. Close all windows.
2. Remove the key from the ignition
switch.
3. Open the doors and get out of the
vehicle.
4. Make sure that the engine hood is
locked.
5. Close the doors and the rear gate but
leave only the driver ’s door or the front
passenger ’s door open.
6. Push the front side (“LOCK” side) of
the power door locking switch to set the
door locks.
7. Close the door. An electronic chirp will
sound once, the turn signal lights will flash
once and the indicator lights will start
flashing rapidly. After rapid flashing for 30
seconds (standby time), the indicator
lights will then flash slowly (twice approxi-
mately every 2 seconds), indicating that
the system has been armed for surveil-
lance.NOTE. The system can be armed even if the
engine hood, the windows and/or
moonroofs are opened. Always make
sure that they are fully closed before
arming the system.
ProCarManuals.com
Page 113 of 409
signal lights to flash for a short time when
the sensed impact is weak, but it warns of
a strong impact or multiple impacts by
sounding the horn and flashing the turn
signal lights, both lasting approximately 30
seconds.
If you desire, your SUBARU dealer can
connect them and set them for activation
or deactivation.NOTE.The shock sensors are not always
able to sense impacts caused by break-
ing in, and cannot sense an impact that
does not cause vibration (such as
breaking the glass using a rescue
hammer).
. The shock sensors may sense vi-
bration like those shown in the follow-
ing and trigger the alarm system.
Select the settings of the alarm system
and shock sensors appropriately de-
pending on where you usually park
your vehicle.
Example:
Vibration from construction site
Vibration in multistory car park
Vibration from trains
. You can have the sensitivity of the
shock sensors adjusted to your pre-
ference by your SUBARU dealer.
Child safety locks
WARNING
Always use the child safety lock
whenever a child rides in the rear.
Serious injury could result if a child
accidentally opened the door and
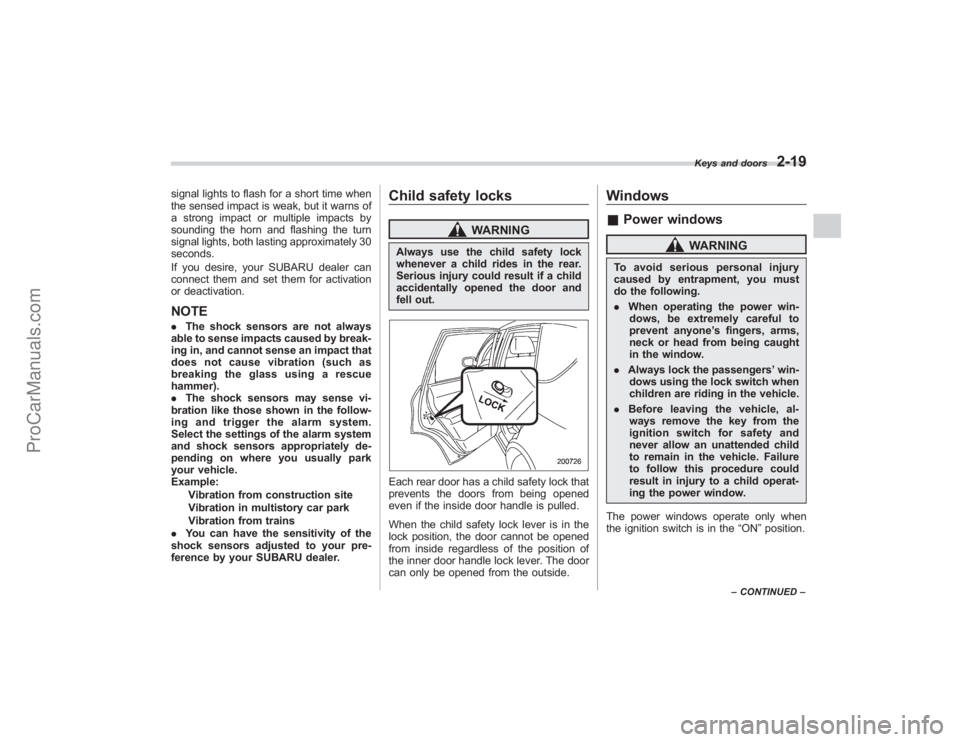
fell out.Each rear door has a child safety lock that
prevents the doors from being opened
even if the inside door handle is pulled.
When the child safety lock lever is in the
lock position, the door cannot be opened
from inside regardless of the position of
the inner door handle lock lever. The door
can only be opened from the outside.
Windows& Power windows
WARNING
To avoid serious personal injury
caused by entrapment, you must
do the following.
. When operating the power win-
dows, be extremely careful to
prevent anyone ’s fingers, arms,
neck or head from being caught
in the window.
. Always lock the passengers ’win-
dows using the lock switch when
children are riding in the vehicle.
. Before leaving the vehicle, al-
ways remove the key from the
ignition switch for safety and
never allow an unattended child
to remain in the vehicle. Failure
to follow this procedure could
result in injury to a child operat-
ing the power window.
The power windows operate only when
the ignition switch is in the “ON”position.
Keys and doors
2-19
– CONTINUED –
ProCarManuals.com