stop start SUBARU WRX 2016 Owner's Manual
[x] Cancel search | Manufacturer: SUBARU, Model Year: 2016, Model line: WRX, Model: SUBARU WRX 2016Pages: 594, PDF Size: 19.43 MB
Page 328 of 594
. For the aha function, the following
touch screen gestures are not avail-
able.
– Multi-touch operation
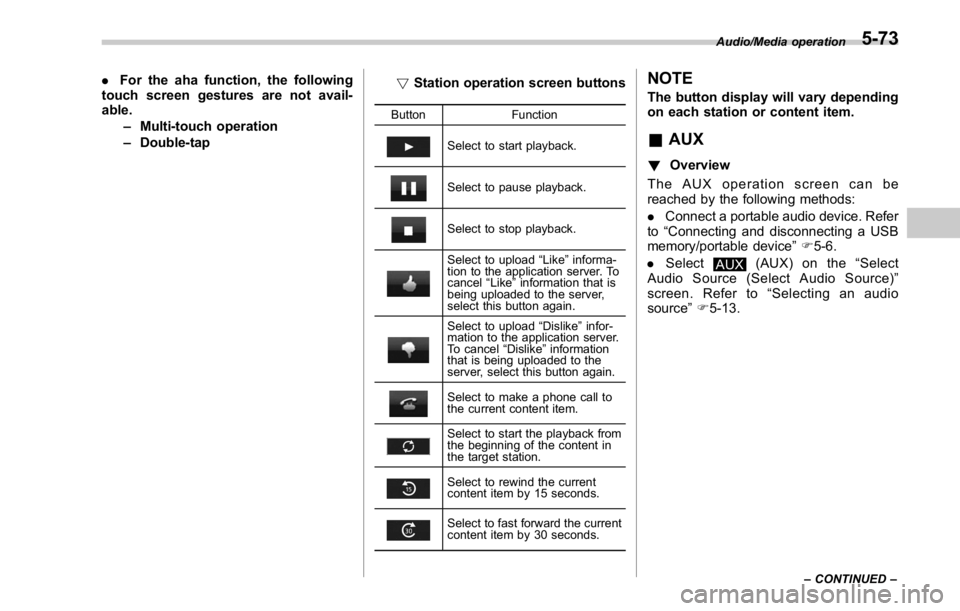
– Double-tap ! Station operation screen buttons Button Function
Select to start playback.
Select to pause playback.
Select to stop playback.
Select to upload “ Like ” informa-
tion to the application server. To
cancel “ Like ” information that is
being uploaded to the server,
select this button again.
Select to upload “ Dislike ” infor-
mation to the application server.
To cancel “ Dislike ” information
that is being uploaded to the
server, select this button again.
Select to make a phone call to
the current content item.
Select to start the playback from
the beginning of the content in
the target station.
Select to rewind the current
content item by 15 seconds.
Select to fast forward the current
content item by 30 seconds. NOTE The button display will vary depending
on each station or content item.
& AUX ! Overview
The AUX operation screen can be
reached by the following methods:
. Connect a portable audio device. Refer
to “ Connecting and disconnecting a USB
memory/portable device ” F 5-6.
. Select
AUX (AUX) on the “ Select
Audio Source (Select Audio Source) ”
screen. Refer to “ Selecting an audio
source ” F 5-13. Audio/Media operation
– CONTINUED –5-73
Page 361 of 594

Audio/What to do if...
In other situations Symptom Likely cause Solution Page
Cellular
phone This
system
Even though all conceivable mea-
sures have been taken, the symptom
status does not change. The cellular phone is not close enough
to this system. Bring the cellular phone closer to this system. ——
The cellular phone is the most likely
cause of the symptom. Turn the cellular phone off, remove and
reinstall the battery pack, and then restart the
cellular phone. * —
Enable the cellular phone ’ s Bluetooth con-
nection. * —
Stop the cellular phone ’ s security software
and close all applications. * —
Before using an application installed on the
cellular phone, carefully check its source and
how its operation might affect this system. * —
*: For details, refer to the owner ’ s manual that came with the cellular phone.5-106
Page 390 of 594

Fuel ...................................................................... 7-3Fuel requirements ............................................... 7-3
Fuel filler lid and cap ........................................... 7-5
State emission testing (U.S. only) ...................... 7-7
Preparing to drive ............................................... 7-8
Starting and stopping the engine (models
without push-button start system) .................. 7-9Starting engine .................................................... 7-9
Stopping the engine ........................................... 7-11
Starting and stopping engine (models with
push-button start system) .............................. 7-12Safety precautions ............................................. 7-12
Operating range for push-button start
system ............................................................. 7-12
Starting engine ................................................... 7-12
Stopping engine ................................................. 7-14
When access key does not operate properly ....... 7-14
Remote engine start system (dealer
option) .............................................................. 7-14Models with “ keyless access with push-button
start system ” ................................................... 7-15
Entering the vehicle while it is running via remote
start ................................................................. 7-16
Entering the vehicle following remote engine start
shutdown ......................................................... 7-16
Pre-heating or pre-cooling the interior of the
vehicle ............................................................. 7-16
System maintenance .......................................... 7-16
Manual transmission .......................................... 7-17
Shifting speeds .................................................. 7-18
Driving tips ........................................................ 7-18 Driver ’ s Control Center Differential (C.DIFF/
DCCD) (STI) ..................................................... 7-19To change mode of driver ’ s control center
differential ....................................................... 7-20
Auto mode ........................................................ 7-20
Manual mode ..................................................... 7-21
Temporary release ............................................. 7-23
Continuously variable transmission ................. 7-23Select lever ....................................................... 7-24
Selection of manual mode .................................. 7-26
Shift lock function ............................................. 7-27
Driving tips ........................................................ 7-28
SI-DRIVE (STI) .................................................... 7-29Intelligent (I) mode ............................................. 7-29
Sport (S) mode .................................................. 7-30
Sport Sharp (S#) mode. ...................................... 7-30
SI-DRIVE selector .............................................. 7-30
SI-DRIVE (except STI: CVT models) ................. 7-31Intelligent (I) mode ............................................. 7-31
Sport (S) mode .................................................. 7-31
Sport Sharp (S#) mode. ...................................... 7-32
SI-DRIVE switches ............................................. 7-32
Limited slip differential (LSD) (STI) .................. 7-33
Power steering ................................................... 7-33
STI .................................................................... 7-33
Except STI ......................................................... 7-34
Braking ............................................................... 7-35
Braking tips ....................................................... 7-35
Brake system .................................................... 7-35
Disc brake pad wear warning indicators ............. 7-36Starting and operating
7
Page 394 of 594
& Fuel filler lid and cap ! Refueling
Only one person should be involved in
refueling. Do not allow others to approach
the area of the vehicle near the fuel filler
pipe while refueling is in progress.
Be sure to observe any other precautions
that are posted at the service station.
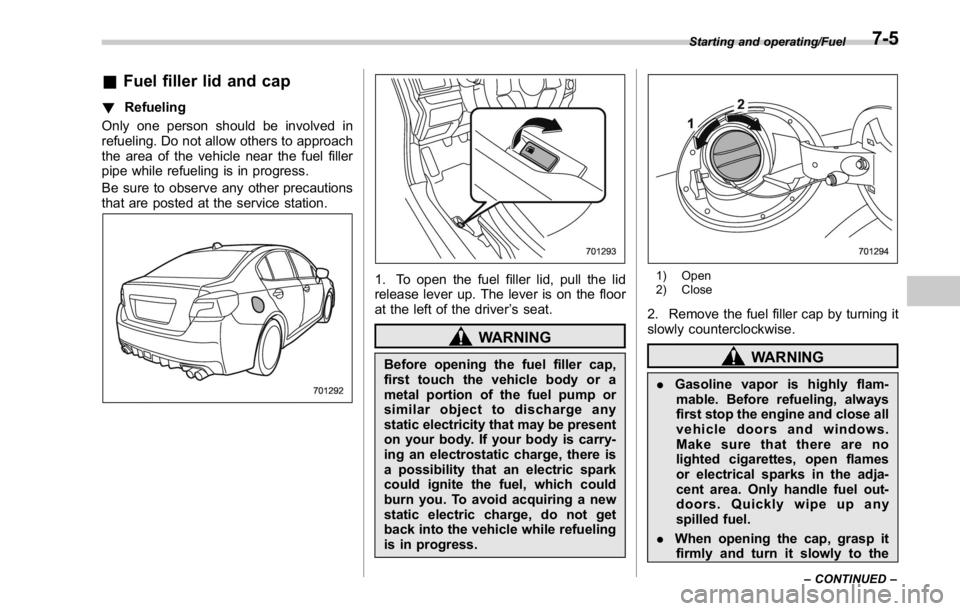
1. To open the fuel filler lid, pull the lid
release lever up. The lever is on the floor
at the left of the driver ’ s seat.
WARNINGBefore opening the fuel filler cap,
first touch the vehicle body or a
metal portion of the fuel pump or
similar object to discharge any
static electricity that may be present
on your body. If your body is carry-
ing an electrostatic charge, there is
a possibility that an electric spark
could ignite the fuel, which could
burn you. To avoid acquiring a new
static electric charge, do not get
back into the vehicle while refueling
is in progress. 1) Open
2) Close
2. Remove the fuel filler cap by turning it
slowly counterclockwise.
WARNING
. Gasoline vapor is highly flam-
mable. Before refueling, always
first stop the engine and close all
vehicle doors and windows.
Make sure that there are no
lighted cigarettes, open flames
or electrical sparks in the adja-
cent area. Only handle fuel out-
doors. Quickly wipe up any
spilled fuel.
. When opening the cap, grasp it
firmly and turn it slowly to the Starting and operating/Fuel
– CONTINUED –7-5
Page 395 of 594
Starting and operating/Fuel
left. Do not remove the cap
quickly. Fuel may be under pres-
sure and spray out of the fuel
filler neck, especially in hot
weather. If you hear a hissing
sound while you are removing
the cap, wait for the sound to
stop and then slowly open the
cap to prevent fuel from spraying
out and creating a fire hazard.
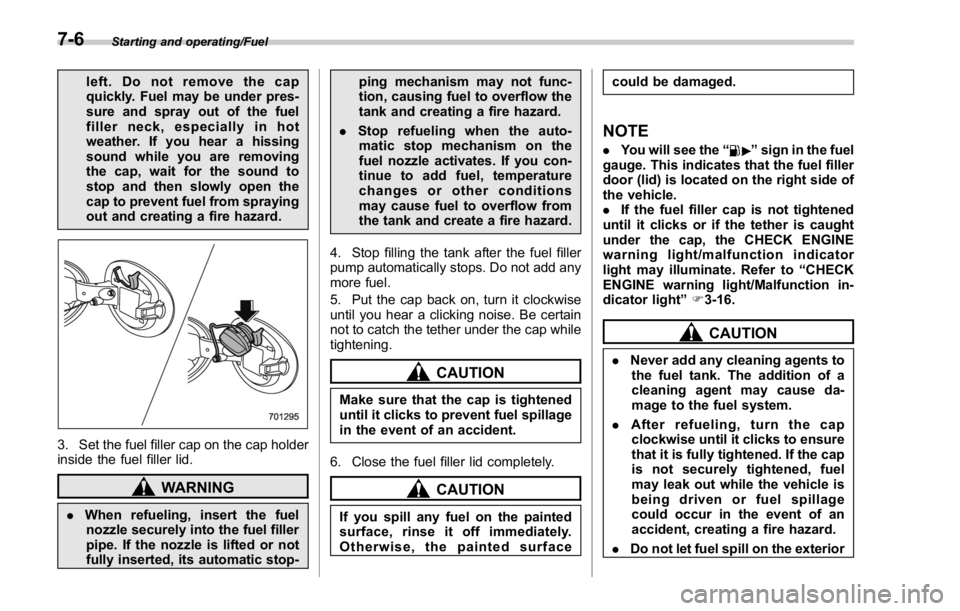
3. Set the fuel filler cap on the cap holder
inside the fuel filler lid.
WARNING
. When refueling, insert the fuel
nozzle securely into the fuel filler
pipe. If the nozzle is lifted or not
fully inserted, its automatic stop- ping mechanism may not func-
tion, causing fuel to overflow the
tank and creating a fire hazard.
. Stop refueling when the auto-
matic stop mechanism on the
fuel nozzle activates. If you con-
tinue to add fuel, temperature
changes or other conditions
may cause fuel to overflow from
the tank and create a fire hazard.
4. Stop filling the tank after the fuel filler
pump automatically stops. Do not add any
more fuel.
5. Put the cap back on, turn it clockwise
until you hear a clicking noise. Be certain
not to catch the tether under the cap while
tightening.
CAUTION
Make sure that the cap is tightened
until it clicks to prevent fuel spillage
in the event of an accident.
6. Close the fuel filler lid completely.
CAUTION
If you spill any fuel on the painted
surface, rinse it off immediately.
Otherwise, the painted surface could be damaged.
NOTE . You will see the “ ” sign in the fuel
gauge. This indicates that the fuel filler
door (lid) is located on the right side of
the vehicle.
. If the fuel filler cap is not tightened
until it clicks or if the tether is caught
under the cap, the CHECK ENGINE
warning light/malfunction indicator
light may illuminate. Refer to “ CHECK
ENGINE warning light/Malfunction in-
dicator light ” F 3-16.
CAUTION. Never add any cleaning agents to
the fuel tank. The addition of a
cleaning agent may cause da-
mage to the fuel system.
. After refueling, turn the cap
clockwise until it clicks to ensure
that it is fully tightened. If the cap
is not securely tightened, fuel
may leak out while the vehicle is
being driven or fuel spillage
could occur in the event of an
accident, creating a fire hazard.
. Do not let fuel spill on the exterior7-6
Page 398 of 594
CAUTIONTrapping small animals in the cool-
ing fan and belts of the engine may
result in a malfunction. Check that
no small animal enters the engine
compartment and under the vehicle
before starting the engine.
NOTE Engine oil, engine coolant, brake fluid,
washer fluid and other fluid levels
should be checked daily, weekly or at
fuel stops. Starting and stopping the
engine (models without
push-button start system) & Starting engine CAUTIONDo not operate the starter motor
continuously for more than 10 sec-
onds. If the engine fails to start after
operating the starter for 5 to 10
seconds, wait for 10 seconds or
more before trying again.
NOTE It may be difficult to start the engine
when the battery has been discon-
nected and reconnected (for mainte-
nance or other purposes). This diffi-
culty is caused by the electronically
controlled throttle ’ s self-diagnosis
function. To overcome it, keep the
ignition switch in the “ ON ” position
for approximately 10 seconds before
starting the engine. ! General precautions when starting
engine
WARNING. Never start the engine from out-
side the vehicle. It may result in
an accident.
. Do not leave the engine running
in locations with poor ventilation,
such as a garage and indoors.
The exhaust gas may enter the
vehicle or indoors, and it may
result in carbon monoxide poi-
soning.
. Do not start the engine near dry
foliage, paper, or other flam-
mable substances. The exhaust
pipe and exhaust emissions can
create a fire hazard at high
temperatures.
CAUTION
. If the engine is stopped during
driving, the catalyst may over-
heat and burn.Starting and operating/Starting and stopping the engine (models without push – button start system)
– CONTINUED –7-9
Page 399 of 594
Starting and operating/Starting and stopping the engine (models without push – button start system)
. When starting the engine, be sure
to sit in the driver ’ s seat (except
when using the remote engine
start system).
NOTE . Avoid rapid racing and rapid accel-
eration immediately after the engine
has started.
. For a short time after the engine has
started, the engine speed is kept high.
When the warm-up is completed, the
engine speed lowers automatically.
. On rare occasions, it may be difficult
to start the engine depending on the
fuel and the usage condition (repeated
driving of a distance in which the
engine has not warmed up sufficiently).
In such a case, it is recommended that
you change to a different brand of fuel.
. On rare occasions, transient knock-
ing may be heard from the engine when
the accelerator is operated rapidly
such as a rapid start-up and a rapid
acceleration. This is not a malfunction.
. The engine starts more easily when
the headlights, air conditioner and rear
window defogger are turned off.
. After the engine starts, the engine
speed will be kept high until the engine
has warmed up sufficiently. ! MT models
1. Apply the parking brake.
2. Turn off unnecessary lights and ac-
cessories.
3. Depress the clutch pedal to the floor
and shift the shift lever into neutral. Hold
the clutch pedal to the floor while starting
the engine.
The starter motor will only operate when
the clutch pedal is depressed fully to the
floor.
4. Turn the ignition switch to the “ ON ”
position and check the operation of the
warning and indicator lights. Refer to
“ Warning and indicator lights ” F 3-13.
5. Turn the ignition switch to the “ START ”
position without depressing the accelera-
tor pedal. Release the key immediately
after the engine has started.
If the engine does not start, try the
following.
(1) Turn the ignition switch to the
“ LOCK ” position and wait for at least
10 seconds. After checking that the
parking brake is firmly set, turn the
ignition switch to the “ START ” position
while depressing the accelerator pedal
slightly (approximately a quarter of the
full stroke). Release the accelerator
pedal as soon as the engine starts.
(2) If this fails to start the engine, turn the ignition switch back to the “ LOCK ”
position and wait for at least 10
seconds. Then fully depress the accel-
erator pedal and turn the ignition
switch to the “ START ” position. If the
engine starts, quickly release the
accelerator pedal.
(3) If this fails to start the engine, turn
the ignition switch again to the “ LOCK ”
position. After waiting for 10 seconds
or longer, turn the ignition switch to the
“ START ” position without depressing
the accelerator pedal.
(4) If the engine still refuses to start,
contact your nearest SUBARU dealer
for assistance.
6. Confirm that all warning and indicator
lights have turned off after the engine has
started. The fuel injection system auto-
matically lowers the idle speed as the
engine warms up.
! CVT models
1. Apply the parking brake.
2. Turn off unnecessary lights and ac-
cessories.
3. Shift the select lever to the “ P ” or
“ N ”
position
(preferably the “ P ” position).
The starter motor will only operate when
the select lever is at the “ P ” or “ N ” position.
4. Turn the ignition switch to the “ ON ”7-10
Page 400 of 594
position and check the operation of the
warning and indicator lights. Refer to
“ Warning and indicator lights ” F 3-13.
5. Turn the ignition switch to the “ START ”
position without depressing the accelera-
tor pedal. Release the key immediately
after the engine has started.
If the engine does not start, try the
following.
(1) Turn the ignition switch to the
“ LOCK ” position and wait for at least
10 seconds. After checking that the
parking brake is firmly set, turn the
ignition switch to the “ START ” position
while depressing the accelerator pedal
slightly (approximately a quarter of the
full stroke). Release the accelerator
pedal as soon as the engine starts.
(2) If this fails to start the engine, turn
the ignition switch back to the “ LOCK ”
position and wait for at least 10
seconds. Then fully depress the accel-
erator pedal and turn the ignition
switch to the “ START ” position. If the
engine starts, quickly release the
accelerator pedal.
(3) If this fails to start the engine, turn
the ignition switch again to the “ LOCK ”
position. After waiting for 10 seconds
or longer, turn the ignition switch to the
“ START ” position without depressing
the accelerator pedal. (4) If the engine still refuses to start,
contact your nearest SUBARU dealer
for assistance.
6. Confirm that all warning and indicator
lights have turned off after the engine has
started. The fuel injection system auto-
matically lowers the idle speed as the
engine warms up.
While the engine is warming up, make
sure that the select lever is at the “ P ” or
“ N ” position and that the parking brake is
applied.
CAUTIONIf you restart the engine while the
vehicle is moving, shift the select
lever into the “ N ” position. Do not
attempt to place the select lever of a
moving vehicle into the “ P ” posi-
tion.
& Stopping the engine The ignition switch should be turned off
only when the vehicle is stopped and the
engine is idling.
WARNING
Do not stop the engine when the
vehicle is moving. This will cause
loss of power to the power steering and the brake booster, making steer-
ing and braking more difficult. It
could also result in accidental acti-
vation of the “ LOCK ” position on the
ignition switch, causing the steering
wheel to lock.Starting and operating/Starting and stopping the engine (models without push – button start system)
7-11
Page 401 of 594
Starting and operating/Starting and stopping engine (models with push – button start system)
Starting and stopping engine
(models with push-button
start system) & Safety precautionsRefer to “ Safety precautions ” F 2-10.
& Operating range for push-
button start systemRefer to “ Operating range for push-button
start system ” F 3-6.
& Starting engine
WARNING. There are some general precau-
tions when starting the engine.
Carefully read the precautions
described in “ General precau-
tions when starting engine ” F 7-
9.
. If the indicator on the push-
button ignition switch flashes in
green after the engine has
started, never drive the vehicle.
The steering is still locked, and it
may result in an accident. CAUTION. When the operation indicator on
the push-button ignition switch is
flashing in orange, there may be
a malfunction with the vehicle.
Contact a SUBARU dealer imme-
diately.
. If the indicator on the push-
button ignition switch is flashing
in green after the engine has
started, it means that the steering
is still locked. Depress the brake
pedal while moving the steering
wheel to the right and left, and
press the push-button ignition
switch.
. Do not continue pushing the
push-button ignition switch for
more than 10 seconds. Doing so
could cause a malfunction. If the
engine does not start, stop push-
ing the push-button ignition
switch and turn off the engine.
Wait 10 seconds, and then push
the push-button ignition switch
to start the engine.
NOTE
. When the push-button ignition
switch is pressed while depressing the clutch pedal (MT models) or the
brake pedal (CVT models), the engine
starter operates for a maximum of 10
seconds and after starting the engine,
the starter stops automatically.
. When the push-button ignition
switch is pressed while depressing
the clutch pedal (MT models) or the
brake pedal (CVT models), the engine
can be started regardless of the status
of the push-button ignition switch.
. If the security indicator light illumi-
nates when you attempt to start the
engine but the engine does not start,
press the push-button ignition switch
to switch the power to “ OFF ” and then
try to start the engine again.
. If the engine does not start, press
the push-button ignition switch without
depressing the clutch pedal (MT mod-
els) or the brake pedal (CVT models) to
switch the power to “ OFF ” . Then, while
depressing the clutch pedal (MT mod-
els) or the brake pedal (CVT models)
more forcefully, press the push-button
ignition switch.
. The engine start procedures may
not function depending on the radio
wave conditions around the vehicle. In
such a case, refer to “ Starting engine ”
F 9-17.
. If the vehicle battery is discharged,
the steering cannot be unlocked.7-12
Page 402 of 594
Charge the battery.
. After the engine starts, the engine
speed will be kept high until the engine
has warmed up sufficiently.
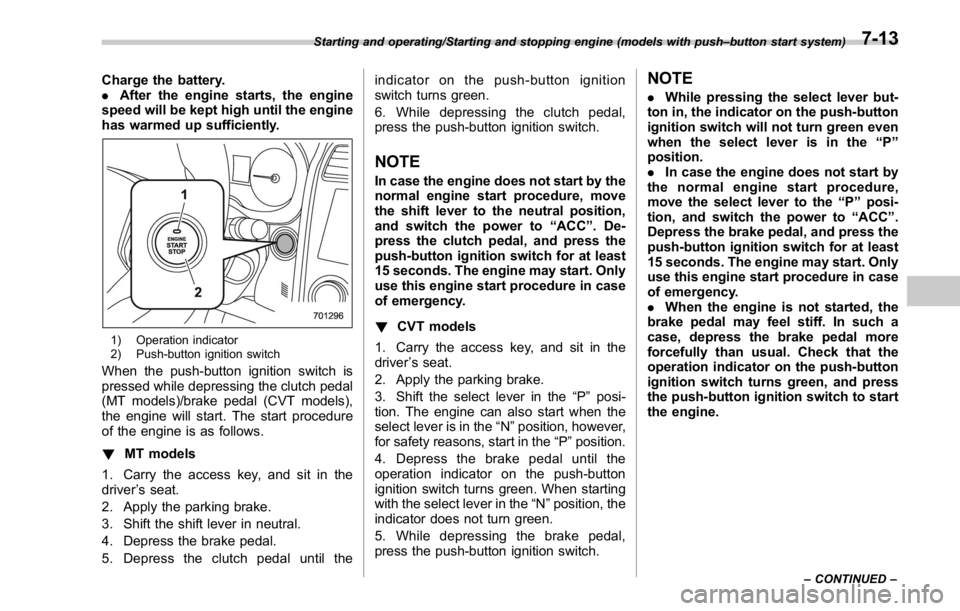
1) Operation indicator
2) Push-button ignition switch
When the push-button ignition switch is
pressed while depressing the clutch pedal
(MT models)/brake pedal (CVT models),
the engine will start. The start procedure
of the engine is as follows.
! MT models
1. Carry the access key, and sit in the
driver ’ s seat.
2. Apply the parking brake.
3. Shift the shift lever in neutral.
4. Depress the brake pedal.
5. Depress the clutch pedal until the indicator on the push-button ignition
switch turns green.
6. While depressing the clutch pedal,
press the push-button ignition switch.
NOTE In case the engine does not start by the
normal engine start procedure, move
the shift lever to the neutral position,
and switch the power to “ ACC ” . De-
press the clutch pedal, and press the
push-button ignition switch for at least
15 seconds. The engine may start. Only
use this engine start procedure in case
of emergency.
! CVT models
1. Carry the access key, and sit in the
driver ’ s seat.
2. Apply the parking brake.
3. Shift the select lever in the “ P ” posi-
tion. The engine can also start when the
select lever is in the “ N ” position, however,
for safety reasons, start in the “ P ” position.
4. Depress the brake pedal until the
operation indicator on the push-button
ignition switch turns green. When starting
with the select lever in the “ N ” position, the
indicator does not turn green.
5. While depressing the brake pedal,
press the push-button ignition switch. NOTE . While pressing the select lever but-
ton in, the indicator on the push-button
ignition switch will not turn green even
when the select lever is in the “ P ”
position.
. In case the engine does not start by
the normal engine start procedure,
move the select lever to the “ P ” posi-
tion, and switch the power to “ ACC ” .
Depress the brake pedal, and press the
push-button ignition switch for at least
15 seconds. The engine may start. Only
use this engine start procedure in case
of emergency.
. When the engine is not started, the
brake pedal may feel stiff. In such a
case, depress the brake pedal more
forcefully than usual. Check that the
operation indicator on the push-button
ignition switch turns green, and press
the push-button ignition switch to start
the engine.Starting and operating/Starting and stopping engine (models with push – button start system)
– CONTINUED –7-13