air conditioning SUZUKI BALENO 1999 1.G Owners Manual
[x] Cancel search | Manufacturer: SUZUKI, Model Year: 1999, Model line: BALENO, Model: SUZUKI BALENO 1999 1.GPages: 65, PDF Size: 3.28 MB
Page 18 of 65
60G-74E
INSTRUMENT PANEL
INSTRUMENT PANEL
Instrument Panel 5-1
Instrument Cluster 5-2
Warning and Indicator Lights 5-3
Speedometer/Odometer/Tripmeter (if equipped) 5-5
Tachometer (if equipped) 5-6
Fuel Gauge 5-6
Temperature Gauge 5-6
Hazard Warning Switch 5-7
Rear Window Defroster Switch (if equipped) 5-7
Cigarette Lighter (if equipped) 5-7
Ashtray 5-8
Glove Box 5-8
Heating System (if equipped) 5-9
System Operating Instructions 5-10
Air Conditioning System (if equipped) 5-13
System Operating Instructions 5-13
37
INSTRUMENT PANEL
60G-74E
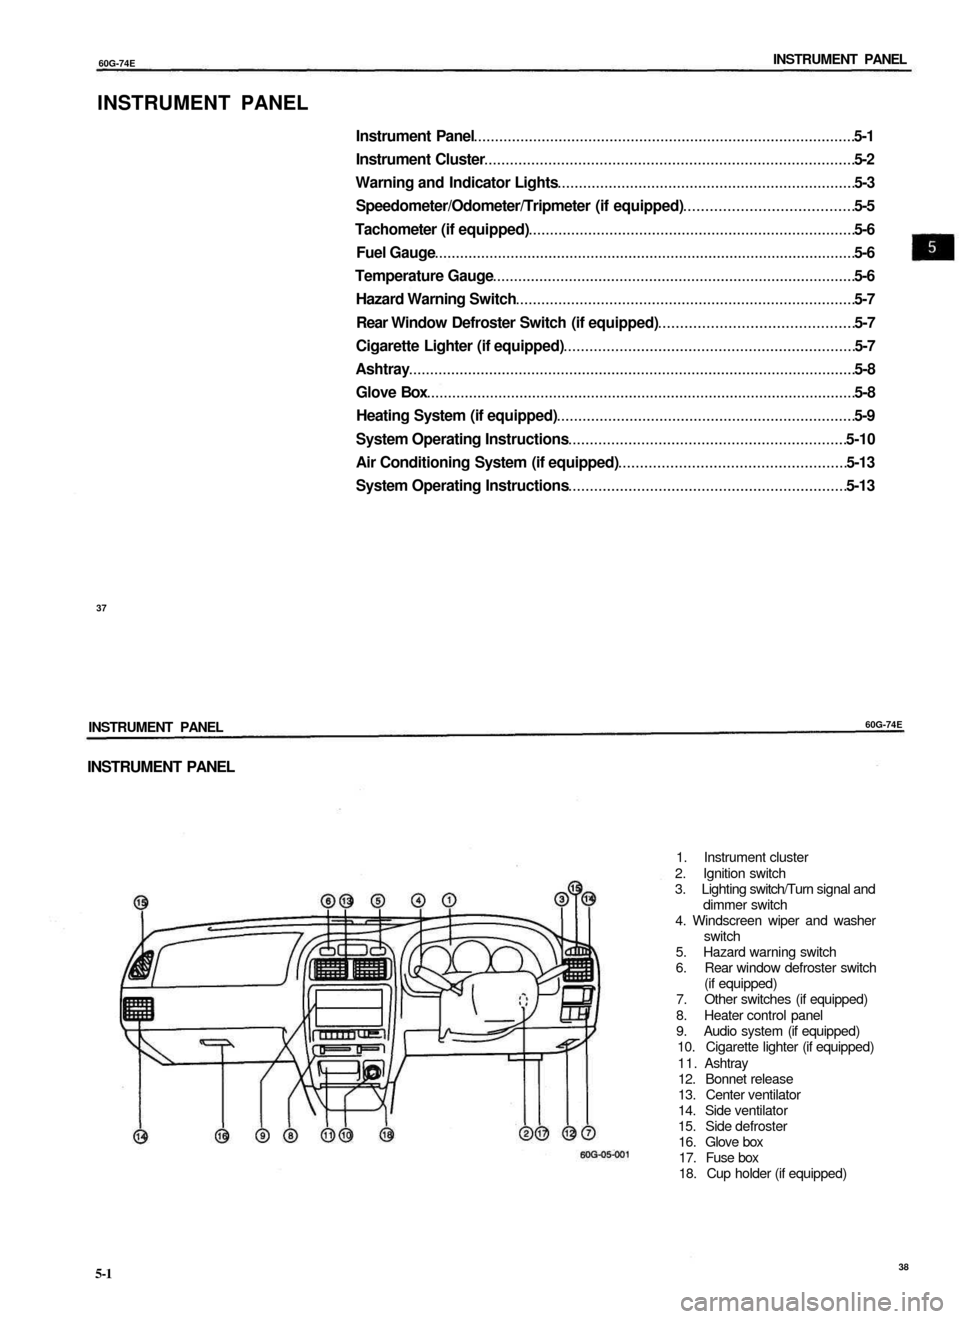
INSTRUMENT PANEL
1. Instrument cluster
2. Ignition switch
3. Lighting switch/Turn signal and
dimmer switch
4. Windscreen wiper and washer
switch
5. Hazard warning switch
6. Rear window defroster switch
(if equipped)
7. Other switches (if equipped)
8. Heater control panel
9. Audio system (if equipped)
10. Cigarette lighter (if equipped)
11. Ashtray
12. Bonnet release
13. Center ventilator
14. Side ventilator
15. Side defroster
16. Glove box
17. Fuse box
18. Cup holder (if equipped)
5-1
38
Page 24 of 65
60G-74E
INSTRUMENT PANEL
60G-05-018
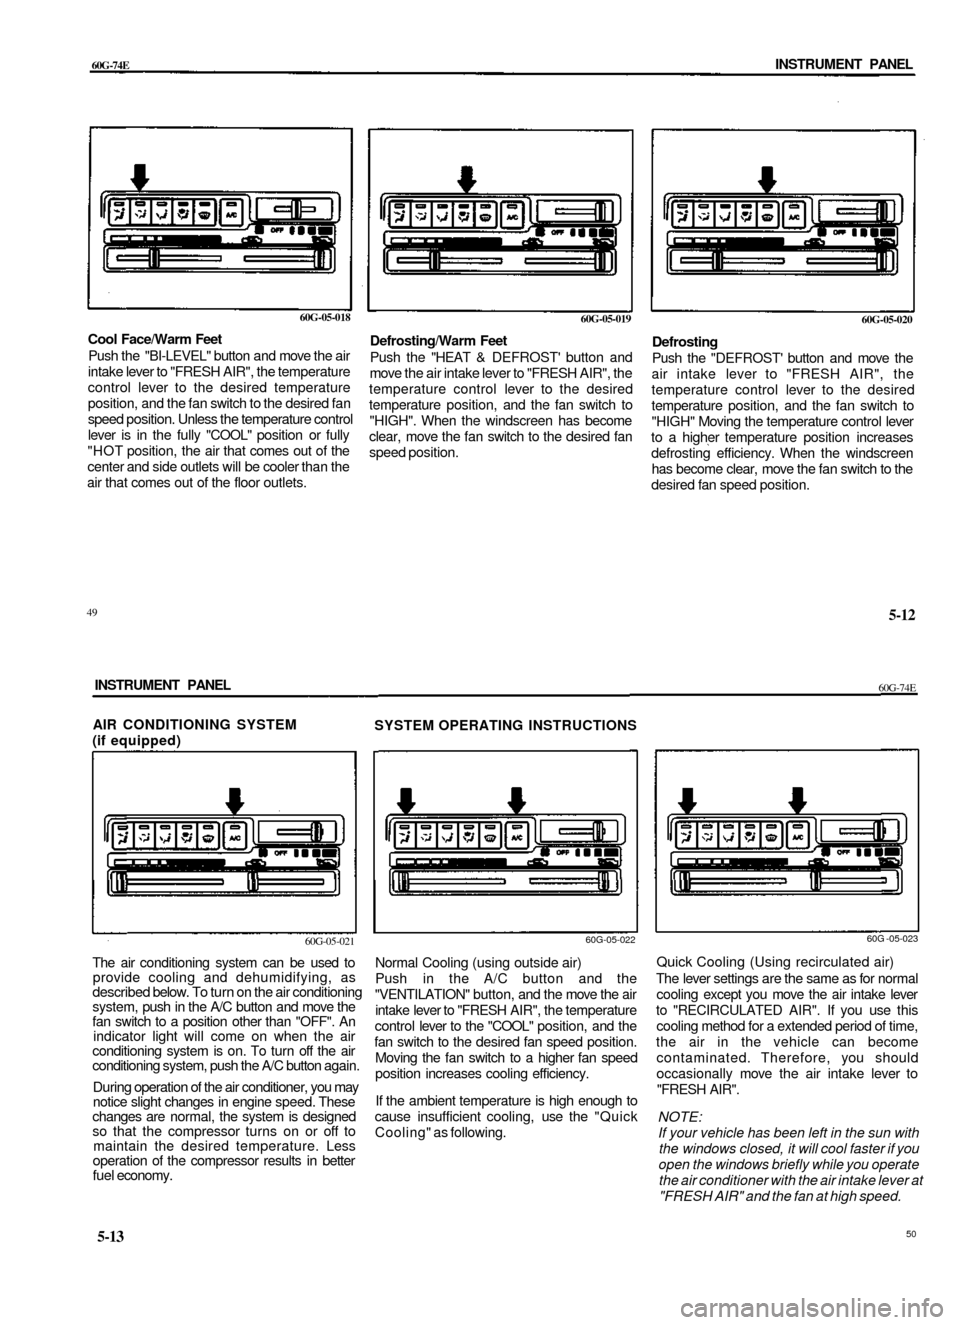
Cool Face/Warm Feet
Push the "BI-LEVEL" button and move the air
intake lever to "FRESH AIR", the temperature
control lever to the desired temperature
position, and the fan switch to the desired fan
speed position. Unless the temperature control
lever is in the fully "COOL" position or fully
"HOT position, the air that comes out of the
center and side outlets will be cooler than the
air that comes out of the floor outlets.
60G-05-019
Defrosting/Warm Feet
Push the "HEAT & DEFROST' button and
move the air intake lever to "FRESH AIR", the
temperature control lever to the desired
temperature position, and the fan switch to
"HIGH". When the windscreen has become
clear, move the fan switch to the desired fan
speed position.
60G-05-020
Defrosting
Push the "DEFROST' button and move the
air intake lever to "FRESH AIR", the
temperature control lever to the desired
temperature position, and the fan switch to
"HIGH" Moving the temperature control lever
to a higher temperature position increases
defrosting efficiency. When the windscreen
has become clear, move the fan switch to the
desired fan speed position.
49
5-12
INSTRUMENT PANEL
60G-74E
AIR CONDITIONING SYSTEM
(if equipped)
SYSTEM OPERATING INSTRUCTIONS
60G-05-021
The air conditioning system can be used to
provide cooling and dehumidifying, as
described below. To turn on the air conditioning
system, push in the A/C button and move the
fan switch to a position other than "OFF". An
indicator light will come on when the air
conditioning system is on. To turn off the air
conditioning system, push the A/C button again.
During operation of the air conditioner, you may
notice slight changes in engine speed. These
changes are normal, the system is designed
so that the compressor turns on or off to
maintain the desired temperature. Less
operation of the compressor results in better
fuel economy.
60G-05-022
Normal Cooling (using outside air)
Push in the A/C button and the
"VENTILATION" button, and the move the air
intake lever to "FRESH AIR", the temperature
control lever to the "COOL" position, and the
fan switch to the desired fan speed position.
Moving the fan switch to a higher fan speed
position increases cooling efficiency.
If the ambient temperature is high enough to
cause insufficient cooling, use the "Quick
Cooling" as following.
60G -05-023
Quick Cooling (Using recirculated air)
The lever settings are the same as for normal
cooling except you move the air intake lever
to "RECIRCULATED AIR". If you use this
cooling method for a extended period of time,
the air in the vehicle can become
contaminated. Therefore, you should
occasionally move the air intake lever to
"FRESH AIR".
NOTE:
If your vehicle has been left in the sun with
the windows closed, it will cool faster if you
open the windows briefly while you operate
the air conditioner with the air intake lever at
"FRESH AIR" and the fan at high speed.
5-13
50
Page 25 of 65
60G-74E
INSTRUMENT PANEL
60G-05-024
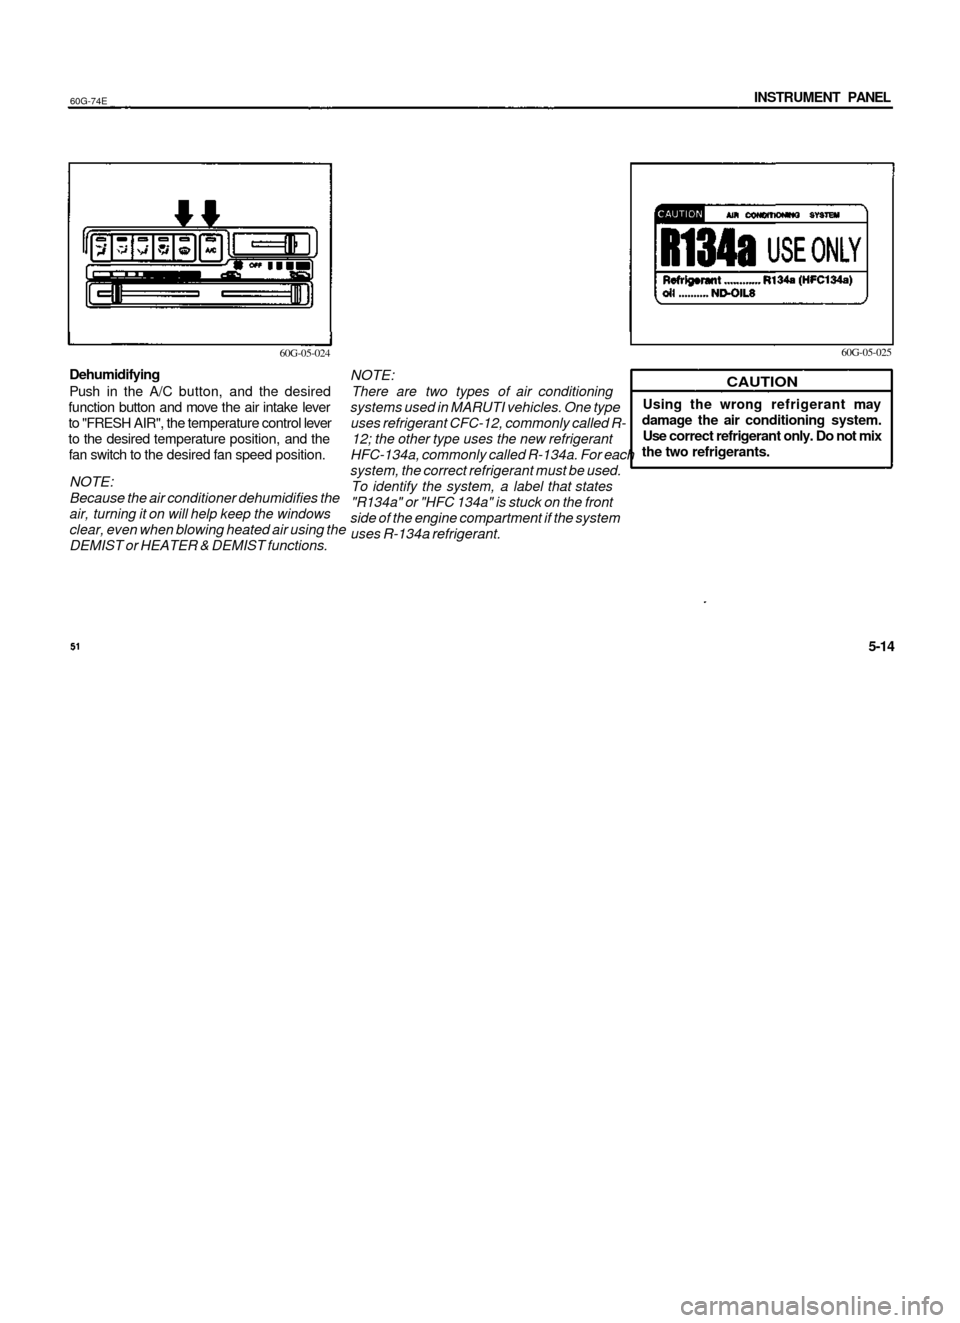
Dehumidifying
Push in the A/C button, and the desired
function button and move the air intake lever
to "FRESH AIR", the temperature control lever
to the desired temperature position, and the
fan switch to the desired fan speed position.
NOTE:
Because the air conditioner dehumidifies the
air, turning it on will help keep the windows
clear, even when blowing heated air using the
DEMIST or HEATER & DEMIST functions.
60G-05-025
NOTE:
There are two types of air conditioning
systems used in MARUTI vehicles. One type
uses refrigerant CFC-12, commonly called R-
12; the other type uses the new refrigerant
HFC-134a, commonly called R-134a. For each
system, the correct refrigerant must be used.
To identify the system, a label that states
"R134a" or "HFC 134a" is stuck on the front
side of the engine compartment if the system
uses R-134a refrigerant.
CAUTION
Using the wrong refrigerant may
damage the air conditioning system.
Use correct refrigerant only. Do not mix
the two refrigerants.
60G-74E
5-14
OTHER CONTROLS AND EQUIPMENT
OTHER CONTROLS AND EQUIPMENT
Parking Brake Lever 6-1
Pedals 6-2
Gear Lever 6-2
Fuel Filler Cap 6-3
Folding Rear Seats 6-4
Sun Visor 6-5
Interior Light Switch 6-5
Assist Grips 6-5
Bonnet 6-6
Cup Holder (if equipped) 6-7
Tyre Changing Tools 6-7
Luggage Compartment Trim 6-8
Trunk (Boot) Light 6-8
Front Seat Back Pocket (if equipped) 6-9
Rear spoiler with Stop lamp (if equipped) 6-9
Alloy Wheels (if equipped) 6-9
Power Antenna (if equipped) 6-10
Leather Cover (if equipped) 6-10
High Mount Stop Lamp 6-10
53
Page 26 of 65
60G-74E
INSTRUMENT PANEL
60G-05-024
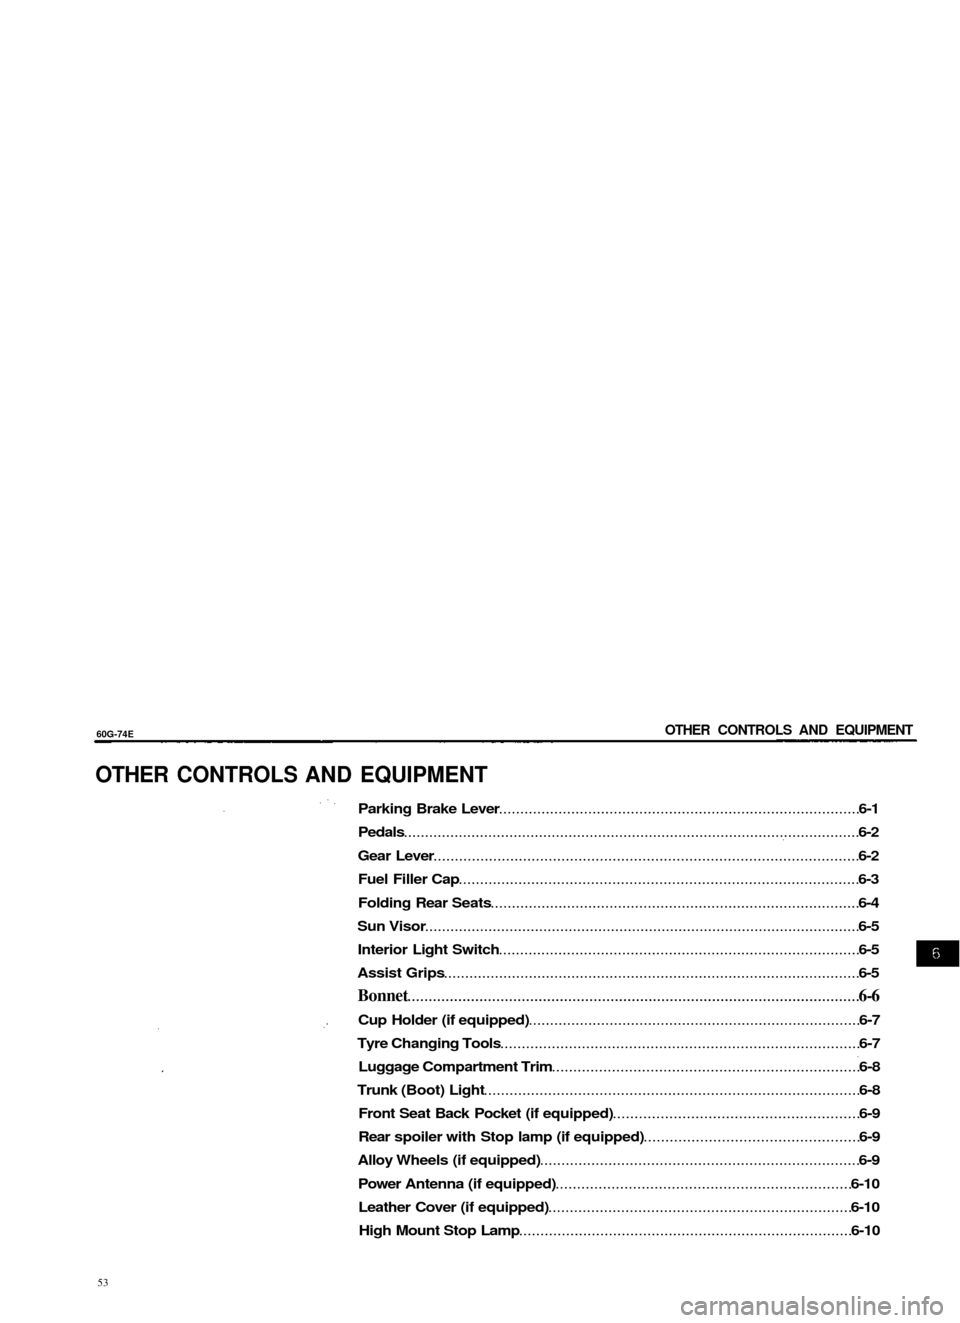
Dehumidifying
Push in the A/C button, and the desired
function button and move the air intake lever
to "FRESH AIR", the temperature control lever
to the desired temperature position, and the
fan switch to the desired fan speed position.
NOTE:
Because the air conditioner dehumidifies the
air, turning it on will help keep the windows
clear, even when blowing heated air using the
DEMIST or HEATER & DEMIST functions.
60G-05-025
NOTE:
There are two types of air conditioning
systems used in MARUTI vehicles. One type
uses refrigerant CFC-12, commonly called R-
12; the other type uses the new refrigerant
HFC-134a, commonly called R-134a. For each
system, the correct refrigerant must be used.
To identify the system, a label that states
"R134a" or "HFC 134a" is stuck on the front
side of the engine compartment if the system
uses R-134a refrigerant.
CAUTION
Using the wrong refrigerant may
damage the air conditioning system.
Use correct refrigerant only. Do not mix
the two refrigerants.
60G-74E
5-14
OTHER CONTROLS AND EQUIPMENT
OTHER CONTROLS AND EQUIPMENT
Parking Brake Lever 6-1
Pedals 6-2
Gear Lever 6-2
Fuel Filler Cap 6-3
Folding Rear Seats 6-4
Sun Visor 6-5
Interior Light Switch 6-5
Assist Grips 6-5
Bonnet 6-6
Cup Holder (if equipped) 6-7
Tyre Changing Tools 6-7
Luggage Compartment Trim 6-8
Trunk (Boot) Light 6-8
Front Seat Back Pocket (if equipped) 6-9
Rear spoiler with Stop lamp (if equipped) 6-9
Alloy Wheels (if equipped) 6-9
Power Antenna (if equipped) 6-10
Leather Cover (if equipped) 6-10
High Mount Stop Lamp 6-10
53
Page 32 of 65
S0G-74E
OPERATING YOUR VEHICLE
OPERATING YOUR VEHICLE
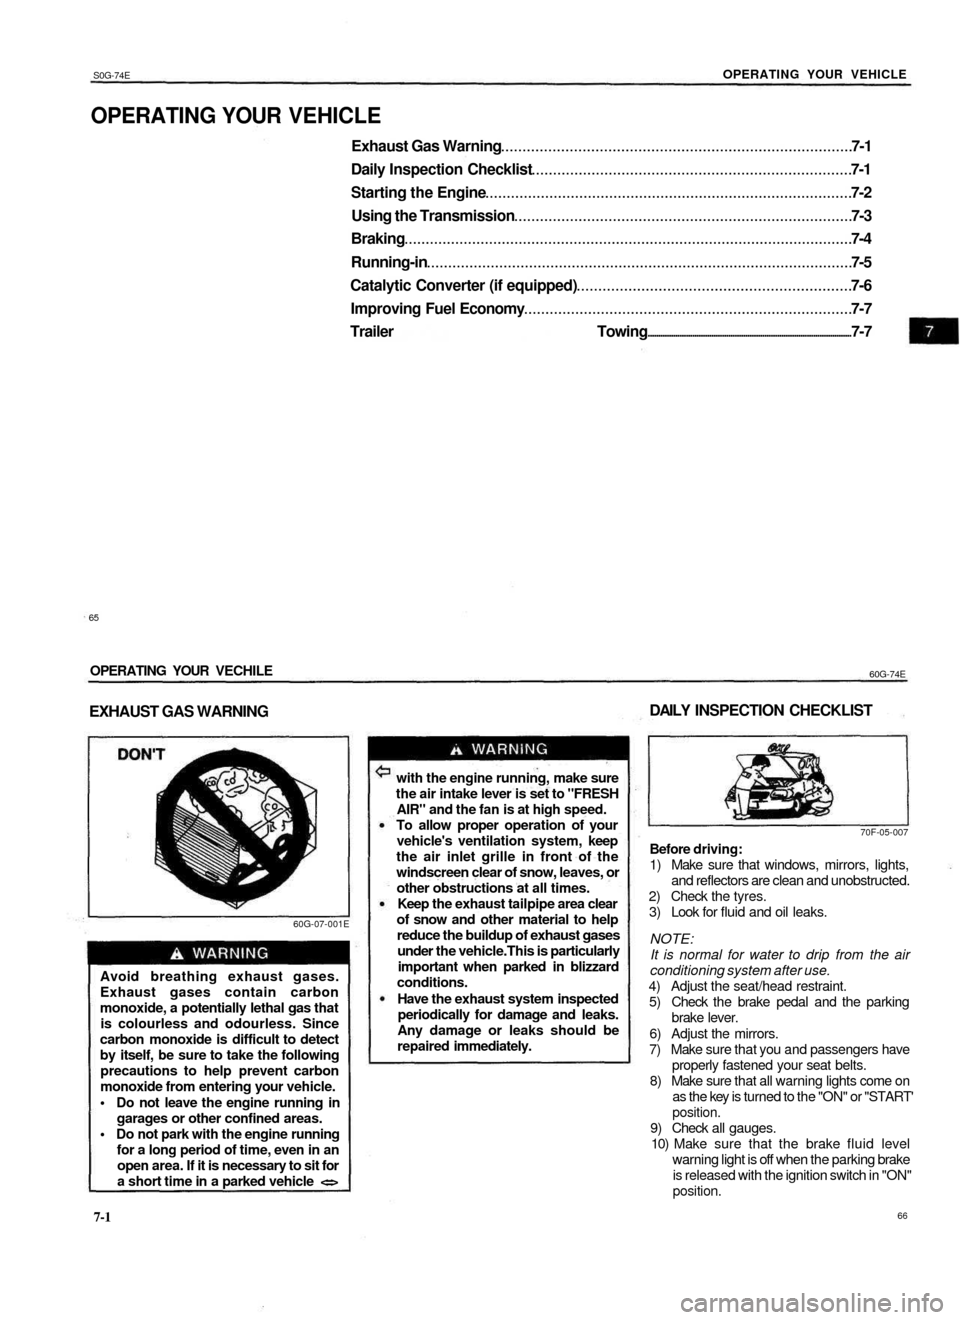
Exhaust Gas Warning 7-1
Daily Inspection Checklist 7-1
Starting the Engine 7-2
Using the Transmission 7-3
Braking 7-4
Running-in 7-5
Catalytic Converter (if equipped) 7-6
Improving Fuel Economy 7-7
Trailer Towing 7-7
OPERATING YOUR VECHILE
60G-74E
EXHAUST GAS WARNING
DAILY INSPECTION CHECKLIST
60G-07-001E
Avoid breathing exhaust gases.
Exhaust gases contain carbon
monoxide, a potentially lethal gas that
is colourless and odourless. Since
carbon monoxide is difficult to detect
by itself, be sure to take the following
precautions to help prevent carbon
monoxide from entering your vehicle.
• Do not leave the engine running in
garages or other confined areas.
• Do not park with the engine running
for a long period of time, even in an
open area. If it is necessary to sit for
a short time in a parked vehicle <=>
with the engine running, make sure
the air intake lever is set to "FRESH
AIR" and the fan is at high speed.
To allow proper operation of your
vehicle's ventilation system, keep
the air inlet grille in front of the
windscreen clear of snow, leaves, or
other obstructions at all times.
Keep the exhaust tailpipe area clear
of snow and other material to help
reduce the buildup of exhaust gases
under the vehicle.This is particularly
important when parked in blizzard
conditions.
Have the exhaust system inspected
periodically for damage and leaks.
Any damage or leaks should be
repaired immediately.
7-1
70F-05-007
Before driving:
1) Make sure that windows, mirrors, lights,
and reflectors are clean and unobstructed.
2) Check the tyres.
3) Look for fluid and oil leaks.
NOTE:
It is normal for water to drip from the air
conditioning system after use.
4) Adjust the seat/head restraint.
5) Check the brake pedal and the parking
brake lever.
6) Adjust the mirrors.
7) Make sure that you and passengers have
properly fastened your seat belts.
8) Make sure that all warning lights come on
as the key is turned to the "ON" or "START'
position.
9) Check all gauges.
10) Make sure that the brake fluid level
warning light is off when the parking brake
is released with the ignition switch in "ON"
position.
66
65