key SUZUKI BALENO 1999 1.G Owners Manual
[x] Cancel search | Manufacturer: SUZUKI, Model Year: 1999, Model line: BALENO, Model: SUZUKI BALENO 1999 1.GPages: 65, PDF Size: 3.28 MB
Page 6 of 65
60G-74E
BEFORE DRIVING
BEFORE DRIVING
Fuel Recommendation 3-1
Remote Keyless Entry System (if equipped) 3-2
Keys 3-2
Door Locks 3-3
Windows 3-5
Mirrors 3-8
Front Seat Adjustment 3-9
Driver Seat Height Adjuster 3-10
Adjustable Head Restraints (if equipped) 3-10
Seat Belts 3-11
BEFORE DRIVING
60G-74E
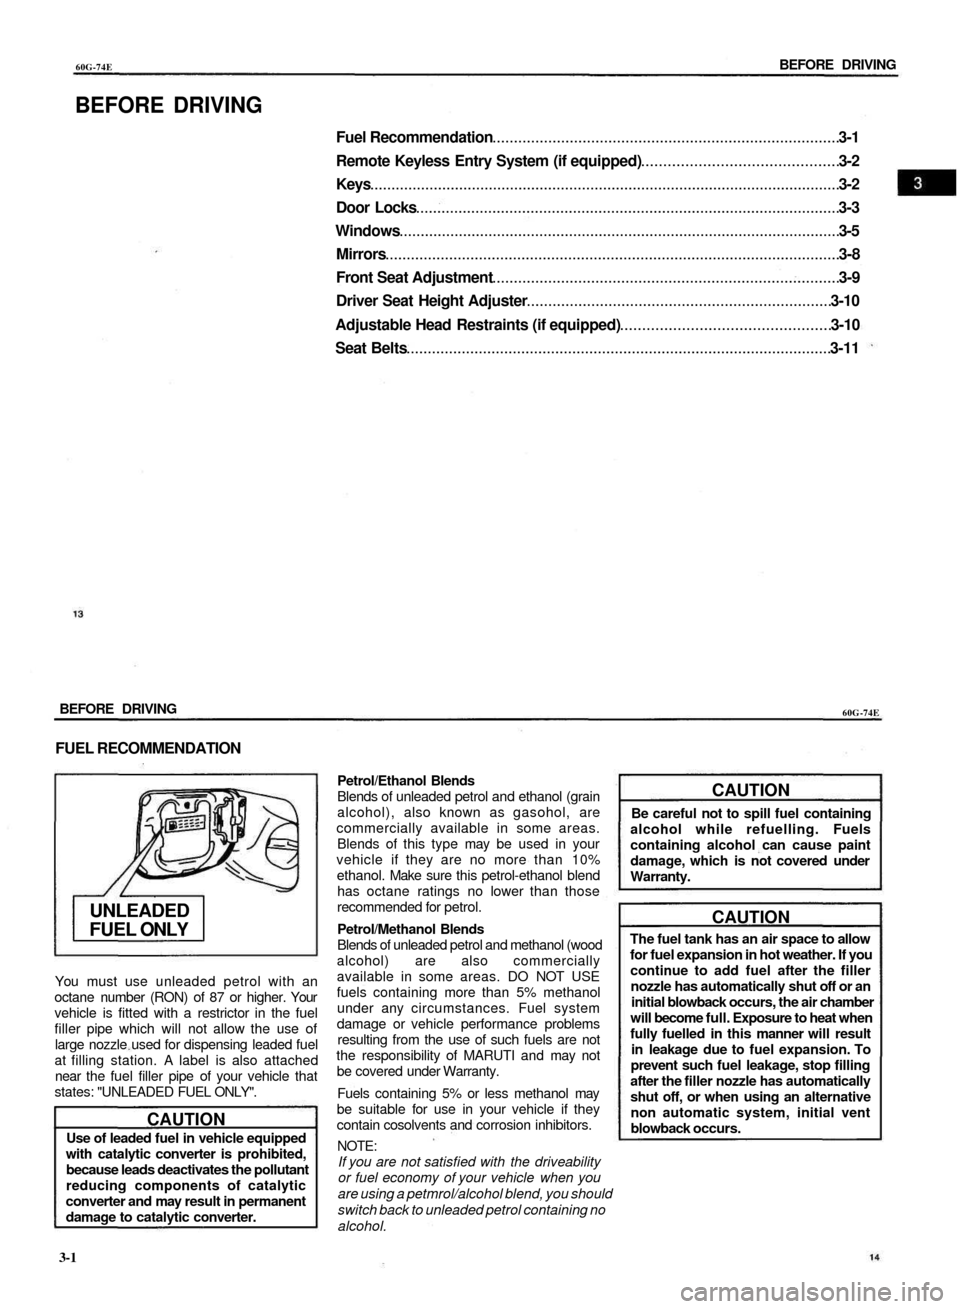
FUEL RECOMMENDATION
UNLEADED
FUEL ONLY
You must use unleaded petrol with an
octane number (RON) of 87 or higher. Your
vehicle is fitted with a restrictor in the fuel
filler pipe which will not allow the use of
large nozzle used for dispensing leaded fuel
at filling station. A label is also attached
near the fuel filler pipe of your vehicle that
states: "UNLEADED FUEL ONLY".
CAUTION
Use of leaded fuel in vehicle equipped
with catalytic converter is prohibited,
because leads deactivates the pollutant
reducing components of catalytic
converter and may result in permanent
damage to catalytic converter.
Petrol/Ethanol Blends
Blends of unleaded petrol and ethanol (grain
alcohol), also known as gasohol, are
commercially available in some areas.
Blends of this type may be used in your
vehicle if they are no more than 10%
ethanol. Make sure this petrol-ethanol blend
has octane ratings no lower than those
recommended for petrol.
Petrol/Methanol Blends
Blends of unleaded petrol and methanol (wood
alcohol) are also commercially
available in some areas. DO NOT USE
fuels containing more than 5% methanol
under any circumstances. Fuel system
damage or vehicle performance problems
resulting from the use of such fuels are not
the responsibility of MARUTI and may not
be covered under Warranty.
Fuels containing 5% or less methanol may
be suitable for use in your vehicle if they
contain cosolvents and corrosion inhibitors.
NOTE:
If you are not satisfied with the driveability
or fuel economy of your vehicle when you
are using a petmrol/alcohol blend, you should
switch back to unleaded petrol containing no
alcohol.
CAUTION
Be careful not to spill fuel containing
alcohol while refuelling. Fuels
containing alcohol can cause paint
damage, which is not covered under
Warranty.
CAUTION
The fuel tank has an air space to allow
for fuel expansion in hot weather. If you
continue to add fuel after the filler
nozzle has automatically shut off or an
initial blowback occurs, the air chamber
will become full. Exposure to heat when
fully fuelled in this manner will result
in leakage due to fuel expansion. To
prevent such fuel leakage, stop filling
after the filler nozzle has automatically
shut off, or when using an alternative
non automatic system, initial vent
blowback occurs.
3-1
Page 7 of 65
60G-74E
BEFORE DRIVING
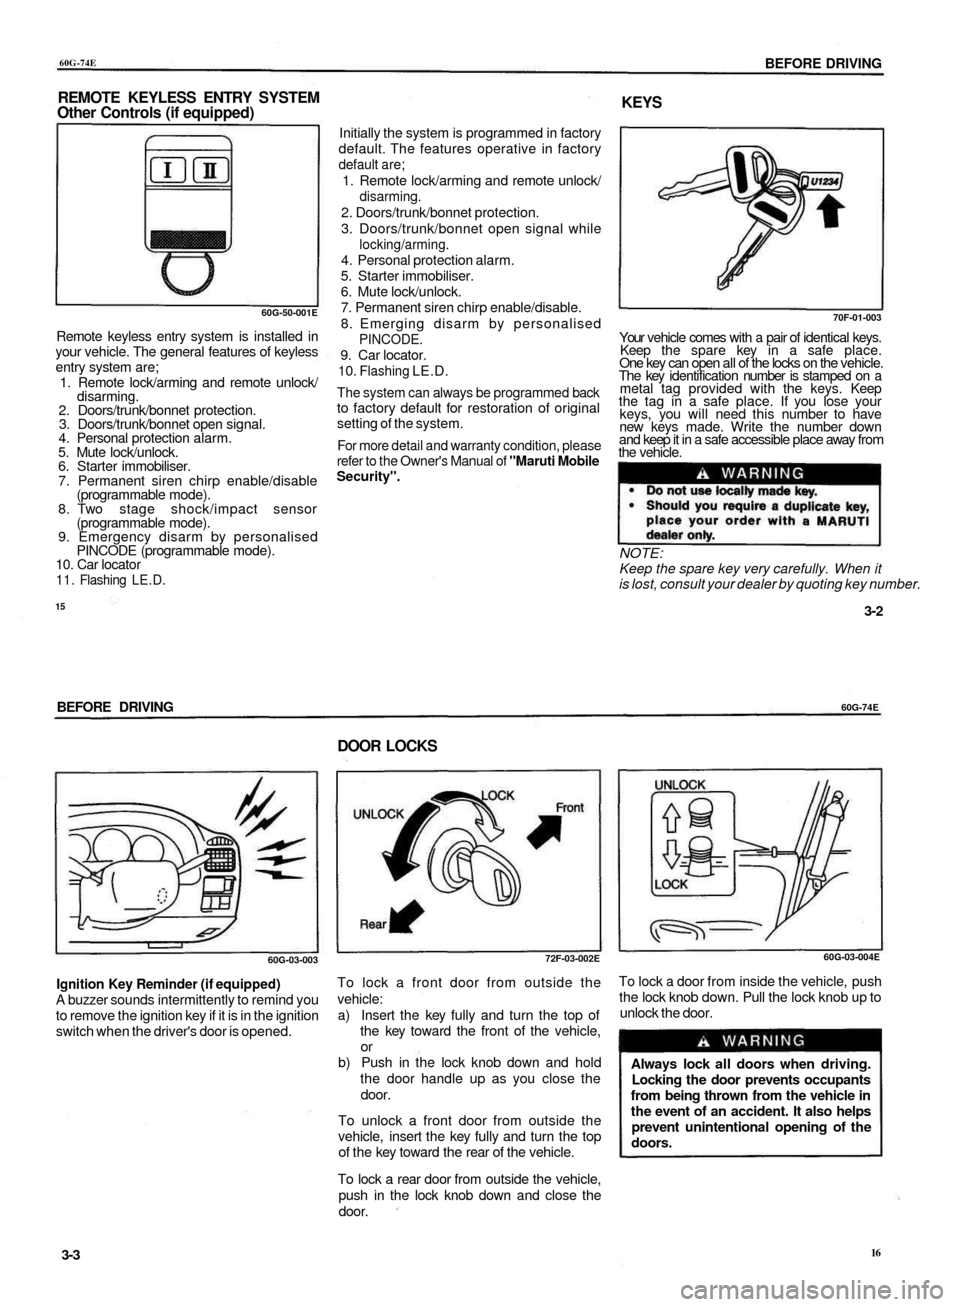
REMOTE KEYLESS ENTRY SYSTEM
Other Controls (if equipped)
KEYS
60G-50-001E
Remote keyless entry system is installed in
your vehicle. The general features of keyless
entry system are;
1. Remote lock/arming and remote unlock/
disarming.
2. Doors/trunk/bonnet protection.
3. Doors/trunk/bonnet open signal.
4. Personal protection alarm.
5. Mute lock/unlock.
6. Starter immobiliser.
7. Permanent siren chirp enable/disable
(programmable mode).
8. Two stage shock/impact sensor
(programmable mode).
9. Emergency disarm by personalised
PINCODE (programmable mode).
10. Car locator
11. Flashing LE.D.
15
Initially the system is programmed in factory
default. The features operative in factory
default are;
1. Remote lock/arming and remote unlock/
disarming.
2. Doors/trunk/bonnet protection.
3. Doors/trunk/bonnet open signal while
locking/arming.
4. Personal protection alarm.
5. Starter immobiliser.
6. Mute lock/unlock.
7. Permanent siren chirp enable/disable.
8. Emerging disarm by personalised
PINCODE.
9. Car locator.
10. Flashing LE.D.
The system can always be programmed back
to factory default for restoration of original
setting of the system.
For more detail and warranty condition, please
refer to the Owner's Manual of "Maruti Mobile
Security".
70F-01-003
Your vehicle comes with a pair of identical keys.
Keep the spare key in a safe place.
One key can open all of the locks on the vehicle.
The key identification number is stamped on a
metal tag provided with the keys. Keep
the tag in a safe place. If you lose your
keys, you will need this number to have
new keys made. Write the number down
and keep it in a safe accessible place away from
the vehicle.
NOTE:
Keep the spare key very carefully. When it
is lost, consult your dealer by quoting key number.
3-2
BEFORE DRIVING
60G-74E
DOOR LOCKS
60G-03-003
Ignition Key Reminder (if equipped)
A buzzer sounds intermittently to remind you
to remove the ignition key if it is in the ignition
switch when the driver's door is opened.
72F-03-002E
To lock a front door from outside the
vehicle:
a) Insert the key fully and turn the top of
the key toward the front of the vehicle,
or
b) Push in the lock knob down and hold
the door handle up as you close the
door.
To unlock a front door from outside the
vehicle, insert the key fully and turn the top
of the key toward the rear of the vehicle.
To lock a rear door from outside the vehicle,
push in the lock knob down and close the
door.
60G-03-004E
To lock a door from inside the vehicle, push
the lock knob down. Pull the lock knob up to
unlock the door.
3-3
16
Always lock all doors when driving.
Locking the door prevents occupants
from being thrown from the vehicle in
the event of an accident. It also helps
prevent unintentional opening of the
doors.
Page 8 of 65
60G-74E
BEFORE DRIVING
72F-03-002E
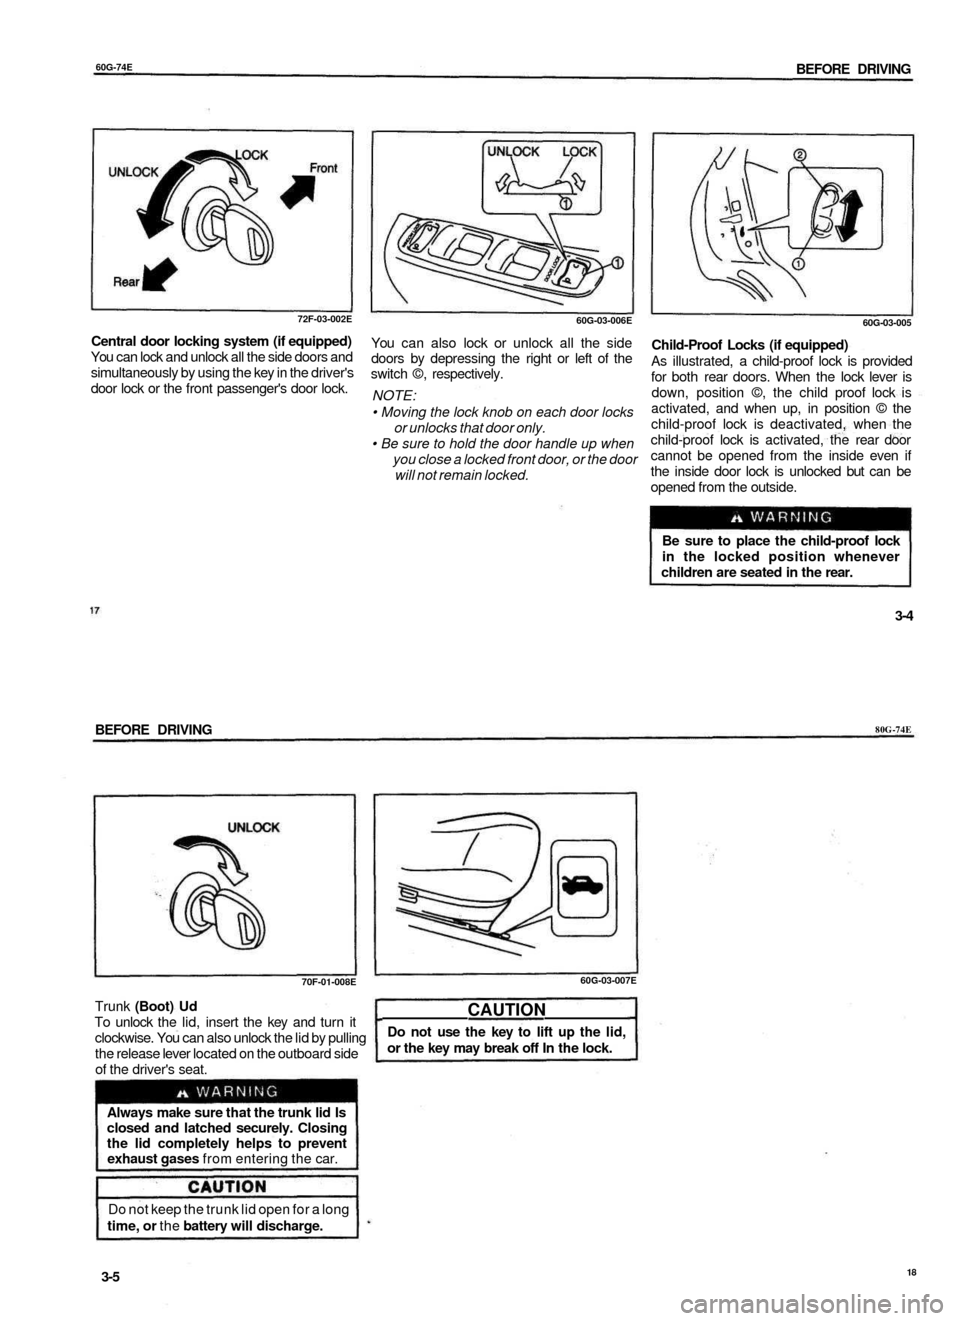
Central door locking system (if equipped)
You can lock and unlock all the side doors and
simultaneously by using the key in the driver's
door lock or the front passenger's door lock.
60G-03-006E
You can also lock or unlock all the side
doors by depressing the right or left of the
switch ©, respectively.
NOTE:
• Moving the lock knob on each door locks
or unlocks that door only.
• Be sure to hold the door handle up when
you close a locked front door, or the door
will not remain locked.
60G-03-005
Child-Proof Locks (if equipped)
As illustrated, a child-proof lock is provided
for both rear doors. When the lock lever is
down, position ©, the child proof lock is
activated, and when up, in position © the
child-proof lock is deactivated, when the
child-proof lock is activated, the rear door
cannot be opened from the inside even if
the inside door lock is unlocked but can be
opened from the outside.
3-4
BEFORE DRIVING
80G-74E
70F-01-008E
Trunk (Boot) Ud
To unlock the lid, insert the key and turn it
clockwise. You can also unlock the lid by pulling
the release lever located on the outboard side
of the driver's seat.
60G-03-007E
3-5
18
Be sure to place the child-proof lock
in the locked position whenever
children are seated in the rear.
CAUTION
Do not use the key to lift up the lid,
or the key may break off In the lock.
Always make sure that the trunk lid Is
closed and latched securely. Closing
the lid completely helps to prevent
exhaust gases from entering the car.
Do not keep the trunk lid open for a long
time, or the battery will discharge.
Page 15 of 65
60G-74E
STEERING COLUMN CONTROLS
STEERING COLUMN CONTROLS
ignition Switch 4.1
Lighting/Tum Signal Control Lever 4-2
Windscreen Wiper and Washer Lever 4-4
Horn 4.5
Rear Wiper and Washer(lf equipped) 4-5
31
STEERING COLUMN CONTROLS
60G-74E
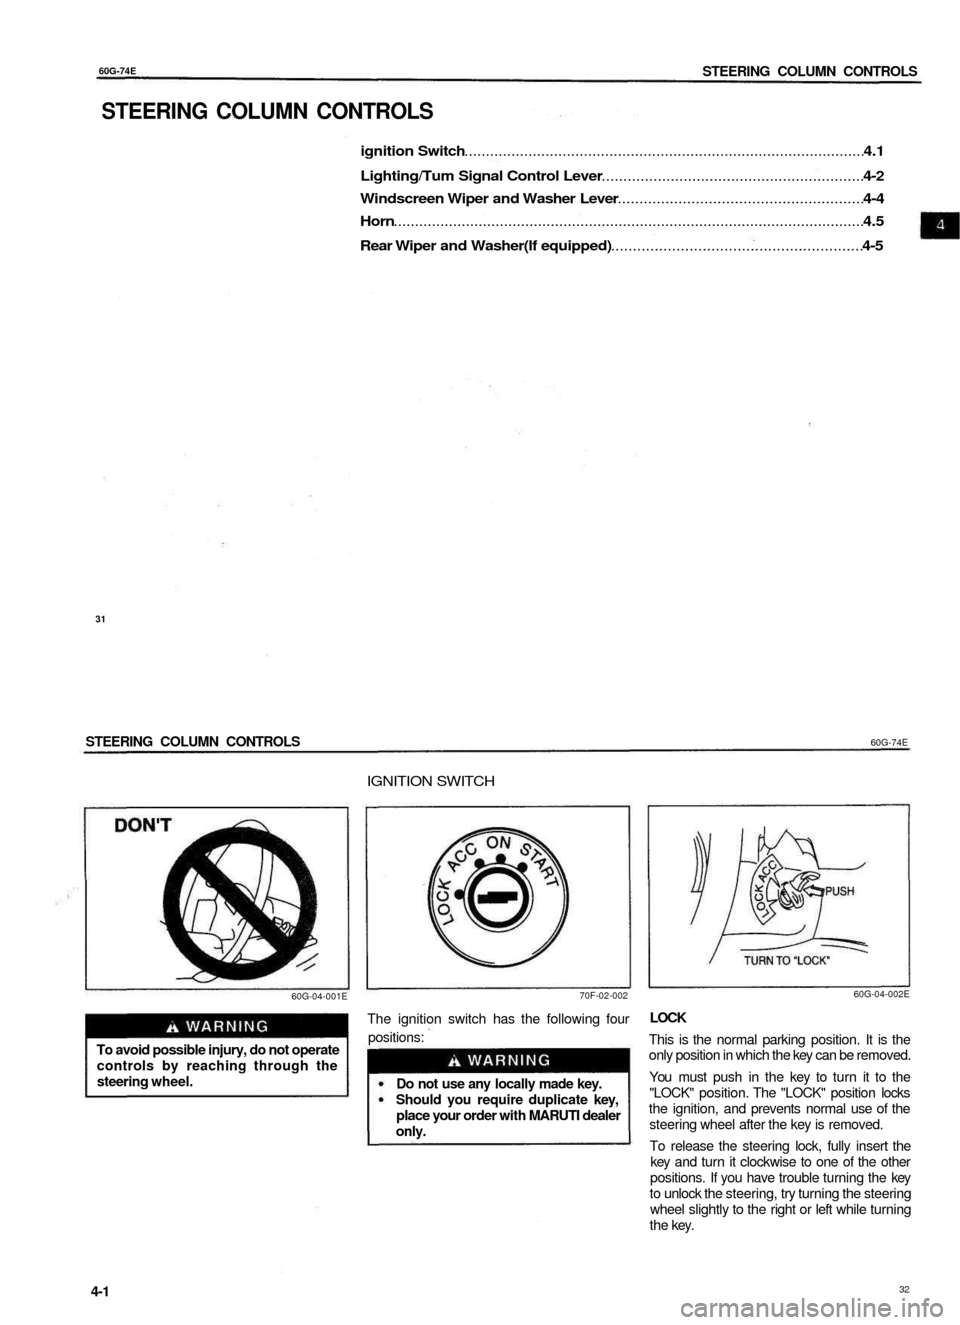
IGNITION SWITCH
60G-04-001E
70F-02-002
To avoid possible injury, do not operate
controls by reaching through the
steering wheel.
The ignition switch has the following four
positions:
Do not use any locally made key.
Should you require duplicate key,
place your order with MARUTI dealer
only.
60G-04-002E
LOCK
This is the normal parking position. It is the
only position in which the key can be removed.
You must push in the key to turn it to the
"LOCK" position. The "LOCK" position locks
the ignition, and prevents normal use of the
steering wheel after the key is removed.
To release the steering lock, fully insert the
key and turn it clockwise to one of the other
positions. If you have trouble turning the key
to unlock the steering, try turning the steering
wheel slightly to the right or left while turning
the key.
4-1
32
Page 16 of 65
6OG-74E
STEERING COLUMN CONTROLS
ACC
Accessories such as the radio can operate,
but the engine is off.
ON
This is the normal operating position. All
electrical systems are on.
START
This is the position for starting the engine using
the starter motor. The key should be released
from this position as soon as the engine starts.
Never remove the ignition key while
the vehicle is moving. The steering
wheel will lock and you will not be
able to steer the vehicle.
Do not leave children alone In a
parked vehicle. Unattended children
could cause accidental movement of
the vehicle, which could result in
severe personal Injury.
Always remove the key when parked
to prevent unintentional operation of
the vehicle and to improve security.
LIGHTING/TURN SIGNAL
CONTROL LEVER
CAUTION
Do not use the starter motor for
more than 15 seconds at a time. If
the engine does not start; wait 15
seconds before trying again. If the
engine does not start after several
attempts, check the fuel and ignition
systems or consult your MARUTI
dealer.
Do not leave the ignition switch in
the "ON" position if the engine is not
running as the battery will
discharge.
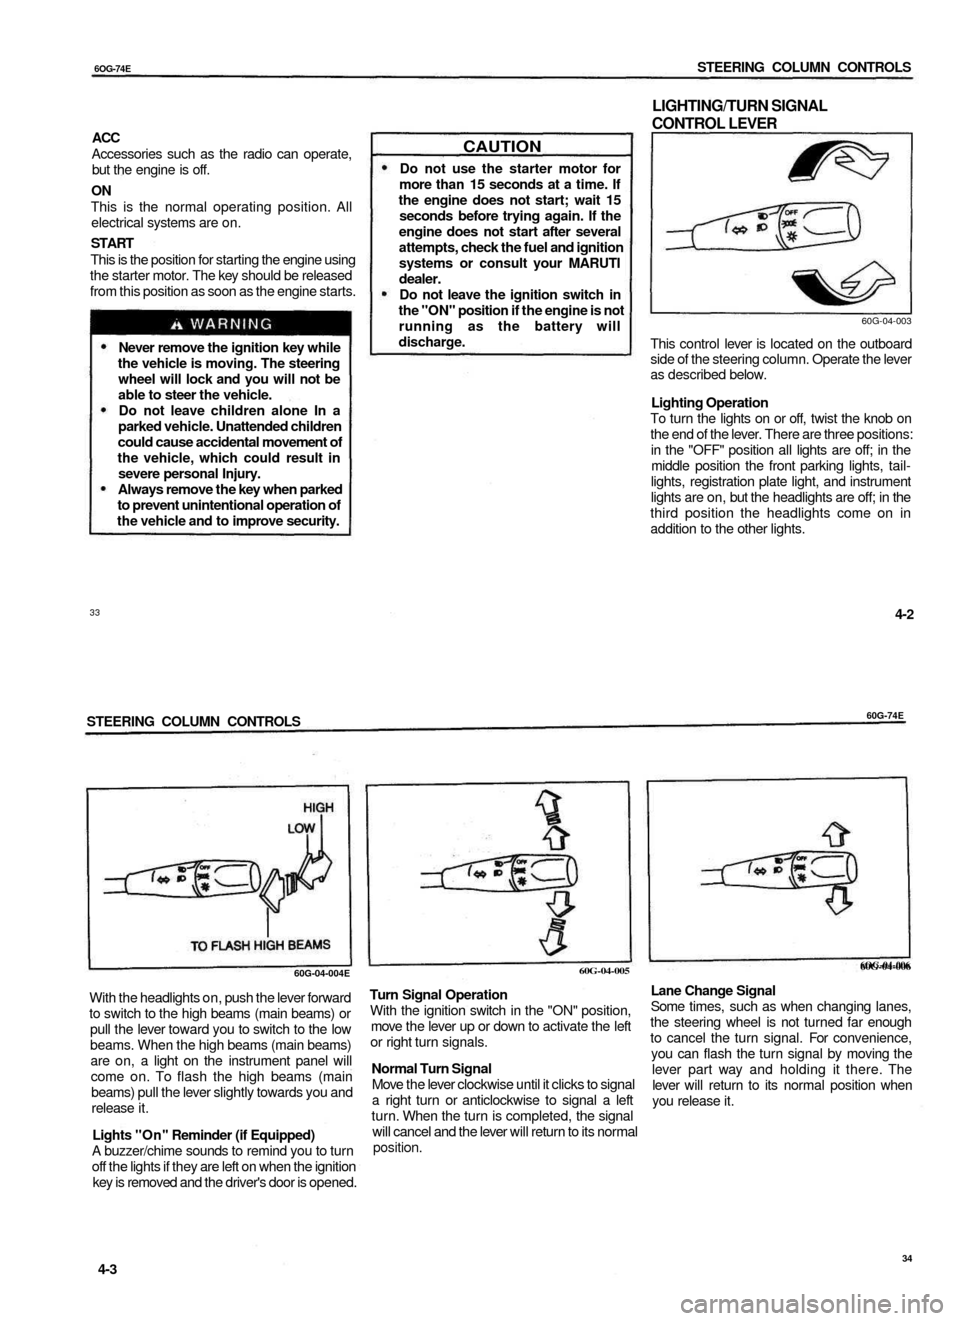
60G-04-003
This control lever is located on the outboard
side of the steering column. Operate the lever
as described below.
Lighting Operation
To turn the lights on or off, twist the knob on
the end of the lever. There are three positions:
in the "OFF" position all lights are off; in the
middle position the front parking lights, tail-
lights, registration plate light, and instrument
lights are on, but the headlights are off; in the
third position the headlights come on in
addition to the other lights.
33
4-2
STEERING COLUMN CONTROLS
60G-74E
With the headlights on, push the lever forward
to switch to the high beams (main beams) or
pull the lever toward you to switch to the low
beams. When the high beams (main beams)
are on, a light on the instrument panel will
come on. To flash the high beams (main
beams) pull the lever slightly towards you and
release it.
Lights "On" Reminder (if Equipped)
A buzzer/chime sounds to remind you to turn
off the lights if they are left on when the ignition
key is removed and the driver's door is opened.
Turn Signal Operation
With the ignition switch in the "ON" position,
move the lever up or down to activate the left
or right turn signals.
Normal Turn Signal
Move the lever clockwise until it clicks to signal
a right turn or anticlockwise to signal a left
turn. When the turn is completed, the signal
will cancel and the lever will return to its normal
position.
6OG-04-006
Lane Change Signal
Some times, such as when changing lanes,
the steering wheel is not turned far enough
to cancel the turn signal. For convenience,
you can flash the turn signal by moving the
lever part way and holding it there. The
lever will return to its normal position when
you release it.
4-3
34
60G-04-006
60G-04-005
60G-04-004E
Page 22 of 65
60G-74E
INSTRUMENT PANEL
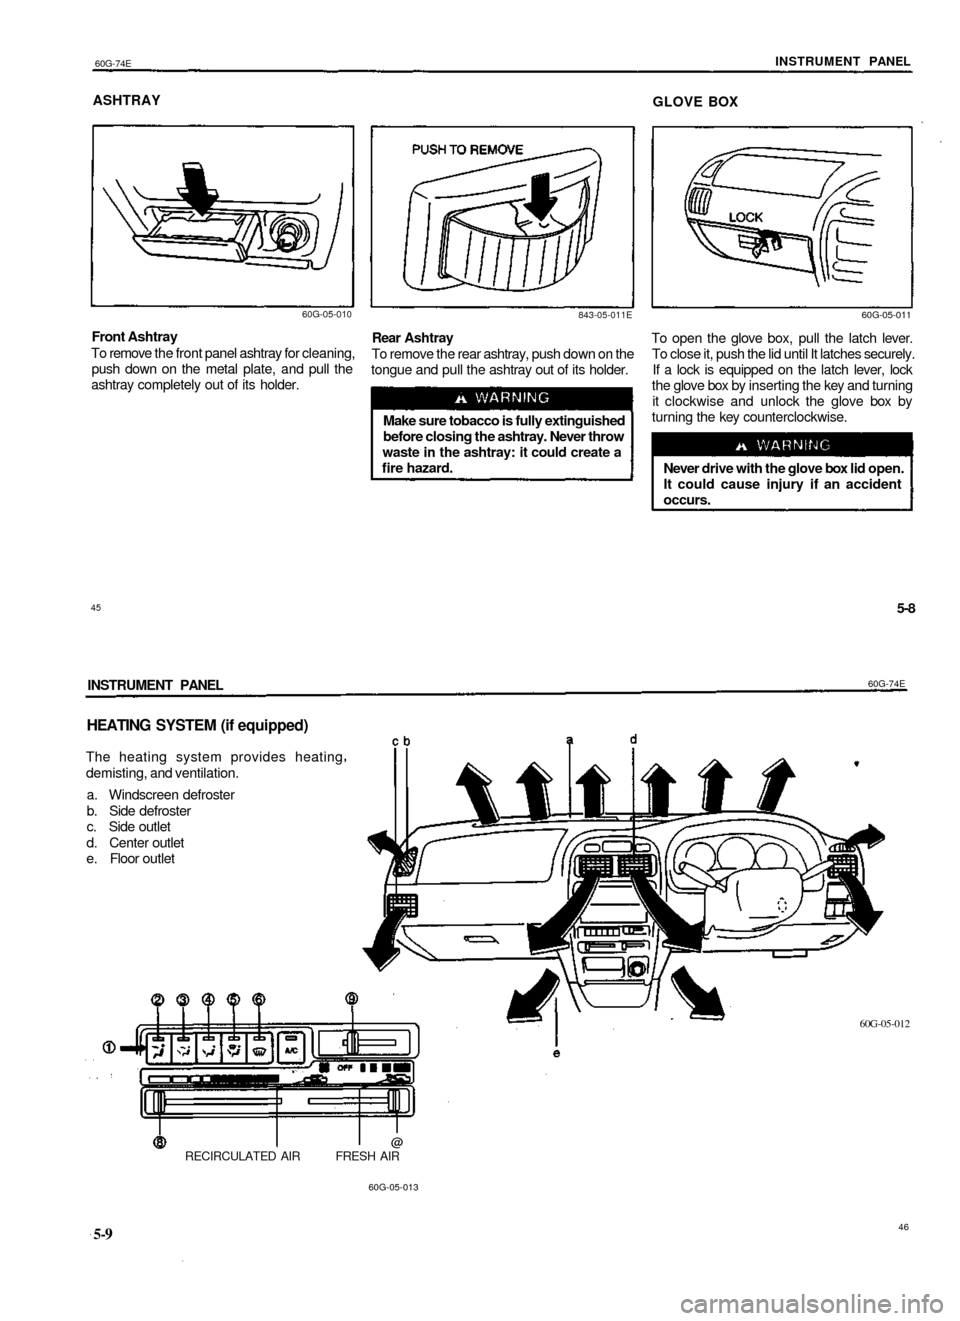
ASHTRAY
GLOVE BOX
60G-05-010
843-05-011E
Front Ashtray
To remove the front panel ashtray for cleaning,
push down on the metal plate, and pull the
ashtray completely out of its holder.
Rear Ashtray
To remove the rear ashtray, push down on the
tongue and pull the ashtray out of its holder.
Make sure tobacco is fully extinguished
before closing the ashtray. Never throw
waste in the ashtray: it could create a
fire hazard.
60G-05-011
To open the glove box, pull the latch lever.
To close it, push the lid until It latches securely.
If a lock is equipped on the latch lever, lock
the glove box by inserting the key and turning
it clockwise and unlock the glove box by
turning the key counterclockwise.
Never drive with the glove box lid open.
It could cause injury if an accident
occurs.
45
5-8
INSTRUMENT PANEL
60G-74E
HEATING SYSTEM (if equipped)
The heating system provides heating
demisting, and ventilation.
a. Windscreen defroster
b. Side defroster
c. Side outlet
d. Center outlet
e. Floor outlet
60G-05-012
@
RECIRCULATED AIR FRESH AIR
60G-05-013
5-9
46
Page 32 of 65
S0G-74E
OPERATING YOUR VEHICLE
OPERATING YOUR VEHICLE
Exhaust Gas Warning 7-1
Daily Inspection Checklist 7-1
Starting the Engine 7-2
Using the Transmission 7-3
Braking 7-4
Running-in 7-5
Catalytic Converter (if equipped) 7-6
Improving Fuel Economy 7-7
Trailer Towing 7-7
OPERATING YOUR VECHILE
60G-74E
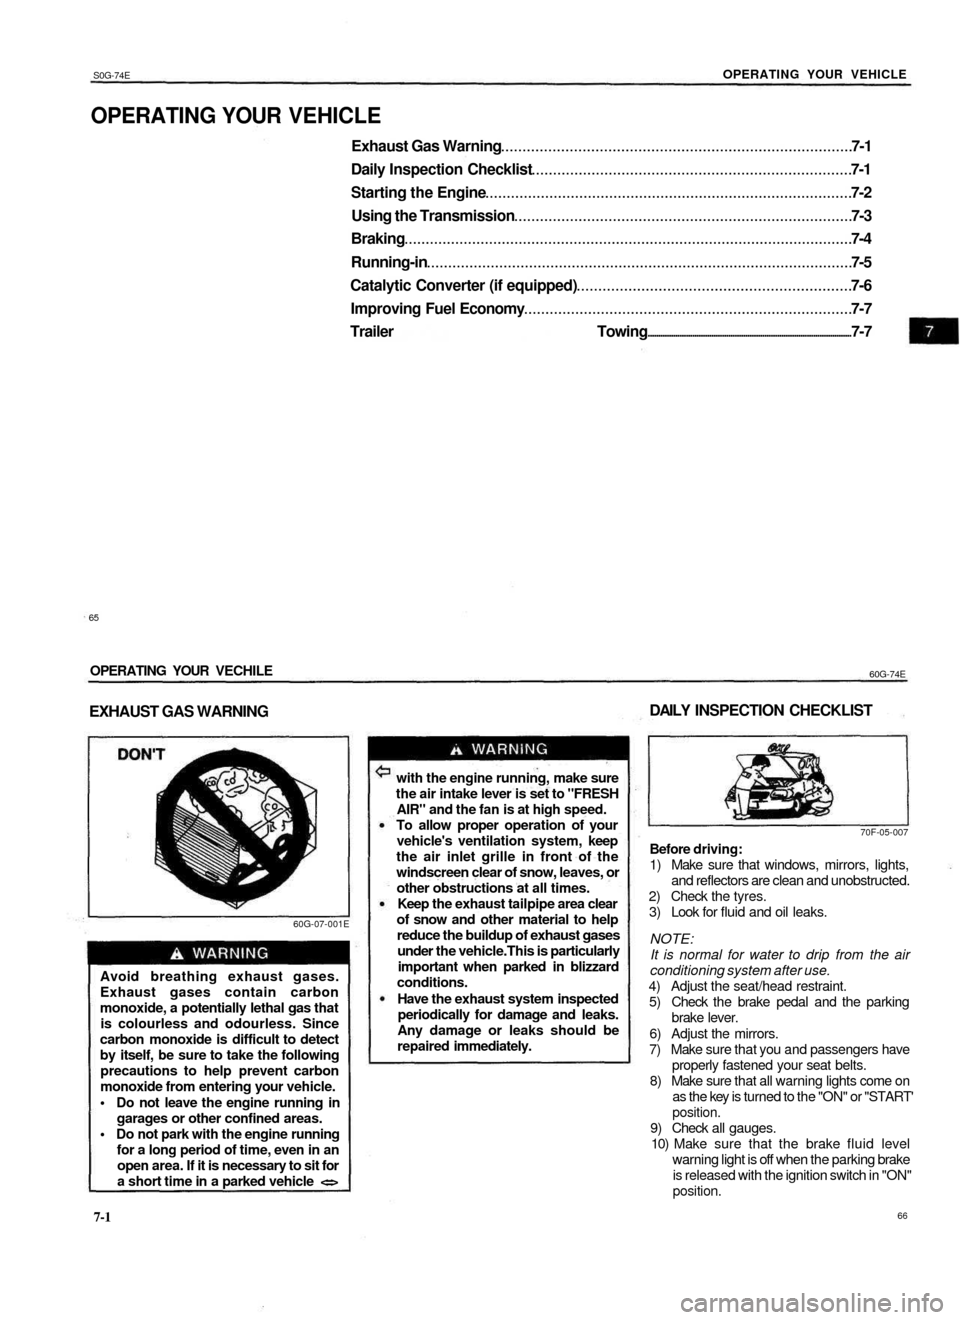
EXHAUST GAS WARNING
DAILY INSPECTION CHECKLIST
60G-07-001E
Avoid breathing exhaust gases.
Exhaust gases contain carbon
monoxide, a potentially lethal gas that
is colourless and odourless. Since
carbon monoxide is difficult to detect
by itself, be sure to take the following
precautions to help prevent carbon
monoxide from entering your vehicle.
• Do not leave the engine running in
garages or other confined areas.
• Do not park with the engine running
for a long period of time, even in an
open area. If it is necessary to sit for
a short time in a parked vehicle <=>
with the engine running, make sure
the air intake lever is set to "FRESH
AIR" and the fan is at high speed.
To allow proper operation of your
vehicle's ventilation system, keep
the air inlet grille in front of the
windscreen clear of snow, leaves, or
other obstructions at all times.
Keep the exhaust tailpipe area clear
of snow and other material to help
reduce the buildup of exhaust gases
under the vehicle.This is particularly
important when parked in blizzard
conditions.
Have the exhaust system inspected
periodically for damage and leaks.
Any damage or leaks should be
repaired immediately.
7-1
70F-05-007
Before driving:
1) Make sure that windows, mirrors, lights,
and reflectors are clean and unobstructed.
2) Check the tyres.
3) Look for fluid and oil leaks.
NOTE:
It is normal for water to drip from the air
conditioning system after use.
4) Adjust the seat/head restraint.
5) Check the brake pedal and the parking
brake lever.
6) Adjust the mirrors.
7) Make sure that you and passengers have
properly fastened your seat belts.
8) Make sure that all warning lights come on
as the key is turned to the "ON" or "START'
position.
9) Check all gauges.
10) Make sure that the brake fluid level
warning light is off when the parking brake
is released with the ignition switch in "ON"
position.
66
65
Page 33 of 65
60G-74E
OPERATING YOUR VEHICLE
Once a week, or each time you fill your fuel
tank, perform the following under-bonnet
checks:
1) Engine oil level.
2) Coolant level.
3) Brake fluid level.
4) Power steering (if equipped) fluid level.
5) Windscreen washer fluid level.
6) Battery solution level.
7) Bonnet latch operation.
Pull the bonnet release handle inside the
vehicle. Make sure that you can not open
the hood all the way without releasing the
secondary latch. Be sure to close the hood
securely after checking for proper
operation. See "All Latches, Hinges &
Locks" of "PERIODIC MAINTENANCE
SCHEDULE" in the "INSPECTION AND
MAINTENANCE" section for lubrication
schedule.
Make sure the bonnet is fully closed
and latched before driving. If it is not,
it can fly up unexpectedly during
driving, obstructing your view and
resulting in an accident.
STARTING THE ENGINE
Before starting the engine:
1) Make sure the parking brake is applied
fully.
2) Manual Transmission - Shift into "N"
(neutral) and depress the clutch pedal all
the way to the floor. Hold it while starting
the engine.
Make sure that the parking brake is
applied fully and the transmission is in
Neutral before attempting to start the
engine.
CAUTION
Stop turning the starter immediately
after the engine has started or the
starter system can be damaged.
Do not crank the engine for more
than 15 seconds at a time. If the
engine doesn't start on the first try,
wait about 15 seconds before trying
again.
Starting a Cold Engine
Engine which is started after 6 hours should
be treated as cold engine.
For Electronic fuel injection models
• With your foot off the accelerator pedal,
crank the engine by turning the ignition
key to "START1. Release the key when the
engine starts.
• If the engine does not start after 15
seconds of cranking, wait about 15
seconds, then press down the accelerator
pedal to 1/3 of its travel and try cranking
the engine again. Release the key and
accelerator pedal when the engine starts.
• If the engine still does not start, try holding
the accelerator pedal all the way to the
floor while cranking. This should clear the
engine if it is flooded.
Starting a Warm Engine
For Electronic fuel injection models:
Use the same procedure as for "Starting a cold
Engine".
67
7-2
OPERATING YOUR VECHILE
60G-74E
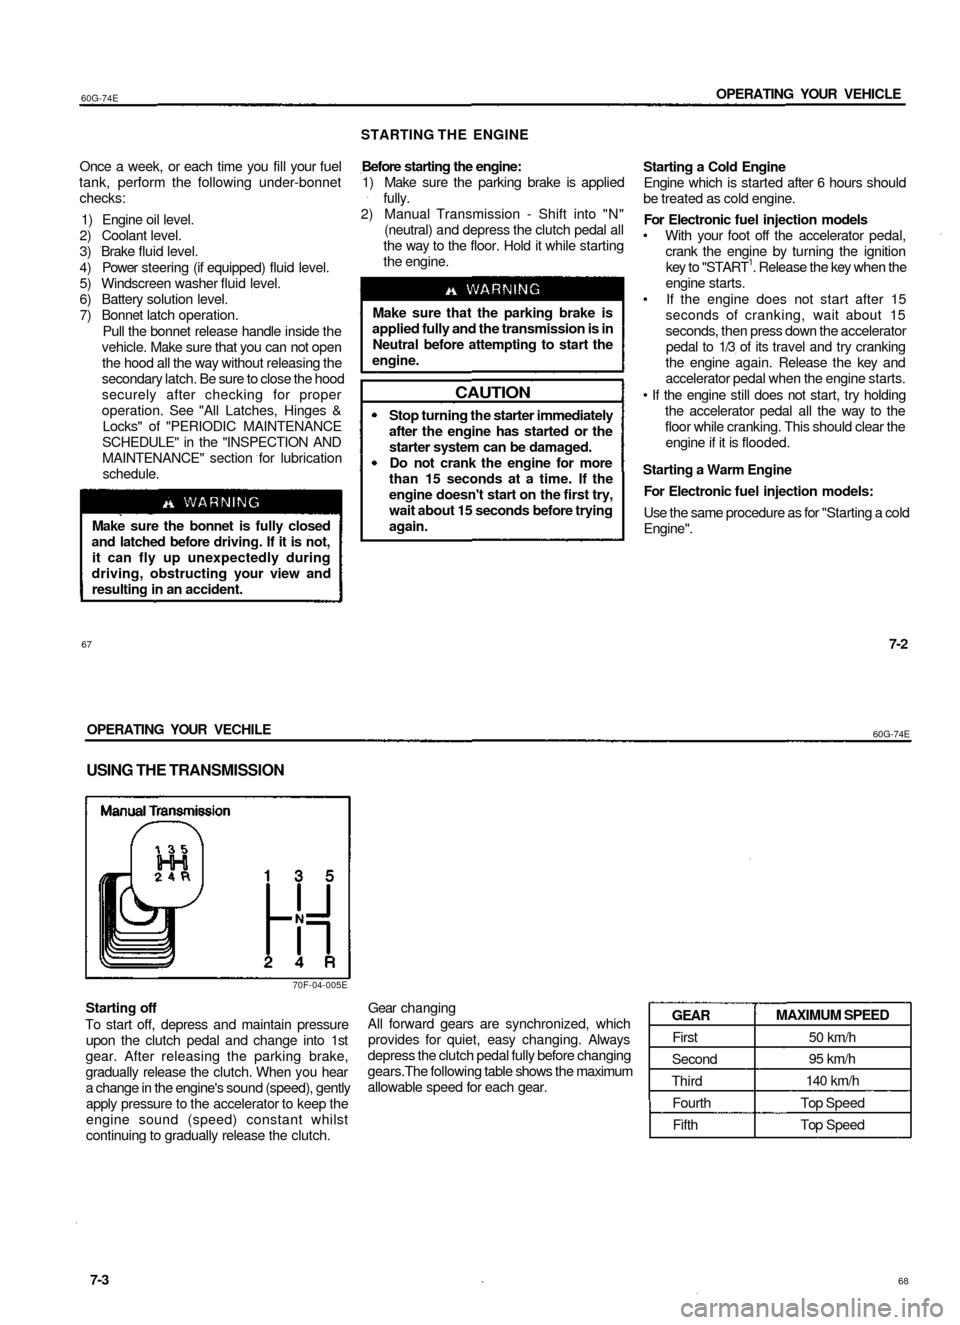
USING THE TRANSMISSION
70F-04-005E
Starting off
To start off, depress and maintain pressure
upon the clutch pedal and change into 1st
gear. After releasing the parking brake,
gradually release the clutch. When you hear
a change in the engine's sound (speed), gently
apply pressure to the accelerator to keep the
engine sound (speed) constant whilst
continuing to gradually release the clutch.
Gear changing
All forward gears are synchronized, which
provides for quiet, easy changing. Always
depress the clutch pedal fully before changing
gears.The following table shows the maximum
allowable speed for each gear.
GEAR
First
Second
Third
Fourth
Fifth
MAXIMUM SPEED
50 km/h
95 km/h
140 km/h
Top Speed
Top Speed
7-3
68
Page 36 of 65
60G-74E
DRIVING TIPS AND SAFE DRIVING
DRIVING TIPS AND SAFE DRIVING
High Speed Driving 8-1
Driving on Hills 8-1
Driving on Slippery Roads 8-2
Driving on Wet Roads 8-2
Do's and Don'ts for Safe Driving 8-3
73
DRIVING TIPS AND SAFE DRIVING
60G-74E
70F-06-001
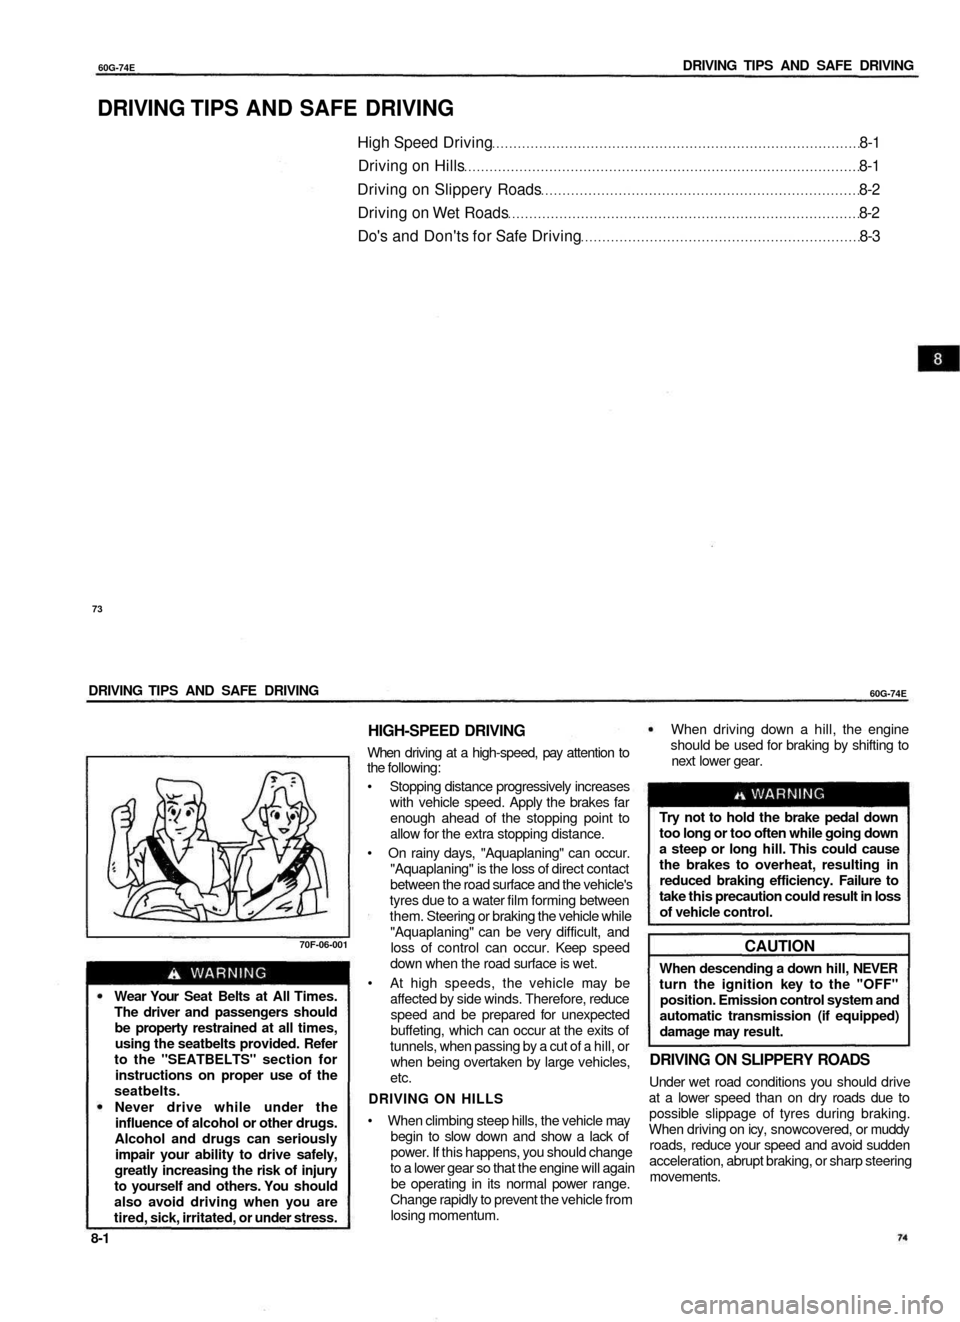
Wear Your Seat Belts at All Times.
The driver and passengers should
be property restrained at all times,
using the seatbelts provided. Refer
to the "SEATBELTS" section for
instructions on proper use of the
seatbelts.
Never drive while under the
influence of alcohol or other drugs.
Alcohol and drugs can seriously
impair your ability to drive safely,
greatly increasing the risk of injury
to yourself and others. You should
also avoid driving when you are
tired, sick, irritated, or under stress.
HIGH-SPEED DRIVING
When driving at a high-speed, pay attention to
the following:
• Stopping distance progressively increases
with vehicle speed. Apply the brakes far
enough ahead of the stopping point to
allow for the extra stopping distance.
• On rainy days, "Aquaplaning" can occur.
"Aquaplaning" is the loss of direct contact
between the road surface and the vehicle's
tyres due to a water film forming between
them. Steering or braking the vehicle while
"Aquaplaning" can be very difficult, and
loss of control can occur. Keep speed
down when the road surface is wet.
• At high speeds, the vehicle may be
affected by side winds. Therefore, reduce
speed and be prepared for unexpected
buffeting, which can occur at the exits of
tunnels, when passing by a cut of a hill, or
when being overtaken by large vehicles,
etc.
DRIVING ON HILLS
• When climbing steep hills, the vehicle may
begin to slow down and show a lack of
power. If this happens, you should change
to a lower gear so that the engine will again
be operating in its normal power range.
Change rapidly to prevent the vehicle from
losing momentum.
When driving down a hill, the engine
should be used for braking by shifting to
next lower gear.
Try not to hold the brake pedal down
too long or too often while going down
a steep or long hill. This could cause
the brakes to overheat, resulting in
reduced braking efficiency. Failure to
take this precaution could result in loss
of vehicle control.
CAUTION
When descending a down hill, NEVER
turn the ignition key to the "OFF"
position. Emission control system and
automatic transmission (if equipped)
damage may result.
DRIVING ON SLIPPERY ROADS
Under wet road conditions you should drive
at a lower speed than on dry roads due to
possible slippage of tyres during braking.
When driving on icy, snowcovered, or muddy
roads, reduce your speed and avoid sudden
acceleration, abrupt braking, or sharp steering
movements.
8-1