key SUZUKI CELERIO 2022 Owner's Manual
[x] Cancel search | Manufacturer: SUZUKI, Model Year: 2022, Model line: CELERIO, Model: SUZUKI CELERIO 2022Pages: 201, PDF Size: 5.82 MB
Page 129 of 201

5-33
OTHER CONTROLS AND EQUIPMENT
76MH1-74E
76MH1-74E
Selection of phone (Select Phone) Follow the instructions below to select a phone to be paired with from the registeredphones. 1) Press the Bluetooth® setup button (4). The Bluetooth® setup menu will be dis-played. 2) Turn the TUNE FOLDER PUSH SOUND knob (1) to select “Setup Blue-tooth”, and press the knob (1) to deter- mine the selection. 3) Turn the TUNE FOLDER PUSHSOUND knob (1) to select “List Phone”, and press the knob (1) to determine the selection.4) Turn the TUNE FOLDER PUSH SOUND knob (1) to select a phone to be paired with, and press the knob (1)to determine the selection. 5) Turn the TUNE FOLDER PUSH SOUND knob (1) to select “Select”, andpress the knob (1) to determine the selection.
NOTE: • When selecting “Go Back”, the previous menu will be displayed.• The Bluetooth® ready audio device will be disconnected when the phone is selected.
List of phones (List Phones) Follow the instructions below to display the names of the registered phones insequence. 1) Press the Bluetooth® setup button (4). The Bluetooth® setup menu will be dis-played. 2) Turn the TUNE FOLDER PUSH SOUND knob (1) to select “Setup Blue-tooth”, and press the knob (1) to deter- mine the selection. 3) Turn the TUNE FOLDER PUSHSOUND knob (1) to select “List Phone”, and press the knob (1) to determine the selection.The names of the registered phones are displayed in sequence.
NOTE: When selecting “Go Back”, the previous menu will be displayed.
Passkey setting (Set Passkey) Follow the instructions below to set thesecurity number (Passkey). 1) Press the Bluetooth® setup button (4). The Bluetooth® setup menu will be dis-played. 2) Turn the TUNE FOLDER PUSH SOUND knob (1) to select “Setup Blue-tooth”, and press the knob (1) to deter- mine the selection. 3) Turn the TUNE FOLDER PUSHSOUND knob (1) to select “Passkey”, and press the knob (1) to determine the selection.
4) Turn the TUNE FOLDER PUSH SOUND knob (1) to select “New Pass- key”, and press the knob (1) to deter-mine the selection. 5) Press or turn the TUNE FOLDER PUSH SOUND knob (1) to select “Con-firm”. 6) Turn the TUNE FOLDER PUSH SOUND knob (1) to select a number forthe first digit, and press the knob (1) to determine the selection. Select and determine numbers for the second,third and fourth digits in order in the same manner. When not entering up to the eighth digit, enter blanks for thesuccessive digits. 7) Turn the TUNE FOLDER PUSH SOUND knob (1) to determine thepasskey setting.
NOTE: When selecting “Go Back”, the previous menu will be displayed.
118
Page 132 of 201

5-36
OTHER CONTROLS AND EQUIPMENT
76MH1-74E
76MH1-74E
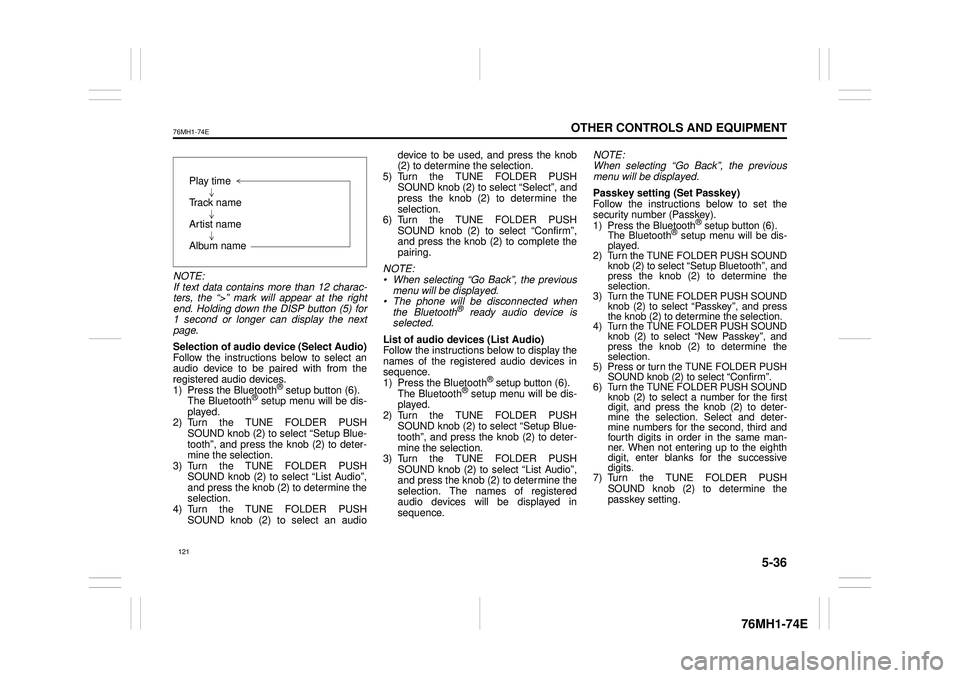
NOTE: If text data contains more than 12 charac- ters, the “>” mark will appear at the rightend. Holding down the DISP button (5) for 1 second or longer can display the next page.
Selection of audio device (Select Audio) Follow the instructions below to select anaudio device to be paired with from the registered audio devices. 1) Press the Bluetooth® setup button (6). The Bluetooth® setup menu will be dis- played. 2) Turn the TUNE FOLDER PUSHSOUND knob (2) to select “Setup Blue- tooth”, and press the knob (2) to deter- mine the selection.3) Turn the TUNE FOLDER PUSH SOUND knob (2) to select “List Audio”, and press the knob (2) to determine theselection. 4) Turn the TUNE FOLDER PUSH SOUND knob (2) to select an audio
device to be used, and press the knob (2) to determine the selection. 5) Turn the TUNE FOLDER PUSHSOUND knob (2) to select “Select”, and press the knob (2) to determine the selection.6) Turn the TUNE FOLDER PUSH SOUND knob (2) to select “Confirm”, and press the knob (2) to complete thepairing.
NOTE: • When selecting “Go Back”, the previous menu will be displayed. • The phone will be disconnected whenthe Bluetooth® ready audio device is selected.
List of audio devices (List Audio) Follow the instructions below to display the names of the registered audio devices insequence. 1) Press the Bluetooth® setup button (6). The Bluetooth® setup menu will be dis-played. 2) Turn the TUNE FOLDER PUSH SOUND knob (2) to select “Setup Blue-tooth”, and press the knob (2) to deter- mine the selection. 3) Turn the TUNE FOLDER PUSHSOUND knob (2) to select “List Audio”, and press the knob (2) to determine the selection. The na mes of registered audio devices will be displayed in sequence.
NOTE: When selecting “Go Back”, the previous menu will be displayed.
Passkey setting (Set Passkey) Follow the instructions below to set thesecurity number (Passkey).1) Press the Bluetooth® setup button (6). The Bluetooth® setup menu will be dis- played. 2) Turn the TUNE FOLDER PUSH SOUND knob (2) to select
Page 148 of 201

6-2
VEHICLE LOADING AND TOWING
76MH1-74E
76MH1-74E
TOWING INSTRUCTION TABLE
76MH022
A: 2WD VEHICLES WITH MANUAL TRANSAXLE OR AUTO GEAR SHIFT 1) Secure the front wheels on a towingdolly according to the instructions pro- vided by the dolly manufacturer. 2) Release the parking brake.
76MH023
B: 2WD VEHICLES WITH MANUAL TRANSAXLE OR AUTO GEAR SHIFT 1) Shift the gearshift lever into neutral. 2) Turn the ignition key to the
Page 186 of 201

8-5
EMERGENCY SERVICE
76MH1-74E
76MH1-74E
3) Make jump lead connections as follows:
1. Connect one end of the first jump lead to the positive (+) terminal of the flat battery (1). 2. Connect the other end to the positive(+) terminal of the booster battery (2). 3. Connect one end of the second jumplead to the negative (–) terminal of the booster battery (2). 4. Make the final connection to anunpainted, heavy metal part (i.e. engine mount bracket (3)) of the engine of the vehicle with the flatbattery (1).
4) If the booster battery you are using is fitted to another vehicle, start the
engine of the vehicle with the booster battery. Run the engine at moderate speed.5) Start the engine of the vehicle with the flat battery. 6) Remove the jump leads in the exactreverse order in which you connected them.
Towing
If you need to have your vehicle towed, contact a professional service. Your dealercan provide you with detailed towing instructions.
2-Wheel Drive (2WD) Manual Tran- saxle or Auto Gear ShiftManual transaxle vehicles or Auto Gear Shift vehicles may be towed using either of the following methods.
1) From the front, with the front wheels lifted and the rear wheels on the ground. Before towing, make sure thatthe parking brake is released. 2) From the rear, with the rear wheels lifted and the front wheels on theground, provided the steering and drivetrain are in operational condition. Before towing, make sure that transaxleis in neutral, the steering wheel is
unlocked (the ignition key should be in the “ACC” position), and the steering wheel is secured with a clampingdevice designed for towing service.
WA R N I N G
Never connect the jump lead directlyto the negative (–) terminal of the dis- charged battery, or an explosion may occur.
CAUTION
Connect the jump le ad to the engine mount bracket securely. If the jump lead disconnects from the engine mount bracket because of vibrationat the start of the engine, the jump lead could be caught in the drive belts.
NOTICE
To help avoid damage to your vehicle during towing, proper equipment and towing procedures must be used.
NOTICE
After shifting the Auto Gear Shiftlever to the “N” position, always check the gear position indicator in the instrument cluster shows the “N”position to make sure that the transaxle is disengaged. If the transaxle cannot be put in neu-tral, turn the key from the “LOCK” to the “ON” position, and move the Auto Gear Shift lever from “N” to “D”,“M” or “R”, then back to “N” again. Then turn the key from the “ON” to the “LOCK” position.These procedures may help put the transaxle in neutral. If the transaxle still cannot be put in neutral, you can-not tow the vehicle without using a towing dolly. The steering column is not strongenough to with stand shocks trans- mitted from the fr ont wheels during towing. Always unlock the steeringwheel before towing.
175