Eps SUZUKI FORENZA 2007 Owners Manual
[x] Cancel search | Manufacturer: SUZUKI, Model Year: 2007, Model line: FORENZA, Model: SUZUKI FORENZA 2007Pages: 225, PDF Size: 4.39 MB
Page 18 of 225
1-6 SEATS AND RESTRAINT SYSTEMS
85Z03-03E
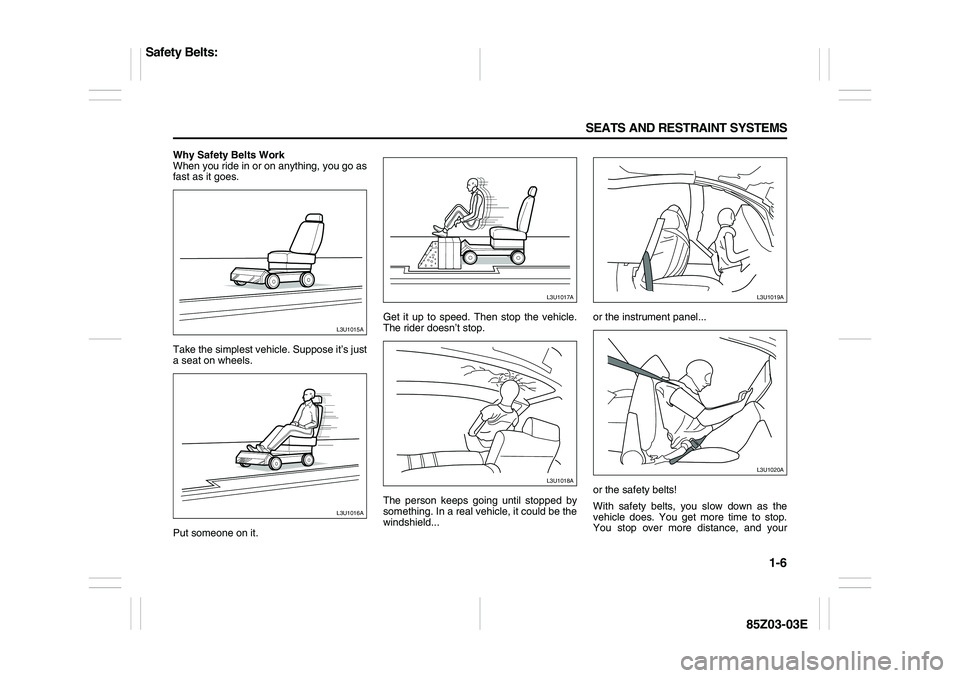
Why Safety Belts Work
When you ride in or on anything, you go as
fast as it goes.
Take the simplest vehicle. Suppose it’s just
a seat on wheels.
Put someone on it.Get it up to speed. Then stop the vehicle.
The rider doesn’t stop.
The person keeps going until stopped by
something. In a real vehicle, it could be the
windshield...or the instrument panel...
or the safety belts!
With safety belts, you slow down as the
vehicle does. You get more time to stop.
You stop over more distance, and your
L3U1015AL3U1016A
L3U1017AL3U1018A
L3U1019AL3U1020A
Safety Belts:
Page 50 of 225
2-2 FEATURES AND CONTROLS
85Z03-03E
Check the distance. You may be too far
from your vehicle. You may need to
stand closer during rainy or snowy
weather.
Check the location. Other vehicles or
objects may be blocking the signal. Take
a few steps to the left or right, hold the
transmitter higher, and try again.
Check to determine if battery replace-
ment is necessary. See “Battery
Replacement” under Remote Keyless
Entry System Operation in this section.
If you are still having trouble, see your
SUZUKI dealer or a qualified technician
for service.
Remote Keyless Entry System
OperationThe following functions are available if your
vehicle has the remote keyless entry sys-
tem:
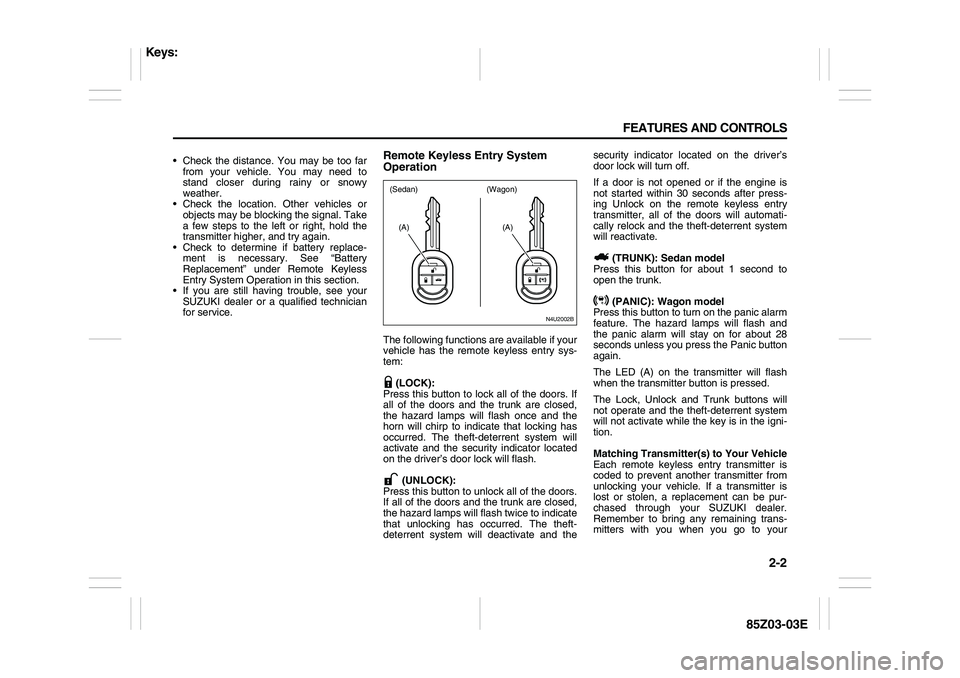
(LOCK):
Press this button to lock all of the doors. If
all of the doors and the trunk are closed,
the hazard lamps will flash once and the
horn will chirp to indicate that locking has
occurred. The theft-deterrent system will
activate and the security indicator located
on the driver’s door lock will flash.
(UNLOCK):
Press this button to unlock all of the doors.
If all of the doors and the trunk are closed,
the hazard lamps will flash twice to indicate
that unlocking has occurred. The theft-
deterrent system will deactivate and thesecurity indicator located on the driver’s
door lock will turn off.
If a door is not opened or if the engine is
not started within 30 seconds after press-
ing Unlock on the remote keyless entry
transmitter, all of the doors will automati-
cally relock and the theft-deterrent system
will reactivate.
(TRUNK): Sedan model
Press this button for about 1 second to
open the trunk.
(PANIC): Wagon model
Press this button to turn on the panic alarm
feature. The hazard lamps will flash and
the panic alarm will stay on for about 28
seconds unless you press the Panic button
again.
The LED (A) on the transmitter will flash
when the transmitter button is pressed.
The Lock, Unlock and Trunk buttons will
not operate and the theft-deterrent system
will not activate while the key is in the igni-
tion.
Matching Transmitter(s) to Your Vehicle
Each remote keyless entry transmitter is
coded to prevent another transmitter from
unlocking your vehicle. If a transmitter is
lost or stolen, a replacement can be pur-
chased through your SUZUKI dealer.
Remember to bring any remaining trans-
mitters with you when you go to your
N4U2002B
(A)
(A)
(Sedan) (Wagon)
Keys:
Page 66 of 225
2-18 FEATURES AND CONTROLS
85Z03-03E
Shifting Into Park (P)
(Automatic Transmission)1) Hold the brake pedal down and set the
parking brake.
2) Move the shift lever into PARK (P) posi-
tion.
3) Turn the ignition key to LOCK.
4) Remove the key and take it with you. If
you can leave your vehicle with the igni-
tion key in your hand, your vehicle is in
PARK (P).Leaving Your Vehicle with the Engine
Running
If you have to leave your vehicle with the
engine running, be sure your vehicle is in
PARK (P) and your parking brake is firmly
set before you leave it. After you’ve moved
the shift lever into PARK (P), hold the regu-
lar brake pedal down. Then, see if you can
move the shift lever away from PARK (P)
without first pushing the button. If you can,
it means that the shift lever wasn’t fully
locked into PARK (P).Torque Lock
If you are parking on a hill and you don’t
shift your transmission into PARK (P) prop-
erly, the weight of the vehicle may put too
much force on the parking pawl in the
transmission. You may find it difficult to pull
the shift lever out of PARK (P). This is
called “torque lock.” To prevent torque lock,
set the parking brake and then shift into
PARK (P) properly before you leave the
driver’s seat. To find out how, see “Shifting
Into Park (P)” in this section.
When you are ready to drive, move the
shift lever out of PARK (P) before you
release the parking brake.
If torque lock does occur, you may need to
have another vehicle push yours a little
uphill to take some of the pressure from
the parking pawl in the transmission, so
you can pull the shift lever out of PARK (P).
Shifting Out of Park (P)
(Automatic Transmission)Your vehicle has a brake transmission shift
interlock system which locks the shift lever
in PARK (P) when the ignition is in the
LOCK position. You have to apply your reg-
ular brakes before you can shift from PARK
(P) when the ignition is in the ON position.
See “Automatic Transmission Operation” in
this section.
If you cannot shift out of PARK (P) while
you hold the brake pedal down, try this:
1) Set the parking brake fully.
WARNING
It is dangerous to get out of your
vehicle if the shift lever is not fully in
PARK (P) with the parking brake
firmly set. Your vehicle can roll. Don’t
leave your vehicle when the engine is
running unless you have to. If you
have left the engine running, the
vehicle can move suddenly. You or
others could be injured. To be sure
your vehicle won’t move, even when
you’re on fairly level ground, use the
steps that follow.
WARNING
It can be dangerous to leave your
vehicle with the engine running. Your
vehicle could move suddenly if the
shift lever is not fully in PARK (P)
with the parking brake firmly set.
And, if you leave the vehicle with the
engine running, it could overheat and
even catch fire. You or others could
be injured. Don’t leave your vehicle
with the engine running.
Starting and Operating Your Vehicle:
Page 68 of 225
2-20 FEATURES AND CONTROLS
85Z03-03E
Engine Exhaust Running Your Engine While You Are
Parked
It’s better not to park with the engine run-
ning. But if you ever have to, here are
some things to know.
Follow the proper steps to be sure your
vehicle won’t move. See “Shifting Into Park
(P)” or “Parking Your Vehicle (Manual
Transmission)” in this section.
WARNING
Engine exhaust can kill. It contains
the gas carbon monoxide (CO), which
you can’t see or smell. It can cause
unconsciousness and death.
You might have exhaust coming in if:
Your exhaust system sounds
strange or different.
Your vehicle gets rusty underneath.
Your vehicle was damaged in a col-
lision.
Your vehicle was damaged when
driving over high points on the
road or over road debris.
Repairs weren’t done correctly.
Your vehicle or exhaust system had
been modified improperly.
If you ever suspect exhaust is com-
ing into your vehicle:
Drive it only with all the windows
down to blow out any CO; and
Have your vehicle fixed immedi-
ately.
WARNING
Idling the engine with the climate
control system off could allow dan-
gerous exhaust into your vehicle. See
the earlier Warning under “Engine
Exhaust.”
Also, idling in a closed-in place can
let deadly carbon monoxide (CO) into
your vehicle even if the climate con-
trol fan is at the highest setting. One
place this can happen is a garage.
Exhaust – with CO – can come in eas-
ily. NEVER park in a garage with the
engine running.
Another closed-in place can be a bliz-
zard. See “Winter Driving” in the
Index.
WARNING
It is dangerous to get out of your
vehicle if the shift lever is not fully in
PARK (P) or the appropriate position
with the parking brake firmly set.
Your vehicle can roll. To determine
the appropriate position, see “Park-
ing Your Vehicle”. Don’t leave your
vehicle when the engine is running
unless you have to. If you’ve left the
engine running, the vehicle can move
suddenly. You or others could be
injured. To be sure your vehicle won’t
move, even when you’re on fairly
level ground, always set your parking
brake and move the shift lever to
PARK (P) or the appropriate position
as described under “Parking Your
Vehicle”.
Starting and Operating Your Vehicle:
Mirrors:
Page 91 of 225
3-15 INSTRUMENT PANEL
85Z03-03E
Air Conditioning
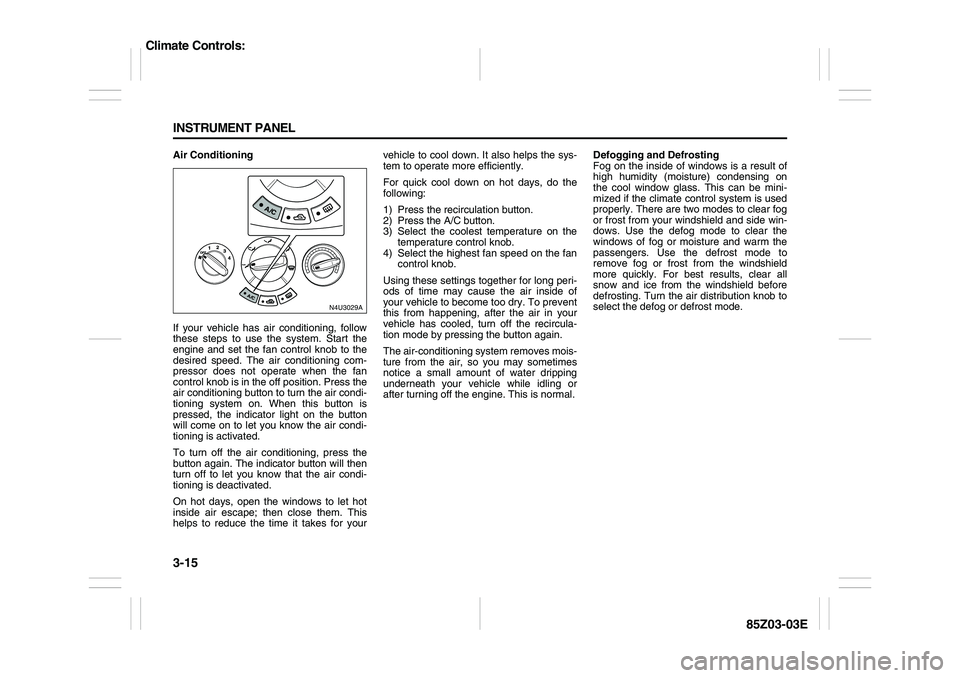
If your vehicle has air conditioning, follow
these steps to use the system. Start the
engine and set the fan control knob to the
desired speed. The air conditioning com-
pressor does not operate when the fan
control knob is in the off position. Press the
air conditioning button to turn the air condi-
tioning system on. When this button is
pressed, the indicator light on the button
will come on to let you know the air condi-
tioning is activated.
To turn off the air conditioning, press the
button again. The indicator button will then
turn off to let you know that the air condi-
tioning is deactivated.
On hot days, open the windows to let hot
inside air escape; then close them. This
helps to reduce the time it takes for yourvehicle to cool down. It also helps the sys-
tem to operate more efficiently.
For quick cool down on hot days, do the
following:
1) Press the recirculation button.
2) Press the A/C button.
3) Select the coolest temperature on the
temperature control knob.
4) Select the highest fan speed on the fan
control knob.
Using these settings together for long peri-
ods of time may cause the air inside of
your vehicle to become too dry. To prevent
this from happening, after the air in your
vehicle has cooled, turn off the recircula-
tion mode by pressing the button again.
The air-conditioning system removes mois-
ture from the air, so you may sometimes
notice a small amount of water dripping
underneath your vehicle while idling or
after turning off the engine. This is normal.Defogging and Defrosting
Fog on the inside of windows is a result of
high humidity (moisture) condensing on
the cool window glass. This can be mini-
mized if the climate control system is used
properly. There are two modes to clear fog
or frost from your windshield and side win-
dows. Use the defog mode to clear the
windows of fog or moisture and warm the
passengers. Use the defrost mode to
remove fog or frost from the windshield
more quickly. For best results, clear all
snow and ice from the windshield before
defrosting. Turn the air distribution knob to
select the defog or defrost mode.
N4U3029AN4U3029A
Climate Controls:
Page 93 of 225
3-17 INSTRUMENT PANEL
85Z03-03E
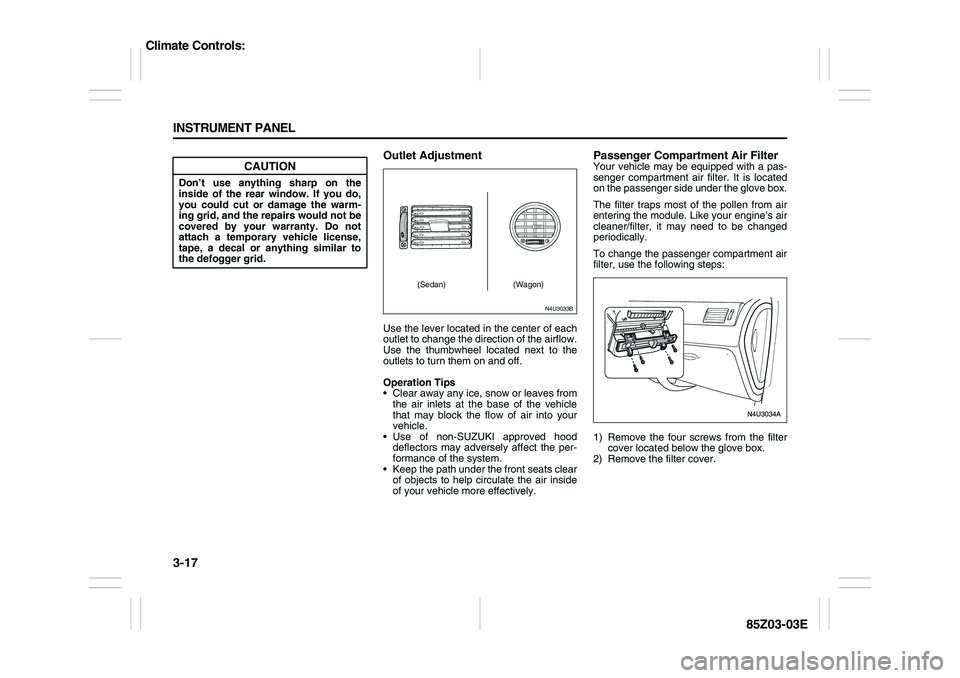
Outlet AdjustmentUse the lever located in the center of each
outlet to change the direction of the airflow.
Use the thumbwheel located next to the
outlets to turn them on and off.
Operation Tips
Clear away any ice, snow or leaves from
the air inlets at the base of the vehicle
that may block the flow of air into your
vehicle.
Use of non-SUZUKI approved hood
deflectors may adversely affect the per-
formance of the system.
Keep the path under the front seats clear
of objects to help circulate the air inside
of your vehicle more effectively.
Passenger Compartment Air FilterYour vehicle may be equipped with a pas-
senger compartment air filter. It is located
on the passenger side under the glove box.
The filter traps most of the pollen from air
entering the module. Like your engine’s air
cleaner/filter, it may need to be changed
periodically.
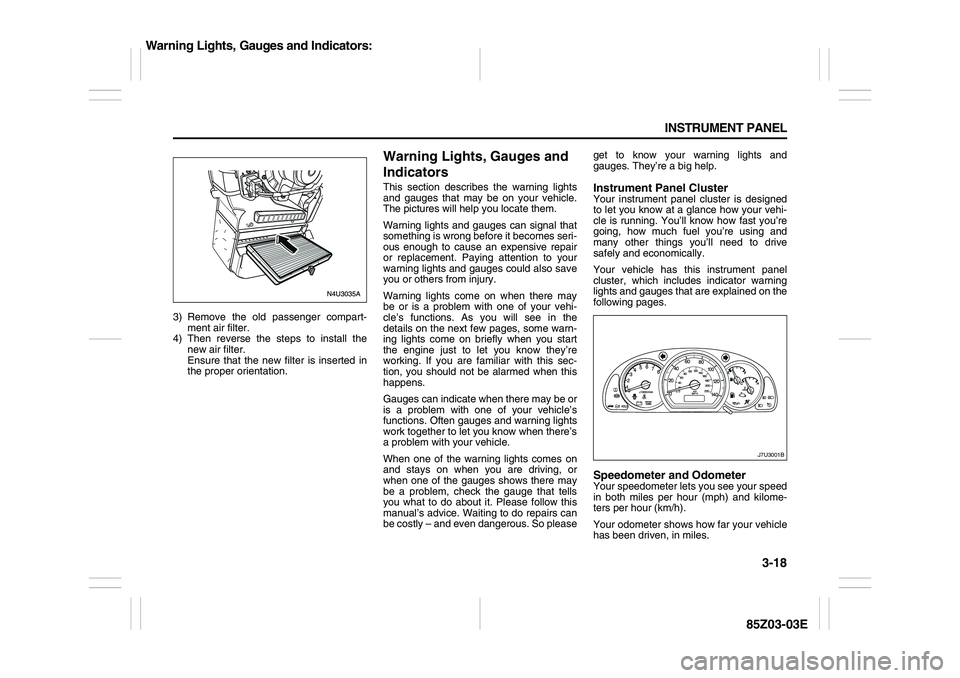
To change the passenger compartment air
filter, use the following steps:
1) Remove the four screws from the filter
cover located below the glove box.
2) Remove the filter cover.
CAUTION
Don’t use anything sharp on the
inside of the rear window. If you do,
you could cut or damage the warm-
ing grid, and the repairs would not be
covered by your warranty. Do not
attach a temporary vehicle license,
tape, a decal or anything similar to
the defogger grid.
N4U3033B
(Sedan) (Wagon)
Climate Controls:
Page 94 of 225
3-18 INSTRUMENT PANEL
85Z03-03E
3) Remove the old passenger compart-
ment air filter.
4) Then reverse the steps to install the
new air filter.
Ensure that the new filter is inserted in
the proper orientation.
Warning Lights, Gauges and
IndicatorsThis section describes the warning lights
and gauges that may be on your vehicle.
The pictures will help you locate them.
Warning lights and gauges can signal that
something is wrong before it becomes seri-
ous enough to cause an expensive repair
or replacement. Paying attention to your
warning lights and gauges could also save
you or others from injury.
Warning lights come on when there may
be or is a problem with one of your vehi-
cle’s functions. As you will see in the
details on the next few pages, some warn-
ing lights come on briefly when you start
the engine just to let you know they’re
working. If you are familiar with this sec-
tion, you should not be alarmed when this
happens.
Gauges can indicate when there may be or
is a problem with one of your vehicle’s
functions. Often gauges and warning lights
work together to let you know when there’s
a problem with your vehicle.
When one of the warning lights comes on
and stays on when you are driving, or
when one of the gauges shows there may
be a problem, check the gauge that tells
you what to do about it. Please follow this
manual’s advice. Waiting to do repairs can
be costly – and even dangerous. So pleaseget to know your warning lights and
gauges. They’re a big help.
Instrument Panel ClusterYour instrument panel cluster is designed
to let you know at a glance how your vehi-
cle is running. You’ll know how fast you’re
going, how much fuel you’re using and
many other things you’ll need to drive
safely and economically.
Your vehicle has this instrument panel
cluster, which includes indicator warning
lights and gauges that are explained on the
following pages.Speedometer and OdometerYour speedometer lets you see your speed
in both miles per hour (mph) and kilome-
ters per hour (km/h).
Your odometer shows how far your vehicle
has been driven, in miles.
J7U3001B
Warning Lights, Gauges and Indicators:
Page 100 of 225
3-24 INSTRUMENT PANEL
85Z03-03E
If you experience one or more of these
conditions, change the fuel brand you use.
It will require at least one full tank of the
proper fuel to turn the light off.
If none of the above steps have made the
light turn off, your SUZUKI dealer can
check the vehicle. Your SUZUKI dealer has
the proper test equipment and diagnostic
tools to fix any mechanical or electrical
problems that may have developed.
Emissions Inspection and Maintenance
Programs
Some state/provincial and local govern-
ments have or may begin programs to
inspect the emission control equipment on
your vehicle. Failure to pass this inspection
could prevent you from getting a vehicle
registration.
Here are some things you need to know to
help your vehicle pass an inspection:
Your vehicle will not pass this inspection if
the Check Engine light is on or is not work-
ing properly.
Your vehicle will not pass this inspection if
the OBD (on-board diagnostic) system
determines that critical emission control
systems have not been completely diag-
nosed by the system. The vehicle would be
considered not ready for inspection. This
can happen if you have recently replaced
your battery or if your battery has run
down. The diagnostic system is designed
to evaluate critical emission control sys-tems during normal driving. This may take
several days of routine driving. If you have
done this and your vehicle still does not
pass the inspection for lack of OBD system
readiness, your SUZUKI dealer can pre-
pare the vehicle for inspection.
Oil Pressure LightIf you have a low engine oil pressure prob-
lem, this light will stay on after you start
your engine, or come on when you are
driving. This indicates that your engine is
not receiving enough oil.
The engine could be low on oil, or could
have some other oil problem. Have it fixed
immediately.
The oil light could also come on in three
other situations:
When the ignition is on but the engine is
not running, the light will come on as a
check to show you it is working. The light
will go out after you start the engine. If it
doesn’t come on with the ignition on, you
may have a problem with the fuse or
bulb. Have it fixed right away. If you’re idling at a stop sign, the light
may blink on and then off.
If you make a hard stop, the light may
come on for a moment. This is normal.
Fog Lamp LightIf your vehicle has this feature, the fog
lamps indicator light will come on when the
fog lamps are in use.
The light will go out when the fog lamps
are turned off.
WARNING
Don’t keep driving if the oil pressure
is low. If you do, your engine can
become so hot that it catches fire.
You or others could be burned. Check
your oil as soon as possible and have
your vehicle serviced.
CAUTION
Operating your engine with the low
oil pressure light on can result in
severe engine damage which is not
covered by your warranty.
Warning Lights, Gauges and Indicators:
Page 107 of 225
3-31 INSTRUMENT PANEL
85Z03-03E
PLAYING THE RADIO
Power/Volume knob (1):
Press this knob to turn the system on and
off.
Turn the Power/Volume knob clockwise or
counterclockwise to increase or decrease
the volume.
Press this button for a short time to MUTE
the radio. Press the button again to cancel
MUTE.
Finding a Station
AM button (2):
Press this button to switch to an AM sta-
tion. The display will show the selection.
FM button (3):
Press this button to switch to an FM sta-
tion. The display will show the selection.
TUNE button (4):
Press this button to select radio stations.
(Manual tuning)
Press the up arrows to increase the fre-
quency.
Press the down arrows to decrease the fre-
quency.
The frequency of the AM band changes
10 kHz each time and the frequency of the
FM band changes 200 kHz each time.
SEEK button (5):
Press this button to search for and select
receivable radio stations. (Seek tuning)
To search for the next receivable higher
station, press the up arrows. To search for the previous receivable lower
station, press the down arrows.
SCAN/AST button (6):
Press this button to scan radio stations.
(Scan tuning)
Scan
The radio will go to a station, play for a few
seconds, and then go on to the next sta-
tion. Press this button again to stop scan-
ning.
The radio will only scan stations with a
strong signal that are in the selected band.
Automatic Store
Press and hold this button to use Auto
Store.
FM1’s 6 preset stations with the strongest
signal in the region can be automatically
stored. The display will show “AUTO
SCANNING”, and “SCANNING” will flash
on display.
Stored stations will flash for a short time on
display in sequence. Once the stations are
stored, the radio will switch to FM-A and
the first preset station will begin to play.
FM-A will appear on the display when lis-
tening to the automatically stored stations.
Press the AM or FM button to stop auto-
matic store.Preset station buttons (7):
Setting Preset Stations
Up to 36 stations (six FM1, six FM2, six
FM-A and six AM1, six AM2, six AM-A),
can be programmed on the six numbered
preset buttons, by performing the following
steps:
1) Turn the radio on.
2) Press the AM or FM button to select
FM1, FM2, FM-A, AM1, AM2 or AM-A.
3) Tune in the desired station.
4) Press and hold one of the six numbered
preset buttons.
The preset button number (Display:
CH#1 ~ CH#6) will flash on the display
when the station has been set. When-
ever that numbered preset button is
pressed, the memorized station will
return.
5) Repeat the previous four steps for each
preset button.
Page 114 of 225
3-38 INSTRUMENT PANEL
85Z03-03E
PLAYING THE RADIO
Power/Volume knob (1):
Press this knob to turn the system on and
off.
Turn the Power/Volume knob clockwise or
counterclockwise to increase or decrease
the volume.
Press this button for a short time to MUTE
the radio. Press the button again to cancel
MUTE.
Finding a Station
AM button (2):
Press this button to switch to an AM sta-
tion. The display will show the selection.
FM button (3):
Press this button to switch to an FM sta-
tion. The display will show the selection.
TUNE button (4):
Press this button to select radio stations.
(Manual tuning)
Press the up arrows to increase the fre-
quency.
Press the down arrows to decrease the fre-
quency.
The frequency of the AM band changes
10 kHz each time and the frequency of the
FM band changes 200 kHz each time.
SEEK button (5):
Press this button to search for and select
receivable radio stations. (Seek tuning)
To search for the next receivable higher
station, press the up arrows. To search for the previous receivable lower
station, press the down arrows.
SCAN/AST button (6):
Press this button to scan radio stations.
(Scan tuning)
Scan
The radio will go to a station, play for a few
seconds, and then go on to the next sta-
tion. Press this button again to stop scan-
ning.
The radio will only scan stations with a
strong signal that are in the selected band.
Automatic Store
Press and hold this button to use Auto
Store.
FM1’s 6 preset stations with the strongest
signal in the region can be automatically
stored. The display will show “AUTO
SCANNING”, and “SCANNING” will flash
on display.
Stored stations will flash for a short time on
display in sequence. Once the stations are
stored, the radio will switch to FM-A and
the first preset station will begin to play.
FM-A will appear on the display when lis-
tening to the automatically stored stations.
Press the AM or FM button to stop auto-
matic store.Preset station buttons (7):
Setting Preset Stations
Up to 36 stations (six FM1, six FM2, six
FM-A and six AM1, six AM2, six AM-A),
can be programmed on the six numbered
preset buttons, by performing the following
steps:
1) Turn the radio on.
2) Press the AM or FM button to select
FM1, FM2, FM-A, AM1, AM2 or AM-A.
3) Tune in the desired station.
4) Press and hold one of the six numbered
preset buttons.
The preset button number (Display:
CH#1 ~ CH#6) will flash on the display
when the station has been set. When-
ever that numbered preset button is
pressed, the memorized station will
return.
5) Repeat the previous four steps for each
preset button.