SUZUKI GRAND VITARA 2008 3.G Inspection And Maintenance Manual
GRAND VITARA 2008 3.G
SUZUKI
SUZUKI
https://www.carmanualsonline.info/img/20/7581/w960_7581-0.png
SUZUKI GRAND VITARA 2008 3.G Inspection And Maintenance Manual
Trending: fuel filter, window, fuel pressure, fog light, check transmission fluid, overheating, spare tire location
Page 41 of 48
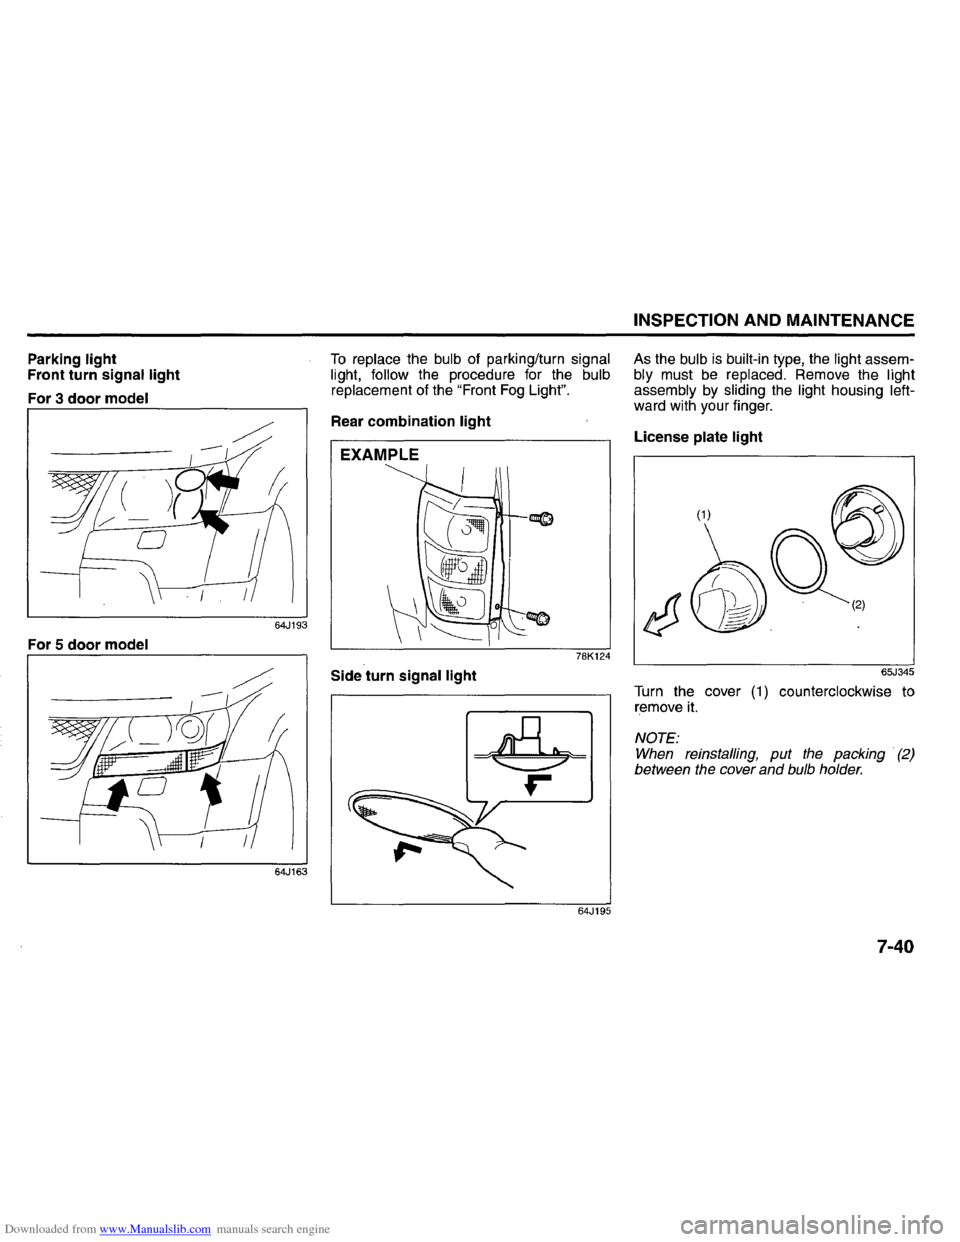
Downloaded from www.Manualslib.com manuals search engine Parking light Front turn signal light
For 3 door model
64J193
For 5 door model
To replace the bulb of parking/turn signal
light, follow the procedure for the bulb
replacement of the "Front Fog Light".
Rear combination light
78K124
Side turn signal light
64J195
INSPECTION AND MAINTENANCE
As the bulb is built-in type, the light assembly must be replaced. Remove the light
assembly by sliding the light housing leftward with your finger.
License plate light
65J345
Turn the cover (1) counterclockwise to
remove it.
NOTE: When reinstalling, put the packing . (2)
between the cover and bulb holder.
7-40
Page 42 of 48
Downloaded from www.Manualslib.com manuals search engine INSPECTION AND MAINTENANCE
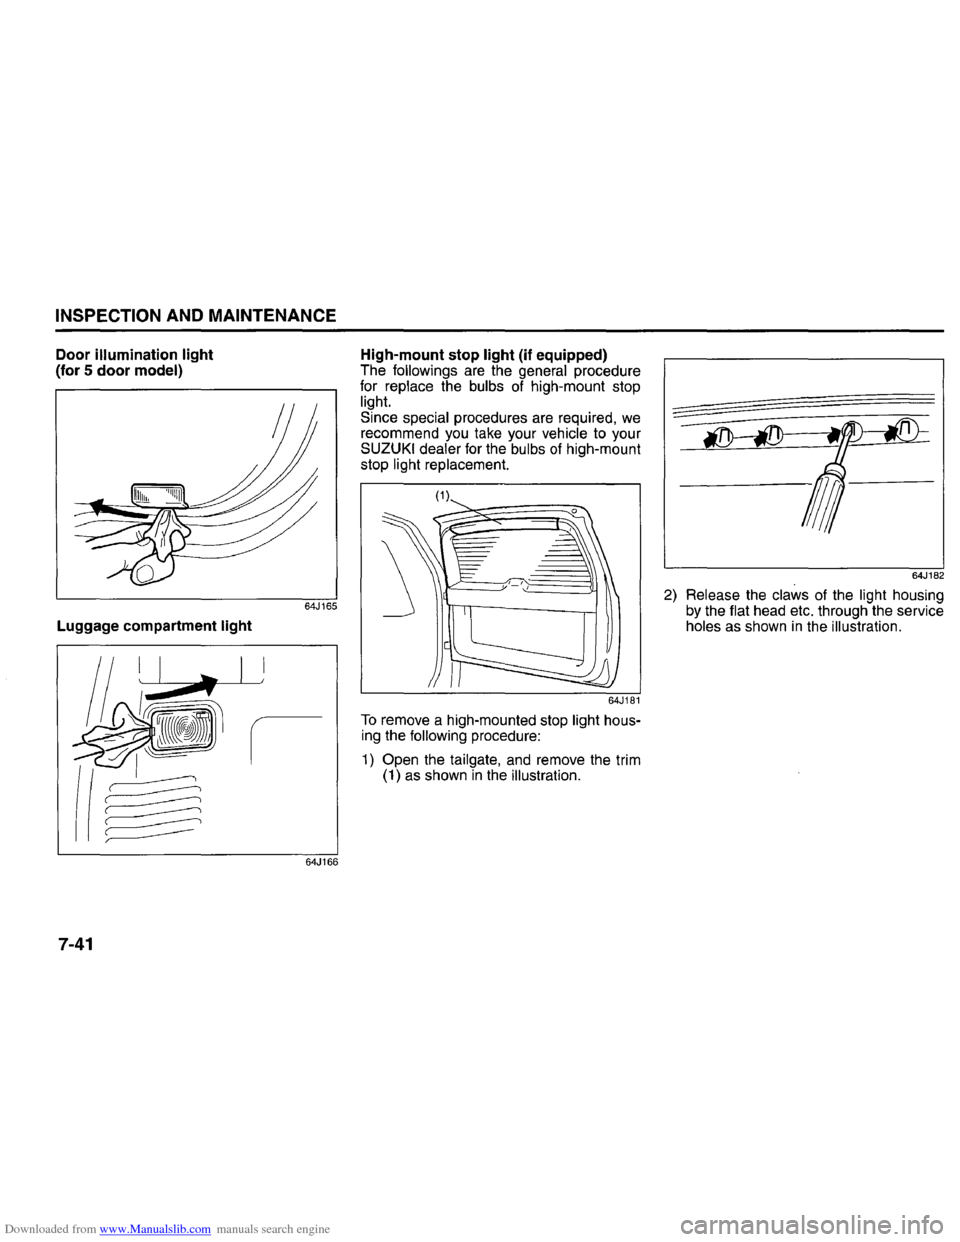
Door illumination light (for 5 door model)
Luggage compartment light
7-41
64J166
High-mount stop light (if equipped) The followings are the general procedure
for replace the bulbs of high-mount stop
light.
Since special procedures are required, we recommend you take your vehicle to your SUZUKI dealer for the bulbs of high-mount
stop light replacement.
To remove a high-mounted stop light hous
ing the following procedure:
1) Open the tailgate, and remove the trim
(1) as shown in the illustration.
64J182
2) Release the claws of the light housing
by the flat head etc. through the service
holes as shown
in the illustration.
Page 43 of 48
Downloaded from www.Manualslib.com manuals search engine (2)
64J183
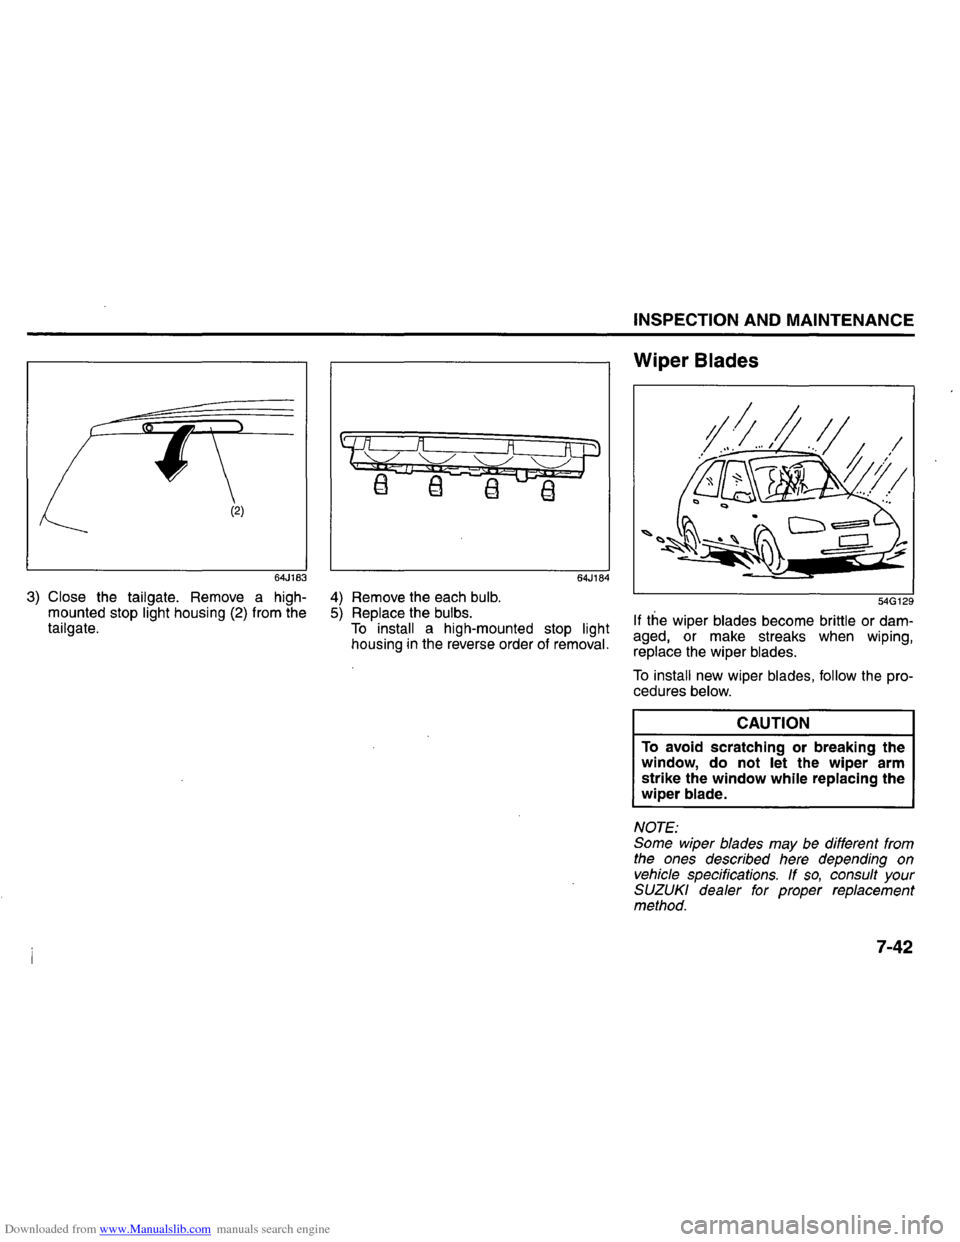
3) Close the tailgate. Remove a high
mounted stop light housing (2) from the tailgate.
64J184
4) Remove the each bulb. 5) Replace the bulbs. To install a high-mounted stop light housing in the reverse order of removal.
INSPECTION AND MAINTENANCE
Wiper Blades
54G129
If the wiper blades become brittle or dam
aged, or make streaks when wiping,
replace the wiper blades.
To install new wiper blades, follow the pro
cedures below.
CAUTION
To avoid scratching or breaking the
window, do not let the wiper arm
strike the window while replacing the
wiper blade.
NOTE: Some wiper blades may be different from
the ones described here depending on
vehicle specifications.
If so, consult your SUZUKI dealer for proper replacement
method.
7-42
Page 44 of 48
Downloaded from www.Manualslib.com manuals search engine INSPECTION AND MAINTENANCE
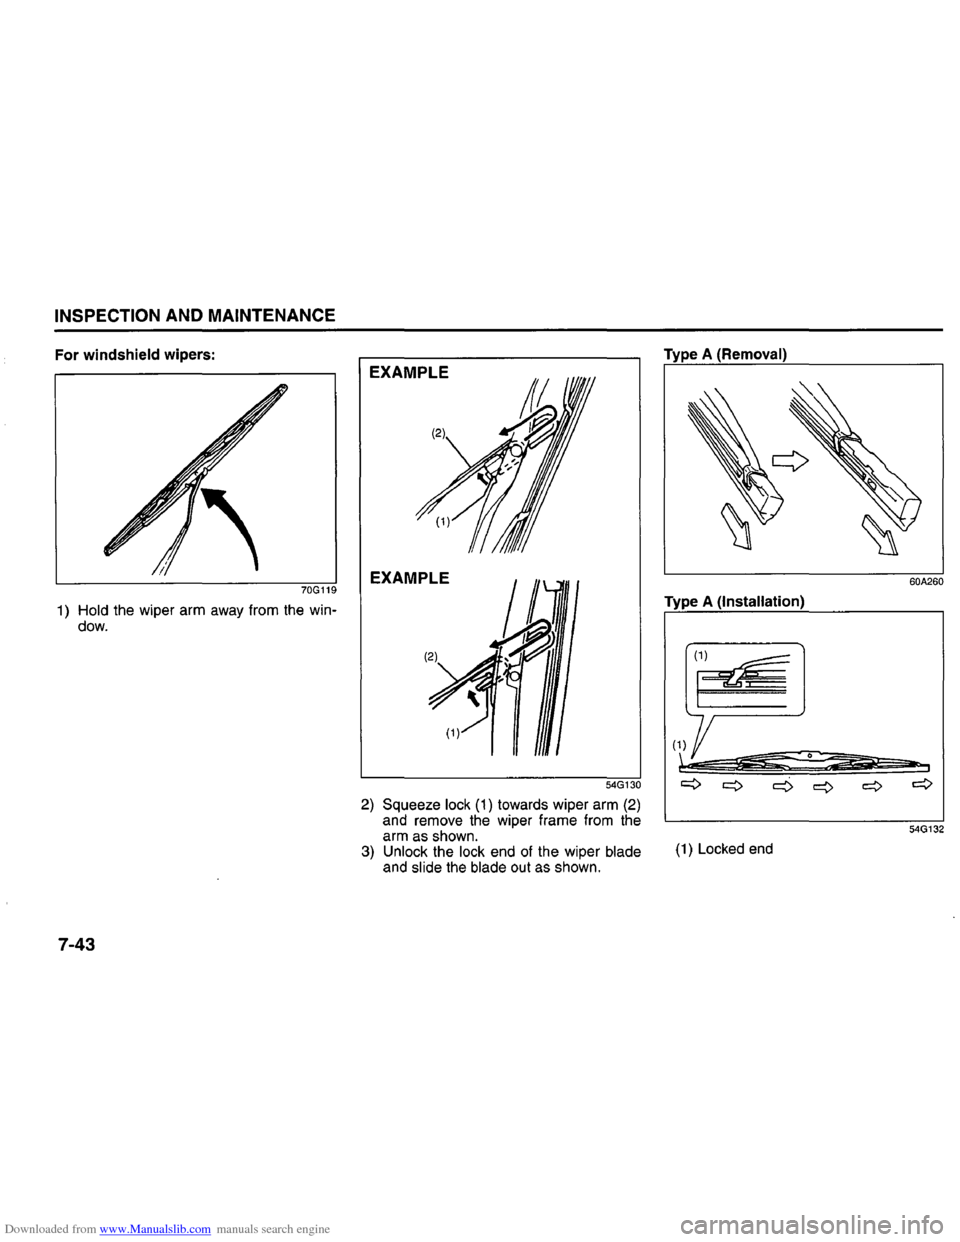
For windshield wipers:
70G119
1) Hold the wiper arm away from the window.
7-43
EXAMPLE
EXAMPLE
54G130
2) Squeeze lock (1) towards wiper arm (2) and remove the wiper frame from the
arm as shown.
3)
Unlock the lock end of the wiper blade and slide the blade out as shown.
Type A (Removal)
60A260
Type A (Installation)
..,
54G132
(1) Locked end
Page 45 of 48
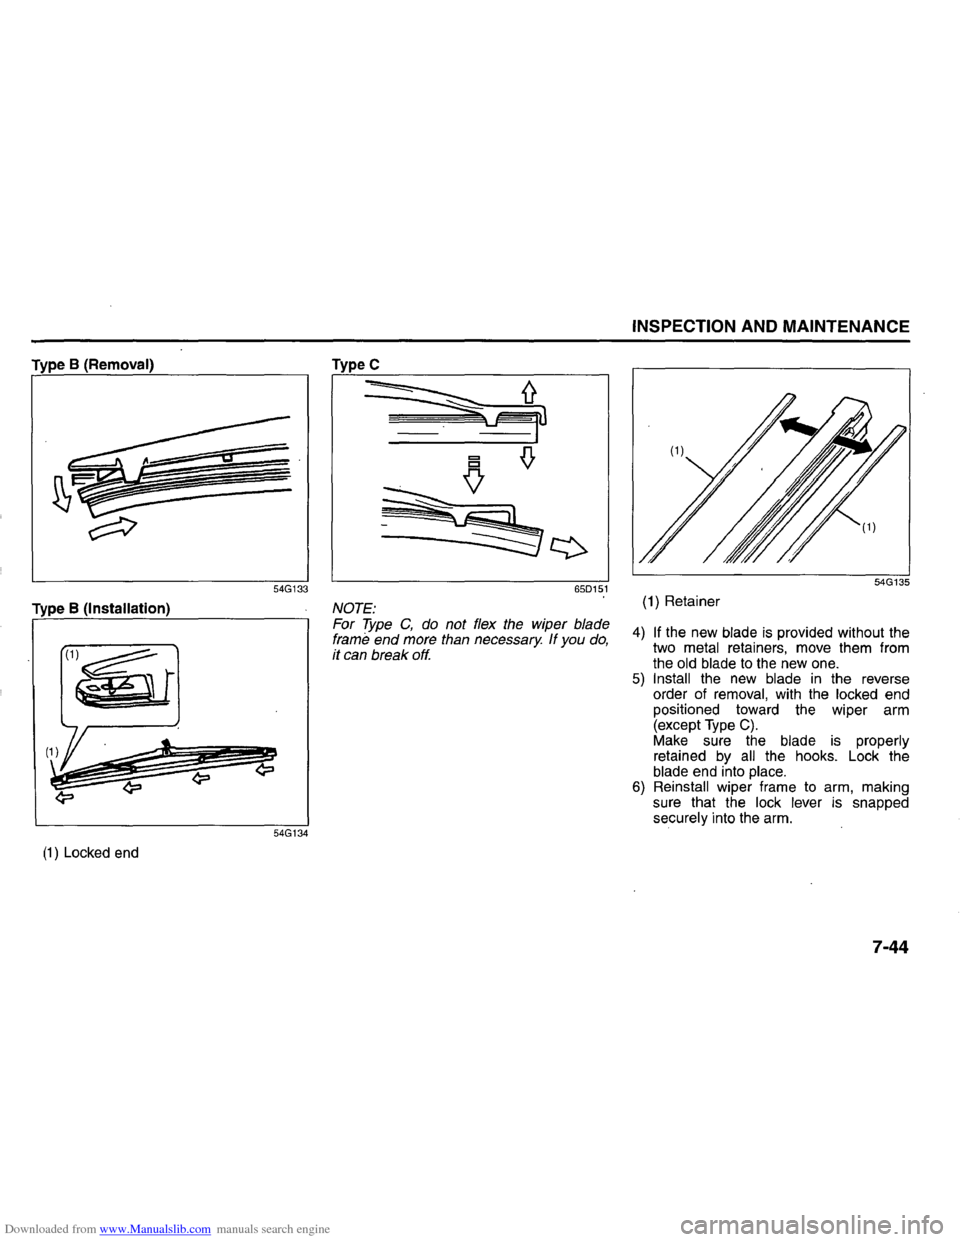
Downloaded from www.Manualslib.com manuals search engine Type B (Removal)
54G133
Type B (Installation)
54G134
(1) Locked end
TypeC
650151
NOTE:
For Type C, do not flex the wiper blade frame end more than necessary If you do, it can break off.
INSPECTION AND MAINTENANCE
(1) Retainer
4) If the new blade is provided without the
two metal retainers, move them from
the old blade to the new one. 5) Install the new blade in the reverse
order of removal, with the locked end
positioned toward the wiper arm
(except
Type C). Make sure the blade is properly
retained by all the hooks. Lock the
blade end into place.
6) Reinstall wiper frame to arm, making
sure that the lock lever is snapped
securely into the arm.
7-44
Page 46 of 48
Downloaded from www.Manualslib.com manuals search engine INSPECTION AND MAINTENANCE
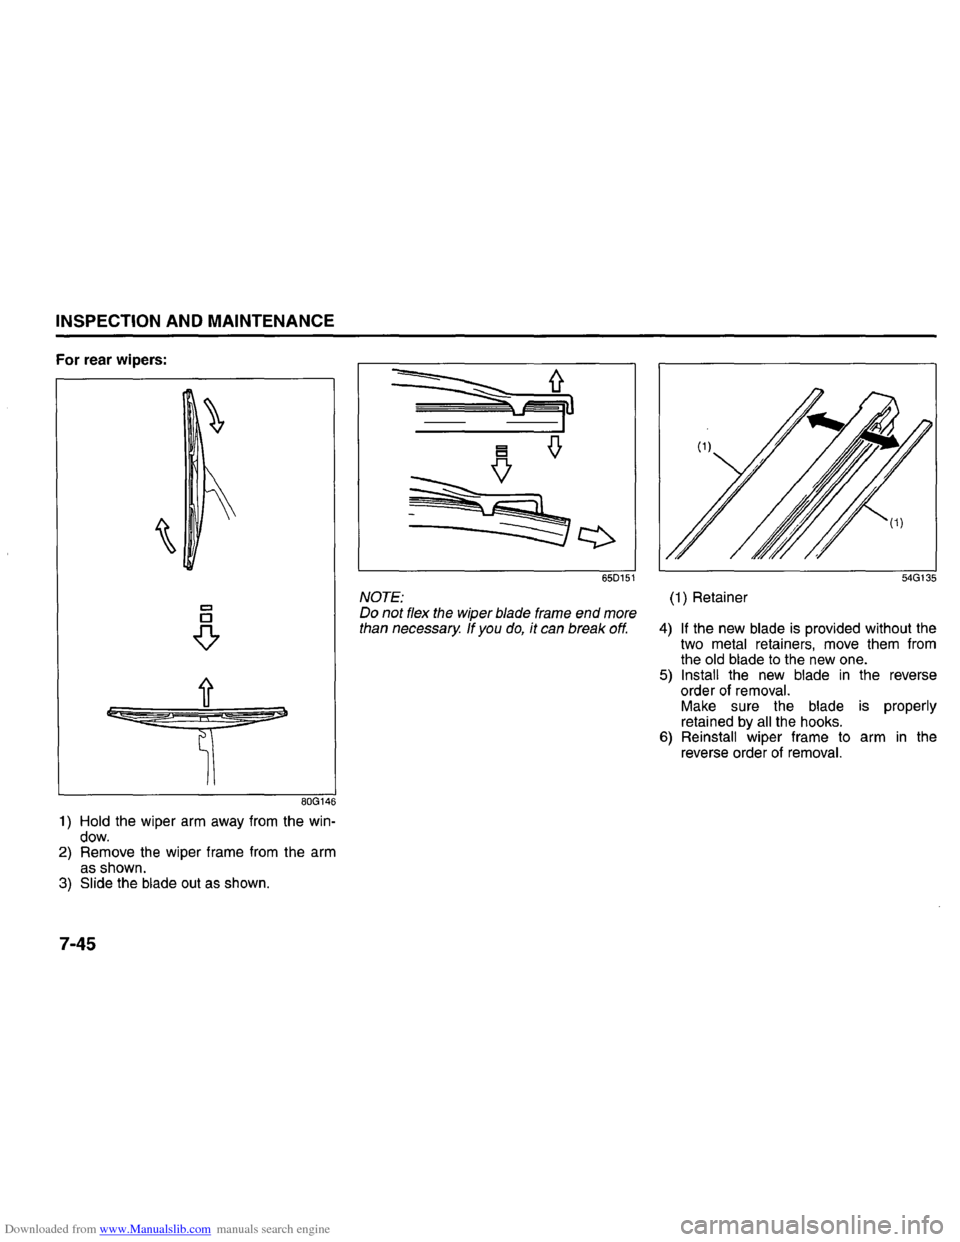
For rear wipers:
~\
80G146
1) Hold the wiper arm away from the window. 2) Remove the wiper frame from the arm as shown. 3) Slide the blade out as shown.
7-45
650151
NOTE: Do not flex the wiper blade frame end more
than necessary If you do, it can break off.
(1) Retainer
4) If the new blade is provided without the
two metal retainers, move them from
the old blade to the new one. 5) Install the new blade in the reverse
order of removal. Make sure the blade is properly retained by all the hooks. 6) Reinstall wiper frame to arm in the
reverse order of removal.
Page 47 of 48
Downloaded from www.Manualslib.com manuals search engine Windshield Washer Fluid
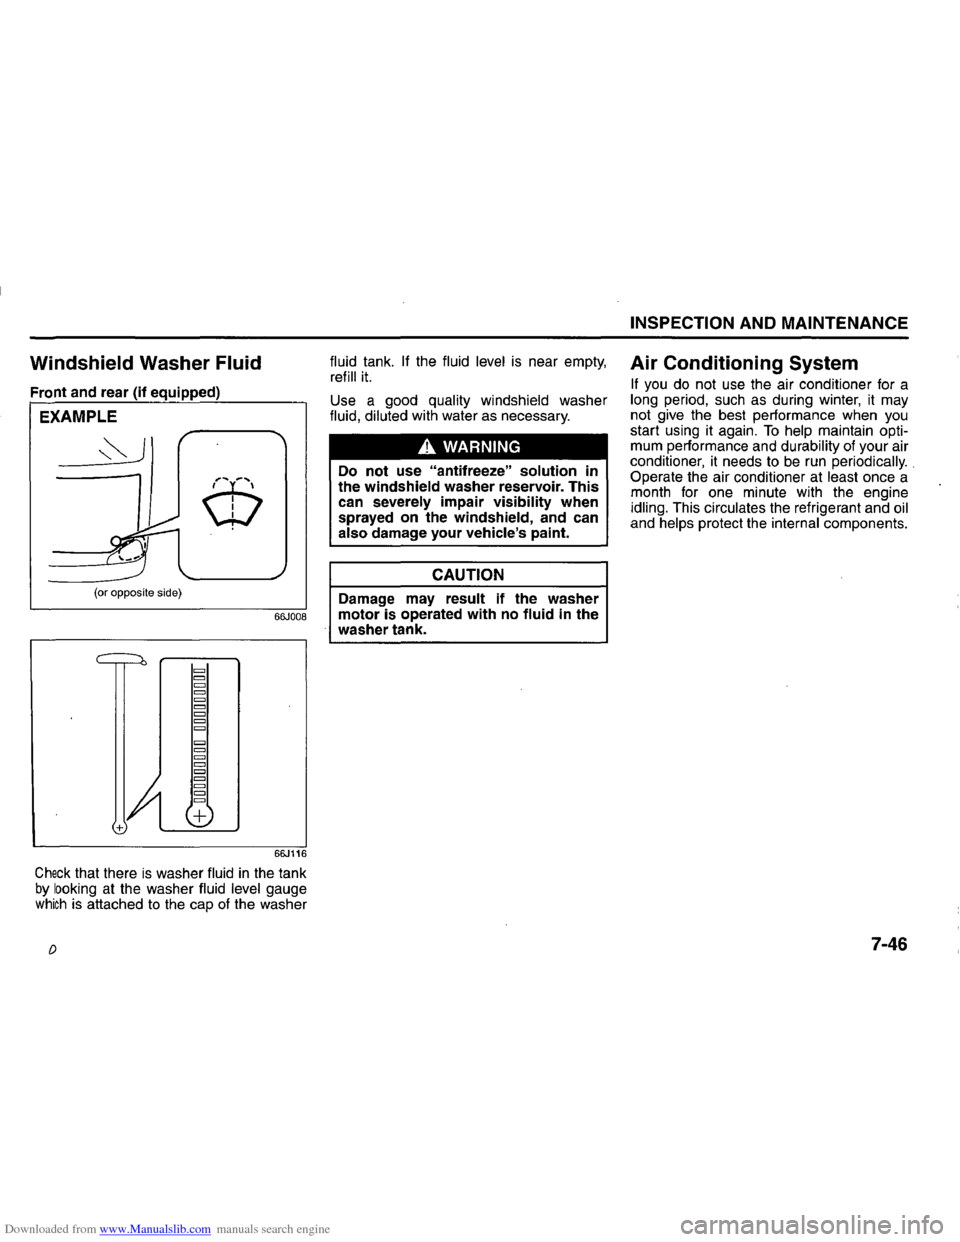
Front and rear (if equipped)
EXAMPLE
(or opposite side)
= = = = =
= =
= =
=
= = =
= = = = =
66JOOB
66J116
Check that there is washer fluid in the tank by looking at the washer fluid level gauge which is attached to the cap of the washer
D
fluid tank. If the fluid level is near empty, refill it.
Use a good quality windshield washer
fluid, diluted with water as necessary.
A WARNING
Do not use "antifreeze" solution in the windshield washer reservoir. This can severely impair visibility when
sprayed on the windshield, and can also damage your vehicle's paint.
CAUTION
Damage may result if the washer
motor is operated with no fluid in the
washer tank.
INSPECTION AND MAINTENANCE
Air Conditioning System
If you do not use the air conditioner for a long period, such as during winter, it may
not give the best performance when you start using it again. To help maintain opti
mum performance and durability of your air
conditioner, it needs to be run periodically .. Operate the air conditioner at least once a
month for one minute with the engine
idling. This circulates the refrigerant and oil and helps protect the internal components.
7-46
Page 48 of 48
Downloaded from www.Manualslib.com manuals search engine INSPECTION AND MAINTENANCE
MEMO
7-47
Trending: odometer, check engine, brake fluid, wiper fluid, trailer, spark plugs, coolant temperature
