manual transmission SUZUKI GRAND VITARA 2008 3.G Owners Manual
[x] Cancel search | Manufacturer: SUZUKI, Model Year: 2008, Model line: GRAND VITARA, Model: SUZUKI GRAND VITARA 2008 3.GPages: 290, PDF Size: 4.99 MB
Page 1 of 290

Part No. 99011-66J22-03E
July, 2007
OWNER’S MANUAL
99011-66J22-03E GRAND VITARA
Printed in Japan
See page 1-1
12.5 mm
Keep With Vehicle At All Times.
Contains Important Information
On Safety, Operation & Maintenance.
SERVICE STATION INFORMATION
Fuel recommendation: Brake and clutch fluid:
Engine oil recommendation: Automatic transmission fluid:
Tire cold pressure:
For further details, see “Engine Oil and Filter” in the
“INSPECTION AND MAINTENANCE” section.DOT3
See the “Tire Information Label” located on the
driver’s door lock pillar.
2008Engine oil with “Starburst” symbol
Made from 100% recycled paper,
except for cover.
ENGLISH
Suzuki Red: PANTONE 485
Suzuki Blue: PANTONE 294
SUZUKI ATF 3317 or Mobil ATF 3309
Page 62 of 290
3-1STEERING COLUMN CONTROLS
66J22-03E
65D611
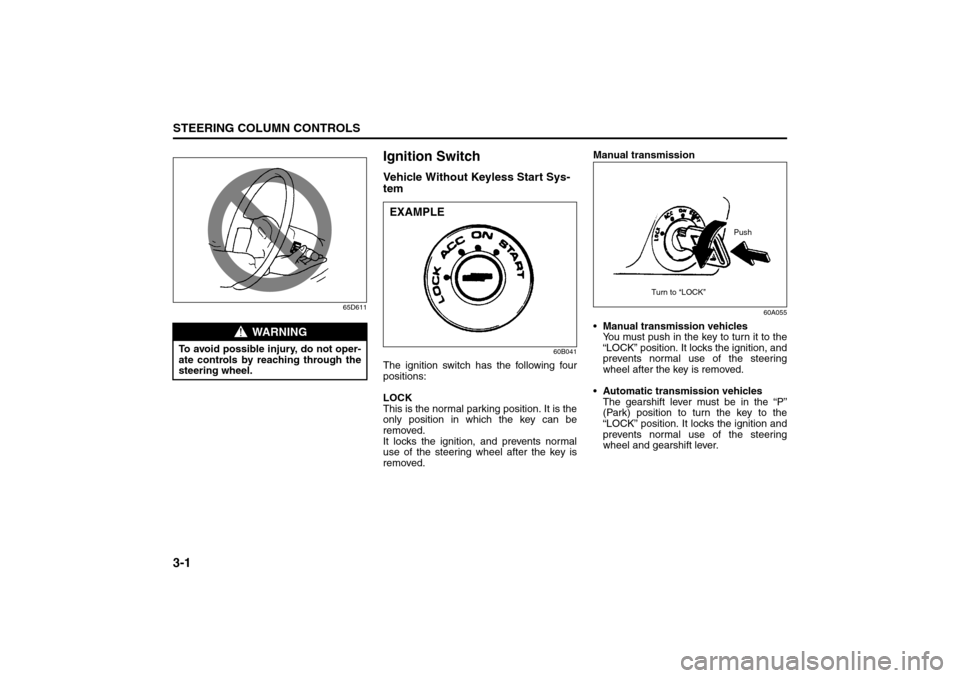
Ignition SwitchVehicle Without Keyless Start Sys-
tem
60B041
The ignition switch has the following four
positions:
LOCK
This is the normal parking position. It is the
only position in which the key can be
removed.
It locks the ignition, and prevents normal
use of the steering wheel after the key is
removed.Manual transmission
60A055
Manual transmission vehicles
You must push in the key to turn it to the
“LOCK” position. It locks the ignition, and
prevents normal use of the steering
wheel after the key is removed.
Automatic transmission vehicles
The gearshift lever must be in the “P”
(Park) position to turn the key to the
“LOCK” position. It locks the ignition and
prevents normal use of the steering
wheel and gearshift lever.
WARNING
To avoid possible injury, do not oper-
ate controls by reaching through the
steering wheel.
EXAMPLE
Push
Turn to “LOCK”
Ignition Switch: 8, 10
Page 65 of 290
3-4
STEERING COLUMN CONTROLS
66J22-03E
64J216
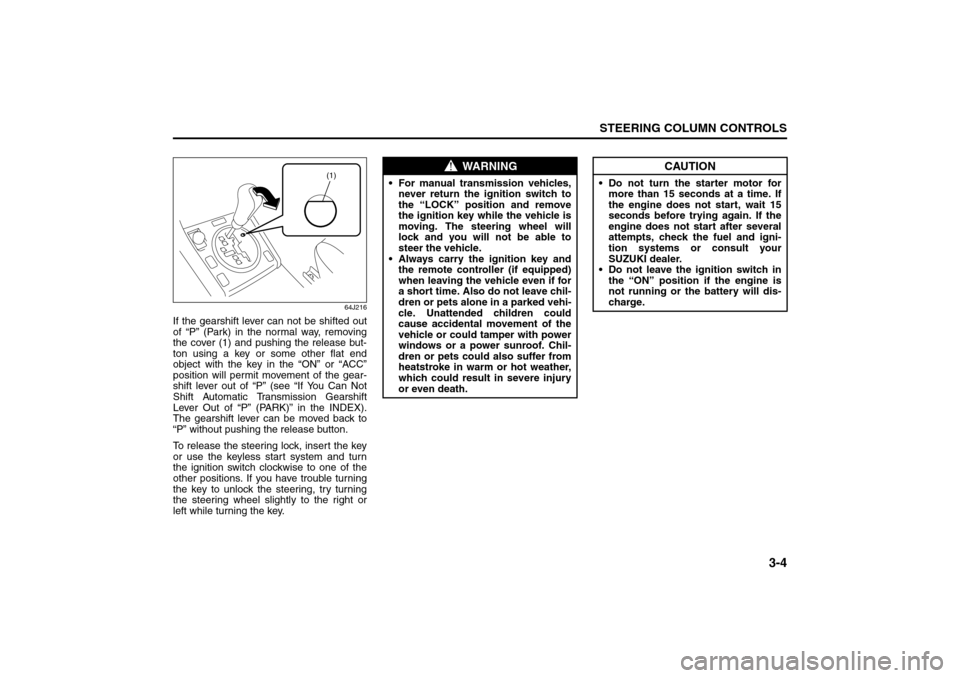
If the gearshift lever can not be shifted out
of “P” (Park) in the normal way, removing
the cover (1) and pushing the release but-
ton using a key or some other flat end
object with the key in the “ON” or “ACC”
position will permit movement of the gear-
shift lever out of “P” (see “If You Can Not
Shift Automatic Transmission Gearshift
Lever Out of “P” (PARK)” in the INDEX).
The gearshift lever can be moved back to
“P” without pushing the release button.
To release the steering lock, insert the key
or use the keyless start system and turn
the ignition switch clockwise to one of the
other positions. If you have trouble turning
the key to unlock the steering, try turning
the steering wheel slightly to the right or
left while turning the key.
(1)
WARNING
For manual transmission vehicles,
never return the ignition switch to
the “LOCK” position and remove
the ignition key while the vehicle is
moving. The steering wheel will
lock and you will not be able to
steer the vehicle.
Always carry the ignition key and
the remote controller (if equipped)
when leaving the vehicle even if for
a short time. Also do not leave chil-
dren or pets alone in a parked vehi-
cle. Unattended children could
cause accidental movement of the
vehicle or could tamper with power
windows or a power sunroof. Chil-
dren or pets could also suffer from
heatstroke in warm or hot weather,
which could result in severe injury
or even death.
CAUTION
Do not turn the starter motor for
more than 15 seconds at a time. If
the engine does not start, wait 15
seconds before trying again. If the
engine does not start after several
attempts, check the fuel and igni-
tion systems or consult your
SUZUKI dealer.
Do not leave the ignition switch in
the “ON” position if the engine is
not running or the battery will dis-
charge.
Ignition Switch: 8, 10
Page 132 of 290
5-1OTHER CONTROLS AND EQUIPMENT
66J22-03E
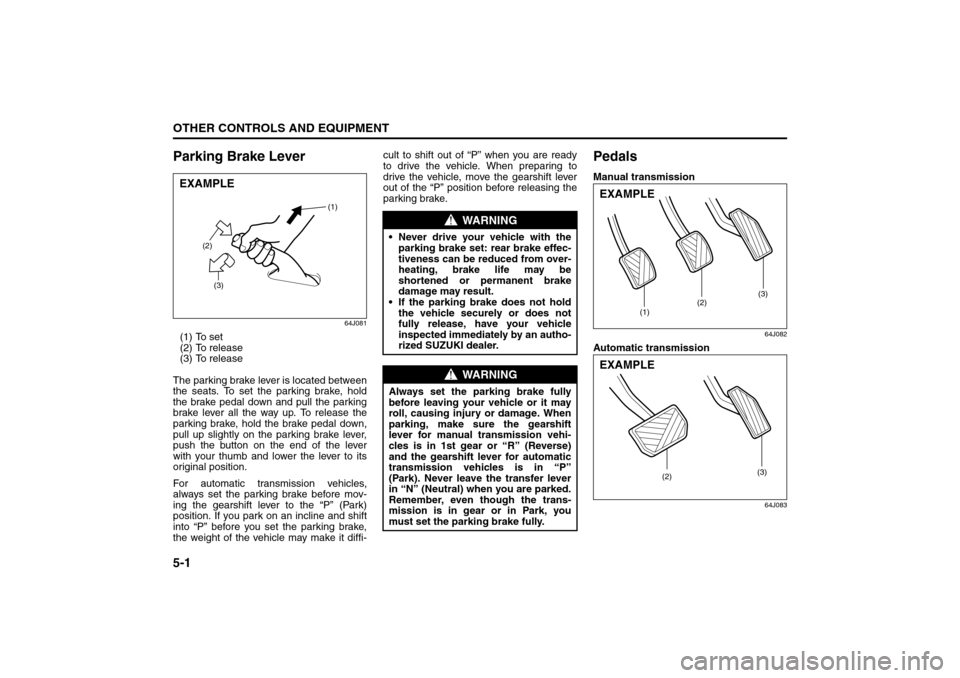
Parking Brake Lever
64J081
(1) To set
(2) To release
(3) To release
The parking brake lever is located between
the seats. To set the parking brake, hold
the brake pedal down and pull the parking
brake lever all the way up. To release the
parking brake, hold the brake pedal down,
pull up slightly on the parking brake lever,
push the button on the end of the lever
with your thumb and lower the lever to its
original position.
For automatic transmission vehicles,
always set the parking brake before mov-
ing the gearshift lever to the “P” (Park)
position. If you park on an incline and shift
into “P” before you set the parking brake,
the weight of the vehicle may make it diffi-cult to shift out of “P” when you are ready
to drive the vehicle. When preparing to
drive the vehicle, move the gearshift lever
out of the “P” position before releasing the
parking brake.
PedalsManual transmission
64J082
Automatic transmission
64J083
EXAMPLE
(2)
(3)(1)
WARNING
Never drive your vehicle with the
parking brake set: rear brake effec-
tiveness can be reduced from over-
heating, brake life may be
shortened or permanent brake
damage may result.
If the parking brake does not hold
the vehicle securely or does not
fully release, have your vehicle
inspected immediately by an autho-
rized SUZUKI dealer.
WARNING
Always set the parking brake fully
before leaving your vehicle or it may
roll, causing injury or damage. When
parking, make sure the gearshift
lever for manual transmission vehi-
cles is in 1st gear or “R” (Reverse)
and the gearshift lever for automatic
transmission vehicles is in “P”
(Park). Never leave the transfer lever
in “N” (Neutral) when you are parked.
Remember, even though the trans-
mission is in gear or in Park, you
must set the parking brake fully.
(1)(2)(3)
EXAMPLE
(2)(3)
EXAMPLE
Parking Brake Lever: 6
Pedals: 6
Page 133 of 290
5-2
OTHER CONTROLS AND EQUIPMENT
66J22-03E
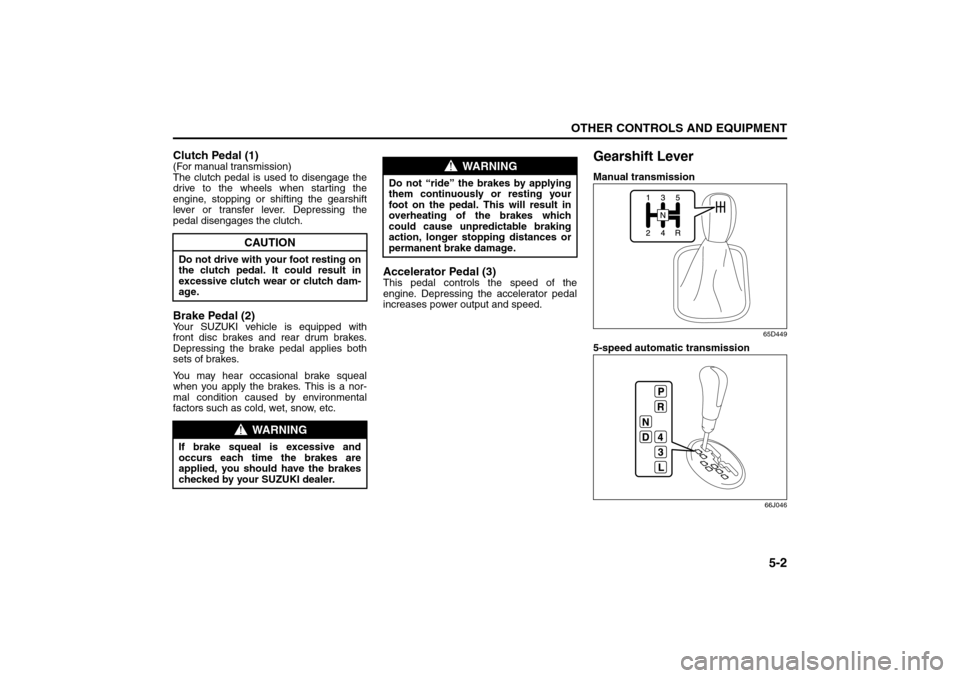
Clutch Pedal (1)(For manual transmission)
The clutch pedal is used to disengage the
drive to the wheels when starting the
engine, stopping or shifting the gearshift
lever or transfer lever. Depressing the
pedal disengages the clutch.Brake Pedal (2)Your SUZUKI vehicle is equipped with
front disc brakes and rear drum brakes.
Depressing the brake pedal applies both
sets of brakes.
You may hear occasional brake squeal
when you apply the brakes. This is a nor-
mal condition caused by environmental
factors such as cold, wet, snow, etc.
Accelerator Pedal (3)This pedal controls the speed of the
engine. Depressing the accelerator pedal
increases power output and speed.
Gearshift LeverManual transmission
65D449
5-speed automatic transmission
66J046
CAUTION
Do not drive with your foot resting on
the clutch pedal. It could result in
excessive clutch wear or clutch dam-
age.
WARNING
If brake squeal is excessive and
occurs each time the brakes are
applied, you should have the brakes
checked by your SUZUKI dealer.
WARNING
Do not “ride” the brakes by applying
them continuously or resting your
foot on the pedal. This will result in
overheating of the brakes which
could cause unpredictable braking
action, longer stopping distances or
permanent brake damage.
Pedals: 6
Gearshift Lever: 10
Page 134 of 290
5-3OTHER CONTROLS AND EQUIPMENT
66J22-03E
Your vehicle is equipped with either a
manual transmission or automatic trans-
mission. The gearshift lever for each trans-
mission type is shown in the illustrations.
For details on how to use the transmission,
refer to the “Using the Transmission” in
“OPERATING YOUR VEHICLE” section.
Fuel Filler Cap
64J085
64J253
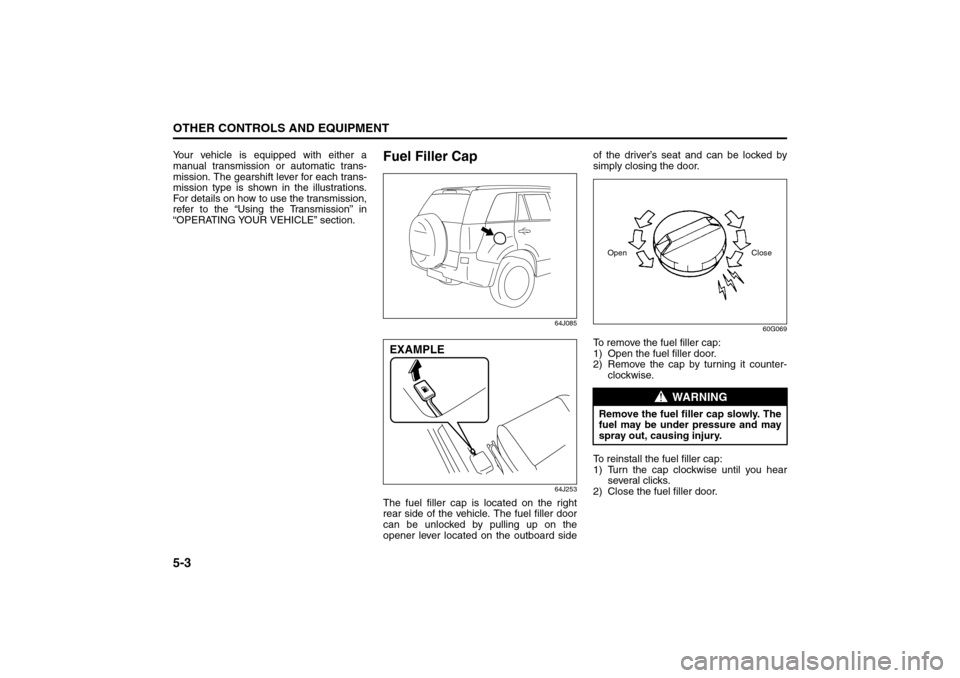
The fuel filler cap is located on the right
rear side of the vehicle. The fuel filler door
can be unlocked by pulling up on the
opener lever located on the outboard sideof the driver’s seat and can be locked by
simply closing the door.
60G069
To remove the fuel filler cap:
1) Open the fuel filler door.
2) Remove the cap by turning it counter-
clockwise.
To reinstall the fuel filler cap:
1) Turn the cap clockwise until you hear
several clicks.
2) Close the fuel filler door.
EXAMPLE
WARNING
Remove the fuel filler cap slowly. The
fuel may be under pressure and may
spray out, causing injury.Open Close
Gearshift Lever: 10
Fuel Filler Cap: 5
Page 161 of 290
6-2
OPERATING YOUR VEHICLE
66J22-03E
Daily Inspection ChecklistBefore Driving1) Make sure that windows, mirrors, lights
and reflectors are clean and unob-
structed.
2) Visually check the tires for the following
points:
– the depth of the tread groove
– abnormal wear, cracks and damage
– loose wheel nuts
– existence of foreign material such as
nails, stones, etc.
Refer to “Tires” in “INSPECTION AND
MAINTENANCE” section for details.
3) Look for fluid, oil leaks.
NOTE:
It is normal for water to drip from the air
conditioning system after use.
4) Make sure the hood is fully closed and
latched.
5) Check the headlights, turn signal lights,
brake lights and horn for proper opera-
tion.
6) Lock all doors.
7) Adjust the seat and adjustable head
restraints (if equipped).
8) Check the brake pedal and the parking
brake lever.
9) Adjust the mirrors.
10)Make sure that you and all passengers
have properly fastened your seat belts.11)Make sure that all warning lights come
on as the key is turned to the “ON” or
“START” position.
12)Check all gauges.
13)Make sure that the BRAKE SYSTEM
WARNING light turns off when the
parking brake is released.
Once a week, or each time you fill your fuel
tank, perform the following under-hood
checks:
1) Engine oil level
2) Coolant level
3) Brake fluid level
4) Power steering (if equipped) fluid level
5) Windshield washer fluid level
6) Hood latch operation
Pull the hood release handle inside the
vehicle. Make sure that you cannot
open the hood all the way without
releasing the secondary latch. Be sure
to close the hood securely after check-
ing for proper latch operation. See the
item “All Latches, Hinges and Locks” of
“CHASSIS AND BODY” in the “Periodic
Maintenance Schedule” in the
“INSPECTION AND MAINTENANCE”
section for lubrication schedule.
Starting the EngineBefore Starting the Engine1) Make sure the parking brake is set fully.
2) Manual Transmission – Shift into “N”
(Neutral) and depress the clutch pedal
all the way to the floor.
Hold it while starting the engine.
Automatic Transmission – If the gear-
shift lever is not in “P” (Park) position,
shift into “P”. (If you need to re-start the
engine while the vehicle is moving, shift
into “N”.)
NOTE:
The engine of manual transmission vehicle
will not start unless the clutch pedal is
depressed.
NOTE:
Automatic transmission vehicles have a
starter interlock device which is designed
to keep the starter from operating if the
transmission is in any of the drive posi-
tions.
WARNING
Make sure the hood is fully closed
and latched before driving. If it is not,
it can fly up unexpectedly during
driving, obstructing your view and
resulting in an accident.
WARNING
Make sure that the parking brake is
set fully and the transmission is in
Neutral (or Park for vehicles with an
automatic transmission) before
attempting to start the engine.
Daily Inspection Checklist: NO
Starting the Engine: 1
Page 166 of 290
6-7OPERATING YOUR VEHICLE
66J22-03E
Manual Transmission
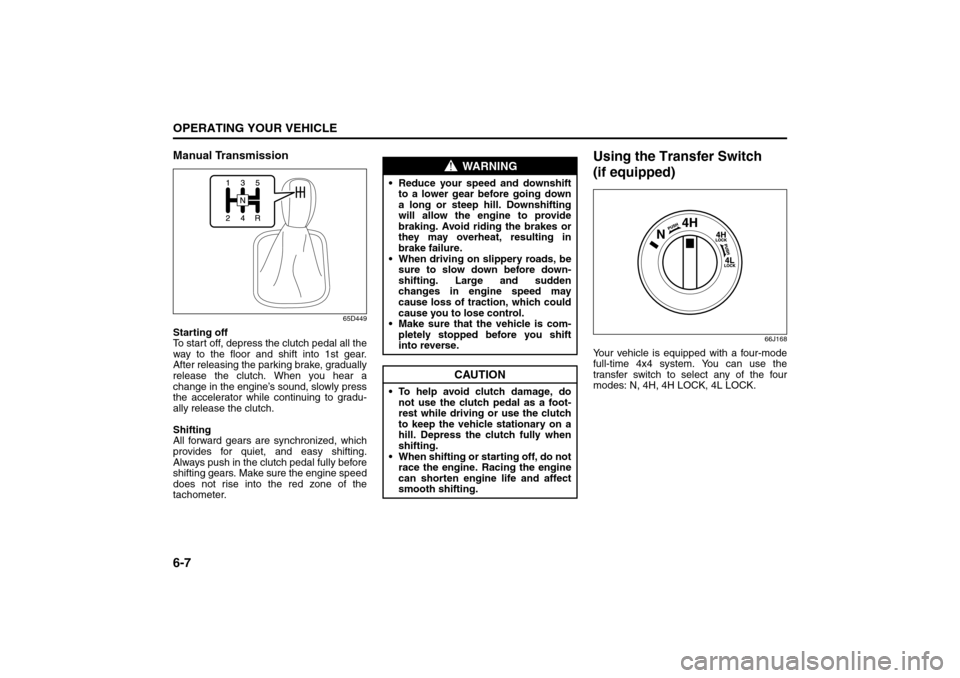
65D449
Starting off
To start off, depress the clutch pedal all the
way to the floor and shift into 1st gear.
After releasing the parking brake, gradually
release the clutch. When you hear a
change in the engine’s sound, slowly press
the accelerator while continuing to gradu-
ally release the clutch.
Shifting
All forward gears are synchronized, which
provides for quiet, and easy shifting.
Always push in the clutch pedal fully before
shifting gears. Make sure the engine speed
does not rise into the red zone of the
tachometer.
Using the Transfer Switch
(if equipped)
66J168
Your vehicle is equipped with a four-mode
full-time 4x4 system. You can use the
transfer switch to select any of the four
modes: N, 4H, 4H LOCK, 4L LOCK.
WARNING
Reduce your speed and downshift
to a lower gear before going down
a long or steep hill. Downshifting
will allow the engine to provide
braking. Avoid riding the brakes or
they may overheat, resulting in
brake failure.
When driving on slippery roads, be
sure to slow down before down-
shifting. Large and sudden
changes in engine speed may
cause loss of traction, which could
cause you to lose control.
Make sure that the vehicle is com-
pletely stopped before you shift
into reverse.
CAUTION
To help avoid clutch damage, do
not use the clutch pedal as a foot-
rest while driving or use the clutch
to keep the vehicle stationary on a
hill. Depress the clutch fully when
shifting.
When shifting or starting off, do not
race the engine. Racing the engine
can shorten engine life and affect
smooth shifting.
Using the Transmission: 10
Page 191 of 290

7-4
DRIVING TIPS
66J22-03E
Off-Road DrivingYour vehicle has specific design character-
istics for off-road driving. When you leave
the pavement, you will encounter driving
surfaces of all kinds which may change
continually as you drive. In most cases, off-
road driving requires the use of 4-wheel
drive. If your vehicle is a 2-wheel drive
vehicle, you should limit your off-road driv-
ing only to hard, flat, nonslippery surfaces.
2-wheel drive vehicles have far less trac-
tion on off-road surfaces than 4-wheel
drive vehicles. It is important when driving
off-road to follow the guidelines below.
Use Caution on Steep Inclines
Always inspect hills before you attempt to
drive up them. Know what is on the other
side and how you will get back down. If you
have any doubt that it is safe, do not
attempt to drive over a hill. Never drive
your vehicle up an extremely steep incline.
Coming down a steep hill can be trickier
than getting up one. Keep the vehicle
heading straight down the hill and use low
gear. Do not lock the brakes. If the vehicle
begins to slide, accelerate slightly to regain
steering control.Do Not Turn on or Drive Across the Side
of Hills
Turning on or driving across the side of a
hill can be extremely hazardous. Most of
the vehicle’s weight will be transferred to
the downhill tires, which could result in the
vehicle rolling sideways. Whenever possi-
ble, avoid this potential hazard. Also, if you
have to exit your vehicle on a side-hill,
always get out on the uphill side.
Wear Your Seat Belts at All Times
You and your passengers should use the
seat belts at all times when driving off-
road. For proper seat belt use, refer to the
“Seat Belts and Child Restraint Systems”
section in this manual.
Avoid Sudden Reactions in Mud, Ice or
Snow
Be careful when off-road conditions are
slick. Reduce your speed and avoid sud-
den movements of the vehicle. If your vehi-
cle is a 2-wheel drive vehicle, do not drive
in deep snow or mud. If your vehicle is a 4-
wheel drive vehicle, be aware that driving
in deep snow or mud can cause a loss of
traction and an increase in the resistance
to the vehicle’s forward motion. Use 4WD
low gear (4L) and maintain a steady but
moderate speed with a light touch on the
steering wheel and brakes.Do not drive in the field covered with
grown grass
If you drive in the field covered with grass,
it may cause unexpected accident or vehi-
cle damage by getting caught in grown
grass.
If Your Vehicle Gets Stuck
If your vehicle gets stuck in snow, mud or
sand, follow the directions below:
1) (For vehicles equipped with transfer
switch) Turn the transfer switch to “4H
LOCK” or “4L LOCK”.
2) Shift the transmission back and forth
between a forward range (or first gear
for manual transmission) and reverse.
This will create a rocking motion which
may give you enough momentum to
free the vehicle. Press gently on the
accelerator to keep wheel spin to a min-
imum. Remove your foot from the
accelerator while shifting.
Do not race the engine. Excessive
wheel spin will cause the tires to dig
deeper, making it more difficult to free
the vehicle.
3) If your vehicle remains stuck after a few
minutes of rocking, get another vehicle
to pull you out.
Off-Road Driving: NO
Page 201 of 290
8-6
VEHICLE LOADING AND TOWING
66J22-03E
60A186
WARNING
(Continued)
Avoid “riding” the brakes. “Riding”
the brakes could cause the brakes
to overheat, resulting in reduced
braking efficiency. Use engine
braking as much as possible.
Because of the added trailer
weight, your engine may overheat
on hot days when going up long or
steep hills. Pay attention to your
engine temperature gauge. If it indi-
cates overheating, pull off the road
and stop in a safe place. Refer to
the “If the Engine Overheats” in
“EMERGENCY SERVICE” section
for details on how to proceed.
WARNING
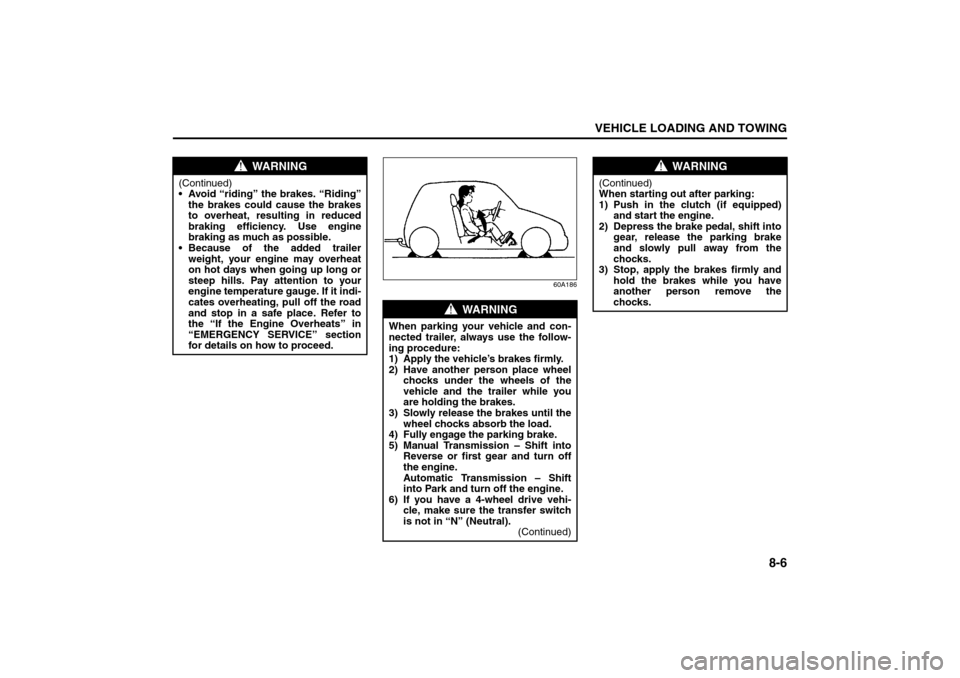
When parking your vehicle and con-
nected trailer, always use the follow-
ing procedure:
1) Apply the vehicle’s brakes firmly.
2) Have another person place wheel
chocks under the wheels of the
vehicle and the trailer while you
are holding the brakes.
3) Slowly release the brakes until the
wheel chocks absorb the load.
4) Fully engage the parking brake.
5) Manual Transmission – Shift into
Reverse or first gear and turn off
the engine.
Automatic Transmission – Shift
into Park and turn off the engine.
6) If you have a 4-wheel drive vehi-
cle, make sure the transfer switch
is not in “N” (Neutral).
(Continued)
WARNING
(Continued)
When starting out after parking:
1) Push in the clutch (if equipped)
and start the engine.
2) Depress the brake pedal, shift into
gear, release the parking brake
and slowly pull away from the
chocks.
3) Stop, apply the brakes firmly and
hold the brakes while you have
another person remove the
chocks.
Trailer Towing: 5, 11, 13