child seat SUZUKI GRAND VITARA 2011 Owner's Manual
[x] Cancel search | Manufacturer: SUZUKI, Model Year: 2011, Model line: GRAND VITARA, Model: SUZUKI GRAND VITARA 2011Pages: 337, PDF Size: 6.21 MB
Page 55 of 337
2-38
BEFORE DRIVING
79K21-03E
To revert from ALR to ELR
65D267
When you unbuckle the seat belt and allow
it to retract to a certain length, the retractor
will automatically revert back to the normal
ELR mode.
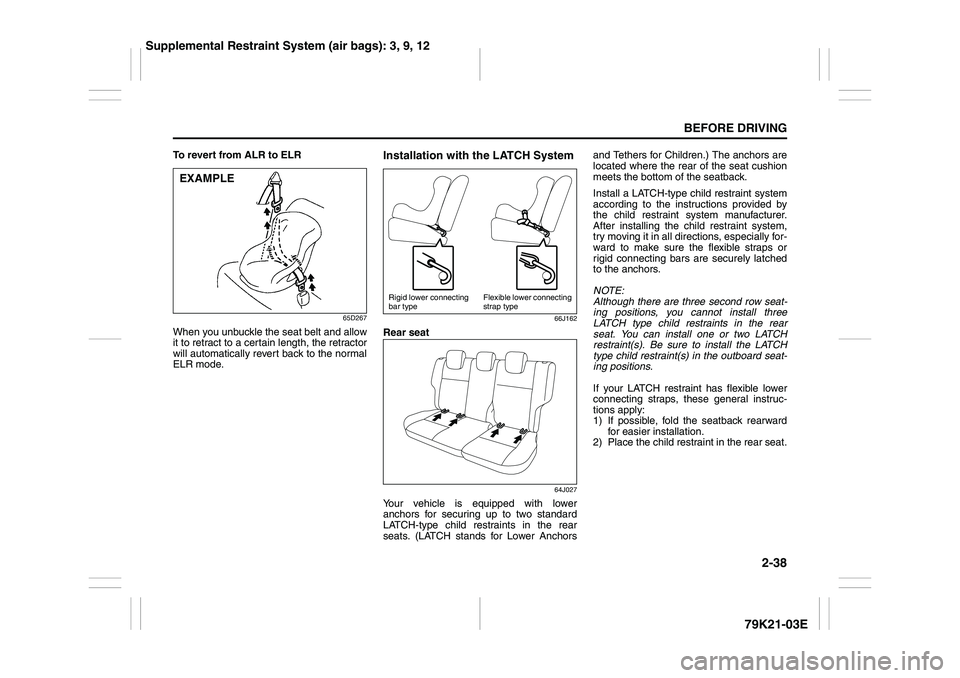
Installation with the LATCH System
66J162
Rear seat
64J027
Your vehicle is equipped with lower
anchors for securing up to two standard
LATCH-type child restraints in the rear
seats. (LATCH stands for Lower Anchorsand Tethers for Children.) The anchors are
located where the rear of the seat cushion
meets the bottom of the seatback.
Install a LATCH-type child restraint system
according to the instructions provided by
the child restraint system manufacturer.
After installing the child restraint system,
try moving it in all directions, especially for-
ward to make sure the flexible straps or
rigid connecting bars are securely latched
to the anchors.
NOTE:
Although there are three second row seat-
ing positions, you cannot install three
LATCH type child restraints in the rear
seat. You can install one or two LATCH
restraint(s). Be sure to install the LATCH
type child restraint(s) in the outboard seat-
ing positions.
If your LATCH restraint has flexible lower
connecting straps, these general instruc-
tions apply:
1) If possible, fold the seatback rearward
for easier installation.
2) Place the child restraint in the rear seat.
EXAMPLE
Rigid lower connecting
bar typeFlexible lower connecting
strap type
Supplemental Restraint System (air bags): 3, 9, 12
Page 56 of 337
2-39BEFORE DRIVING
79K21-03E
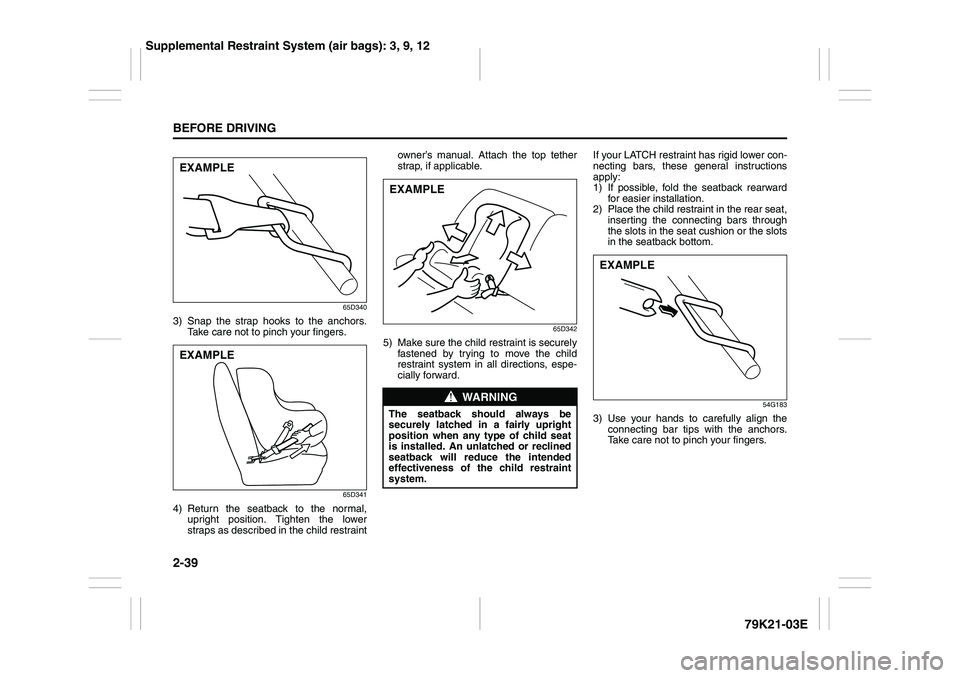
65D340
3) Snap the strap hooks to the anchors.
Take care not to pinch your fingers.
65D341
4) Return the seatback to the normal,
upright position. Tighten the lower
straps as described in the child restraintowner’s manual. Attach the top tether
strap, if applicable.
65D342
5) Make sure the child restraint is securely
fastened by trying to move the child
restraint system in all directions, espe-
cially forward.If your LATCH restraint has rigid lower con-
necting bars, these general instructions
apply:
1) If possible, fold the seatback rearward
for easier installation.
2) Place the child restraint in the rear seat,
inserting the connecting bars through
the slots in the seat cushion or the slots
in the seatback bottom.
54G183
3) Use your hands to carefully align the
connecting bar tips with the anchors.
Take care not to pinch your fingers.
EXAMPLEEXAMPLE
WARNING
The seatback should always be
securely latched in a fairly upright
position when any type of child seat
is installed. An unlatched or reclined
seatback will reduce the intended
effectiveness of the child restraint
system.EXAMPLE
EXAMPLE
Supplemental Restraint System (air bags): 3, 9, 12
Page 57 of 337
2-40
BEFORE DRIVING
79K21-03E
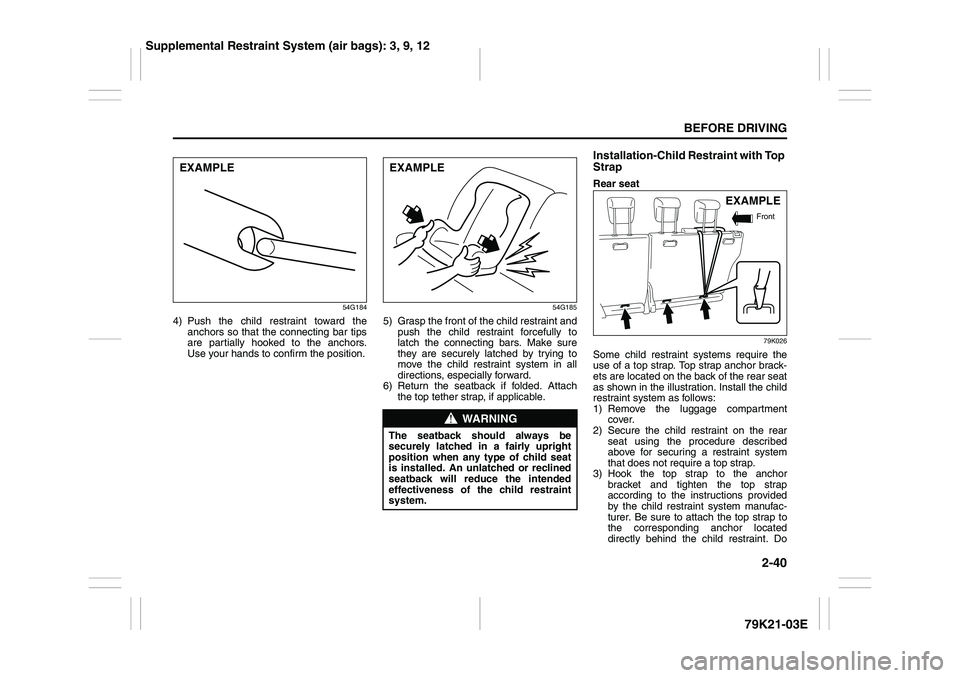
54G184
4) Push the child restraint toward the
anchors so that the connecting bar tips
are partially hooked to the anchors.
Use your hands to confirm the position.
54G185
5) Grasp the front of the child restraint and
push the child restraint forcefully to
latch the connecting bars. Make sure
they are securely latched by trying to
move the child restraint system in all
directions, especially forward.
6) Return the seatback if folded. Attach
the top tether strap, if applicable.
Installation-Child Restraint with Top
StrapRear seat
79K026
Some child restraint systems require the
use of a top strap. Top strap anchor brack-
ets are located on the back of the rear seat
as shown in the illustration. Install the child
restraint system as follows:
1) Remove the luggage compartment
cover.
2) Secure the child restraint on the rear
seat using the procedure described
above for securing a restraint system
that does not require a top strap.
3) Hook the top strap to the anchor
bracket and tighten the top strap
according to the instructions provided
by the child restraint system manufac-
turer. Be sure to attach the top strap to
the corresponding anchor located
directly behind the child restraint. Do
EXAMPLE
WARNING
The seatback should always be
securely latched in a fairly upright
position when any type of child seat
is installed. An unlatched or reclined
seatback will reduce the intended
effectiveness of the child restraint
system.EXAMPLE
EXAMPLE
Front
Supplemental Restraint System (air bags): 3, 9, 12
Page 58 of 337
2-41BEFORE DRIVING
79K21-03E
not attach the top strap to the luggage
restraint loops (if equipped).
86G032
4) When routing the top strap, be sure to
pass it between the head restraint and
the rear seatback as shown. (Refer to
“Head Restraints” section for details onhow to raise or lower the head
restraint.)
5) Make sure that cargo does not interfere
with routing of the top strap.
Seat Belt Extender
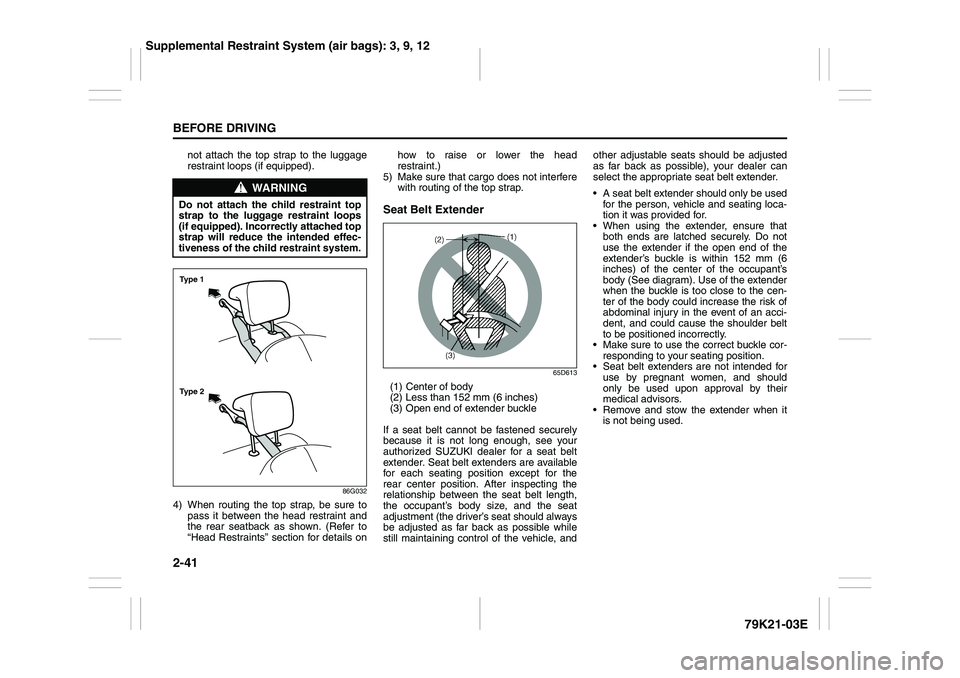
65D613
(1) Center of body
(2) Less than 152 mm (6 inches)
(3) Open end of extender buckle
If a seat belt cannot be fastened securely
because it is not long enough, see your
authorized SUZUKI dealer for a seat belt
extender. Seat belt extenders are available
for each seating position except for the
rear center position. After inspecting the
relationship between the seat belt length,
the occupant’s body size, and the seat
adjustment (the driver’s seat should always
be adjusted as far back as possible while
still maintaining control of the vehicle, andother adjustable seats should be adjusted
as far back as possible), your dealer can
select the appropriate seat belt extender.
A seat belt extender should only be used
for the person, vehicle and seating loca-
tion it was provided for.
When using the extender, ensure that
both ends are latched securely. Do not
use the extender if the open end of the
extender’s buckle is within 152 mm (6
inches) of the center of the occupant’s
body (See diagram). Use of the extender
when the buckle is too close to the cen-
ter of the body could increase the risk of
abdominal injury in the event of an acci-
dent, and could cause the shoulder belt
to be positioned incorrectly.
Make sure to use the correct buckle cor-
responding to your seating position.
Seat belt extenders are not intended for
use by pregnant women, and should
only be used upon approval by their
medical advisors.
Remove and stow the extender when it
is not being used.
WARNING
Do not attach the child restraint top
strap to the luggage restraint loops
(if equipped). Incorrectly attached top
strap will reduce the intended effec-
tiveness of the child restraint system.Ty p e 2 Ty p e 1
Supplemental Restraint System (air bags): 3, 9, 12
Page 60 of 337
2-43BEFORE DRIVING
79K21-03E
tion and the instructions and precautions
about the seat belts in this “Seat Belts and
Child Restraint Systems” section for details
on proper seat and seat belt adjustments.
Please note that the pretensioners along
with the front air bags will activate in
severe frontal collisions. Also, the preten-
sioners along with the side curtain air bags
will activate in severe rollovers. They are
not designed to activate in rear impacts,
side impacts, or minor frontal collisions.
The pretensioners can be activated only
once. If the pretensioners are activated
(that is, if the front air bags and/or the side
curtain air bags are activated), have the
pretensioner system serviced by an autho-
rized SUZUKI dealer as soon as possible.
If the “AIR BAG” light on the instrument
cluster does not blink or come on briefly
when the ignition switch is turned to the
“ON” position, stays on for more than 10
seconds, or comes on while driving, the
pretensioner system or the air bag system
may not work properly. Have both systems
inspected by an authorized SUZUKI dealer
as soon as possible.
Service on or around the pretensioner sys-
tem components or wiring must be per-
formed only by an authorized SUZUKI
dealer who is specially trained. Improper
service could result in unintended activa-
tion of pretensioners or could render the
pretensioner inoperative. Either of thesetwo conditions may result in personal
injury.
To prevent damage or unintended activa-
tion of the pretensioners, be sure the bat-
tery is disconnected and the ignition switch
has been in the “LOCK” position for at least
90 seconds before performing any electri-
cal service work on your SUZUKI. Do not
touch pretensioner system components or
wiring. The wires are wrapped with yellow
tape or yellow tubing, and the couplers are
yellow. When scrapping your SUZUKI, ask
your SUZUKI dealer, body repair shop or
scrap yard for assistance.
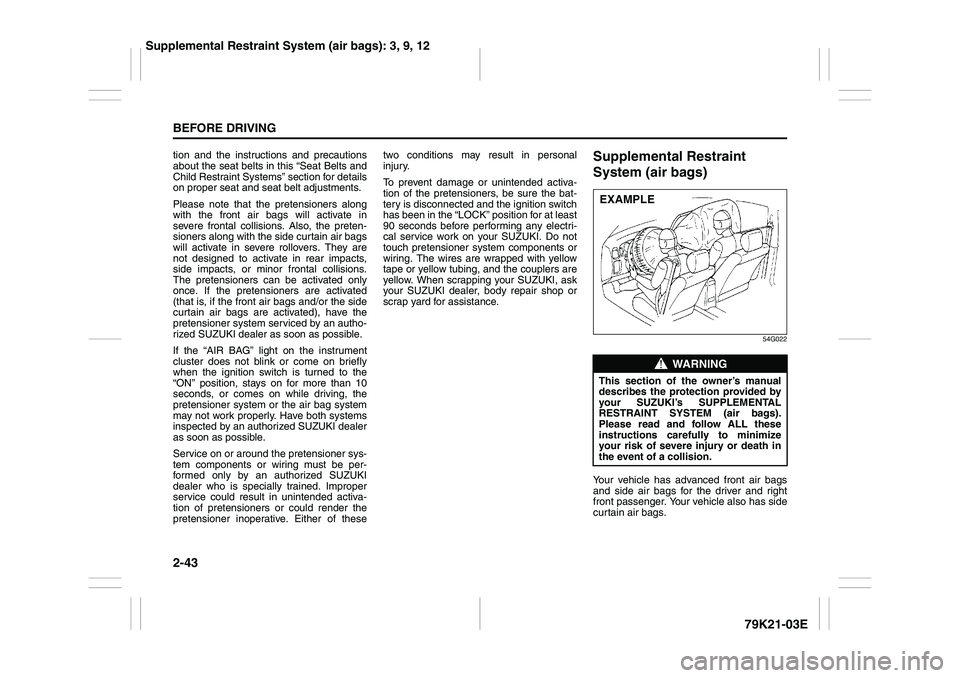
Supplemental Restraint
System (air bags)
54G022
Your vehicle has advanced front air bags
and side air bags for the driver and right
front passenger. Your vehicle also has side
curtain air bags.
WARNING
This section of the owner’s manual
describes the protection provided by
your SUZUKI’s SUPPLEMENTAL
RESTRAINT SYSTEM (air bags).
Please read and follow ALL these
instructions carefully to minimize
your risk of severe injury or death in
the event of a collision.EXAMPLE
Supplemental Restraint System (air bags): 3, 9, 12
Page 66 of 337
2-49BEFORE DRIVING
79K21-03E
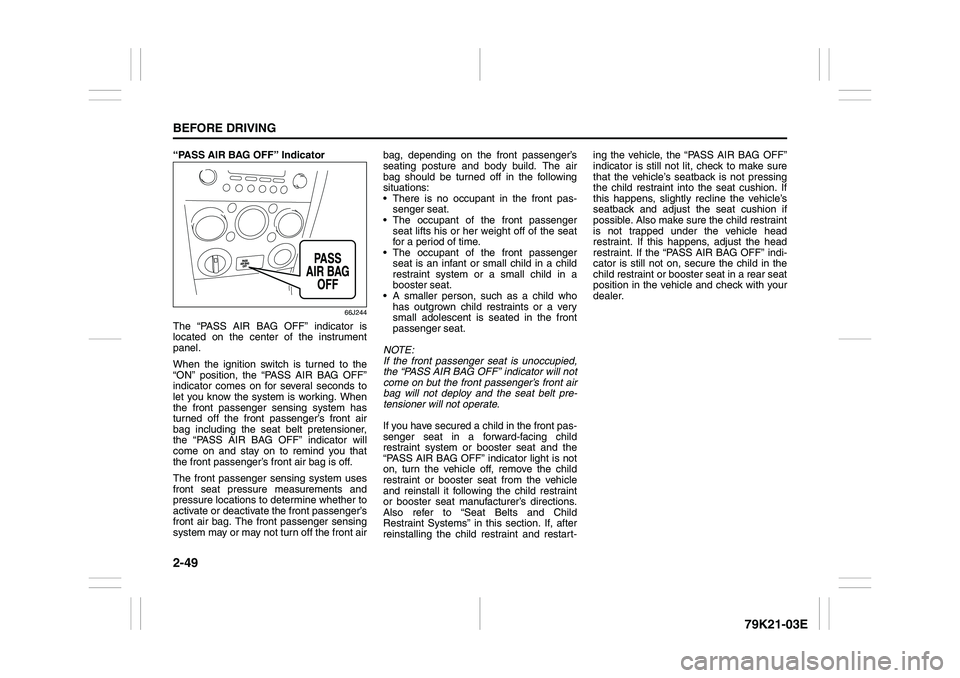
“PASS AIR BAG OFF” Indicator
66J244
The “PASS AIR BAG OFF” indicator is
located on the center of the instrument
panel.
When the ignition switch is turned to the
“ON” position, the “PASS AIR BAG OFF”
indicator comes on for several seconds to
let you know the system is working. When
the front passenger sensing system has
turned off the front passenger’s front air
bag including the seat belt pretensioner,
the “PASS AIR BAG OFF” indicator will
come on and stay on to remind you that
the front passenger’s front air bag is off.
The front passenger sensing system uses
front seat pressure measurements and
pressure locations to determine whether to
activate or deactivate the front passenger’s
front air bag. The front passenger sensing
system may or may not turn off the front airbag, depending on the front passenger’s
seating posture and body build. The air
bag should be turned off in the following
situations:
There is no occupant in the front pas-
senger seat.
The occupant of the front passenger
seat lifts his or her weight off of the seat
for a period of time.
The occupant of the front passenger
seat is an infant or small child in a child
restraint system or a small child in a
booster seat.
A smaller person, such as a child who
has outgrown child restraints or a very
small adolescent is seated in the front
passenger seat.
NOTE:
If the front passenger seat is unoccupied,
the “PASS AIR BAG OFF” indicator will not
come on but the front passenger’s front air
bag will not deploy and the seat belt pre-
tensioner will not operate.
If you have secured a child in the front pas-
senger seat in a forward-facing child
restraint system or booster seat and the
“PASS AIR BAG OFF” indicator light is not
on, turn the vehicle off, remove the child
restraint or booster seat from the vehicle
and reinstall it following the child restraint
or booster seat manufacturer’s directions.
Also refer to “Seat Belts and Child
Restraint Systems” in this section. If, after
reinstalling the child restraint and restart-ing the vehicle, the “PASS AIR BAG OFF”
indicator is still not lit, check to make sure
that the vehicle’s seatback is not pressing
the child restraint into the seat cushion. If
this happens, slightly recline the vehicle’s
seatback and adjust the seat cushion if
possible. Also make sure the child restraint
is not trapped under the vehicle head
restraint. If this happens, adjust the head
restraint. If the “PASS AIR BAG OFF” indi-
cator is still not on, secure the child in the
child restraint or booster seat in a rear seat
position in the vehicle and check with your
dealer.
Page 67 of 337
2-50
BEFORE DRIVING
79K21-03E
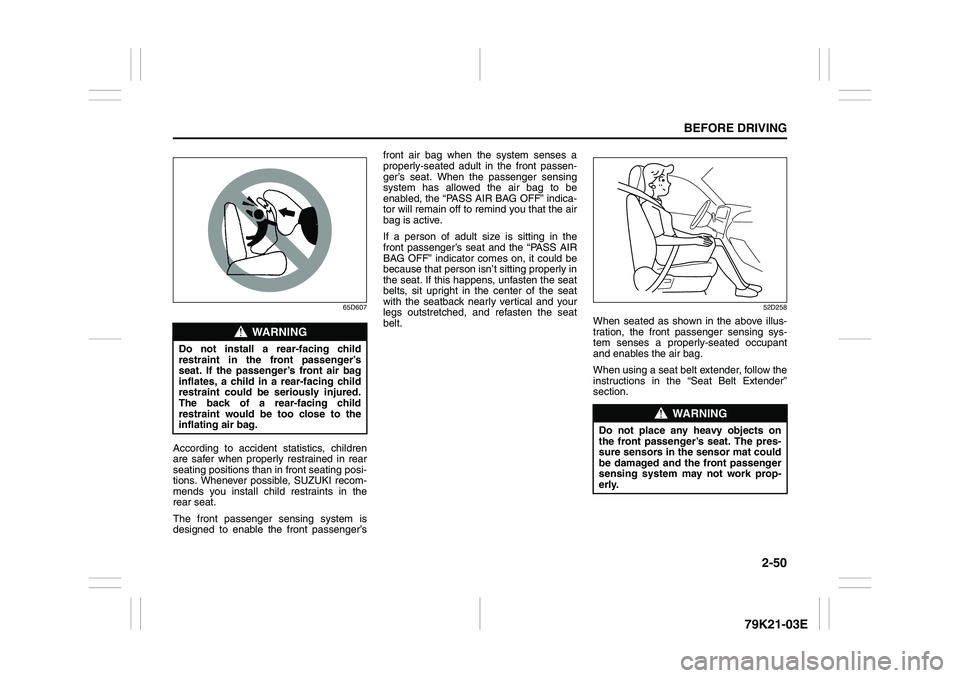
65D607
According to accident statistics, children
are safer when properly restrained in rear
seating positions than in front seating posi-
tions. Whenever possible, SUZUKI recom-
mends you install child restraints in the
rear seat.
The front passenger sensing system is
designed to enable the front passenger’sfront air bag when the system senses a
properly-seated adult in the front passen-
ger’s seat. When the passenger sensing
system has allowed the air bag to be
enabled, the “PASS AIR BAG OFF” indica-
tor will remain off to remind you that the air
bag is active.
If a person of adult size is sitting in the
front passenger’s seat and the “PASS AIR
BAG OFF” indicator comes on, it could be
because that person isn’t sitting properly in
the seat. If this happens, unfasten the seat
belts, sit upright in the center of the seat
with the seatback nearly vertical and your
legs outstretched, and refasten the seat
belt.
52D258
When seated as shown in the above illus-
tration, the front passenger sensing sys-
tem senses a properly-seated occupant
and enables the air bag.
When using a seat belt extender, follow the
instructions in the “Seat Belt Extender”
section.
WARNING
Do not install a rear-facing child
restraint in the front passenger’s
seat. If the passenger’s front air bag
inflates, a child in a rear-facing child
restraint could be seriously injured.
The back of a rear-facing child
restraint would be too close to the
inflating air bag.
WARNING
Do not place any heavy objects on
the front passenger’s seat. The pres-
sure sensors in the sensor mat could
be damaged and the front passenger
sensing system may not work prop-
erly.
Page 69 of 337
2-52
BEFORE DRIVING
79K21-03E
The air bag will neither hinder your view
nor make it harder to exit the vehicle.
Air bags must inflate quickly and forcefully
in order to reduce the chance of serious or
fatal injuries. However, an unavoidable
consequence of the quick inflation is that
the air bag may irritate bare skin, such as
the facial area against a front air bag. Also,
upon inflation, a loud noise will occur and
some powder and smoke will be released.
These conditions are not harmful and do
not indicate a fire in the car. Be aware,
however, that some air bag components
may be hot for a while after inflation.
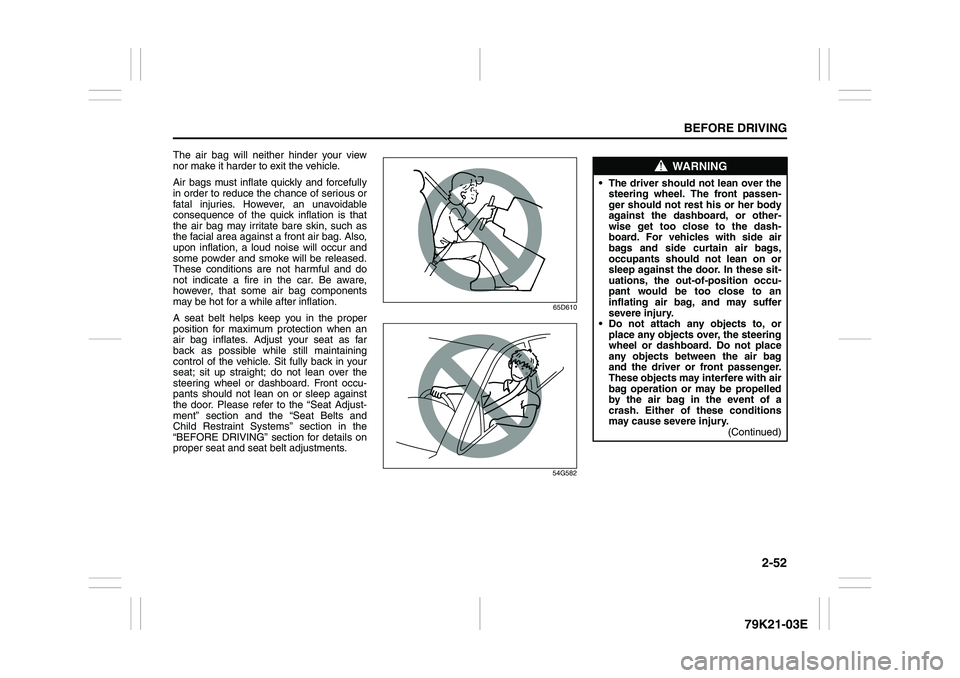
A seat belt helps keep you in the proper
position for maximum protection when an
air bag inflates. Adjust your seat as far
back as possible while still maintaining
control of the vehicle. Sit fully back in your
seat; sit up straight; do not lean over the
steering wheel or dashboard. Front occu-
pants should not lean on or sleep against
the door. Please refer to the “Seat Adjust-
ment” section and the “Seat Belts and
Child Restraint Systems” section in the
“BEFORE DRIVING” section for details on
proper seat and seat belt adjustments.
65D610
54G582
WARNING
The driver should not lean over the
steering wheel. The front passen-
ger should not rest his or her body
against the dashboard, or other-
wise get too close to the dash-
board. For vehicles with side air
bags and side curtain air bags,
occupants should not lean on or
sleep against the door. In these sit-
uations, the out-of-position occu-
pant would be too close to an
inflating air bag, and may suffer
severe injury.
Do not attach any objects to, or
place any objects over, the steering
wheel or dashboard. Do not place
any objects between the air bag
and the driver or front passenger.
These objects may interfere with air
bag operation or may be propelled
by the air bag in the event of a
crash. Either of these conditions
may cause severe injury.
(Continued)
Page 72 of 337
2-55BEFORE DRIVING
79K21-03E
Warning and Indicator LightsFront Passenger’s Seat Belt
Reminder Light
66J246
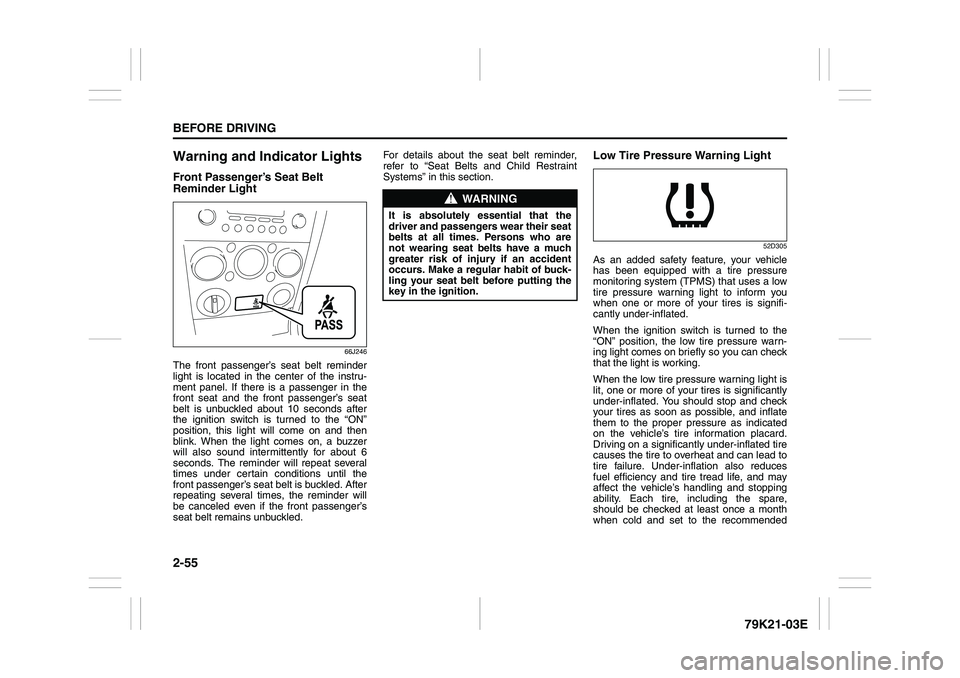
The front passenger’s seat belt reminder
light is located in the center of the instru-
ment panel. If there is a passenger in the
front seat and the front passenger’s seat
belt is unbuckled about 10 seconds after
the ignition switch is turned to the “ON”
position, this light will come on and then
blink. When the light comes on, a buzzer
will also sound intermittently for about 6
seconds. The reminder will repeat several
times under certain conditions until the
front passenger’s seat belt is buckled. After
repeating several times, the reminder will
be canceled even if the front passenger’s
seat belt remains unbuckled.For details about the seat belt reminder,
refer to “Seat Belts and Child Restraint
Systems” in this section.
Low Tire Pressure Warning Light
52D305
As an added safety feature, your vehicle
has been equipped with a tire pressure
monitoring system (TPMS) that uses a low
tire pressure warning light to inform you
when one or more of your tires is signifi-
cantly under-inflated.
When the ignition switch is turned to the
“ON” position, the low tire pressure warn-
ing light comes on briefly so you can check
that the light is working.
When the low tire pressure warning light is
lit, one or more of your tires is significantly
under-inflated. You should stop and check
your tires as soon as possible, and inflate
them to the proper pressure as indicated
on the vehicle’s tire information placard.
Driving on a significantly under-inflated tire
causes the tire to overheat and can lead to
tire failure. Under-inflation also reduces
fuel efficiency and tire tread life, and may
affect the vehicle’s handling and stopping
ability. Each tire, including the spare,
should be checked at least once a month
when cold and set to the recommended
WARNING
It is absolutely essential that the
driver and passengers wear their seat
belts at all times. Persons who are
not wearing seat belts have a much
greater risk of injury if an accident
occurs. Make a regular habit of buck-
ling your seat belt before putting the
key in the ignition.
Page 78 of 337
2-61BEFORE DRIVING
79K21-03E
Driver’s Seat Belt Reminder Light
60G049
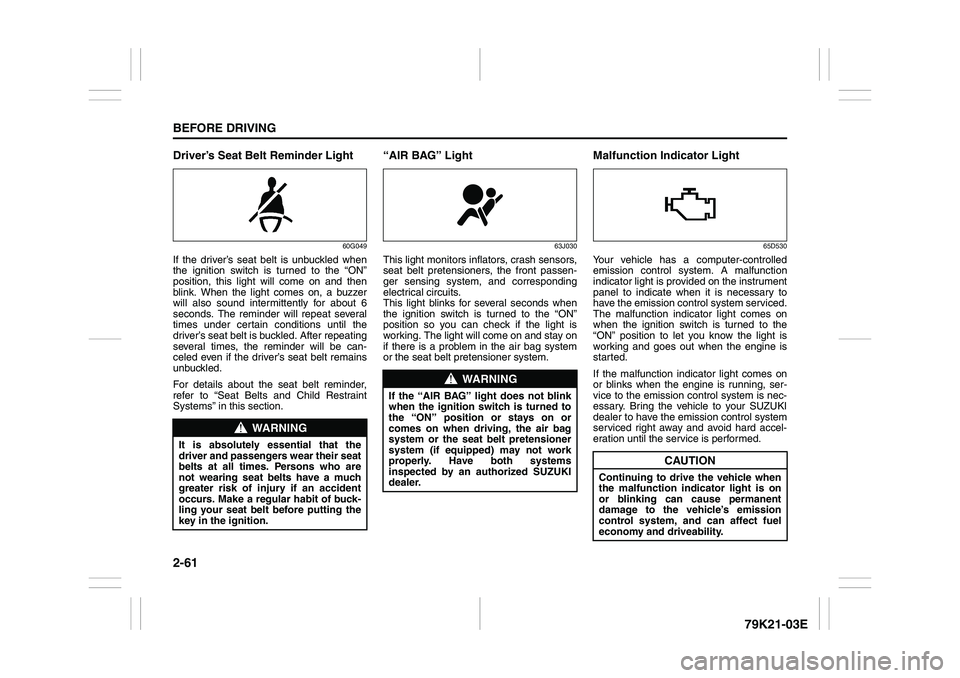
If the driver’s seat belt is unbuckled when
the ignition switch is turned to the “ON”
position, this light will come on and then
blink. When the light comes on, a buzzer
will also sound intermittently for about 6
seconds. The reminder will repeat several
times under certain conditions until the
driver’s seat belt is buckled. After repeating
several times, the reminder will be can-
celed even if the driver’s seat belt remains
unbuckled.
For details about the seat belt reminder,
refer to “Seat Belts and Child Restraint
Systems” in this section.
“AIR BAG” Light
63J030
This light monitors inflators, crash sensors,
seat belt pretensioners, the front passen-
ger sensing system, and corresponding
electrical circuits.
This light blinks for several seconds when
the ignition switch is turned to the “ON”
position so you can check if the light is
working. The light will come on and stay on
if there is a problem in the air bag system
or the seat belt pretensioner system.
Malfunction Indicator Light
65D530
Your vehicle has a computer-controlled
emission control system. A malfunction
indicator light is provided on the instrument
panel to indicate when it is necessary to
have the emission control system serviced.
The malfunction indicator light comes on
when the ignition switch is turned to the
“ON” position to let you know the light is
working and goes out when the engine is
started.
If the malfunction indicator light comes on
or blinks when the engine is running, ser-
vice to the emission control system is nec-
essary. Bring the vehicle to your SUZUKI
dealer to have the emission control system
serviced right away and avoid hard accel-
eration until the service is performed.
WARNING
It is absolutely essential that the
driver and passengers wear their seat
belts at all times. Persons who are
not wearing seat belts have a much
greater risk of injury if an accident
occurs. Make a regular habit of buck-
ling your seat belt before putting the
key in the ignition.
WARNING
If the “AIR BAG” light does not blink
when the ignition switch is turned to
the “ON” position or stays on or
comes on when driving, the air bag
system or the seat belt pretensioner
system (if equipped) may not work
properly. Have both systems
inspected by an authorized SUZUKI
dealer.
CAUTION
Continuing to drive the vehicle when
the malfunction indicator light is on
or blinking can cause permanent
damage to the vehicle’s emission
control system, and can affect fuel
economy and driveability.