ECU SUZUKI IGNIS 2017 Owners Manual
[x] Cancel search | Manufacturer: SUZUKI, Model Year: 2017, Model line: IGNIS, Model: SUZUKI IGNIS 2017Pages: 505, PDF Size: 8.36 MB
Page 7 of 505
75RM4-01E
(For EU countries)
Parties who can read out the technical data using specific diag nostic devices (the “Parties”);• Authorized distributors, dealers and repairers/service worksho ps of SUZUKI vehicles, and independent repairers/service workshops
• Manufacturer of SUZUKI vehicles ( e.g. SUZUKI MOTOR CORPORATION (“SUZUKI”), MAGYAR SUZUKI CORPORATION LTD.,
MARUTI SUZUKI INDIA LIMITED, SUZ UKI MOTOR (THAILAND) CO., LTD., THAI SUZUKI MOTOR CO., LTD.)
• Suppliers of SUZUKI vehicle part s, components and accessories (the “Suppliers”)Data usage (the “Data Usage”)SUZUKI and the Parties may use t he Recorded Data in the modules or memories for the purpose of;
• Diagnostic, service, repair and warranty processes
• Research and further vehicle developments
• Implementation of or investigat ion for field actions including recall and service campaign
• Quality improvements, etc.
After an error has been corrected, data related to such error a re basically deleted from error storage module or memory, while certain
data are overwritten or kept further.Conditions under which SUZUKI and the Parties can disclose or p rovide any of the Recorded Data to a third partySUZUKI and the Parties may disclose or provide any of the Recorded Data to a third party under any of the following conditions:
• A consent from the Vehicle owner/ user(s), or from lessee of the Vehicle (in case of lease) is obtained.
• It is officially requested by police, prosecutor, court, or other authorities.
• It is provided to a research in stitute for statistical study after processing in such a manner that owner/user(s) of the Vehi cle cannot be
identified.
• It is used by SUZUKI or the Part ies or their directors, officers or employees for the purpose s described in the Data Usage.
• It is used by SUZUKI or t he Parties in a lawsuit.
• Any other cases allowed by ap plicable laws and regulations.
If required, you may receive fur ther information from each of the Parties other than the Suppliers.
NOTE:
• The data cannot be used to detect the Vehicle’s movements.
• The data stored in data storage modules or memories differ according to the Vehicle’s grade or model.
• No conversation nor noise/sound will be recorded in any event.
• The data may not be recorded in some situations.
If these technical data are combined with other information (e. g. accident or witness report, damage on the Vehicle, etc.), there may be
cases that such data may i dentify a specific person.
Page 42 of 505
2-19BEFORE DRIVING
75RM4-01E
1) Close all the doors and turn the lockknob (1) on the driver’s door in the
unlocking direction (2) (rearward). Turn
the knob on the lighting control lever to
“OFF” position (5).
NOTE:
All operations included in the following
Step 2) and 3) must be completed within
15 seconds.
2) Turn the knob on the lighting control lever to the position (6) and then to
“OFF” position (5). Repeat this opera-
tion 4 times with the control lever finally
set to “OFF” position.
3) Push the lock end (3) (forward end) of
the power door lock switch (4) to lock
the doors, and then the unlock end (2)
(backward end) to unlock the doors.
Repeat these operations 3 times and
finally push the lock end of the switch. Every time you perform the series of the
above steps, the state of the theft deterrent
alarm system changes from the currently
selected one to the other. You can check
whether the system is
enabled or disabled
by the number of interior buzzer beeps at
the end of the procedure as follows.
NOTE:
• You cannot disable the theft deterrent
alarm system while it is in the armed
condition.
• If you fail to complete the operations in
Step 2) and 3) within 15 seconds, per-
form the procedure again from the
beginning.
• Check that all doors are closed when performing the above procedure.
NOTE:
You can also switch the theft deterrent
alarm system from the enabled state to the
disabled state, and vice versa, via the
information display setting mode. For
details on how to use the information dis-
play, refer to “Informa tion display” in this
section.
Theft deterrent light (if equipped)
75RM314
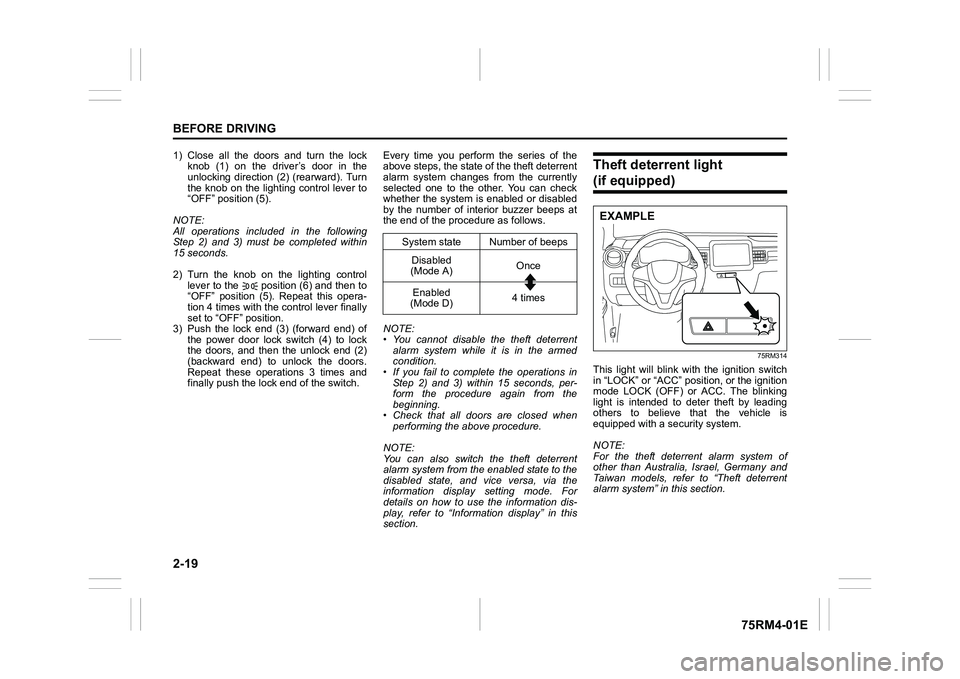
This light will blink with the ignition switch
in “LOCK” or “ACC” pos ition, or the ignition
mode LOCK (OFF) or ACC. The blinking
light is intended to deter theft by leading
others to believe that the vehicle is
equipped with a security system.
NOTE:
For the theft deterrent alarm system of
other than Australia, Israel, Germany and
Taiwan models, refer to “Theft deterrent
alarm system” in this section.
System state Number of beeps Disabled
(Mode A) Once
Enabled
(Mode D) 4 times
EXAMPLE
Page 50 of 505
2-27BEFORE DRIVING
75RM4-01E
Front seatsSeat adjustment
75RM302
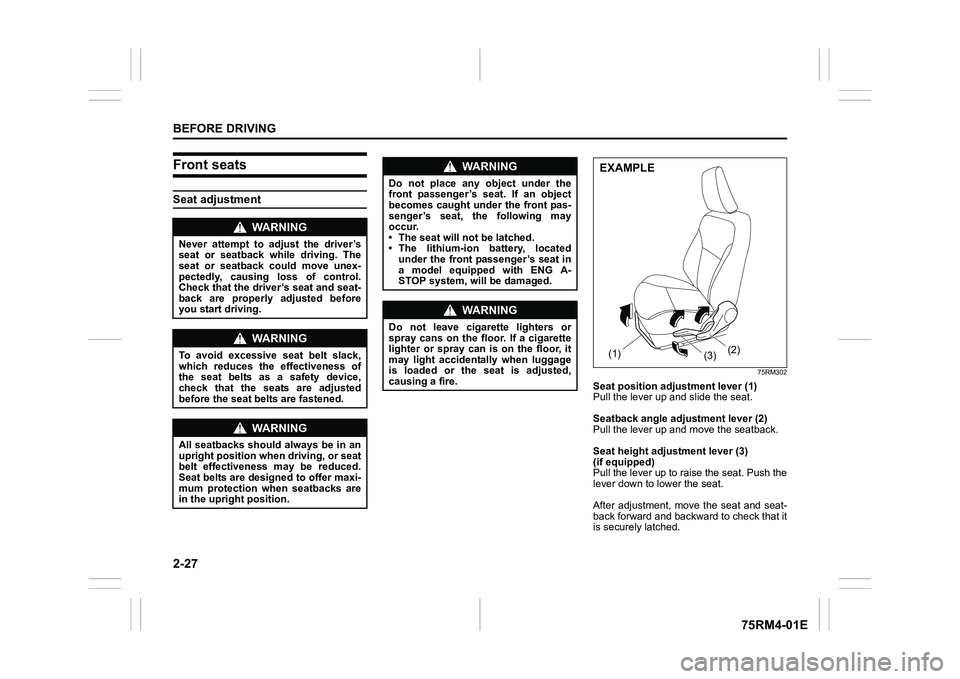
Seat position adjustment lever (1)
Pull the lever up and slide the seat.
Seatback angle adju stment lever (2)
Pull the lever up and move the seatback.
Seat height adjustment lever (3)
(if equipped)
Pull the lever up to raise the seat. Push the
lever down to lower the seat.
After adjustment, move the seat and seat-
back forward and backward to check that it
is securely latched.
WA R N I N G
Never attempt to adjust the driver’s
seat or seatback while driving. The
seat or seatback could move unex-
pectedly, causing loss of control.
Check that the driver’s seat and seat-
back are properly adjusted before
you start driving.
WA R N I N G
To avoid excessive seat belt slack,
which reduces the effectiveness of
the seat belts as a safety device,
check that the seats are adjusted
before the seat belts are fastened.
WA R N I N G
All seatbacks should always be in an
upright position when driving, or seat
belt effectiveness may be reduced.
Seat belts are designed to offer maxi-
mum protection when seatbacks are
in the upright position.
WA R N I N G
Do not place any object under the
front passenger’s seat. If an object
becomes caught under the front pas-
senger’s seat, the following may
occur.
• The seat will not be latched.
• The lithium-ion battery, located under the front passenger’s seat in
a model equipped with ENG A-
STOP system, will be damaged.
WA R N I N G
Do not leave cigarette lighters or
spray cans on the floor. If a cigarette
lighter or spray can is on the floor, it
may light accidentally when luggage
is loaded or the seat is adjusted,
causing a fire.
(1) (2)
(3)EXAMPLE
Page 53 of 505
2-30
BEFORE DRIVING
75RM4-01E
75RM192
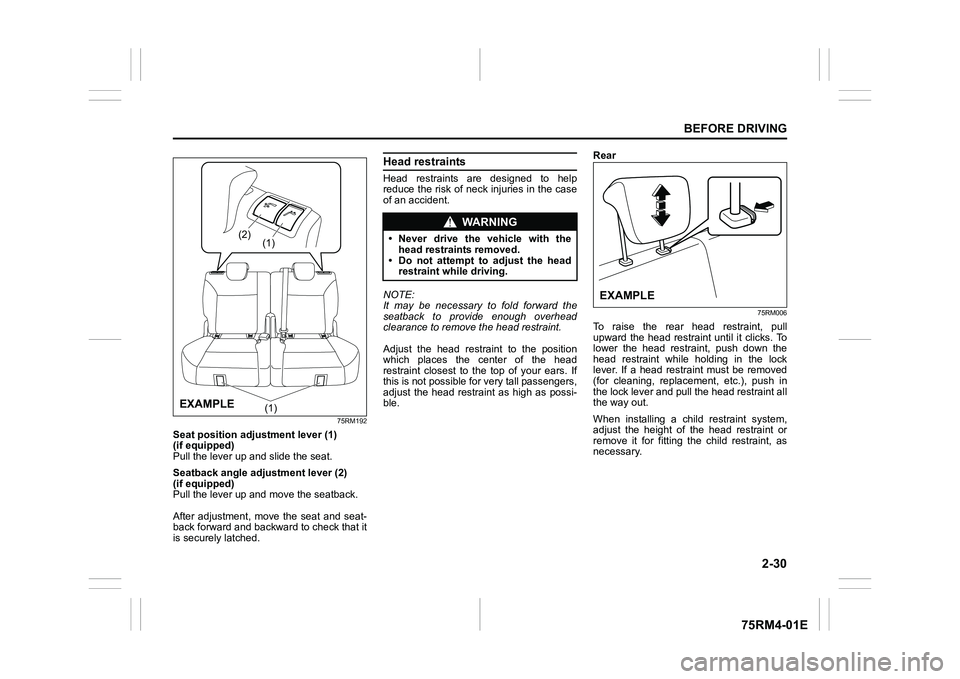
Seat position adjustment lever (1)
(if equipped)
Pull the lever up and slide the seat.
Seatback angle adju stment lever (2)
(if equipped)
Pull the lever up and move the seatback.
After adjustment, move the seat and seat-
back forward and backward to check that it
is securely latched.
Head restraintsHead restraints are designed to help
reduce the risk of neck injuries in the case
of an accident.
NOTE:
It may be necessary to fold forward the
seatback to provide enough overhead
clearance to remove the head restraint.
Adjust the head restraint to the position
which places the center of the head
restraint closest to the top of your ears. If
this is not possible for very tall passengers,
adjust the head restraint as high as possi-
ble. Rear
75RM006
To raise the rear head restraint, pull
upward the head restraint until it clicks. To
lower the head restraint, push down the
head restraint while holding in the lock
lever. If a head restraint must be removed
(for cleaning, replacement, etc.), push in
the lock lever and pull the head restraint all
the way out.
When installing a chil
d restraint system,
adjust the height of the head restraint or
remove it for fitting the child restraint, as
necessary.
(1)
(2)
(1)
EXAMPLE
WA R N I N G
• Never drive the vehicle with the
head restraints removed.
• Do not attempt to adjust the head restraint while driving.
EXAMPLE
Page 54 of 505
2-31BEFORE DRIVING
75RM4-01E
Folding rear seatsThe rear seats of your vehicle can be
folded forward to provide additional cargo
space.
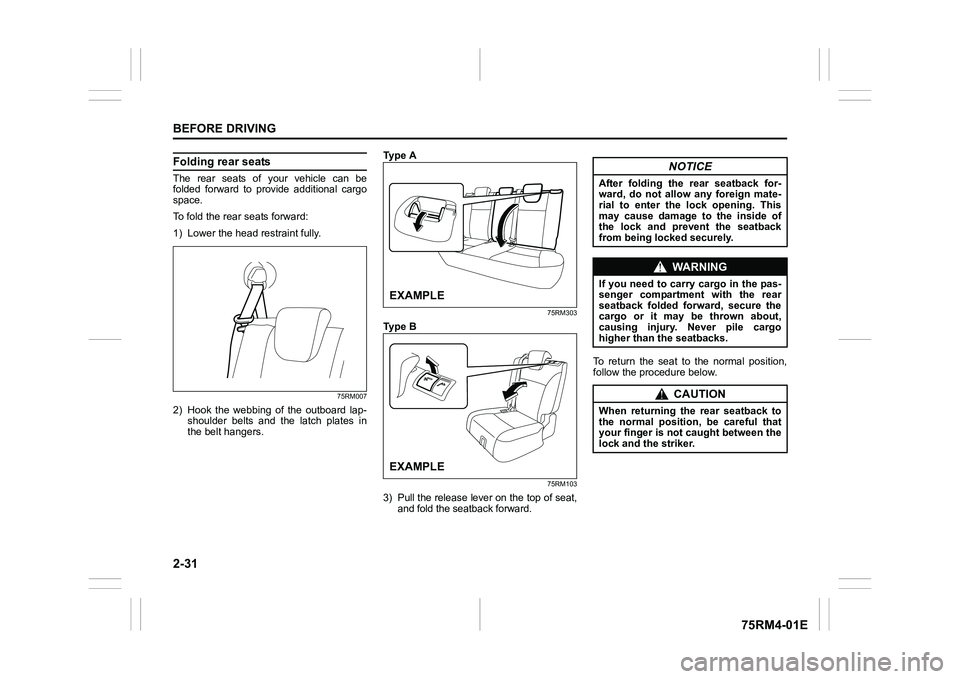
To fold the rear seats forward:
1) Lower the head restraint fully.
75RM007
2) Hook the webbing of the outboard lap-shoulder belts and the latch plates in
the belt hangers. Ty p e A
75RM303
Ty p e B
75RM103
3) Pull the release lever on the top of seat,
and fold the seatback forward. To return the seat to the normal position,
follow the procedure below.EXAMPLEEXAMPLE
NOTICE
After folding the
rear seatback for-
ward, do not allow any foreign mate-
rial to enter the lock opening. This
may cause damage to the inside of
the lock and prevent the seatback
from being locked securely.
WA R N I N G
If you need to carry cargo in the pas-
senger compartment with the rear
seatback folded forward, secure the
cargo or it may be thrown about,
causing injury. Never pile cargo
higher than the seatbacks.
CAUTION
When returning the rear seatback to
the normal position, be careful that
your finger is not caught between the
lock and the striker.
Page 55 of 505
2-32
BEFORE DRIVING
75RM4-01E
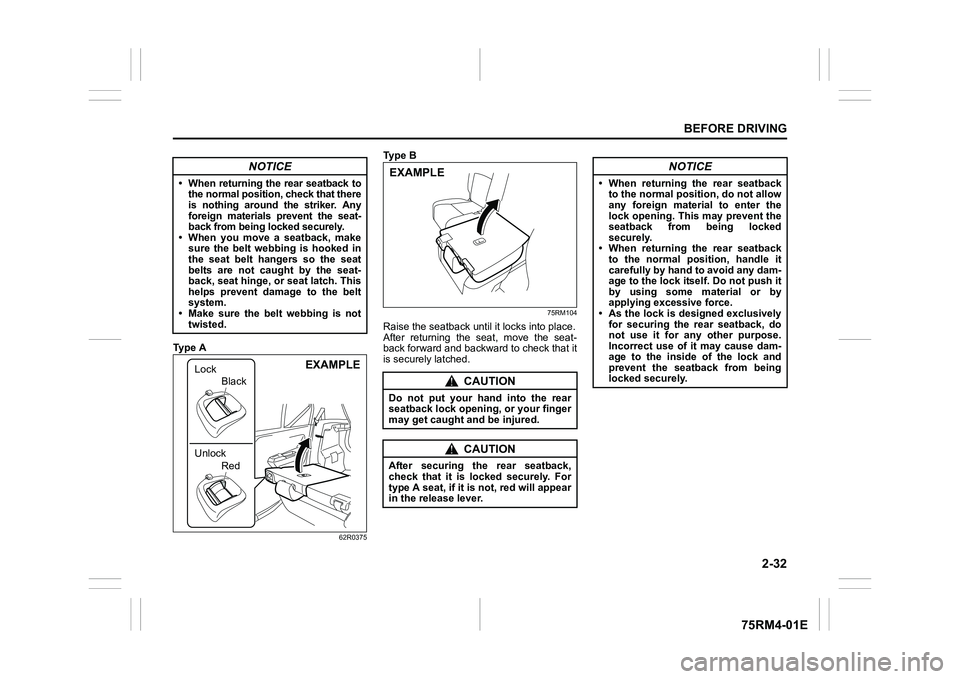
Ty p e A
62R0375
Ty p e B
75RM104
Raise the seatback until it locks into place.
After returning the seat, move the seat-
back forward and backward to check that it
is securely latched.
NOTICE
• When returning the rear seatback to the normal position, check that there
is nothing around the striker. Any
foreign materials prevent the seat-
back from being locked securely.
• When you move a seatback, make sure the belt webbing is hooked in
the seat belt hangers so the seat
belts are not caught by the seat-
back, seat hinge, or seat latch. This
helps prevent damage to the belt
system.
• Make sure the belt webbing is not
twisted.
EXAMPLE
Lock
Unlock
Red
Black
CAUTION
Do not put your hand into the rear
seatback lock opening, or your finger
may get caught and be injured.
CAUTION
After securing the rear seatback,
check that it is locked securely. For
type A seat, if it is not, red will appear
in the release lever.EXAMPLE
NOTICE
• When returning the rear seatback
to the normal position, do not allow
any foreign materi al to enter the
lock opening. This may prevent the
seatback from being locked
securely.
• When returning the rear seatback to the normal position, handle it
carefully by hand to avoid any dam-
age to the lock itself. Do not push it
by using some material or by
applying excessive force.
• As the lock is designed exclusively
for securing the rear seatback, do
not use it for any other purpose.
Incorrect use of it may cause dam-
age to the inside of the lock and
prevent the seatback from being
locked securely.
Page 62 of 505
2-39BEFORE DRIVING
75RM4-01E
• If a seat belt is unfastened when thevehicle speed is more than 15 km/h, the
corresponding light will come on and a
buzzer will sound.
The reminder will be automatically can-
celed when the rear seat belt is buckled or
the ignition switch is turned off, or the
engine switch is pressed to change the
ignition mode to LOCK (OFF).
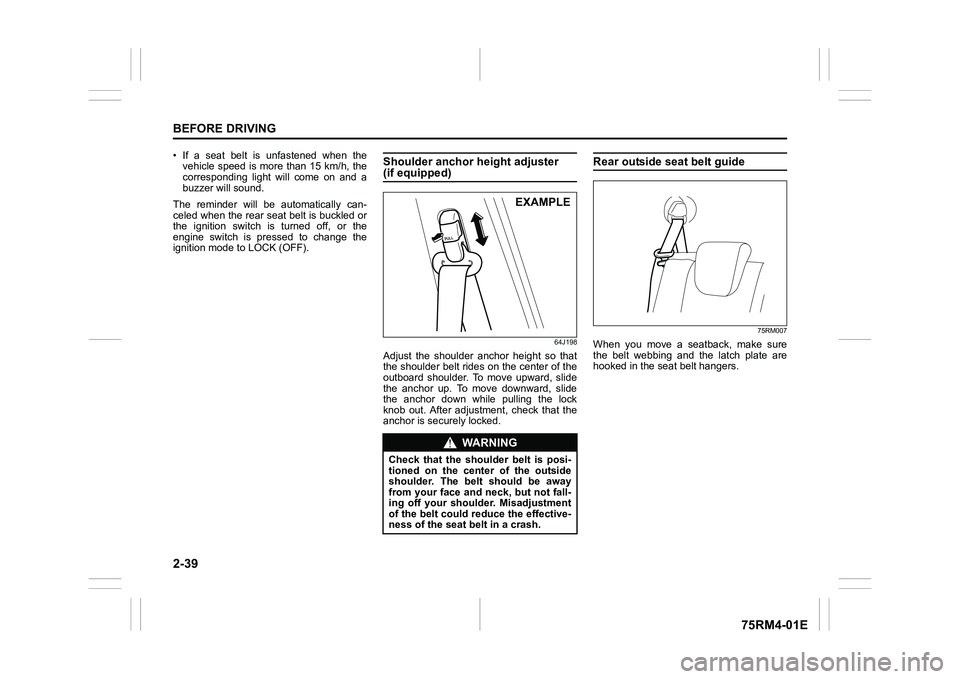
Shoulder anchor height adjuster (if equipped)
64J198
Adjust the shoulder anchor height so that
the shoulder belt rides on the center of the
outboard shoulder. To move upward, slide
the anchor up. To move downward, slide
the anchor down while pulling the lock
knob out. After adjustment, check that the
anchor is securely locked.
Rear outside seat belt guide
75RM007
When you move a seatback, make sure
the belt webbing and the latch plate are
hooked in the seat belt hangers.
WA R N I N G
Check that the shoulder belt is posi-
tioned on the cent er of the outside
shoulder. The belt should be away
from your face and neck, but not fall-
ing off your shoulder. Misadjustment
of the belt could reduce the effective-
ness of the seat belt in a crash.
EXAMPLE
Page 64 of 505
2-41BEFORE DRIVING
75RM4-01E
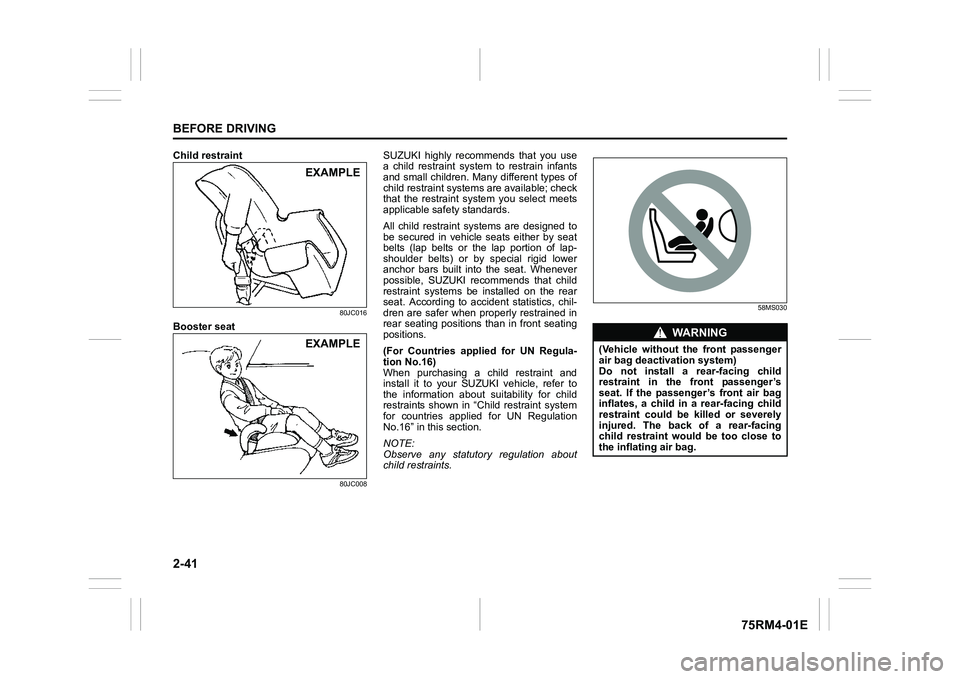
Child restraint
80JC016
Booster seat
80JC008
SUZUKI highly recommends that you use
a child restraint system to restrain infants
and small children. Many different types of
child restraint systems are available; check
that the restraint syst em you select meets
applicable safety standards.
All child restraint systems are designed to
be secured in vehicle seats either by seat
belts (lap belts or the lap portion of lap-
shoulder belts) or by special rigid lower
anchor bars built into the seat. Whenever
possible, SUZUKI recommends that child
restraint systems be installed on the rear
seat. According to accident statistics, chil-
dren are safer when properly restrained in
rear seating positions than in front seating
positions.
(For Countries applied for UN Regula-
tion No.16)
When purchasing a child restraint and
install it to your SUZUKI vehicle, refer to
the information about suitability for child
restraints shown in “Child restraint system
for countries applied for UN Regulation
No.16” in this section.
NOTE:
Observe any statutory regulation about
child restraints.
58MS030
EXAMPLEEXAMPLE
WA R N I N G
(Vehicle without the front passenger
air bag deactivation system)
Do not install a rear-facing child
restraint in the front passenger’s
seat. If the passenger’s front air bag
inflates, a child in a rear-facing child
restraint could be killed or severely
injured. The back of a rear-facing
child restraint would be too close to
the inflating air bag.
Page 65 of 505
2-42
BEFORE DRIVING
75RM4-01E
65D60865D609
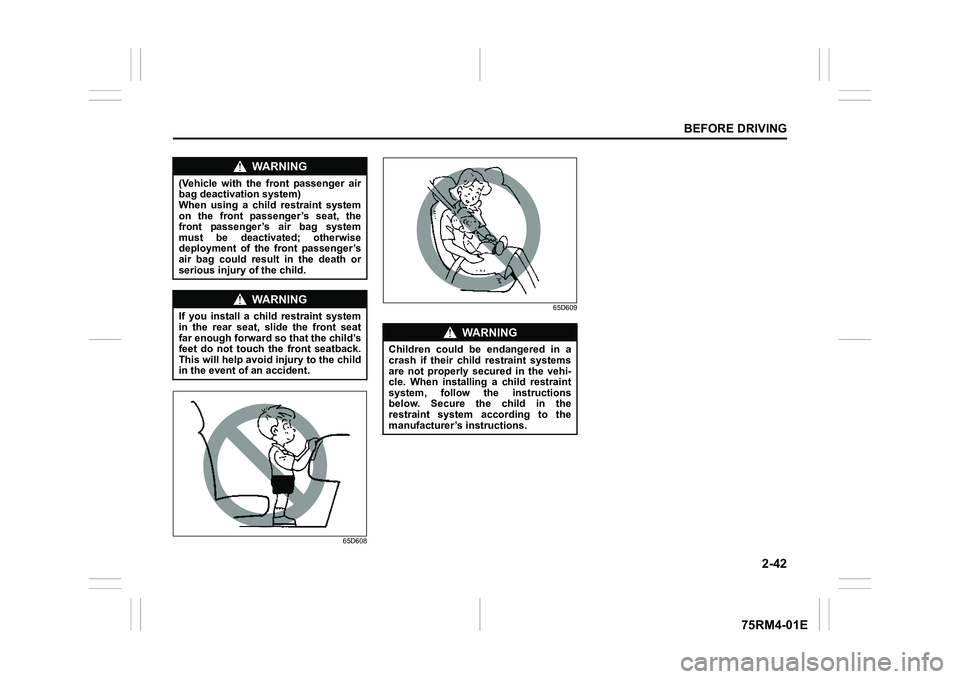
WA R N I N G
(Vehicle with the front passenger air
bag deactivation system)
When using a child restraint system
on the front passenger’s seat, the
front passenger’s air bag system
must be deactivated; otherwise
deployment of the
front passenger’s
air bag could result in the death or
serious injury of the child.
WA R N I N G
If you install a child restraint system
in the rear seat, slide the front seat
far enough forward so that the child’s
feet do not touch the front seatback.
This will help avoid injury to the child
in the event of an accident.
WA R N I N G
Children could be endangered in a
crash if their child restraint systems
are not properly secured in the vehi-
cle. When installing a child restraint
system, follow the instructions
below. Secure the child in the
restraint system according to the
manufacturer’s instructions.
Page 71 of 505
2-48
BEFORE DRIVING
75RM4-01E
Installation with lap-shoulder seat beltsNOTE:
Stow the removed head restraint in the lug-
gage compartment so it will not cause
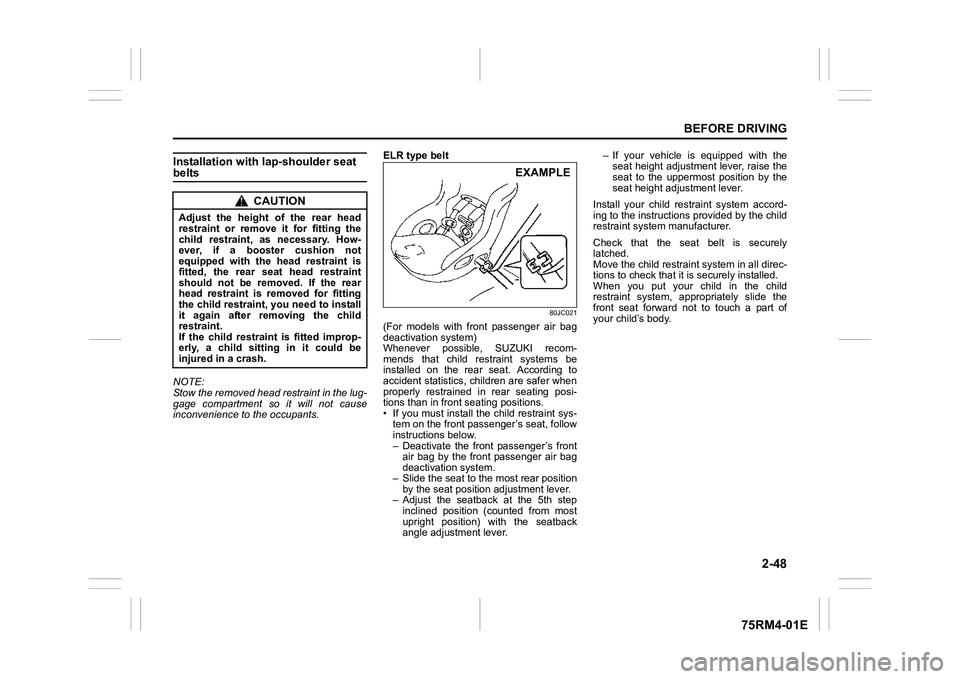
inconvenience to the occupants.ELR type belt
80JC021
(For models with front passenger air bag
deactivation system)
Whenever possible, SUZUKI recom-
mends that child restraint systems be
installed on the rear seat. According to
accident statistics, children are safer when
properly restrained in rear seating posi-
tions than in front seating positions.
• If you must install the child restraint sys-
tem on the front passe nger’s seat, follow
instructions below.
– Deactivate the front passenger’s front air bag by the front passenger air bag
deactivation system.
– Slide the seat to t he most rear position
by the seat position adjustment lever.
– Adjust the seatba ck at the 5th step
inclined position (counted from most
upright position) w ith the seatback
angle adjustment lever. – If your vehicle is equipped with the
seat height adjustment lever, raise the
seat to the uppermost position by the
seat height adjustment lever.
Install your child restraint system accord-
ing to the instructions provided by the child
restraint system manufacturer.
Check that the seat belt is securely
latched.
Move the child restraint system in all direc-
tions to check that it is securely installed.
When you put your child in the child
restraint system, appr opriately slide the
front seat forward not to touch a part of
your child’s body.
CAUTION
Adjust the height of the rear head
restraint or remove it for fitting the
child restraint, as necessary. How-
ever, if a booster cushion not
equipped with the head restraint is
fitted, the rear seat head restraint
should not be removed. If the rear
head restraint is removed for fitting
the child restraint, you need to install
it again after removing the child
restraint.
If the child restraint is fitted improp-
erly, a child sitting in it could be
injured in a crash.
EXAMPLE