check engine light SUZUKI IGNIS 2017 Owners Manual
[x] Cancel search | Manufacturer: SUZUKI, Model Year: 2017, Model line: IGNIS, Model: SUZUKI IGNIS 2017Pages: 505, PDF Size: 8.36 MB
Page 31 of 505
2-8
BEFORE DRIVING
75RM4-01E
There are two ways to lock or unlock all
doors (including the tailgate) simultane-
ously by operating the remote controller
near the vehicle.
Central door locking system
• To lock all doors, push LOCK button (1)once.
• For models except for Hong Kong, to
unlock only the driver’s door, push
UNLOCK button (2) once. To unlock
other doors, push UNLOCK button (2)
once again.
• For Hong Kong models, to unlock all doors, push UNLOCK button (2) once.
NOTE:
For models except for Hong Kong, you can
switch the function that unlocks all doors
from requiring two pushes to requiring one
push, and vice versa, via the information
display setting mode. For details on how to
use the information display, refer to “Infor-
mation display” in this section.
The turn signal lights will flash once and
the exterior buzzer will sound once when
the doors are locked.
Central door locking system with the
dead lock system (if equipped)
If you want to prevent tamper-unlocking of
the door locks, use this method. When the
dead lock system is activated, operating the
lock knobs will not unlock the side doors. To activate this system:
To lock all doors, push LOCK button (1)
twice within 3 seconds.
To release this system:
• To unlock only the driver’s door, push
UNLOCK button (2) once.
• To unlock other doors, push UNLOCK
button (2) once again.
NOTE:
You can switch the fu nction that unlocks all
doors from requiring two pushes to requir-
ing one push, and vice versa, via the infor-
mation display setting mode. For details on
how to use the informati on display, refer to
“Information display” in this section.
The turn signal lights will flash once and
the exterior buzzer will sound once when
the doors are locked, and then the turn sig-
nal lights will flash once and the exterior
buzzer will sound once again when the
doors are locked with the dead lock sys-
tem.
With the remote controller inside the vehi-
cle, if you push LOCK button on the
remote controller, the exterior buzzer will
sound and doors cannot be locked. When the doors are unlocked:
• The turn signal lights will flash twice and
the exterior buzzer will sound twice.
• If the interior light switch is in DOOR position, the interior light will turn on for
about 15 seconds and then fade out. If
you press the engine switch during this
time, the light will start to fade out imme-
diately.
Check that the doors are locked after you
operate LOCK button (1).
If no door is opened within about 30 sec-
onds after UNLOCK button (2) is operated,
the doors will automatically lock again.
NOTE:
• The maximum operating distance of the
remote controller is about 5 m (16 ft.),
but this can vary depending on the sur-
roundings, especially near other trans-
mitting devices such as radio towers or
CB (Citizen’s Band) radios.
• The door locks cannot be operated with
the remote controller if the ignition mode
is in any other mode than LOCK (OFF).
• When any door is open, if you push
LOCK button on the remote controller,
the exterior buzzer will sound and doors
cannot be locked.
• If you lose one of the remote controllers, ask your SUZUKI dealer as soon as pos-
sible for replacement. Have your dealer
program the new remo te controller code
in your vehicle’s memory so that the old
code is erased.
WA R N I N G
Do not activate the dead lock system
if there are occupants in the vehicle.
They will be locked in the vehicle and
cannot unlock the doors from inside.
Page 32 of 505
2-9BEFORE DRIVING
75RM4-01E
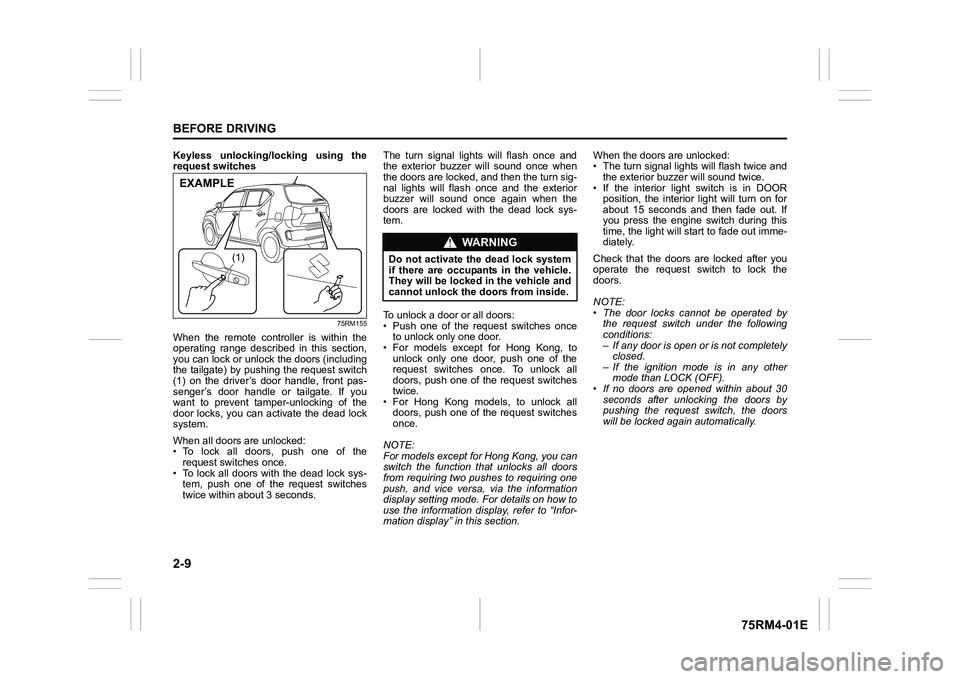
Keyless unlocking/locking using the
request switches
75RM155
When the remote controller is within the
operating range described in this section,
you can lock or unlock the doors (including
the tailgate) by pushing the request switch
(1) on the driver’s door handle, front pas-
senger’s door handle or tailgate. If you
want to prevent tamper-unlocking of the
door locks, you can activate the dead lock
system.
When all doors are unlocked:
• To lock all doors, push one of the request switches once.
• To lock all doors with the dead lock sys- tem, push one of the request switches
twice within abou t 3 seconds. The turn signal lights will flash once and
the exterior buzzer will sound once when
the doors are locked, and then the turn sig-
nal lights will flash once and the exterior
buzzer will sound once again when the
doors are locked with the dead lock sys-
tem.
To unlock a door or all doors:
• Push one of the request switches once
to unlock only one door.
• For models except for Hong Kong, to
unlock only one door, push one of the
request switches once. To unlock all
doors, push one of the request switches
twice.
• For Hong Kong models, to unlock all doors, push one of the request switches
once.
NOTE:
For models except for Hong Kong, you can
switch the function that unlocks all doors
from requiring two pushes to requiring one
push, and vice versa, via the information
display setting mode. For details on how to
use the information display, refer to “Infor-
mation display” in this section. When the doors are unlocked:
• The turn signal lights will flash twice and
the exterior buzzer will sound twice.
• If the interior light switch is in DOOR position, the interior light will turn on for
about 15 seconds and then fade out. If
you press the engine switch during this
time, the light will start to fade out imme-
diately.
Check that the doors are locked after you
operate the request switch to lock the
doors.
NOTE:
• The door locks cannot be operated by the request switch under the following
conditions:
– If any door is open or is not completelyclosed.
– If the ignition mode is in any other mode than LOCK (OFF).
• If no doors are opened within about 30
seconds after unlocking the doors by
pushing the request switch, the doors
will be locked again automatically.
(1)
EXAMPLE
WA R N I N G
Do not activate the dead lock system
if there are occupants in the vehicle.
They will be locked in the vehicle and
cannot unlock the doors from inside.
Page 34 of 505
2-11BEFORE DRIVING
75RM4-01E
57L21016
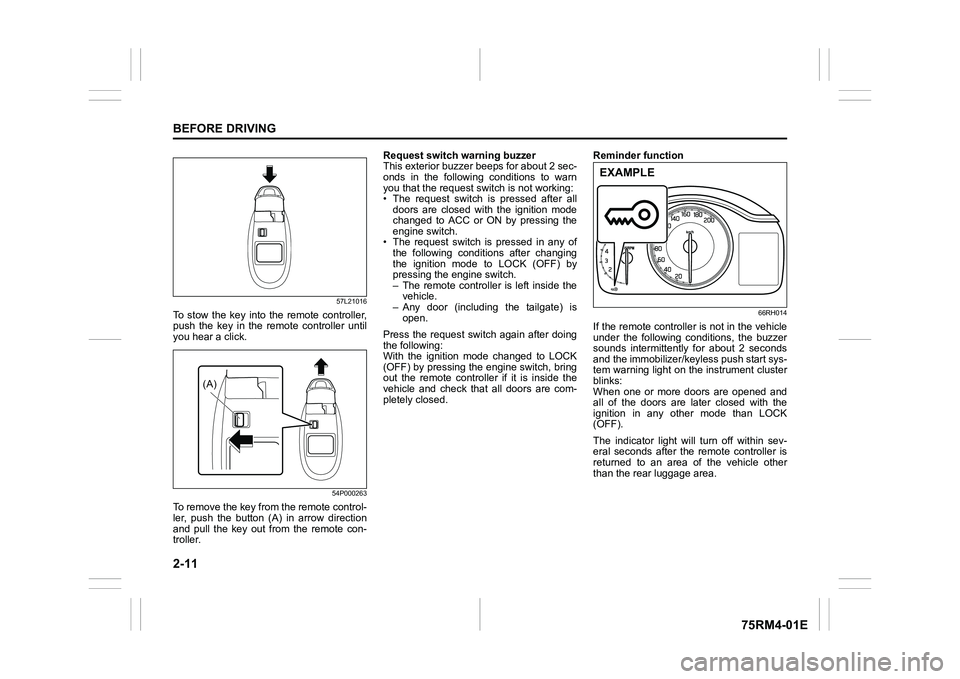
To stow the key into the remote controller,
push the key in the remote controller until
you hear a click.
54P000263
To remove the key from the remote control-
ler, push the button (A) in arrow direction
and pull the key out from the remote con-
troller.Request switch warning buzzer
This exterior buzzer beeps for about 2 sec-
onds in the following conditions to warn
you that the request s
witch is not working:
• The request switch is pressed after all doors are closed with the ignition mode
changed to ACC or ON by pressing the
engine switch.
• The request switch is pressed in any of
the following conditions after changing
the ignition mode to LOCK (OFF) by
pressing the engine switch.
– The remote controller is left inside thevehicle.
– Any door (including the tailgate) is
open.
Press the request switch again after doing
the following:
With the ignition mode changed to LOCK
(OFF) by pressing the engine switch, bring
out the remote controller if it is inside the
vehicle and check that all doors are com-
pletely closed. Reminder function
66RH014
If the remote controller is not in the vehicle
under the following conditions, the buzzer
sounds intermittently for about 2 seconds
and the immobilizer/keyless push start sys-
tem warning light on the instrument cluster
blinks:
When one or more doors are opened and
all of the doors are later closed with the
ignition in any other mode than LOCK
(OFF).
The indicator light will turn off within sev-
eral seconds after the remote controller is
returned to an area of the vehicle other
than the rear luggage area.
(A)
EXAMPLE
Page 41 of 505
2-18
BEFORE DRIVING
75RM4-01E
Checking whether the alarm has been
triggered during parking
If the alarm was triggered due to an unau-
thorized entry into the vehicle and you then
press the engine switch to change the igni-
tion mode to ON or turn the ignition switch
to “ON” position, the theft deterrent light
will blink rapidly for about 8 seconds and a
buzzer will beep 4 times during this period.
If this happens, check whether your vehi-
cle has been broken into while you were
away from it.
Enabling and disabling the theft deter-
rent alarm system
The theft deterrent alarm system can be
either enabled or disabled.
When enabled (factory setting)
When the system is enabled, it causes the
hazard warning lights to flash for about 40
seconds if any of the alarm trigger condi-
tions is met. The system also causes the
interior buzzer to beep intermittently for
about 10 seconds, which is followed by
intermittent sounding of the horn for about
30 seconds.
The theft deterrent light continues to blink
during this time.
When disabled
When the system is disabled, it stays dis-
armed even if you perform any system
arming operation. How to switch the state of the theft
deterrent alarm system
(Except EU specification vehicle)
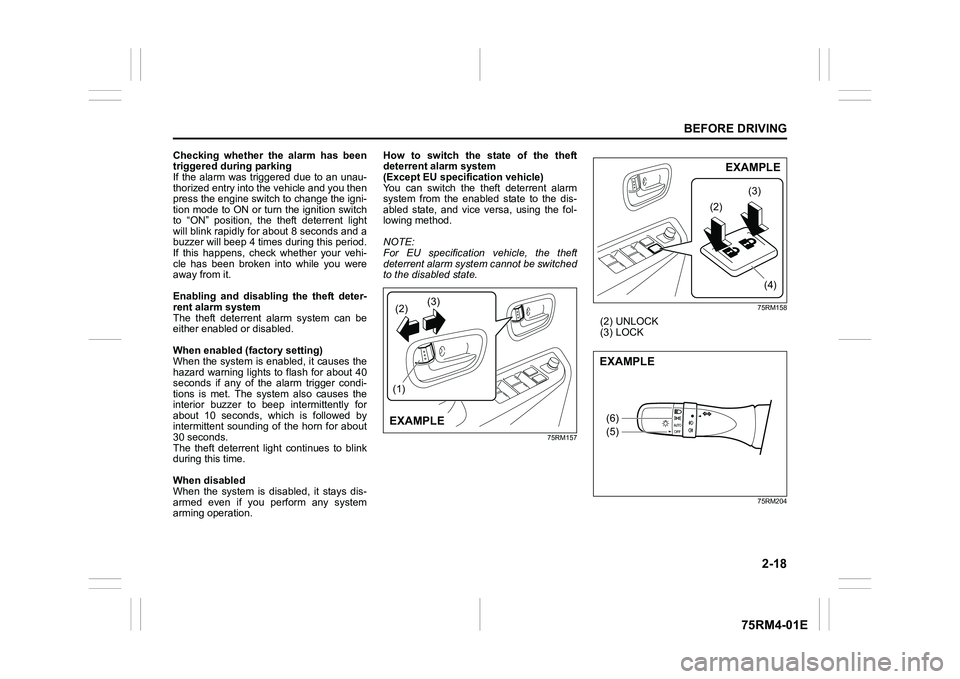
You can switch the theft deterrent alarm
system from the enabled
state to the dis-
abled state, and vice versa, using the fol-
lowing method.
NOTE:
For EU specification vehicle, the theft
deterrent alarm system cannot be switched
to the disabled state.
75RM157 75RM158
(2) UNLOCK
(3) LOCK
75RM204
(2)
(1) (3)EXAMPLE
(2)
(3)
(4)
EXAMPLE
(6)
(5)EXAMPLE
Page 46 of 505
2-23BEFORE DRIVING
75RM4-01E
To initialize the pinching prevention func-
tion, use the following procedure:
1) Turn the ignition switch to “ON” positionor press the engine switch to change
the ignition mode to ON.
2) Open the driver’s window fully by hold-
ing the window switch in DOWN posi-
tion.
3) Close the driver’s window by holding
the switch in UP position, and keep
holding the switch for 2 seconds after
the window is fully closed.
4) Check the driver’s window to see if the AUTO-DOWN/UP feature works.
If the AUTO-DOWN/UP feature will not
work after initialization, there might be
something wrong with the pinching preven-
tion function. Have your vehicle inspected
by an authorized SUZUKI dealer.
MirrorsInside rearview mirror
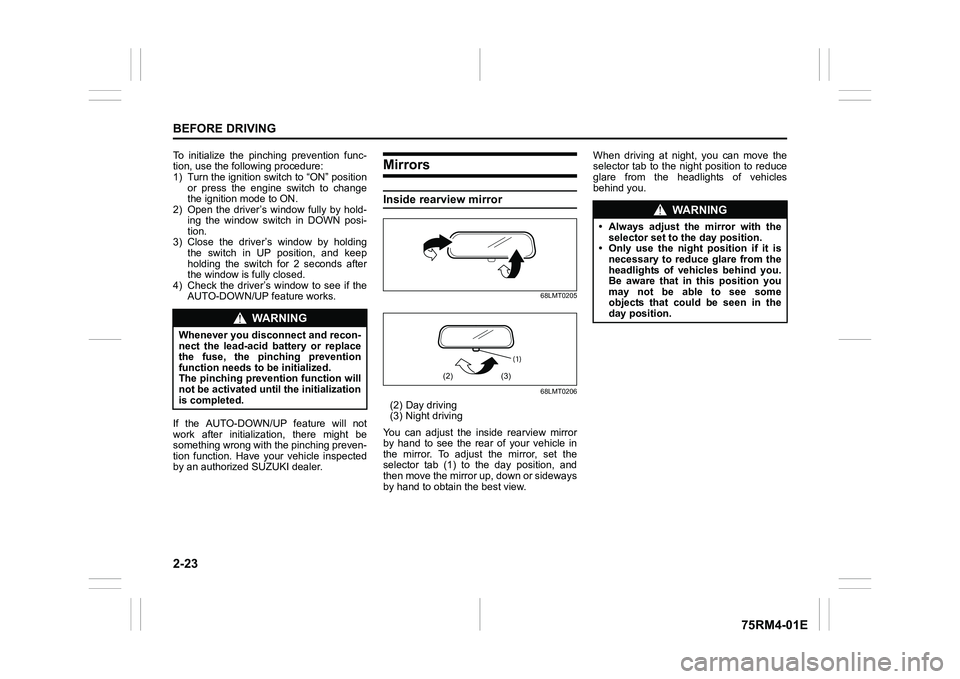
68LMT0205
68LMT0206
(2) Day driving
(3) Night driving
You can adjust the inside rearview mirror
by hand to see the rear of your vehicle in
the mirror. To adjust the mirror, set the
selector tab (1) to the day position, and
then move the mirror up, down or sideways
by hand to obtain the best view. When driving at night, you can move the
selector tab to the night position to reduce
glare from the headlights of vehicles
behind you.
WA R N I N G
Whenever you disconnect and recon-
nect the lead-acid battery or replace
the fuse, the pinching prevention
function needs to be initialized.
The pinching prevention function will
not be activated until the initialization
is completed.
(1)
(2) (3)
WA R N I N G
• Always adjust th
e mirror with the
selector set to th e day position.
• Only use the night position if it is necessary to reduce glare from the
headlights of vehicles behind you.
Be aware that in this position you
may not be able to see some
objects that could be seen in the
day position.
Page 62 of 505
2-39BEFORE DRIVING
75RM4-01E
• If a seat belt is unfastened when thevehicle speed is more than 15 km/h, the
corresponding light will come on and a
buzzer will sound.
The reminder will be automatically can-
celed when the rear seat belt is buckled or
the ignition switch is turned off, or the
engine switch is pressed to change the
ignition mode to LOCK (OFF).
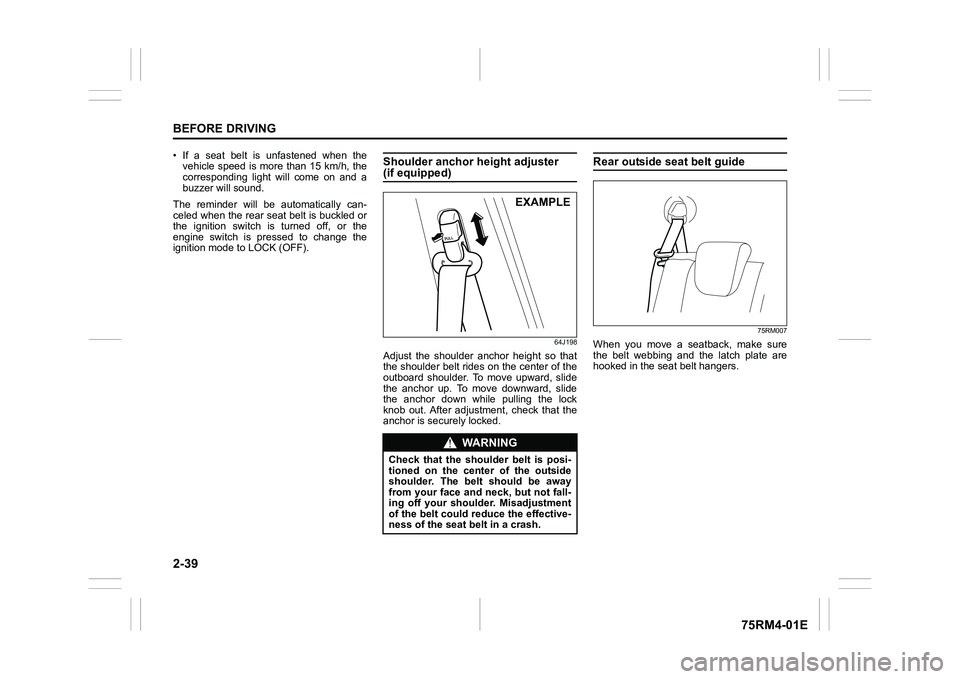
Shoulder anchor height adjuster (if equipped)
64J198
Adjust the shoulder anchor height so that
the shoulder belt rides on the center of the
outboard shoulder. To move upward, slide
the anchor up. To move downward, slide
the anchor down while pulling the lock
knob out. After adjustment, check that the
anchor is securely locked.
Rear outside seat belt guide
75RM007
When you move a seatback, make sure
the belt webbing and the latch plate are
hooked in the seat belt hangers.
WA R N I N G
Check that the shoulder belt is posi-
tioned on the cent er of the outside
shoulder. The belt should be away
from your face and neck, but not fall-
ing off your shoulder. Misadjustment
of the belt could reduce the effective-
ness of the seat belt in a crash.
EXAMPLE
Page 75 of 505
2-52
BEFORE DRIVING
75RM4-01E
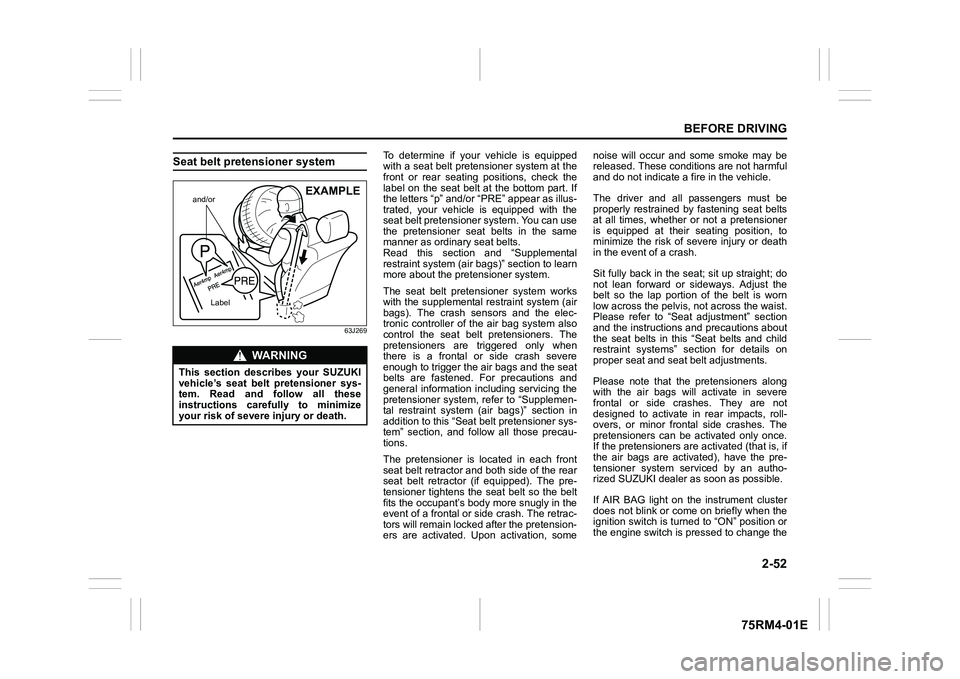
Seat belt pretensioner system
63J269
To determine if your vehicle is equipped
with a seat belt pretensioner system at the
front or rear seating positions, check the
label on the seat belt at the bottom part. If
the letters “p” and/or “PRE” appear as illus-
trated, your vehicle is equipped with the
seat belt pretensioner system. You can use
the pretensioner seat belts in the same
manner as ordinary seat belts.
Read this section and “Supplemental
restraint system (air bags)” section to learn
more about the pretensioner system.
The seat belt pretensioner system works
with the supplemental r estraint system (air
bags). The crash sensors and the elec-
tronic controller of t he air bag system also
control the seat belt pretensioners. The
pretensioners are triggered only when
there is a frontal or side crash severe
enough to trigger the air bags and the seat
belts are fastened. For precautions and
general information including servicing the
pretensioner system, refer to “Supplemen-
tal restraint system (air bags)” section in
addition to this “Seat belt pretensioner sys-
tem” section, and follow all those precau-
tions.
The pretensioner is located in each front
seat belt retractor and both side of the rear
seat belt retractor (if equipped). The pre-
tensioner tightens the seat belt so the belt
fits the occupant’s body more snugly in the
event of a frontal or side crash. The retrac-
tors will remain locked after the pretension-
ers are activated. Upon activation, some noise will occur and some smoke may be
released. These conditions are not harmful
and do not indicate a fire in the vehicle.
The driver and all passengers must be
properly restrained by fastening seat belts
at all times, whether or not a pretensioner
is equipped at their seating position, to
minimize the risk of severe injury or death
in the event o
f a crash.
Sit fully back in the seat; sit up straight; do
not lean forward or sideways. Adjust the
belt so the lap portion of the belt is worn
low across the pelvis , not across the waist.
Please refer to “Seat adjustment” section
and the instructions and precautions about
the seat belts in this “Seat belts and child
restraint systems” section for details on
proper seat and seat belt adjustments.
Please note that the pretensioners along
with the air bags will activate in severe
frontal or side crashes. They are not
designed to activate in rear impacts, roll-
overs, or minor frontal side crashes. The
pretensioners can be activated only once.
If the pretensioners are activated (that is, if
the air bags are activated), have the pre-
tensioner system serviced by an autho-
rized SUZUKI dealer as soon as possible.
If AIR BAG light on the instrument cluster
does not blink or come on briefly when the
ignition switch is turned to “ON” position or
the engine switch is pressed to change the
WA R N I N G
This section describes your SUZUKI
vehicle’s seat belt pretensioner sys-
tem. Read and follow all these
instructions carefully to minimize
your risk of severe injury or death.
and/or
Label
EXAMPLE
Page 104 of 505
2-81BEFORE DRIVING
75RM4-01E
NOTE:
For the theft deterrent alarm system of
other than Australia, Israel, Germany and
Taiwan models, refer to “Theft deterrent
alarm system” in this section.
Oil change
(Oil life monitoring system reset setting)
(if equipped)
The oil life monitoring system must be
reset after changing the engine oil and oil
filter.
IS A/C (ENG A-STOP system setting)
(if equipped)
• When using the automatic heating and air conditioning system (if equipped),
you can select one of the following
engine auto stop settings.
– Standard
– Economy
–Comfort
• When “Economy” is selected, engine
auto stop condition is eased, compared
with “Standard”. Engine auto stop condi-
tion will occur more f requently, the stop
time will be longer, leading to reduction
of fuel consumption.
• When “Comfort” is sel ected, engine auto
stop condition becomes severe, com-
pared with “Standard”. Engine auto stop
condition will occur less frequently, the
stop time will be shorter, leading to more
comfortable cabin condition by air condi-
tioner. TPMS
(Tire pressure monitoring system set-
ting) (if equipped)
• You can check the current tire inflation
pressure on the information display.
• You can set one of the initial values of
tire pressure below that are indicated on
the tire information label.
– Comfort Mode
– Load Mode
Refer to “Tire pressure monitoring system
(TPMS)” in the “OPERATING YOUR VEHI-
CLE” section for details.
Display item (if equipped)
(Idling stop setting)
You can switch whether the information
display shows the engine stopping time by
the ENG A-STOP system.
(Idling disp setting)
You can switch whether the information
display shows the Eco-driving display
when the ignition switch is turned to
“LOCK” position or the ignition mode is
changed to LOCK (OFF).
(Idling warn setting)
You can switch whether the information
display shows the warning and indicator
messages related on the ENG A-STOP
system.
(Regen disp setting)
You can choose that the deceleration
energy regenerating indicator light comes
on or does not come on. Default (initialization setting)
If you select “YES” and push the informa-
tion switch (2), all settings will be reinitial-
ized.
Page 124 of 505
2-101BEFORE DRIVING
75RM4-01E
Warning and indicator lightsNOTE:
If warning and indicator lights blink or
come on, the corresponding messages
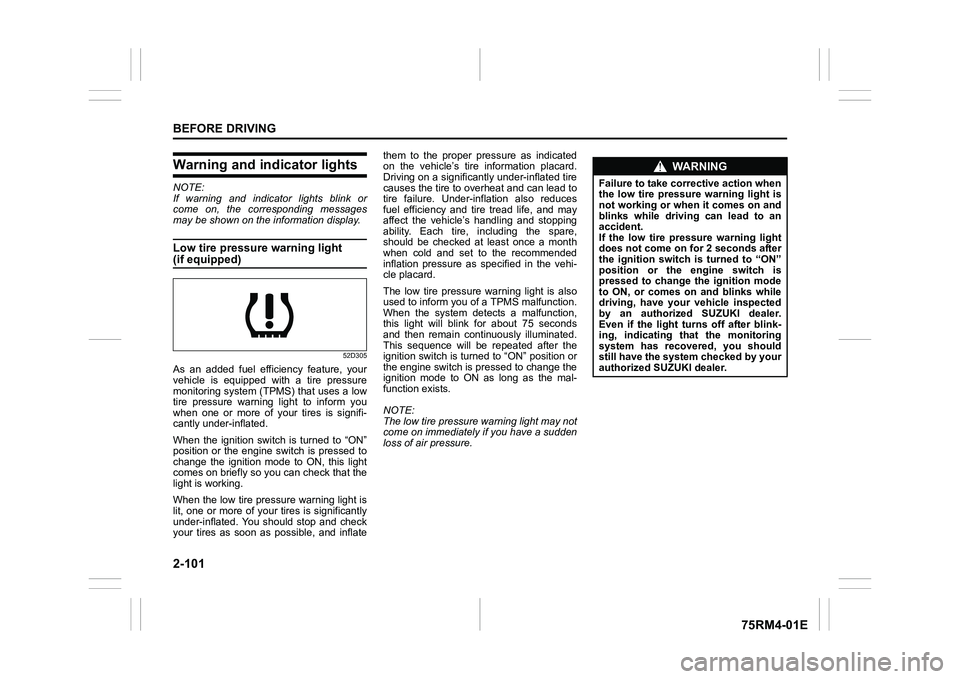
may be shown on the information display.Low tire pressure warning light (if equipped)
52D305
As an added fuel efficiency feature, your
vehicle is equipped with a tire pressure
monitoring system (TPMS) that uses a low
tire pressure warning light to inform you
when one or more of your tires is signifi-
cantly under-inflated.
When the ignition switch is turned to “ON”
position or the engine switch is pressed to
change the ignition mode to ON, this light
comes on briefly so you can check that the
light is working.
When the low tire pressure warning light is
lit, one or more of your tires is significantly
under-inflated. You should stop and check
your tires as soon as possible, and inflate them to the proper pressure as indicated
on the vehicle’s tire information placard.
Driving on a significantly under-inflated tire
causes the tire to overheat and can lead to
tire failure. Under-inf
lation also reduces
fuel efficiency and tire tread life, and may
affect the vehicle’s handling and stopping
ability. Each tire, including the spare,
should be checked at least once a month
when cold and set to the recommended
inflation pressure as specified in the vehi-
cle placard.
The low tire pressure warning light is also
used to inform you of a TPMS malfunction.
When the system detects a malfunction,
this light will blink for about 75 seconds
and then remain continuously illuminated.
This sequence will be repeated after the
ignition switch is turned to “ON” position or
the engine switch is pressed to change the
ignition mode to ON as long as the mal-
function exists.
NOTE:
The low tire pressure warning light may not
come on immediately if you have a sudden
loss of air pressure.
WA R N I N G
Failure to take corrective action when
the low tire pressure warning light is
not working or when it comes on and
blinks while driving can lead to an
accident.
If the low tire pressure warning light
does not come on for 2 seconds after
the ignition switch is turned to “ON”
position or the engine switch is
pressed to change the ignition mode
to ON, or comes on and blinks while
driving, have your vehicle inspected
by an authorized SUZUKI dealer.
Even if the light tu rns off after blink-
ing, indicating that the monitoring
system has recovered, you should
still have the system checked by your
authorized SUZUKI dealer.
Page 126 of 505
2-103BEFORE DRIVING
75RM4-01E
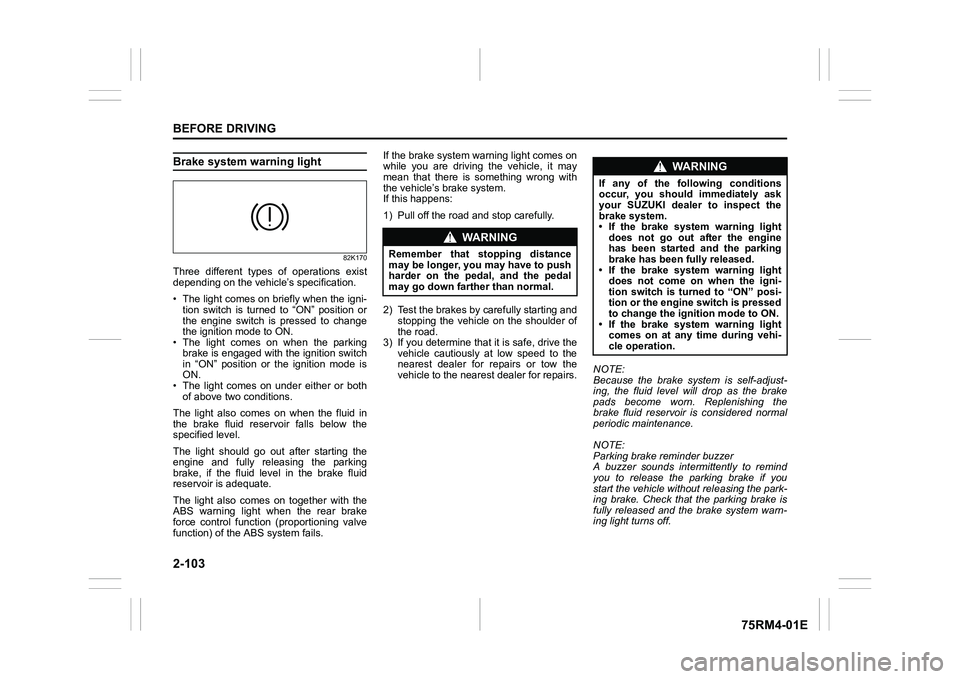
Brake system warning light
82K170
Three different types of operations exist
depending on the vehicle’s specification.
• The light comes on briefly when the igni- tion switch is turned to “ON” position or
the engine switch is pressed to change
the ignition mode to ON.
• The light comes on when the parking
brake is engaged with the ignition switch
in “ON” position or the ignition mode is
ON.
• The light comes on under either or both of above two conditions.
The light also comes on when the fluid in
the brake fluid reservoir falls below the
specified level.
The light should go out after starting the
engine and fully releasing the parking
brake, if the fluid level in the brake fluid
reservoir is adequate.
The light also comes on together with the
ABS warning light when the rear brake
force control function (proportioning valve
function) of the ABS system fails. If the brake system warning light comes on
while you are driving the vehicle, it may
mean that there is something wrong with
the vehicle’s brake system.
If this happens:
1) Pull off the road and stop carefully.
2) Test the brakes by carefully starting and
stopping the vehicle on the shoulder of
the road.
3) If you determine that it is safe, drive the
vehicle cautiously at low speed to the
nearest dealer for repairs or tow the
vehicle to the nearest dealer for repairs. NOTE:
Because the brake system is self-adjust-
ing, the fluid level will drop as the brake
pads become worn. Replenishing the
brake fluid reservoir is considered normal
periodic maintenance.
NOTE:
Parking brake reminder buzzer
A buzzer sounds intermittently to remind
you to release the parking brake if you
start the vehicle without releasing the park-
ing brake. Check that the parking brake is
fully released and the brake system warn-
ing light turns off.
WA R N I N G
Remember that stopping distance
may be longer, you may have to push
harder on the pedal, and the pedal
may go down farther than normal.
WA R N I N G
If any of the following conditions
occur, you should immediately ask
your SUZUKI dealer to inspect the
brake system.
• If the brake system warning light
does not go out after the engine
has been started and the parking
brake has been fully released.
• If the brake system warning light does not come on when the igni-
tion switch is turned to “ON” posi-
tion or the engine switch is pressed
to change the ignition mode to ON.
• If the brake system warning light comes on at any time during vehi-
cle operation.