horn SUZUKI IGNIS 2017 Owners Manual
[x] Cancel search | Manufacturer: SUZUKI, Model Year: 2017, Model line: IGNIS, Model: SUZUKI IGNIS 2017Pages: 505, PDF Size: 8.36 MB
Page 23 of 505
BEFORE DRIVING
2
75RM4-01E
60G404
Keys ......................................................................................2-1
Door locks .................................................... ........................2-2
Keyless push start system remote controller /
Keyless entry system transmitte r (if equipped) ................2-7
Theft deterrent alarm system (if equipped) .................... ...2-16
Theft deterrent light (if equipped) ........................... ...........2-19
Windows ....................................................... ........................2-20
Mirrors ....................................................... ...........................2-23
Front seats ................................................... ........................2-27
Rear seats .................................................... .........................2-29
BEFORE DRIVINGSeat belts and child restraint systems ........................ ...... 2-33
Child restraint system f or countries applied for
UN Regulation No.16 ........................................... ................ 2-43
Supplemental restraint system (air bags) ...................... ... 2-54
Instrument cluster ............................................ ................... 2-68
Speedometer ................................................... .................... 2-69
Tachometer (if equipped) ...................................... ............. 2-69
Fuel gauge .................................................... ....................... 2-70
Brightness control ............................................ .................. 2-70
Information display
(instrument clus ter with tachometer) .......................... ...... 2-72
Information display
(instrument clus ter without tachometer) ....................... ... 2-93
Warning and indicator lights .................................. .......... 2-101
Lighting control lever ........................................ ............... 2-116
Headlight leveling switch (if equipped) ....................... .... 2-123
Turn signal control lever ..................................... ............. 2-123
Hazard warning switch ......................................... ............ 2-125
Windshield wiper and washer lever ............................. ... 2-125
Tilt steering lock lever ... ................................................... 2-128
Horn .......................................................... .......................... 2-128
Heated rear window switch /
heated outside rearview mirror switch (if equipped) ..... 2-129
Page 41 of 505
2-18
BEFORE DRIVING
75RM4-01E
Checking whether the alarm has been
triggered during parking
If the alarm was triggered due to an unau-
thorized entry into the vehicle and you then
press the engine switch to change the igni-
tion mode to ON or turn the ignition switch
to “ON” position, the theft deterrent light
will blink rapidly for about 8 seconds and a
buzzer will beep 4 times during this period.
If this happens, check whether your vehi-
cle has been broken into while you were
away from it.
Enabling and disabling the theft deter-
rent alarm system
The theft deterrent alarm system can be
either enabled or disabled.
When enabled (factory setting)
When the system is enabled, it causes the
hazard warning lights to flash for about 40
seconds if any of the alarm trigger condi-
tions is met. The system also causes the
interior buzzer to beep intermittently for
about 10 seconds, which is followed by
intermittent sounding of the horn for about
30 seconds.
The theft deterrent light continues to blink
during this time.
When disabled
When the system is disabled, it stays dis-
armed even if you perform any system
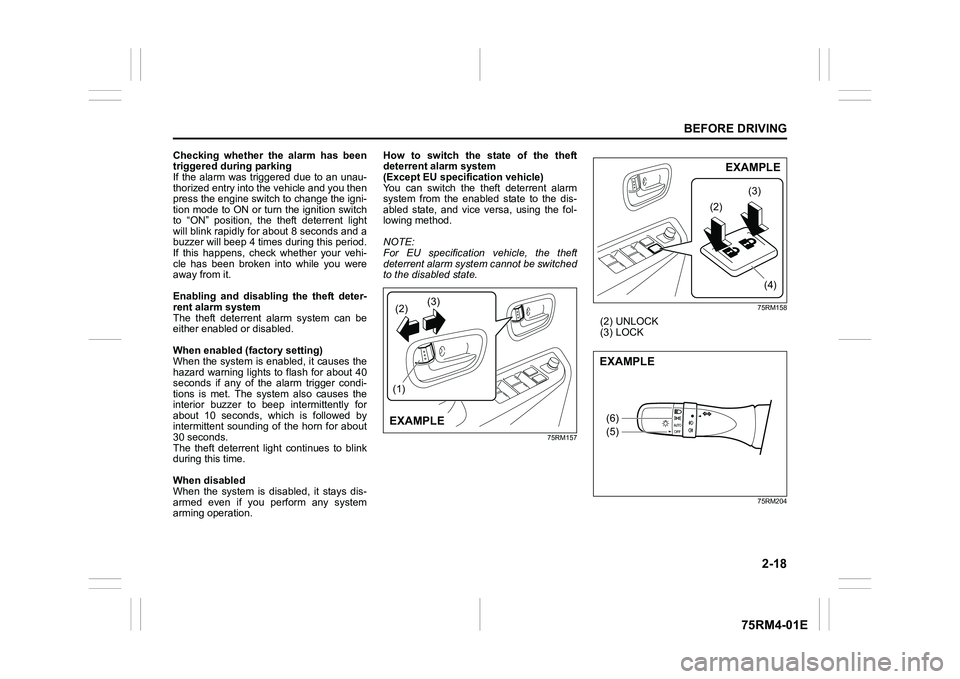
arming operation. How to switch the state of the theft
deterrent alarm system
(Except EU specification vehicle)
You can switch the theft deterrent alarm
system from the enabled
state to the dis-
abled state, and vice versa, using the fol-
lowing method.
NOTE:
For EU specification vehicle, the theft
deterrent alarm system cannot be switched
to the disabled state.
75RM157 75RM158
(2) UNLOCK
(3) LOCK
75RM204
(2)
(1) (3)EXAMPLE
(2)
(3)
(4)
EXAMPLE
(6)
(5)EXAMPLE
Page 151 of 505

2-128
BEFORE DRIVING
75RM4-01E
Tilt steering lock lever
75RM044
(1) LOCK
(2) UNLOCK
The lock lever is located under the steering
column. To adjust the steering wheel
height:
1) Push down the lock lever to unlock the
steering column.
2) Adjust the steering wheel to the desired height and lock the steering column by
pulling up the lock lever.
3) Try moving the steering wheel up and down to check that it is securely locked
in position.
Horn
75RM045
Press the horn button of the steering wheel
to sound the horn. The horn will sound with
the ignition switch in any position or any
ignition mode.
(1)
(2)
EXAMPLE
WA R N I N G
Never attempt to adjust the steering
wheel while the vehicle is moving or
you could lose contr ol of the vehicle.
EXAMPLE
Page 155 of 505
3-2
OPERATING YOUR VEHICLE
75RM4-01E
NOTE:
It is normal for water to drip from the air
conditioning system after use.
4) Check that the hood is fully closed andlatched.
5) Check the headlights, turn signal lights, brake lights and horn for proper opera-
tion.
6) Adjust the seat and head restraint.
7) Check the brake pedal and the parking brake lever.
8) Adjust the mirrors.
9) Check that you and all passengers have properly fastened your seat belts.
10)Check that all warning lights come on as the ignition switch is turned to “ON”
position or the engine switch is pressed
to change the ignition mode to ON.
11)Check all gauges.
12)Check that the brake system warning light turns off when the parking brake is
released.
Once a week, or each time you fill your fuel
tank, perform the following under-hood
checks:
1) Engine oil level
2) Coolant level
3) Brake fluid level
4) Lead-acid battery solution level
5) Windshield washer fluid level
6) Hood latch operation Pull the hood release handle inside the
vehicle. Check that you cannot open the hood all the way without releasing
the secondary latch. Close the hood
securely after checking for proper latch
operation. See the item “All latches,
hinges and locks” of “Chassis, body
and others” in “Maintenance schedule”
in the “INSPECTION AND MAINTE-
NANCE” section for lubrication sched-
ule.
Once a month, or each time you fill your
fuel tank, check the tire pressure using a
tire pressure gauge. Also check the tire
pressure of the spare tire.
Engine oil consumptionIt is normal for the engine to consume
some engine oil during normal vehicle
operation.
The amount of engine oil consumption
depends on viscosity and quality of the oil
and your driving conditions.
More oil is consumed during high-speed
driving and when there is frequent acceler-
ation and deceleration. Under high loads,
your engine also will consume more oil.
A new engine also consumes more oil,
since its pistons, piston rings and cylinder
walls have not yet become conditioned.
New engines reach the normal level of oil
consumption only after approximately
5000 km (3000 miles) driving.
Oil consumption:
Max. 1.0 L per 1000 km
(1 Qt. per 600 miles)
When judging the amount of oil consump-
tion, note that the oil may become diluted
and it is difficult to judge the accurate oil
level.
As an example, if a vehicle is used for
repeated short trips, and consumes a nor-
mal amount of oil, the dipstick may not
show any drop in the oil level at all, even
after 1000 km (600 miles) or more of driv-
ing. This is because the oil gradually
becomes diluted with fuel or moisture,
WA R N I N G
Check that the hood is fully closed
and latched before d riving. If it is not,
it can fly up unexpectedly during
driving, obstructing your view and
resulting in an accident.
Page 296 of 505
5-41OTHER CONTROLS AND EQUIPMENT
75RM4-01E
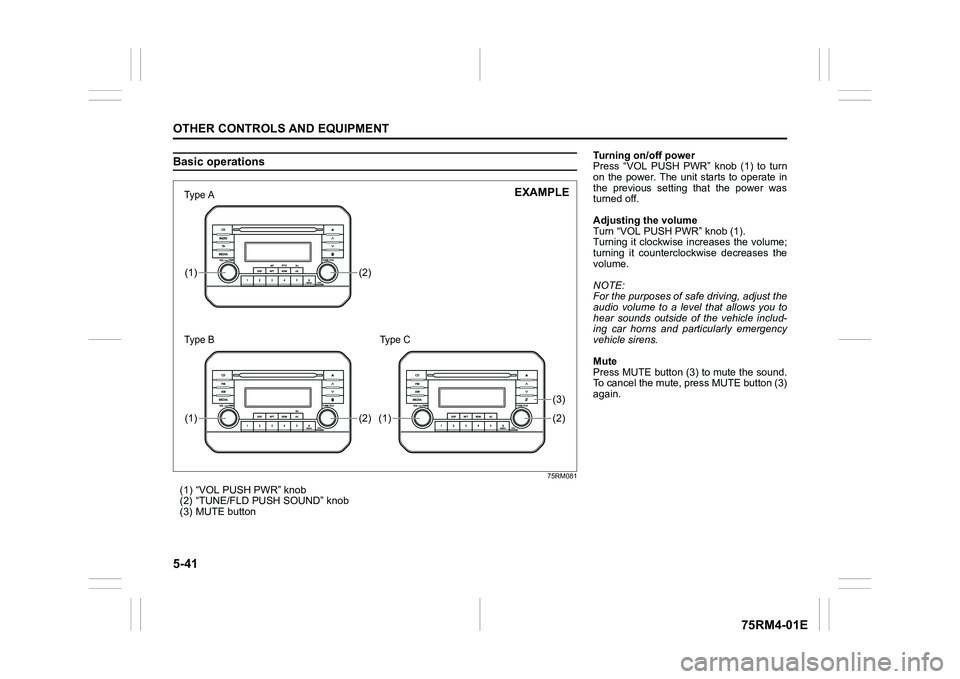
Basic operations
75RM081
(1) “VOL PUSH PWR” knob
(2) “TUNE/FLD PUSH SOUND” knob
(3) MUTE button
(2)
(1)(2)
(1)
(2)(3)
(1)
�7�ś�S�H�а�Ν
�7�ś�S�H�а�Π
EXAMPLE
Type C
Turning on/off power
Press “VOL PUSH PWR” knob (1) to turn
on the power. The unit starts to operate in
the previous setting that the power was
turned off.
Adjusting the volume
Turn “VOL PUSH PWR” knob (1).
Turning it clockwise increases the volume;
turning it counterclockwise decreases the
volume.
NOTE:
For the purposes of safe driving, adjust the
audio volume to a level that allows you to
hear sounds outside of the vehicle includ-
ing car horns and particularly emergency
vehicle sirens.
Mute
Press MUTE button (3) to mute the sound.
To cancel the mute, press MUTE button (3)
again.
Page 397 of 505
7-48
INSPECTION AND MAINTENANCE
75RM4-01E
81A283
Headlight aimingSince special procedures are required, ask
your authorized SUZUKI dealer for this job.
(21) 20 A Power window timer
(22) 5 A Key
(23) 15 A Horn
(24) 5 A Tail light (Left)
(25) 10 A Tail light
(26) 10 A Air bag
(27) 10 A Ignition-1 signal
(28) 10 A Back-up light
(29) 5 A ACC-3
(30) 20 A Rear defogger
(31) 10 A Heated mirror
(32) 15 A ACC-2
(33) 5 A ACC
(34) 10 A Rear wiper
(35) 5 A Ignition-2 signal
(36) 15 A Washer
(37) 25 A Front wiper
(38) 10 A Stop light
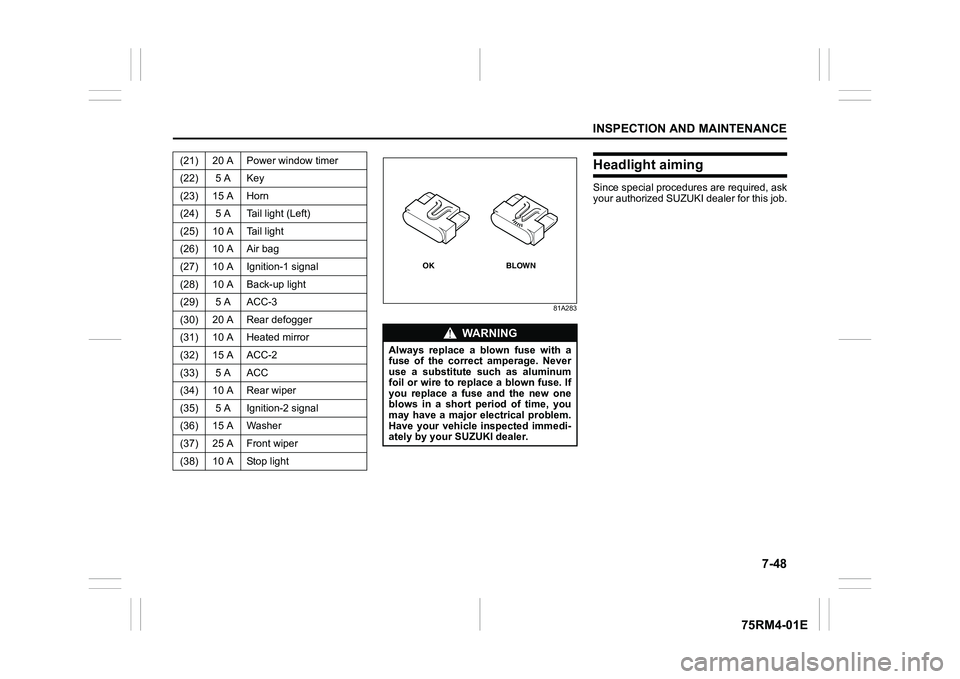
WA R N I N G
Always replace a blown fuse with a
fuse of the correct amperage. Never
use a substitute such as aluminum
foil or wire to replace a blown fuse. If
you replace a fuse and the new one
blows in a short period of time, you
may have a major electrical problem.
Have your vehicle inspected immedi-
ately by your SUZUKI dealer.
BLOWN
OK
Page 452 of 505
13-4INDEX
75RM4-01E
Horn .................................................................................... 2-128
How ABS works .................................................. ................. 3-77II/S AC Settings ..................................................................... 3-48
Idling stop time ............................................... ..................... 2-78
If you cannot shift CVT gearshift lever
out of “P” (PARK) .............................................. .................. 3-23
Ignition key reminder .......................................... .................. 2-2
Ignition switch................................................ ........................ 3-3
Illumination indicator light ................................... ............. 2-112
Immobilizer system ............................................. .................. 2-1
Immobilizer/keyless push start system warning light.... 2-108
Improving fuel economy ......................................... .............. 4-2
Information display
(instrument cluster with tachometer) ........................... ..... 2-72
Information display
(instrument cluster without tachometer) ........................ ... 2-93
Inside rearview mirror ...... ................................................... 2-23
Installation of child restraint with top tether ................ ..... 2-51
Installation of radio frequenc y transmitters...................... 5-32
Installation with ISOFIX type anchorages ....................... .. 2-49
Installation with lap-shoulder seat belts ........................... 2-48
Instantaneous fuel consumption .............................. 2-7 4, 2-94
Instrument cluster ............................................. .................. 2-68
Interior light ................................................. .................. 5-5, 7-49
Interior workable area for engi ne starting ........................... 3-9JJacking instructions ........................................... ................... 8-1
Jump-starting instructions ..................................... ............ 8-10
KKeyless entry system transmitter............................... .2-7, 2-13
Keyless push start system ... ................................................. 3-6
Keyless push start system rem ote controller.....................2-7
Keys........................................................... .............................. 2-1LLane departure warning indicator light......................... ... 2-110
Lane departure warning OFF indicator light ................... 2- 111
Lane departure warning OFF switch .............................. .... 3-62
Lap-shoulder belt .............................................. ................... 2-35
Lead-acid battery .............................................. ................... 7-42
LED headlight warning light.................................... .......... 2-112
LED headlights ................................................. .................... 7-49
License plate light ............................................ .................... 7-54
Light reminder buzzer.......................................... .............. 2-118
Lighting control lever ......................................... ............... 2-116
Lighting operation............................................. ................. 2-116
Listening to a CD.............................................. .................... 5-50
Listening to an iPod
®........................................................... 5-60
Listening to an MP3/WMA/AAC disc ............................... ... 5-53
Listening to files stored in a USB device...................... ..... 5-57
Listening to the radio......................................... .........5-43, 5-45
Lithium-ion battery............................................ ................... 7-45
Low engine coolant temperature l ight (blue color)......... 2-113
Low fuel warning light ......................................... .............. 2-108
Low tire pressure warning light ...............................2 -101, 3-85
Luggage compartment cover ...................................... ........ 5-11
MMain beam (high beam) indicator light ............................ 2-112
Maintenance recommended under severe driving
conditions (except for EU countries and Israel) ................ .7-8