SUZUKI IGNIS 2019 Owners Manual
Manufacturer: SUZUKI, Model Year: 2019, Model line: IGNIS, Model: SUZUKI IGNIS 2019Pages: 505, PDF Size: 8.36 MB
Page 381 of 505

7-32
INSPECTION AND MAINTENANCE
75RM4-01E
54G106
Spark plug gap “a”
ILZKR6F11:
1.0 – 1.1 mm (0.039 – 0.043 in.)
(For K12M engine model)
Since special procedures, materials and
tools are required, it is recommended that
you trust this job to your authorized
SUZUKI dealer.
Continuously variable transaxle (CVT) fluidSpecified fluidUse a CVT fluid SUZUKI CVT FLUID
GREEN-2.Fluid level checkYou must check the fluid level with the CVT
fluid at normal ope rating temperature.
To check the fluid level:
1) To warm up the CVT fluid, drive the vehicle for more 5 km. NOTE:
Do not check the fluid level if you have just
driven the vehicle for a long time at high
speed, or if you have driven in city traffic in
hot weather, or if the vehicle has been pull-
ing a trailer. Wait until the fluid cools down
(about 30 minutes), or the fluid level indi-
cation will not be correct.
2) Park your vehicle on level ground.
3) Apply the parking brake and then start
the engine in “P” (Park). Let it idle for
two minutes and keep it running during
the fluid level check.
4) With your foot on the brake pedal,
move the gearshift lever through each
gear, pausing for about three seconds
in each range. Then move it back to the
“P” (Park) position.
NOTICE
When replacing spark plugs, you
should use the brand and type speci-
fied for your vehicle. For the specified
plugs, refer to “SPECIFICATIONS”
section in the end of this book. If you
wish to use a brand of spark plug
other than the specified plugs, con-
sult your SUZUKI dealer.
NOTICE
Driving with too much or too little
fluid can damage the transaxle.
NOTICE
Be sure to use the specified CVT
fluid. Using CVT fluid other than
SUZUKI CVT FLUID GREEN-2 may
damage the CVT of your vehicle.
WA R N I N G
Be sure to depress the brake pedal
when moving the gearshift lever, or
the vehicle can move suddenly.
Page 382 of 505
7-33INSPECTION AND MAINTENANCE
75RM4-01E
75F086
81PN159 75RM370
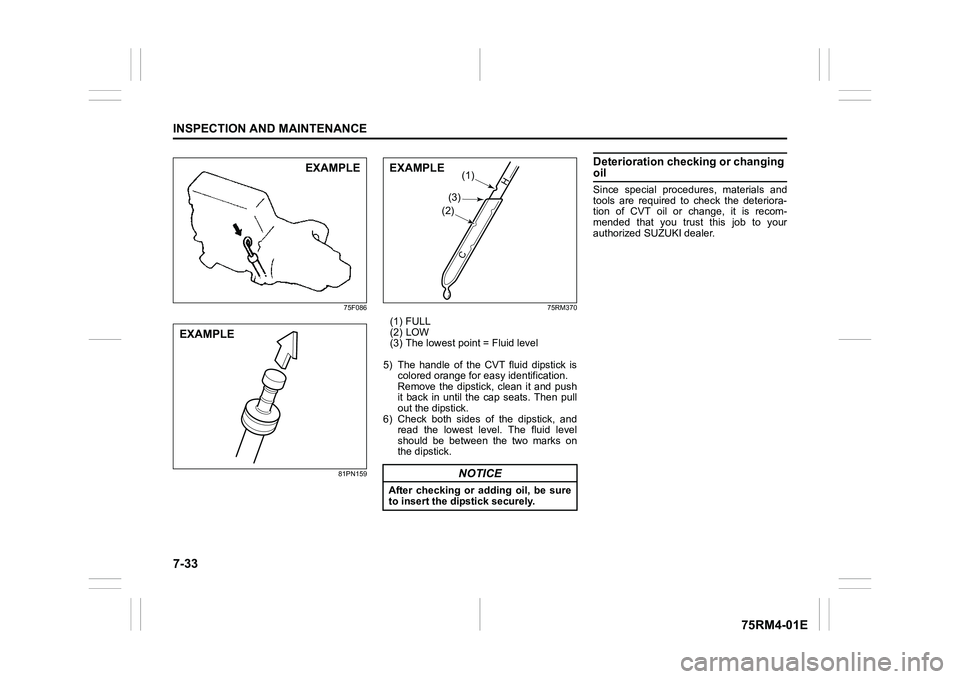
(1) FULL
(2) LOW
(3) The lowest point = Fluid level
5) The handle of the CVT fluid dipstick is colored orange for ea sy identification.
Remove the dipstick, clean it and push
it back in until the cap seats. Then pull
out the dipstick.
6) Check both sides of the dipstick, and read the lowest level. The fluid level
should be between the two marks on
the dipstick.
Deterioration checking or changing oilSince special procedures, materials and
tools are required to check the deteriora-
tion of CVT oil or change, it is recom-
mended that you trust this job to your
authorized SUZUKI dealer.
EXAMPLE
EXAMPLE
NOTICE
After checking or adding oil, be sure
to insert the di pstick securely.
(3)
(1)
(2)
C
H
�(�Ο�Ν�0�3�/�(
Page 383 of 505
7-34
INSPECTION AND MAINTENANCE
75RM4-01E
Gear oilManual transaxle oil / Auto Gear
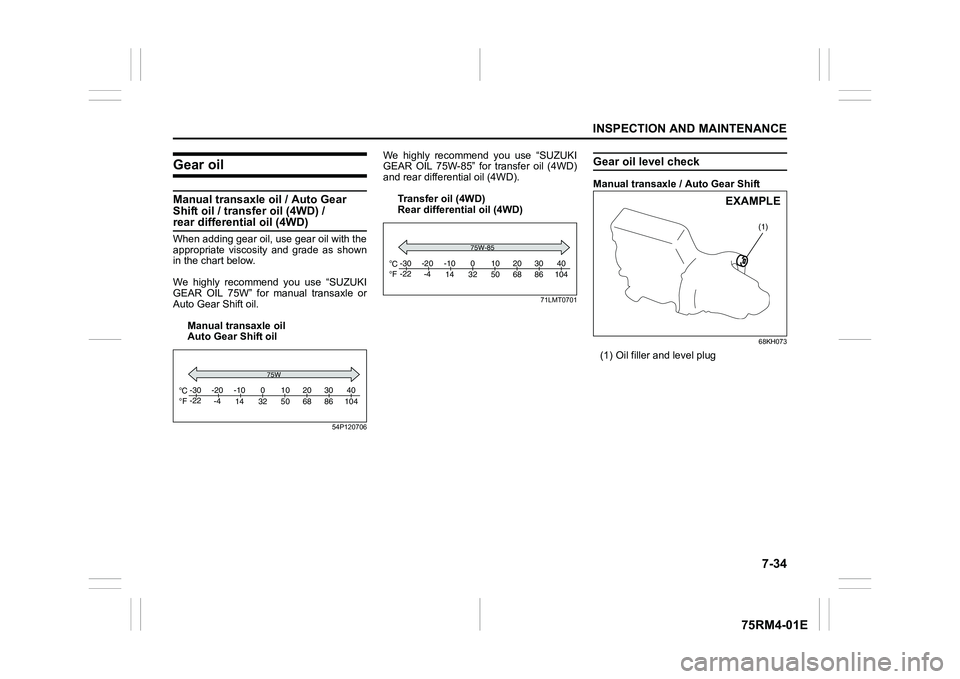
Shift oil / transfer oil (4WD) / rear differential oil (4WD)When adding gear oil, use gear oil with the
appropriate viscosity and grade as shown
in the chart below.
We highly recommend you use “SUZUKI
GEAR OIL 75W” for manual transaxle or
Auto Gear Shift oil.Manual transaxle oil
Auto Gear Shift oil
54P120706
We highly recommend you use “SUZUKI
GEAR OIL 75W-85” for transfer oil (4WD)
and rear differential oil (4WD).Transfer oil (4WD)
Rear differential oil (4WD)
71LMT0701
Gear oil level checkManual transaxle / Auto Gear Shift
68KH073
(1) Oil filler and level plug
C
Fo
o-30
-22
-20
-4 -10
14 32 50 68 86 104 010203040
75W
C
Fo
o-30
-22
-20
-4 -10
14 32 50 68 86 104 010203040
75W-85
(1)
EXAMPLE
Page 384 of 505
7-35INSPECTION AND MAINTENANCE
75RM4-01E
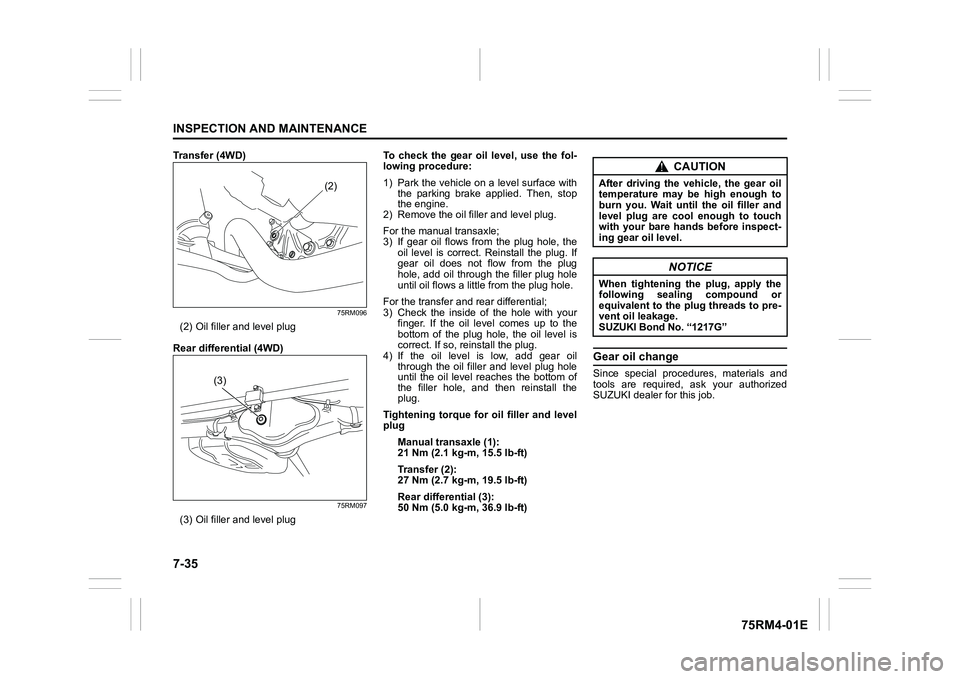
Transfer (4WD)
75RM096
(2) Oil filler and level plug
Rear differential (4WD)
75RM097
(3) Oil filler and level plug To check the gear oil level, use the fol-
lowing procedure:
1) Park the vehicle on a level surface with
the parking brake applied. Then, stop
the engine.
2) Remove the oil filler and level plug.
For the manual transaxle;
3) If gear oil flows from the plug hole, the
oil level is correct. Reinstall the plug. If
gear oil does not flow from the plug
hole, add oil through the filler plug hole
until oil flows a littl e from the plug hole.
For the transfer and rear differential;
3) Check the inside of the hole with your finger. If the oil level comes up to the
bottom of the plug hole, the oil level is
correct. If so, reinstall the plug.
4) If the oil level is low, add gear oil through the oil filler and level plug hole
until the oil level reaches the bottom of
the filler hole, and then reinstall the
plug.
Tightening torque for oil filler and level
plug
Manual transaxle (1):
21 Nm (2.1 kg-m, 15.5 lb-ft)
Transfer (2):
27 Nm (2.7 kg-m, 19.5 lb-ft)
Rear differential (3):
50 Nm (5.0 kg-m, 36.9 lb-ft)
Gear oil changeSince special procedures, materials and
tools are required, ask your authorized
SUZUKI dealer for this job.
(2)
(3)
CAUTION
After driving the vehicle, the gear oil
temperature may be high enough to
burn you. Wait until the oil filler and
level plug are cool enough to touch
with your bare hands before inspect-
ing gear oil level.
NOTICE
When tightening the plug, apply the
following sealing compound or
equivalent to the plug threads to pre-
vent oil leakage.
SUZUKI Bond No. “1217G”
Page 385 of 505

7-36
INSPECTION AND MAINTENANCE
75RM4-01E
Clutch pedalCable control clutch
54G274
Clutch pedal play “d”:
10 – 15 mm (0.4 – 0.6 in.)
Measure the clutch pedal play by moving
the clutch pedal with your hand and mea-
suring the distance it moves until you feel
slight resistance. The play in the clutch
pedal should be between the specified val-
ues. If the play is more or less than the
above, or clutch dragging is felt with the
pedal fully depressed, have the clutch
inspected by your SUZUKI dealer.
BrakesBrake fluid
75RM095
Check the brake fluid level by looking at
the reservoir in the engine compartment.
Check that the fluid level is between “MAX”
and “MIN” lines.
EXAMPLE
NOTICE
If your brake fluid level is near the
“MIN” line, there is a possibility of
brake pad and/or shoe wear and brake
fluid leakage.
Consult with your authorized SUZUKI
dealer regarding this possibility
before filling the reservoir.
WA R N I N G
Failure to follow the guidelines below
can result in personal injury or seri-
ous damage to the brake system.
• If the brake fluid in the reservoir drops below a certain level, the
brake warning light on the instru-
ment cluster will come on (the
engine must be running with the
parking brake fully disengaged).
Should the light come on, immedi-
ately ask your SUZUKI dealer to
inspect the brake system.
• A rapid fluid loss indicates leakage
in the brake system which should
be inspected by your SUZUKI
dealer immediately.
• Do not use any fluid other than SAE J1703 or DOT3 brake fluid. Do not
use reclaimed fluid or fluid that has
been stored in old or open contain-
ers. It is essential that foreign parti-
cles and other liquids are kept out
of the brake fluid reservoir.
CAUTION
Brake fluid can harm your eyes and
damage painted surfaces. Be careful
when refilling the reservoir.
Page 386 of 505
7-37INSPECTION AND MAINTENANCE
75RM4-01E
NOTE:
• The fluid level can be expected to gradu-ally fall as the brake pad and/or shoe
wear.
• Brake fluid absorbs water over time and
brake fluid with high water content may
cause vapor lock or brake system mal-
function.
Replace your brake fluid in accordance
with the maintenance schedule in your
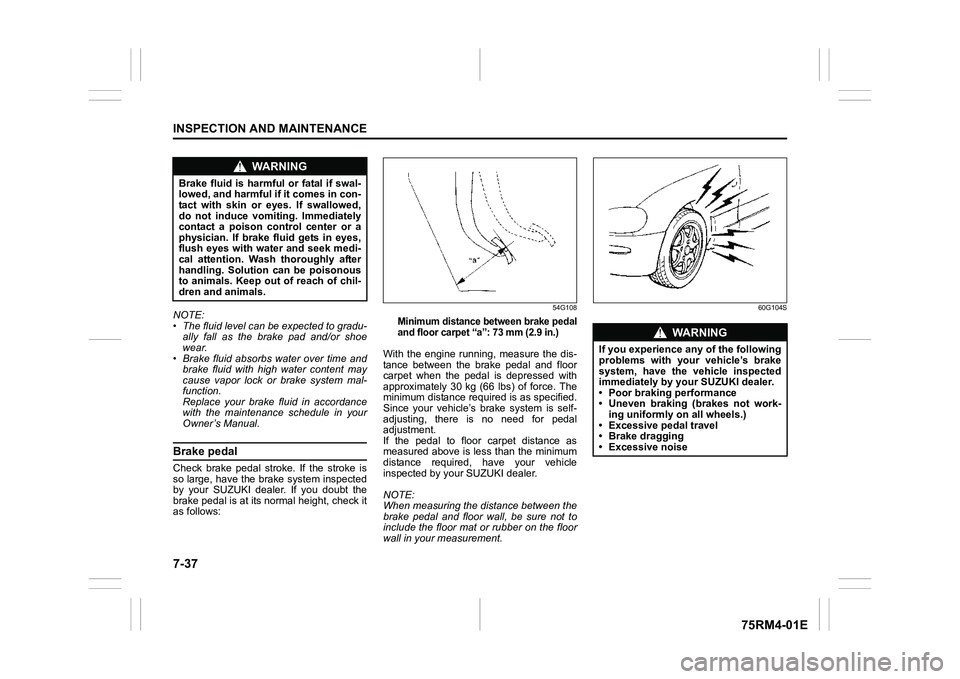
Owner’s Manual.Brake pedalCheck brake pedal stroke. If the stroke is
so large, have the brake system inspected
by your SUZUKI dealer. If you doubt the
brake pedal is at its normal height, check it
as follows:
54G108
Minimum distance between brake pedal
and floor carpet “a”: 73 mm (2.9 in.)
With the engine running, measure the dis-
tance between the brake pedal and floor
carpet when the pedal is depressed with
approximately 30 kg (66 lbs) of force. The
minimum distance required is as specified.
Since your vehicle’s brake system is self-
adjusting, there is no need for pedal
adjustment.
If the pedal to floor carpet distance as
measured above is less than the minimum
distance required, have your vehicle
inspected by your SUZUKI dealer.
NOTE:
When measuring the distance between the
brake pedal and floor wall, be sure not to
include the floor mat or rubber on the floor
wall in your measurement.
60G104S
WA R N I N G
Brake fluid is harmful or fatal if swal-
lowed, and harmful if it comes in con-
tact with skin or eyes. If swallowed,
do not induce vomiting. Immediately
contact a poison control center or a
physician. If brake fluid gets in eyes,
flush eyes with water and seek medi-
cal attention. Wash thoroughly after
handling. Solution can be poisonous
to animals. Keep out of reach of chil-
dren and animals.
WA R N I N G
If you experience any of the following
problems with your vehicle’s brake
system, have the vehicle inspected
immediately by your SUZUKI dealer.
• Poor braking performance
• Uneven braking (brakes not work- ing uniformly on all wheels.)
• Excessive pedal travel
• Brake dragging
• Excessive noise
Page 387 of 505
7-38
INSPECTION AND MAINTENANCE
75RM4-01E
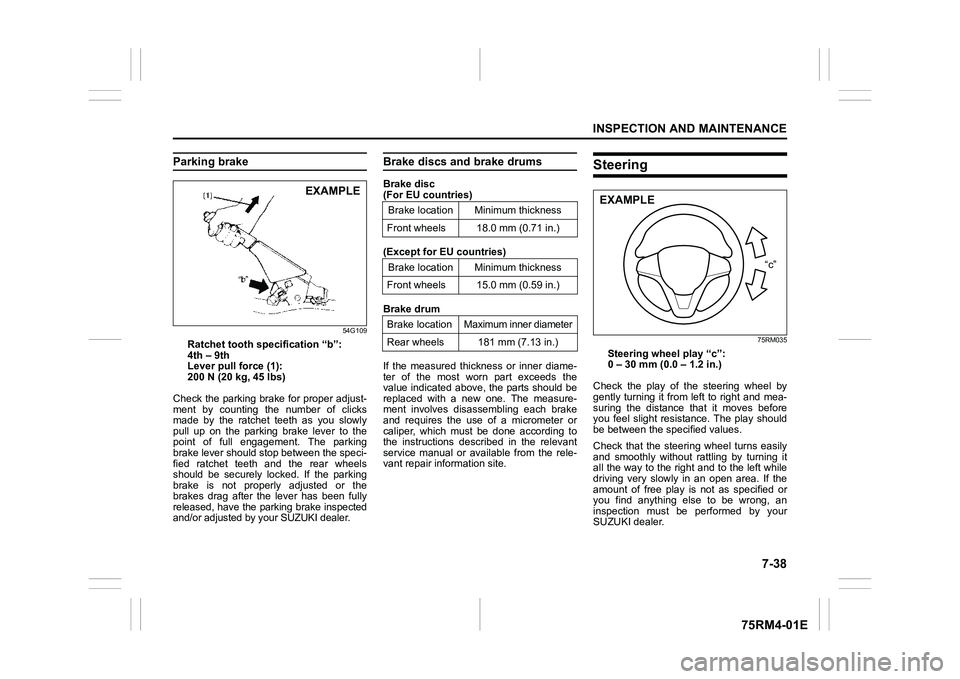
Parking brake
54G109
Ratchet tooth specification “b”:
4th – 9th
Lever pull force (1):
200 N (20 kg, 45 lbs)
Check the parking brake for proper adjust-
ment by counting the number of clicks
made by the ratchet teeth as you slowly
pull up on the parking brake lever to the
point of full engagement. The parking
brake lever should stop between the speci-
fied ratchet teeth and the rear wheels
should be securely locked. If the parking
brake is not properly adjusted or the
brakes drag after the lever has been fully
released, have the park ing brake inspected
and/or adjusted by your SUZUKI dealer.
Brake discs and brake drumsBrake disc
(For EU countries)
(Except for EU countries)
Brake drum
If the measured thickness or inner diame-
ter of the most worn part exceeds the
value indicated above, the parts should be
replaced with a new one. The measure-
ment involves disassembling each brake
and requires the use of a micrometer or
caliper, which must be done according to
the instructions described in the relevant
service manual or available from the rele-
vant repair information site.
Steering
75RM035
Steering wheel play “c”:
0 – 30 mm (0.0 – 1.2 in.)
Check the play of the steering wheel by
gently turning it from left to right and mea-
suring the distance that it moves before
you feel slight resistance. The play should
be between the specified values.
Check that the steering wheel turns easily
and smoothly without r attling by turning it
all the way to the right and to the left while
driving very slowly in an open area. If the
amount of free play is not as specified or
you find anything else to be wrong, an
inspection must be performed by your
SUZUKI dealer.
EXAMPLE
Brake location Minimum thickness
Front wheels 18.0 mm (0.71 in.)
Brake location Minimum thickness
Front wheels 15.0 mm (0.59 in.)
Brake location Maximum inner diameter
Rear wheels 181 mm (7.13 in.)
“c”
EXAMPLE
Page 388 of 505
7-39INSPECTION AND MAINTENANCE
75RM4-01E
Tires
80JS025
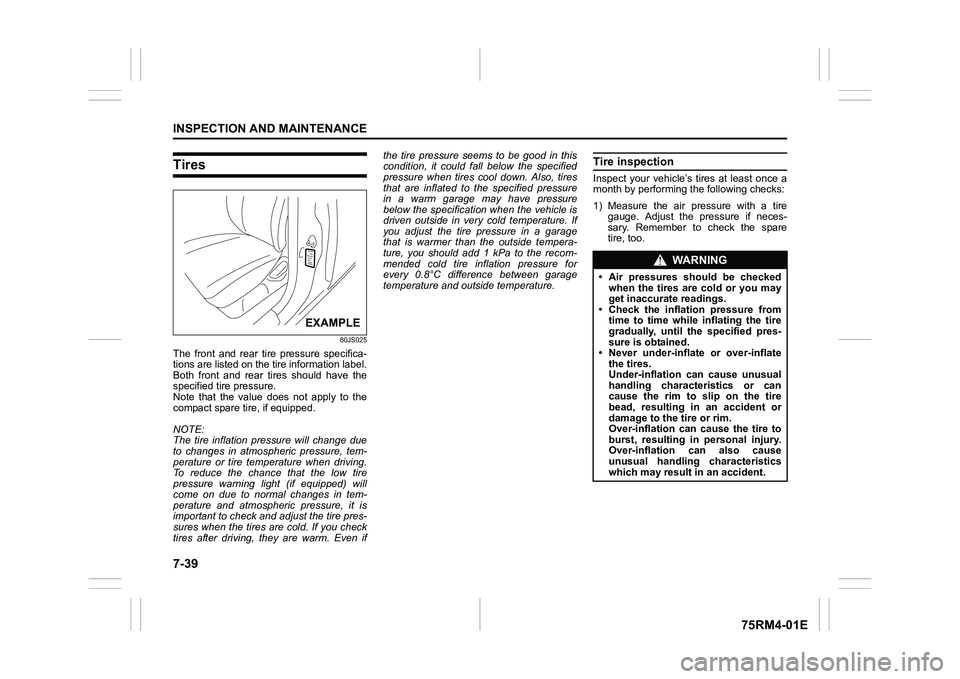
The front and rear tire pressure specifica-
tions are listed on the tire information label.
Both front and rear tires should have the
specified tire pressure.
Note that the value does not apply to the
compact spare tire, if equipped.
NOTE:
The tire inflation pressure will change due
to changes in atmospheric pressure, tem-
perature or tire temperature when driving.
To reduce the chance that the low tire
pressure warning light (if equipped) will
come on due to normal changes in tem-
perature and atmospheric pressure, it is
important to check and adjust the tire pres-
sures when the tires are cold. If you check
tires after driving, they are warm. Even ifthe tire pressure seems to be good in this
condition, it could fall below the specified
pressure when tires co
ol down. Also, tires
that are inflated to the specified pressure
in a warm garage may have pressure
below the specification when the vehicle is
driven outside in very cold temperature. If
you adjust the tire pressure in a garage
that is warmer than the outside tempera-
ture, you should add 1 kPa to the recom-
mended cold tire inflation pressure for
every 0.8°C difference between garage
temperature and outside temperature.
Tire inspectionInspect your vehicle’s tires at least once a
month by performing the following checks:
1) Measure the air pressure with a tire gauge. Adjust the pressure if neces-
sary. Remember to check the spare
tire, too.
EXAMPLE
WA R N I N G
• Air pressures should be checkedwhen the tires are cold or you may
get inaccurate readings.
• Check the inflation pressure from time to time while inflating the tire
gradually, until the specified pres-
sure is obtained.
• Never under-inflate or over-inflate the tires.
Under-inflation can cause unusual
handling characteristics or can
cause the rim to slip on the tire
bead, resulting in an accident or
damage to the tire or rim.
Over-inflation can cause the tire to
burst, resulting in personal injury.
Over-inflation c an also cause
unusual handling characteristics
which may result in an accident.
Page 389 of 505
7-40
INSPECTION AND MAINTENANCE
75RM4-01E
52KM110
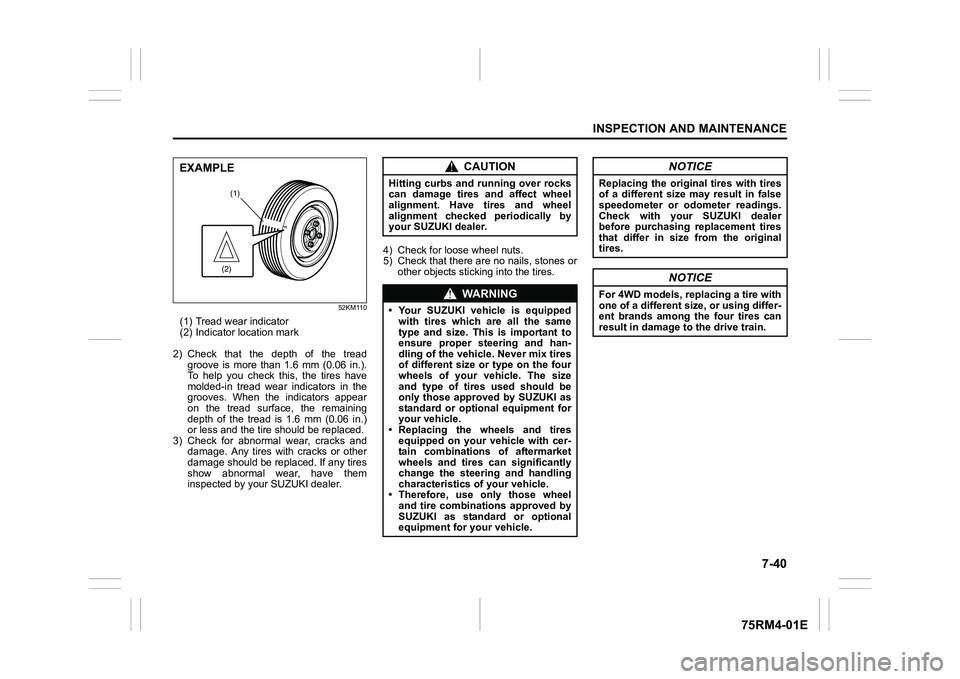
(1) Tread wear indicator
(2) Indicator location mark
2) Check that the depth of the tread groove is more than 1.6 mm (0.06 in.).
To help you check this, the tires have
molded-in tread wear indicators in the
grooves. When the indicators appear
on the tread surface, the remaining
depth of the tread is 1.6 mm (0.06 in.)
or less and the tire should be replaced.
3) Check for abnormal wear, cracks and damage. Any tires with cracks or other
damage should be replaced. If any tires
show abnormal wear, have them
inspected by your SUZUKI dealer. 4) Check for loose wheel nuts.
5) Check that there are no nails, stones or
other objects sticki ng into the tires.
(1)(2)
EXAMPLE
CAUTION
Hitting curbs and running over rocks
can damage tires and affect wheel
alignment. Have tires and wheel
alignment checked periodically by
your SUZUKI dealer.
WA R N I N G
• Your SUZUKI vehicle is equipped
with tires which are all the same
type and size. This is important to
ensure proper steering and han-
dling of the vehicle. Never mix tires
of different size or type on the four
wheels of your vehicle. The size
and type of tires used should be
only those approved by SUZUKI as
standard or optional equipment for
your vehicle.
• Replacing the wheels and tires
equipped on your vehicle with cer-
tain combinations of aftermarket
wheels and tires can significantly
change the steering and handling
characteristics of your vehicle.
• Therefore, use only those wheel
and tire combinations approved by
SUZUKI as standard or optional
equipment for your vehicle.
NOTICE
Replacing the original tires with tires
of a different size may result in false
speedometer or odometer readings.
Check with your SUZUKI dealer
before purchasing replacement tires
that differ in size from the original
tires.
NOTICE
For 4WD models, replacing a tire with
one of a different size, or using differ-
ent brands among the four tires can
result in damage to the drive train.
Page 390 of 505
7-41INSPECTION AND MAINTENANCE
75RM4-01E
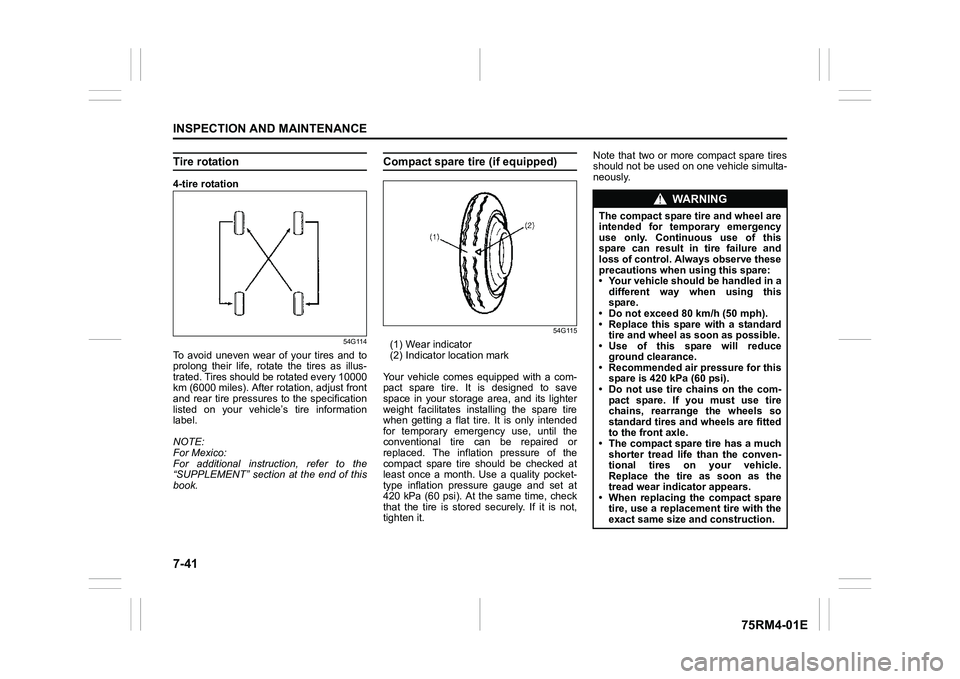
Tire rotation4-tire rotation
54G114
To avoid uneven wear of your tires and to
prolong their life, rotate the tires as illus-
trated. Tires should be rotated every 10000
km (6000 miles). After rotation, adjust front
and rear tire pressures to the specification
listed on your vehicle’s tire information
label.
NOTE:
For Mexico:
For additional instruction, refer to the
“SUPPLEMENT” section at the end of this
book.
Compact spare tire (if equipped)
54G115
(1) Wear indicator
(2) Indicator location mark
Your vehicle comes equipped with a com-
pact spare tire. It is designed to save
space in your storage area, and its lighter
weight facilitates installing the spare tire
when getting a flat tire. It is only intended
for temporary emergency use, until the
conventional tire can be repaired or
replaced. The inflation pressure of the
compact spare tire should be checked at
least once a month. Use a quality pocket-
type inflation pressure gauge and set at
420 kPa (60 psi). At the same time, check
that the tire is stored securely. If it is not,
tighten it. Note that two or more compact spare tires
should not be used on one vehicle simulta-
neously.
WA R N I N G
The compact spare tire and wheel are
intended for temporary emergency
use only. Continuous use of this
spare can result in tire failure and
loss of control. Always observe these
precautions when using this spare:
• Your vehicle should be handled in a
different way when using this
spare.
• Do not exceed 80 km/h (50 mph).
• Replace this spare with a standard tire and wheel as soon as possible.
• Use of this spare will reduce
ground clearance.
• Recommended air pressure for this spare is 420 kPa (60 psi).
• Do not use tire chains on the com- pact spare. If you must use tire
chains, rearrange the wheels so
standard tires and wheels are fitted
to the front axle.
• The compact spare tire has a much
shorter tread life than the conven-
tional tires on your vehicle.
Replace the tire as soon as the
tread wear indicator appears.
• When replacing the compact spare tire, use a replacement tire with the
exact same size and construction.