clock setting SUZUKI IGNIS 2019 Owners Manual
[x] Cancel search | Manufacturer: SUZUKI, Model Year: 2019, Model line: IGNIS, Model: SUZUKI IGNIS 2019Pages: 505, PDF Size: 8.36 MB
Page 97 of 505
2-74
BEFORE DRIVING
75RM4-01E
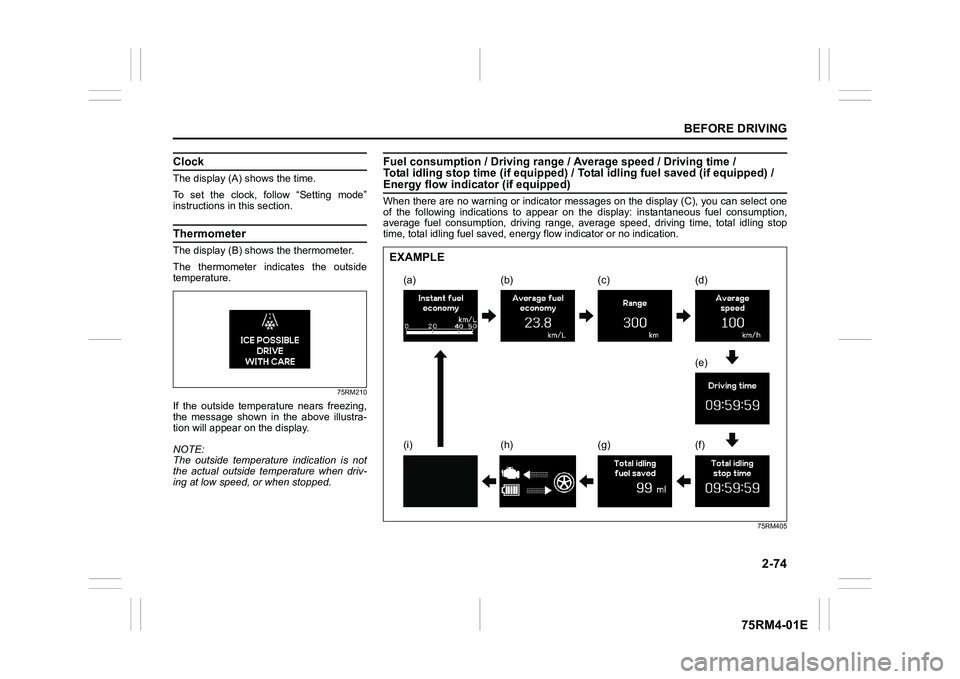
ClockThe display (A) shows the time.
To set the clock, follow “Setting mode”
instructions in this section.ThermometerThe display (B) show s the thermometer.
The thermometer indicates the outside
temperature.
75RM210
If the outside temperature nears freezing,
the message shown in the above illustra-
tion will appear on the display.
NOTE:
The outside temperature indication is not
the actual outside temperature when driv-
ing at low speed, or when stopped.
Fuel consumption / Driving range / Average speed / Driving time /
Total idling stop time (if equi pped) / Total idling fuel saved (if equipped) / Energy flow indicator (if equipped)When there are no warning or indicator messages on the display (C), you can select one
of the following indications to appear on the display: instanta neous fuel consumption,
average fuel consumption, driving range, average speed, driving time, total idling stop
time, total idling fuel saved, energy flow indicator or no indi cation.
75RM405
(a) (d)
(e)
(f)
(c)
(b)
(g)
(h)
(i)
EXAMPLE
Page 103 of 505
2-80
BEFORE DRIVING
75RM4-01E
NOTE:
• If you push and hold the informationswitch (2) to enter the setting mode
when the display (C) shows average fuel
consumption, average speed, driving
time, total idling stop time or total idling
fuel saved, the value will be reset simul-
taneously. If you do not want to reset the
value, push the information switch
quickly to switch the indication of the dis-
play.
• If you turn the ignition switch, press the
engine switch or start to move the vehi-
cle when the display is in the setting
mode, the setting mode will be canceled
automatically.
Distance unit (Odometer / trip meter distance unit setting)You can change the units in which odome-
ter / trip meter / driving range distance is
displayed.
Fuel economy
(Fuel consumption unit setting)
You can change the units that fuel con-
sumption is displayed in.
Language
You can change the language of the infor-
mation display.
Fuel reset
(Average fuel consumption reset setting)
You can change when the value of aver-
age fuel consumption is reset. Temperature (Tempera
ture unit setting)
You can change the units that temperature
is displayed in.
NOTE:
When you change the units that tempera-
ture is displayed in, the automatic heating
and air conditioning system (if equipped)
temperature display units will be changed
automatically.
Clock setting (Adjusting the clock)
• To change the hour indication, push the brightness control switch (4) up or down
repeatedly when the hour indication
appears as reversed color. To change
the hour indication quickly, push and
hold the brightness control switch (4). To
set the hour indication, push the informa-
tion switch (2) and the minute indication
appears as reversed color.
• To change the minute indication, push the brightness control switch (4) up or
down repeatedly when the minute indi-
cation appears as reversed color. To
change the minute indication quickly,
push and hold the brightness control
switch (4). To set the minute indication,
push the information switch (2).
You can also switch the time indication
between 12-hour and 24-hour format. Door lock (Door
unlock setting)
(if equipped)
You can choose either once or twice oper-
ation(s) to unlock all doors (including the
tailgate) by turning the key, or operating
the keyless entry syst em transmitter, key-
less push start system remote controller or
request switch.
If your vehicle is equip ped with the keyless
push start system, you can also turn off or
on the buzzer sound when the door(s)
is(are) locked or unlocked.
Lights (Light setting)
Lane change (Turn signal lights setting)
The turn signal and its indicator can be set
whether they flash three times even if you
return the turn signal control lever immedi-
ately after moving it.
Guide me light setting (Light setting)
(if equipped)
You can change the lighting time of “To
car” function or “To home” function.
Antitheft
(Theft deterrent alarm system setting)
(if equipped)
You can switch the theft deterrent alarm
system from the enabled state to the dis-
abled state, and vice versa.
The state of the theft deterrent alarm sys-
tem is shown on the information display as
follows:
• Mode A: Disabled state
• Mode D: Enabled state
Page 121 of 505
2-98
BEFORE DRIVING
75RM4-01E
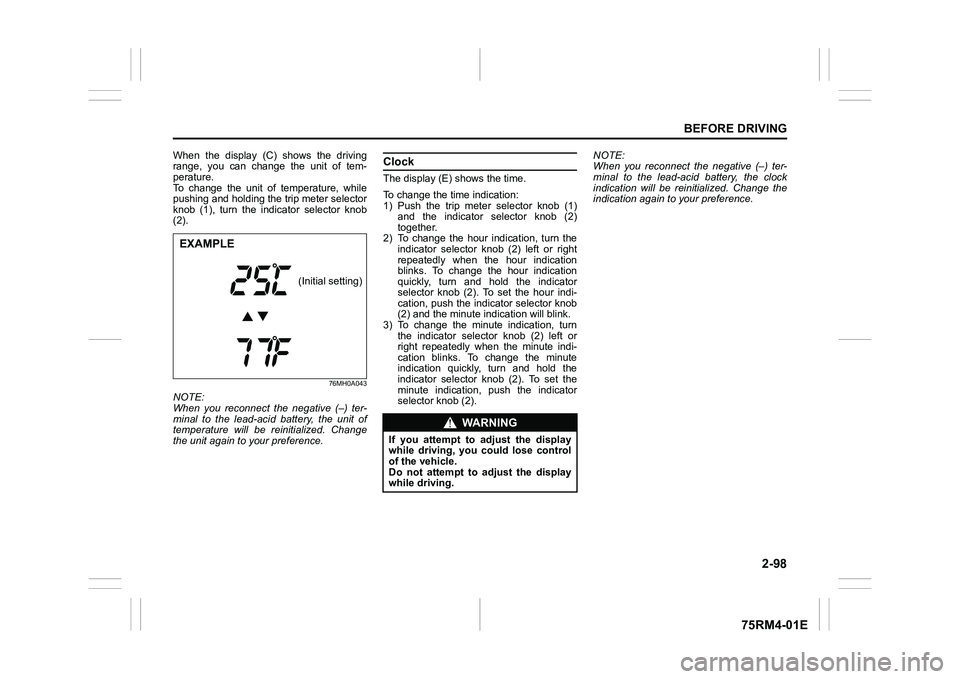
When the display (C) shows the driving
range, you can change the unit of tem-
perature.
To change the unit of temperature, while
pushing and holding the trip meter selector
knob (1), turn the indicator selector knob
(2).
76MH0A043
NOTE:
When you reconnect the negative (–) ter-
minal to the lead-acid battery, the unit of
temperature will be reinitialized. Change
the unit again to your preference.
ClockThe display (E) shows the time.
To change the time indication:
1) Push the trip meter selector knob (1) and the indicator selector knob (2)
together.
2) To change the hour indication, turn the indicator selector kn ob (2) left or right
repeatedly when the hour indication
blinks. To change the hour indication
quickly, turn and hold the indicator
selector knob (2). To set the hour indi-
cation, push the indicator selector knob
(2) and the minute ind ication will blink.
3) To change the minute indication, turn the indicator selector knob (2) left or
right repeatedly when the minute indi-
cation blinks. To change the minute
indication quickly, turn and hold the
indicator selector knob (2). To set the
minute indication, push the indicator
selector knob (2). NOTE:
When you reconnect the negative (–) ter-
minal to the lead-acid battery, the clock
indication will be reinitialized. Change the
indication again to your preference.
EXAMPLE
(Initial setting)
WA R N I N G
If you attempt to a
djust the display
while driving, you could lose control
of the vehicle.
Do not attempt to adjust the display
while driving.
Page 122 of 505
2-99BEFORE DRIVING
75RM4-01E
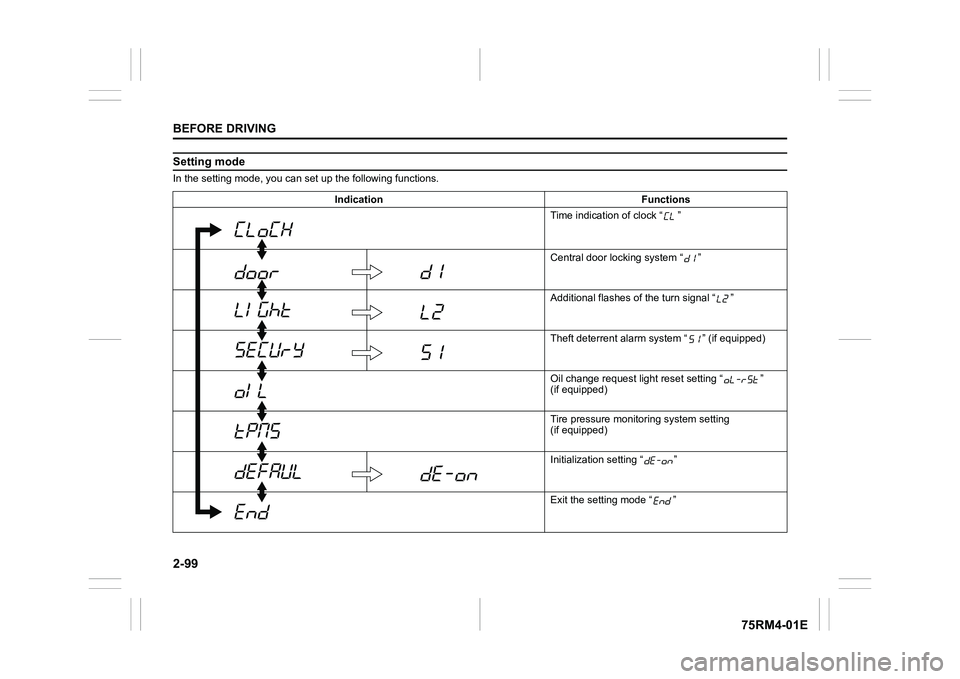
Setting modeIn the setting mode, you can set up the following functions.
Indication Functions Time indication of clock “ ”
Central door locking system “ ”
Additional flashes of the turn signal “ ”
Theft deterrent alarm system “ ” (if equipped)
Oil change request lig ht reset setting “ ”
(if equipped)
Tire pressure monito ring system setting
(if equipped)
Initialization setting “ ”
Exit the setting mode “ ”
Page 123 of 505
2-100
BEFORE DRIVING
75RM4-01E
NOTE:
Depending on vehicle’s specifications,
some items may not be displayed.
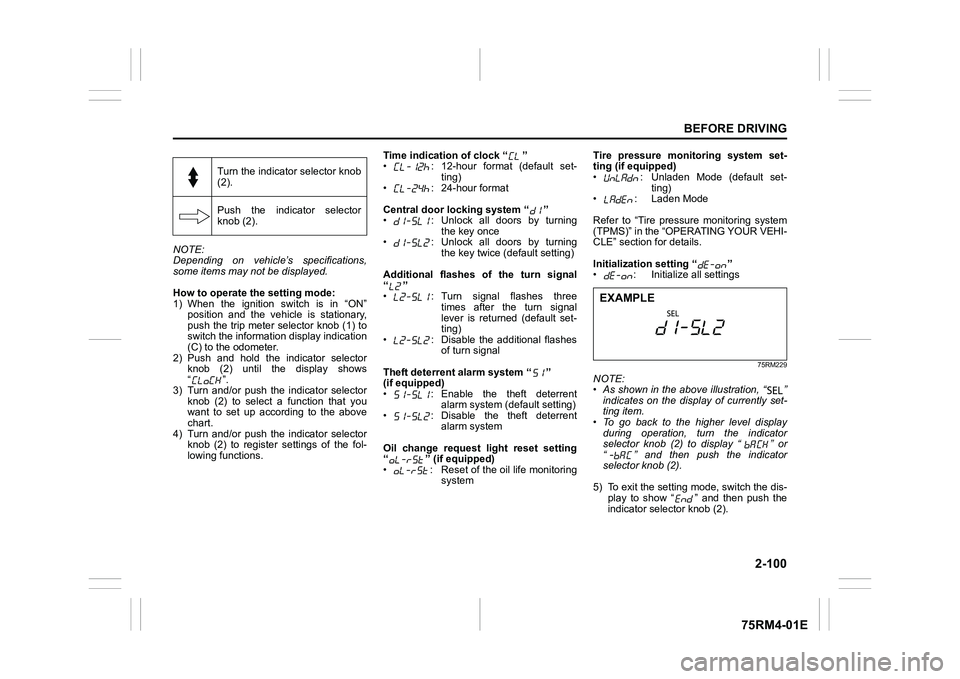
How to operate the setting mode:
1) When the ignition switch is in “ON”
position and the vehicle is stationary,
push the trip meter selector knob (1) to
switch the information display indication
(C) to the odometer.
2) Push and hold the indicator selector knob (2) until the display shows
“”.
3) Turn and/or push the indicator selector knob (2) to select a function that you
want to set up according to the above
chart.
4) Turn and/or push the indicator selector knob (2) to register settings of the fol-
lowing functions. Time indication of clock “ ”
• : 12-hour format (default set-
ting)
• : 24-hour format
Central door locking system “ ”
• : Unlock all doors by turning the key once
• : Unlock all doors by turning
the key twice (default setting)
Additional flashes of the turn signal
“”
• : Turn signal flashes three times after the turn signal
lever is returned (default set-
ting)
• : Disable the additional flashes of turn signal
Theft deterrent alarm system “ ”
(if equipped)
• : Enable the theft deterrent alarm system (default setting)
• : Disable the theft deterrent alarm system
Oil change request light reset setting
“ ” (if equipped)
• : Reset of the oil life monitoring system Tire pressure monitoring system set-
ting (if equipped)
• : Unladen Mode (default set-
ting)
• : Laden Mode
Refer to “Tire pressure monitoring system
(TPMS)” in the “OPERATING YOUR VEHI-
CLE” section for details.
Initialization setting “ ”
• : Initialize all settings
75RM229
NOTE:
• As shown in the above illustration, “ ”
indicates on the disp lay of currently set-
ting item.
• To go back to the higher level display
during operation, turn the indicator
selector knob (2) to display “ ” or
“ ” and then push the indicator
selector knob (2).
5) To exit the setting mode, switch the dis- play to show “ ” and then push the
indicator selector knob (2).
Turn the indicator selector knob
(2).
Push the indicator selector
knob (2).EXAMPLE
Page 296 of 505
5-41OTHER CONTROLS AND EQUIPMENT
75RM4-01E
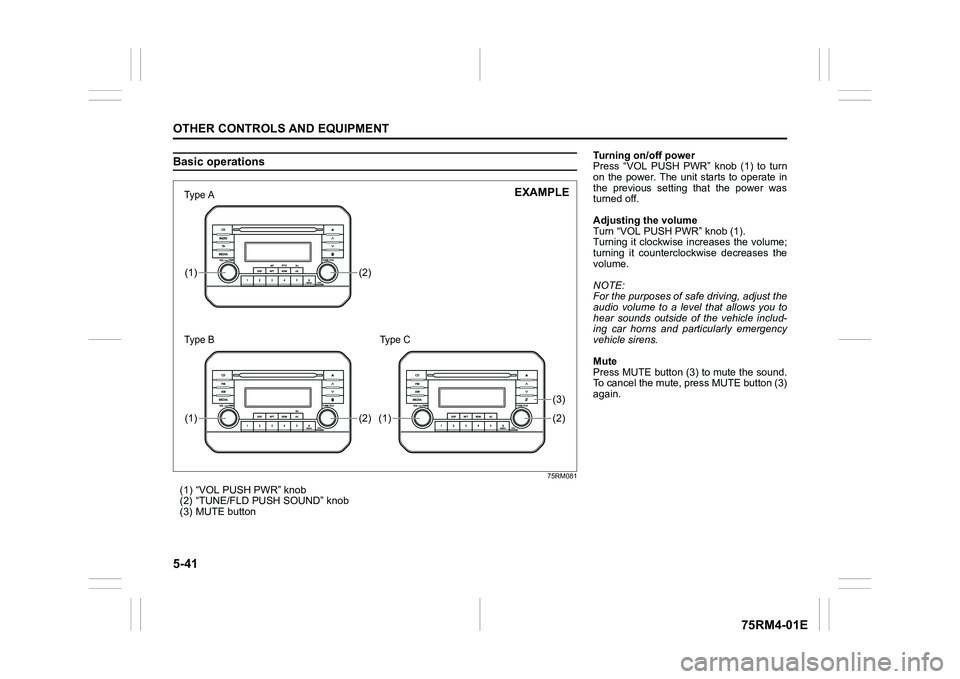
Basic operations
75RM081
(1) “VOL PUSH PWR” knob
(2) “TUNE/FLD PUSH SOUND” knob
(3) MUTE button
(2)
(1)(2)
(1)
(2)(3)
(1)
�7�ś�S�H�а�Ν
�7�ś�S�H�а�Π
EXAMPLE
Type C
Turning on/off power
Press “VOL PUSH PWR” knob (1) to turn
on the power. The unit starts to operate in
the previous setting that the power was
turned off.
Adjusting the volume
Turn “VOL PUSH PWR” knob (1).
Turning it clockwise increases the volume;
turning it counterclockwise decreases the
volume.
NOTE:
For the purposes of safe driving, adjust the
audio volume to a level that allows you to
hear sounds outside of the vehicle includ-
ing car horns and particularly emergency
vehicle sirens.
Mute
Press MUTE button (3) to mute the sound.
To cancel the mute, press MUTE button (3)
again.
Page 375 of 505
7-26
INSPECTION AND MAINTENANCE
75RM4-01E
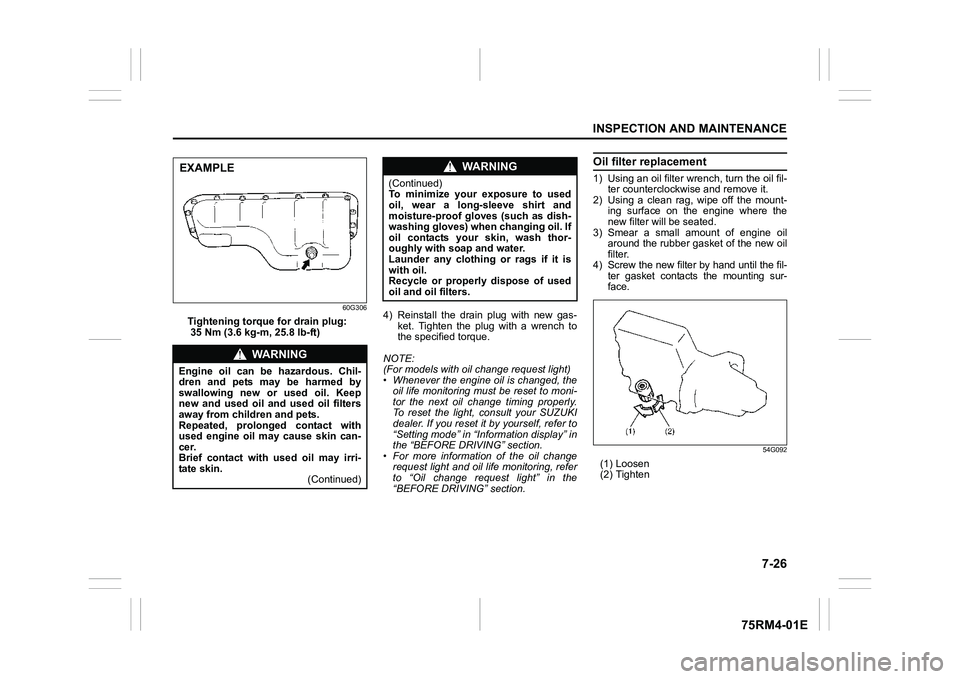
60G306
Tightening torque for drain plug:
35 Nm (3.6 kg-m, 25.8 lb-ft)4) Reinstall the drain plug with new gas-
ket. Tighten the plug with a wrench to
the specif ied torque.
NOTE:
(For models with oil change request light)
• Whenever the engine oil is changed, the oil life monitoring must be reset to moni-
tor the next oil change timing properly.
To reset the light, consult your SUZUKI
dealer. If you reset it by yourself, refer to
“Setting mode” in “Inf ormation display” in
the “BEFORE DRIVING” section.
• For more information of the oil change request light and oil life monitoring, refer
to “Oil change request light” in the
“BEFORE DRIVING” section.
Oil filter replacement1) Using an oil filter wr ench, turn the oil fil-
ter counterclockwise and remove it.
2) Using a clean rag, wipe off the mount- ing surface on the engine where the
new filter will be seated.
3) Smear a small amount of engine oil around the rubber gasket of the new oil
filter.
4) Screw the new filter by hand until the fil- ter gasket contacts the mounting sur-
face.
54G092
(1) Loosen
(2) Tighten
WA R N I N G
Engine oil can be hazardous. Chil-
dren and pets may be harmed by
swallowing new or used oil. Keep
new and used oil and used oil filters
away from children and pets.
Repeated, prolonged contact with
used engine oil may cause skin can-
cer.
Brief contact with used oil may irri-
tate skin. (Continued)EXAMPLE
WA R N I N G
(Continued)
To minimize your exposure to used
oil, wear a long-sleeve shirt and
moisture-proof gloves (such as dish-
washing gloves) when changing oil. If
oil contacts your skin, wash thor-
oughly with soap and water.
Launder any clothing or rags if it is
with oil.
Recycle or properly dispose of used
oil and oil filters.