SUZUKI IGNIS 2021 Manual PDF
Manufacturer: SUZUKI, Model Year: 2021, Model line: IGNIS, Model: SUZUKI IGNIS 2021Pages: 505, PDF Size: 8.36 MB
Page 71 of 505
2-48
BEFORE DRIVING
75RM4-01E
Installation with lap-shoulder seat beltsNOTE:
Stow the removed head restraint in the lug-
gage compartment so it will not cause
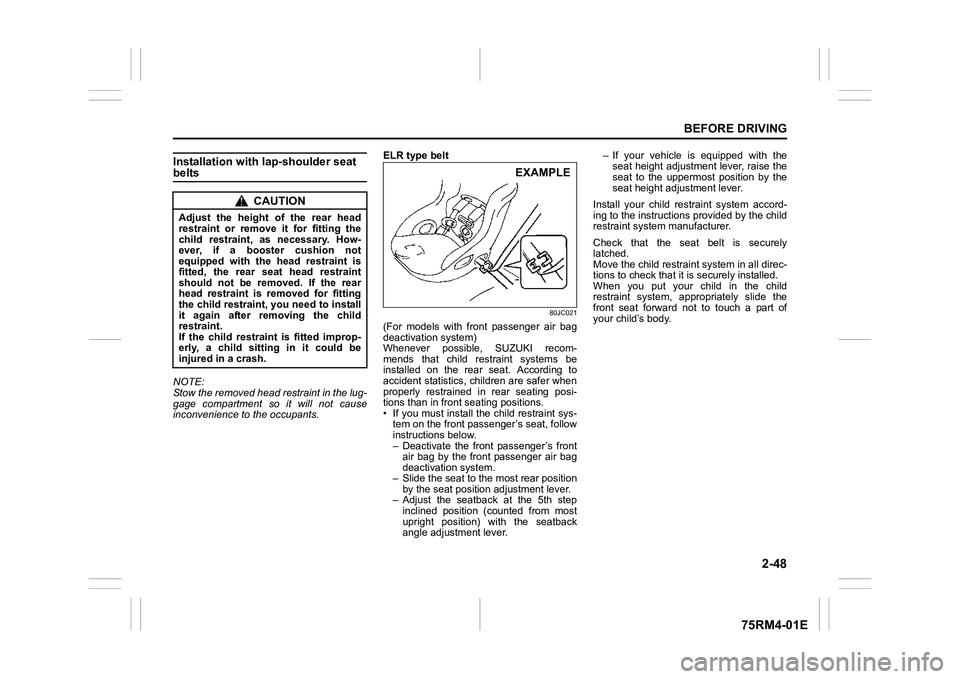
inconvenience to the occupants.ELR type belt
80JC021
(For models with front passenger air bag
deactivation system)
Whenever possible, SUZUKI recom-
mends that child restraint systems be
installed on the rear seat. According to
accident statistics, children are safer when
properly restrained in rear seating posi-
tions than in front seating positions.
• If you must install the child restraint sys-
tem on the front passe nger’s seat, follow
instructions below.
– Deactivate the front passenger’s front air bag by the front passenger air bag
deactivation system.
– Slide the seat to t he most rear position
by the seat position adjustment lever.
– Adjust the seatba ck at the 5th step
inclined position (counted from most
upright position) w ith the seatback
angle adjustment lever. – If your vehicle is equipped with the
seat height adjustment lever, raise the
seat to the uppermost position by the
seat height adjustment lever.
Install your child restraint system accord-
ing to the instructions provided by the child
restraint system manufacturer.
Check that the seat belt is securely
latched.
Move the child restraint system in all direc-
tions to check that it is securely installed.
When you put your child in the child
restraint system, appr opriately slide the
front seat forward not to touch a part of
your child’s body.
CAUTION
Adjust the height of the rear head
restraint or remove it for fitting the
child restraint, as necessary. How-
ever, if a booster cushion not
equipped with the head restraint is
fitted, the rear seat head restraint
should not be removed. If the rear
head restraint is removed for fitting
the child restraint, you need to install
it again after removing the child
restraint.
If the child restraint is fitted improp-
erly, a child sitting in it could be
injured in a crash.
EXAMPLE
Page 72 of 505
2-49BEFORE DRIVING
75RM4-01E
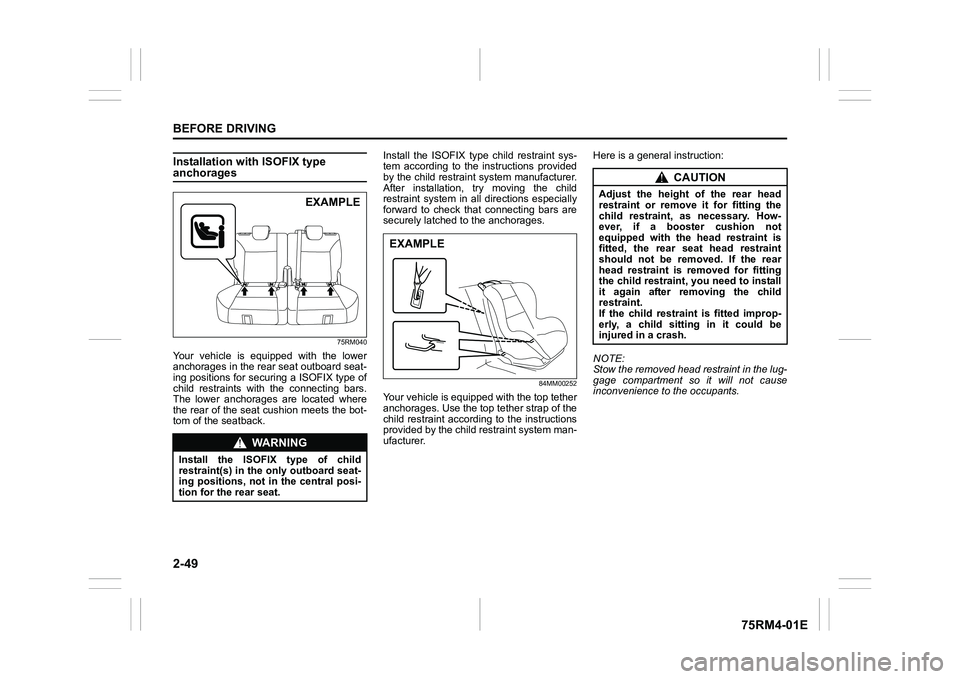
Installation with ISOFIX type anchorages
75RM040
Your vehicle is equipped with the lower
anchorages in the rear seat outboard seat-
ing positions for securing a ISOFIX type of
child restraints with the connecting bars.
The lower anchorages are located where
the rear of the seat cushion meets the bot-
tom of the seatback.Install the ISOFIX type child restraint sys-
tem according to the instructions provided
by the child restraint system manufacturer.
After installation, try moving the child
restraint system in all
directions especially
forward to check that connecting bars are
securely latched t o the anchorages.
84MM00252
Your vehicle is equipped with the top tether
anchorages. Use the top tether strap of the
child restraint according to the instructions
provided by the child restraint system man-
ufacturer. Here is a genera
l instruction:
NOTE:
Stow the removed head restraint in the lug-
gage compartment so it will not cause
inconvenience to the occupants.
WA R N I N G
Install the ISOFIX type of child
restraint(s) in the o nly outboard seat-
ing positions, not in the central posi-
tion for the rear seat.
EXAMPLE
EXAMPLE
CAUTION
Adjust the height of the rear head
restraint or remove it for fitting the
child restraint, as necessary. How-
ever, if a booster cushion not
equipped with the head restraint is
fitted, the rear seat head restraint
should not be removed. If the rear
head restraint is removed for fitting
the child restraint, you need to install
it again after removing the child
restraint.
If the child restraint is fitted improp-
erly, a child sitting in it could be
injured in a crash.
Page 73 of 505
2-50
BEFORE DRIVING
75RM4-01E
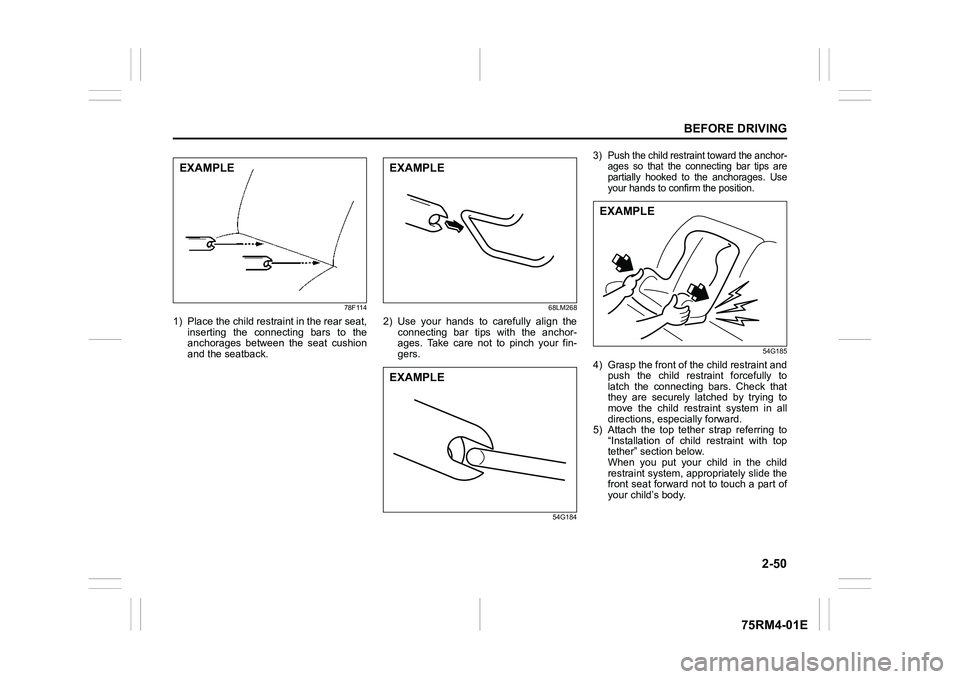
78F114
1) Place the child restraint in the rear seat,inserting the connecting bars to the
anchorages between the seat cushion
and the seatback.
68LM268
2) Use your hands to carefully align theconnecting bar tips with the anchor-
ages. Take care not to pinch your fin-
gers.
54G184
3) Push the child restraint toward the anchor- ages so that the connecting bar tips are
partially hooked to the anchorages. Use
your hands to confirm the position.
54G185
4) Grasp the front of the child restraint and
push the child restraint forcefully to
latch the connecting bars. Check that
they are securely latched by trying to
move the child restraint system in all
directions, especially forward.
5) Attach the top tether strap referring to
“Installation of child restraint with top
tether” section below.
When you put your child in the child
restraint system, appropriately slide the
front seat forward not to touch a part of
your child’s body.
EXAMPLE
EXAMPLEEXAMPLE
EXAMPLE
Page 74 of 505

2-51BEFORE DRIVING
75RM4-01E
Installation of child restraint with top tether
75RM105
Some child restraint systems require the
use of a top tether strap. Top tether anchor-
age brackets are provided in your vehicle at
the locations shown in the illustrations.
The number of the top tether anchorage
brackets provided in your vehicle depends
on the vehicle specification. Install the child
restraint system as follows:
1) Remove the luggage compartment cover
(if equipped).2) Secure the child restraint on the rear
seat using the procedure described
above for securing a restraint system
that does not require a top tether strap.
3) Hook the top tether strap to the top tether anchorage bracket and tighten
the top tether strap according to the
instructions provided by the child
restraint system manufacturer. Attach
the top tether strap to the correspond-
ing top tether anchorage bracket
located directly behind the child
restraint. Do not attach the top tether
strap to the luggage restraint loops (if
equipped).
54P000264
4) When routing the top tether strap, passthe top tether strap as shown in the
illustration. (Refer to “Head restraints”
section for details on how to remove the
head restraint.)
5) Check that cargo does not interfere with routing of the top tether strap.
NOTE:
For Australia:
For additional information, refer to the
“SUPPLEMENT” section at the end of this
book.
NOTICE
When installing a child restraint sys-
tem to the rear seat, adjust the front
seat position so that the front seat
does not interfer e with the child
restraint system.EXAMPLE
Front
WA R N I N G
Do not attach the child restraint top
tether strap t o the luggage restraint
loops (if equipped). Incorrectly
attached top tether strap will reduce
the intended effectiveness of the
child restraint system.
NOTICE
When installing a child restraint sys-
tem to the rear seat, adjust the front
seat position so that the front seat
does not interfer e with the child
restraint system.EXAMPLE
Page 75 of 505
2-52
BEFORE DRIVING
75RM4-01E
Seat belt pretensioner system
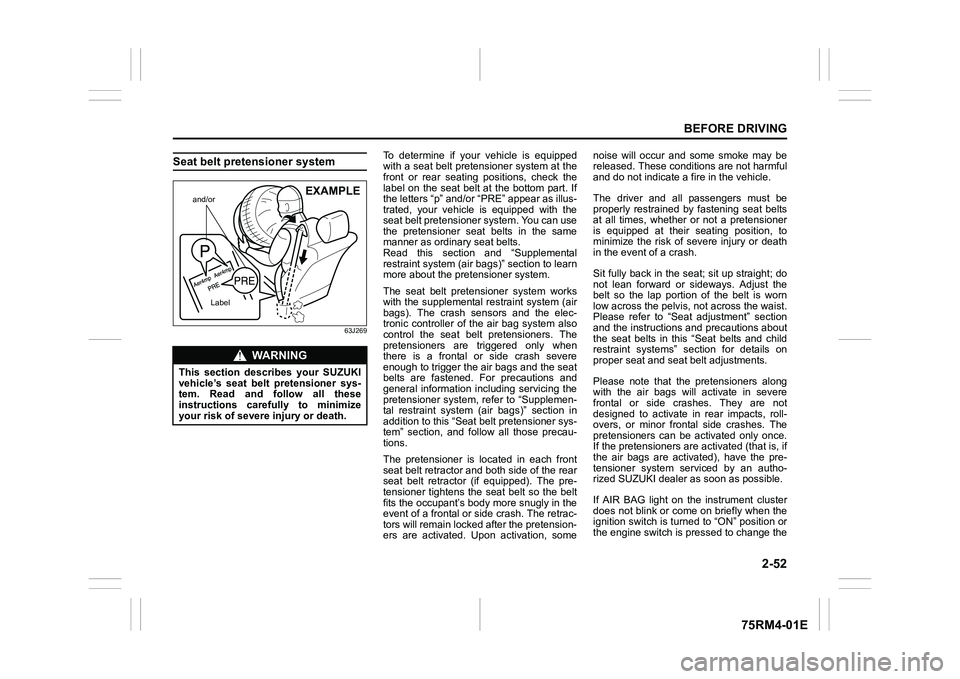
63J269
To determine if your vehicle is equipped
with a seat belt pretensioner system at the
front or rear seating positions, check the
label on the seat belt at the bottom part. If
the letters “p” and/or “PRE” appear as illus-
trated, your vehicle is equipped with the
seat belt pretensioner system. You can use
the pretensioner seat belts in the same
manner as ordinary seat belts.
Read this section and “Supplemental
restraint system (air bags)” section to learn
more about the pretensioner system.
The seat belt pretensioner system works
with the supplemental r estraint system (air
bags). The crash sensors and the elec-
tronic controller of t he air bag system also
control the seat belt pretensioners. The
pretensioners are triggered only when
there is a frontal or side crash severe
enough to trigger the air bags and the seat
belts are fastened. For precautions and
general information including servicing the
pretensioner system, refer to “Supplemen-
tal restraint system (air bags)” section in
addition to this “Seat belt pretensioner sys-
tem” section, and follow all those precau-
tions.
The pretensioner is located in each front
seat belt retractor and both side of the rear
seat belt retractor (if equipped). The pre-
tensioner tightens the seat belt so the belt
fits the occupant’s body more snugly in the
event of a frontal or side crash. The retrac-
tors will remain locked after the pretension-
ers are activated. Upon activation, some noise will occur and some smoke may be
released. These conditions are not harmful
and do not indicate a fire in the vehicle.
The driver and all passengers must be
properly restrained by fastening seat belts
at all times, whether or not a pretensioner
is equipped at their seating position, to
minimize the risk of severe injury or death
in the event o
f a crash.
Sit fully back in the seat; sit up straight; do
not lean forward or sideways. Adjust the
belt so the lap portion of the belt is worn
low across the pelvis , not across the waist.
Please refer to “Seat adjustment” section
and the instructions and precautions about
the seat belts in this “Seat belts and child
restraint systems” section for details on
proper seat and seat belt adjustments.
Please note that the pretensioners along
with the air bags will activate in severe
frontal or side crashes. They are not
designed to activate in rear impacts, roll-
overs, or minor frontal side crashes. The
pretensioners can be activated only once.
If the pretensioners are activated (that is, if
the air bags are activated), have the pre-
tensioner system serviced by an autho-
rized SUZUKI dealer as soon as possible.
If AIR BAG light on the instrument cluster
does not blink or come on briefly when the
ignition switch is turned to “ON” position or
the engine switch is pressed to change the
WA R N I N G
This section describes your SUZUKI
vehicle’s seat belt pretensioner sys-
tem. Read and follow all these
instructions carefully to minimize
your risk of severe injury or death.
and/or
Label
EXAMPLE
Page 76 of 505
2-53BEFORE DRIVING
75RM4-01E
ignition mode to ON, stays on for more
than 10 seconds, or comes on while driv-
ing, the pretensioner system or the air bag
system may not work properly. Have both
systems inspected by an authorized
SUZUKI dealer as soon as possible.
Service on or around the pretensioner sys-
tem components or wiring must be per-
formed only by an authorized SUZUKI
dealer who is specially trained. Improper
service could result in unintended activa-
tion of pretensioners or could render the
pretensioner inoperative. Either of these
two conditions may result in personal
injury.
To prevent damage or unintended activa-
tion of the pretensioners, check that the
lead-acid battery is disconnected and the
ignition switch has been in “LOCK” position
or the ignition mode has been LOCK
(OFF) for at least 90 seconds before per-
forming any electrical service work on your
SUZUKI vehicle.
Do not touch preten sioner system compo-
nents or wiring. The wires are wrapped
with yellow tape or yellow tubing, and the
couplers are yellow. When scrapping your
SUZUKI vehicle, ask your SUZUKI dealer,
body repair shop, or scrap yard for assis-
tance.
Page 77 of 505
2-54
BEFORE DRIVING
75RM4-01E
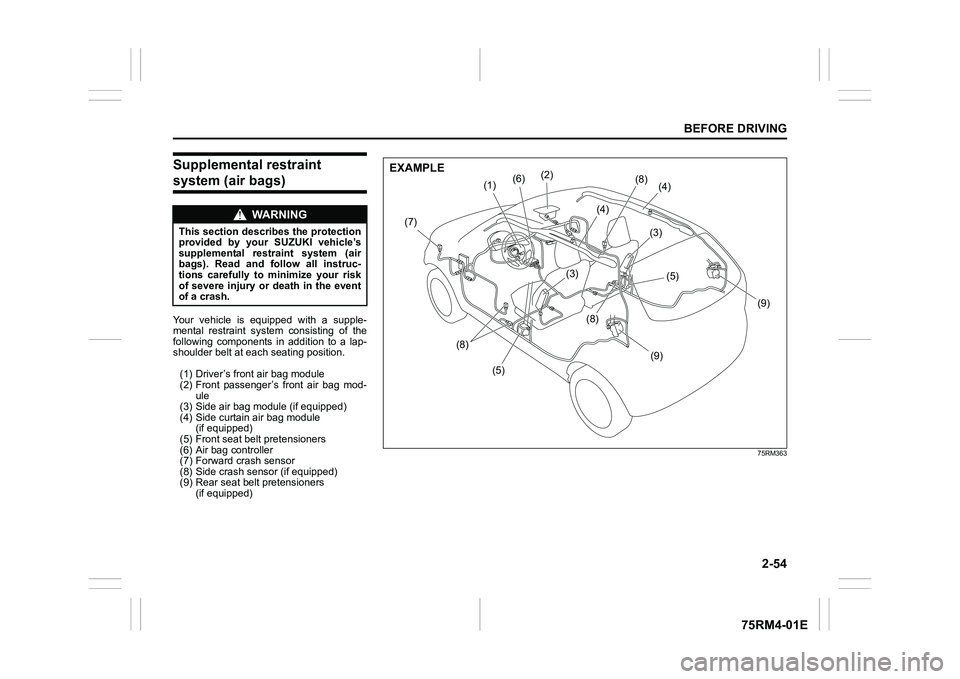
Supplemental restraint system (air bags) Your vehicle is equipped with a supple-
mental restraint system consisting of the
following components in addition to a lap-
shoulder belt at each seating position.
(1) Driver’s front air bag module
(2) Front passenger’s front air bag mod- ule
(3) Side air bag module (if equipped)
(4) Side curtain air bag module (if equipped)
(5) Front seat belt pretensioners
(6) Air bag controller
(7) Forward crash sensor
(8) Side crash sensor (if equipped)
(9) Rear seat belt pretensioners (if equipped)
WA R N I N G
This section describes the protection
provided by your SUZUKI vehicle’s
supplemental restraint system (air
bags). Read and follow all instruc-
tions carefully to minimize your risk
of severe injury or death in the event
of a crash.
75RM363
(5)
(8)
(7)
(6)
(1)
(2)
(4)
(9)
(9)
(8)
(5)
(3)
(3)
(4)
(8)
EXAMPLE
Page 78 of 505
2-55BEFORE DRIVING
75RM4-01E
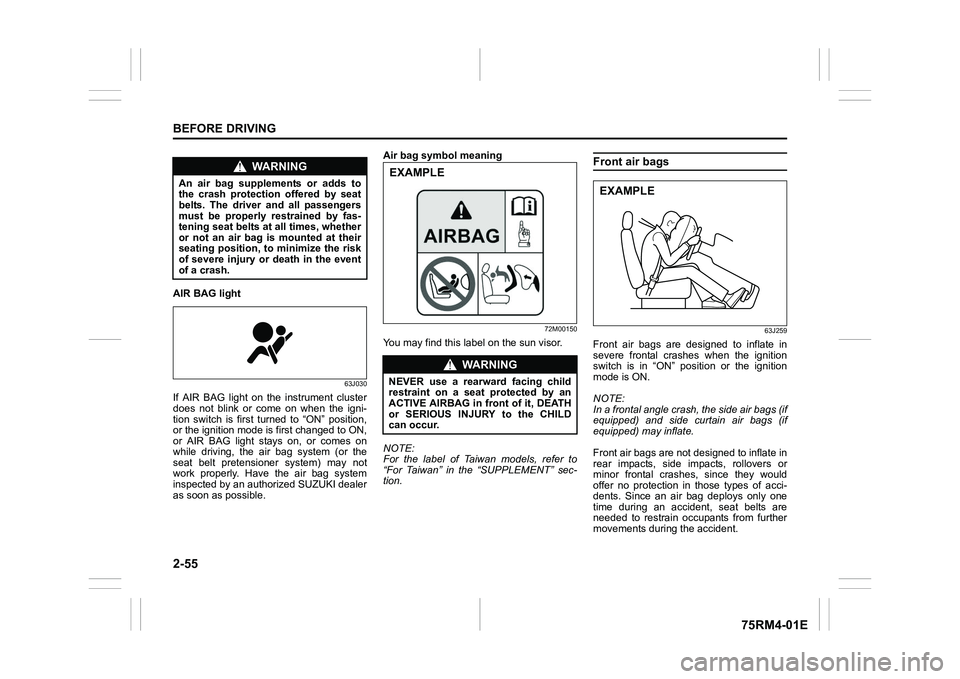
AIR BAG light
63J030
If AIR BAG light on the instrument cluster
does not blink or come on when the igni-
tion switch is first turned to “ON” position,
or the ignition mode is first changed to ON,
or AIR BAG light stays on, or comes on
while driving, the air bag system (or the
seat belt pretensioner system) may not
work properly. Have the air bag system
inspected by an authorized SUZUKI dealer
as soon as possible. Air bag symbol meaning
72M00150
You may find this label on the sun visor.
NOTE:
For the label of Taiwan models, refer to
“For Taiwan” in the “SUPPLEMENT” sec-
tion.
Front air bags
63J259
Front air bags are designed to inflate in
severe frontal crashes when the ignition
switch is in “ON” position or the ignition
mode is ON.
NOTE:
In a frontal angle crash, the side air bags (if
equipped) and side curtain air bags (if
equipped) may inflate.
Front air bags are not designed to inflate in
rear impacts, side impacts, rollovers or
minor frontal crashes, since they would
offer no protection in
those types of acci-
dents. Since an air bag deploys only one
time during an accident, seat belts are
needed to restrain occupants from further
movements during the accident.
WA R N I N G
An air bag supplements or adds to
the crash protectio n offered by seat
belts. The driver and all passengers
must be properly restrained by fas-
tening seat belts at all times, whether
or not an air bag is mounted at their
seating position, to minimize the risk
of severe injury or death in the event
of a crash.
WA R N I N G
NEVER use a rearward facing child
restraint on a seat protected by an
ACTIVE AIRBAG in front of it, DEATH
or SERIOUS INJURY to the CHILD
can occur.EXAMPLE
EXAMPLE
Page 79 of 505
2-56
BEFORE DRIVING
75RM4-01E
Therefore, an air bag is not a substitute for
seat belts. To maximize your protection,
always fasten your seat belts. Be aware
that no system can prevent all possible
injuries that may occur in an accident.
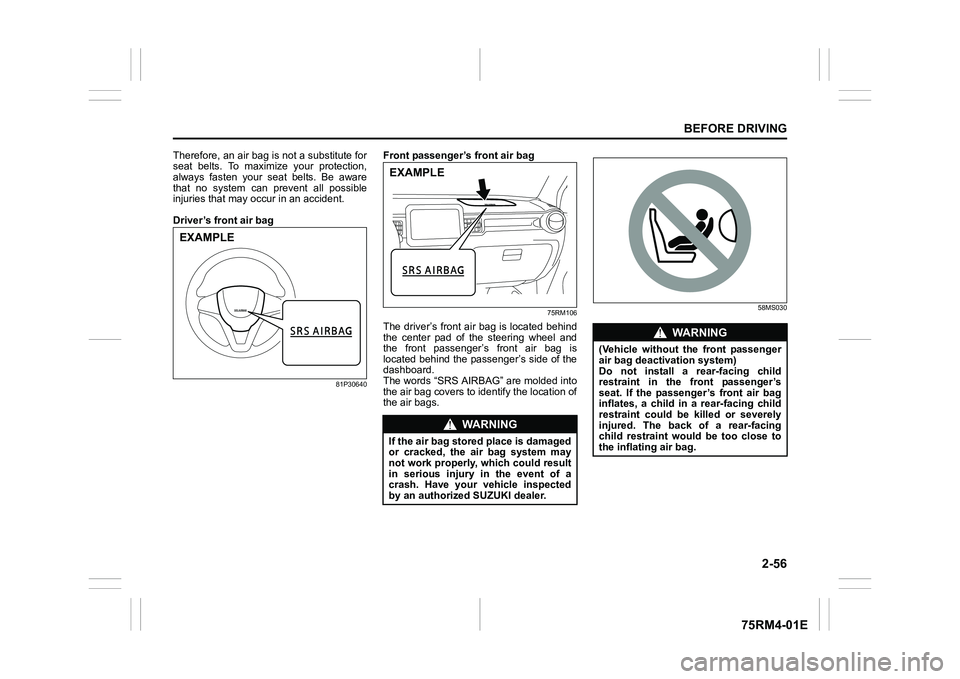
Driver’s front air bag
81P30640
Front passenger’ s front air bag
75RM106
The driver’s front air bag is located behind
the center pad of the steering wheel and
the front passenger’s front air bag is
located behind the passenger’s side of the
dashboard.
The words “SRS AIRBAG” are molded into
the air bag covers to identify the location of
the air bags.
58MS030
EXAMPLE
WA R N I N G
If the air bag stored place is damaged
or cracked, the air bag system may
not work properly, which could result
in serious injury in the event of a
crash. Have your vehicle inspected
by an authorized SUZUKI dealer.EXAMPLE
WA R N I N G
(Vehicle without the front passenger
air bag deactivation system)
Do not install a rear-facing child
restraint in the front passenger’s
seat. If the passenger’s front air bag
inflates, a child in a rear-facing child
restraint could be killed or severely
injured. The back of a rear-facing
child restraint would be too close to
the inflating air bag.
Page 80 of 505
2-57BEFORE DRIVING
75RM4-01E
Refer to “Seat belts and child restraint sys-
tems” section for details on securing your
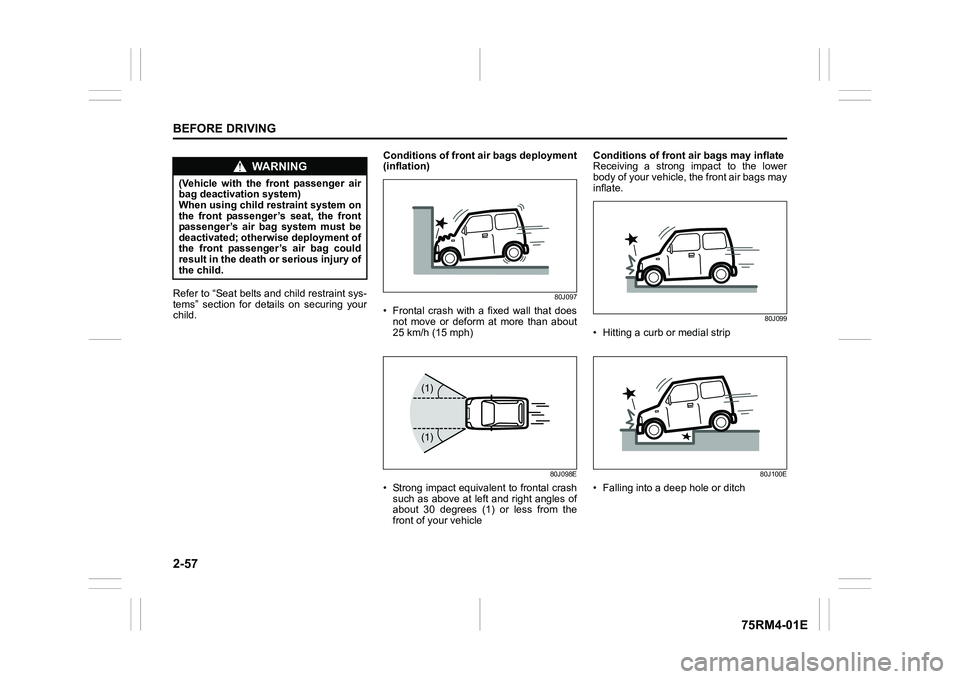
child. Conditions of front
air bags deployment
(inflation)
80J097
• Frontal crash with a fixed wall that does not move or deform at more than about
25 km/h (15 mph)
80J098E
• Strong impact equivalent to frontal crashsuch as above at left and right angles of
about 30 degrees (1) or less from the
front of your vehicle Conditions of front air bags may inflate
Receiving a strong impact to the lower
body of your vehicle, the front air bags may
inflate.
80J099
• Hitting a curb or medial strip
80J100E
• Falling into a deep hole or ditch
WA R N I N G
(Vehicle with the front passenger air
bag deactivation system)
When using child restraint system on
the front passenger’s seat, the front
passenger’s air bag system must be
deactivated; otherwise deployment of
the front passenger’s air bag could
result in the death or serious injury of
the child.
(1)
(1)