Key SUZUKI IGNIS 2022 Service Manual
[x] Cancel search | Manufacturer: SUZUKI, Model Year: 2022, Model line: IGNIS, Model: SUZUKI IGNIS 2022Pages: 505, PDF Size: 8.36 MB
Page 169 of 505
3-16
OPERATING YOUR VEHICLE
75RM4-01E
If the master warning indicator light
blinks and the engine cannot be started
Your keyless push start system remote
controller may not be sensed as being
within the interior workable area. Try again
after checking that you have the remote
controller with you. If the engine still can-
not be started, the battery of the remote
controller may be discharged. To start the
engine, use the following method:
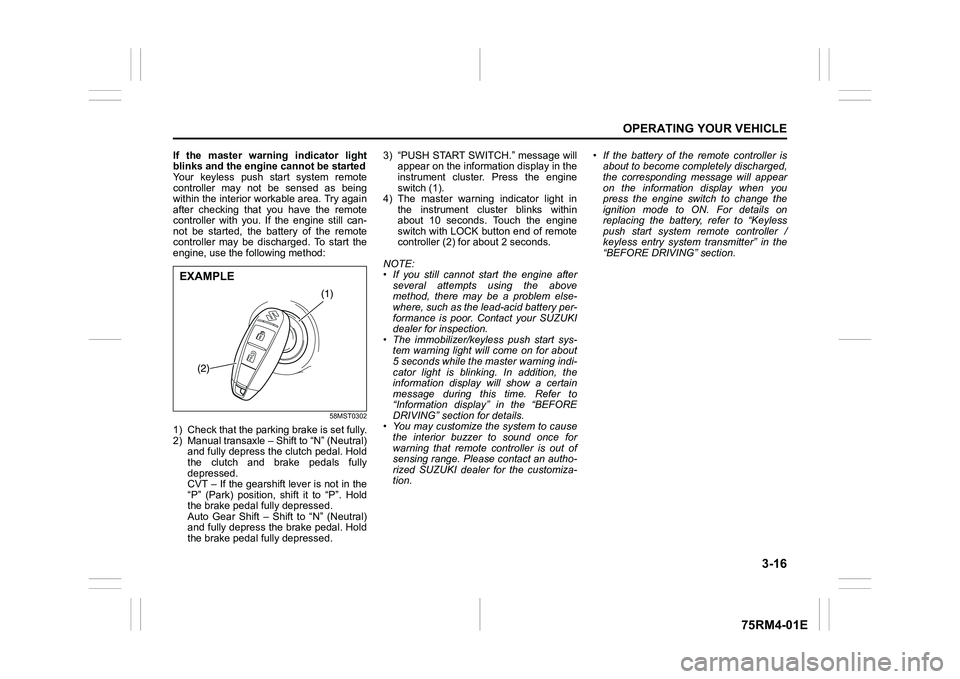
58MST0302
1) Check that the parking brake is set fully.
2) Manual transaxle – Shift to “N” (Neutral) and fully depress the clutch pedal. Hold
the clutch and brake pedals fully
depressed.
CVT – If the gearshift lever is not in the
“P” (Park) position, shift it to “P”. Hold
the brake pedal fully depressed.
Auto Gear Shift – Shift to “N” (Neutral)
and fully depress the brake pedal. Hold
the brake pedal fully depressed. 3) “PUSH START SWITCH.” message will
appear on the information display in the
instrument cluster. Press the engine
switch (1).
4) The master warning indicator light in the instrument cluster blinks within
about 10 seconds. Touch the engine
switch with LOCK button end of remote
controller (2) for about 2 seconds.
NOTE:
• If you still cannot start the engine after several attempts using the above
method, there may be a problem else-
where, such as the lead-acid battery per-
formance is poor. Contact your SUZUKI
dealer for inspection.
• The immobilizer/keyless push start sys- tem warning light will come on for about
5 seconds while the master warning indi-
cator light is blinking. In addition, the
information display will show a certain
message during this time. Refer to
“Information display” in the “BEFORE
DRIVING” section for details.
• You may customize the system to cause
the interior buzzer to sound once for
warning that remote controller is out of
sensing range. Please contact an autho-
rized SUZUKI dealer for the customiza-
tion. • If the battery of the remote controller is
about to become completely discharged,
the corresponding message will appear
on the information display when you
press the engine switch to change the
ignition mode to ON. For details on
replacing the battery, refer to “Keyless
push start system remote controller /
keyless entry system transmitter” in the
“BEFORE DRIVING” section.
(1)
(2)
EXAMPLE
Page 170 of 505
3-17OPERATING YOUR VEHICLE
75RM4-01E
Returning ignition mode to LOCK (OFF)CVT – To ensure safety, the ignition mode
can be returned to LOCK (OFF) by press-
ing the engine switch only when the gear-
shift lever is placed in the “P” position
without pressing the knob button.
NOTE:
In the case of a CVT model, the ignition
mode cannot be returned to the LOCK
(OFF) position if the gearshift lever is in
any other position than “P”.
Certain problems like a fault in engine sys-
tem may prevent the engine switch from
going back to the LOCK (OFF) mode. If
this happens, have the vehicle inspected
by an authorized SUZUKI dealer after
doing the following:
• Lock the doors using the key to prevent
theft. (The request switches and the key-
less push start system remote controller
cannot be used to lock them.)
• Disconnect the negative cable from the lead-acid battery to prevent discharge. LOCK (OFF) mode reminder buzzer
If the driver’s door is opened without
returning the ignition mode to LOCK (OFF)
by pressing the engine switch, a buzzer
sounds to warn you of this state.
• If you open the driver’s door after press-
ing the engine switch to change the igni-
tion mode to ACC, the interior buzzer
beeps intermittently.
• The buzzer will stop sounding if you then push the engine switch twice, thus bringing
it back the ignition mode to LOCK (OFF).NOTE:
Whenever you leave the vehicle, check
that you have returned the ignition mode to
LOCK (OFF) using the engine switch and
then lock the doors. Without returning the
ignition mode to LOCK (OFF), you cannot
use a request switch or keyless push start
system remote controller to lock the doors.
Steering lock warning buzzer
If the steering lock fails to engage due to a
fault in the system when the ignition mode
is turned to LOCK (OFF) by pressing the
engine switch and any door (including the
tailgate) is opened or closed, the interior
buzzer will warn you of this condition with
repeated short beeps. If this happens,
have the vehicle inspected by an autho-
rized SUZUKI dealer.
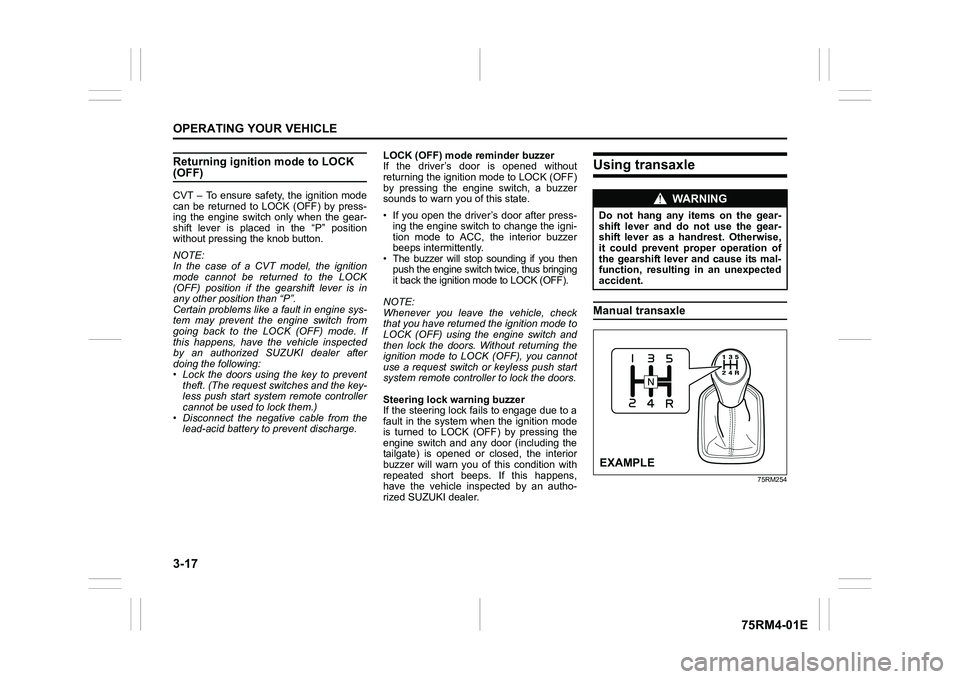
Using transaxleManual transaxle
75RM254
WA R N I N G
Do not hang any items on the gear-
shift lever and do not use the gear-
shift lever as a handrest. Otherwise,
it could prevent proper operation of
the gearshift lever and cause its mal-
function, resulting in an unexpected
accident.EXAMPLE
Page 177 of 505
3-24
OPERATING YOUR VEHICLE
75RM4-01E
1) Be sure the parking brake is firmlyapplied.
2) If the engine is running, stop the
engine.
3) Make sure the key is in the “ON” or “ACC” position, or the ignition mode is
ON or ACC.
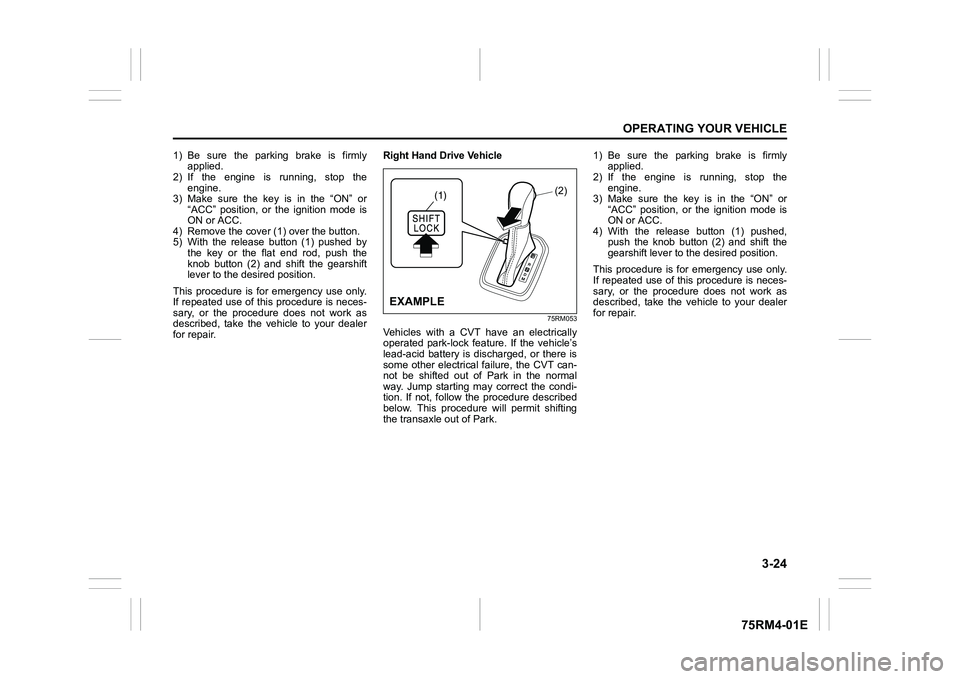
4) Remove the cover ( 1) over the button.
5) With the release button (1) pushed by
the key or the flat end rod, push the
knob button (2) and shift the gearshift
lever to the desired position.
This procedure is for emergency use only.
If repeated use of this procedure is neces-
sary, or the procedure does not work as
described, take the vehicle to your dealer
for repair. Right Hand Drive Vehicle
75RM053
Vehicles with a CVT have an electrically
operated park-lock feat
ure. If the vehicle’s
lead-acid battery is discharged, or there is
some other electrical failure, the CVT can-
not be shifted out of Park in the normal
way. Jump starting may correct the condi-
tion. If not, follow the procedure described
below. This procedure will permit shifting
the transaxle out of Park. 1) Be sure the parking brake is firmly
applied.
2) If the engine is running, stop the
engine.
3) Make sure the key is in the “ON” or “ACC” position, or the ignition mode is
ON or ACC.
4) With the release button (1) pushed, push the knob button (2) and shift the
gearshift lever to t he desired position.
This procedure is for emergency use only.
If repeated use of this procedure is neces-
sary, or the procedure does not work as
described, take the vehicle to your dealer
for repair.
(1)
(2)
EXAMPLE
Page 251 of 505
4-4
DRIVING TIPS
75RM4-01E
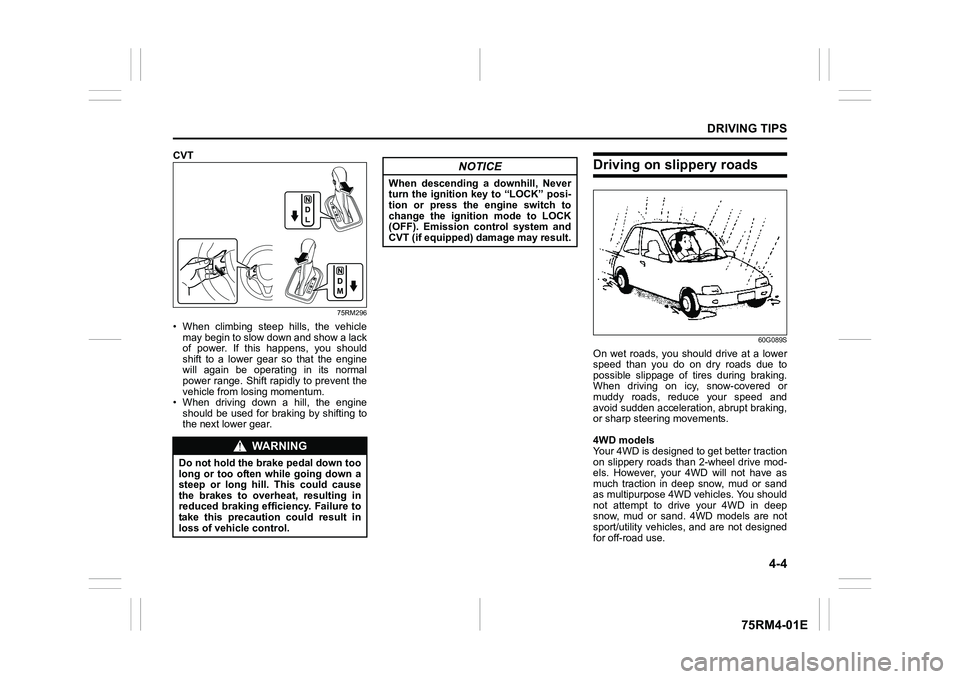
CVT
75RM296
• When climbing steep hills, the vehiclemay begin to slow down and show a lack
of power. If this happens, you should
shift to a lower gear so that the engine
will again be operating in its normal
power range. Shift rapidly to prevent the
vehicle from losing momentum.
• When driving down a hill, the engine
should be used for braking by shifting to
the next lower gear.
Driving on slippery roads
60G089S
On wet roads, you shou ld drive at a lower
speed than you do on dry roads due to
possible slippage of tires during braking.
When driving on icy, snow-covered or
muddy roads, reduce your speed and
avoid sudden acceleration, abrupt braking,
or sharp steering movements.
4WD models
Your 4WD is designed to get better traction
on slippery roads than 2-wheel drive mod-
els. However, your 4WD will not have as
much traction in deep snow, mud or sand
as multipurpose 4WD vehicles. You should
not attempt to drive your 4WD in deep
snow, mud or sand. 4WD models are not
sport/utility vehicles, and are not designed
for off-road use.
WA R N I N G
Do not hold the brake pedal down too
long or too often while going down a
steep or long hill. This could cause
the brakes to overheat, resulting in
reduced braking efficiency. Failure to
take this precaution could result in
loss of vehicle control.
NOTICE
When descending a downhill, Never
turn the ignition key to “LOCK” posi-
tion or press the engine switch to
change the ignition mode to LOCK
(OFF). Emission control system and
CVT (if equipped) damage may result.
Page 260 of 505
5-5OTHER CONTROLS AND EQUIPMENT
75RM4-01E
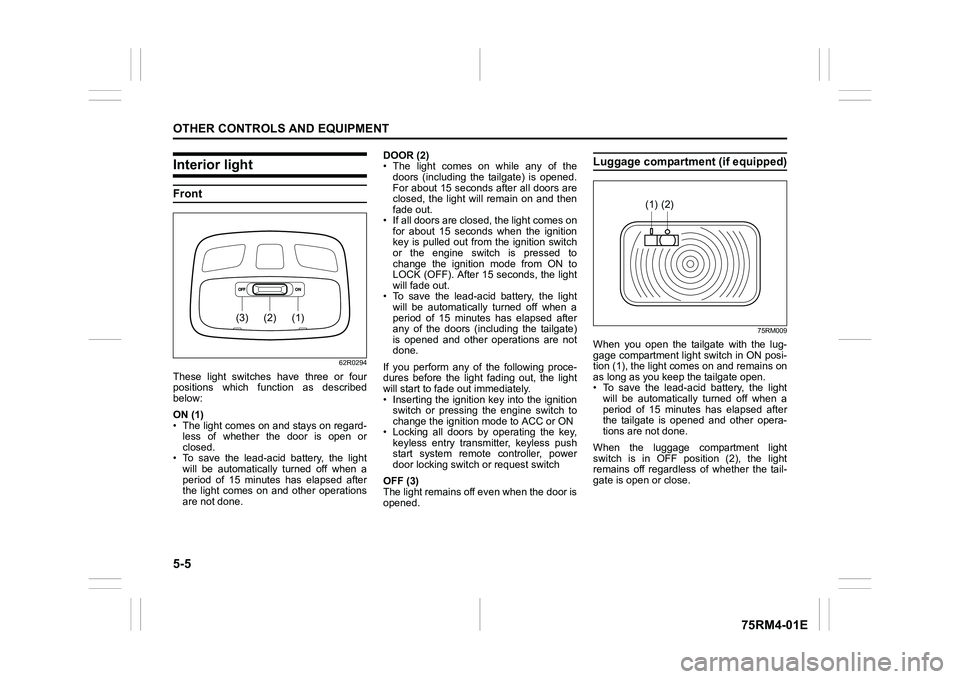
Interior lightFront
62R0294
These light switches have three or four
positions which function as described
below:
ON (1)
• The light comes on and stays on regard-less of whether the door is open or
closed.
• To save the lead-acid battery, the light
will be automatically turned off when a
period of 15 minutes has elapsed after
the light comes on and other operations
are not done. DOOR (2)
• The light comes on while any of the
doors (including the tailgate) is opened.
For about 15 seconds after all doors are
closed, the light will remain on and then
fade out.
• If all doors are closed, the light comes on for about 15 seconds when the ignition
key is pulled out from the ignition switch
or the engine switch is pressed to
change the ignition mode from ON to
LOCK (OFF). After 15 seconds, the light
will fade out.
• To save the lead-acid battery, the light will be automatically turned off when a
period of 15 minutes has elapsed after
any of the doors (including the tailgate)
is opened and other operations are not
done.
If you perform any of the following proce-
dures before the light fading out, the light
will start to fade out immediately.
• Inserting the ignition key into the ignition switch or pressing the engine switch to
change the ignition mode to ACC or ON
• Locking all doors by operating the key, keyless entry transmitter, keyless push
start system remote controller, power
door locking switc h or request switch
OFF (3)
The light remains off even when the door is
opened.
Luggage compartment (if equipped)
75RM009
When you open the tailgate with the lug-
gage compartment light switch in ON posi-
tion (1), the light com es on and remains on
as long as you keep the tailgate open.
• To save the lead-acid battery, the light
will be automatically turned off when a
period of 15 minutes has elapsed after
the tailgate is opened and other opera-
tions are not done.
When the luggage compartment light
switch is in OFF position (2), the light
remains off regardless of whether the tail-
gate is open or close.
(1)
(2)
(3)
(2)
(1)
Page 292 of 505
5-37OTHER CONTROLS AND EQUIPMENT
75RM4-01E
The Bluetooth
® word mark and logo are
registered trademarks and are owned by
the Bluetooth SIG, Ink.
Stop using this unit and a Bluetooth
®
ready device whenever requested.
This unit shares the communication fre-
quency with other priv ate or public wireless
communication equipment such as a wire-
less LAN and other wireless communica-
tion radios.
You should stop using this unit whenever
you are notified that your unit disturbs
other wireless communi cation immediately.Access to http://www.ptc.panasonic.eu/
,
enter the below
Model No. into the keyword search box,
you can download the latest “DECLARA-
TION of CONFORMITY” (DoC).
Set No. AZ1601
WA R N I N G
This is a class I laser product. Use
of controls or adjustments or perfor-
mance of procedures other than
those specified herein may result in
hazardous radiation exposure.
Do not open covers and do not
attempt to repair this unit by your-
self.
Ask an authorized dealer for the
repair.
Page 321 of 505
5-66
OTHER CONTROLS AND EQUIPMENT
75RM4-01E
Phone registration
NOTE:
• Up to 5 phones can be registered.
• To set up a new phone, disconnect theaudio player from the unit. Connect the
audio player again after phone setup is
completed if necessary.
• When attempts to establish the pairing
fail within 60 seconds, the connecting
operation will be canceled. Try to estab-
lish the pairing again or refer to the man-
ual of the phone in use for how to
establish the pairing with the phone.
1) Press the Bluetooth
® setup button (5)
or (6).
The Bluetooth
® setup menu will be dis-
played.
2) Turn “TUNE/FLD PUSH SOUND” knob (1) to select “Setup Bluetooth”, and
press the knob (1) to determine the
selection.
3) Turn “TUNE/FLD PUSH SOUND” knob (1) to select “Pairi ng”, and press the
knob (1) to determine the selection.
4) Select “My Car” from the Bluetooth
®
menu of the phone and establish the
pairing.
Refer to the manual of the phone in use
for further information.
5) Enter the passkey displayed on the unit to the phone. 6) When the pairing with the phone is
established, automatic transfer of the
phonebook and the call history
becomes selectable. The automatic
transfer starts with “Yes” and it does not
with “No”.
7) Press ON HOOK button (8).
NOTE:
• When selecting “Go Back” or pressing BACK button (4), the previous menu will
be displayed.
• When registering an additional phone, repeat Step from 1).
Receiving a call
Press OFF HOOK button (7) to receive a
call.
Ending a call
Press ON HOOK button (8) to end a call.
Rejecting a call (only for supported
models)
Press ON HOOK button (8) to reject a
incoming call.
Mute of hands-free microphone
Press MUTE switch (9) to mute the micro-
phone. To cancel the mute, press MUTE
switch (9) again. Adjusting the listening volume
• Turn “VOL PUSH PWR” knob (2) during
a call.
Turning it clockwise increases the vol-
ume; turning it counterclockwise
decreases the volume.
• Press “VOL” switch (10) during a call. Pressing the switch up increases the vol-
ume; pressing the switch down
decreases the volume.
Adjusting the ring volume
• Turn “VOL PUSH PWR” knob (2) while a call is coming in.
Turning it clockwise increases the vol-
ume; turning it counterclockwise
decreases the volume.
• Press “VOL” switch (10) during a call. Pressing the switch up increases the vol-
ume; pressing the switch down
decreases the volume.To use the hands-free function with this
unit, it is required to register the phone
in advance.
Page 327 of 505
5-72
OTHER CONTROLS AND EQUIPMENT
75RM4-01E
Selection of phone (Select Phone)
Follow the instructions below to select a
phone to be paired with from the registered
phones.
1) Press the Bluetooth
® setup button (5)
or (6).
The Bluetooth
® setup menu will be dis-
played.
2) Turn “TUNE/FLD PUSH SOUND” knob
(1) to select “Setup Bluetooth”, and
press the knob (1) to determine the
selection.
3) Turn “TUNE/FLD PUSH SOUND” knob (1) to select “List Phone”, and press the
knob (1) to determine the selection.
4) Turn “TUNE/FLD PUSH SOUND” knob (1) to select a phone to be paired with,
and press the knob (1) to determine the
selection.
5) Turn “TUNE/FLD PUSH SOUND” knob
(1) to select “Select”, and press the
knob (1) to determine the selection.
NOTE:
• When selecting “Go Back” or pressing BACK button (4), the previous menu will
be displayed.
• The Bluetooth® ready audio device will
be disconnected when the phone is
selected. List of phones (List Phones)
Follow the instructions below to display the
names of the registered phones in
sequence.
1) Press the Bluetooth
® setup button (5)
or (6).
The Bluetooth
® setup menu will be dis-
played.
2) Turn “TUNE/FLD PUSH SOUND” knob
(1) to select “Setup Bluetooth”, and
press the knob (1) to determine the
selection.
3) Turn “TUNE/FLD PUSH SOUND” knob (1) to select “List Phone”, and press the
knob (1) to determine the selection.
The names of the registered phones
are displayed in sequence.
NOTE:
When selecting “Go Back” or pressing
BACK button (4), the previous menu will
be displayed.
Passkey setting (Set Passkey)
Follow the instructions below to set the
security number (passkey).
1) Press the Bluetooth
® setup button (5)
or (6).
The Bluetooth
® setup menu will be dis-
played.
2) Turn “TUNE/FLD PUSH SOUND” knob (1) to select “Setup Bluetooth”, and
press the knob (1) to determine the
selection. 3) Turn “TUNE/FLD PUSH SOUND” knob
(1) to select “Passkey”, and press the
knob (1) to determine the selection.
4) Turn “TUNE/FLD PUSH SOUND” knob (1) to select “Enter New Passkey”, and
press the knob (1) to determine the
selection.
5) Press or turn “TUNE/FLD PUSH SOUND” knob (1) to select “Confirm”.
6) Turn “TUNE/FLD PUSH SOUND” knob (1) to select a number for the first digit,
and press the knob (1) to determine the
selection. Select and determine num-
bers for the second, third and fourth
digits in order in the same manner.
When not entering up to the eighth
digit, enter blanks for the successive
digits.
7) Press “TUNE/FLD PUSH SOUND” knob (1) to determine the passkey set-
ting.
NOTE:
When selecting “Go Back” or pressing
BACK button (4), the previous menu will
be displayed.
Page 330 of 505
5-75OTHER CONTROLS AND EQUIPMENT
75RM4-01E
Registration of audio devices
NOTE:
• To set up a new audio player, disconnectthe phone from the unit. Connect the
phone after audio player setup is com-
pleted if necessary.
• When attempts to establish the pairing fail within 60 seconds, the connecting
operation will be canceled. Try to estab-
lish the pairing again or refer to the audio
player manual for assistance with the
pairing process.
1) Press the Bluetooth
® setup button (7)
or (8).
The Bluetooth
® setup menu will be dis-
played.
2) Turn “TUNE/FLD PUSH SOUND” knob
(2) to select “Setup Bluetooth”, and
press the knob (2) to determine the
selection.
3) Turn “TUNE/FLD PUSH SOUND” knob (2) to select “Pairi ng”, and press the
knob (2) to determine the selection.
4) Select “My Car” from the Bluetooth
®
menu of the audio player and establish
the pairing.
Refer to the manual of the audio player
in use for further information.
5) Enter the passkey displayed on the unit
to the audio player. NOTE:
• When selecting “Go Back” or pressing
BACK button (6), the previous menu will
be displayed.
• When registering additional audio devices, repeat Step from 1).
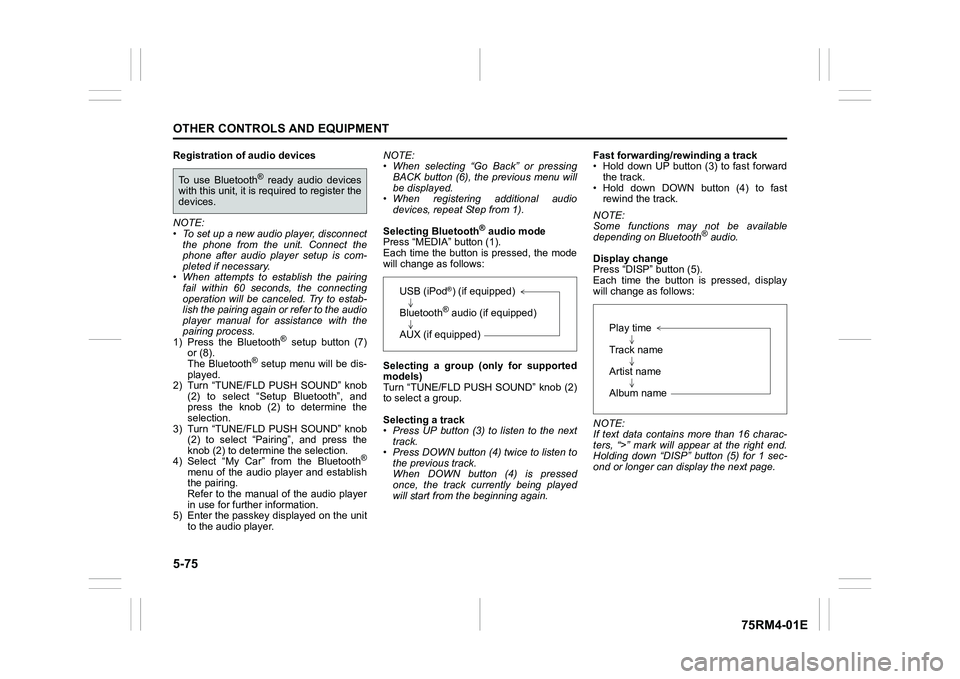
Selecting Bluetooth
® audio mode
Press “MEDIA” button (1).
Each time the button is pressed, the mode
will change as follows:
Selecting a group (only for supported
models)
Turn “TUNE/FLD PUSH SOUND” knob (2)
to select a group.
Selecting a track
• Press UP button (3) to listen to the next track.
• Press DOWN button (4) twice to listen to the previous track.
When DOWN button (4) is pressed
once, the track currently being played
will start from the beginning again. Fast forwarding/rewinding a track
• Hold down UP button (3) to fast forward
the track.
• Hold down DOWN button (4) to fast rewind the track.
NOTE:
Some functions may not be available
depending on Bluetooth
® audio.
Display change
Press “DISP” button (5).
Each time the button is pressed, display
will change as follows:
NOTE:
If text data contains more than 16 charac-
ters, “>” mark will appear at the right end.
Holding down “DISP” button (5) for 1 sec-
ond or longer can display the next page.
To use Bluetooth
® ready audio devices
with this unit, it is r equired to register the
devices.
USB (iPod
®) (if equipped)
Bluetooth® audio (if equipped)
AUX (if equipped)
Play time
Track name
Artist name
Album name
Page 331 of 505
5-76
OTHER CONTROLS AND EQUIPMENT
75RM4-01E
Selection of audio device (Select Audio)
Follow the instructions below to select an
audio device to be paired with from the
registered audio devices.
1) Press the Bluetooth
® setup button (7)
or (8).
The Bluetooth
® setup menu will be dis-
played.
2) Turn “TUNE/FLD PUSH SOUND” knob
(2) to select “Setup Bluetooth”, and
press the knob (2) to determine the
selection.
3) Turn “TUNE/FLD PUSH SOUND” knob (2) to select “List Audio”, and press the
knob (2) to determine the selection.
4) Turn “TUNE/FLD PUSH SOUND” knob (2) to select an audio device to be
used, and press the knob (2) to deter-
mine the selection.
5) Turn “TUNE/FLD PUSH SOUND” knob
(2) to select “Select”, and press the
knob (2) to determine the selection.
NOTE:
• When selecting “Go Back” or pressing BACK button (6), the previous menu will
be displayed.
• The phone will be disconnected when the Bluetooth® ready audio device is
selected. List of audio devices (List Audio)
Follow the instructions below to display the
names of the registered audio devices in
sequence.
1) Press the Bluetooth
® setup button (7)
or (8).
The Bluetooth
® setup menu will be dis-
played.
2) Turn “TUNE/FLD PUSH SOUND” knob
(2) to select “Setup Bluetooth”, and
press the knob (2) to determine the
selection.
3) Turn “TUNE/FLD PUSH SOUND” knob (2) to select “List Audio”, and press the
knob (2) to determine the selection.
The names of registered audio devices
will be displayed in sequence.
NOTE:
When selecting “Go Back” or pressing
BACK button (6), the previous menu will
be displayed.
Passkey setting (Set Passkey)
Follow the instructions below to set the
security number (Passkey).
1) Press the Bluetooth
® setup button (7)
or (8).
The Bluetooth
® setup menu will be dis-
played.
2) Turn “TUNE/FLD PUSH SOUND” knob (2) to select “Setup Bluetooth”, and
press the knob (2) to determine the
selection. 3) Turn “TUNE/FLD PUSH SOUND” knob
(2) to select “Passkey”, and press the
knob (2) to determine the selection.
4) Turn “TUNE/FLD PUSH SOUND” knob (2) to select “Enter New Passkey”, and
press the knob (2) to determine the
selection.
5) Press or turn “TUNE/FLD PUSH SOUND” knob (2) to select “Confirm”.
6) Turn “TUNE/FLD PUSH SOUND” knob (2) to select a number for the first digit,
and press the knob (2) to determine the
selection. Select and determine num-
bers for the second, third and fourth
digits in order in the same manner.
When not entering up to the eighth
digit, enter blanks for the successive
digits.
7) Press “TUNE/FLD PUSH SOUND” knob (2) to determine the passkey set-
ting.
NOTE:
When selecting “Go Back” or pressing
BACK button (6), the previous menu will
be displayed.