tyre SUZUKI JIMNY 2018 Owners Manual
[x] Cancel search | Manufacturer: SUZUKI, Model Year: 2018, Model line: JIMNY, Model: SUZUKI JIMNY 2018Pages: 421, PDF Size: 6.35 MB
Page 9 of 421
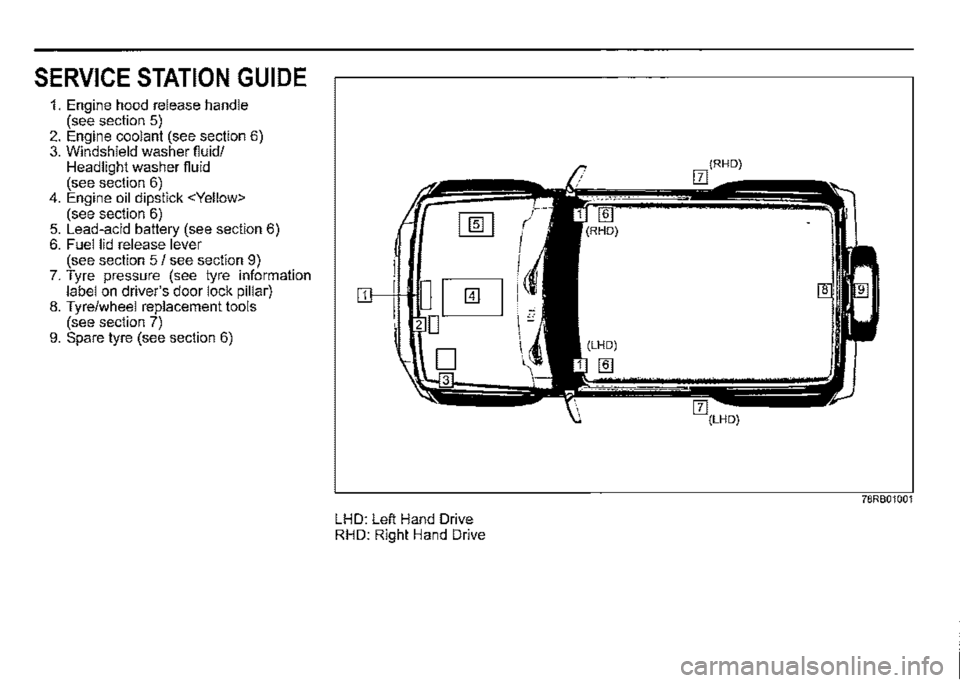
SERVICE STATION GUIDE
1. Engine hood release handle (see section 5) 2. Engine coolant (see section 6) 3. Windshield washer fiuid/ Headlight washer fiuid (see section 6) 4. Engine oil dipstick
(see section 6) 5. Lead-acid battery (see section 6) 6. Fuel lid release lever (see section 5 / see section 9) 7. Tyre pressure (see tyre information label on driver's door lock pillar) 8. Tyre/wheel replacement tools (see section 7) 9. Spare tyre (see section 6)
LHD: Left Hand Drive RHD: Right Hand Drive
78RB01001
Page 13 of 421
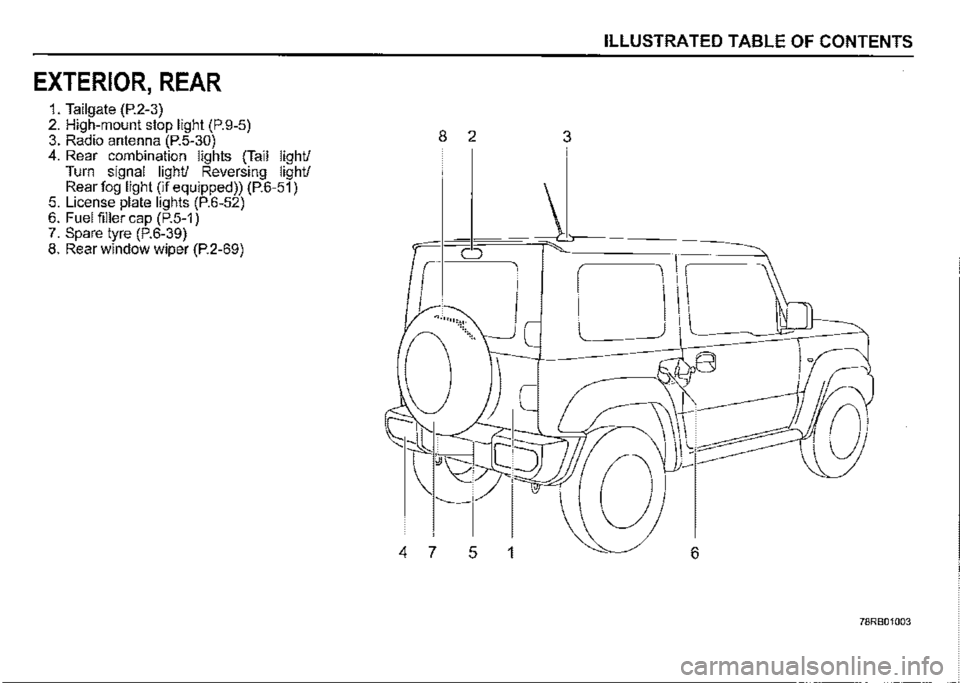
EXTERIOR, REAR
1. Tailgate (P.2-3) 2. High-mount stop light (P.9-5) 3. Radio antenna (P.5-30) 4. Rear combination lights (Tail light/ Turn signal light/ Reversing light/ Rear fog light (if equipped)) (P.6-51) 5. License plate lights (P.6-52) 6. Fuel filler cap (P.5-1) 7. Spare tyre (P.6-39) 8. Rear window wiper (P.2-69)
ILLUSTRATED TABLE OF CONTENTS
8 2 3
0
.... ,,.,,:\:<.
'----
4 7 5 1 6
78RB01003
Page 94 of 421
BEFORE DRIVING
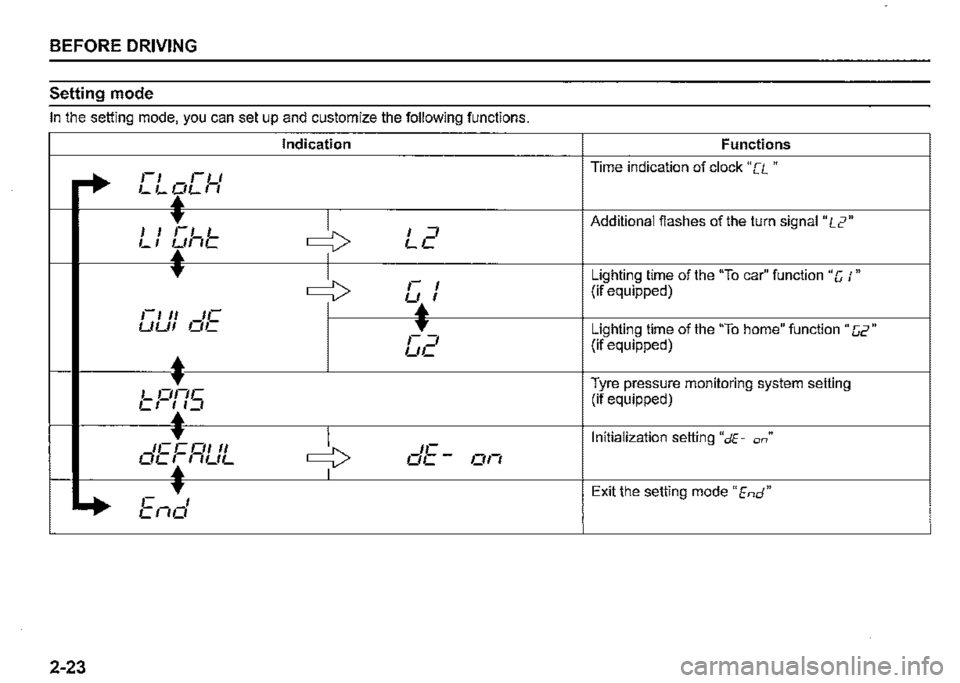
Setting mode
In the setting mode, you can set up and customize the following functions.
Indication Functions
+
,-, ,-u Time indication of clock "[L "
LL~LI I
I I t-1 L ~ I =, Additional flashes of the turn signal" L2"
LI ~//7L LL I
T
~ ,-Lighting time of the "To car" function "C /" I (if equipped) L!t,. I 1-1 II IC LILI/ n1 ,-"' =, Lighting time of the "To home" function "C2" (if equipped)
•
LIL
1 nhc Tyre pressure monitoring system setting
C ,-!t,.1 _, (if equipped)
1ct-q1 II ~ 'E
Initialization setting "dE-on"
OL~I UL o_-017 I
*
C TI Exit the setting mode" End"
Ll70
2-23
Page 95 of 421
•
Turn the indicator selector knob (2).
c:::::> Push the indicator selector knob (2).
NOTE: Depending on vehicle's specifications, some items may not be displayed.
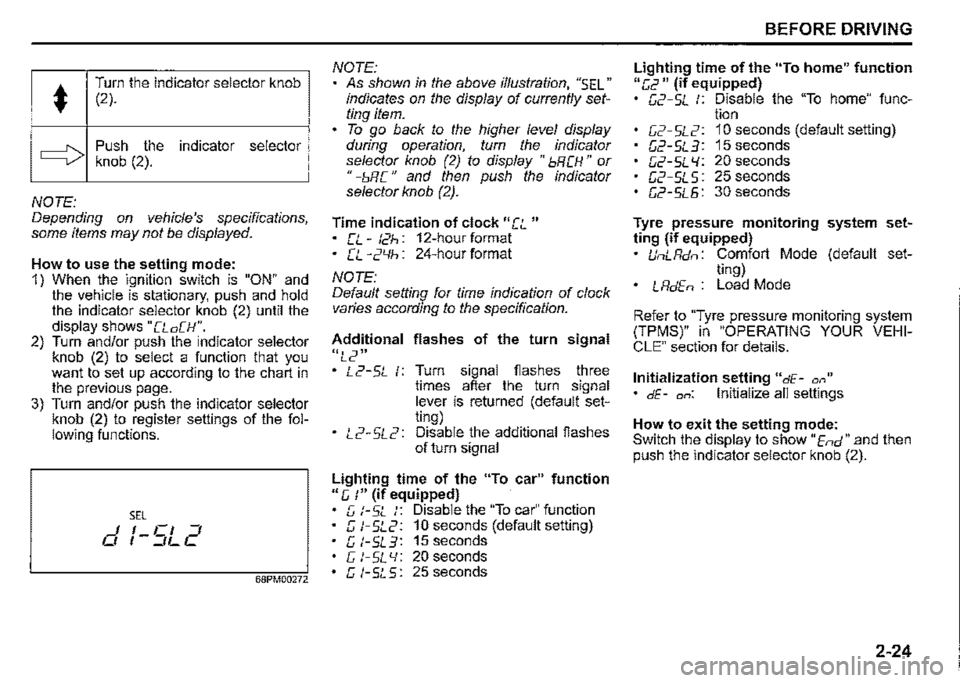
How to use the setting mode: 1) When the ignition switch is "ON" and the vehicle is stationary, push and hold the indicator selector knob (2) until the display shows "[Lo[H". 2) Turn and/or push the indicator selector knob (2) to select a function that you want to set up according to the chart in the previous page. 3) Turn and/or push the indicator selector knob (2) to register settings of the following functions.
SEL I I Cl ::J 0 , -::JL C
68PM00272
NOTE: As shown in the above illustration, "SEL" indicates on the display of currently setting item. To go back to the higher level display during operation, turn the indicator selector knob (2) to display "bRCH" or " -bR C " and then push the indicator selector knob (2).
Time indication of clock "[L " • [L-t2h: 12-hourformat • CL -2'-lh: 24-hour format
NOTE: Default setting for time indication of clock varies according to the specification.
Additional flashes of the turn signal
"L2" • L2-5L 1: Turn signal flashes three times after the turn signal lever is returned (default setting) • L2-5L2: Disable the additional flashes of turn signal
Lighting time of the "To car" function 11 e, :" (if equipped) G t-SL :: Disable the "To car" function c; t-5L2: 10 seconds (default setting) G l-5L3: 15 seconds c; t-SL 'I: 20 seconds G t-5L5: 25 seconds
BEFORE DRIVING
Lighting time of the "To home" function "[,2 11 (if equipped) G2-5L :: Disable the "To home" func-tion C2-5L2: 10 seconds (default setting) G2-5L3: 15seconds G2-5L l/: 20 seconds G2-SLS: 25 seconds G2-5L5: 30 seconds
Tyre pressure monitoring system setting (if equipped) UnLRdn: Comfort Mode (default set-ting) • LRdEn : Load Mode
Refer to "Tyre pressure monitoring system (TPMS)" in "OPERATING YOUR VEHICLE" section for details.
Initialization setting "dE-a,," • dE-on: Initialize all settings
How to exit the setting mode: Switch the display to show "End" and then push the indicator selector knob (2).
2-24
Page 105 of 421
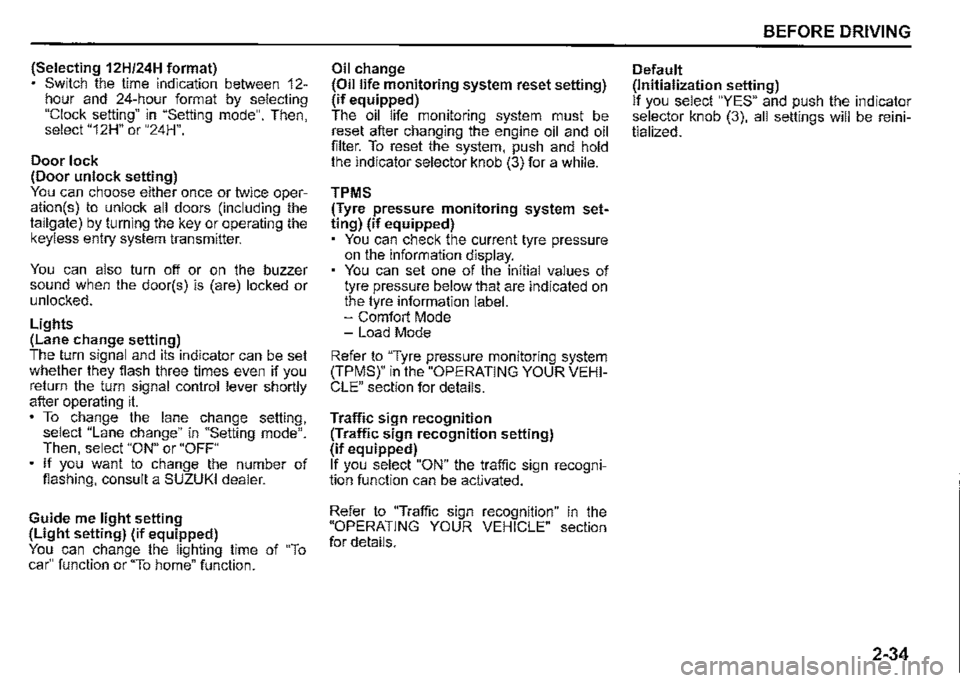
(Selecting 12H/24H format) Switch the time indication between 12-hour and 24-hour format by selecting "Clock setting" in "Setting mode". Then, select "12H" or "24H".
Door lock (Door unlock setting) You can choose either once or twice operation(s) to unlock all doors (including the tailgate) by turning the key or operating the keyless entry system transmitter.
You can also turn off or on the buzzer sound when the door(s) is (are) locked or unlocked.
Lights (Lane change setting) The turn signal and its indicator can be set whether they flash three times even if you return the turn signal control lever shortly after operating it. To change the lane change setting, select "Lane change" in "Setting mode". Then, select "ON" or "OFF" If you want to change the number of flashing, consult a SUZUKI dealer.
Guide me light setting (Light setting) (if equipped) You can change the lighting time of "To car" function or "To home" function.
Oil change (Oil life monitoring system reset setting) (if equipped) The oil life monitoring system must be reset after changing the engine oil and oil filter. To reset the system, push and hold the indicator selector knob (3) for a while.
TPMS (Tyre pressure monitoring system setting) (if equipped) You can check the current tyre pressure on the information display. You can set one of the initial values of tyre pressure below that are indicated on the tyre information label. -Comfort Mode -Load Mode
Refer to "Tyre pressure monitoring system (TPMS)" in the "OPERATING YOUR VEHICLE" section for details.
Traffic sign recognition (Traffic sign recognition setting) (if equipped) If you select "ON" the traffic sign recognition function can be activated.
Refer to "Traffic sign recognition" in the "OPERATING YOUR VEHICLE" section for details.
BEFORE DRIVING
Default (Initialization setting) If you select "YES" and push the indicator selector knob (3), all settings will be reinitialized.
2-34
Page 110 of 421
BEFORE DRIVING
Warning and indicator lights
NOTE: If warning and indicator lights blink or come on, the corresponding messages may be shown on the information display. If your vehicle is equipped with the "Emergency road assistance -global navigation satellite system (ERA-GLONASS)", the information display also indicates warning and indicator message related to the system. For information on this message, refer to "Emergency Road Assistance -Global Navigation Satellite System (ERA-GLONASS)" in "For Russia and other countries adopting ERAGLONASS" in the "SUPPLEMENT" section.
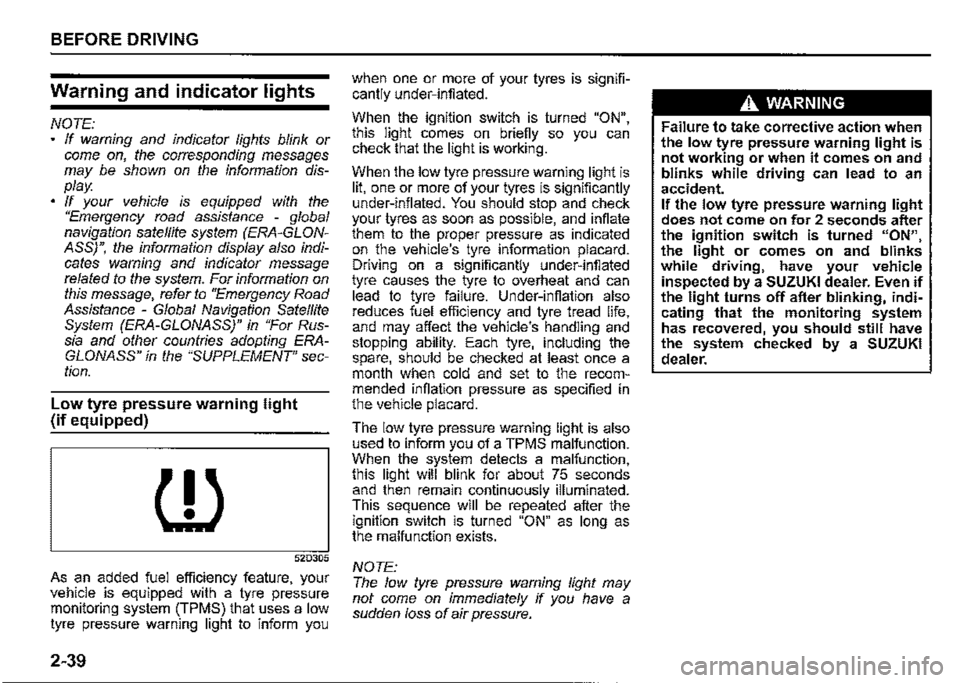
Low tyre pressure warning light {if equipped)
{l)
52D305
As an added fuel efficiency feature, your vehicle is equipped with a tyre pressure monitoring system (TPMS) that uses a low tyre pressure warning light to inform you
2-39
when one or more of your tyres is significantly under-inflated.
When the ignition switch is turned "ON", this light comes on briefly so you can check that the light is working.
When the low tyre pressure warning light is lit, one or more of your tyres is significantly under-inflated. You should stop and check your tyres as soon as possible, and inflate them to the proper pressure as indicated on the vehicle's tyre information placard. Driving on a significantly under-inflated tyre causes the tyre to overheat and can lead to tyre failure. Under-inflation also reduces fuel efficiency and tyre tread life, and may affect the vehicle's handling and stopping ability. Each tyre, including the spare, should be checked at least once a month when cold and set to the recommended inflation pressure as specified in the vehicle placard.
The low tyre pressure warning light is also used to inform you of a TPMS malfunction. When the system detects a malfunction, this light will blink for about 75 seconds and then remain continuously illuminated. This sequence will be repeated after the ignition switch is turned "ON" as long as the malfunction exists.
NOTE: The low tyre pressure warning light may not come on immediately if you have a sudden loss of air pressure.
A WARNING
Failure to take corrective action when the low tyre pressure warning light is not working or when it comes on and blinks while driving can lead to an accident. If the low tyre pressure warning light does not come on for 2 seconds after the ignition switch is turned "ON", the light or comes on and blinks while driving, have your vehicle inspected by a SUZUKI dealer. Even if the light turns off after blinking, indicating that the monitoring system has recovered, you should still have the system checked by a SUZUKI dealer.
Page 111 of 421
A. WARNING
The load-carrying capacity of your tyres is reduced at lower inflation pressures. If your tyres are even moderately under-inflated, the load on the tyres may exceed the load-carrying capacity of the tyres, which could lead to tyre failure. The low tyre pressure warning light will not alert you to this condition, because it only comes on when one or more of your tyres becomes significantly under
inflated. Check and adjust your tyre pressure at least once a month. Refer to "Tyres" in "INSPECTION AND MAINTENANCE" section.
A. WARNING
Continuing to drive with the low tyre pressure warning light on can lead to an accident, resulting in severe injury or death. If the low tyre pressure warning light comes on and stays on, reduce your speed and avoid abrupt steering and braking. Be aware that driving on a significantly under-inflated tyre can cause the tyre to overheat and can lead to tyre failure, and may affect steering control and brake effectiveness. Stop the vehicle in a safe place as soon as possible and check your
tyres. • If you have a flat tyre, replace it with the spare tyre (if equipped). Refer to "Jacking instructions11 in "EMERGENCY SERVICE" section for the tyre replacement method. Also refer to "Replacing tyres and/ or wheels" for instructions on how to restore normal operation of the TPMS after you have had a flat tyre. If one or more of your tyres is under-inflated, adjust the inflation pressure of all tyres to the recommended inflation pressure as soon as possible.
BEFORE DRIVING
Refer to "Tyre pressure monitoring system (TPMS)" in "OPERATING YOUR VEHICLE" section for additional details on the tyre pressure monitoring system. Refer to "Tyres" in "INSPECTION AND MAINTENANCE" section for information on maintaining proper tyre pressure.
2-40
Page 145 of 421
Tow bars
Only use a tow bar that is designed to attach to the chassis of your vehicle, and a hitch that is designed to bolt to this tow bar. We recommend that you use a genuine SUZUKI tow bar kit (available as an option), or equivalent.
A WARNING
Never use a tow bar which attaches to the axle or the bumper of your vehicle.
Safety chains
Always attach safety chains between your vehicle and the trailer. Cross safety chains under the nose of the trailer so that the nose will not drop to the road if the trailer becomes separated from the tow bar. Follow the manufacturer's recommendation for attaching safety chains. Always leave just enough slack to permit full turning. Never allow safety chains to drag on the road.
A WARNING
Never attach safety chains to the bumper of your vehicle. Secure connections so that they cannot come loose.
-----------------------
Trailer lights
Check that your trailer is equipped with lights which meet local requirements. Always check for the proper operation of all trailer lights before you start to tow.
A WARNING
Never connect trailer lights directly into your vehicle's electrical system, or electrical system damage may occur.
Brakes
A WARNING
If the trailer is equipped with the brakes, follow all instructions provided by the manufacturer. Never connect to the brake system of your vehicle and never take an electrical supply directly from the wiring har
ness.
BEFORE DRIVING
Tyres
A WARNING
When towing a trailer, it is very important for your vehicle and trailer to have properly inflated tyres. Your vehicle's tyres should be inflated to the pressures listed on your vehicle's tyre information label. The tyres should be inflated to the laden pressures. Inflate trailer tyres according to the specifications provided by the trailer manufacturer.
Mirrors
Check if your vehicle's mirrors meet local requirements for mirrors used on towing vehicles. If they do not, you must install the required mirrors before you tow.
2-74
Page 151 of 421
OPERATING YOUR VEHICLE
OPERATING YOUR VEHICLE
Daily inspection checklist .................................................. 3-1
Engine oil consumption ..................................................... 3-2
Ignition switch ..................................................................... 3-2 -
Parking brake lever ............................................................. 3-5
Pedal ..................................................................................... 3-6
Starting engine .................................................................... 3-7
Using transmission ............................................................. 3-8
Gearshift indicator (if equipped) ........................................ 3-13
Transfer lever ...................................................................... 3-16
Cruise control (if equipped) ............................................... 3-22
Speed limiter (if equipped) ................................................. 3-25
SUZUKI SAFETY SUPPORT (if equipped) ......................... 3-27
Emergency stop signal (ESS) (if equipped) ...................... 3-52
Braking ................................................................................. 3-53
Electronic stability program (ESP®) .................................. 3-55
Tyre pressure monitoring system
(TPMS) (if equipped) ........................................................... 3-63
Page 152 of 421
OPERATING YOUR VEHICLE
Daily inspection checklist
Before driving
60A187
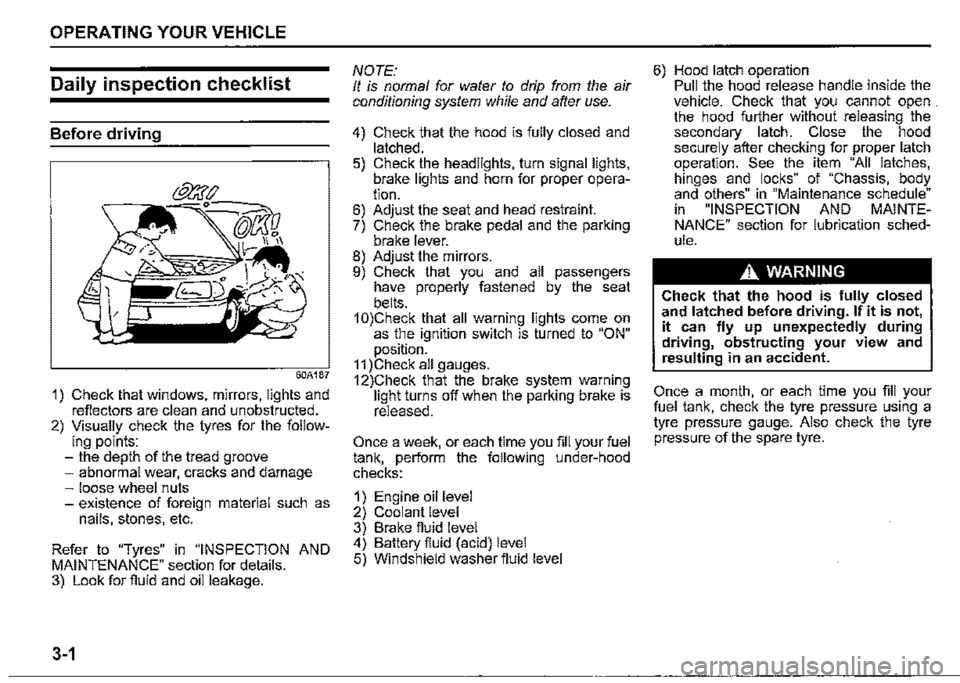
1) Check that windows, mirrors, lights and reflectors are clean and unobstructed. 2) Visually check the tyres for the follow-ing points: -the depth of the tread groove -abnormal wear, cracks and damage -loose wheel nuts -existence of foreign material such as nails, stones, etc.
Refer to "Tyres" in "INSPECTION AND MAINTENANCE" section for details. 3) Look for fluid and oil leakage.
3-1
NOTE: It is normal for water to drip from the air conditioning system while and after use.
4) Check that the hood is fully closed and latched. 5) Check the headlights, turn signal lights, brake lights and horn for proper operation. 6) Adjust the seat and head restraint. 7) Check the brake pedal and the parking brake lever. 8) Adjust the mirrors. 9) Check that you and all passengers have properly fastened by the seat belts. 1 0)Check that all warning lights come on as the ignition switch is turned to "ON" position. 11 )Check all gauges. 12)Check that the brake system warning light turns off when the parking brake is released.
Once a week, or each time you fill your fuel tank, perform the following under-hood checks:
1) Engine oil level 2) Coolant level 3) Brake fluid level 4) Battery fluid (acid) level 5) Windshield washer fluid level
6) Hood latch operation Pull the hood release handle inside the vehicle. Check that you cannot open . the hood further without releasing the secondary latch. Close the hood securely after checking for proper latch operation. See the item "All latches, hinges and locks" of "Chassis, body and others" in "Maintenance schedule" in "INSPECTION AND MAINTENANCE" section for lubrication schedule.
A WARNING
Check that the hood is fully closed and latched before driving. If it is not, it can fly up unexpectedly during driving, obstructing your view and resulting in an accident.
Once a month, or each time you fill your fuel tank, check the tyre pressure using a tyre pressure gauge. Also check the tyre pressure of the spare tyre.