transmission SUZUKI JIMNY 2020 Owner's Manual
[x] Cancel search | Manufacturer: SUZUKI, Model Year: 2020, Model line: JIMNY, Model: SUZUKI JIMNY 2020Pages: 421, PDF Size: 6.35 MB
Page 170 of 421
OPERATING YOUR VEHICLE
NOTE: When you select the "4L" position the ESF'® systems (other than ABS) w/11 be canceled to provide improved vehicle traction, and the ESF'® OFF indicator light, dual sensor brake support OFF indicator light and lane departure warning OFF indicator light will come on. When you select the "4L" position braketraction control can be activated'. Braketraction control brakes the spinning wheel to distribute drive power to the other wheels for increased climbing ability or for better performance on a rolling hill or a slippery surface. If dual sensor brake support OFF indicator light and lane departure warning OFF indicator light come on or go off, the intenor buzzer beeps. This is not a ma/function.
3-19
Transfer lever operation
NOTICE
Unevenly worn tyres can cause problems in the operation of the transfer lever. Be sure to rotate the tyres according to the maintenance schedule. Refer to "Tyres" and "Maintenance Schedule" in the "INSPECTION AND MAINTENANCE" section for proper tyre rotation procedures. If a problem exists during the shifting function, all lights of the 4WD indicator will blink continuously and the transfer lever operation will not work. If the shift function does not work after trying the shifting operation several times, it may be the result of a system failure. Have the system inspected by a SUZUKI dealer.
NOTE: When the temperature of 4-whee/ drive system or the transmission is not warm ':'nder the low temperature, you may feel ,t hard to shift the transfer lever or gear n01se may occur. Unless you can shift the transfer lever drive your vehicle for a while and the/2 shift the transfer lever again.
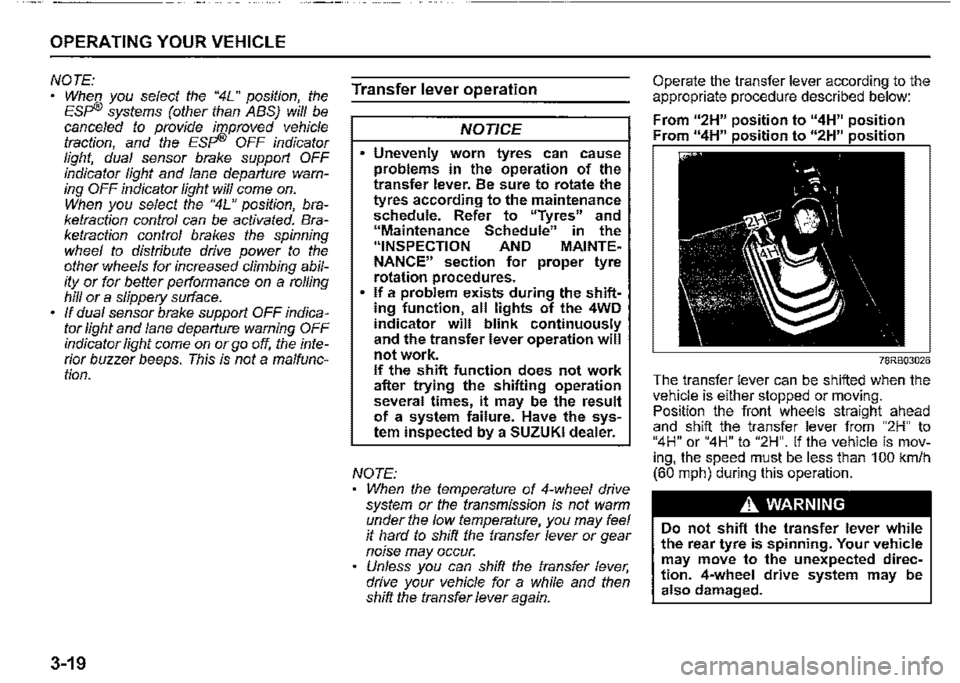
Operate the transfer lever according to the appropriate procedure described below:
From u2H" position to "4H" position Fr " 11 • • " " • •
78RB03026
The transfer lever can be shifted when the vehi_c_le is either stopped or moving. Pos1t1on the front wheels straight ahead and shift the transfer lever from "2H" to "4H" or "4H" to "2H". If the vehicle is moving, the speed must be less than 100 km/h (60 mph) during this operation.
A WARNING
Do not shift the transfer lever while the rear tyre is spinning. Your vehicle may move to the unexpected direction. 4-wheel drive system may be also damaged.
Page 171 of 421

NOTICE
Pay attention to shifting the transfer lever safely when driving your vehicle.
NOTE: After shifting the transfer lever from "2H'" to "4H", check that the 4WD indicator
light comes on. After shifting the transfer lever from "4H" to "2H", check that the 4WD indicator goes off. ·
When 4WD indicator fight is blinking after shifting the transfer fever to "4H" position, accelerate, slow down your vehicle or stop and reverse your vehicle a little to shift the transfer lever. Pay attention to the vehicles and the circumference toward or backward your vehicle when shifting the transfer fever. When you shift the transfer fever while turning the steering wheel or depressing the accelerator pedal, shifting the transfer fever may be difficult. Operate the transfer fever while driving at low speed if it may be difficult to shift the transfer fever from "2H" position to "4H" position when the vehicle is stopped.
Shift the transfer fever again after decelerating or stopping the vehicle if it may be difficult to shift the transfer fever from "2H" position to "4H" position while driving or when the gear noise occurs. There may be a case to operate the transfer fever heavily when shifting the transfer lever from "4H" position to "2H" P_Osition while driving. In this case, position the front wheels straight ahead and drive for a while and then operate shifting the transfer fever again. When the transfer lever is shifted from 2H" position to "4H" position or from "4H" position to 2H" position and the air locking hubs are activated, the air conditioning system may not be operated for several seconds. This is not a malfunction. When the ignition switch is turned "ON" after the transfer fever is shifted from 2H" position to "4H" position or from "4H" position to 2H" position while stopping the engine, 4WD indicator light may blink. This is not a malfunction.
OPERATING YOUR VEHICLE
78RB03027
Stop the vehicle completely, place the transmission in "N" (Neutral) or depress the clutch pedal fully (if equipped), then shift the transfer lever from "4H" position to "4L" position by pressing the transfer lever.
3-20
Page 172 of 421

OPERATING YOUR VEHICLE
A WARNING
When you turn off the engine while the transfer is not finished to shift into "4L" position, follow instructions below. 1) Depress the brake pedal* fully. 2) Turn the ignition switch to "OFF" position. • Depress the brake pedal until the engine is started again. Even though the gearshift lever is shifted into 1st gear or "R" (Reverse) gear for manual transmission vehicles or shifted into "P" (Park) position for automatic transmission vehicles, there may be a case that the wheels of the vehicle is not stationary. When you turn off the engine in this situation, start the engine again and move the vehicle forward or backward slowly.
3-21
A CAUTION
Do not operate the transfer lever while driving. Do not operate the transfer lever while making a left or right turn or while holding rear wheels slipped on icy, snow-covered, or muddy roads. Your vehicle may move to the unexpected direction. 4-wheel drive system may be also damaged.
NOTE: There may be a case that you will feel the difficulty to operate the transfer lever when shifting the transfer lever from "4H" position to "4L" position. Operate the transfer lever into "4L" position surely. When shifting the transfer lever from "4H" position to "4L" position, the buzzer will sound and the function of the ES?® system and the vehicle stability control system will be deactivated. There may be a case that shifting into "4L" position is not completed when the transfer system or the transmission is not warm in the cold weather. There may be a possibility of difficulty to shift especially for automatic transmission vehicles in the cold weather. Follow instructions below in this case and operate the transfer lever again. -Stop the vehicle completely. -Place the transmission in "N" (Neu-tral). -Depress the brake pedal* fully. -Release the parking brake. -Turn the ignition switch to "OFF" posi-tion. -Shift the transfer lever from "4H" position to "4L" position by pressing the transfer lever. -Check whether the vehicle can be moved by moving the vehicle forward or backward slowly. • Depress the brake pedal until the engine is started again.
Page 173 of 421
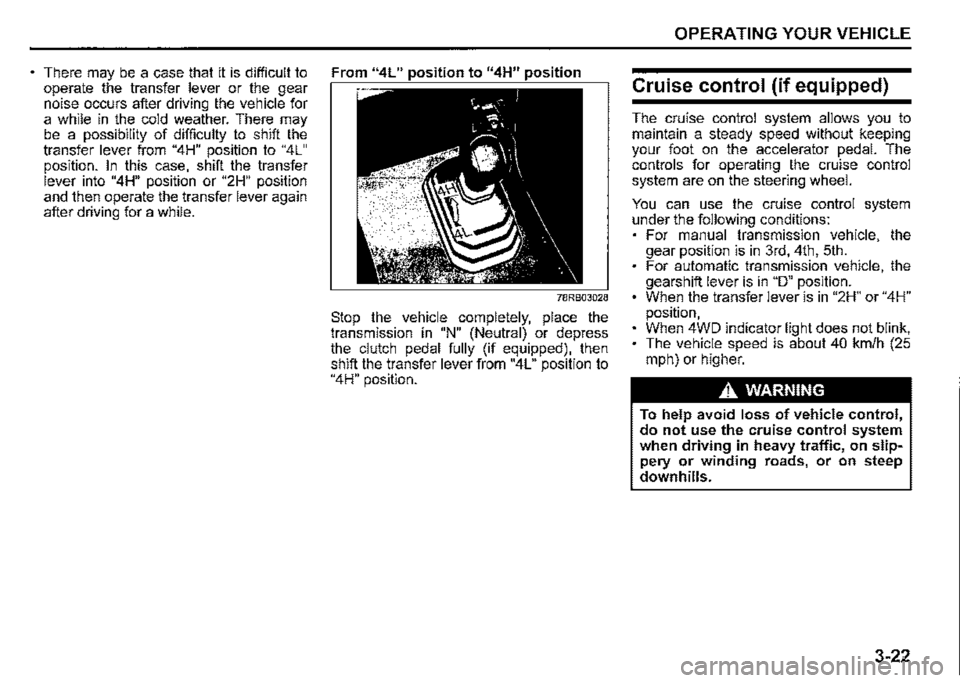
There may be a case that it is difficult to From "4L" position to "4H" position operate the transfer lever or the gear noise occurs after driving the vehicle for a while in the cold weather. There may be a possibility of difficulty to shift the transfer lever from "4H" position to "4L" position. In this case, shift the transfer lever into "4H" position or "2H" position
and then operate the transfer lever again after driving for a while.
78RB03028
Stop the vehicle completely, place the transmission in "N" (Neutral) or depress the clutch pedal fully (if equipped), then shift the transfer lever from "4L" position to "4H" position.
OPERATING YOUR VEHICLE
Cruise control (if equipped)
The cruise control system allows you to maintain a steady speed without keeping your foot on the accelerator pedal. The controls for operating the cruise control system are on the steering wheel.
You can use the cruise control system under the following conditions: For manual transmission vehicle, the gear position is in 3rd, 4th, 5th. For automatic transmission vehicle, the gearshift lever is in "D" position. When the transfer lever is in "2H" or "4H" position, When 4WD indicator light does not blink, The vehicle speed is about 40 km/h (25 mph) or higher.
A, WARNING
To help avoid loss of vehicle control, do not use the cruise control system when driving in heavy traffic, on slippery or winding roads, or on steep downhills.
3-22
Page 175 of 421

Changing cruising speed
Using the accelerator pedal To reset at a faster cruising speed, accelerate to the desired speed using the accelerator pedal and push down the "RES +/SET-" switch (3). The new speed will be main
tained.
Using the brake pedal To reset at a slower cruising speed, decelerate to the desired speed using the brake pedal and push down the "RES +/SET -" switch (3). The new speed will be main
tained.
NOTE: When the brake pedal is depressed, "SET" indicator light (5) or set indicator (7) goes off until the cruising speed is reset.
Using "RES +/SET-" switch To reset at a faster cruising speed, press repeatedly or hold push up the "RES +/ SET -" switch (3). Vehicle speed will steadily increase. When you release the switch, the new speed will be maintained.
To reset at a slower cruising speed, press repeatedly or hold push down the "RES +/ SET -" switch (3) until the vehicle has slowed to the desired speed, and then release the switch. The new speed will be maintained.
NOTE: You can adjust the set speed by approximately 1 km/h (1 mph) by pushing "RES +/ SET-" switch quickly
Cancelling cruise control
"SET' indicator light (5) or set indicator (7) will go off and the cruise control will be canceled temporarily with the following conditions:
Push "CANCEL" switch (2). Depress the brake pedal. For manual transmission vehicle, depress the clutch pedal. For automatic transmission vehicle, the gear position is changed to "L" When the transfer lever is operated, The vehicle speed falls more than about 20 percent from the set speed. Any time the vehicle speed falls below 40 km/h (25 mph). When the vehicle skids and ESP® is activated.
To resume the previously set speed, push up the "RES +/SET-" switch (3) and turn on "SET' indicator light (5) or set indicator (7). The vehicle speed must be above 40 km/h (25 mph) when the vehicle is not under the above conditions.
OPERATING YOUR VEHICLE
To turn off the cruise control system, push cruise switch (1) and check that the cruise indicator light (4) or cruise indicator (6)
goes off.
Also, if the malfunction indicator light in the instrument cluster comes on or blinks, the cruise control system will be turned off.
NOTE: If you turn off the cruise control system, the previously set speed in the memory is cleared. Reset your cruising speed again.
3-24
Page 190 of 421
OPERATING YOUR VEHICLE
Traffic sign recognition
(if equipped)
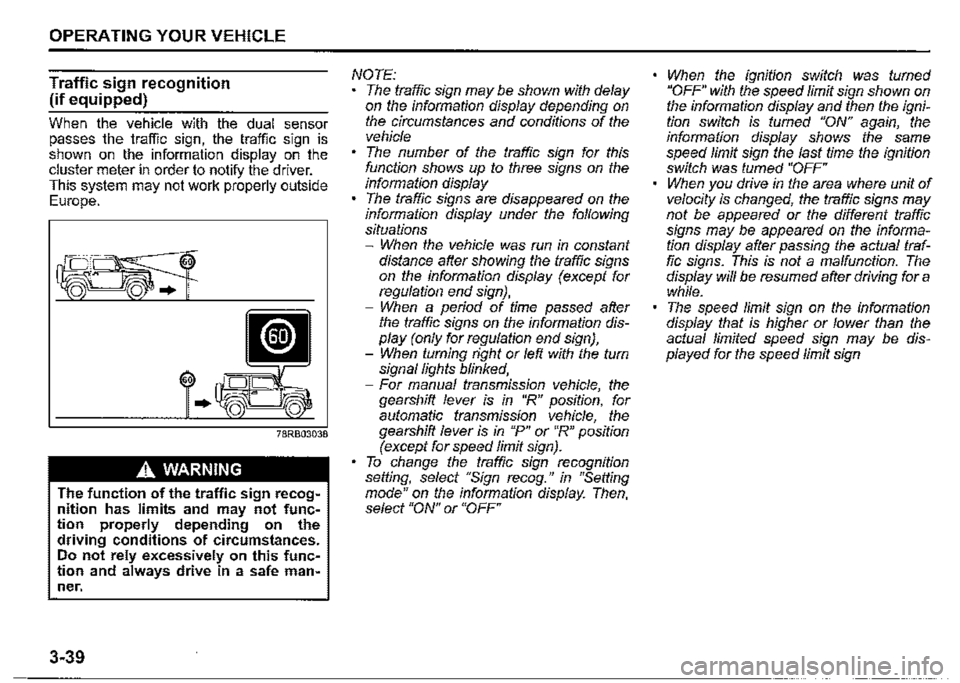
When the vehicle with the dual sensor passes the traffic sign, the traffic sign is shown on the information display on the cluster meter in order to notify the driver. This system may not work properly outside Europe.
60
..
A WARNING
The function of the traffic sign recognition has limits and may not function properly depending on the driving conditions of circumstances. Do not rely excessively on this function and always drive in a safe man~ ner.
3-39
NOTE: The traffic sign may be shown with delay on the information display depending on the circumstances and conditions of the vehicle The number of the traffic sign for this function shows up to three signs on the information display The traffic signs are disappeared on the information display under the following situations -When the vehicle was run in constant distance after showing the traffic signs on the information display (except for regulation end sign}, -When a period of time passed after the traffic signs on the information display (only for regulation end sign), -When turning right or left with the turn signal lights blinked, -For manual transmission vehicle, the gearshift lever is in "R" position, for automatic transmission vehicle, the gearshift lever is in "P" or "R" position (except for speed limit sign). To change the traffic sign recognition setting, select "Sign recog." in "Setting mode" on the information display. Then, select "ON" or "OFF"
When the ignition switch was turned "OFF" with the speed limit sign shown on the information display and then the ignition switch is fumed "ON" again, the information display shows the same speed limit sign the last time the ignition switch was fumed "OFF" When you drive in the area where unit of velocity is changed, the traffic signs may not be appeared or the different traffic signs may be appeared on the information display after passing the actual traffic signs. This is not a malfunction. The display will be resumed after driving for a while. The speed limit sign on the information display that is higher or lower than the actual limited speed sign may be displayed for the speed limit sign
Page 191 of 421

Situations where the system does not activate Under the following situations, the system does not activate. When the engine is off When dual sensor brake support indicator light and lane departure warning indicator light are initially lighting immediately after the ignition switch is in "ON" position For manual transmission vehicle, the gearshift lever is in "R" position, for automatic transmission vehicle, the gearshift lever is in "P", "R", or "N" position When the dual sensor is temporarily stopped or malfunctioning When the ESP® OFF switch is pushed and the system is turned off When the traffic sign recognition is turned off by operating the setting mode of information display When parking brake is applied When you drive in the area that there are no speed limit signs and has speed limit
OPERATING YOUR VEHICLE
3-40
Page 228 of 421
DRIVING TIPS
Snow chains
Snow chains should only be used if they are needed to increase traction or are required by law. Check that the chains you use are the correct size for your vehicle's tyres. Also check that there is enough clearance between the fenders and the chains as installed on the tyres. Install the chains on the rear tyres tightly, according to the chain manufacturer's instructions. Retighten the chains after driving about 1.0 km (1/2 mile) if necessary. With the chains installed, drive slowly.
NOTICE
If you hear the chains hitting against the vehicle body while driving, stop and tighten them.
4-5
Do not drive in the field covered
with grown grass
If you drive in the field covered with grass, it may cause accident or vehicle damage by getting caught in grown grass.
If Your Vehicle Gets Stuck
If your vehicle gets stuck in snow, mud, or sand, follow the directions below:
1) Shift the transfer shift lever into the "4L"
position. 2) Shift the transmission back and forth between a forward range (or first gear for manual transmission) and reverse. This will create a rocking motion which may give you enough momentum to free the vehicle. Press gently on the accelerator to keep wheel spin to a minimum. Remove your foot from the accelerator while shifting. Do not race the engine. Excessive wheel spin will cause the tyres to dig deeper, making it more difficult to free the vehicle. 3) If your vehicle remains stuck after a few minutes of rocking, get another vehicle to pull you out.
A WARNING
Do not allow anyone to stand near the vehicle when you are rocking it, and do not spin the wheels faster than an indicated 40 km/h (25 mph) on the speedometer. Personal injury and/or vehicle damage may result from spinning the wheels too fast.
NOTICE
• Release the accelerator pedal when operating the gearshift lever or the transfer lever. Operating the gearshift lever or the transfer lever with the engine racing can damage the gears and the free axle mechanism. • Do not continue rocking the vehicle for more than a few minutes. Prolonged rocking can cause engine overheating, transmission, transfer case, axles, propeller shaft or differential damage, or tyre damage.
Page 229 of 421
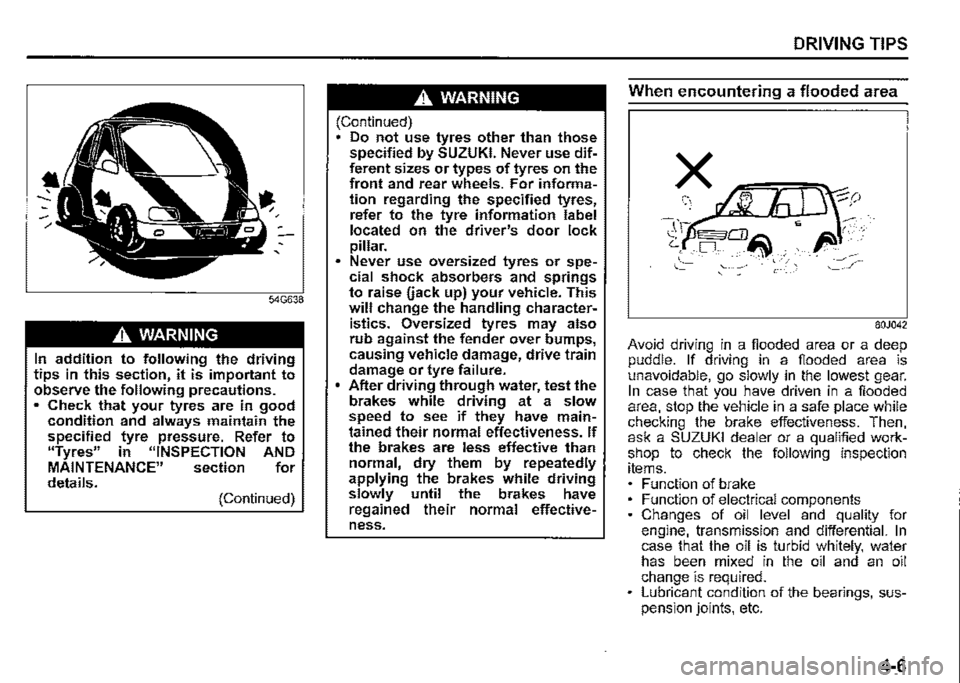
A WARNING
In addition to following the driving tips in this section, it is important to observe the following precautions. • Check that your tyres are in good condition and always maintain the specified tyre pressure. Refer to "Tyres" in "INSPECTION AND MAINTENANCE" section for details. (Continued)
A WARNING
(Continued) Do not use tyres other than those specified by SUZUKI. Never use different sizes or types of tyres on the front and rear wheels. For information regarding the specified tyres, refer to the tyre information label located on the driver's door lock pillar. Never use oversized tyres or spe~ cial shock absorbers and springs to raise uack up) your vehicle. This will change the handling characteristics. Oversized tyres may also rub against the fender over bumps, causing vehicle damage, drive train damage or tyre failure. After driving through water, test the brakes while driving at a slow speed to see if they have maintained their normal effectiveness. If the brakes are less effective than normal, dry them by repeatedly applying the brakes while driving slowly until the brakes have regained their normal effectiveness.
DRIVING TIPS
When encountering a flooded area
80J042
Avoid driving in a flooded area or a deep puddle. If driving in a flooded area is unavoidable, go slowly in the lowest gear. In case that you have driven in a flooded area, stop the vehicle in a safe place while checking the brake effectiveness. Then, ask a SUZUKI dealer or a qualified workshop to check the following inspection items. Function of brake Function of electrical components Changes of oil level and quality for engine, transmission and differential. In case that the oil is turbid whitely, water has been mixed in the oil and an oil change is required. Lubricant condition of the bearings, suspension joints, etc.
4-6
Page 230 of 421
DRIVING TIPS
NOTICE
Avoid driving in a flooded area or a deep puddle. It may cause an engine stall, short in electrical components, engine and transmission damages, etc.
4-7
Do not drive through deep or rush
ing water
Driving in deep or rushing water can be hazardous. You could lose control of the vehicle and the occupants could drown. Also, your vehicle could be seriously damaged. To avoid these risks, observe the following instructions and precautions. Do not drive through deep or rushing water. Deep or rushing water, such as fast-moving streams or fioodwaters, could carry your vehicle away from your intended path. The water is too deep if it covers your wheel hubs, axles, or exhaust tailpipe. Know the depth of the water before you attempt to drive through it.
If the vehicle goes across the river unavoidably, follow the instructions below before going across the river. 1) Confirm the depth of the river and the terrain. 2) Select the place which is less than 30cm (11.8 inch) in depth of water. Go across the river to a right angle for the river or lower part of the river 3) Drive slowly at less than 5 km/h (3.1 mph) not to raise the wave and go across the river immediately to avoid operating the gearshift lever.
If the vehicle goes across the river that is more than 30 cm (11.8 inch) in depth of water unavoidably, stop the vehicle in a safe place while checking the brake effectiveness. Then, ask a SUZUKI dealer or a qualified workshop to check the following
inspection items. Function of brake Function of electrical components Changes of oil level and quality for engine, transmission and differential. In case that the oil is turbid whitely, water has been mixed in the oil and an oil change is required. Lubricant condition of the bearings, suspension joints, etc. If water blocks the tailpipe, the engine may not start or run. If the water is deep enough to get drawn into the engine intake system, the engine will be badly damaged. Submerged brakes will have poor braking performance. Drive slowly and carefully. Driving slowly will also help avoid water splashing onto the ignition system, which could cause the engine to stall. Even when driving through shallow or still waters, drive carefully since the water may be hiding ground hazards such as holes, ditches, or bumps.