SUZUKI JIMNY 2022 Owners Manual
Manufacturer: SUZUKI, Model Year: 2022, Model line: JIMNY, Model: SUZUKI JIMNY 2022Pages: 421, PDF Size: 6.35 MB
Page 171 of 421

NOTICE
Pay attention to shifting the transfer lever safely when driving your vehicle.
NOTE: After shifting the transfer lever from "2H'" to "4H", check that the 4WD indicator
light comes on. After shifting the transfer lever from "4H" to "2H", check that the 4WD indicator goes off. ·
When 4WD indicator fight is blinking after shifting the transfer fever to "4H" position, accelerate, slow down your vehicle or stop and reverse your vehicle a little to shift the transfer lever. Pay attention to the vehicles and the circumference toward or backward your vehicle when shifting the transfer fever. When you shift the transfer fever while turning the steering wheel or depressing the accelerator pedal, shifting the transfer fever may be difficult. Operate the transfer fever while driving at low speed if it may be difficult to shift the transfer fever from "2H" position to "4H" position when the vehicle is stopped.
Shift the transfer fever again after decelerating or stopping the vehicle if it may be difficult to shift the transfer fever from "2H" position to "4H" position while driving or when the gear noise occurs. There may be a case to operate the transfer fever heavily when shifting the transfer lever from "4H" position to "2H" P_Osition while driving. In this case, position the front wheels straight ahead and drive for a while and then operate shifting the transfer fever again. When the transfer lever is shifted from 2H" position to "4H" position or from "4H" position to 2H" position and the air locking hubs are activated, the air conditioning system may not be operated for several seconds. This is not a malfunction. When the ignition switch is turned "ON" after the transfer fever is shifted from 2H" position to "4H" position or from "4H" position to 2H" position while stopping the engine, 4WD indicator light may blink. This is not a malfunction.
OPERATING YOUR VEHICLE
78RB03027
Stop the vehicle completely, place the transmission in "N" (Neutral) or depress the clutch pedal fully (if equipped), then shift the transfer lever from "4H" position to "4L" position by pressing the transfer lever.
3-20
Page 172 of 421

OPERATING YOUR VEHICLE
A WARNING
When you turn off the engine while the transfer is not finished to shift into "4L" position, follow instructions below. 1) Depress the brake pedal* fully. 2) Turn the ignition switch to "OFF" position. • Depress the brake pedal until the engine is started again. Even though the gearshift lever is shifted into 1st gear or "R" (Reverse) gear for manual transmission vehicles or shifted into "P" (Park) position for automatic transmission vehicles, there may be a case that the wheels of the vehicle is not stationary. When you turn off the engine in this situation, start the engine again and move the vehicle forward or backward slowly.
3-21
A CAUTION
Do not operate the transfer lever while driving. Do not operate the transfer lever while making a left or right turn or while holding rear wheels slipped on icy, snow-covered, or muddy roads. Your vehicle may move to the unexpected direction. 4-wheel drive system may be also damaged.
NOTE: There may be a case that you will feel the difficulty to operate the transfer lever when shifting the transfer lever from "4H" position to "4L" position. Operate the transfer lever into "4L" position surely. When shifting the transfer lever from "4H" position to "4L" position, the buzzer will sound and the function of the ES?® system and the vehicle stability control system will be deactivated. There may be a case that shifting into "4L" position is not completed when the transfer system or the transmission is not warm in the cold weather. There may be a possibility of difficulty to shift especially for automatic transmission vehicles in the cold weather. Follow instructions below in this case and operate the transfer lever again. -Stop the vehicle completely. -Place the transmission in "N" (Neu-tral). -Depress the brake pedal* fully. -Release the parking brake. -Turn the ignition switch to "OFF" posi-tion. -Shift the transfer lever from "4H" position to "4L" position by pressing the transfer lever. -Check whether the vehicle can be moved by moving the vehicle forward or backward slowly. • Depress the brake pedal until the engine is started again.
Page 173 of 421

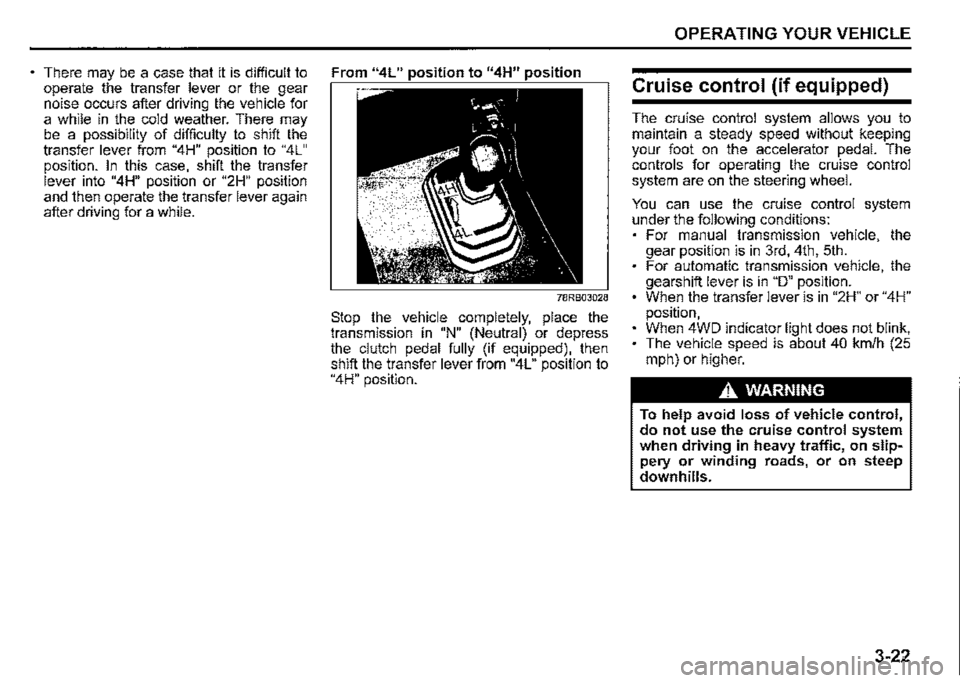
There may be a case that it is difficult to From "4L" position to "4H" position operate the transfer lever or the gear noise occurs after driving the vehicle for a while in the cold weather. There may be a possibility of difficulty to shift the transfer lever from "4H" position to "4L" position. In this case, shift the transfer lever into "4H" position or "2H" position
and then operate the transfer lever again after driving for a while.
78RB03028
Stop the vehicle completely, place the transmission in "N" (Neutral) or depress the clutch pedal fully (if equipped), then shift the transfer lever from "4L" position to "4H" position.
OPERATING YOUR VEHICLE
Cruise control (if equipped)
The cruise control system allows you to maintain a steady speed without keeping your foot on the accelerator pedal. The controls for operating the cruise control system are on the steering wheel.
You can use the cruise control system under the following conditions: For manual transmission vehicle, the gear position is in 3rd, 4th, 5th. For automatic transmission vehicle, the gearshift lever is in "D" position. When the transfer lever is in "2H" or "4H" position, When 4WD indicator light does not blink, The vehicle speed is about 40 km/h (25 mph) or higher.
A, WARNING
To help avoid loss of vehicle control, do not use the cruise control system when driving in heavy traffic, on slippery or winding roads, or on steep downhills.
3-22
Page 174 of 421

OPERATING YOUR VEHICLE
Setting cruising speed
Cruise control switch
(1)
(1) Cruise switch (2) "CANCEL" switch (3) "RES +/SET-" switch
(4) Cruise indicator light (5) "SET" indicator light
3-23
52RM30190
75RM329
78R803029
(6) Cruise indicator (7) Set indicator
1) Turn on the cruise control system by pushing cruise switch (1). When the cruise indicator light (4) (type A) or cruise indicator (6) (type B) comes on, you can set cruising speed. 2) Accelerate or decelerate to the desired speed. 3) Push down the "RES +/SET -" switch (3) and turn on the "SET" indicator light (5) (type A) or set indicator (7) (type B). Take your foot off the accelerator pedal and the set speed will be maintained.
A WARNING
If the cruising speed is set by accident, you cannot decelerate or could loose control of the vehicle. This could lead to an accident, resulting in severe injury or death. Turn off the cruise control system and check that cruise indicator (6) is off when the system is not in use.
Changing speed temporarily
When the cruising speed is maintained, you can temporarily accelerate or decelerate.
To accelerate, depress the accelerator pedal. When you take your foot off the pedal, your vehicle will return to the set speed.
To decelerate, depress the brake pedal. The set speed will be canceled and "SET" indicator light (5) or set indicator (7) will go off. To resume the previously set speed, push up the "RES +/SET -" switch (3) and turn on "SET" indicator light (5) or set indicator (7) again when vehicle speed is above 40 km/h (25 mph). The vehicle will accelerate to the previously set speed and maintain its speed.
Page 175 of 421

Changing cruising speed
Using the accelerator pedal To reset at a faster cruising speed, accelerate to the desired speed using the accelerator pedal and push down the "RES +/SET-" switch (3). The new speed will be main
tained.
Using the brake pedal To reset at a slower cruising speed, decelerate to the desired speed using the brake pedal and push down the "RES +/SET -" switch (3). The new speed will be main
tained.
NOTE: When the brake pedal is depressed, "SET" indicator light (5) or set indicator (7) goes off until the cruising speed is reset.
Using "RES +/SET-" switch To reset at a faster cruising speed, press repeatedly or hold push up the "RES +/ SET -" switch (3). Vehicle speed will steadily increase. When you release the switch, the new speed will be maintained.
To reset at a slower cruising speed, press repeatedly or hold push down the "RES +/ SET -" switch (3) until the vehicle has slowed to the desired speed, and then release the switch. The new speed will be maintained.
NOTE: You can adjust the set speed by approximately 1 km/h (1 mph) by pushing "RES +/ SET-" switch quickly
Cancelling cruise control
"SET' indicator light (5) or set indicator (7) will go off and the cruise control will be canceled temporarily with the following conditions:
Push "CANCEL" switch (2). Depress the brake pedal. For manual transmission vehicle, depress the clutch pedal. For automatic transmission vehicle, the gear position is changed to "L" When the transfer lever is operated, The vehicle speed falls more than about 20 percent from the set speed. Any time the vehicle speed falls below 40 km/h (25 mph). When the vehicle skids and ESP® is activated.
To resume the previously set speed, push up the "RES +/SET-" switch (3) and turn on "SET' indicator light (5) or set indicator (7). The vehicle speed must be above 40 km/h (25 mph) when the vehicle is not under the above conditions.
OPERATING YOUR VEHICLE
To turn off the cruise control system, push cruise switch (1) and check that the cruise indicator light (4) or cruise indicator (6)
goes off.
Also, if the malfunction indicator light in the instrument cluster comes on or blinks, the cruise control system will be turned off.
NOTE: If you turn off the cruise control system, the previously set speed in the memory is cleared. Reset your cruising speed again.
3-24
Page 176 of 421

OPERATING YOUR VEHICLE
Speed limiter (if equipped)
The speed limiter allows you to choose a maximum speed that you do not wish to exceed.
Setting maximum speed
Speed limiter switch
(3)
(1)
78RB03007
(1) "LIMIT" switch (2) "CANCEL" switch (3) "RES +/SET-" switch
3-25
Information display (For instrument cluster -Type B)
(For instrument cluster -Type A)
(6)
I~
(4)
SET
L[]□•
(4) (5) (6)
• •. . .,
(5) 78RB03008
L....-----------,"',"'•e;;;,;;;30;c30 (4) Limit indicator
(4) Limit indicator (5) "SET" indicator (6) Speed indication
(5) "SET" indicator (6) Speed indication
1) Turn on the speed limiter system by pushing "LIMIT" switch (1 ). When the limit indicator (4) appears in the information display, you can set the maximum speed. 2) Accelerate or decelerate to the desired speed. 3) Pull down the "RES +/SET -" switch (3), "SET" indicator (5) appears in the information display. The current vehicle speed is set as the maximum speed.
Page 177 of 421

NOTE: If you pull down the "RES +/SET-" switch (3) when the vehicle speed is less than 30 km/h or 20 mph, the maximum speed will be set to 30 km/h or 20 mph.
Exceeding maximum speed
You can exceed the maximum speed temporarily by quickly depressing the accelerator pedal all the way down. While the vehicle speed is exceeded, the speed indication (6) on the information display will fiash and the buzzer will sound briefiy. If the accelerator pedal is released to return below the maximum speed, the speed indication (6) will stop fiashing and then stay lit, and the function will restore.
NOTE: When you depress the accelerator pedal slowly, the vehicle speed may not exceed the maximum speed. If you wish to exceed the maximum speed, depress the accelerator pedal all the way down quickly or push "CANCEL" switch (2) to cancel the maximum speed temporarily. The speed indication (6) will also flash and the buzzer will sound if the speed limiter cannot prevent the vehicle from exceeding the maximum speed in such cases as when going down a steep hill, or under excessive acceleration. In this case, decelerate to return below the maximum speed using the brake pedal.
Changing speed setting
Setting to the current speed 1) Push "CANCEL" switch (2). 2) Accelerate or decelerate to the desired speed. 3) Pull down the "RES +/SET -" switch (3), "SET" indicator (5) appear in the information display. The current vehicle speed is set as the maximum speed.
Using "RES +/SET-" switch To change to a faster speed, press repeatedly or hold pulling up the "RES +/SET -" switch (3).
To change to a slower speed, press repeatedly or hold pulling down the "RES +/SET-" switch (3).
OPERATING YOUR VEHICLE
NOTE: You can adjust the set speed by 1 km/h (or 1 mph) by pulling up and down "RES +/SET-" switch (3) quickly. You can adjust the set speed by 5 km/h (or 5 mph} by pulling up and down and holding "RES +/SET-" switch (3). (e.g. 62 Km/h (or 42 mph} > 65 Km/h (or 45 mph) > 70 Km/h (or 50 mph), etc) If the current vehicle speed exceeds the maximum speed when changing to the slower speed using "RES +/SET -" switch (3), the speed indication (6) will flash and the buzzer will sound.
3-26
Page 178 of 421

OPERATING YOUR VEHICLE
Cancelling speed limiter
To cancel the speed limiter, push "CANCEL" switch (2). The set indicator (5) will disappear. To resume the previously set speed, pull up the "RES +/SET -" switch (3) and show "SET" indicator (5).
To turn off the speed limiter system, push "LIMIT" switch (1) and check that limit indicator (4) disappears. Also, you can turn off the speed limiter by turning off the engine.
NOTE: If you turn off the speed limiter system, the previously set speed in the memory is cleared. Set your speed again.
3-27
SUZUKI SAFETY SUPPORT
(if equipped)
Dual sensor brake support
Dual sensor brake support is a system that detects a vehicle or a pedestrian in front of your vehicle by the dual sensor, attempts to avoid a collision by giving warning to the driver, and attempts to reduce damage in the event of a collision.
A WARNING
• Dual sensor brake support has limits and may not function properly depending on the driving conditions. Do not rely excessively on the system and always drive in a safe manner. For safety reasons, do not check the operation of the system by yourself. Check that all passengers fasten their seat belts when the vehicle is being operated. When the system is activated, there is a risk of serious injury from being thrown.
NOTE: While the system is working, if a vehicle in front of you moves outside the dual sensor's detection field or the vehicle can no longer be detected, the system may stop functioning. While the system is working, a braking sound may be heard even if you do not depress the brake pedal, but this is normal. • As the function of the dual sensor brake support is different depending on some destinations or areas, there are type of vehicles with the function not to detect the pedestrians.
Page 179 of 421

Frontal collision warning When there is a risk of a frontal collision, a warning will be given through the information display and sound.
Information display
•::::: buzzer
78R803031
Brake assist system When there is high probability of a frontal collision, the brake assist system provides more powerful braking when you slam down on the brake pedal. Brake assist system might work at the same time as automatic brake system.
Information display
78RB03032
OPERATING YOUR VEHICLE
3-28
Page 180 of 421

OPERATING YOUR VEHICLE
Automatic brake system When a frontal collision is unavoidable, the brakes will powerfully operate automatically. (#1)
Indicator Information display light
~ buzzer
78RB03033
(#1) After the vehicle has been stopped by the automatic brake system, the interior buzzer will continue to beep until the automatic brake system is released. Also, the indication on the information display and the dual sensor brake support indicator light will go off 3 seconds after the automatic brake system is released.
A CAUTION
After the vehicle has been stopped by the automatic brake system, immediately depress the brake pedal. If your vehicle is equipped with the automatic transmission, and when the automatic brake system is released, the vehicle will start to move by the creeping function. This may result in an accident.
NOTE: If you do not depress the clutch pedal when the vehicle has been stopped by the automatic brake system, the engine will stall.
3-29