stop start SUZUKI KIZASHI 2010 1.G Owners Manual
[x] Cancel search | Manufacturer: SUZUKI, Model Year: 2010, Model line: KIZASHI, Model: SUZUKI KIZASHI 2010 1.GPages: 388, PDF Size: 4.94 MB
Page 35 of 388
2-16
BEFORE DRIVING
57L20-03E
How to stop the alarm
Should the alarm be triggered accidentally,
change the ignition mode to “ON” by press-
ing the engine switch. The alarm will then
stop.
NOTE:
Even after the alarm has stopped, if you
lock the doors using the keyless start
system remote controller or by pushing
the request switch, the theft deterrent
alarm system will be rearmed with a
delay of about 20 seconds.
If you disconnect the battery while the
theft deterrent alarm system is in the
armed condition or the alarm is actually
in operation, the alarm will be triggered
or re-triggered when the battery is then
reconnected, although, in the latter case,
the alarm remains stopped for the period
between disconnection and reconnec-
tion of the battery.
Even after the alarm has stopped at the
end of the predetermined operation time,
it will be triggered again if any door is
opened without disarming the theft
deterrent alarm system.Checking whether the alarm has been
triggered during parking
If the alarm was triggered due to an unau-
thorized entry into the vehicle and you then
change the ignition mode to “ON” by press-
ing the engine switch, the theft deterrent
light will flash rapidly for about 8 seconds
and a buzzer will beep 4 times during this
period. If this happens, check whether your
vehicle has been broken into while you
were away from it.
Enabling and disabling the theft deter-
rent alarm system
The theft deterrent alarm system can be
either “enabled” or “disabled”.
When enabled (factory setting)
When the system is enabled, it causes the
hazard warning lights to flash for about 40
seconds if any of the alarm trigger condi-
tions is met. The system also causes the
interior buzzer to beep intermittently for
about 10 seconds, which is followed by
intermittent sounding of the horn for about
30 seconds.
*The theft deterrent light continues to flash
during this time.
When disabled
When the system is disabled, it stays dis-
armed even if you perform any system
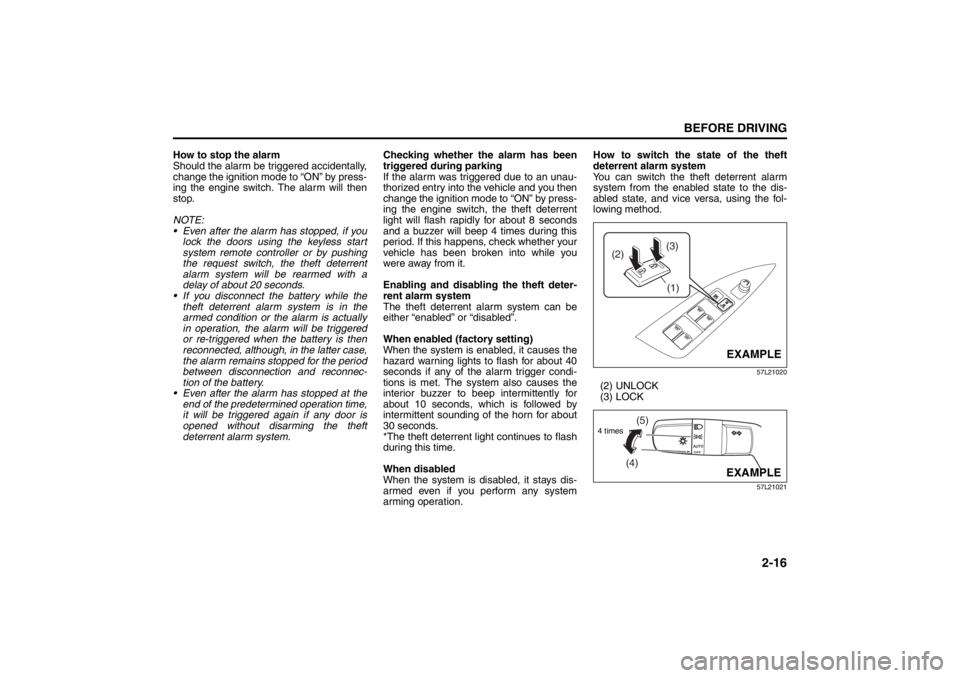
arming operation.How to switch the state of the theft
deterrent alarm system
You can switch the theft deterrent alarm
system from the enabled state to the dis-
abled state, and vice versa, using the fol-
lowing method.
57L21020
(2) UNLOCK
(3) LOCK
57L21021
(3)
(2)
(1)
EXAMPLE
(4)(5)
4 times
EXAMPLE
Seat Belts and Child Restraint Systems: 3
Page 38 of 388
2-19BEFORE DRIVING
57L20-03E
NOTE:
The driver’s and passenger’s windows can
be operated for 30 seconds even after the
ignition mode is changed from “ON” to
“ACC” or “LOCK” (OFF) by pressing the
engine switch. However, if either of the
front doors is opened within this 30-second
period, the windows cannot be operated
thereafter.
If you drive with one of the rear windows
open, you may hear a loud sound caused
by air vibration. To reduce the sound, openthe driver’s or front passenger’s window, or
narrow the rear window opening.
Initialization of Auto-Down/Up Function
If the auto-down/up function does not work
for some reason, initialize the function as
instructed below. Note that the initialization
must be performed using the switch for
each window; the function of the passen-
ger’s door window cannot be initialized
using the switch of the driver’s door win-
dow.
1) Start the engine.
2) Open the front window fully by holding
the window switch in the “Down” posi-
tion.
3) Close the front window by holding the
switch in the “Up” position, and keep
holding the switch for 2 seconds after
the window fully closed.
4) Check the front window if the auto-
down/up feature work.
Pinching Prevention Function
(if equipped)The front window is equipped with the
pinching prevention function. The function
detects a foreign object caught in the win-
dow while being closed by the “auto-up”
feature, which you can close the window
without holding the window switch in the
“Up” position, and stops the window clos-
ing to prevent damage.
WARNING
You should always lock the passen-
ger’s window operation when there
are children in the vehicle. Children
can be seriously injured if they get
part of their body caught by the
window during operation.
To avoid injuring an occupant by
window entrapment, be sure no
part of the occupant’s body such
as hands or head is in the path of
the electric windows when closing
them.
Always take the keyless start sys-
tem remote controller with you
when leaving the vehicle even if
only for a short time. Also do not
leave children alone in a parked
vehicle. Unattended children could
use the electric window switches
and get trapped by the window.
WARNING
To avoid injuring an occupant by win-
dow entrapment, be sure no part of
the occupant’s body such as hands
or head is in the path of the electric
window when closing it.
The function may not detect the
object depending on size, hardness,
and position of the object caught by
the closing window.
CAUTION
The pinching prevention function
does not act while you are holding
the window switch in the “Up” posi-
tion.
The pinching prevention function
may not detect an object caught in
the window where just before the
window fully closed.
Seat Belts and Child Restraint Systems: 3
Page 45 of 388
2-26
BEFORE DRIVING
57L20-03E
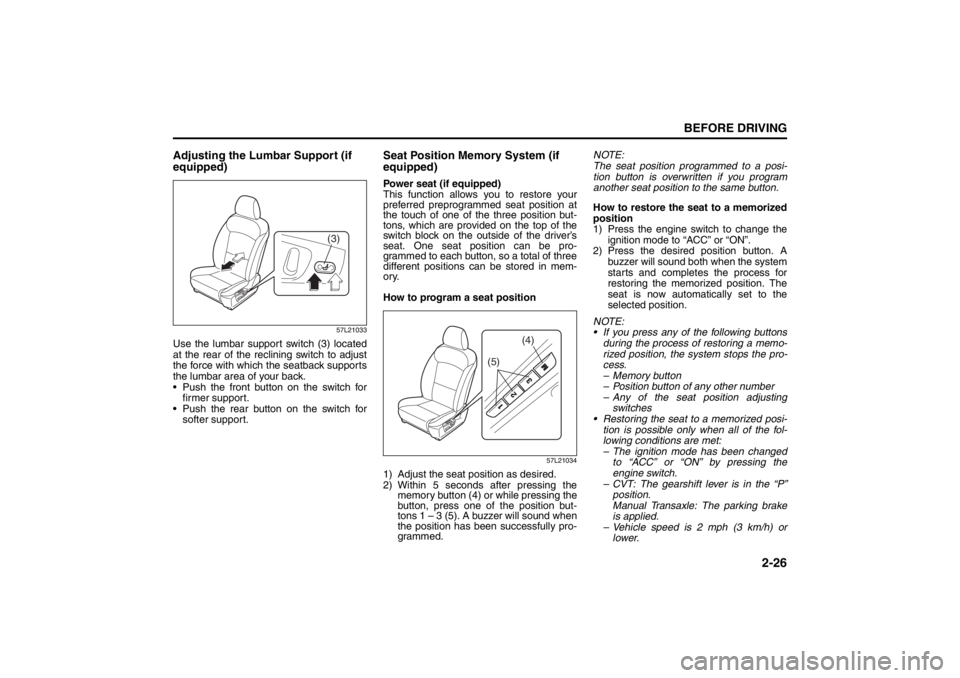
Adjusting the Lumbar Support (if
equipped)
57L21033
Use the lumbar support switch (3) located
at the rear of the reclining switch to adjust
the force with which the seatback supports
the lumbar area of your back.
Push the front button on the switch for
firmer support.
Push the rear button on the switch for
softer support.
Seat Position Memory System (if
equipped)Power seat (if equipped)
This function allows you to restore your
preferred preprogrammed seat position at
the touch of one of the three position but-
tons, which are provided on the top of the
switch block on the outside of the driver’s
seat. One seat position can be pro-
grammed to each button, so a total of three
different positions can be stored in mem-
ory.
How to program a seat position
57L21034
1) Adjust the seat position as desired.
2) Within 5 seconds after pressing the
memory button (4) or while pressing the
button, press one of the position but-
tons 1 – 3 (5). A buzzer will sound when
the position has been successfully pro-
grammed. NOTE:
The seat position programmed to a posi-
tion button is overwritten if you program
another seat position to the same button.
How to restore the seat to a memorized
position
1) Press the engine switch to change the
ignition mode to “ACC” or “ON”.
2) Press the desired position button. A
buzzer will sound both when the system
starts and completes the process for
restoring the memorized position. The
seat is now automatically set to the
selected position.
NOTE:
If you press any of the following buttons
during the process of restoring a memo-
rized position, the system stops the pro-
cess.
– Memory button
– Position button of any other number
– Any of the seat position adjusting
switches
Restoring the seat to a memorized posi-
tion is possible only when all of the fol-
lowing conditions are met:
– The ignition mode has been changed
to “ACC” or “ON” by pressing the
engine switch.
– CVT: The gearshift lever is in the “P”
position.
Manual Transaxle: The parking brake
is applied.
– Vehicle speed is 2 mph (3 km/h) or
lower.
(3)
(5)
(4)
Seat Belts and Child Restraint Systems: 3
Page 90 of 388
2-71BEFORE DRIVING
57L20-03E
1) Pull off the road and stop carefully.
2) Test the brakes by carefully starting and
stopping on the shoulder of the road.
3) If you determine that it is safe, drive
cautiously at low speed to the nearest
dealer for repairs,
or
4) Have the vehicle towed to the nearest
dealer for repairs.NOTE:
Because the disc brake system is self-
adjusting, the fluid level will drop as the
brake pads become worn.
Replenishing the brake fluid reservoir is
considered normal periodic maintenance.
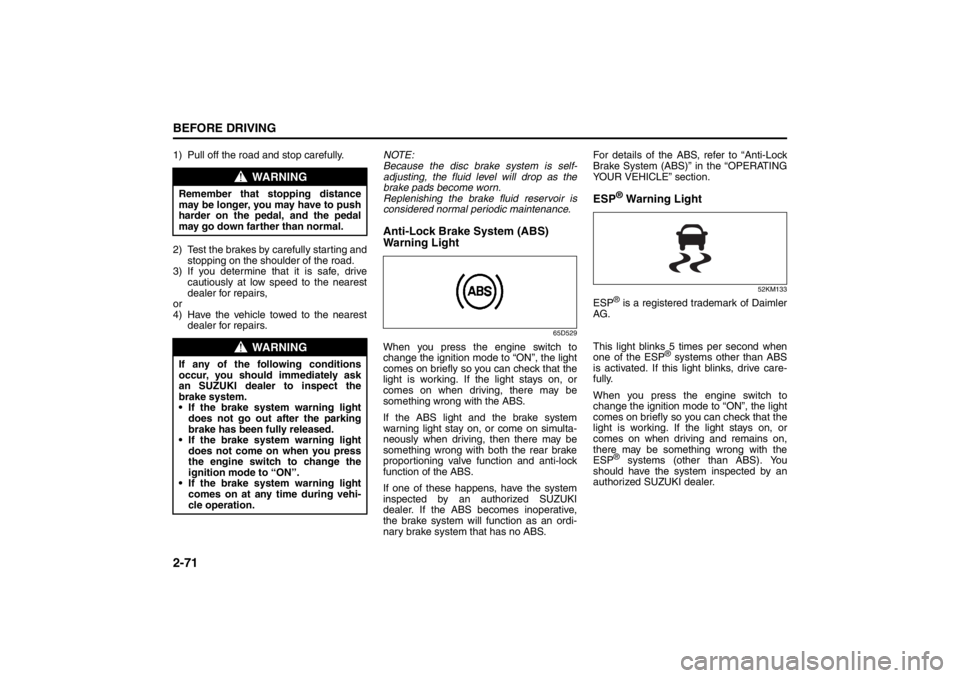
Anti-Lock Brake System (ABS)
Warning Light
65D529
When you press the engine switch to
change the ignition mode to “ON”, the light
comes on briefly so you can check that the
light is working. If the light stays on, or
comes on when driving, there may be
something wrong with the ABS.
If the ABS light and the brake system
warning light stay on, or come on simulta-
neously when driving, then there may be
something wrong with both the rear brake
proportioning valve function and anti-lock
function of the ABS.
If one of these happens, have the system
inspected by an authorized SUZUKI
dealer. If the ABS becomes inoperative,
the brake system will function as an ordi-
nary brake system that has no ABS.For details of the ABS, refer to “Anti-Lock
Brake System (ABS)” in the “OPERATING
YOUR VEHICLE” section.
ESP
® Warning Light
52KM133
ESP
® is a registered trademark of Daimler
AG.
This light blinks 5 times per second when
one of the ESP
® systems other than ABS
is activated. If this light blinks, drive care-
fully.
When you press the engine switch to
change the ignition mode to “ON”, the light
comes on briefly so you can check that the
light is working. If the light stays on, or
comes on when driving and remains on,
there may be something wrong with the
ESP
® systems (other than ABS). You
should have the system inspected by an
authorized SUZUKI dealer.
WARNING
Remember that stopping distance
may be longer, you may have to push
harder on the pedal, and the pedal
may go down farther than normal.
WARNING
If any of the following conditions
occur, you should immediately ask
an SUZUKI dealer to inspect the
brake system.
If the brake system warning light
does not go out after the parking
brake has been fully released.
If the brake system warning light
does not come on when you press
the engine switch to change the
ignition mode to “ON”.
If the brake system warning light
comes on at any time during vehi-
cle operation.
Page 91 of 388
2-72
BEFORE DRIVING
57L20-03E
NOTE:
When you disconnect and re-connect the
battery, ESP
® system functions other than
ABS will be deactivated. For details on how
to reactive the ESP
® systems, refer to
“ESP
® Warning Light” in the “OPERATING
YOUR VEHICLE” section.
For details of the ESP
® systems, refer to
“Electronic Stability Program (ESP
®)” in
the “OPERATING YOUR VEHICLE” sec-
tion.
“ESP
® OFF” Indicator Light
57L30045
When you press the engine switch to
change the ignition mode to “ON”, this light
comes on briefly so you can check that the
light is working.
When the “ESP
® OFF” switch is pushed to
turn off the ESP® systems (other than
ABS), the “ESP
® OFF” light comes on and
stays on.
For details of the ESP
® systems, refer to
“Electronic Stability Program (ESP
®)” in
the “OPERATING YOUR VEHICLE” sec-
tion.
Oil Pressure Light
50G051
This light comes on when you press the
engine switch to change the ignition mode
to “ON”, and goes out when the engine is
started. The light will come on and remain
on if there is insufficient oil pressure. If the
light comes on when driving, pull off the
road as soon as you can and stop the
engine. Check the oil level and add oil if
necessary. If there is enough oil, the lubri-
cation system should be inspected by an
authorized SUZUKI dealer before you drive
the vehicle again.
WARNING
The ESP
® systems cannot prevent
accidents. Always drive carefully.
CAUTION
If you operate the engine with this
light on, severe engine damage can
result.
Do not rely on the Oil Pressure
Light to indicate the need to add
oil. Be sure to periodically check
the engine oil level.
Page 96 of 388
2-77BEFORE DRIVING
57L20-03E
comes on briefly so you can check that the
light is working.
This light comes on if there is any prob-
lem with the intelligent all wheel drive (i-
AWD) system. The drive mode will then
automatically switch to the two-wheel
drive (2WD) mode.
The light flashes if the vehicle is in any of
the following conditions, and the drive
train mode will then automatically switch
to the 2WD mode.
– Wheels of different diameters are fitted
to the vehicle.
– Drive train components overheat as a
result of spinning of a drive wheel in
the mud or snow.
The light should normally come on when
you press the engine switch to change
the ignition mode to “ON” and continue
to light or go out depending on the drive
train mode engaged.
NOTE:
Should the light flash, immediately move
the vehicle to a safe place and park it there
to protect the drive train components. If
you let the engine run at idle for a while,
the light will stop flashing and then stay lit,
and the i-AWD mode will resume.
Electric Power Steering Warning
Light
80J408
This light comes on while the engine is
running if there is any problem with the
electric power steering system.
The light should normally come on when
you press the engine switch to change
the ignition mode to “ON” and go out as
soon as the engine is started.
NOTE:
The following conditions may indicate a
problem with the electric power steering
system. In the event of any of these con-
ditions, have your vehicle inspected by
an authorized SUZUKI dealer.
– The light comes on while driving.
– The light does not come on even when
you press the engine switch to change
the ignition mode to “ON”.
– The light stays on after the engine has
started.
The electric power steering system
stops functioning if it has any problem.
Without the system operating, the steer-
ing wheel will require more effort to turn
than usual.
Master Warning Indicator Light
78K049
When you press the engine switch to
change the ignition mode to “ON”, the light
comes on briefly so you can check that the
light is working. When the information dis-
play shows warning and indicator mes-
sages, this indicator light may also come
on or blink.
For details, refer to “Information Display” in
this section.
Page 128 of 388
2-109BEFORE DRIVING
57L20-03E
– There were already raindrops on the
windshield before starting rain-sensing
wiper operation. You should remove
the raindrops by operating the wipers
under manual control.
– The rain sensor is hotter than 80°C
(176°F) in the sun or lower than –10°C
(14°F) in freezing weather. (The wip-
ers do not operate under this condi-
tion.)
– The windshield is coated with a water-
repellent substance, which causes
raindrops to run down quickly. This will
give a clearer view and the wipers may
seem to operate too frequently. In this
case, decrease the system’s sensitiv-
ity.
– The sensor area is covered with a
sticker.
– The wiper blades are damaged. You
should replace them.
The following conditions may indicate
problems with the rain-sensing wiper
system. If your system exhibits any of
the following conditions, have it
inspected by an authorized SUZUKI
dealer.
– Rainfall/snowfall rate varies but the
wiping interval remains constant.
– Rain/snow is falling but the wipers do
not operate.Reprogramming the Rain-sensing
Wiper Function
The AUTO position operation of the rain-
sensing wiper function can be customized
to your preference by reprogramming its
setting as follows. Please contact an
authorized SUZUKI dealer for this customi-
zation.
Semi-automatic wiping
The system automatically selects the most
appropriate of the following wiping modes:
intermittent wiping, low-speed wiping, or
high-speed wiping. (The wipers do not stop
automatically.)
Intermittent wiping
The wipers operate only in the intermittent
wiping mode. The wiping interval can be
changed with the ring control (3).
Full-automatic wiping (factory setting)
The system automatically selects the most
appropriate of the following wiping modes,
no wiping, intermittent wiping, low-speed
wiping, and high-speed wiping.
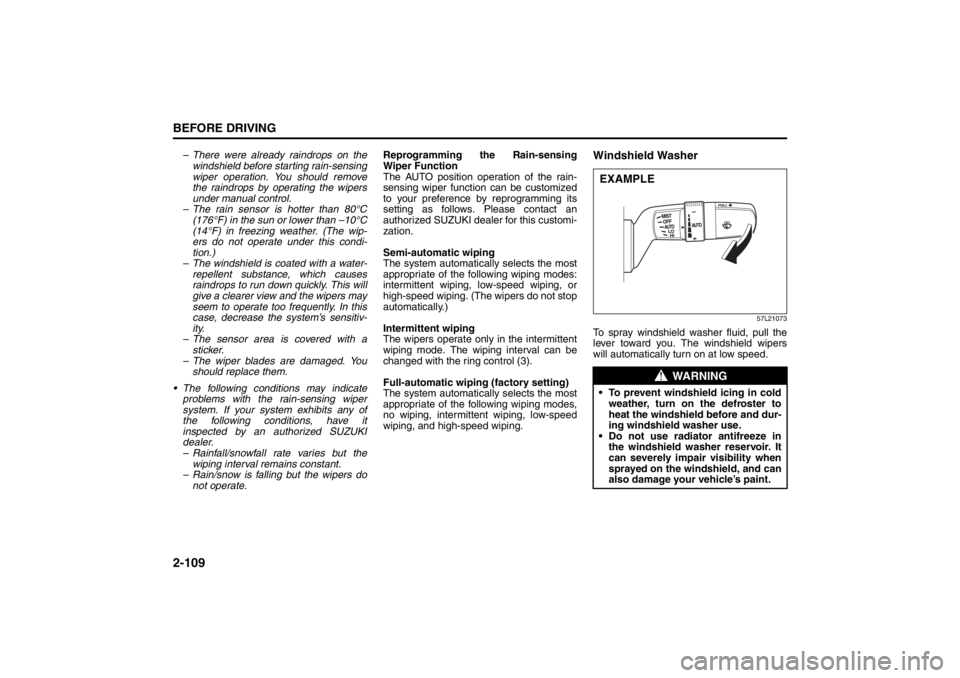
Windshield Washer
57L21073
To spray windshield washer fluid, pull the
lever toward you. The windshield wipers
will automatically turn on at low speed.
WARNING
To prevent windshield icing in cold
weather, turn on the defroster to
heat the windshield before and dur-
ing windshield washer use.
Do not use radiator antifreeze in
the windshield washer reservoir. It
can severely impair visibility when
sprayed on the windshield, and can
also damage your vehicle’s paint.EXAMPLE
Page 137 of 388
3-6
OPERATING YOUR VEHICLE
57L20-03E
on the information display when you
press the engine switch to change the
ignition mode to “ON”. Refer to “Informa-
tion Display” in the “Before Driving” sec-
tion for details. For details on replacing
the battery, refer to the “Keyless Start
System Remote Controller” section in
the “Before Driving” chapter.“Remote Controller Outside” Warn-
ingWhen the conditions described below are
met, the system gives a “remote controller
outside” warning by sounding the interior
and exterior buzzers and flashing the
immobilizer/keyless start system and mas-
ter warning indicator lights.
The remote controller is not inside the vehicle when any of the doors is opened
when the engine is running or when the
engine switch is pressed to change the
ignition mode to “ACC” or “ON” and then
all doors are closed.
The remote controller is not inside the vehicle when you attempt to start the
engine after changing the ignition mode
to “ACC” or “ON” by pressing the engine
switch.
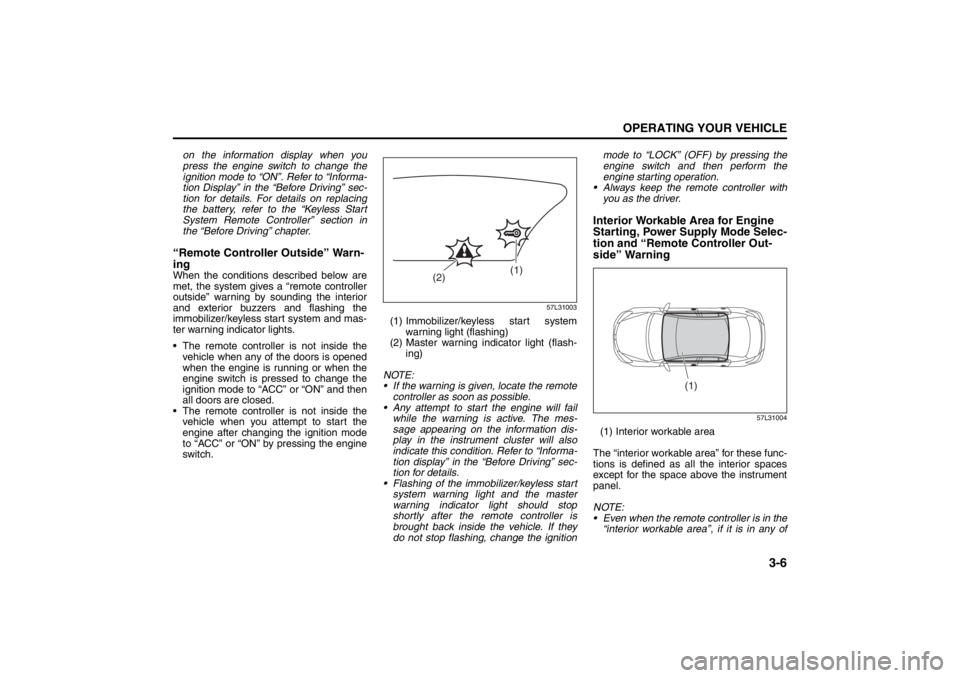
57L31003
(1) Immobilizer/keyless start system
warning light (flashing)
(2) Master warning indicator light (flash- ing)
NOTE:
If the warning is given, locate the remote controller as soon as possible.
Any attempt to start the engine will fail while the warning is active. The mes-
sage appearing on the information dis-
play in the instrument cluster will also
indicate this condition. Refer to “Informa-
tion display” in the “Before Driving” sec-
tion for details.
Flashing of the immobilizer/keyless start
system warning light and the master
warning indicator light should stop
shortly after the remote controller is
brought back inside the vehicle. If they
do not stop flashing, change the ignition mode to “LOCK” (OFF) by pressing the
engine switch and then perform the
engine starting operation.
Always keep the remote controller with
you as the driver.
Interior Workable Area for Engine
Starting, Power Supply Mode Selec-
tion and “Remote Controller Out-
side” Warning
57L31004
(1) Interior workable area
The “interior workable area” for these func-
tions is defined as all the interior spaces
except for the space above the instrument
panel.
NOTE:
Even when the remote controller is in the “interior workable area”, if it is in any of
(1)
(2)
(1)
Rear Window Wiper/Washer Switch: 8
Tilt Steering Lock Lever: 6
Cruise Control: 7, 8
Page 138 of 388
3-7OPERATING YOUR VEHICLE
57L20-03E
the following conditions, you may not be
able to start the engine or select the
power supply modes, and the “remote
controller outside” warning may be
given.
– The remote controller’s battery is low.
– The remote controller is affected bystrong radio signals or noise.
– The remote controller is in contact with or covered by a metallic object.
– The remote controller is in stowage like the glove box or a door pocket.
– The remote controller is in the sun
visor pocket or on the floor.
Even when the remote controller is out- side the “interior workable area”, if it is in
any of the following conditions, you may
be able to start the engine or select the
power supply mode. The “remote con-
troller outside” warning may not be given
at that time.
– The remote controller is outside the
vehicle but very close to a door.
– The remote controller is on the instru- ment panel.
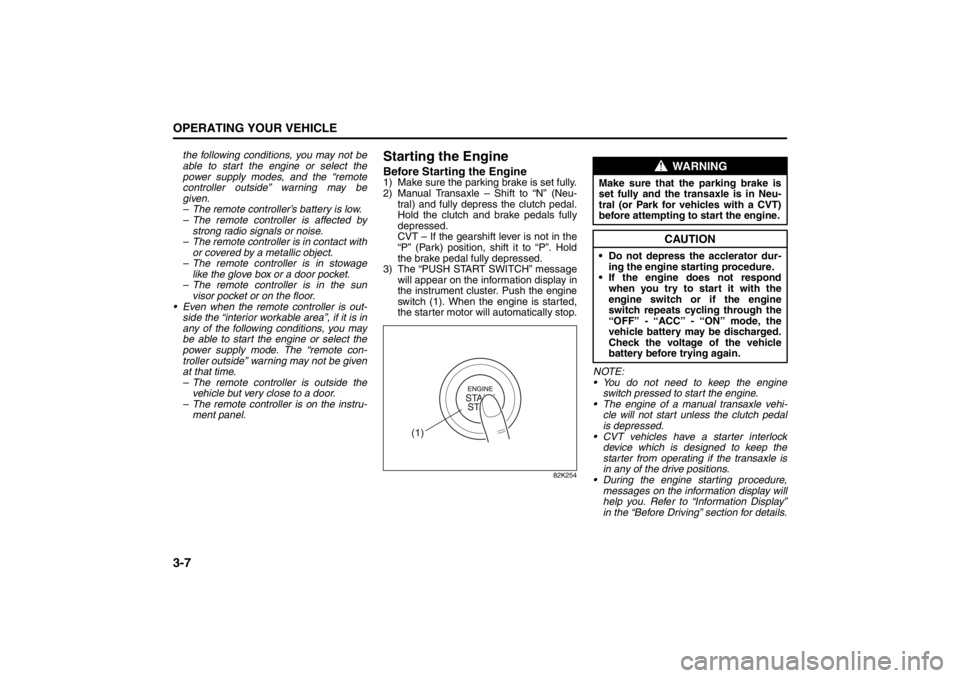
Starting the EngineBefore Starting the Engine1) Make sure the parking brake is set fully.
2) Manual Transaxle – Shift to “N” (Neu- tral) and fully depress the clutch pedal.
Hold the clutch and brake pedals fully
depressed.
CVT – If the gearshift lever is not in the
“P” (Park) position, shift it to “P”. Hold
the brake pedal fully depressed.
3) The “PUSH START SWITCH” message will appear on the information display in
the instrument cluster. Push the engine
switch (1). When the engine is started,
the starter motor will automatically stop.
82K254
NOTE:
You do not need to keep the engine
switch pressed to start the engine.
The engine of a manual transaxle vehi- cle will not start unless the clutch pedal
is depressed.
CVT vehicles have a starter interlock device which is designed to keep the
starter from operating if the transaxle is
in any of the drive positions.
During the engine starting procedure,
messages on the inform ation display will
help you. Refer to “Information Display”
in the “Before Driving” section for details.
(1)
WARNING
Make sure that the parking brake is
set fully and the tr ansaxle is in Neu-
tral (or Park for vehicles with a CVT)
before attempting to start the engine.
CAUTION
Do not depress the acclerator dur-
ing the engine st arting procedure.
If the engine does not respond when you try to start it with the
engine switch or if the engine
switch repeats cycling through the
“OFF” - “ACC” - “ON” mode, the
vehicle battery may be discharged.
Check the voltage of the vehicle
battery before trying again.
Cruise Control: 7, 8
Page 139 of 388
3-8
OPERATING YOUR VEHICLE
57L20-03E
You should turn off such loads as theheadlights and air conditioning system to
facilitate starting of the engine.
Even if you fail to start the engine, the
starter motor will stop turning automati-
cally after a short time. After the starter
motor has stopped or if there is some
problem with the system, the starter
motor will rotate only while the engine
switch is being pressed.Stopping the engine Depress the engine switch to stop theengine after the vehicle stopped com-
pletely.
In case of emergency, you can stop the engine by depressing the engine switch
more than 3 seconds while the vehicle in
motion.
NOTE:
Except in emergency, do not stop the
engine while the vehicle in motion.
The steering and braking operation will
require more effort s when the engine
stopped.
Refer to “Braking” in the “OPERATING
YOUR VEHICLE” section.
Starting a Cold EngineWith your foot off the accelerator pedal,
crank the engine by pressing the engine
switch to change the ignition mode to
“START”.
After pressing the engine switch to change
the ignition mode to “START”, the starter
cranks the engine for about 12 seconds
before it can start the engine. If the engine
fails to start at the first attempt, wait about
15 seconds, then try again while keeping
the engine switch pressed while pressing
down the accelerator pedal to 1/3 of its
travel. Release the accelerator pedal when
the engine starts.
If the engine still does not start, try holding
the accelerator pedal all the way to the
floor while cranking. Th is should clear the
engine if it is flooded.
If you are unable to start the engine using
this procedure, consult your SUZUKI
dealer.
Starting a Warm EngineUse the same procedure as for “Starting a
Cold Engine”.If the master warning light flashes
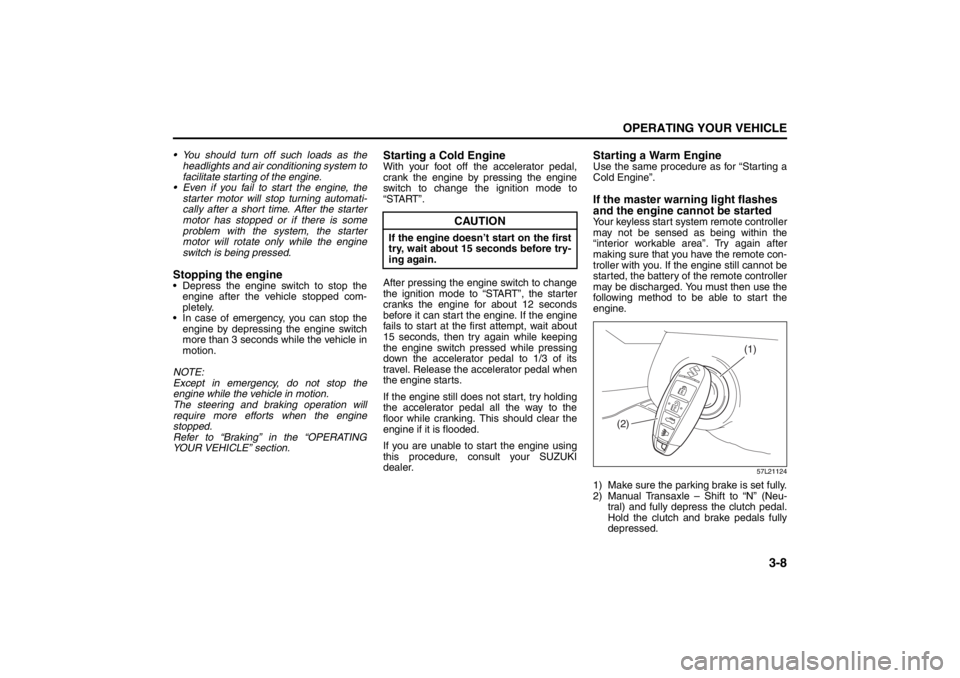
and the engine cannot be startedYour keyless start system remote controller
may not be sensed as being within the
“interior workable area”. Try again after
making sure that you have the remote con-
troller with you. If the engine still cannot be
started, the battery of the remote controller
may be discharged. You must then use the
following method to be able to start the
engine.
57L21124
1) Make sure the parking brake is set fully.
2) Manual Transaxle – Shift to “N” (Neu- tral) and fully depress the clutch pedal.
Hold the clutch and brake pedals fully
depressed.
CAUTION
If the engine doesn’ t start on the first
try, wait about 15 seconds before try-
ing again.
(1)
(2)
Cruise Control: 7, 8
Remote Audio Controls:
Horn: 6