SES SUZUKI MARUTI 2005 1.G Owners Manual
[x] Cancel search | Manufacturer: SUZUKI, Model Year: 2005, Model line: MARUTI, Model: SUZUKI MARUTI 2005 1.GPages: 136, PDF Size: 2.93 MB
Page 4 of 136

Downloaded from www.Manualslib.com manuals search engine 483K
1-1VEHICLE DETAILS
IMPORTANT INFORMATION TO CUSTOMER
Dear Customer
For any assistance with regard to our product, please contact
General Manager/Works Manager at any of our Dealer or
Authorised Service Station. For additional enquiry you may
contact our Regional office or Service Division. The
Addresses and Phone nos. are given in Service Network
booklet provided along with vehicle. MODEL CHASSIS NO. ENGINE NO. KEY NO. DATE OF ODOMETER BATTERY
DELIVERY READING (KM)
MAKE SR. NO
./BATCH CODE
OWNER’S NAME & ADDRESS____________________________________________________________________________
_____________________________________________________________________TEL. NO. _________________________ADDRESS/STAMP OF SELLING DEALER SELLING DEALER CODE
SHOWROOM
WORKSHOP
VEHICLE DETAILS
Page 6 of 136
Downloaded from www.Manualslib.com manuals search engine 683K
WARRANTY POLICY
2-1WARRANTY POLICYMaruti Suzuki India Limited (hereinafter called "Maruti Suzuki"),
warrants that each new Maruti Suzuki vehicle distributed in India
by Maruti Suzuki and sold by an authorised Maruti Suzuki dealer
will be free, under normal use and service, from any defects in
material and workmanship at the time of manufacture SUBJECT
TO THE FOLLOWING TERMS AND CONDITIONS:
(1) Qualification:
To qualify for this warranty:
(a) The Maruti Suzuki vehicle must be delivered by Maruti
Suzuki authorised dealer and set-up, serviced by Maruti
Suzuki authorised dealer/service station.
(b) The warranty registration card in respect of each vehicle
must be completed by the dealer at the time of delivery
of the vehicle and dealer should retain the same.
(2) Term:
The term of the warranty shall be twenty four (24) months
or 40,000 kilometers (whichever occurs first) from the date
of delivery to the first owner.
(3) Maruti Suzuki's Warranty Obligation:
If any defect(s) should be found in a Maruti Suzuki vehicle
within the term stipulated above, Maruti Suzuki's only obligation
is to repair or replace at its sole discretion any part shown
to be defec-tive, with a new part or the equivalent at no cost
to the owner for parts or labour, when Maruti Suzuki
acknowledges that such a defect is attributable to faulty
material or workmanship at the time of manufacture. The
owner is responsible for any repair or replacements which are
not covered by this warranty.(4) Limitation:
This warranty shall not apply to:
(1) Normal maintenance service required other than the three
free services, including without limitation, oil and fluid
changes, headlight aiming, fastener retightening, wheel bal-
ancing, wheel alignment and tyre rotation, cleaning of injec-
tors, adjustments of carburettor, ignition timing, clutch and
valve clearance.
(2) The replacement of normal wear parts including without
limitation, bulbs, tyres and tubes, spark plugs, belts, hoses,
filters, wiper blades, brushes, contact points, fuses, clutch
disc, brake shoes, brake pads, cable and all rubber parts
(except oil seal and glass run).
(3) Any vehicle which has been used for competition or racing.
(4) Any repairs or replacement required as a result of
accidents or collision.
(5) Any defects caused by misuse, negligence, abnormal use
or insufficient care.
(6) Any vehicle which has been modified or altered, including
without limitation, the installation of performance accessories.
(7) Any vehicle on which parts or accessories not approved
by Maruti Suzuki have been used.
(8) Any vehicle which has not been operated in accordance
with the operating instructions in the Maruti Suzuki Owner’s
Manual.
(9) Any vehicle which has not received, during the warranty
term, the service inspections prescribed in the Maruti
Suzuki Owner’s Manual.
(10) Any vehicle which has been assembled, disassembled,
adjusted or repaired by other than an Maruti Suzuki
authorised dealer/service station.
Page 7 of 136
Downloaded from www.Manualslib.com manuals search engine 783K
WARRANTY POLICY
2-2
(11) Any vehicle which has been used for purposes other than
what it was designed for.
(12)Any damage or deterioration caused by industrial pollution
and bird droppings.
(13) Insignificant defects which do not affect the function of
the vehicle including without limitation, sound, vibration
and fluid seep.
(14) Any natural wear and tear including without limitation,
aging etc.
(15) Installation and usage of Domestic LPG Gas/LPG cylinder.
(16)V-belts, hoses and gas leaks (For Maruti Suzuki AC
vehicle).
(17) Any vehicle retrofitted with LPG / CNG kits.
(5) Extent of Warranty:
This warranty is the entire written warranty given by Maruti
Suzuki for Maruti Suzuki vehicles and no dealer or its or his
agent or employee is authorised to extend or enlarge this
warranty and no dealer or its or his agent or employee is
authorised to make any oral warranty on Maruti Suzuki's
behalf.
Maruti Suzuki reserves the right to add any improvements or
change the design of any model at any time with no obligation
to make the same changes on units previously sold.
(6) Warranty Service:
To obtain warranty service, the complete vehicle must be
presented at the owner’s expenses to any authorised Maruti
Suzuki dealer.
(7) Owner’s Warranty Responsibilities:
It is responsibility of each owner to:(a) Make certain that the warranty registration/PDI card was
completed at the time of delivery of the vehicle;
(b) Have performed, at his own expenses, by an Maruti
Suzuki authorised dealer/service station all the service
inspections specified in the Maruti Suzuki “Owner’s Manual
and Service Booklet” and maintain adequate proof that
such service inspections have been performed.
(c) make certain that the Maruti Suzuki authorised dealer/
servise station performing the service inspection has
certified the work on the “Maintenance Service Record”
page in the “Owner’s Manual and Service Booklet” and
(d) Present the Maruti Suzuki “Owner’s Manual and Service
Booklet” to the authorised Maruti Suzuki dealer whenever
requesting service inspections or warranty service.
If the “Owner’s Manual and Service Booklet” should be lost
or destroyed the owner should consult the authorised Maruti
Suzuki dealer from whom the vehicle was purchased for
instructions concerning replacement of the “Owner’s Manual
and Service Booklet”.
(8) Disclaimer of Consequential Damage:
Maruti Suzuki assumes no responsibility for loss of vehicle,
loss of time, inconvenience or any other indirect incidental
or consequential damage resulting from the vehicle not being
available to the owner because of any defect covered by this
warranty.
(9) Change of Owner
Even if ownership of the vehicle changes, the remaining
warranty period is effective for the new owner.
Page 16 of 136
Downloaded from www.Manualslib.com manuals search engine 1683K
You can lock and unlock the tailgate by
using the key in the driver’s door lock.
To open the tailgate, pull up and hold the
tailgate unlatch handle (1) and lift the tailgate.
w ww w
w WARNING
Always make sure that the tailgate is
closed and latched securely. Com-
pletely closing the tailgate helps pre-
vent occupants from being thrown
from the vehicle in the event of an
accident. Completely closing it also
helps keep away exhaust gases from
entering the car.BEFORE DRIVING
4-4
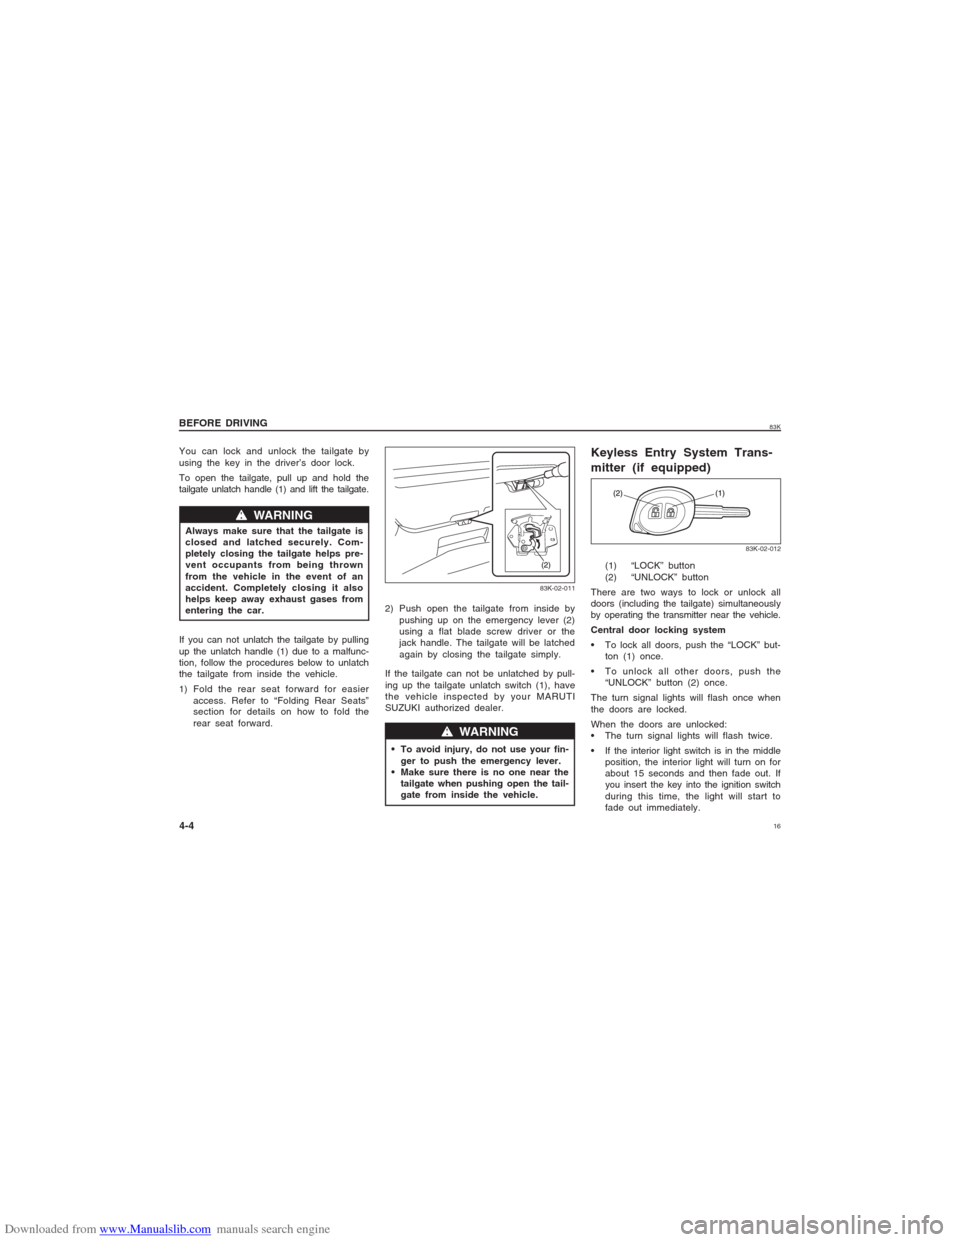
83K-02-011
2) Push open the tailgate from inside by
pushing up on the emergency lever (2)
using a flat blade screw driver or the
jack handle. The tailgate will be latched
again by closing the tailgate simply.
If the tailgate can not be unlatched by pull-
ing up the tailgate unlatch switch (1), have
the vehicle inspected by your MARUTI
SUZUKI authorized dealer. If you can not unlatch the tailgate by pulling
up the unlatch handle (1) due to a malfunc-
tion, follow the procedures below to unlatch
the tailgate from inside the vehicle.
1) Fold the rear seat forward for easier
access. Refer to “Folding Rear Seats”
section for details on how to fold the
rear seat forward.
w ww w
w WARNING
To avoid injury, do not use your fin-
ger to push the emergency lever.
Make sure there is no one near the
tailgate when pushing open the tail-
gate from inside the vehicle.
Keyless Entry System Trans-
mitter (if equipped)
83K-02-012
(1) “LOCK” button
(2) “UNLOCK” button
There are two ways to lock or unlock all
doors (including the tailgate) simultaneously
by operating the transmitter near the vehicle.
Central door locking system
To lock all doors, push the “LOCK” but-
ton (1) once.
To unlock all other doors, push the
“UNLOCK” button (2) once.
The turn signal lights will flash once when
the doors are locked.
When the doors are unlocked:
The turn signal lights will flash twice.
If the interior light switch is in the middle
position, the interior light will turn on for
about 15 seconds and then fade out. If
you insert the key into the ignition switch
during this time, the light will start to
fade out immediately.
Page 19 of 136
Downloaded from www.Manualslib.com manuals search engine 1983K
BEFORE DRIVING
4-7
while you are entering/exiting the vehicle.
a) Press and release the Key Unlock but-
ton.
b) Two Siren chrip and two indicator light-
flashes will confirm Disarm and Unlock.
c) Doors will get Unlock and vehicle will get
disarmed.
d) Visible theft warning LED on security
switch will flash fastly.
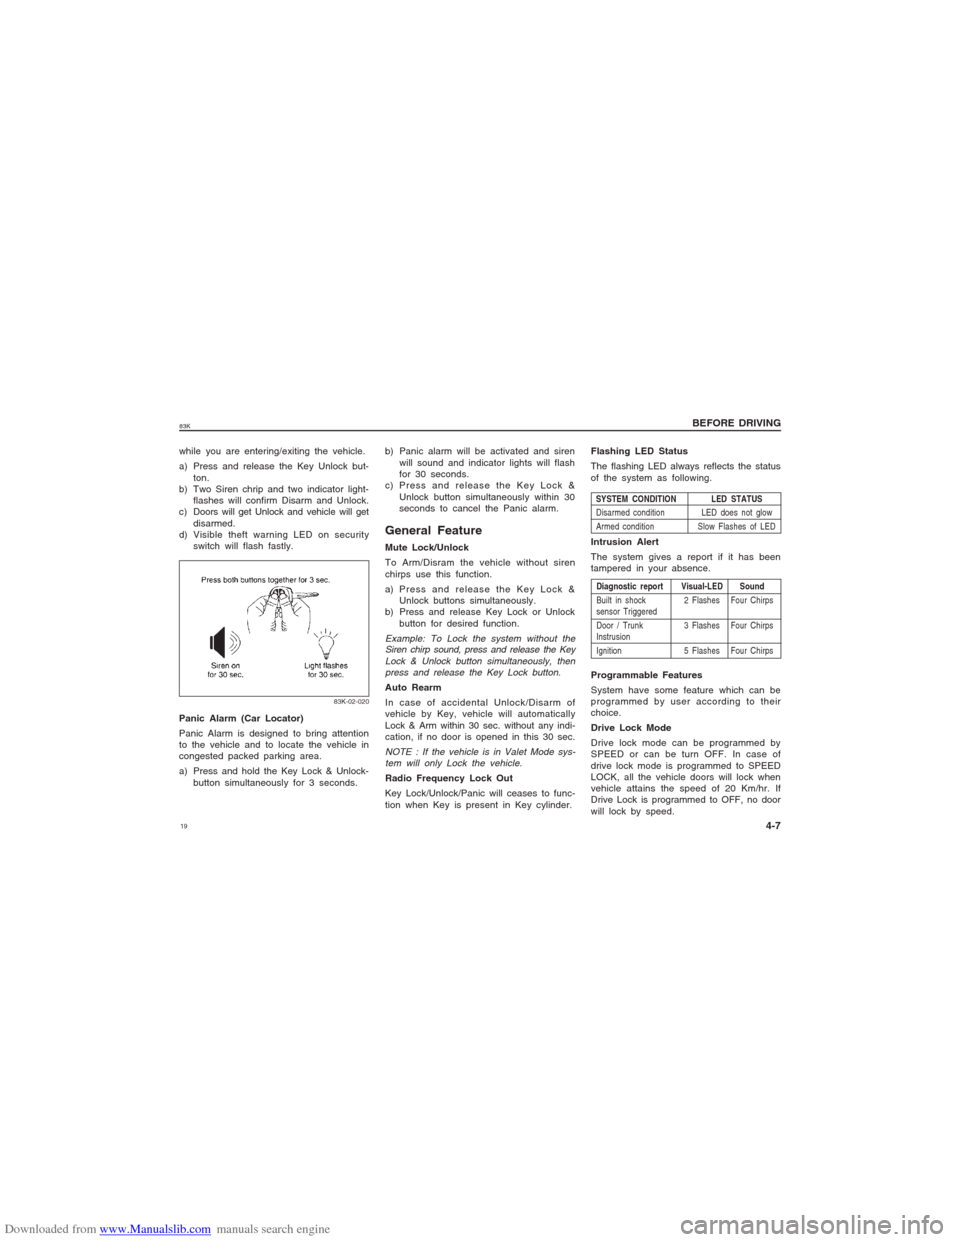
83K-02-020
Panic Alarm (Car Locator)
Panic Alarm is designed to bring attention
to the vehicle and to locate the vehicle in
congested packed parking area.
a) Press and hold the Key Lock & Unlock-
button simultaneously for 3 seconds.b) Panic alarm will be activated and siren
will sound and indicator lights will flash
for 30 seconds.
c) Press and release the Key Lock &
Unlock button simultaneously within 30
seconds to cancel the Panic alarm.
General FeatureMute Lock/Unlock
To Arm/Disram the vehicle without siren
chirps use this function.
a) Press and release the Key Lock &
Unlock buttons simultaneously.
b) Press and release Key Lock or Unlock
button for desired function.Example: To Lock the system without the
Siren chirp sound, press and release the Key
Lock & Unlock button simultaneously, then
press and release the Key Lock button.Auto Rearm
In case of accidental Unlock/Disarm of
vehicle by Key, vehicle will automatically
Lock & Arm within 30 sec. without any indi-
cation, if no door is opened in this 30 sec.NOTE : If the vehicle is in Valet Mode sys-
tem will only Lock the vehicle.Radio Frequency Lock Out
Key Lock/Unlock/Panic will ceases to func-
tion when Key is present in Key cylinder.Flashing LED Status
The flashing LED always reflects the status
of the system as following.
SYSTEM CONDITION LED STATUS
Disarmed condition LED does not glow
Armed condition Slow Flashes of LEDDiagnostic report Visual-LED Sound
Built in shock 2 Flashes Four Chirps
sensor Triggered
Door / Trunk 3 Flashes Four Chirps
Instrusion
Ignition 5 Flashes Four ChirpsIntrusion Alert
The system gives a report if it has been
tampered in your absence.
Programmable Features
System have some feature which can be
programmed by user according to their
choice.
Drive Lock Mode
Drive lock mode can be programmed by
SPEED or can be turn OFF. In case of
drive lock mode is programmed to SPEED
LOCK, all the vehicle doors will lock when
vehicle attains the speed of 20 Km/hr. If
Drive Lock is programmed to OFF, no door
will lock by speed.
Page 23 of 136
Downloaded from www.Manualslib.com manuals search engine 2383K
BEFORE DRIVING
4-11
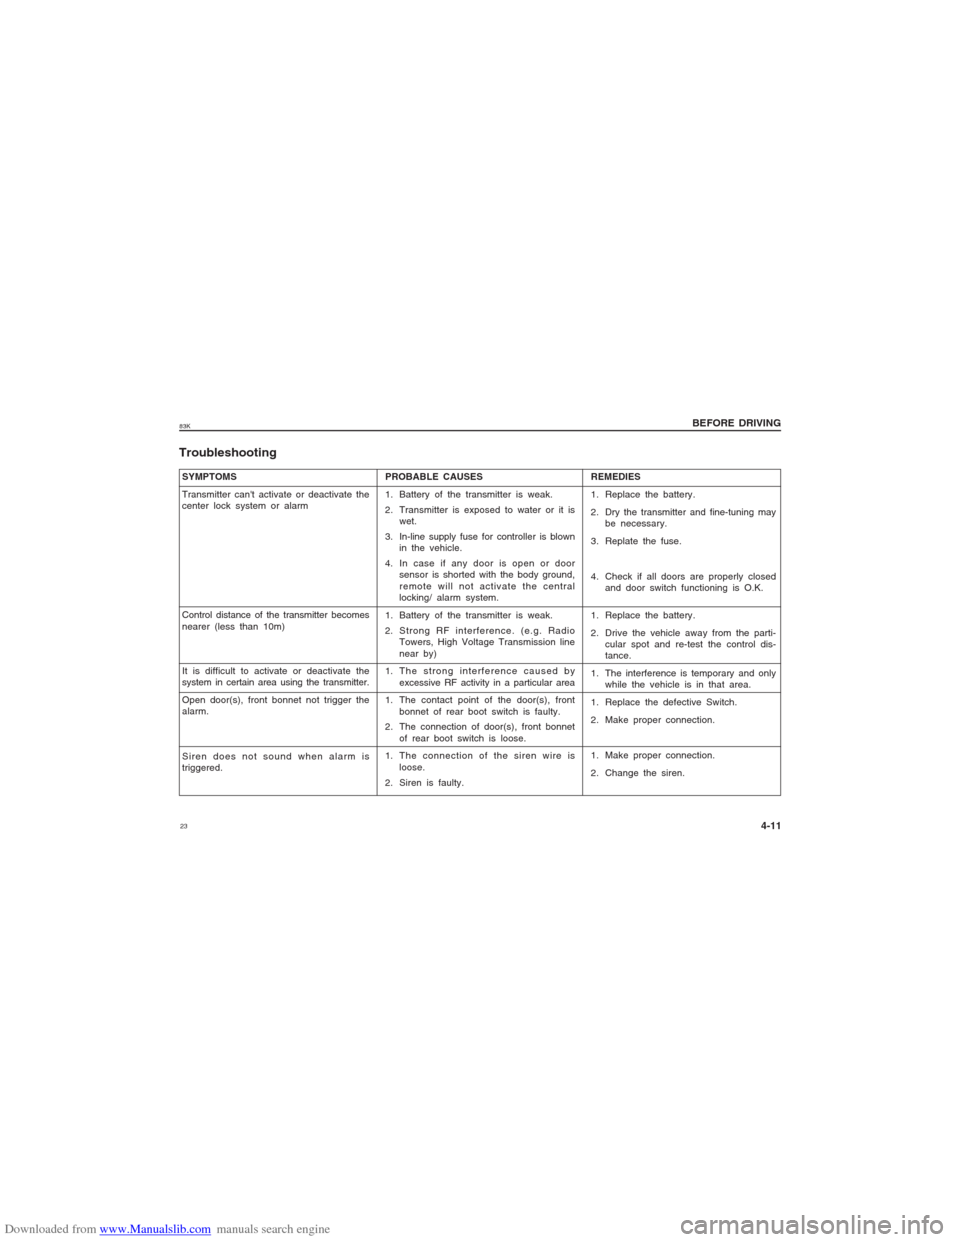
SYMPTOMS
Transmitter can't activate or deactivate the
center lock system or alarm
Control distance of the transmitter becomes
nearer (less than 10m)
It is difficult to activate or deactivate the
system in certain area using the transmitter.
Open door(s), front bonnet not trigger the
alarm.
Siren does not sound when alarm is
triggered.Troubleshooting
PROBABLE CAUSES
1. Battery of the transmitter is weak.
2. Transmitter is exposed to water or it is
wet.
3. In-line supply fuse for controller is blown
in the vehicle.
4. In case if any door is open or door
sensor is shorted with the body ground,
remote will not activate the central
locking/ alarm system.
1. Battery of the transmitter is weak.
2. Strong RF interference. (e.g. Radio
Towers, High Voltage Transmission line
near by)
1. The strong interference caused by
excessive RF activity in a particular area
1. The contact point of the door(s), front
bonnet of rear boot switch is faulty.
2. The connection of door(s), front bonnet
of rear boot switch is loose.
1. The connection of the siren wire is
loose.
2. Siren is faulty.REMEDIES
1. Replace the battery.
2. Dry the transmitter and fine-tuning may
be necessary.
3. Replate the fuse.
4. Check if all doors are properly closed
and door switch functioning is O.K.
1. Replace the battery.
2. Drive the vehicle away from the parti-
cular spot and re-test the control dis-
tance.
1. The interference is temporary and only
while the vehicle is in that area.
1. Replace the defective Switch.
2. Make proper connection.
1. Make proper connection.
2. Change the siren.
Page 27 of 136

Downloaded from www.Manualslib.com manuals search engine 2783K
BEFORE DRIVING
4-15
w ww w
w WARNING
Never drive the vehicle with the
head restraints removed.
Do not attempt to adjust the head
restraint while driving.
83K-02-031
To adjust the seatback angle of front seats,
pull up the lever on the outboard side of
the seat, move the seatback to the desired
position, and release the lever to lock the
seatback in place.Adjustable Head Restraints
(if equipped)Head restraints are designed to help reduce
the risk of neck injuries in the case of an
accident.
NOTE:
It may be necessary to recline the seatback
to provide enough overhead clearance to
remove the head restraint.
83K-02-032
Adjust the head restraint to the position
which places the center of the head restraint
closest to the top of your ears. If this is not
possible for very tall passengers, adjust the
head restraint as high as possible.
EXAMPLE
Seat Height Adjuster (if equipped)If the driver’s seat is equipped with a seat
height adjuster lever on the outboard side
of the seat, raise or lower the seat by pull-
ing up or down the adjuster lever.Adjusting Seatbacks
83K-02-030
w ww w
w WARNING
All seatbacks should always be in an
upright position when driving, or seat
belt effectiveness may be reduced.
Seat belts are designed to offer maxi-
mum protection when seatbacks are in
the upright position.EXAMPLE
Page 31 of 136
Downloaded from www.Manualslib.com manuals search engine 3183K
BEFORE DRIVING
4-19
w ww w
w WARNING
w ww w
w WARNING
V VV V
V
V VV V
V
V VV V
V
w ww w
w WARNING
Seat belts should never be worn
with the straps twisted and should
be adjusted as tightly as is com-
fortable to provide the protection for
which they have been designed. A
slack belt will provide less pro-
tection than one which is snug.
Make sure that each seat belt buckle
is inserted into the proper buckle
catch. It is possible to cross the
buckles in the rear seat.
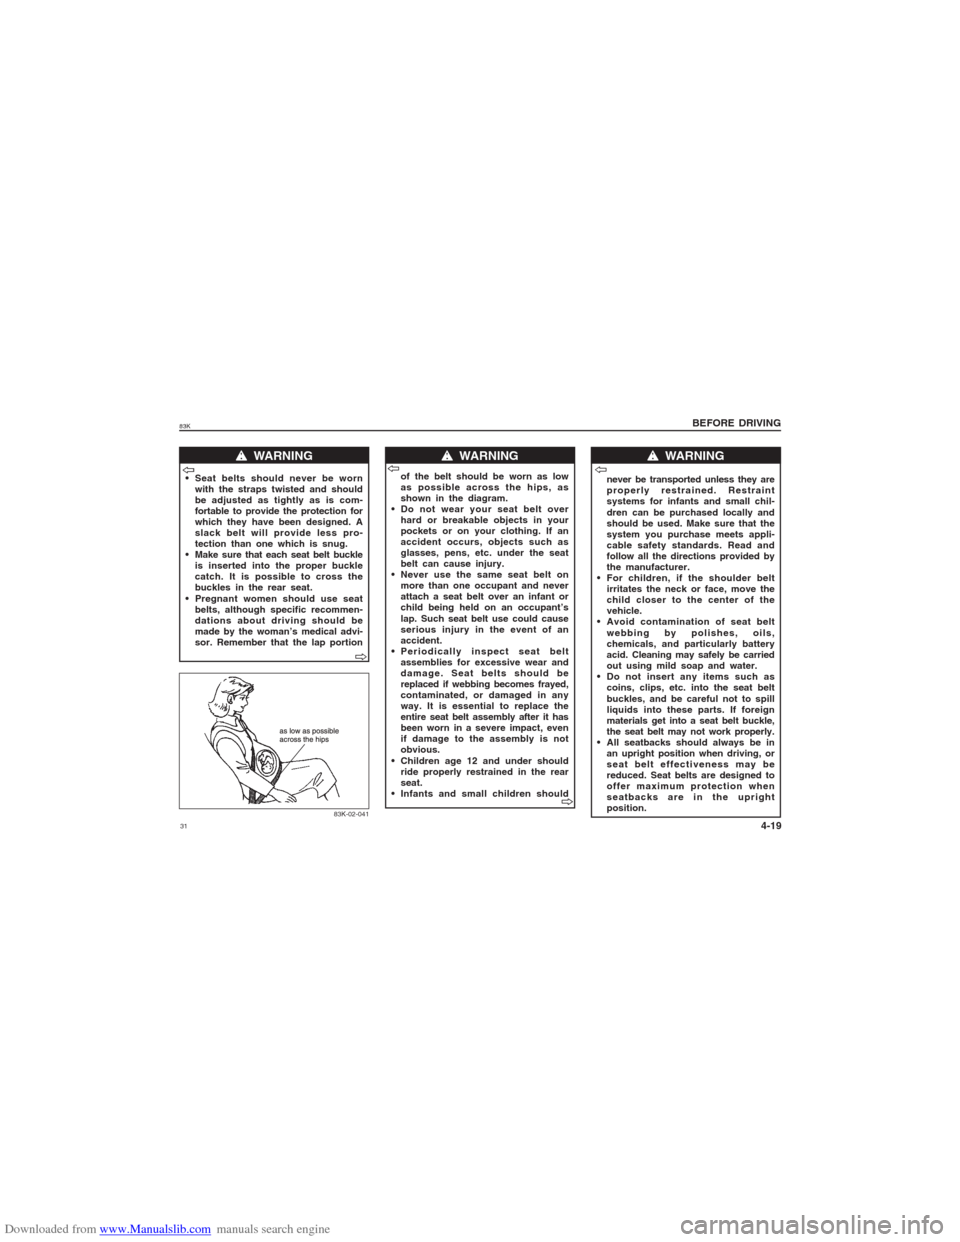
Pregnant women should use seat
belts, although specific recommen-
dations about driving should be
made by the woman’s medical advi-
sor. Remember that the lap portion
83K-02-041
V VV V
V
V VV V
V
of the belt should be worn as low
as possible across the hips, as
shown in the diagram.
Do not wear your seat belt over
hard or breakable objects in your
pockets or on your clothing. If an
accident occurs, objects such as
glasses, pens, etc. under the seat
belt can cause injury.
Never use the same seat belt on
more than one occupant and never
attach a seat belt over an infant or
child being held on an occupant’s
lap. Such seat belt use could cause
serious injury in the event of an
accident.
Periodically inspect seat belt
assemblies for excessive wear and
damage. Seat belts should be
replaced if webbing becomes frayed,
contaminated, or damaged in any
way. It is essential to replace the
entire seat belt assembly after it has
been worn in a severe impact, even
if damage to the assembly is not
obvious.
Children age 12 and under should
ride properly restrained in the rear
seat.
Infants and small children shouldnever be transported unless they are
properly restrained. Restraint
systems for infants and small chil-
dren can be purchased locally and
should be used. Make sure that the
system you purchase meets appli-
cable safety standards. Read and
follow all the directions provided by
the manufacturer.
For children, if the shoulder belt
irritates the neck or face, move the
child closer to the center of the
vehicle.
Avoid contamination of seat belt
webbing by polishes, oils,
chemicals, and particularly battery
acid. Cleaning may safely be carried
out using mild soap and water.
Do not insert any items such as
coins, clips, etc. into the seat belt
buckles, and be careful not to spill
liquids into these parts. If foreign
materials get into a seat belt buckle,
the seat belt may not work properly.
All seatbacks should always be in
an upright position when driving, or
seat belt effectiveness may be
reduced. Seat belts are designed to
offer maximum protection when
seatbacks are in the upright
position.
Page 56 of 136
Downloaded from www.Manualslib.com manuals search engine 5683K
Exhaust Gas Warning
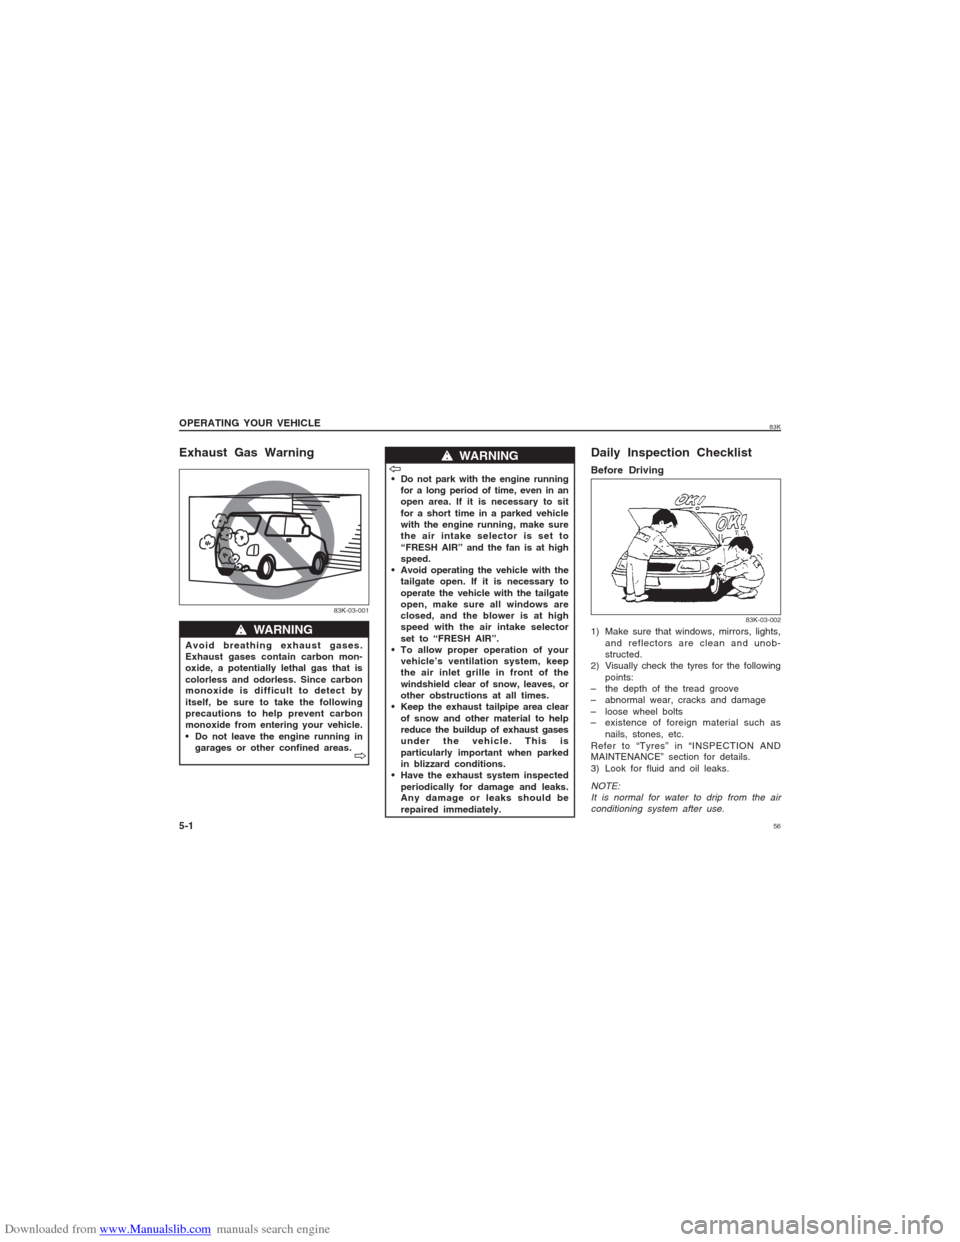
83K-03-001
w ww w
w WARNING
Avoid breathing exhaust gases.
Exhaust gases contain carbon mon-
oxide, a potentially lethal gas that is
colorless and odorless. Since carbon
monoxide is difficult to detect by
itself, be sure to take the following
precautions to help prevent carbon
monoxide from entering your vehicle.
Do not leave the engine running in
garages or other confined areas.
w ww w
w WARNING
Do not park with the engine running
for a long period of time, even in an
open area. If it is necessary to sit
for a short time in a parked vehicle
with the engine running, make sure
the air intake selector is set to
“FRESH AIR” and the fan is at high
speed.
Avoid operating the vehicle with the
tailgate open. If it is necessary to
operate the vehicle with the tailgate
open, make sure all windows are
closed, and the blower is at high
speed with the air intake selector
set to “FRESH AIR”.
To allow proper operation of your
vehicle’s ventilation system, keep
the air inlet grille in front of the
windshield clear of snow, leaves, or
other obstructions at all times.
Keep the exhaust tailpipe area clear
of snow and other material to help
reduce the buildup of exhaust gases
under the vehicle. This is
particularly important when parked
in blizzard conditions.
Have the exhaust system inspected
periodically for damage and leaks.
Any damage or leaks should be
repaired immediately.
Daily Inspection ChecklistBefore Driving1) Make sure that windows, mirrors, lights,
and reflectors are clean and unob-
structed.
2) Visually check the tyres for the following
points:
– the depth of the tread groove
– abnormal wear, cracks and damage
– loose wheel bolts
– existence of foreign material such as
nails, stones, etc.
Refer to “Tyres” in “INSPECTION AND
MAINTENANCE” section for details.
3) Look for fluid and oil leaks.NOTE:
It is normal for water to drip from the air
conditioning system after use.
83K-03-002
OPERATING YOUR VEHICLE
5-1
V VV V
V
V VV V
V
Page 60 of 136
Downloaded from www.Manualslib.com manuals search engine 6083K
OPERATING YOUR VEHICLE
5-5 Brake Pedal (2)Your SUZUKI vehicle is equipped with front
disc brakes and rear drum brakes.
Depressing the brake pedal applies both
sets of brakes.
You may hear occasional brake squeal
when you apply the brakes. This is a
normal condition caused by environmental
factors such as cold, wet, snow, etc.
w ww w
w WARNING
If brake squeal is excessive and
occurs each time the brakes are
applied, you should have the brakes
checked by your SUZUKI dealer.
w ww w
w WARNING
Do not “ride” the brakes by applying
them continuously or resting your foot
on the pedal. This will result in
overheating of the brakes which could
cause unpredictable braking action,
longer stopping distances, or
permanent brake damage.Accelerator Pedal (3)This pedal controls the speed of the engine.
Depressing the accelerator pedal increases
power output and speed.
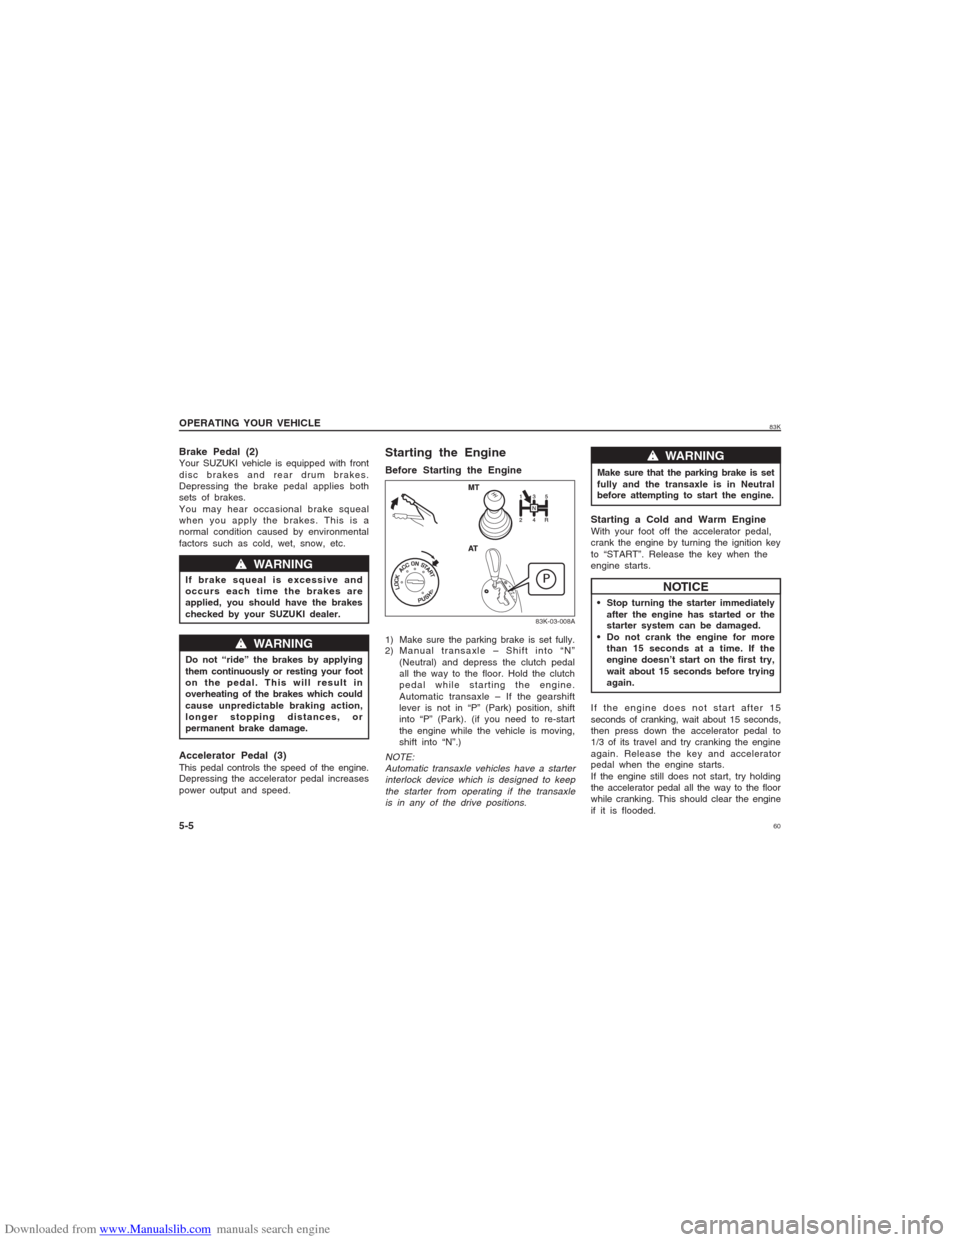
Starting the EngineBefore Starting the Engine
83K-03-008A
1) Make sure the parking brake is set fully.
2) Manual transaxle – Shift into “N”
(Neutral) and depress the clutch pedal
all the way to the floor. Hold the clutch
pedal while starting the engine.
Automatic transaxle – If the gearshift
lever is not in “P” (Park) position, shift
into “P” (Park). (if you need to re-start
the engine while the vehicle is moving,
shift into “N”.)NOTE:
Automatic transaxle vehicles have a starter
interlock device which is designed to keep
the starter from operating if the transaxle
is in any of the drive positions.
Make sure that the parking brake is set
fully and the transaxle is in Neutral
before attempting to start the engine.
w ww w
w WARNING
Starting a Cold and Warm EngineWith your foot off the accelerator pedal,
crank the engine by turning the ignition key
to “START”. Release the key when the
engine starts.
NOTICE
Stop turning the starter immediately
after the engine has started or the
starter system can be damaged.
Do not crank the engine for more
than 15 seconds at a time. If the
engine doesn’t start on the first try,
wait about 15 seconds before trying
again.
If the engine does not start after 15
seconds of cranking, wait about 15 seconds,
then press down the accelerator pedal to
1/3 of its travel and try cranking the engine
again. Release the key and accelerator
pedal when the engine starts.
If the engine still does not start, try holding
the accelerator pedal all the way to the floor
while cranking. This should clear the engine
if it is flooded.