headlights SUZUKI MARUTI 2005 1.G Owners Manual
[x] Cancel search | Manufacturer: SUZUKI, Model Year: 2005, Model line: MARUTI, Model: SUZUKI MARUTI 2005 1.GPages: 136, PDF Size: 2.93 MB
Page 25 of 136
Downloaded from www.Manualslib.com manuals search engine 2583K
BEFORE DRIVING
4-13
or (6). To restore normal operation, release
the lock switch by pushing again.
w ww w
w WARNING
You should always lock the passen-
ger’s window operation when there
are children in the vehicle. Children
can be seriously injured if they get
part of their body caught by the
window during operation.
To avoid injuring an occupant by
window entrapment, be sure no part
of the occupant’s body such as
hands or head is in the path of the
electric windows when closing them.
Always remove the ignition key
when leaving the vehicle even if a
short time. Also do not leave chil-
dren alone in a parked vehicle.
Unattended children could use the
electric window switches and get
trapped by the window.MirrorsInside Rearview Mirror
83K-02-026
83K-02-026A
w ww w
w WARNING
selector set to the day position.
necessary to reduce glare from the
headlights of vehicles behind you.
Be aware that in this position you
may not be able to see some
objects that could be seen in the
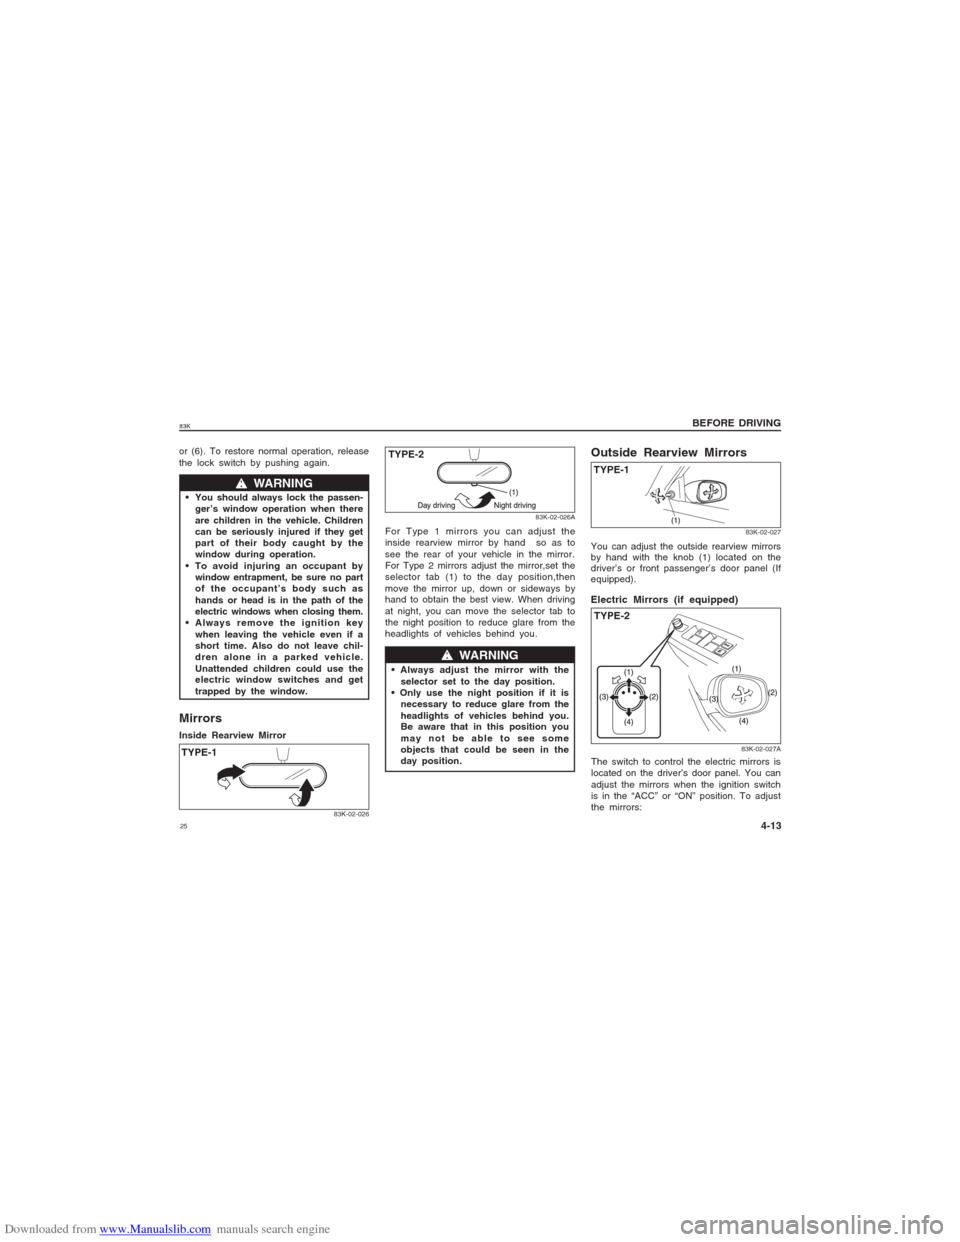
day position.You can adjust the outside rearview mirrors
by hand with the knob (1) located on the
driver’s or front passenger’s door panel (If
equipped).
83K-02-027
Outside Rearview MirrorsTYPE-1
83K-02-027A
TYPE-2 Electric Mirrors (if equipped)The switch to control the electric mirrors is
located on the driver’s door panel. You can
adjust the mirrors when the ignition switch
is in the “ACC” or “ON” position. To adjust
the mirrors: For Type 1 mirrors you can adjust the
inside rearview mirror by hand so as to
see the rear of your vehicle in the mirror.
For Type 2 mirrors adjust the mirror,set the
selector tab (1) to the day position,then
move the mirror up, down or sideways by
hand to obtain the best view. When driving
at night, you can move the selector tab to
the night position to reduce glare from the
headlights of vehicles behind you.
TYPE-1TYPE-2
Page 47 of 136
Downloaded from www.Manualslib.com manuals search engine 4783KTo reset the trip meter to zero, hold the
“MODE” knob (3) for more than 2 seconds
when the display (2) shows the indication
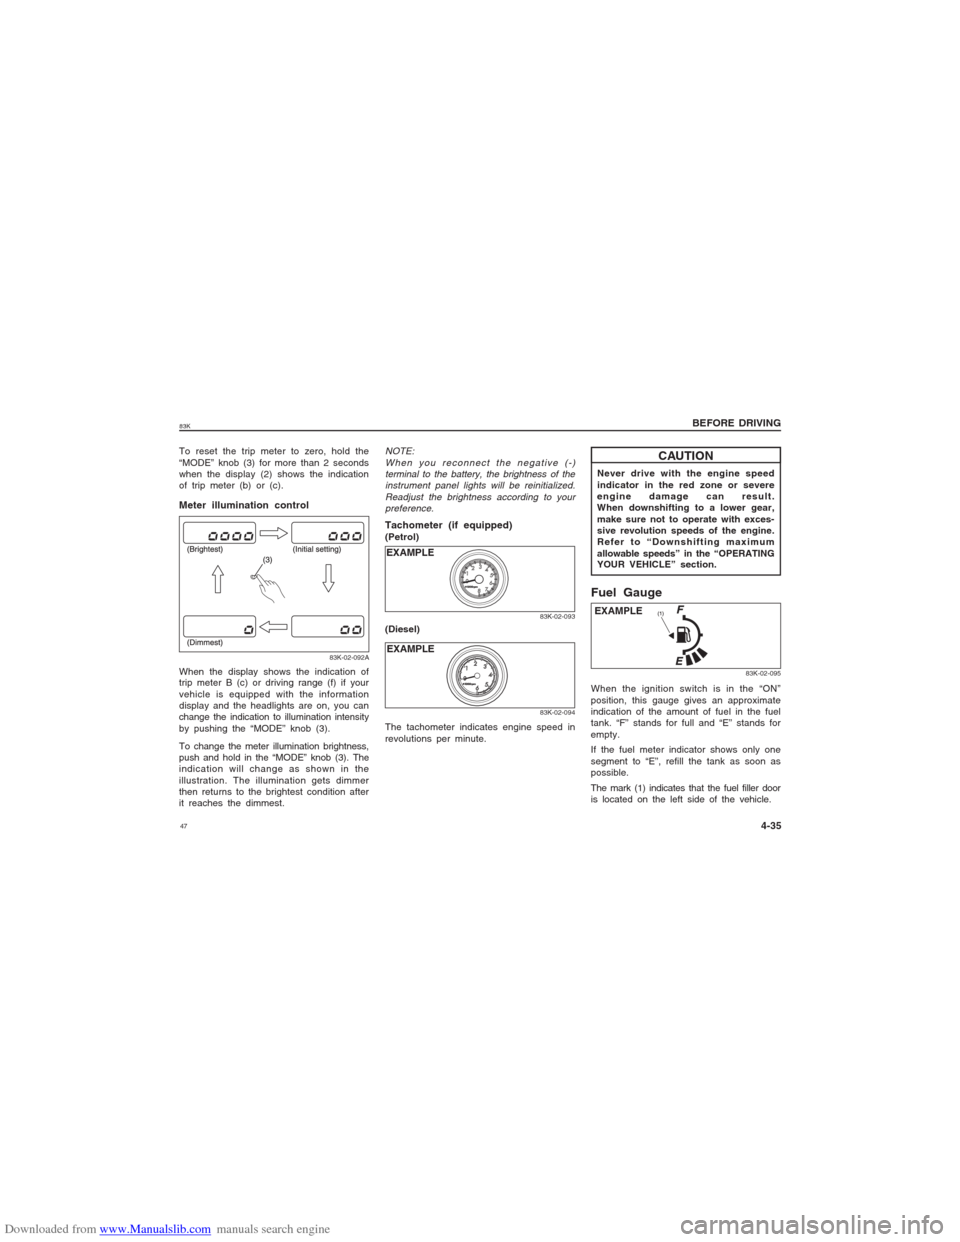
of trip meter (b) or (c).Meter illumination control
83K-02-092A
When the display shows the indication of
trip meter B (c) or driving range (f) if your
vehicle is equipped with the information
display and the headlights are on, you can
change the indication to illumination intensity
by pushing the “MODE” knob (3).
To change the meter illumination brightness,
push and hold in the “MODE” knob (3). The
indication will change as shown in the
illustration. The illumination gets dimmer
then returns to the brightest condition after
it reaches the dimmest.
NOTE:
When you reconnect the negative (-)
terminal to the battery, the brightness of the
instrument panel lights will be reinitialized.
Readjust the brightness according to your
preference.
83K-02-09383K-02-094
EXAMPLE EXAMPLE
Never drive with the engine speed
indicator in the red zone or severe
engine damage can result.
When downshifting to a lower gear,
make sure not to operate with exces-
sive revolution speeds of the engine.
Refer to “Downshifting maximum
allowable speeds” in the “OPERATING
YOUR VEHICLE” section.
CAUTION
Fuel GaugeEXAMPLEWhen the ignition switch is in the “ON”
position, this gauge gives an approximate
indication of the amount of fuel in the fuel
tank. “F” stands for full and “E” stands for
empty.
If the fuel meter indicator shows only one
segment to “E”, refill the tank as soon as
possible.
The mark (1) indicates that the fuel filler door
is located on the left side of the vehicle.
83K-02-095
Tachometer (if equipped)(Petrol)
(Diesel)
The tachometer indicates engine speed in
revolutions per minute.
BEFORE DRIVING
4-35
Page 51 of 136
Downloaded from www.Manualslib.com manuals search engine 5183KEXAMPLE
83K-02-098
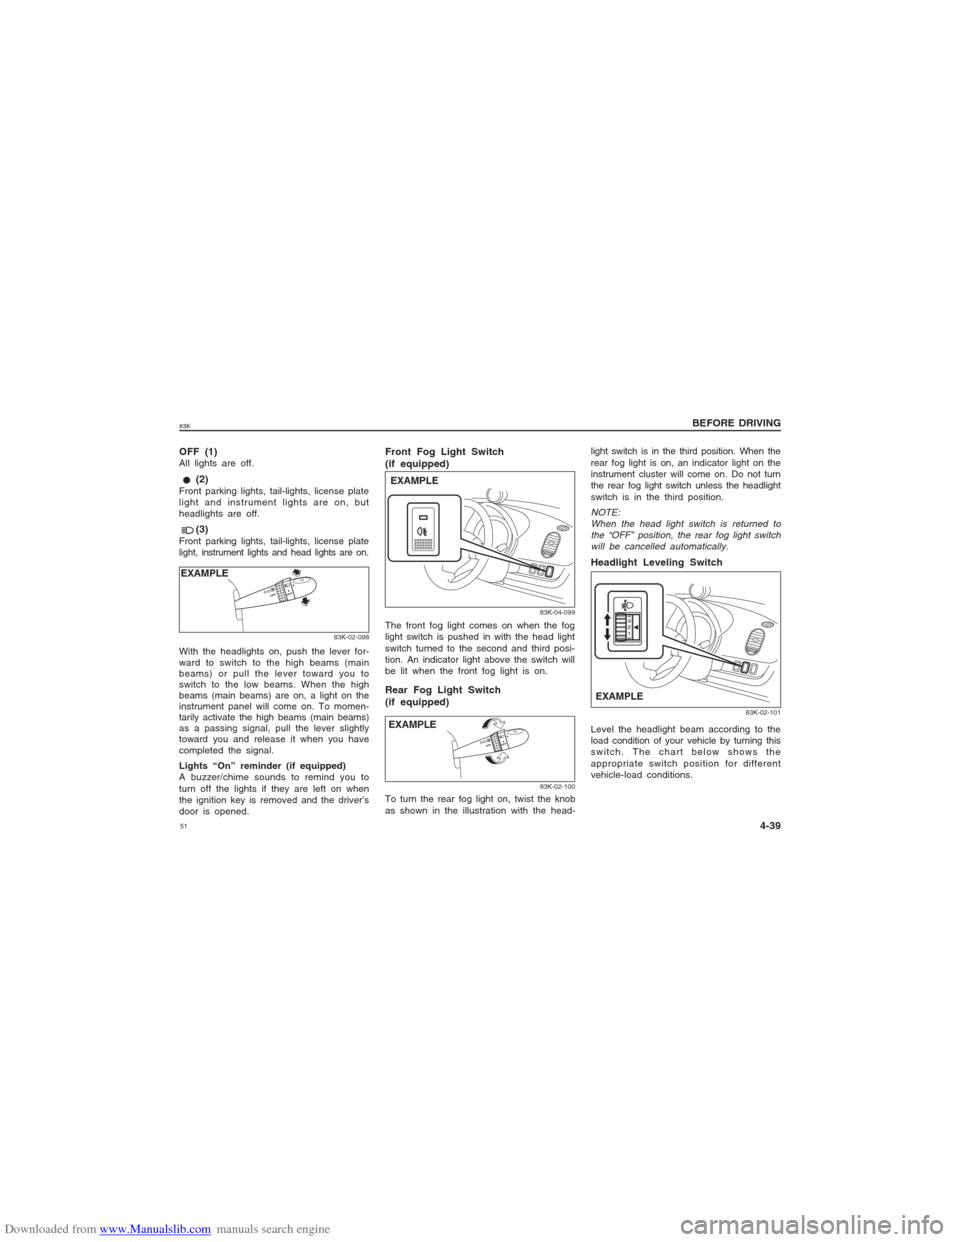
With the headlights on, push the lever for-
ward to switch to the high beams (main
beams) or pull the lever toward you to
switch to the low beams. When the high
beams (main beams) are on, a light on the
instrument panel will come on. To momen-
tarily activate the high beams (main beams)
as a passing signal, pull the lever slightly
toward you and release it when you have
completed the signal.
Lights “On” reminder (if equipped)
A buzzer/chime sounds to remind you to
turn off the lights if they are left on when
the ignition key is removed and the driver’s
door is opened.OFF (1)All lights are off. (2)Front parking lights, tail-lights, license plate
light and instrument lights are on, but
headlights are off. (3)Front parking lights, tail-lights, license plate
light, instrument lights and head lights are on.
Front Fog Light Switch
(if equipped)
83K-04-099
EXAMPLEThe front fog light comes on when the fog
light switch is pushed in with the head light
switch turned to the second and third posi-
tion. An indicator light above the switch will
be lit when the front fog light is on.Rear Fog Light Switch
(if equipped)
83K-02-100
To turn the rear fog light on, twist the knob
as shown in the illustration with the head-
light switch is in the third position. When the
rear fog light is on, an indicator light on the
instrument cluster will come on. Do not turn
the rear fog light switch unless the headlight
switch is in the third position.NOTE:
When the head light switch is returned to
the “OFF” position, the rear fog light switch
will be cancelled automatically.Headlight Leveling Switch
83K-02-101
EXAMPLELevel the headlight beam according to the
load condition of your vehicle by turning this
switch. The chart below shows the
appropriate switch position for different
vehicle-load conditions.
BEFORE DRIVING
4-39 EXAMPLE
Page 57 of 136
Downloaded from www.Manualslib.com manuals search engine 5783K4) Make sure the bonnet is fully closed and
latched.
5) Check the headlights, turn signal lights,
brake lights and horn for proper opera-
tion.
6) Adjust the seat and adjustable head
restraint (if equipped).
7) Check the brake pedal and the parking
brake lever.
8) Adjust the mirrors.
9) Make sure that you and all passengers
have properly fastened your seat belts.
10)Make sure that all warning lights come
on as the key is turned to the “ON” or
“START” position.
11)Check all gauges.
12)Make sure that the BRAKE SYSTEM
WARNING light turns off when the
parking brake is released.
Once a week, or each time you fill your fuel
tank, perform the following under-hood
checks:
1) Engine oil level
2) Coolant level
3) Brake fluid level
4) Windshield washer fluid level
5) Battery solution level
6) Bonnet latch operation
Pull the Bonnet release handle inside the
vehicle. Make sure that you cannot open
the Bonnet all the way without releasingthe secondary latch. Be sure to close
the Bonnet securely after checking for
proper latch operation. See “All latches,
hinges & locks” of “CHASSIS AND
BODY” in the “Periodic Maintenance
Schedule” in the “INSPECTION AND
MAINTENANCE” section for lubrication
schedule.
w ww w
w WARNING
Make sure the bonnet is fully closed
and latched before driving. If it is not,
it can fly up unexpectedly during
driving, obstructing your view and
resulting in an accident.
Once a month, or each time you fill your
fuel tank, check the tyre pressure using a
tyre pressure gauge. Also check the tyre
pressure of the spare tyre.since its pistons, piston rings and cylinder
walls have not yet become conditioned. New
engines reach the normal level of oil
consumption only after approximately 5000
km (3000 miles) driving.
When judging the amount of oil consump-
tion, note that the oil may become diluted
and make it difficult to accurately judge the
true oil level.
As an example, if a vehicle is used for
repeated short trips, and consumes a nor-
mal amount of oil, the dipstick may not
show any drop in the oil level at all, even
after 1000 km (600 miles) or more of driv-
ing. This is because the oil is gradually
becoming diluted with fuel or moisture,
making it appear that the oil level has not
changed.
You should also be aware that the diluting
ingredients evaporate out when the vehicle
is subsequently driven at high speeds, such
as on an expressway, making it appear that
oil is excessively consumed after high-speed
driving.
OPERATING YOUR VEHICLE
5-2
Engine Oil ConsumptionIt is normal for the engine to consume some
engine oil during normal vehicle operation.
The amount of engine oil consumed
depends on the viscosity of the oil, the
quality of the oil and the conditions the
vehicle is driven under.
More oil is consumed during high-speed
driving and when there is frequent acceler-
ation and deceleration. Under high loads,
your engine also will consume more oil.
A new engine also consumes more oil,
83K-03-003
Ignition SwitchEXAMPLE
Page 125 of 136
Downloaded from www.Manualslib.com manuals search engine 12583K
EMERGENCY SERVICE
10-4
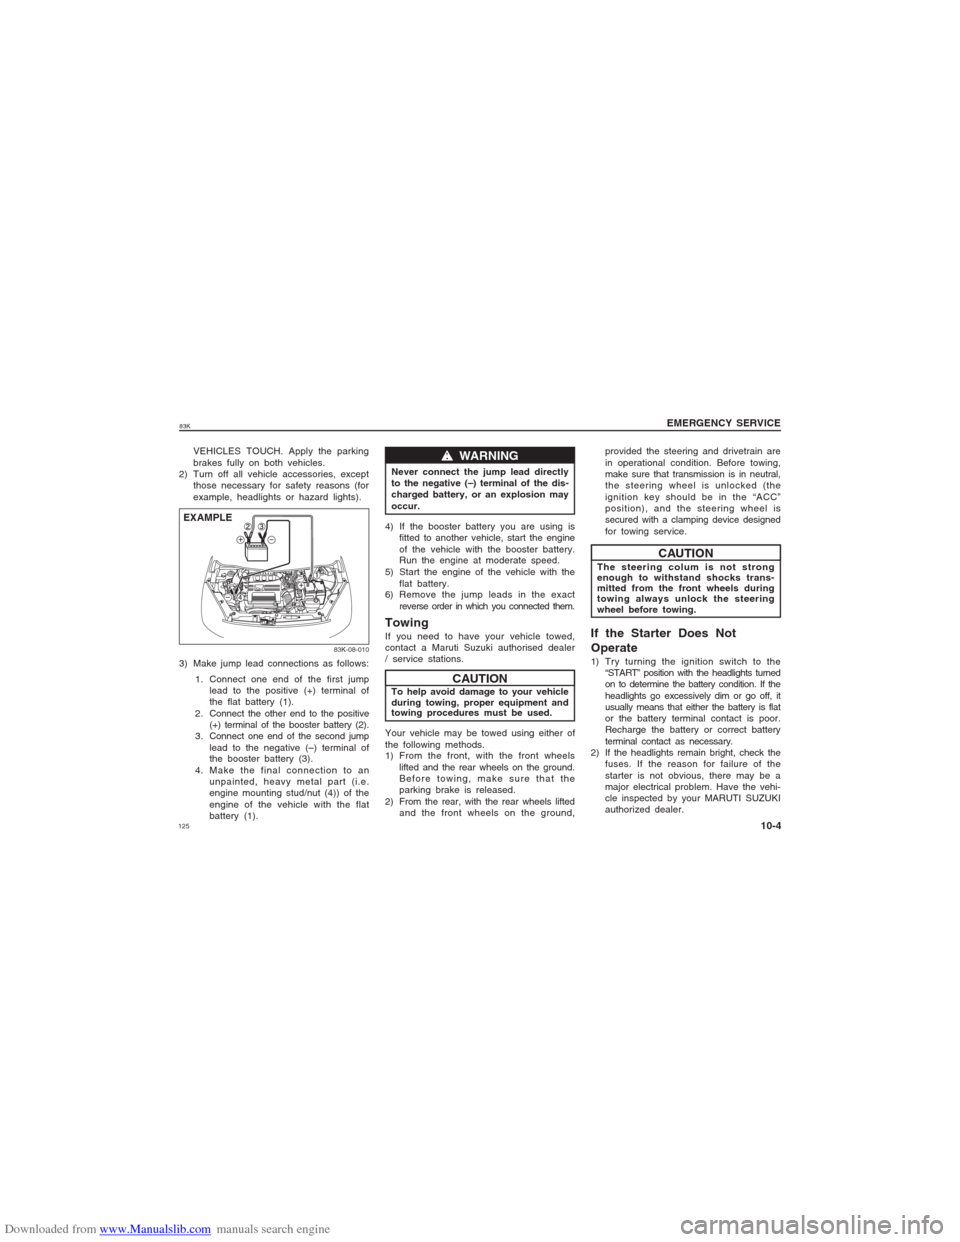
83K-08-010
VEHICLES TOUCH. Apply the parking
brakes fully on both vehicles.
2) Turn off all vehicle accessories, except
those necessary for safety reasons (for
example, headlights or hazard lights).
3) Make jump lead connections as follows:
1. Connect one end of the first jump
lead to the positive (+) terminal of
the flat battery (1).
2. Connect the other end to the positive
(+) terminal of the booster battery (2).
3. Connect one end of the second jump
lead to the negative (–) terminal of
the booster battery (3).
4. Make the final connection to an
unpainted, heavy metal part (i.e.
engine mounting stud/nut (4)) of the
engine of the vehicle with the flat
battery (1).4) If the booster battery you are using is
fitted to another vehicle, start the engine
of the vehicle with the booster battery.
Run the engine at moderate speed.
5) Start the engine of the vehicle with the
flat battery.
6) Remove the jump leads in the exact
reverse order in which you connected them.
TowingIf you need to have your vehicle towed,
contact a Maruti Suzuki authorised dealer
/ service stations.
w ww w
w WARNING
Never connect the jump lead directly
to the negative (–) terminal of the dis-
charged battery, or an explosion may
occur.
CAUTION
To help avoid damage to your vehicle
during towing, proper equipment and
towing procedures must be used.
CAUTION
The steering colum is not strong
enough to withstand shocks trans-
mitted from the front wheels during
towing always unlock the steering
wheel before towing.
Your vehicle may be towed using either of
the following methods.
1) From the front, with the front wheels
lifted and the rear wheels on the ground.
Before towing, make sure that the
parking brake is released.
2) From the rear, with the rear wheels lifted
and the front wheels on the ground,provided the steering and drivetrain are
in operational condition. Before towing,
make sure that transmission is in neutral,
the steering wheel is unlocked (the
ignition key should be in the “ACC”
position), and the steering wheel is
secured with a clamping device designed
for towing service.If the Starter Does Not
Operate1) Try turning the ignition switch to the
“START” position with the headlights turned
on to determine the battery condition. If the
headlights go excessively dim or go off, it
usually means that either the battery is flat
or the battery terminal contact is poor.
Recharge the battery or correct battery
terminal contact as necessary.
2) If the headlights remain bright, check the
fuses. If the reason for failure of the
starter is not obvious, there may be a
major electrical problem. Have the vehi-
cle inspected by your MARUTI SUZUKI
authorized dealer.
EXAMPLE