reset SUZUKI MARUTI 2005 1.G Owners Manual
[x] Cancel search | Manufacturer: SUZUKI, Model Year: 2005, Model line: MARUTI, Model: SUZUKI MARUTI 2005 1.GPages: 136, PDF Size: 2.93 MB
Page 47 of 136

Downloaded from www.Manualslib.com manuals search engine 4783KTo reset the trip meter to zero, hold the
“MODE” knob (3) for more than 2 seconds
when the display (2) shows the indication
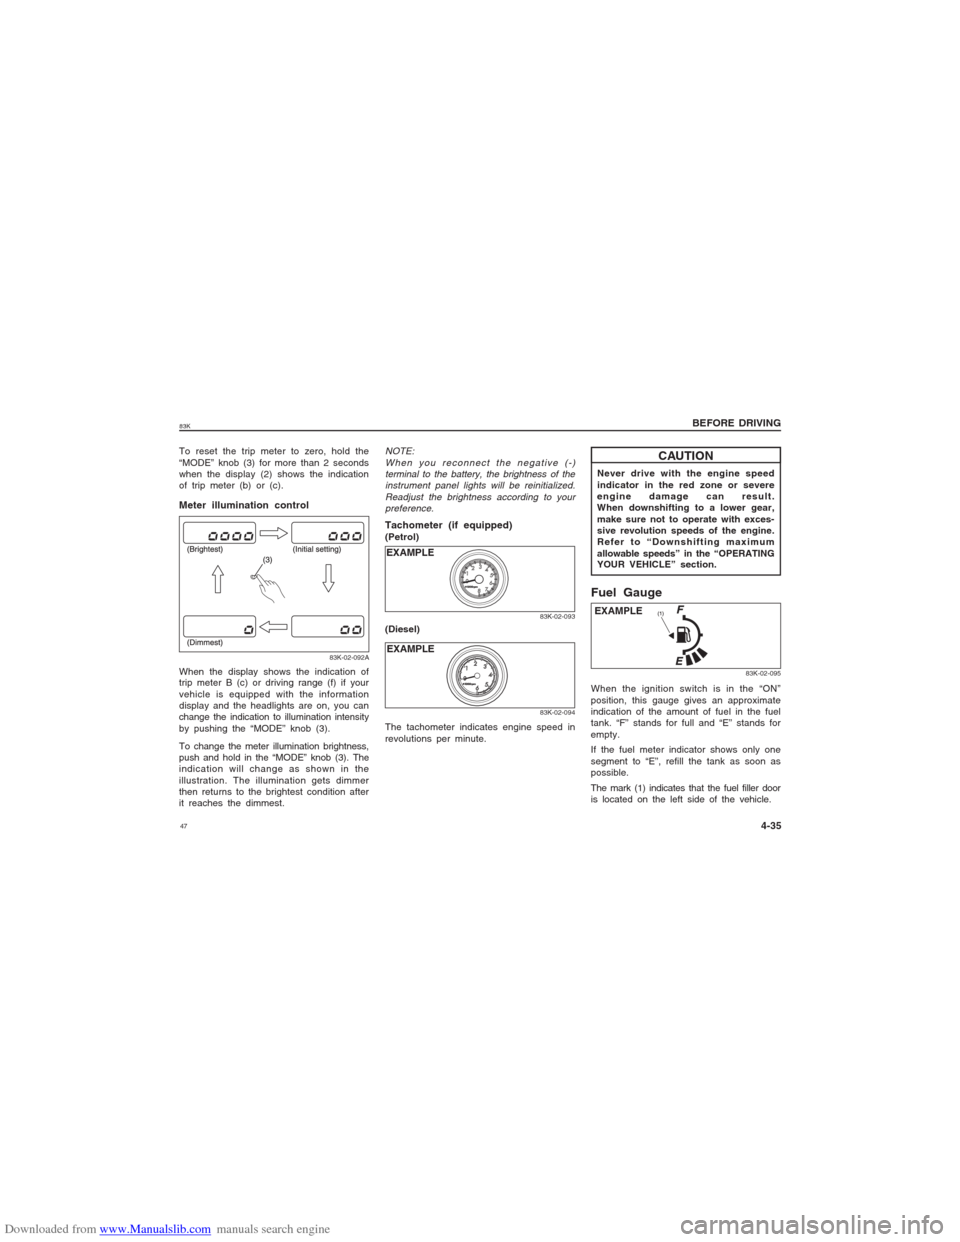
of trip meter (b) or (c).Meter illumination control
83K-02-092A
When the display shows the indication of
trip meter B (c) or driving range (f) if your
vehicle is equipped with the information
display and the headlights are on, you can
change the indication to illumination intensity
by pushing the “MODE” knob (3).
To change the meter illumination brightness,
push and hold in the “MODE” knob (3). The
indication will change as shown in the
illustration. The illumination gets dimmer
then returns to the brightest condition after
it reaches the dimmest.
NOTE:
When you reconnect the negative (-)
terminal to the battery, the brightness of the
instrument panel lights will be reinitialized.
Readjust the brightness according to your
preference.
83K-02-09383K-02-094
EXAMPLE EXAMPLE
Never drive with the engine speed
indicator in the red zone or severe
engine damage can result.
When downshifting to a lower gear,
make sure not to operate with exces-
sive revolution speeds of the engine.
Refer to “Downshifting maximum
allowable speeds” in the “OPERATING
YOUR VEHICLE” section.
CAUTION
Fuel GaugeEXAMPLEWhen the ignition switch is in the “ON”
position, this gauge gives an approximate
indication of the amount of fuel in the fuel
tank. “F” stands for full and “E” stands for
empty.
If the fuel meter indicator shows only one
segment to “E”, refill the tank as soon as
possible.
The mark (1) indicates that the fuel filler door
is located on the left side of the vehicle.
83K-02-095
Tachometer (if equipped)(Petrol)
(Diesel)
The tachometer indicates engine speed in
revolutions per minute.
BEFORE DRIVING
4-35
Page 49 of 136

Downloaded from www.Manualslib.com manuals search engine 4983K
BEFORE DRIVING
4-37
w ww w
w WARNING
If you attempt to adjust the display
while driving, you could lose control
of the vehicle.
Do not attempt to adjust the display
while driving.NOTE:
Refer to “Speedometer/ Odometer/ Trip
meter” in this section for details of (a), (b),
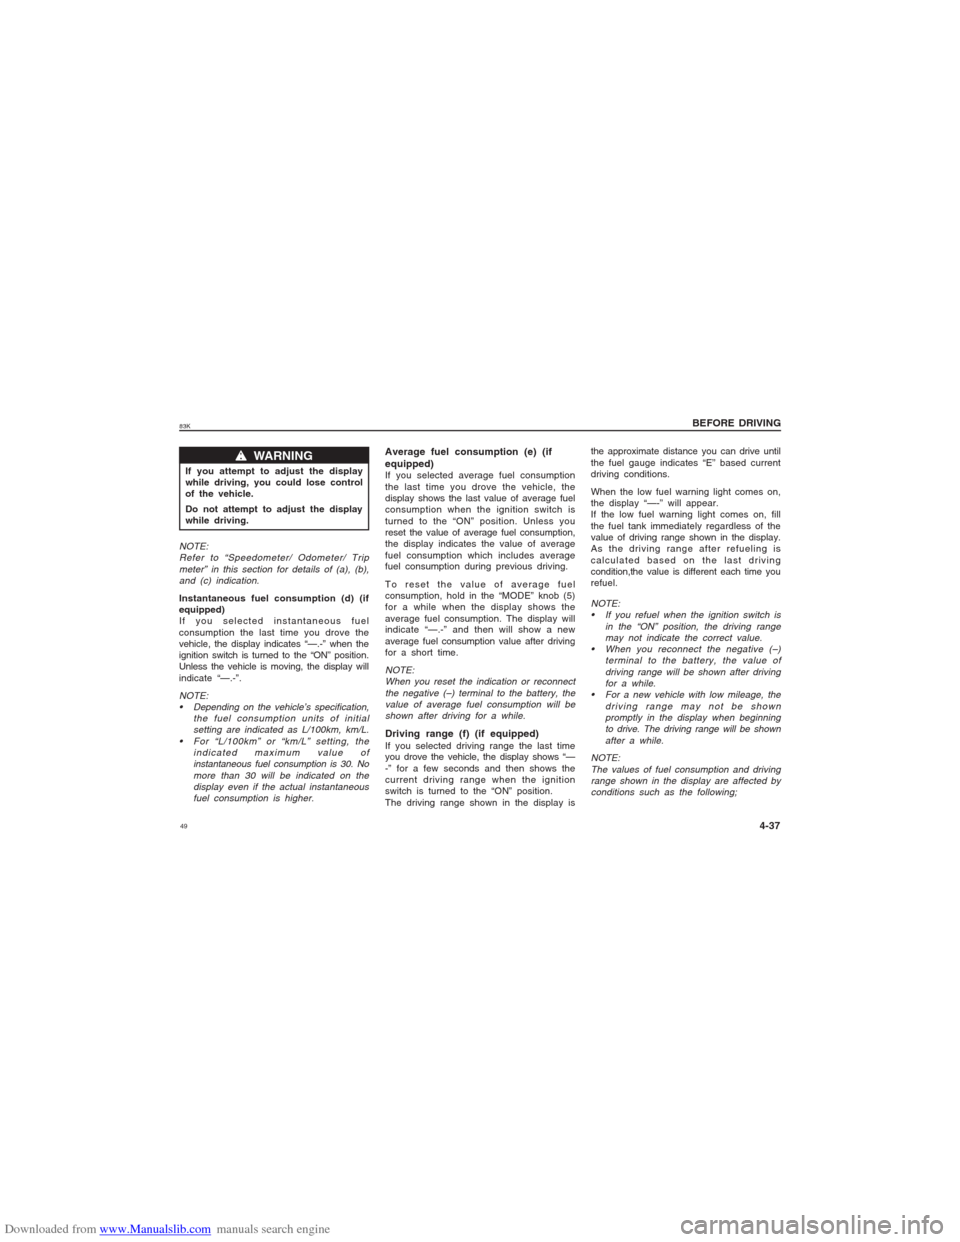
and (c) indication.Instantaneous fuel consumption (d) (if
equipped)
If you selected instantaneous fuel
consumption the last time you drove the
vehicle, the display indicates “—.-” when the
ignition switch is turned to the “ON” position.
Unless the vehicle is moving, the display will
indicate “—.-”.NOTE:
Depending on the vehicle’s specification,
the fuel consumption units of initial
setting are indicated as L/100km, km/L.
For “L/100km” or “km/L” setting, the
indicated maximum value of
instantaneous fuel consumption is 30. No
more than 30 will be indicated on the
display even if the actual instantaneous
fuel consumption is higher.
Average fuel consumption (e) (if
equipped)If you selected average fuel consumption
the last time you drove the vehicle, the
display shows the last value of average fuel
consumption when the ignition switch is
turned to the “ON” position. Unless you
reset the value of average fuel consumption,
the display indicates the value of average
fuel consumption which includes average
fuel consumption during previous driving.
To reset the value of average fuel
consumption, hold in the “MODE” knob (5)
for a while when the display shows the
average fuel consumption. The display will
indicate “—.-” and then will show a new
average fuel consumption value after driving
for a short time.NOTE:
When you reset the indication or reconnect
the negative (–) terminal to the battery, the
value of average fuel consumption will be
shown after driving for a while.Driving range (f) (if equipped)If you selected driving range the last time
you drove the vehicle, the display shows “—
-” for a few seconds and then shows the
current driving range when the ignition
switch is turned to the “ON” position.
The driving range shown in the display is
NOTE:
If you refuel when the ignition switch is
in the “ON” position, the driving range
may not indicate the correct value.
When you reconnect the negative (–)
terminal to the battery, the value of
driving range will be shown after driving
for a while.
For a new vehicle with low mileage, the
driving range may not be shown
promptly in the display when beginning
to drive. The driving range will be shown
after a while.
NOTE:
The values of fuel consumption and driving
range shown in the display are affected by
conditions such as the following;the approximate distance you can drive until
the fuel gauge indicates “E” based current
driving conditions.
When the low fuel warning light comes on,
the display “—-” will appear.
If the low fuel warning light comes on, fill
the fuel tank immediately regardless of the
value of driving range shown in the display.
As the driving range after refueling is
calculated based on the last driving
condition,the value is different each time you
refuel.
Page 79 of 136

Downloaded from www.Manualslib.com manuals search engine 7983K
OTHER CONTROLS AND EQUIPMENT
7-5
To change the radio station:
To advance to the next preset station,
push the switch (5) briefly.
To select the previous preset station,
push the switch (6) briefly.
To scan the higher frequency radio sta-
tion, push and hold the switch (5).
To scan the lower frequency radio sta-
tion, push and hold the switch (6).
To scan the selection on a CD:
To advance to the next track on a CD,
push the switch (5).
To select the previous track on a CD,
push the switch (6).Fuel Filler Cap
83K-05-015
EXAMPLE
83K-05-016
w ww w
w WARNING
Remove the fuel filler cap slowly. The
fuel may be under pressure and may
spray out, causing injury.
w ww w
w WARNING
Petrol is extremely flammable. Do not
smoke when refueling, and make sure
there are no open flames or sparks in
the area.
EXAMPLE
83K-05-017
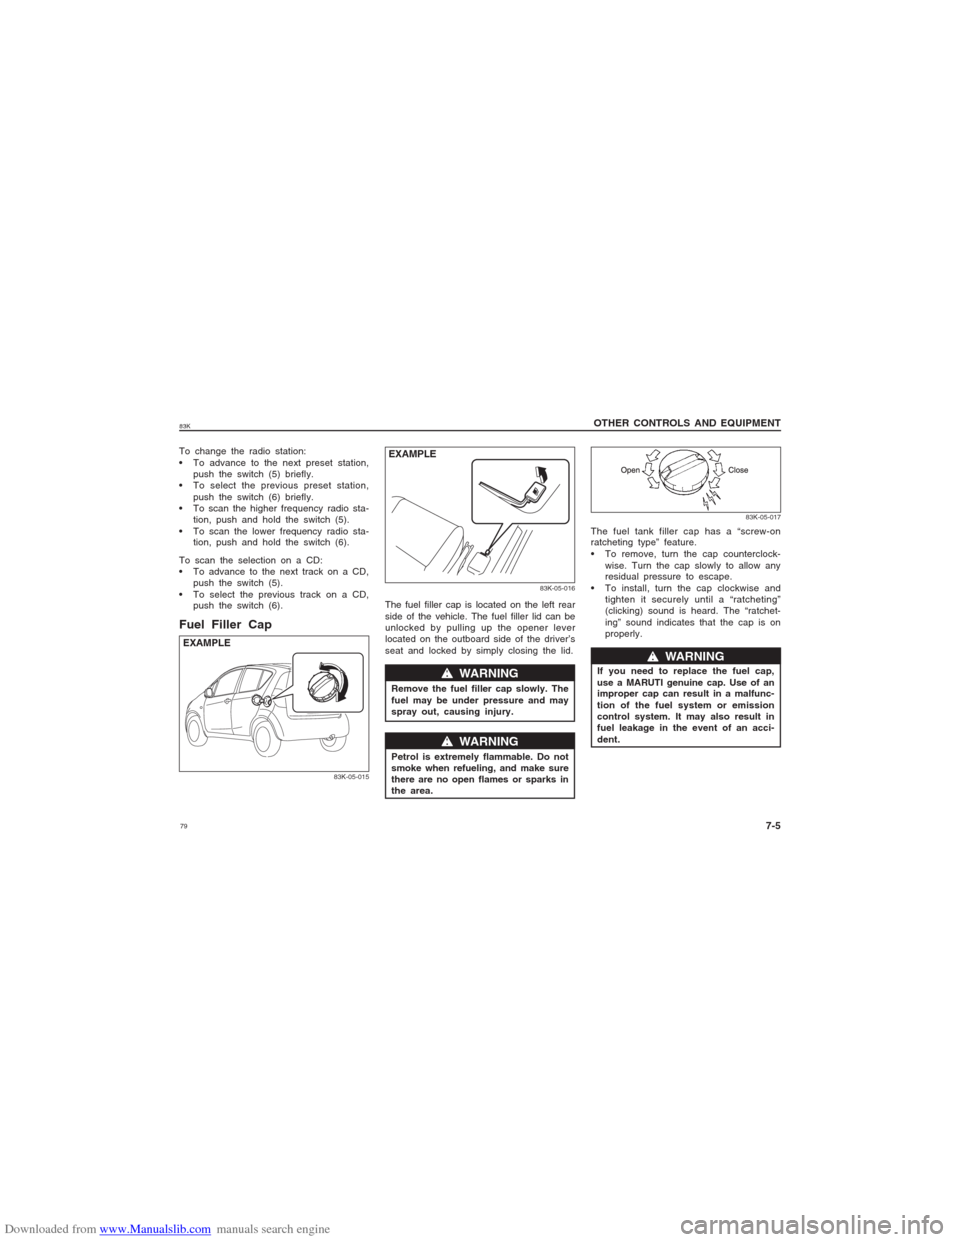
The fuel tank filler cap has a “screw-on
ratcheting type” feature.
To remove, turn the cap counterclock-
wise. Turn the cap slowly to allow any
residual pressure to escape.
To install, turn the cap clockwise and
tighten it securely until a “ratcheting”
(clicking) sound is heard. The “ratchet-
ing” sound indicates that the cap is on
properly. The fuel filler cap is located on the left rear
side of the vehicle. The fuel filler lid can be
unlocked by pulling up the opener lever
located on the outboard side of the driver’s
seat and locked by simply closing the lid.
If you need to replace the fuel cap,
use a MARUTI genuine cap. Use of an
improper cap can result in a malfunc-
tion of the fuel system or emission
control system. It may also result in
fuel leakage in the event of an acci-
dent.
w ww w
w WARNING
Page 111 of 136

Downloaded from www.Manualslib.com manuals search engine 11183K
INSPECTION AND MAINTENANCE
9-22
83K-07-043
83K-07-044
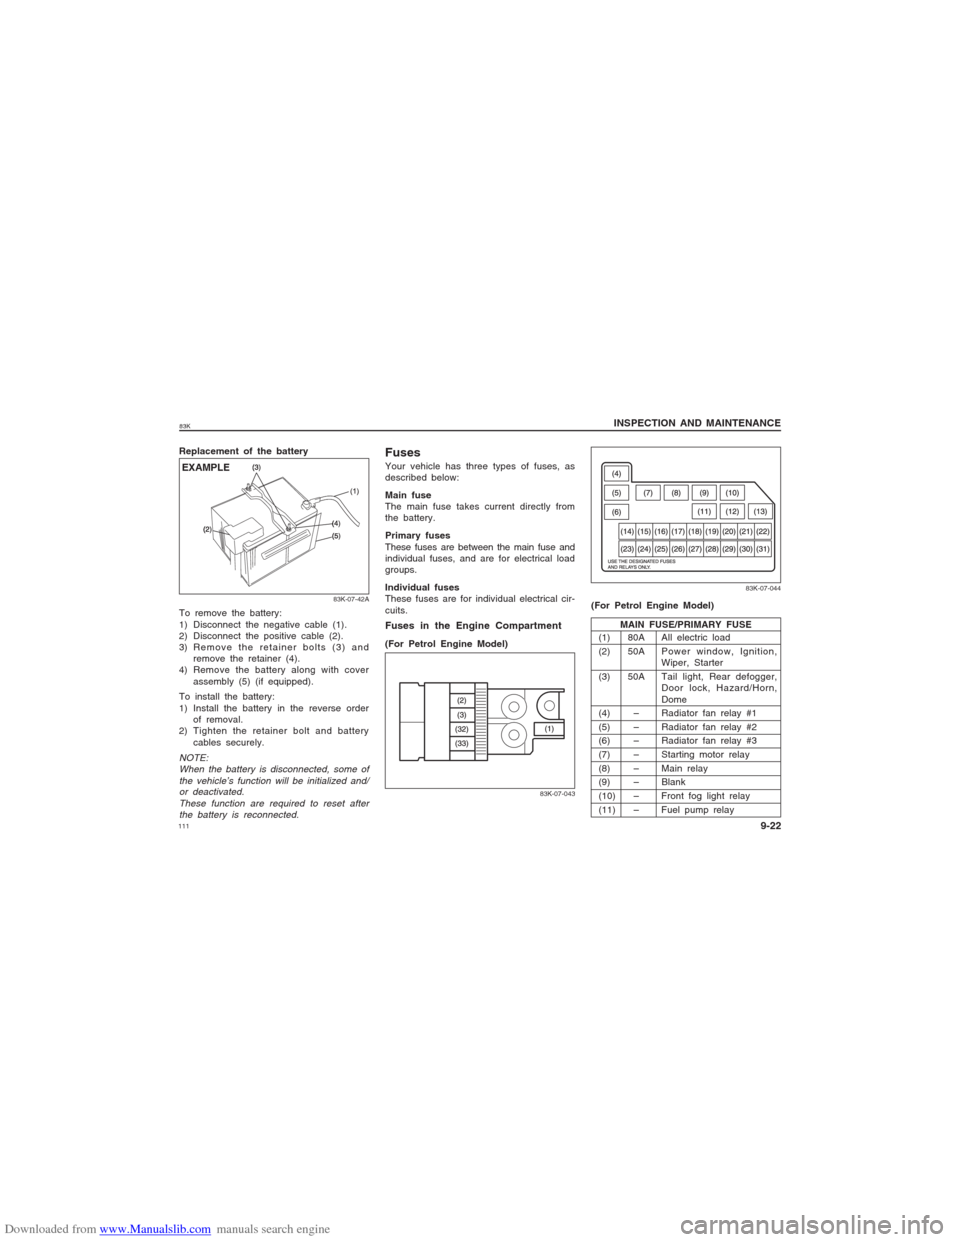
Fuses in the Engine Compartment(For Petrol Engine Model)
Replacement of the battery
83K-07-42A
EXAMPLETo remove the battery:
1) Disconnect the negative cable (1).
2) Disconnect the positive cable (2).
3) Remove the retainer bolts (3) and
remove the retainer (4).
4) Remove the battery along with cover
assembly (5) (if equipped).
To install the battery:
1) Install the battery in the reverse order
of removal.
2) Tighten the retainer bolt and battery
cables securely.NOTE:
When the battery is disconnected, some of
the vehicle’s function will be initialized and/
or deactivated.
These function are required to reset after
the battery is reconnected.
FusesYour vehicle has three types of fuses, as
described below:
Main fuse
The main fuse takes current directly from
the battery.
Primary fuses
These fuses are between the main fuse and
individual fuses, and are for electrical load
groups.
Individual fuses
These fuses are for individual electrical cir-
cuits.
(1) 80A All electric load
(2) 50A Power window, Ignition,
Wiper, Starter
(3) 50A Tail light, Rear defogger,
Door lock, Hazard/Horn,
Dome
(4) – Radiator fan relay #1
(5) – Radiator fan relay #2
(6) – Radiator fan relay #3
(7) – Starting motor relay
(8) – Main relay
(9) – Blank
(10) – Front fog light relay
(11) – Fuel pump relayMAIN FUSE/PRIMARY FUSE(For Petrol Engine Model)