child lock SUZUKI RENO 2008 1.G Owners Manual
[x] Cancel search | Manufacturer: SUZUKI, Model Year: 2008, Model line: RENO, Model: SUZUKI RENO 2008 1.GPages: 226, PDF Size: 4.98 MB
Page 10 of 226
0-3
85Z14-03E
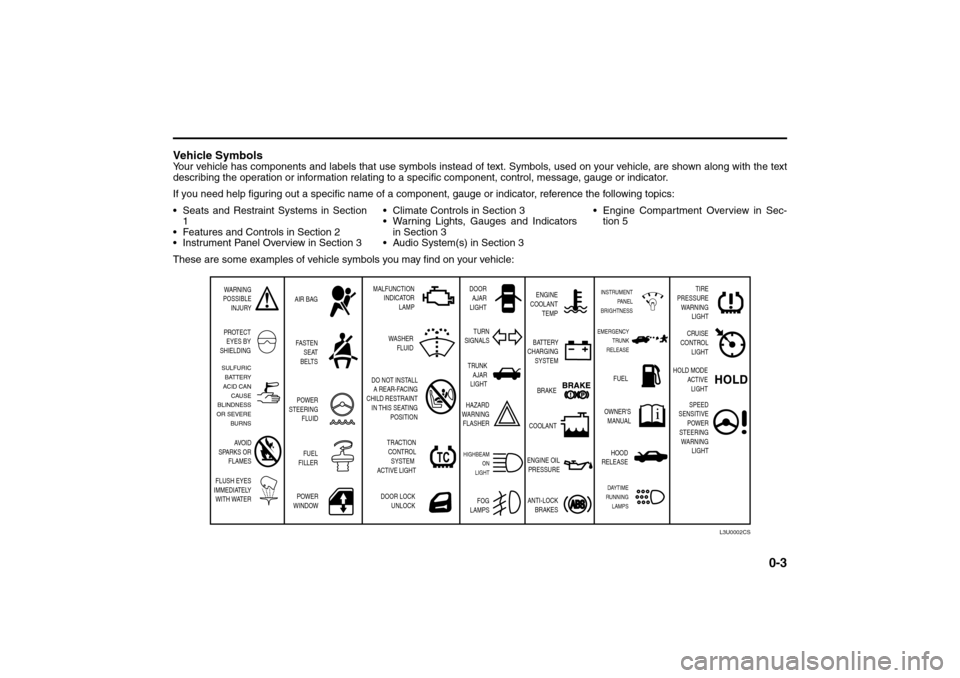
Vehicle SymbolsYour vehicle has components and labels that use symbols instead of text. Symbols, used on your vehicle, are shown along with the text
describing the operation or information relating to a specific component, control, message, gauge or indicator.
If you need help figuring out a specific name of a component, gauge or indicator, reference the following topics:
Seats and Restraint Systems in Section
1
Features and Controls in Section 2
Instrument Panel Overview in Section 3 Climate Controls in Section 3
Warning Lights, Gauges and Indicators
in Section 3
Audio System(s) in Section 3 Engine Compartment Overview in Sec-
tion 5
These are some examples of vehicle symbols you may find on your vehicle:
WARNING
POSSIBLE
INJURY
PROTECT
EYES BY
SHIELDINGFASTEN
SEAT
BELTS
POWER
WINDOWDOOR LOCK
UNLOCK DO NOT INSTALL
A REAR-FACING
CHILD RESTRAINT
IN THIS SEATING
POSITION AIR BAGMALFUNCTION
INDICATOR
LAMPENGINE
COOLANT
TEMP
FUEL
OWNER'S
MANUAL BATTERY
CHARGING
SYSTEM
BRAKE
COOLANT
ENGINE OIL
PRESSURE
ANTI-LOCK
BRAKES TURN
SIGNALS
HAZARD
WARNING
FLASHER
HIGHBEAM
ON
LIGHT
FOG
LAMPS
SULFURIC
BATTERY
ACID CAN
CAUSE
BLINDNESS
OR SEVERE
BURNS
AVOID
SPARKS OR
FLAMES
FLUSH EYES
IMMEDIATELY
WITH WATER
L3U0002CS
DOOR
AJAR
LIGHT
POWER
STEERING
FLUID
FUEL
FILLER
EMERGENCY
TRUNK
RELEASEINSTRUMENT
PANEL
BRIGHTNESS
TRUNK
AJAR
LIGHT
HOOD
RELEASEDAYTIME
RUNNING
LAMPS
TRACTION
CONTROL
SYSTEM
ACTIVE LIGHTWASHER
FLUID
TIRE
PRESSURE
WARNING
LIGHT
CRUISE
CONTROL
LIGHT
HOLD MODE
ACTIVE
LIGHT
SPEED
SENSITIVE
POWER
STEERING
WARNING
LIGHT
Page 19 of 226
1-7SEATS AND RESTRAINT SYSTEMS
85Z14-03E
strongest bones take the forces. That’s
why safety belts make such good sense.Questions and Answers About
Safety BeltsQuestion: Won’t I be trapped in the
vehicle after an accident if I’m wearing a
safety belt?
Answer: You could be – whether you’re
wearing a safety belt or not. But you can
unbuckle a safety belt, even if you’re
upside down. And your chance of being
conscious during and after an accident, so
you can unbuckle and get out, is much
greater if you are belted.
Question: If my vehicle has air bags,
why should I have to wear safety belts?
Answer: Air bags are in many vehicles
today and will be in most of them in the
future. But they are supplemental systems
only; so they work with safety belts – not
instead of them. Every air bag system ever
offered for sale has required the use of
safety belts. Even if you’re in a vehicle that
has air bags, you still have to buckle up to
get the most protection. That’s true not
only in frontal collisions, but especially in
side and other collisions.Question: If I’m a good driver, and I
never drive far from home, why should I
wear safety belts?
Answer: You may be an excellent driver,
but if you’re in an accident – even one that
isn’t your fault – you and your passengers
can be hurt. Being a good driver doesn’t
protect you from things beyond your con-
trol, such as bad drivers.
Most accidents occur within 25 miles (40
km) of home. And the greatest number of
serious injuries and deaths occur at
speeds of less than 40 mph (65 km/h).
Safety belts are for everyone.
How to Wear Safety Belts ProperlyThis section is only for people of adult size.
Be aware that there are special things to
know about safety belts and children. And
there are different rules for smaller children
and babies. If a child will be riding in your
vehicle, see “Older Children” or “Infants
and Young Children” in this section. Follow
those rules for everyone’s protection.
First, you’ll want to know which restraint
systems your vehicle has.
We’ll start with the driver position.Driver PositionThis section describes the driver’s restraint
system.Lap-Shoulder Belt
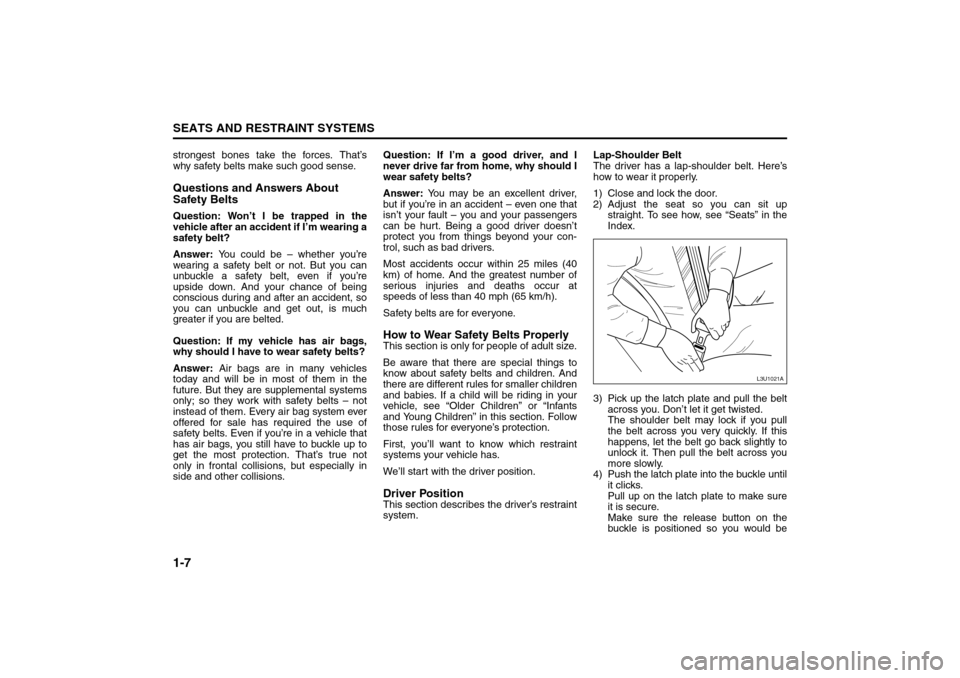
The driver has a lap-shoulder belt. Here’s
how to wear it properly.
1) Close and lock the door.
2) Adjust the seat so you can sit up
straight. To see how, see “Seats” in the
Index.
3) Pick up the latch plate and pull the belt
across you. Don’t let it get twisted.
The shoulder belt may lock if you pull
the belt across you very quickly. If this
happens, let the belt go back slightly to
unlock it. Then pull the belt across you
more slowly.
4) Push the latch plate into the buckle until
it clicks.
Pull up on the latch plate to make sure
it is secure.
Make sure the release button on the
buckle is positioned so you would be
L3U1021A
Safety Belts:
Page 36 of 226
1-24
SEATS AND RESTRAINT SYSTEMS
85Z14-03E
Securing a Child Restraint in a Rear
Seat PositionIf your child restraint is equipped with the
LATCH system, see “Lower Anchorages
and Top Tethers for Children (LATCH Sys-
tem)” in this section. See “Top Strap” in this
section if the child restraint has one.
If your child restraint does not have the
LATCH system, you will be using the lap-
shoulder belt to secure the child restraint in
this position. Be sure to follow the instruc-
tions that came with the child restraint.
Secure the child in the child restraint when
and as the instructions say.
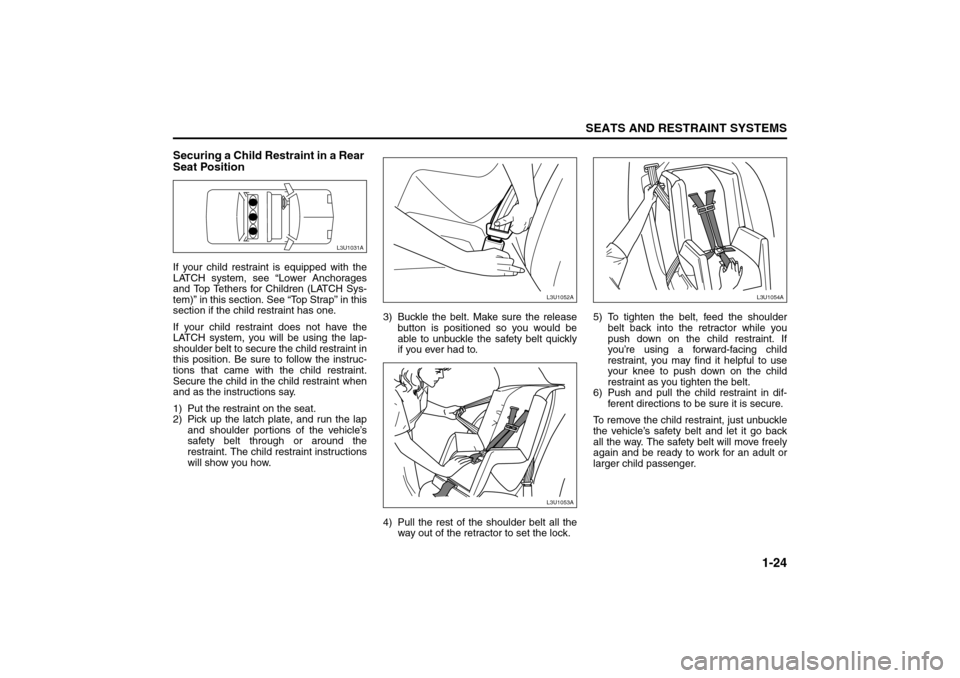
1) Put the restraint on the seat.
2) Pick up the latch plate, and run the lap
and shoulder portions of the vehicle’s
safety belt through or around the
restraint. The child restraint instructions
will show you how. 3) Buckle the belt. Make sure the release
button is positioned so you would be
able to unbuckle the safety belt quickly
if you ever had to.
4) Pull the rest of the shoulder belt all the
way out of the retractor to set the lock.5) To tighten the belt, feed the shoulder
belt back into the retractor while you
push down on the child restraint. If
you’re using a forward-facing child
restraint, you may find it helpful to use
your knee to push down on the child
restraint as you tighten the belt.
6) Push and pull the child restraint in dif-
ferent directions to be sure it is secure.
To remove the child restraint, just unbuckle
the vehicle’s safety belt and let it go back
all the way. The safety belt will move freely
again and be ready to work for an adult or
larger child passenger.
L3U1031A
L3U1052AL3U1053A
L3U1054A
Child Restraints:
Page 38 of 226
1-26
SEATS AND RESTRAINT SYSTEMS
85Z14-03E
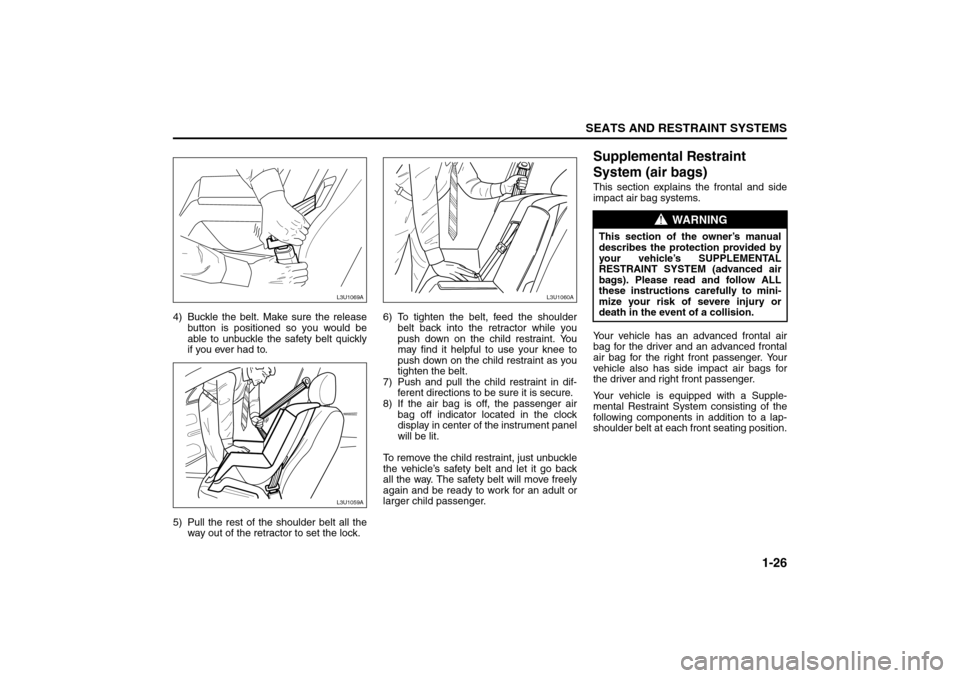
4) Buckle the belt. Make sure the release
button is positioned so you would be
able to unbuckle the safety belt quickly
if you ever had to.
5) Pull the rest of the shoulder belt all the
way out of the retractor to set the lock.6) To tighten the belt, feed the shoulder
belt back into the retractor while you
push down on the child restraint. You
may find it helpful to use your knee to
push down on the child restraint as you
tighten the belt.
7) Push and pull the child restraint in dif-
ferent directions to be sure it is secure.
8) If the air bag is off, the passenger air
bag off indicator located in the clock
display in center of the instrument panel
will be lit.
To remove the child restraint, just unbuckle
the vehicle’s safety belt and let it go back
all the way. The safety belt will move freely
again and be ready to work for an adult or
larger child passenger.
Supplemental Restraint
System (air bags)This section explains the frontal and side
impact air bag systems.
Your vehicle has an advanced frontal air
bag for the driver and an advanced frontal
air bag for the right front passenger. Your
vehicle also has side impact air bags for
the driver and right front passenger.
Your vehicle is equipped with a Supple-
mental Restraint System consisting of the
following components in addition to a lap-
shoulder belt at each front seating position.
L3U1069AL3U1059A
L3U1061AL3U1060A
WARNING
This section of the owner’s manual
describes the protection provided by
your vehicle’s SUPPLEMENTAL
RESTRAINT SYSTEM (advanced air
bags). Please read and follow ALL
these instructions carefully to mini-
mize your risk of severe injury or
death in the event of a collision.
Child Restraints:
Supplemental Restraint System:
Page 42 of 226
1-30
SEATS AND RESTRAINT SYSTEMS
85Z14-03E
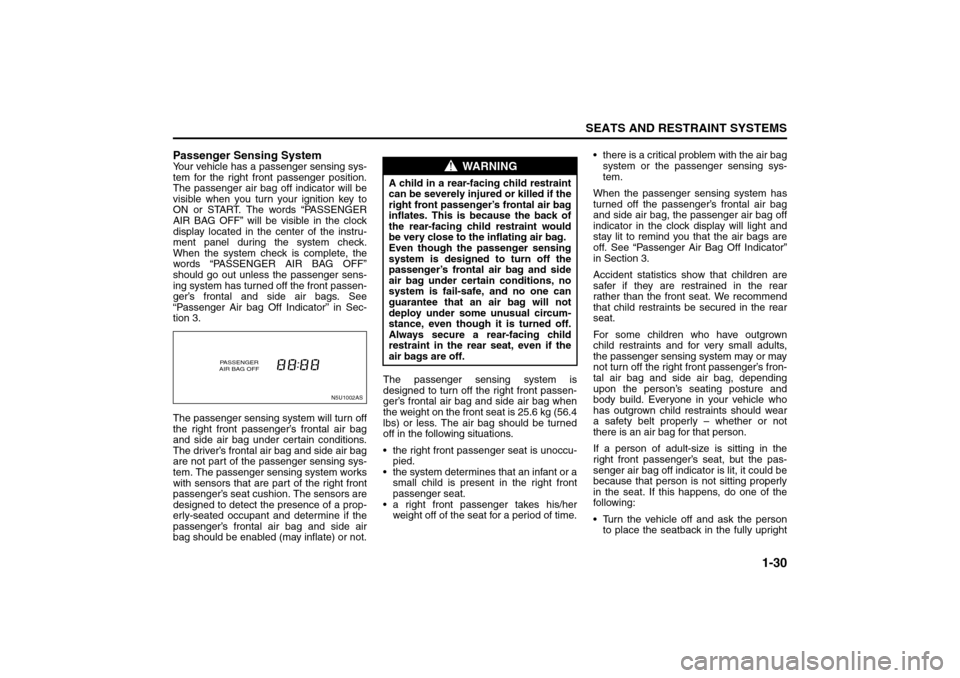
Passenger Sensing SystemYour vehicle has a passenger sensing sys-
tem for the right front passenger position.
The passenger air bag off indicator will be
visible when you turn your ignition key to
ON or START. The words “PASSENGER
AIR BAG OFF” will be visible in the clock
display located in the center of the instru-
ment panel during the system check.
When the system check is complete, the
words “PASSENGER AIR BAG OFF”
should go out unless the passenger sens-
ing system has turned off the front passen-
ger’s frontal and side air bags. See
“Passenger Air bag Off Indicator” in Sec-
tion 3.
The passenger sensing system will turn off
the right front passenger’s frontal air bag
and side air bag under certain conditions.
The driver’s frontal air bag and side air bag
are not part of the passenger sensing sys-
tem. The passenger sensing system works
with sensors that are part of the right front
passenger’s seat cushion. The sensors are
designed to detect the presence of a prop-
erly-seated occupant and determine if the
passenger’s frontal air bag and side air
bag should be enabled (may inflate) or not.The passenger sensing system is
designed to turn off the right front passen-
ger’s frontal air bag and side air bag when
the weight on the front seat is 25.6 kg (56.4
lbs) or less. The air bag should be turned
off in the following situations.
the right front passenger seat is unoccu-
pied.
the system determines that an infant or a
small child is present in the right front
passenger seat.
a right front passenger takes his/her
weight off of the seat for a period of time. there is a critical problem with the air bag
system or the passenger sensing sys-
tem.
When the passenger sensing system has
turned off the passenger’s frontal air bag
and side air bag, the passenger air bag off
indicator in the clock display will light and
stay lit to remind you that the air bags are
off. See “Passenger Air Bag Off Indicator”
in Section 3.
Accident statistics show that children are
safer if they are restrained in the rear
rather than the front seat. We recommend
that child restraints be secured in the rear
seat.
For some children who have outgrown
child restraints and for very small adults,
the passenger sensing system may or may
not turn off the right front passenger’s fron-
tal air bag and side air bag, depending
upon the person’s seating posture and
body build. Everyone in your vehicle who
has outgrown child restraints should wear
a safety belt properly – whether or not
there is an air bag for that person.
If a person of adult-size is sitting in the
right front passenger’s seat, but the pas-
senger air bag off indicator is lit, it could be
because that person is not sitting properly
in the seat. If this happens, do one of the
following:
Turn the vehicle off and ask the person
to place the seatback in the fully upright
N5U1002AS
PASSENGER
AIR BAG OFF
WARNING
A child in a rear-facing child restraint
can be severely injured or killed if the
right front passenger’s frontal air bag
inflates. This is because the back of
the rear-facing child restraint would
be very close to the inflating air bag.
Even though the passenger sensing
system is designed to turn off the
passenger’s frontal air bag and side
air bag under certain conditions, no
system is fail-safe, and no one can
guarantee that an air bag will not
deploy under some unusual circum-
stance, even though it is turned off.
Always secure a rear-facing child
restraint in the rear seat, even if the
air bags are off.
Supplemental Restraint System:
Page 49 of 226
2-1FEATURES AND CONTROLS
85Z14-03E
Keys
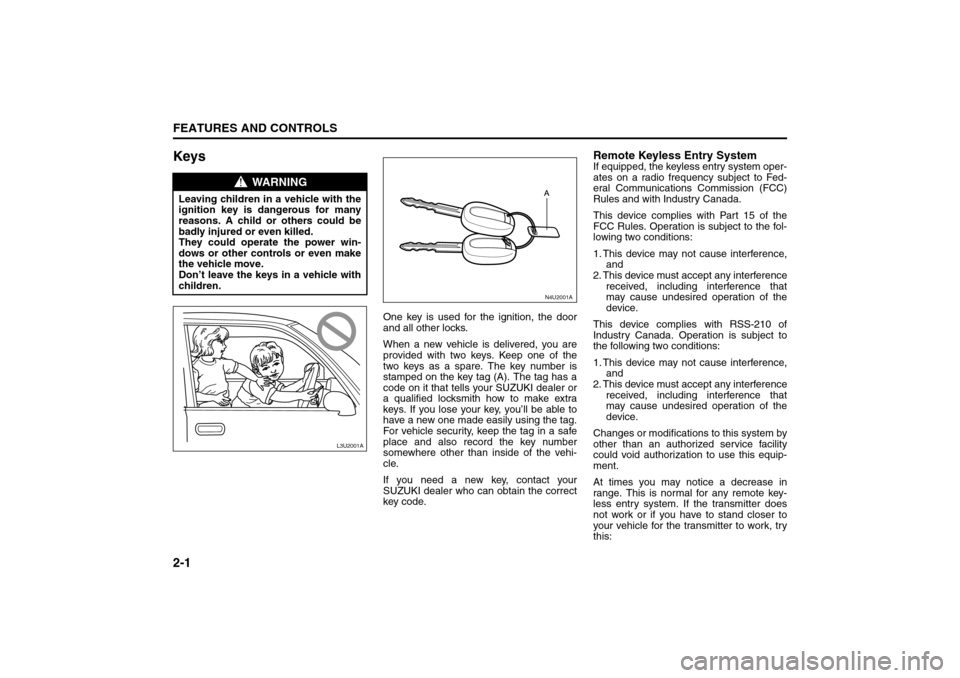
One key is used for the ignition, the door
and all other locks.
When a new vehicle is delivered, you are
provided with two keys. Keep one of the
two keys as a spare. The key number is
stamped on the key tag (A). The tag has a
code on it that tells your SUZUKI dealer or
a qualified locksmith how to make extra
keys. If you lose your key, you’ll be able to
have a new one made easily using the tag.
For vehicle security, keep the tag in a safe
place and also record the key number
somewhere other than inside of the vehi-
cle.
If you need a new key, contact your
SUZUKI dealer who can obtain the correct
key code.
Remote Keyless Entry SystemIf equipped, the keyless entry system oper-
ates on a radio frequency subject to Fed-
eral Communications Commission (FCC)
Rules and with Industry Canada.
This device complies with Part 15 of the
FCC Rules. Operation is subject to the fol-
lowing two conditions:
1. This device may not cause interference,
and
2. This device must accept any interference
received, including interference that
may cause undesired operation of the
device.
This device complies with RSS-210 of
Industry Canada. Operation is subject to
the following two conditions:
1. This device may not cause interference,
and
2. This device must accept any interference
received, including interference that
may cause undesired operation of the
device.
Changes or modifications to this system by
other than an authorized service facility
could void authorization to use this equip-
ment.
At times you may notice a decrease in
range. This is normal for any remote key-
less entry system. If the transmitter does
not work or if you have to stand closer to
your vehicle for the transmitter to work, try
this:
WARNING
Leaving children in a vehicle with the
ignition key is dangerous for many
reasons. A child or others could be
badly injured or even killed.
They could operate the power win-
dows or other controls or even make
the vehicle move.
Don’t leave the keys in a vehicle with
children.
L3U2001A
N4U2001A
Keys:
Page 51 of 226
2-3FEATURES AND CONTROLS
85Z14-03E
transmitter will not unlock your vehicle.
Each vehicle can have a maximum of four
transmitters matched to it.
Battery Replacement
Under normal use, the battery in your
remote keyless entry transmitter should
last about two years.
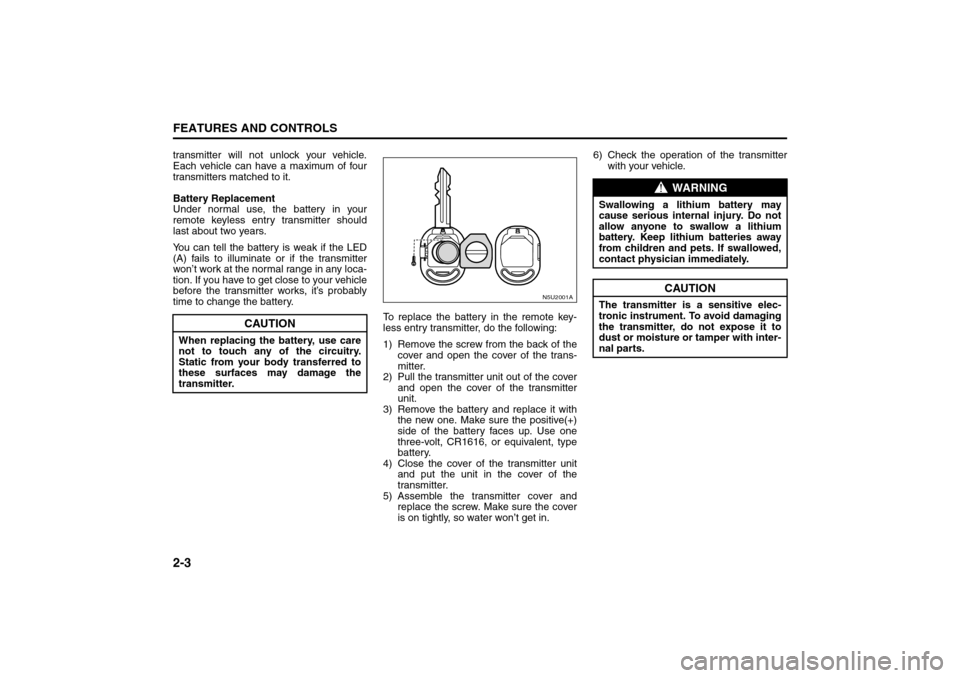
You can tell the battery is weak if the LED
(A) fails to illuminate or if the transmitter
won’t work at the normal range in any loca-
tion. If you have to get close to your vehicle
before the transmitter works, it’s probably
time to change the battery.
To replace the battery in the remote key-
less entry transmitter, do the following:
1) Remove the screw from the back of the
cover and open the cover of the trans-
mitter.
2) Pull the transmitter unit out of the cover
and open the cover of the transmitter
unit.
3) Remove the battery and replace it with
the new one. Make sure the positive(+)
side of the battery faces up. Use one
three-volt, CR1616, or equivalent, type
battery.
4) Close the cover of the transmitter unit
and put the unit in the cover of the
transmitter.
5) Assemble the transmitter cover and
replace the screw. Make sure the cover
is on tightly, so water won’t get in.6) Check the operation of the transmitter
with your vehicle.
CAUTION
When replacing the battery, use care
not to touch any of the circuitry.
Static from your body transferred to
these surfaces may damage the
transmitter.
N5U2001A
WARNING
Swallowing a lithium battery may
cause serious internal injury. Do not
allow anyone to swallow a lithium
battery. Keep lithium batteries away
from children and pets. If swallowed,
contact physician immediately.
CAUTION
The transmitter is a sensitive elec-
tronic instrument. To avoid damaging
the transmitter, do not expose it to
dust or moisture or tamper with inter-
nal parts.
Keys:
Page 52 of 226
2-4
FEATURES AND CONTROLS
85Z14-03E
Doors and LocksDoor LocksThere are several ways to lock and unlock
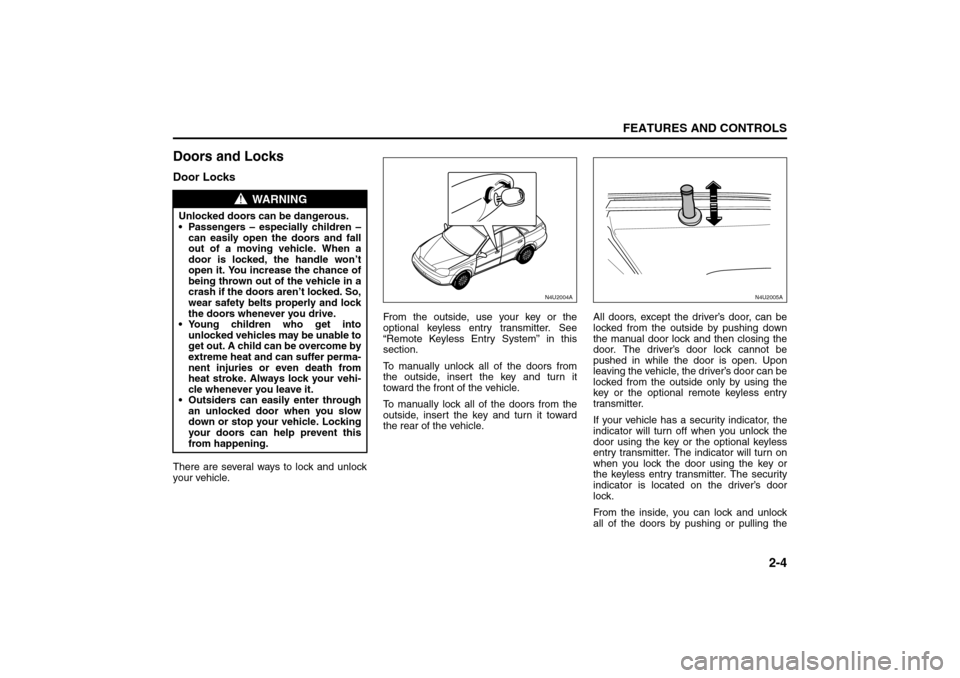
your vehicle.From the outside, use your key or the
optional keyless entry transmitter. See
“Remote Keyless Entry System” in this
section.
To manually unlock all of the doors from
the outside, insert the key and turn it
toward the front of the vehicle.
To manually lock all of the doors from the
outside, insert the key and turn it toward
the rear of the vehicle.All doors, except the driver’s door, can be
locked from the outside by pushing down
the manual door lock and then closing the
door. The driver’s door lock cannot be
pushed in while the door is open. Upon
leaving the vehicle, the driver’s door can be
locked from the outside only by using the
key or the optional remote keyless entry
transmitter.
If your vehicle has a security indicator, the
indicator will turn off when you unlock the
door using the key or the optional keyless
entry transmitter. The indicator will turn on
when you lock the door using the key or
the keyless entry transmitter. The security
indicator is located on the driver’s door
lock.
From the inside, you can lock and unlock
all of the doors by pushing or pulling the
WARNING
Unlocked doors can be dangerous.
Passengers – especially children –
can easily open the doors and fall
out of a moving vehicle. When a
door is locked, the handle won’t
open it. You increase the chance of
being thrown out of the vehicle in a
crash if the doors aren’t locked. So,
wear safety belts properly and lock
the doors whenever you drive.
Young children who get into
unlocked vehicles may be unable to
get out. A child can be overcome by
extreme heat and can suffer perma-
nent injuries or even death from
heat stroke. Always lock your vehi-
cle whenever you leave it.
Outsiders can easily enter through
an unlocked door when you slow
down or stop your vehicle. Locking
your doors can help prevent this
from happening.
N4U2004A
N4U2005A
Doors and Locks:
Page 54 of 226
2-6
FEATURES AND CONTROLS
85Z14-03E
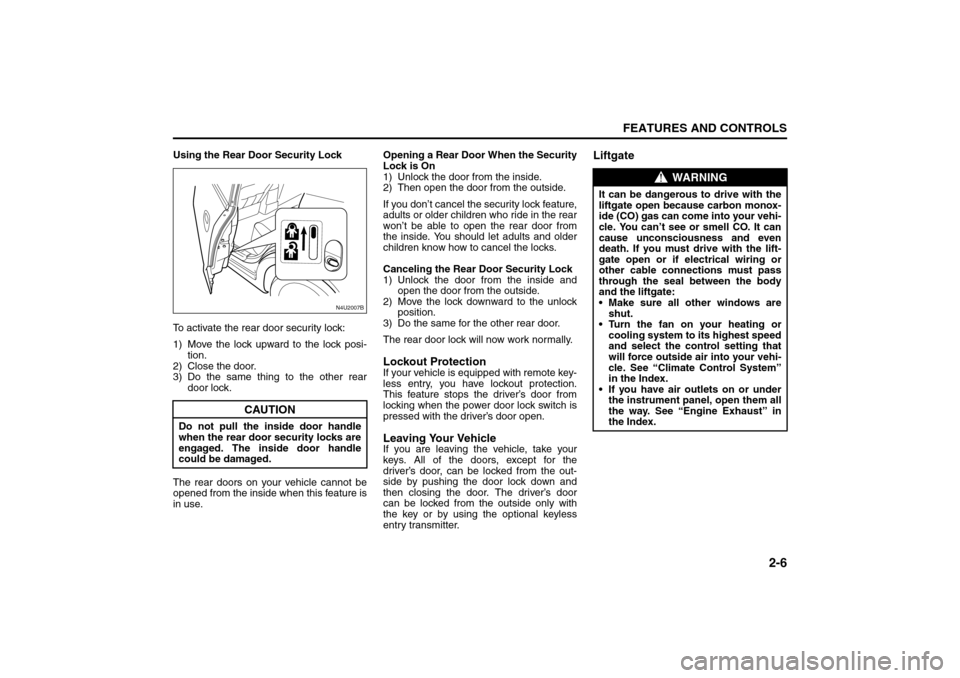
Using the Rear Door Security Lock
To activate the rear door security lock:
1) Move the lock upward to the lock posi-
tion.
2) Close the door.
3) Do the same thing to the other rear
door lock.
The rear doors on your vehicle cannot be
opened from the inside when this feature is
in use.Opening a Rear Door When the Security
Lock is On
1) Unlock the door from the inside.
2) Then open the door from the outside.
If you don’t cancel the security lock feature,
adults or older children who ride in the rear
won’t be able to open the rear door from
the inside. You should let adults and older
children know how to cancel the locks.
Canceling the Rear Door Security Lock
1) Unlock the door from the inside and
open the door from the outside.
2) Move the lock downward to the unlock
position.
3) Do the same for the other rear door.
The rear door lock will now work normally.
Lockout ProtectionIf your vehicle is equipped with remote key-
less entry, you have lockout protection.
This feature stops the driver’s door from
locking when the power door lock switch is
pressed with the driver’s door open.Leaving Your VehicleIf you are leaving the vehicle, take your
keys. All of the doors, except for the
driver’s door, can be locked from the out-
side by pushing the door lock down and
then closing the door. The driver’s door
can be locked from the outside only with
the key or by using the optional keyless
entry transmitter.
Liftgate
CAUTION
Do not pull the inside door handle
when the rear door security locks are
engaged. The inside door handle
could be damaged.
N4U2007B
WARNING
It can be dangerous to drive with the
liftgate open because carbon monox-
ide (CO) gas can come into your vehi-
cle. You can’t see or smell CO. It can
cause unconsciousness and even
death. If you must drive with the lift-
gate open or if electrical wiring or
other cable connections must pass
through the seal between the body
and the liftgate:
Make sure all other windows are
shut.
Turn the fan on your heating or
cooling system to its highest speed
and select the control setting that
will force outside air into your vehi-
cle. See “Climate Control System”
in the Index.
If you have air outlets on or under
the instrument panel, open them all
the way. See “Engine Exhaust” in
the Index.
Doors and Locks:
Page 55 of 226
2-7FEATURES AND CONTROLS
85Z14-03E
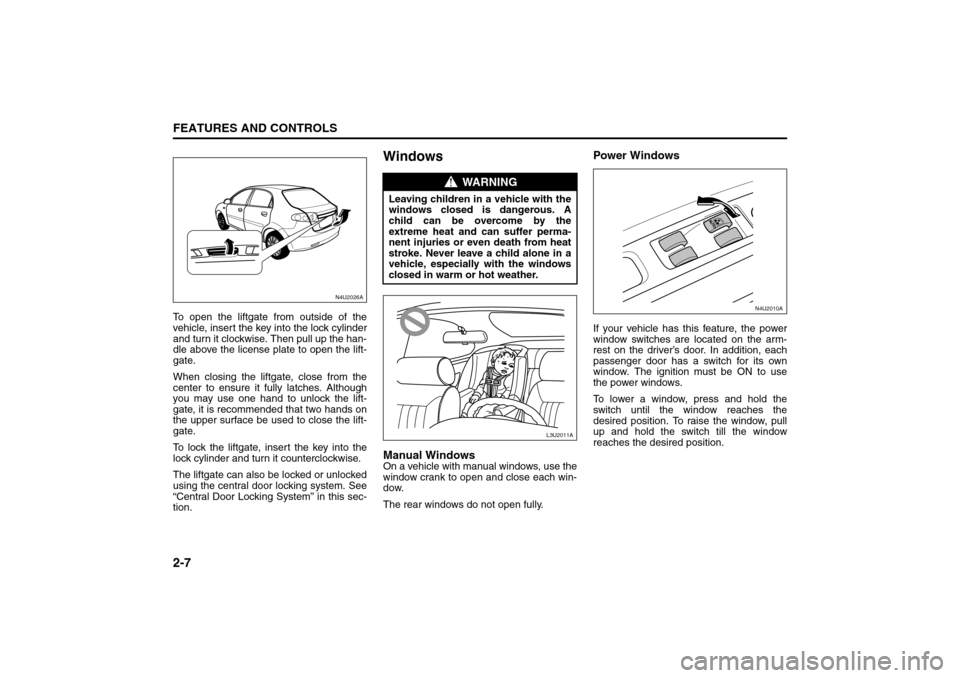
To open the liftgate from outside of the
vehicle, insert the key into the lock cylinder
and turn it clockwise. Then pull up the han-
dle above the license plate to open the lift-
gate.
When closing the liftgate, close from the
center to ensure it fully latches. Although
you may use one hand to unlock the lift-
gate, it is recommended that two hands on
the upper surface be used to close the lift-
gate.
To lock the liftgate, insert the key into the
lock cylinder and turn it counterclockwise.
The liftgate can also be locked or unlocked
using the central door locking system. See
“Central Door Locking System” in this sec-
tion.
WindowsManual WindowsOn a vehicle with manual windows, use the
window crank to open and close each win-
dow.
The rear windows do not open fully.
Power WindowsIf your vehicle has this feature, the power
window switches are located on the arm-
rest on the driver’s door. In addition, each
passenger door has a switch for its own
window. The ignition must be ON to use
the power windows.
To lower a window, press and hold the
switch until the window reaches the
desired position. To raise the window, pull
up and hold the switch till the window
reaches the desired position.
N4U2026A
WARNING
Leaving children in a vehicle with the
windows closed is dangerous. A
child can be overcome by the
extreme heat and can suffer perma-
nent injuries or even death from heat
stroke. Never leave a child alone in a
vehicle, especially with the windows
closed in warm or hot weather.
L3U2011A
N4U2010A
Doors and Locks:
Windows: