ESP SUZUKI SWIFT 2017 5.G User Guide
[x] Cancel search | Manufacturer: SUZUKI, Model Year: 2017, Model line: SWIFT, Model: SUZUKI SWIFT 2017 5.GPages: 336, PDF Size: 6.24 MB
Page 43 of 336
2-24
BEFORE DRIVING
74LH0-74E
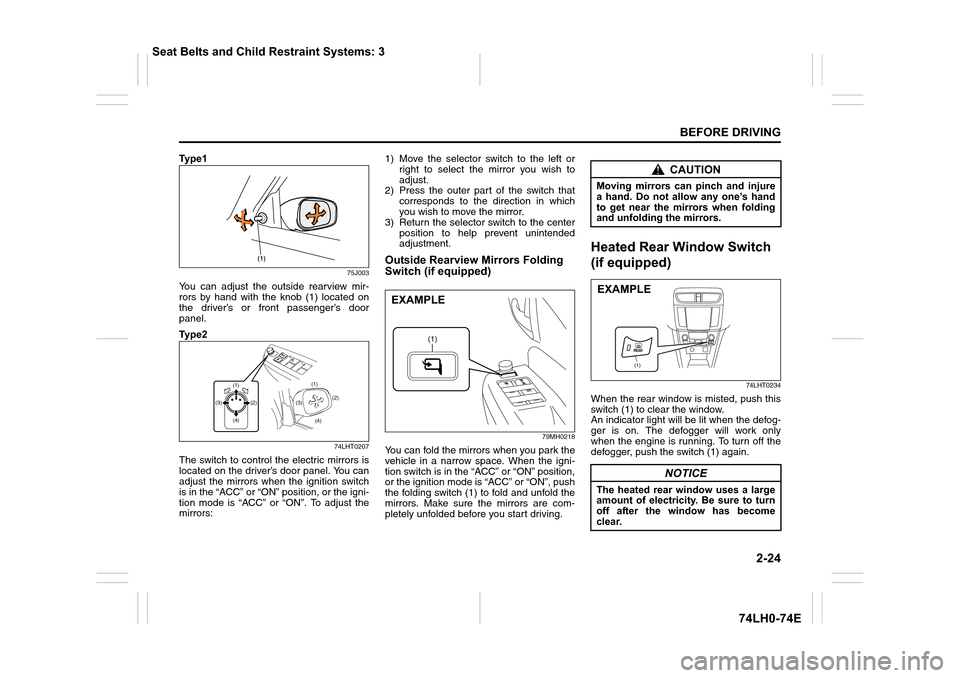
Ty p e 1
75J003
You can adjust the outside rearview mir-
rors by hand with the knob (1) located on
the driver’s or front passenger’s door
panel.
Ty p e 2
74LHT0207
The switch to control the electric mirrors is
located on the driver’s door panel. You can
adjust the mirrors when the ignition switch
is in the “ACC” or “ON” position, or the igni-
tion mode is “ACC” or “ON”. To adjust the
mirrors:1) Move the selector switch to the left or
right to select the mirror you wish to
adjust.
2) Press the outer part of the switch that
corresponds to the direction in which
you wish to move the mirror.
3) Return the selector switch to the center
position to help prevent unintended
adjustment.
Outside Rearview Mirrors Folding
Switch (if equipped)
79MH0218
You can fold the mirrors when you park the
vehicle in a narrow space. When the igni-
tion switch is in the “ACC” or “ON” position,
or the ignition mode is “ACC” or “ON”, push
the folding switch (1) to fold and unfold the
mirrors. Make sure the mirrors are com-
pletely unfolded before you start driving.
Heated Rear Window Switch
(if equipped)
74LHT0234
When the rear window is misted, push this
switch (1) to clear the window.
An indicator light will be lit when the defog-
ger is on. The defogger will work only
when the engine is running. To turn off the
defogger, push the switch (1) again.
(1)(1)
(4) (4)(2)(2)
(3)(3)
(1)
EXAMPLE
CAUTION
Moving mirrors can pinch and injure
a hand. Do not allow any one’s hand
to get near the mirrors when folding
and unfolding the mirrors.
NOTICE
The heated rear window uses a large
amount of electricity. Be sure to turn
off after the window has become
clear.
(1)
EXAMPLE
Seat Belts and Child Restraint Systems: 3
Page 69 of 336
2-50
BEFORE DRIVING
74LH0-74E
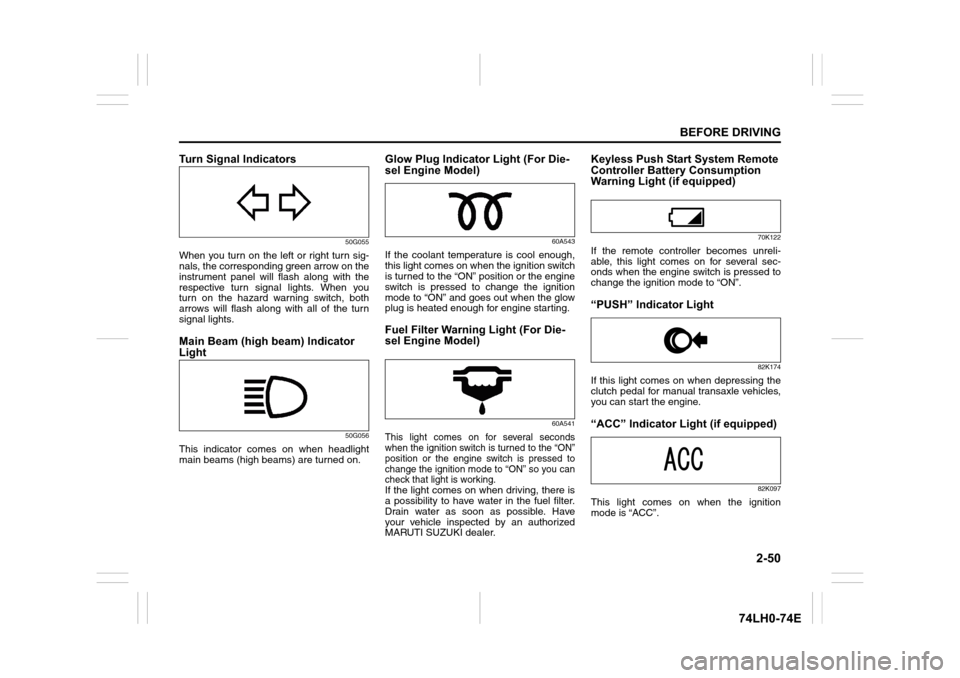
Turn Signal Indicators
50G055
When you turn on the left or right turn sig-
nals, the corresponding green arrow on the
instrument panel will flash along with the
respective turn signal lights. When you
turn on the hazard warning switch, both
arrows will flash along with all of the turn
signal lights.
Main Beam (high beam) Indicator
Light
50G056
This indicator comes on when headlight
main beams (high beams) are turned on.
Glow Plug Indicator Light (For Die-
sel Engine Model)
60A543
If the coolant temperature is cool enough,
this light comes on when the ignition switch
is turned to the “ON” position or the engine
switch is pressed to change the ignition
mode to “ON” and goes out when the glow
plug is heated enough for engine starting.
Fuel Filter Warning Light (For Die-
sel Engine Model)
60A541
This light comes on for several seconds
when the ignition switch is turned to the “ON”
position or the engine switch is pressed to
change the ignition mode to “ON” so you can
check that light is working.
If the light comes on when driving, there is
a possibility to have water in the fuel filter.
Drain water as soon as possible. Have
your vehicle inspected by an authorized
MARUTI SUZUKI dealer.
Keyless Push Start System Remote
Controller Battery Consumption
Warning Light (if equipped)
70K122
If the remote controller becomes unreli-
able, this light comes on for several sec-
onds when the engine switch is pressed to
change the ignition mode to “ON”.
“PUSH” Indicator Light
82K174
If this light comes on when depressing the
clutch pedal for manual transaxle vehicles,
you can start the engine.
“ACC” Indicator Light (if equipped)
82K097
This light comes on when the ignition
mode is “ACC”.
Page 91 of 336
3-6
OPERATING YOUR VEHICLE
74LH0-74E
Selection of Ignition ModesPress the engine switch to select the
“ACC” or “ON” mode as follows when you
use an electric accessory or check the
operation of instruments without running
the engine.
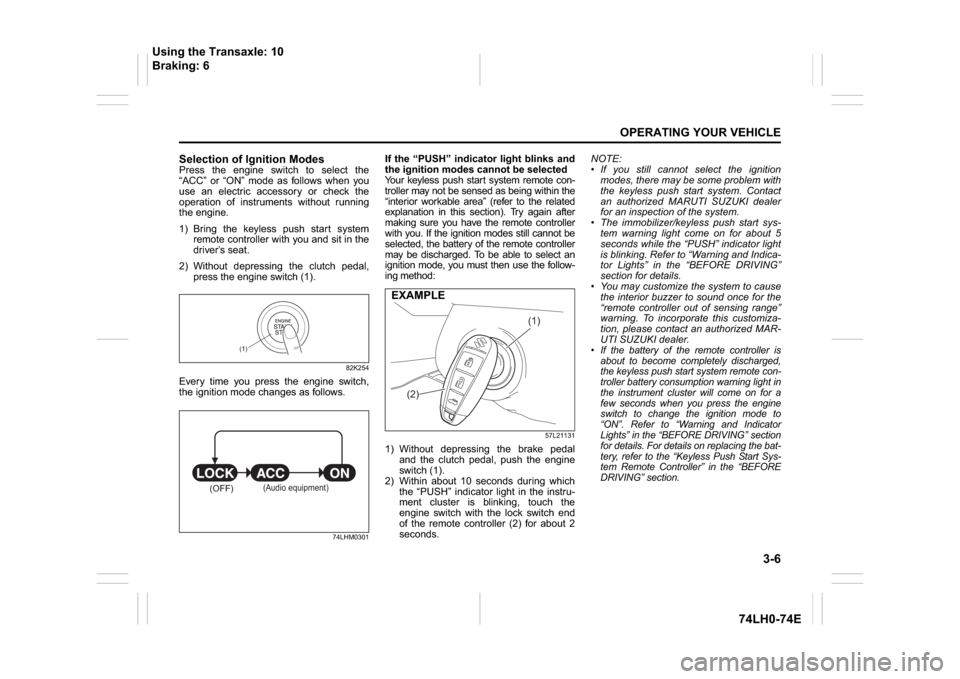
1) Bring the keyless push start system
remote controller with you and sit in the
driver’s seat.
2) Without depressing the clutch pedal,
press the engine switch (1).
82K254
Every time you press the engine switch,
the ignition mode changes as follows.
74LHM0301
If the “PUSH” indicator light blinks and
the ignition modes cannot be selected
Your keyless push start system remote con-
troller may not be sensed as being within the
“interior workable area” (refer to the related
explanation in this section). Try again after
making sure you have the remote controller
with you. If the ignition modes still cannot be
selected, the battery of the remote controller
may be discharged. To be able to select an
ignition mode, you must then use the follow-
ing method:
57L21131
1) Without depressing the brake pedal
and the clutch pedal, push the engine
switch (1).
2) Within about 10 seconds during which
the “PUSH” indicator light in the instru-
ment cluster is blinking, touch the
engine switch with the lock switch end
of the remote controller (2) for about 2
seconds.NOTE:
If you still cannot select the ignition
modes, there may be some problem with
the keyless push start system. Contact
an authorized MARUTI SUZUKI dealer
for an inspection of the system.
The immobilizer/keyless push start sys-
tem warning light come on for about 5
seconds while the “PUSH” indicator light
is blinking. Refer to “Warning and Indica-
tor Lights” in the “BEFORE DRIVING”
section for details.
You may customize the system to cause
the interior buzzer to sound once for the
“remote controller out of sensing range”
warning. To incorporate this customiza-
tion, please contact an authorized MAR-
UTI SUZUKI dealer.
If the battery of the remote controller is
about to become completely discharged,
the keyless push start system remote con-
troller battery consumption warning light in
the instrument cluster will come on for a
few seconds when you press the engine
switch to change the ignition mode to
“ON”. Refer to “Warning and Indicator
Lights” in the “BEFORE DRIVING” section
for details. For details on replacing the bat-
tery, refer to the “Keyless Push Start Sys-
tem Remote Controller” in the “BEFORE
DRIVING” section.
(1)
(OFF)
(Audio equipment)
(1)
(2)
EXAMPLE
Using the Transaxle: 10
Braking: 6
Page 97 of 336
3-12
OPERATING YOUR VEHICLE
74LH0-74E
NOTE:
You do not need to keep the engine
switch pressed to start the engine.
The engine of a manual transaxle vehi-
cle will not start unless the clutch pedal
is depressed.
You should turn off such loads as the
headlights and air conditioning system to
facilitate starting of the engine.
Even if you fail to start the engine, the
starter motor will stop turning automati-
cally after a short time. After the starter
motor has stopped or if there is some
problem with the system, the starter
motor will rotate only while the engine
switch is being pressed.
Stopping the engine Depress the engine switch to stop the
engine after the vehicle stopped com-
pletely.
In case of emergency, you can stop the
engine by quickly pushing the engine
switch more than 3 times, or pushing
and holding the engine switch more than
2 seconds while the vehicle in motion.
NOTE:
Except in emergency, do not stop the
engine while the vehicle in motion.
The steering and braking operation will
require more efforts when the engine
stopped.
Refer to “Braking” in this section.
If the engine has been stopped and
stayed as it as for while after the engine
was stopped unexpectedly or was raced
before stopped, a clicking sound may be
heard from around the engine when
engine restarted. This is not a malfunc-
tion. In this case, always let the engine
idle before stop it.
Starting a Cold and Warm Engine(For Petrol Engine Model)
With your foot off the accelerator pedal,
crank the engine by pressing the engine
switch to change the ignition mode to
“START”.After pressing the engine switch to change the
ignition mode to “START”, the starter cranks
the engine for about 12 seconds before it can
start the engine. If the engine fails to start at
the first attempt, wait about 15 seconds, then
try again while keeping the engine switch
pressed while pressing down the accelerator
pedal to 1/3 of its travel. Release the accelera-
tor pedal when the engine starts.If the engine still does not start, try holding
the accelerator pedal all the way to the
floor while cranking. This should clear the
engine if it is flooded.
If you are unable to start the engine using
this procedure, consult your MARUTI
SUZUKI dealer.
NOTICE
Do not depress the accelerator
during the engine starting proce-
dure. If the engine does not respond
when you try to start it with the
engine switch or if the engine
switch repeats cycling through the
“LOCK”(OFF) - “ACC” - “ON” mode,
the vehicle battery may be dis-
charged. Check the voltage of the
vehicle battery before trying again.
NOTICE
Avoid stopping the engine while driv-
ing.
NOTICE
Do not crank the engine for more
than 12 seconds at a time.
If the engine doesn’t start on the first
try, wait about 15 seconds before try-
ing again.
Page 118 of 336
4-1DRIVING TIPS
67LH3-74E
74LHM0401
Running-inCatalytic Converter
74LHM0402
The purpose of the catalytic converter is to
minimize the amount of harmful pollutants
in your vehicle’s exhaust. Use of leaded
fuel in vehicles equipped with catalytic
converters is prohibited, because lead
deactivates the pollutant-reducing compo-
nents of the catalyst system.
The converter is designed to last the life of
the vehicle under normal usage and when
unleaded fuel is used. No special mainte-
nance is required on the converter. How-
ever, it is very important to keep the engine
properly tuned. Engine misfiring, which can
result from an improperly tuned engine,
may cause overheating of the catalyst.
This may result in permanent heat damage
to the catalyst and other vehicle compo-
nents.
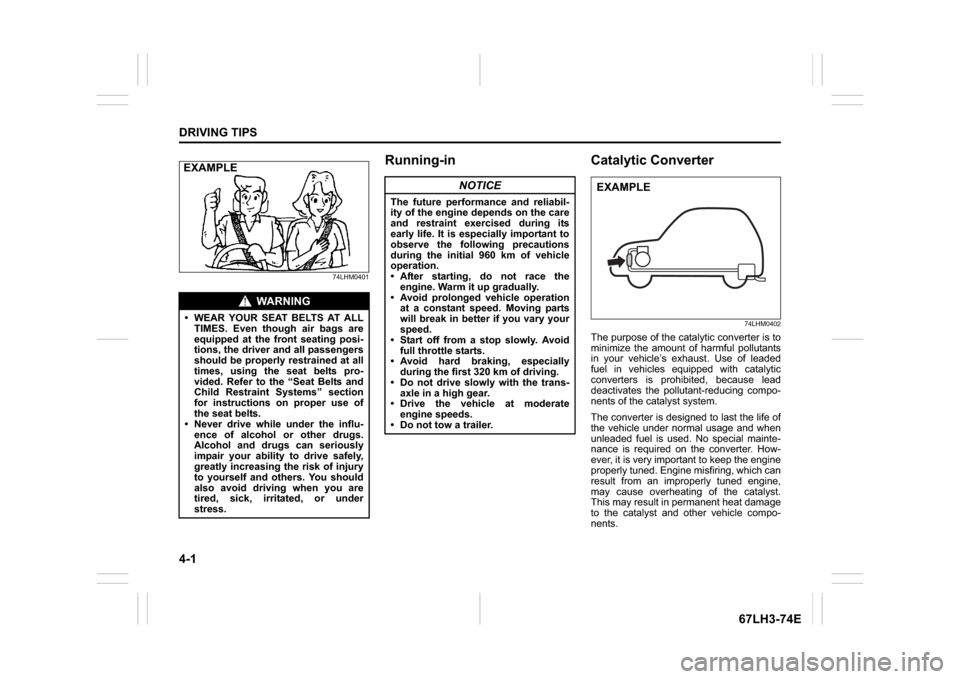
WA R N I N G
WEAR YOUR SEAT BELTS AT ALL
TIMES. Even though air bags are
equipped at the front seating posi-
tions, the driver and all passengers
should be properly restrained at all
times, using the seat belts pro-
vided. Refer to the “Seat Belts and
Child Restraint Systems” section
for instructions on proper use of
the seat belts.
Never drive while under the influ-
ence of alcohol or other drugs.
Alcohol and drugs can seriously
impair your ability to drive safely,
greatly increasing the risk of injury
to yourself and others. You should
also avoid driving when you are
tired, sick, irritated, or under
stress.EXAMPLE
NOTICE
The future performance and reliabil-
ity of the engine depends on the care
and restraint exercised during its
early life. It is especially important to
observe the following precautions
during the initial 960 km of vehicle
operation.
After starting, do not race theengine. Warm it up gradually.
Avoid prolonged vehicle operation at a constant speed. Moving parts
will break in better if you vary your
speed.
Start off from a stop slowly. Avoid
full throttle starts.
Avoid hard braking, especially during the first 320 km of driving.
Do not drive slowly with the trans- axle in a high gear.
Drive the vehicle at moderate
engine speeds.
Do not tow a trailer.
EXAMPLE
Page 124 of 336
4-7DRIVING TIPS
67LH3-74E
74LHM0411
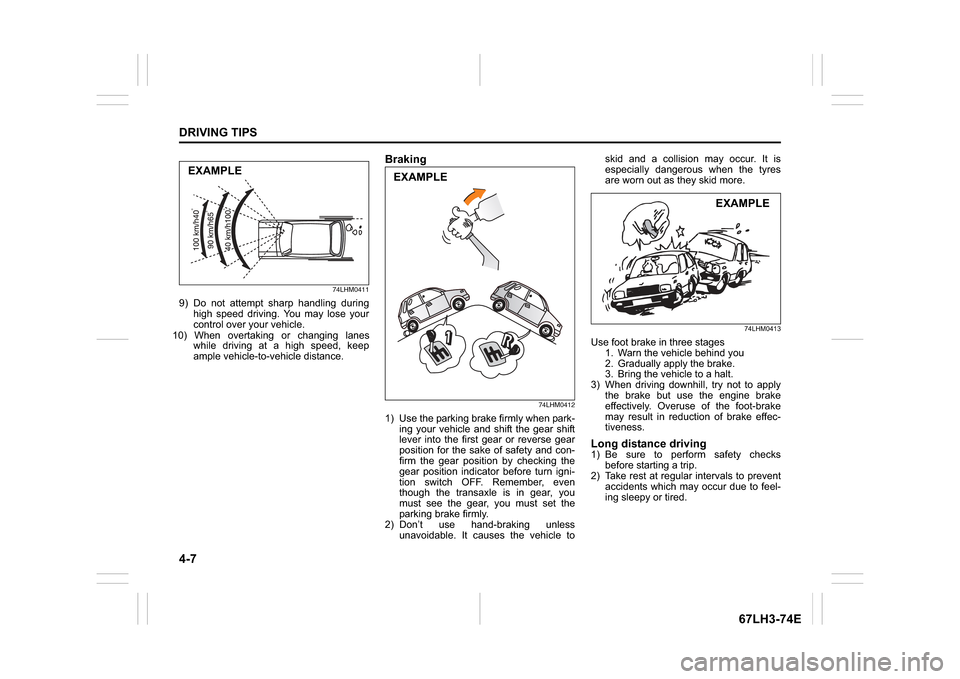
9) Do not attempt sharp handling duringhigh speed driving. You may lose your
control over your vehicle.10) When overtaking or changing lanes
while driving at a high speed, keep
ample vehicle-to-vehicle distance.
Braking
74LHM0412
1) Use the parking brake firmly when park-
ing your vehicle and shift the gear shift
lever into the first gear or reverse gear
position for the sake of safety and con-
firm the gear position by checking the
gear position indicator before turn igni-
tion switch OFF. Remember, even
though the transaxle is in gear, you
must see the gear, you must set the
parking brake firmly.
2) Don’t use hand-braking unless unavoidable. It causes the vehicle to skid and a collision may occur. It is
especially dangerous when the tyres
are worn out as they skid more.
74LHM0413
Use foot brake in three stages
1. Warn the vehicle behind you
2. Gradually apply the brake.
3. Bring the vehicle to a halt.
3) When driving downhill, try not to apply the brake but use the engine brake
effectively. Overuse of the foot-brake
may result in reduction of brake effec-
tiveness.Long distance driving1) Be sure to perform safety checks
before starting a trip.
2) Take rest at regular intervals to prevent accidents which may occur due to feel-
ing sleepy or tired.
EXAMPLE
EXAMPLE
EXAMPLE
Page 148 of 336
5-21OTHER CONTROLS AND EQUIPMENT
74LH0-74E
Notes on USB deviceCompatible USB devices
USB Mass Storage Class
For details as to whether your USB
memory/USB Audio is compatible with
USB Mass Storage Class, please con-
tact the USB memory/USB Audio manu-
facturer.
USB Standard Compatibility 1.1/2.0 Full
Speed
File System FAT12/16/32, VFAT
Maximum current less than 1.0 A
If devices such as USB hub, extension
cable are connected to the audio sys-
tem, it may not be recognized. In such
case connect the USB device directly to
the audio system.
Devices such as MP3 player/Mobile
phone/digital camera may not be recog-
nized by the audio system for playing
music.
USB device connection
When connecting a USB device, make
sure that the connector is pushed all the
way into the port.
Do not leave the USB device for long
periods of time in places inside the vehi-
cle where the temperature can rise too
high.
Back up any important data beforehand.
We cannot accept responsibility for any
lost data.
It is recommended not to connect a USB
device that contains data files other than
MP3/WMA/AAC format.Recording MP3/WMA/AAC files on a
USB device
Playback or display may not be possible
depending on the type of USB device in
use or the condition of the recording.
Depending on the connected USB mem-
ory, the files may be played in different
order from the order that the files were
stored.
Compression formats
MP3
Bit rate
:
MPEG1 Audio Layer III: 32 k - 320 kbps
MPEG2 Audio Layer III: 8 k - 160 kbps
MPEG2.5 Audio Layer III: 8 k - 160 kbps Sampling frequency
:
MPEG1 Audio Layer III: 32 k/44.1 k/48 kHz
MPEG2 Audio Layer III: 16 k/22.05 k/24 kHz
MPEG2.5 Audio Layer III: 8 k/11.025 k/12 kHzWMA (Ver. 7, Ver. 8, Ver. 9*)
Bit rate: CBR 32 k -320 kbps
Sampling frequency: 32 k/44.1 k/48 kHz
* WMA 9 Professional/LossLess/Voice are
not supported.
AAC*
Bit rate: ABR 16k - 320 kbbs
Sampling frequency: 32 k/44.1 k/48 kHz
* Apple Lossless is not supported.
Maximum number of files/folders
Maximum number of files: 2500
Maximum number of files in a folder: 255
Maximum depth of tree structure: 8
Maximum number of folders: 255
(Root folder is included.)
Listening to an iPod
®
74LHT5007
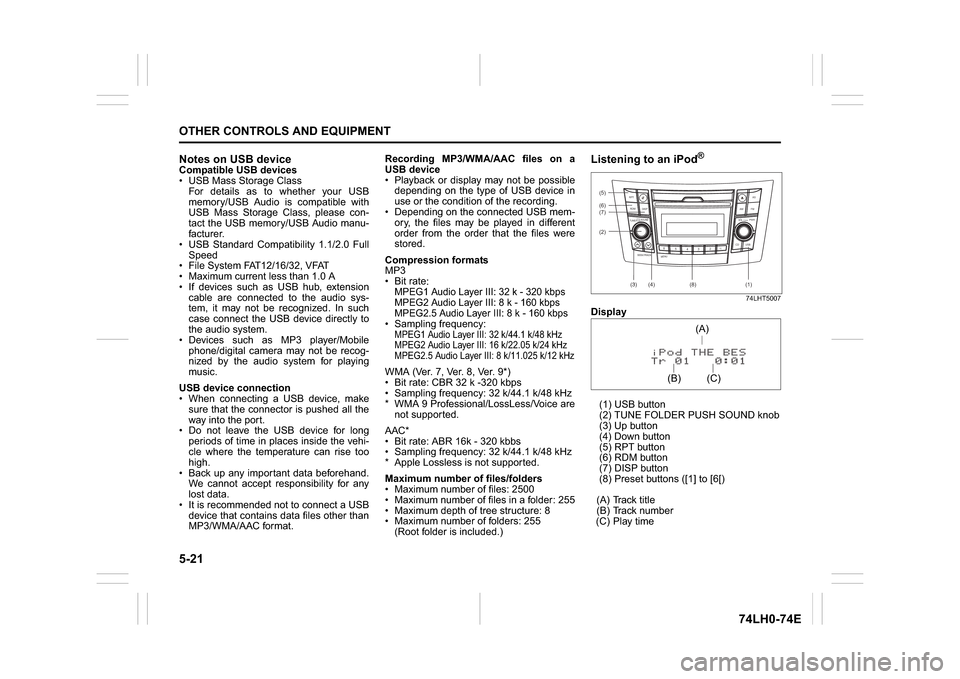
Display
(1) USB button
(2) TUNE FOLDER PUSH SOUND knob
(3) Up button
(4) Down button
(5) RPT button
(6) RDM button
(7) DISP button
(8) Preset buttons ([1] to [6[)
(A) Track title
(B) Track number
(C) Play time(2) (6)
B S U
CD
2
3 4 5 6
SEEK/TRACK
AS
AMFM RPT
RDM
DISP
PUSHSOUND
TUNE/FLD
VOLPWRPUSH
11
MENU
(3)
(5)
(4) (7)
(1)
(8)
(C)(A)
(B)
Page 150 of 336
5-23OTHER CONTROLS AND EQUIPMENT
74LH0-74E
Notes on iPod
®
Supported iPod
®
® touch (5th generation)
® touch (4th generation)
® touch (3rd generation)
® touch (2nd generation)
® touch (1st generation)
® classic
® nano (7th generation)
® nano (6th generation)
® nano (5th generation)
® nano (4th generation)
® nano (3rd generation)
® nano (2nd generation)
® nano (1st generation)
® (5th generation)
iPhone® 6 Plus
iPhone® 6
iPhone® 5S
iPhone® 5
iPhone® 4S
iPhone® 4
iPhone® 3GS
iPhone® 3G
iPhone®
* Some functions may not be available
depending on the model of iPod
®.
*iPod
® is a trademark of Apple Inc., regis-
tered in the U.S. and other countries.
* iPhone® is a trademark of Apple Inc.,
registered in the U.S. and other coun-
tries.
* Apple is not responsible for the operation
of this device or its compliance with
safety and regulatory standards.iPod
® connection
Make sure to detach the iPod
® after
pressing the engine switch to change the
ignition mode to LOCK. The iPod® may
not be shut down when it is being con-
nected and may result in battery deple-
tion.
Please do not connect iPod
® accesso-
ries such as an iPod
® remote control or
headphones while connecting the iPod
®
with the unit. The unit may not operate
correctly.
AUX Function
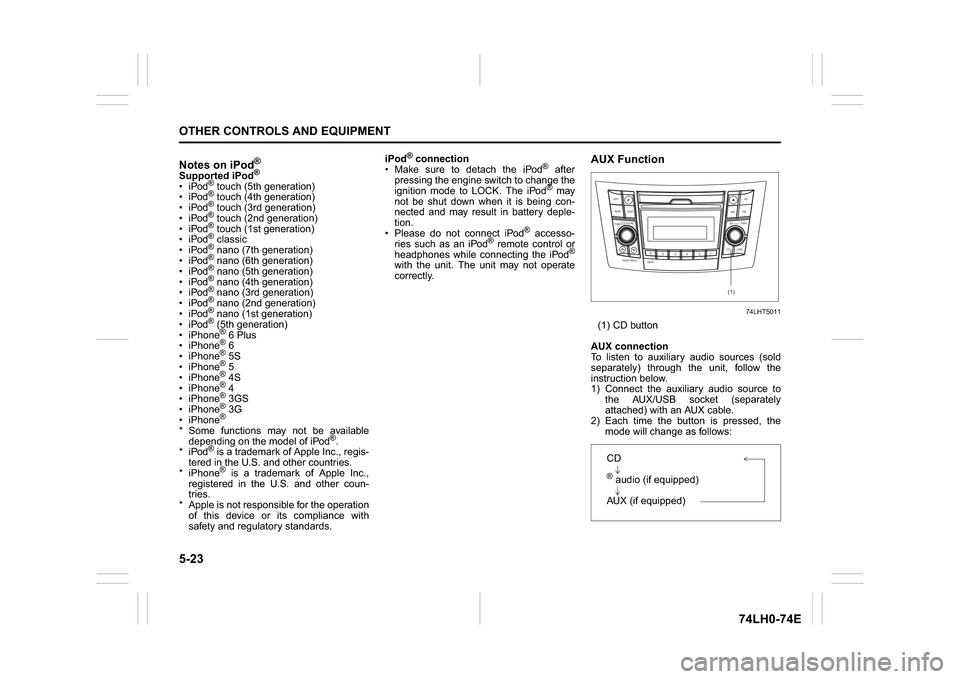
74LHT5011
(1) CD button
AUX connection
To listen to auxiliary audio sources (sold
separately) through the unit, follow the
instruction below.
1) Connect the auxiliary audio source to
the AUX/USB socket (separately
attached) with an AUX cable.
2) Each time the button is pressed, the
mode will change as follows:
B S U
CD
2
3 4 5 6
SEEK/TRACK
AS
AMFM RPT
RDM
DISP
PUSHSOUND
TUNE/FLD
VOL
PWRPUSH
11
MENU
(1)
CD® audio (if equipped)
AUX (if equipped)
Page 153 of 336
5-26
OTHER CONTROLS AND EQUIPMENT
74LH0-74E
press the knob (1) to determine the
selection.
NOTE:
When selecting “Go Back”, the previous
menu will be displayed.Dialing using Missed/Incoming/
Outgoing CallsFollow the instructions below to dial to the
last dialed number again.NOTE:
Up to 10 phone numbers of the latest calls
can be stored. (10 each for dialed, received
and missed call)1) Press the Off Hook button (5).
The
® phonebook menu will be dis-
played.
2) Turn the TUNE FOLDER PUSH SOUND
knob (1) to select “Missed Calls”,
“Incoming Calls” or “Outgoing Calls”,
and press the knob (1) to determine the
selection.
To dial from the dialed history or the
received history, select “Missed Calls”,
“Incoming Calls” or “Outgoing Calls”
respectively.
3) Turn the TUNE FOLDER PUSH SOUND
knob (1) to select the desired number,
and press the knob (1) to determine the
selection.
4) Turn the TUNE FOLDER PUSH SOUND
knob (1) to select “Dial”, and press the
knob (1) or the Off Hook button (5) to
dial to the selected number.
NOTE:
When selecting “Go Back”, the previous
menu will be displayed.
Pressing “Confirm” after selecting “Add
Speed Dial” can register the selected
number in the speed dial.
Pressing “Confirm” after selecting
“Delete” can delete the selected number
from the call history.Deletion of call historyFollow the instructions below to delete a
missed/incoming/outgoing call history.
1) Press the Off Hook button (5).
The
® phonebook menu will be dis-
played.
2) Turn the TUNE FOLDER PUSH SOUND
knob (1) to select “Setup Phonebook”,
and press the knob (1) to determine the
selection.
3) Turn the TUNE FOLDER PUSH SOUND
knob (1) to select “Delete History”, and
press the knob (1) to determine the
selection.
4) Turn the TUNE FOLDER PUSH SOUND
knob (1) to select “Missed Calls”,
“Incoming Calls”, or “Outgoing Calls”,
and press the knob (1) to determine the
selection.
5) Turn the TUNE FOLDER PUSH
SOUND knob (1) to select a number to
be deleted or “ALL”, and press the knob
(1) to determine the selection.
6) Turn the TUNE FOLDER PUSH
SOUND knob (1) to select “Delete?” or“Delete All?”, and press the knob (1) to
determine the selection.
7) Turn the TUNE FOLDER PUSH
SOUND knob (1) to select “Confirm”,
and press the knob (1) to complete the
deletion.
NOTE:
When selecting “Go Back”, the previous
menu will be displayed.
Registration in Phonebook
Registration of numbers in the phonebook.
Follow the instructions below to register
phone numbers in the Phonebook of the
unit.
1) Press the
® setup button (4).
The
® setup menu will be displayed.
2) Turn the TUNE FOLDER PUSH
SOUND knob (1) to select “Setup Tele-
phone”, and press the knob (1) to deter-
mine the selection.
3) Turn the TUNE FOLDER PUSH
SOUND knob (1) to select “Setup
Phonebook”, and press the knob (1) to
determine the selection.
4) Turn the TUNE FOLDER PUSH
SOUND knob (1) to select “Add Con-
tacts”, and press the knob (1) to deter-
mine the selection.
5) Turn the TUNE FOLDER PUSH
SOUND knob (1) to select “Overwrite
All” or “Add One Contact”, and press
the knob (1) to determine the selection.
The “Rest of Memory XXXX: Ok?” will
be displayed.
Page 163 of 336
5-36
OTHER CONTROLS AND EQUIPMENT
74LH0-74E
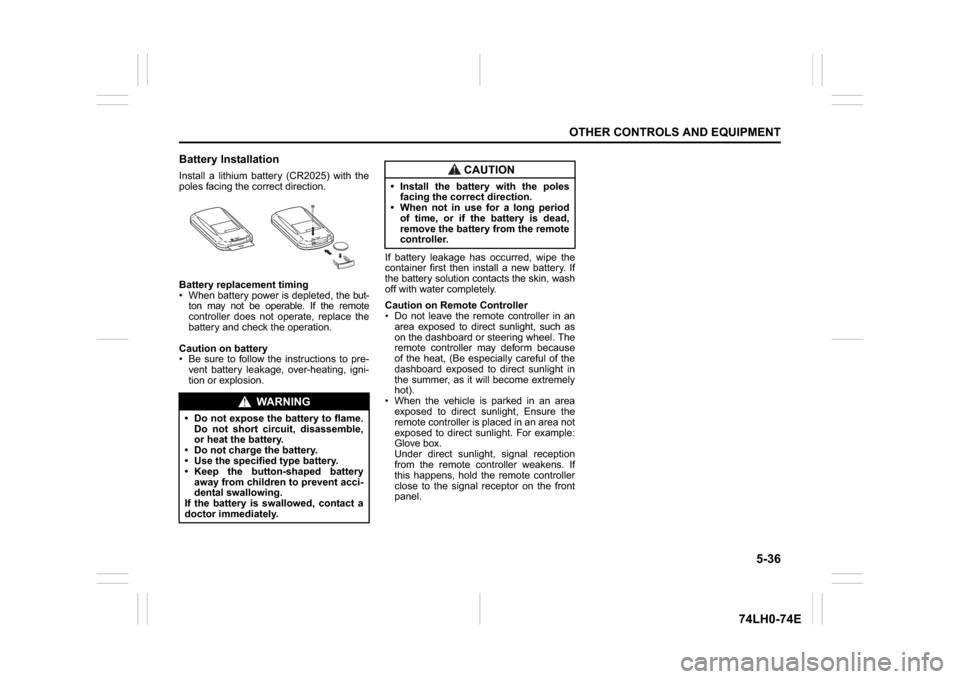
Battery InstallationInstall a lithium battery (CR2025) with the
poles facing the correct direction.
Battery replacement timing
When battery power is depleted, the but-
ton may not be operable. If the remote
controller does not operate, replace the
battery and check the operation.
Caution on battery
Be sure to follow the instructions to pre-
vent battery leakage, over-heating, igni-
tion or explosion.If battery leakage has occurred, wipe the
container first then install a new battery. If
the battery solution contacts the skin, wash
off with water completely.
Caution on Remote Controller
Do not leave the remote controller in an
area exposed to direct sunlight, such as
on the dashboard or steering wheel. The
remote controller may deform because
of the heat, (Be especially careful of the
dashboard exposed to direct sunlight in
the summer, as it will become extremely
hot).
When the vehicle is parked in an area
exposed to direct sunlight, Ensure the
remote controller is placed in an area not
exposed to direct sunlight. For example:
Glove box.
Under direct sunlight, signal reception
from the remote controller weakens. If
this happens, hold the remote controller
close to the signal receptor on the front
panel.
WA R N I N G
Do not expose the battery to flame.
Do not short circuit, disassemble,
or heat the battery.
Do not charge the battery.
Use the specified type battery.
Keep the button-shaped battery
away from children to prevent acci-
dental swallowing.
If the battery is swallowed, contact a
doctor immediately.
CAUTION
Install the battery with the poles
facing the correct direction.
When not in use for a long period
of time, or if the battery is dead,
remove the battery from the remote
controller.