turn off SUZUKI SWIFT 2017 5.G User Guide
[x] Cancel search | Manufacturer: SUZUKI, Model Year: 2017, Model line: SWIFT, Model: SUZUKI SWIFT 2017 5.GPages: 336, PDF Size: 6.24 MB
Page 44 of 336
2-25
BEFORE DRIVING
74LH0-74E
NOTE:
• The defogger will work only when the
engine is running.
• The defogger will automatically turn off
after the defogger remains on for 15 min-
utes to prevent discharging of the bat-
tery.
Front Seats
Seat AdjustmentAdjusting Seat Position
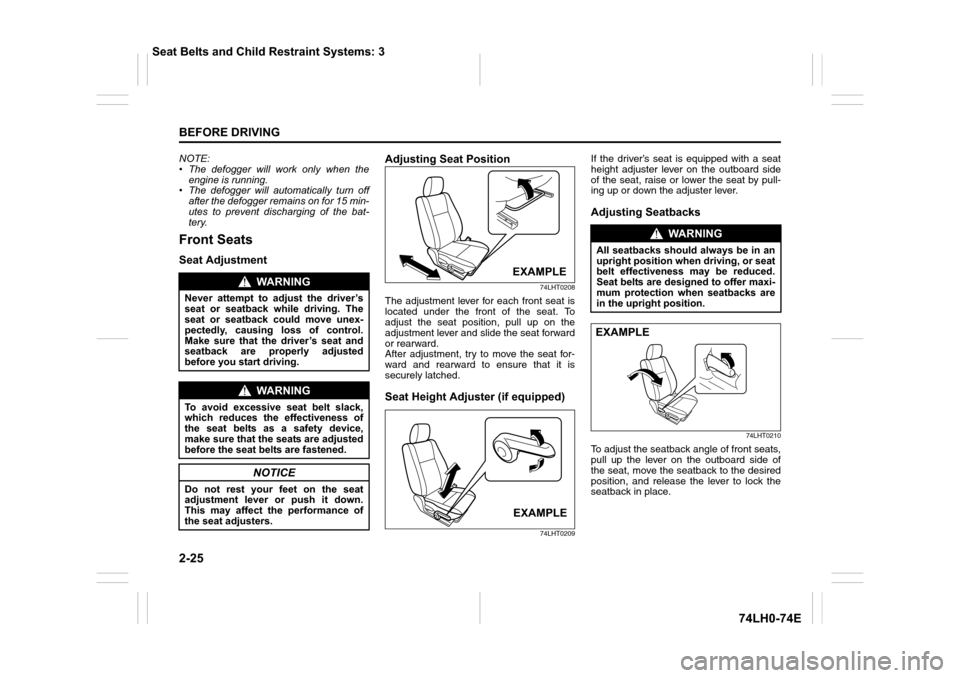
74LHT0208
The adjustment lever for each front seat is
located under the front of the seat. To
adjust the seat position, pull up on the
adjustment lever and slide the seat forward
or rearward.
After adjustment, try to move the seat for-
ward and rearward to ensure that it is
securely latched.
Seat Height Adjuster (if equipped)
74LHT0209
If the driver’s seat is equipped with a seat
height adjuster lever on the outboard side
of the seat, raise or lower the seat by pull-
ing up or down the adjuster lever.
Adjusting Seatbacks
74LHT0210
To adjust the seatback angle of front seats,
pull up the lever on the outboard side of
the seat, move the seatback to the desired
position, and release the lever to lock the
seatback in place.
WA R N I N G
Never attempt to adjust the driver’s
seat or seatback while driving. The
seat or seatback could move unex-
pectedly, causing loss of control.
Make sure that the driver’s seat and
seatback are properly adjusted
before you start driving.
WA R N I N G
To avoid excessive seat belt slack,
which reduces the effectiveness of
the seat belts as a safety device,
make sure that the seats are adjusted
before the seat belts are fastened.
NOTICE
Do not rest your feet on the seat
adjustment lever or push it down.
This may affect the performance of
the seat adjusters.
EXAMPLE
EXAMPLE
WA R N I N G
All seatbacks should always be in an
upright position when driving, or seat
belt effectiveness may be reduced.
Seat belts are designed to offer maxi-
mum protection when seatbacks are
in the upright position.
EXAMPLE
Seat Belts and Child Restraint Systems: 3
Page 47 of 336
2-28
BEFORE DRIVING
74LH0-74E
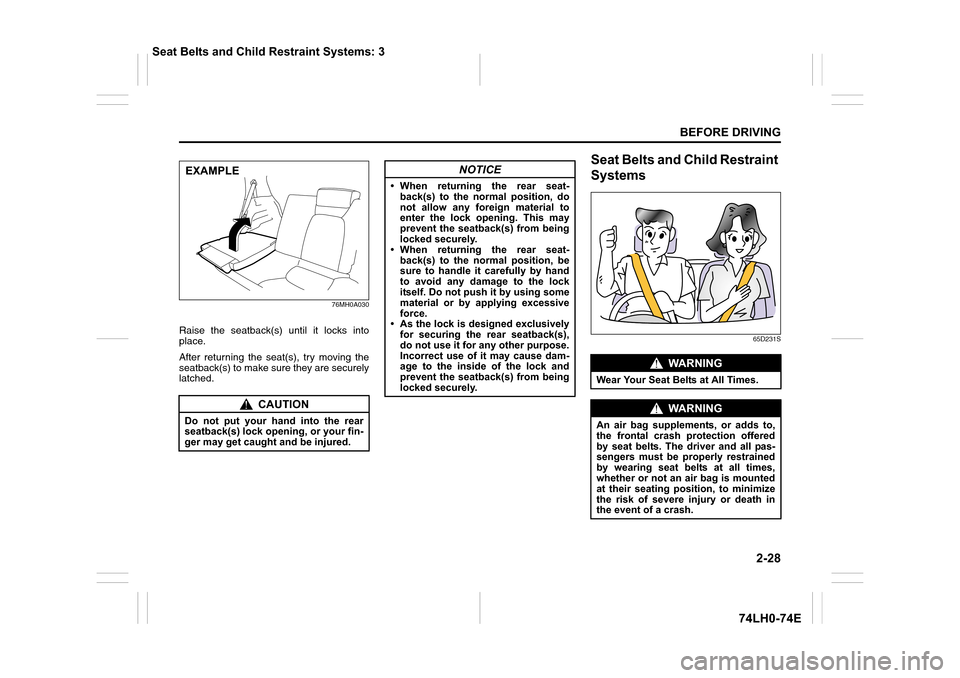
76MH0A030
Raise the seatback(s) until it locks into
place.
After returning the seat(s), try moving the
seatback(s) to make sure they are securely
latched.
Seat Belts and Child Restraint
Systems
65D231S
CAUTION
Do not put your hand into the rear
seatback(s) lock opening, or your fin-
ger may get caught and be injured.
EXAMPLENOTICE
• When returning the rear seat-
back(s) to the normal position, do
not allow any foreign material to
enter the lock opening. This may
prevent the seatback(s) from being
locked securely.
• When returning the rear seat-
back(s) to the normal position, be
sure to handle it carefully by hand
to avoid any damage to the lock
itself. Do not push it by using some
material or by applying excessive
force.
• As the lock is designed exclusively
for securing the rear seatback(s),
do not use it for any other purpose.
Incorrect use of it may cause dam-
age to the inside of the lock and
prevent the seatback(s) from being
locked securely.
WA R N I N G
Wear Your Seat Belts at All Times.
WA R N I N G
An air bag supplements, or adds to,
the frontal crash protection offered
by seat belts. The driver and all pas-
sengers must be properly restrained
by wearing seat belts at all times,
whether or not an air bag is mounted
at their seating position, to minimize
the risk of severe injury or death in
the event of a crash.
Seat Belts and Child Restraint Systems: 3
Page 51 of 336
2-32
BEFORE DRIVING
74LH0-74E
NOTE:
The word “CENTER” is molded on the
buckle and latch plate of the center lap
belt. The buckles are designed so a latch
plate can not be inserted into the wrong
buckle.
Driver’s Seat Belt Reminder
(if equipped)
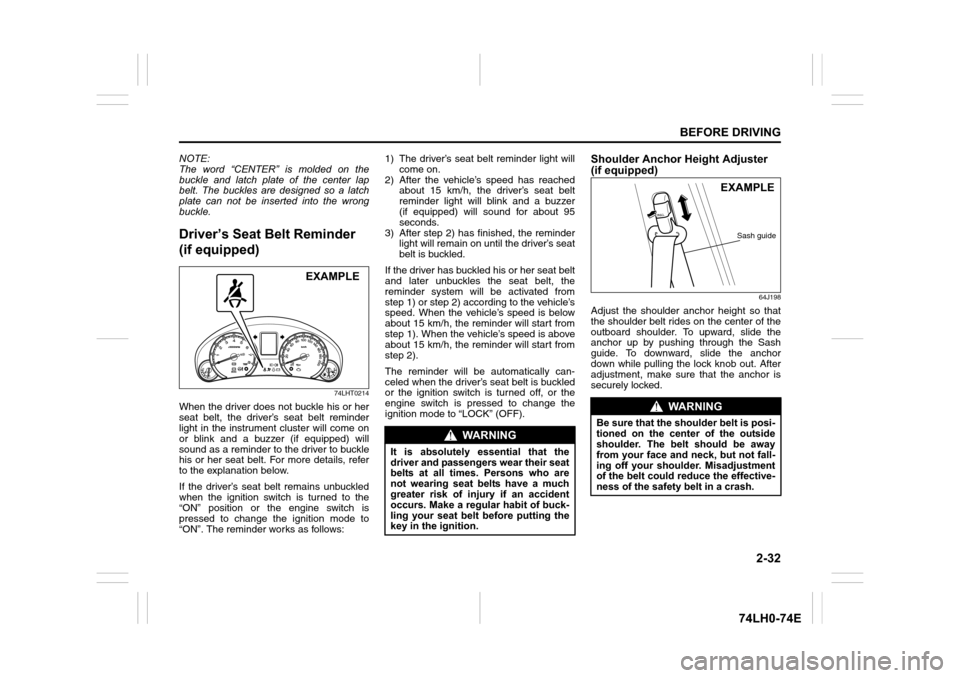
74LHT0214
When the driver does not buckle his or her
seat belt, the driver’s seat belt reminder
light in the instrument cluster will come on
or blink and a buzzer (if equipped) will
sound as a reminder to the driver to buckle
his or her seat belt. For more details, refer
to the explanation below.
If the driver’s seat belt remains unbuckled
when the ignition switch is turned to the
“ON” position or the engine switch is
pressed to change the ignition mode to
“ON”. The reminder works as follows:1) The driver’s seat belt reminder light will
come on.
2) After the vehicle’s speed has reached
about 15 km/h, the driver’s seat belt
reminder light will blink and a buzzer
(if equipped) will sound for about 95
seconds.
3) After step 2) has finished, the reminder
light will remain on until the driver’s seat
belt is buckled.
If the driver has buckled his or her seat belt
and later unbuckles the seat belt, the
reminder system will be activated from
step 1) or step 2) according to the vehicle’s
speed. When the vehicle’s speed is below
about 15 km/h, the reminder will start from
step 1). When the vehicle’s speed is above
about 15 km/h, the reminder will start from
step 2).
The reminder will be automatically can-
celed when the driver’s seat belt is buckled
or the ignition switch is turned off, or the
engine switch is pressed to change the
ignition mode to “LOCK” (OFF).
Shoulder Anchor Height Adjuster
(if equipped)
64J198
Adjust the shoulder anchor height so that
the shoulder belt rides on the center of the
outboard shoulder. To upward, slide the
anchor up by pushing through the Sash
guide. To downward, slide the anchor
down while pulling the lock knob out. After
adjustment, make sure that the anchor is
securely locked.
EXAMPLE
WA R N I N G
It is absolutely essential that the
driver and passengers wear their seat
belts at all times. Persons who are
not wearing seat belts have a much
greater risk of injury if an accident
occurs. Make a regular habit of buck-
ling your seat belt before putting the
key in the ignition.
WA R N I N G
Be sure that the shoulder belt is posi-
tioned on the center of the outside
shoulder. The belt should be away
from your face and neck, but not fall-
ing off your shoulder. Misadjustment
of the belt could reduce the effective-
ness of the safety belt in a crash.
EXAMPLE
Sash guide
Page 55 of 336
2-36
BEFORE DRIVING
74LH0-74E
Read this section and the “Supplemental
Restraint System (air bags)” section to
learn more about the pretensioner system.
The seat belt pretensioner system works
with the SUPPLEMENTAL RESTRAINT
SYSTEM (Air Bags). The crash sensors
and the electronic controller of the air bag
system also control the seat belt preten-
sioners. When the air bags are triggered,
the pretensioner are also triggered. For
precautions and general information
including servicing the pretensioner sys-
tem, refer to the “Supplemental Restraint
System (air bags)” section in addition to
this “Seat Belt Pretensioner System” sec-
tion, and follow all those precautions.
The pretensioner is located in each front
seat belt retractor. The pretensioner tight-
ens the seat belt so the belt fits the occu-
pant’s body more snugly in the event of a
frontal crash. The retractors will remain
locked after the pretensioners are acti-
vated. Upon activation, some noise will
occur and some smoke may be released.
These conditions are not harmful and do
not indicate a fire in the vehicle.
The driver and all passengers must be
properly restrained by wearing seat belts
at all times, whether or not a pretensioner
is equipped at their seating position, to
minimize the risk of severe injury or death
in the event of a crash. Sit fully back in the seat; sit up straight; do
not lean forward or sideways. Adjust the
belt so the lap portion of the belt is worn
low across the pelvis, not across the waist.
Please refer to the “Seat Adjustment” sec-
tion and the instructions and precautions
about the seat belts in this “Seat Belts and
Child Restraint Systems” section for details
on proper seat and seat belt adjustments.
Please note that the pretensioners along
with the air bags will activate in severe
frontal collisions. They are not designed to
activate in rear impacts, side impacts, roll-
overs, or minor frontal collisions. The pre-
tensioners can be activated only once. If
the pretensioners are activated (that is, if
the air bags are activated), have the pre-
tensioner system serviced by an autho-
rized MARUTI SUZUKI dealer as soon as
possible.
If the “AIR BAG” light on the instrument
cluster does not blink or come on briefly
when the ignition switch is turned to the
“ON” position, or the engine switch is
pressed to change the ignition mode to
“ON”, stays on for more than 10 seconds,
or comes on while driving, the pretensioner
system or the air bag system may not work
properly. Have both systems inspected by
an authorized MARUTI SUZUKI dealer as
soon as possible.
Service on or around the pretensioner sys-
tem components or wiring must be per-formed only by an authorized MARUTI
SUZUKI dealer who is specially trained.
Improper service could result in unin-
tended activation of pretensioners or could
render the pretensioner inoperative. Either
of these two conditions may result in per-
sonal injury.
To prevent damage or unintended activa-
tion of the pretensioners, be sure the bat-
tery is disconnected and the ignition switch
has been in the “LOCK” position or the
ignition mode has been “LOCK” (OFF) for
at least 90 seconds before performing any
electrical service work on your MARUTI
SUZUKI.
Do not touch pretensioner system compo-
nents or wiring. The wires are wrapped
with yellow tape or yellow tubing, and the
couplers are yellow. When scrapping your
MARUTI SUZUKI, ask your MARUTI
SUZUKI dealer, body repair shop, or scrap
yard for assistance.
Page 58 of 336
2-39
BEFORE DRIVING
74LH0-74E
“AIR BAG” light (If equipped)
63J030
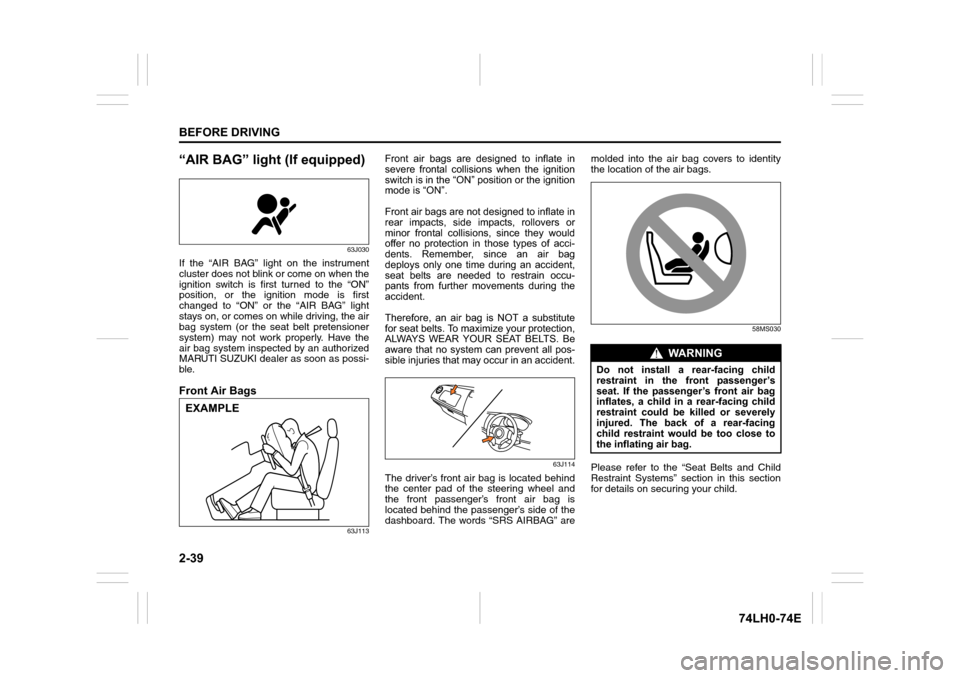
If the “AIR BAG” light on the instrument
cluster does not blink or come on when the
ignition switch is first turned to the “ON”
position, or the ignition mode is first
changed to “ON” or the “AIR BAG” light
stays on, or comes on while driving, the air
bag system (or the seat belt pretensioner
system) may not work properly. Have the
air bag system inspected by an authorized
MARUTI SUZUKI dealer as soon as possi-
ble.
Front Air Bags
63J113
Front air bags are designed to inflate in
severe frontal collisions when the ignition
switch is in the “ON” position or the ignition
mode is “ON”.
Front air bags are not designed to inflate in
rear impacts, side impacts, rollovers or
minor frontal collisions, since they would
offer no protection in those types of acci-
dents. Remember, since an air bag
deploys only one time during an accident,
seat belts are needed to restrain occu-
pants from further movements during the
accident.
Therefore, an air bag is NOT a substitute
for seat belts. To maximize your protection,
ALWAYS WEAR YOUR SEAT BELTS. Be
aware that no system can prevent all pos-
sible injuries that may occur in an accident.
63J114
The driver’s front air bag is located behind
the center pad of the steering wheel and
the front passenger’s front air bag is
located behind the passenger’s side of the
dashboard. The words “SRS AIRBAG” aremolded into the air bag covers to identity
the location of the air bags.
58MS030
Please refer to the “Seat Belts and Child
Restraint Systems” section in this section
for details on securing your child.
EXAMPLE
WA R N I N G
Do not install a rear-facing child
restraint in the front passenger’s
seat. If the passenger’s front air bag
inflates, a child in a rear-facing child
restraint could be killed or severely
injured. The back of a rear-facing
child restraint would be too close to
the inflating air bag.
Page 65 of 336
2-46
BEFORE DRIVING
74LH0-74E
Warning and Indicator Lights
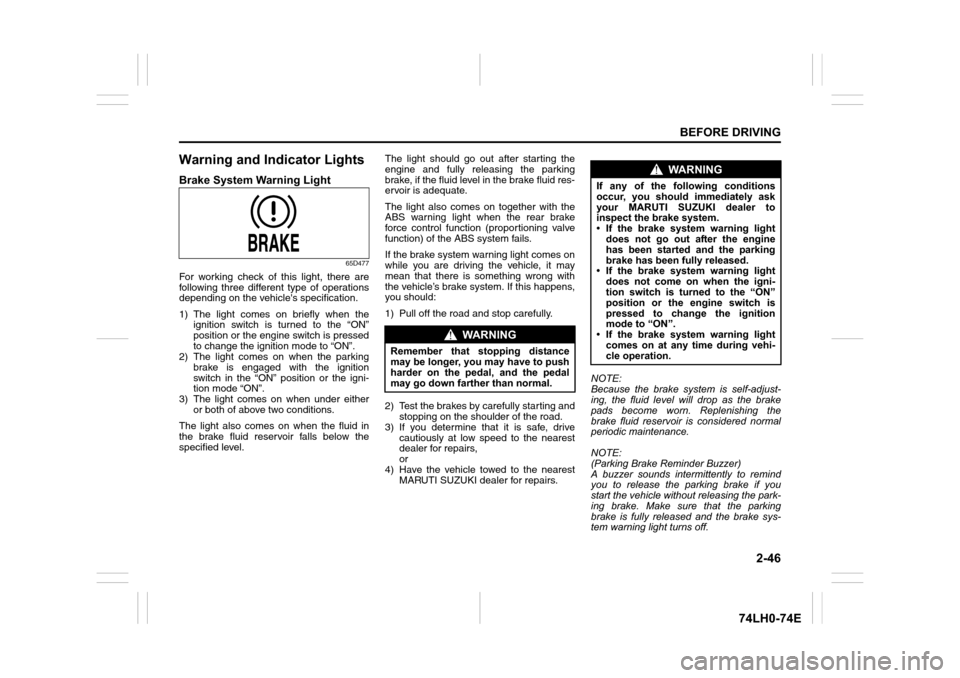
Brake System Warning Light
65D477
For working check of this light, there are
following three different type of operations
depending on the vehicle's specification.
1) The light comes on briefly when the
ignition switch is turned to the “ON”
position or the engine switch is pressed
to change the ignition mode to “ON”.
2) The light comes on when the parking
brake is engaged with the ignition
switch in the “ON” position or the igni-
tion mode “ON”.
3) The light comes on when under either
or both of above two conditions.
The light also comes on when the fluid in
the brake fluid reservoir falls below the
specified level.The light should go out after starting the
engine and fully releasing the parking
brake, if the fluid level in the brake fluid res-
ervoir is adequate.
The light also comes on together with the
ABS warning light when the rear brake
force control function (proportioning valve
function) of the ABS system fails.
If the brake system warning light comes on
while you are driving the vehicle, it may
mean that there is something wrong with
the vehicle’s brake system. If this happens,
you should:
1) Pull off the road and stop carefully.
2) Test the brakes by carefully starting and
stopping on the shoulder of the road.
3) If you determine that it is safe, drive
cautiously at low speed to the nearest
dealer for repairs,
or
4) Have the vehicle towed to the nearest
MARUTI SUZUKI dealer for repairs.NOTE:
Because the brake system is self-adjust-
ing, the fluid level will drop as the brake
pads become worn. Replenishing the
brake fluid reservoir is considered normal
periodic maintenance.
NOTE:
(Parking Brake Reminder Buzzer)
A buzzer sounds intermittently to remind
you to release the parking brake if you
start the vehicle without releasing the park-
ing brake. Make sure that the parking
brake is fully released and the brake sys-
tem warning light turns off.
WA R N I N G
Remember that stopping distance
may be longer, you may have to push
harder on the pedal, and the pedal
may go down farther than normal.
WA R N I N G
If any of the following conditions
occur, you should immediately ask
your MARUTI SUZUKI dealer to
inspect the brake system.
• If the brake system warning light
does not go out after the engine
has been started and the parking
brake has been fully released.
• If the brake system warning light
does not come on when the igni-
tion switch is turned to the “ON”
position or the engine switch is
pressed to change the ignition
mode to “ON”.
• If the brake system warning light
comes on at any time during vehi-
cle operation.
Page 66 of 336
2-47
BEFORE DRIVING
74LH0-74E
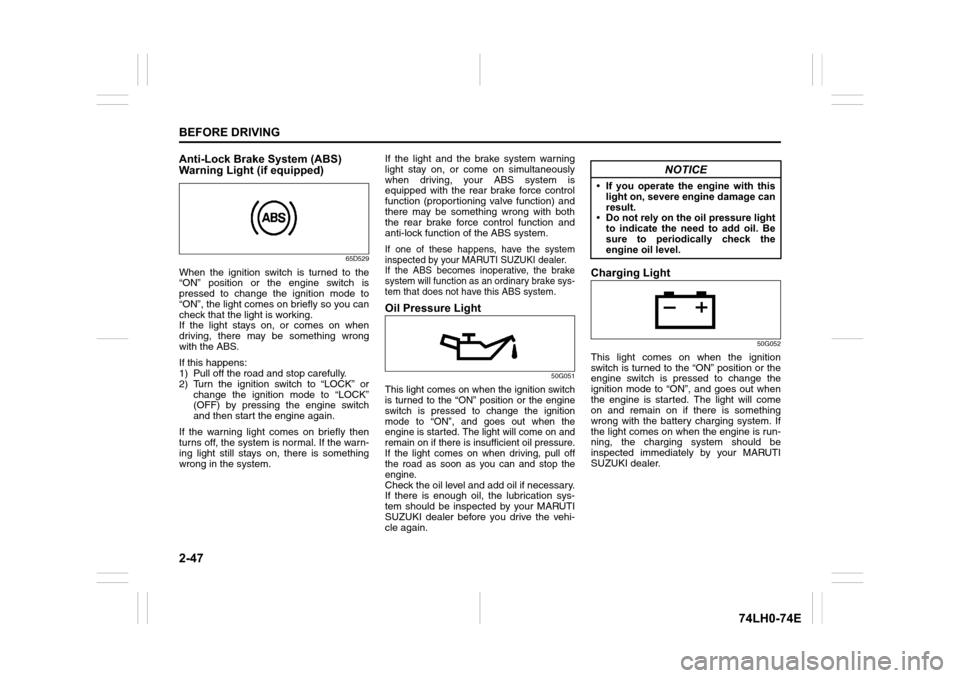
Anti-Lock Brake System (ABS)
Warning Light (if equipped)
65D529
When the ignition switch is turned to the
“ON” position or the engine switch is
pressed to change the ignition mode to
“ON”, the light comes on briefly so you can
check that the light is working.
If the light stays on, or comes on when
driving, there may be something wrong
with the ABS.
If this happens:
1) Pull off the road and stop carefully.
2) Turn the ignition switch to “LOCK” or
change the ignition mode to “LOCK”
(OFF) by pressing the engine switch
and then start the engine again.
If the warning light comes on briefly then
turns off, the system is normal. If the warn-
ing light still stays on, there is something
wrong in the system.If the light and the brake system warning
light stay on, or come on simultaneously
when driving, your ABS system is
equipped with the rear brake force control
function (proportioning valve function) and
there may be something wrong with both
the rear brake force control function and
anti-lock function of the ABS system.
If one of these happens, have the system
inspected by your MARUTI SUZUKI dealer.
If the ABS becomes inoperative, the brake
system will function as an ordinary brake sys-
tem that does not have this ABS system.
Oil Pressure Light
50G051
This light comes on when the ignition switch
is turned to the “ON” position or the engine
switch is pressed to change the ignition
mode to “ON”, and goes out when the
engine is started. The light will come on and
remain on if there is insufficient oil pressure.
If the light comes on when driving, pull off
the road as soon as you can and stop the
engine.
Check the oil level and add oil if necessary.
If there is enough oil, the lubrication sys-
tem should be inspected by your MARUTI
SUZUKI dealer before you drive the vehi-
cle again.
Charging Light
50G052
This light comes on when the ignition
switch is turned to the “ON” position or the
engine switch is pressed to change the
ignition mode to “ON”, and goes out when
the engine is started. The light will come
on and remain on if there is something
wrong with the battery charging system. If
the light comes on when the engine is run-
ning, the charging system should be
inspected immediately by your MARUTI
SUZUKI dealer.
NOTICE
• If you operate the engine with this
light on, severe engine damage can
result.
• Do not rely on the oil pressure light
to indicate the need to add oil. Be
sure to periodically check the
engine oil level.
Page 78 of 336
2-59
BEFORE DRIVING
74LH0-74E
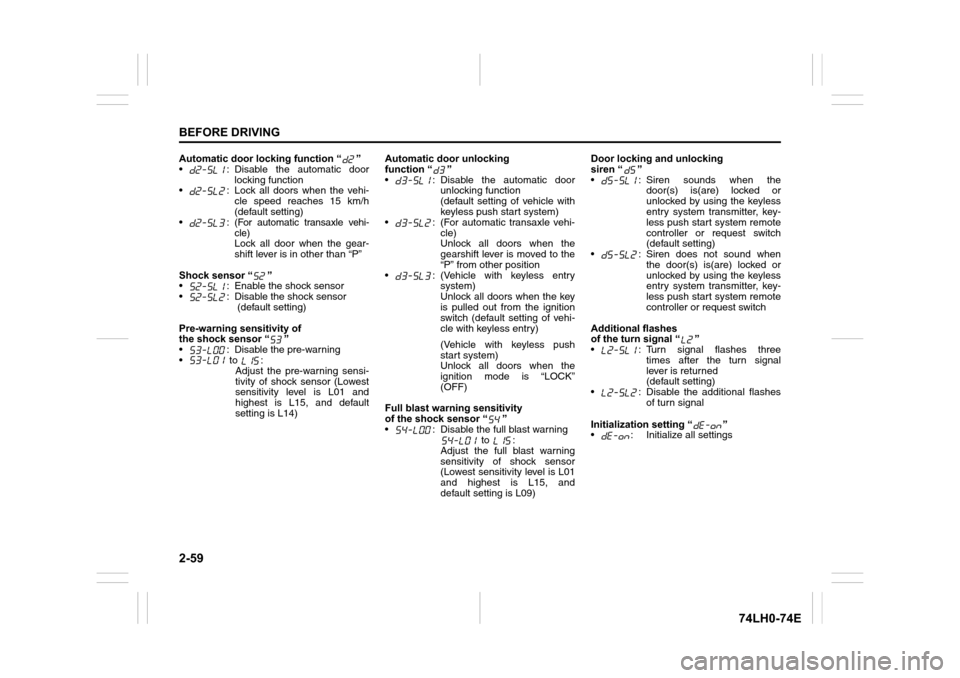
Automatic door locking function “ ”
• : Disable the automatic door
locking function
• : Lock all doors when the vehi-
cle speed reaches 15 km/h
(default setting)
•:
(For automatic transaxle vehi-
cle)
Lock all door when the gear-
shift lever is in other than “P”
Shock sensor “ ”
• : Enable the shock sensor
• : Disable the shock sensor
(default setting)
Pre-warning sensitivity of
the shock sensor “ ”
• : Disable the pre-warning
• to :
Adjust the pre-warning sensi-
tivity of shock sensor (Lowest
sensitivity level is L01 and
highest is L15, and default
setting is L14)Automatic door unlocking
function “ ”
• : Disable the automatic door
unlocking function
(default setting of vehicle with
keyless push start system)
• : (For automatic transaxle vehi-
cle)
Unlock all doors when the
gearshift lever is moved to the
“P” from other position
• : (Vehicle with keyless entry
system)
Unlock all doors when the key
is pulled out from the ignition
switch (default setting of vehi-
cle with keyless entry)
(Vehicle with keyless push
start system)
Unlock all doors when the
ignition mode is “LOCK”
(OFF)
Full blast warning sensitivity
of the shock sensor “ ”
• : Disable the full blast warning
to :
Adjust the full blast warning
sensitivity of shock sensor
(Lowest sensitivity level is L01
and highest is L15, and
default setting is L09)Door locking and unlocking
siren “ ”
• : Siren sounds when the
door(s) is(are) locked or
unlocked by using the keyless
entry system transmitter, key-
less push start system remote
controller or request switch
(default setting)
• : Siren does not sound when
the door(s) is(are) locked or
unlocked by using the keyless
entry system transmitter, key-
less push start system remote
controller or request switch
Additional flashes
of the turn signal “ ”
• : Turn signal flashes three
times after the turn signal
lever is returned
(default setting)
• : Disable the additional flashes
of turn signal
Initialization setting “ ”
• : Initialize all settings
Page 79 of 336
2-60
BEFORE DRIVING
74LH0-74E
76MH0017
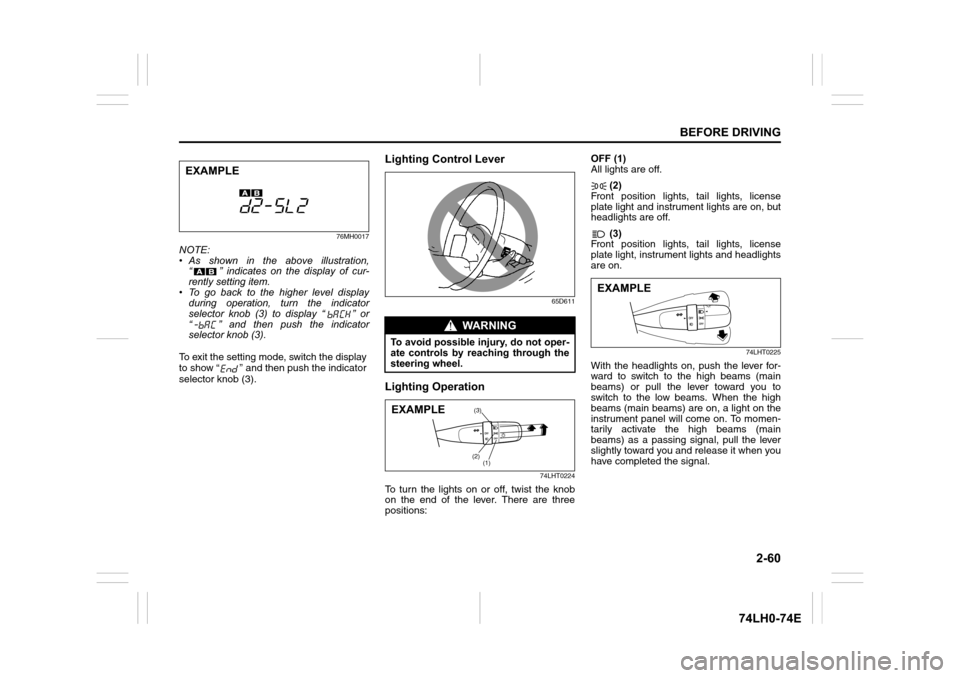
NOTE:
• As shown in the above illustration,
“ ” indicates on the display of cur-
rently setting item.
• To go back to the higher level display
during operation, turn the indicator
selector knob (3) to display “ ” or
“ ” and then push the indicator
selector knob (3).
To exit the setting mode, switch the display
to show “ ” and then push the indicator
selector knob (3).
Lighting Control Lever
65D611
Lighting Operation
74LHT0224
To turn the lights on or off, twist the knob
on the end of the lever. There are three
positions:OFF (1)
All lights are off.
(2)
Front position lights, tail lights, license
plate light and instrument lights are on, but
headlights are off.
(3)
Front position lights, tail lights, license
plate light, instrument lights and headlights
are on.
74LHT0225
With the headlights on, push the lever for-
ward to switch to the high beams (main
beams) or pull the lever toward you to
switch to the low beams. When the high
beams (main beams) are on, a light on the
instrument panel will come on. To momen-
tarily activate the high beams (main
beams) as a passing signal, pull the lever
slightly toward you and release it when you
have completed the signal.
EXAMPLE
WA R N I N G
To avoid possible injury, do not oper-
ate controls by reaching through the
steering wheel.
(3)
(2)
(1)EXAMPLE
EXAMPLE
Page 80 of 336
2-61
BEFORE DRIVING
74LH0-74E
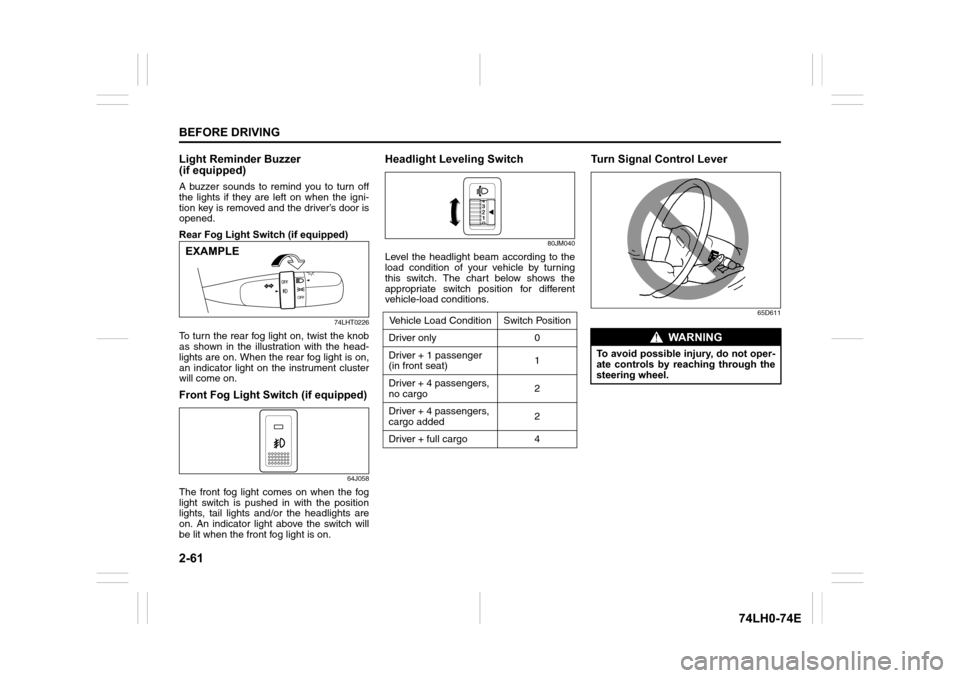
Light Reminder Buzzer
(if equipped)
A buzzer sounds to remind you to turn off
the lights if they are left on when the igni-
tion key is removed and the driver’s door is
opened.
Rear Fog Light Switch (if equipped)
74LHT0226
To turn the rear fog light on, twist the knob
as shown in the illustration with the head-
lights are on. When the rear fog light is on,
an indicator light on the instrument cluster
will come on.
Front Fog Light Switch (if equipped)
64J058
The front fog light comes on when the fog
light switch is pushed in with the position
lights, tail lights and/or the headlights are
on. An indicator light above the switch will
be lit when the front fog light is on.
Headlight Leveling Switch
80JM040
Level the headlight beam according to the
load condition of your vehicle by turning
this switch. The chart below shows the
appropriate switch position for different
vehicle-load conditions.
Turn Signal Control Lever
65D611
EXAMPLE
Vehicle Load Condition Switch Position
Driver only 0
Driver + 1 passenger
(in front seat)1
Driver + 4 passengers,
no cargo2
Driver + 4 passengers,
cargo added2
Driver + full cargo 4
WA R N I N G
To avoid possible injury, do not oper-
ate controls by reaching through the
steering wheel.