Lights SUZUKI SWIFT 2017 5.G Owner's Manual
[x] Cancel search | Manufacturer: SUZUKI, Model Year: 2017, Model line: SWIFT, Model: SUZUKI SWIFT 2017 5.GPages: 336, PDF Size: 6.24 MB
Page 90 of 336
3-5OPERATING YOUR VEHICLE
74LH0-74E
Manual transaxle – Provided you have the
keyless push start system remote control-
ler with you, the engine automatically
starts when you press the engine switch to
select this ignition mode after shifting to
“N” (Neutral) and depressing the brake and
clutch pedals.
Auto Gear Shift – Provided you have the
keyless push start system remote control-
ler with you, the engine automatically
starts when you press the engine switch to
select this ignition mode after placing the
gearshift lever in the “N” position and
depressing the brake pedal.
NOTE:
You do not need to keep the engine switch
pressed to start the engine.
NOTE:
The steering lock may not be released if
some load is acting on the steering
wheel. If this happens, turn the steering
wheel to the right or left to relieve it from
the load before you press the engineswitch again to change to the desired
ignition mode.
In the presence of strong radio signals or
noise, you may not be able to change
the ignition mode to “ACC” or “ON” or to
start the engine using the engine switch.
Keyless Push Start System
(if equipped)Provided the keyless push start system
remote controller is within the “interior work-
able area” (refer to the related explanation
in this section), you can use the engine
switch for starting the engine and selecting
an ignition mode (“ACC” or “ON”). In addi-
tion, the following functions can be used: Keyless entry function. Refer to “Keyless
Push Start System Remote Controller” in the
“BEFORE DRIVING” section for details. Locking and unlocking doors using a
request switch. Refer to “Keyless Push
Start System Remote Controller” in the
“BEFORE DRIVING” section for details.
Immobilizer (anti-theft) function. Refer to
“Immobilizer System” in the “BEFORE
DRIVING” section for details.
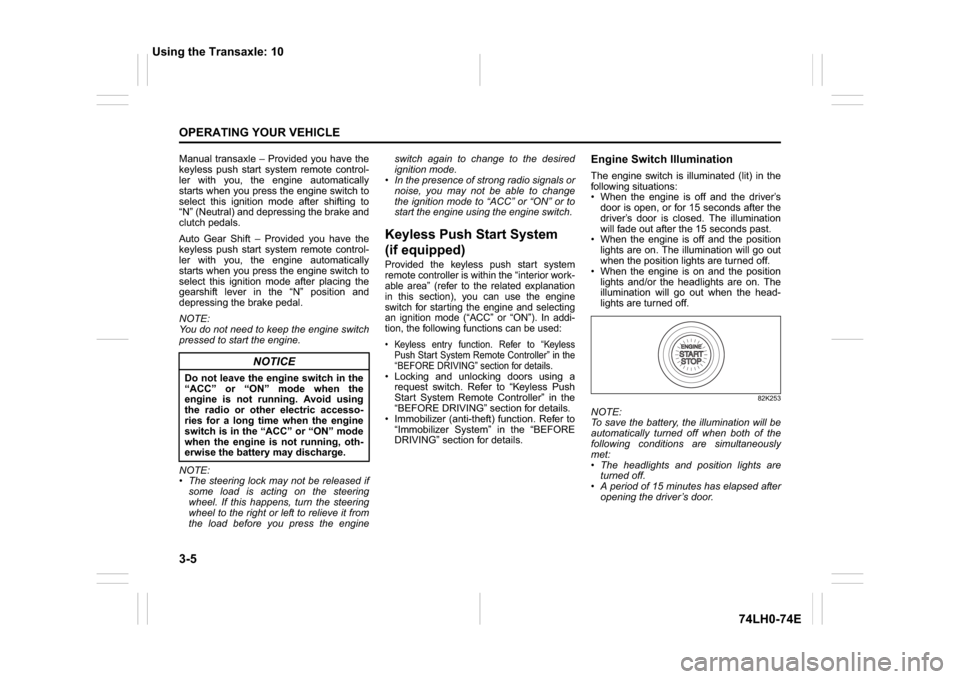
Engine Switch IlluminationThe engine switch is illuminated (lit) in the
following situations:
When the engine is off and the driver’s
door is open, or for 15 seconds after the
driver’s door is closed. The illumination
will fade out after the 15 seconds past.
When the engine is off and the position
lights are on. The illumination will go out
when the position lights are turned off.
When the engine is on and the position
lights and/or the headlights are on. The
illumination will go out when the head-
lights are turned off.
82K253
NOTE:
To save the battery, the illumination will be
automatically turned off when both of the
following conditions are simultaneously
met:
The headlights and position lights are
turned off.
A period of 15 minutes has elapsed after
opening the driver’s door.
NOTICE
Do not leave the engine switch in the
“ACC” or “ON” mode when the
engine is not running. Avoid using
the radio or other electric accesso-
ries for a long time when the engine
switch is in the “ACC” or “ON” mode
when the engine is not running, oth-
erwise the battery may discharge.
Using the Transaxle: 10
Page 91 of 336
3-6
OPERATING YOUR VEHICLE
74LH0-74E
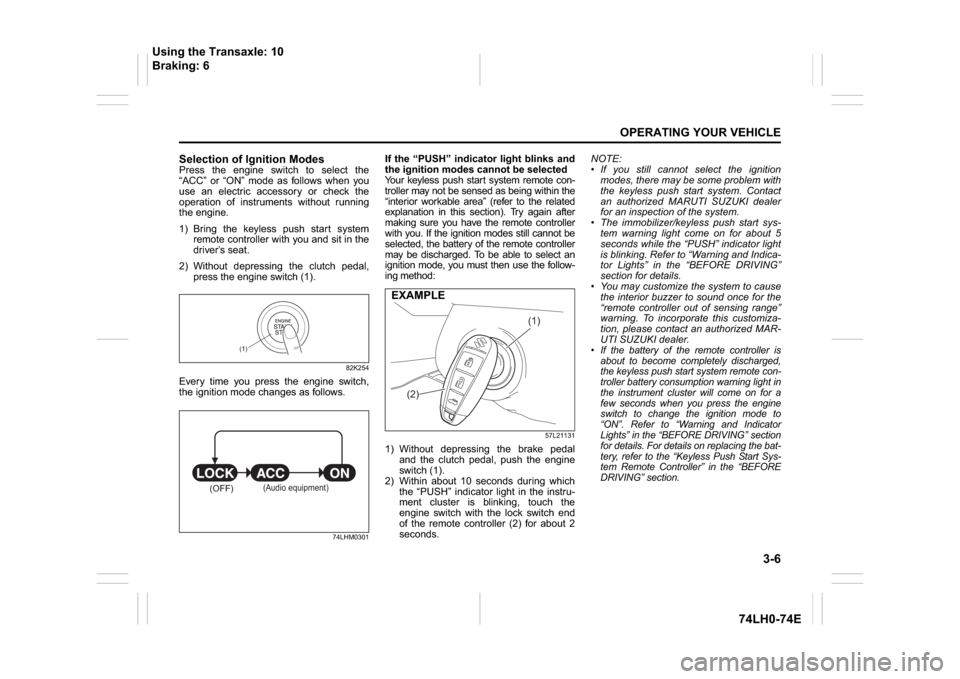
Selection of Ignition ModesPress the engine switch to select the
“ACC” or “ON” mode as follows when you
use an electric accessory or check the
operation of instruments without running
the engine.
1) Bring the keyless push start system
remote controller with you and sit in the
driver’s seat.
2) Without depressing the clutch pedal,
press the engine switch (1).
82K254
Every time you press the engine switch,
the ignition mode changes as follows.
74LHM0301
If the “PUSH” indicator light blinks and
the ignition modes cannot be selected
Your keyless push start system remote con-
troller may not be sensed as being within the
“interior workable area” (refer to the related
explanation in this section). Try again after
making sure you have the remote controller
with you. If the ignition modes still cannot be
selected, the battery of the remote controller
may be discharged. To be able to select an
ignition mode, you must then use the follow-
ing method:
57L21131
1) Without depressing the brake pedal
and the clutch pedal, push the engine
switch (1).
2) Within about 10 seconds during which
the “PUSH” indicator light in the instru-
ment cluster is blinking, touch the
engine switch with the lock switch end
of the remote controller (2) for about 2
seconds.NOTE:
If you still cannot select the ignition
modes, there may be some problem with
the keyless push start system. Contact
an authorized MARUTI SUZUKI dealer
for an inspection of the system.
The immobilizer/keyless push start sys-
tem warning light come on for about 5
seconds while the “PUSH” indicator light
is blinking. Refer to “Warning and Indica-
tor Lights” in the “BEFORE DRIVING”
section for details.
You may customize the system to cause
the interior buzzer to sound once for the
“remote controller out of sensing range”
warning. To incorporate this customiza-
tion, please contact an authorized MAR-
UTI SUZUKI dealer.
If the battery of the remote controller is
about to become completely discharged,
the keyless push start system remote con-
troller battery consumption warning light in
the instrument cluster will come on for a
few seconds when you press the engine
switch to change the ignition mode to
“ON”. Refer to “Warning and Indicator
Lights” in the “BEFORE DRIVING” section
for details. For details on replacing the bat-
tery, refer to the “Keyless Push Start Sys-
tem Remote Controller” in the “BEFORE
DRIVING” section.
(1)
(OFF)
(Audio equipment)
(1)
(2)
EXAMPLE
Using the Transaxle: 10
Braking: 6
Page 92 of 336
3-7OPERATING YOUR VEHICLE
74LH0-74E
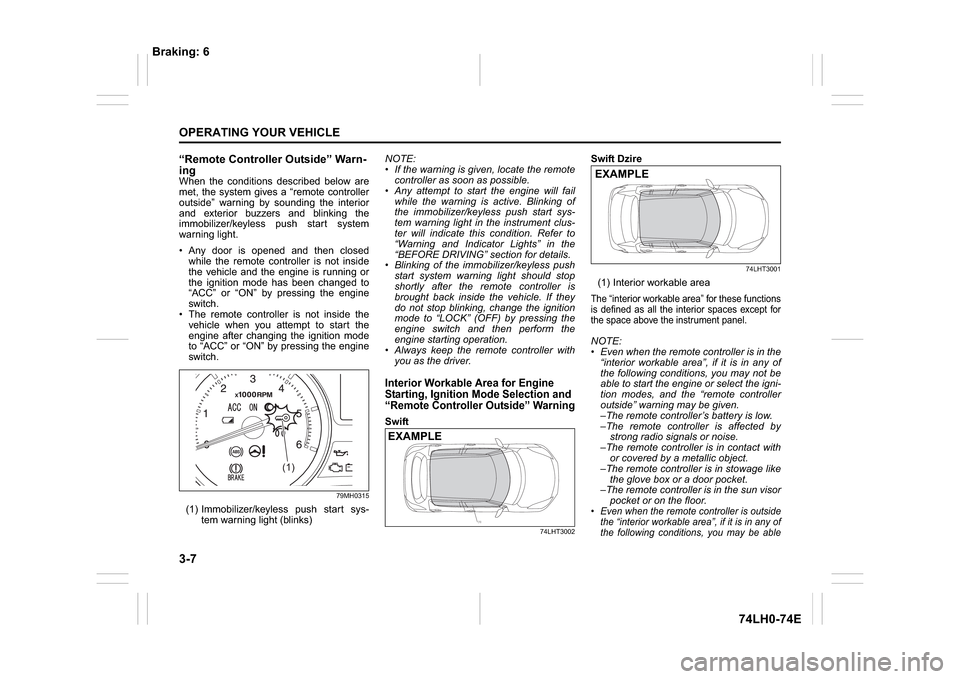
“Remote Controller Outside” Warn-
ingWhen the conditions described below are
met, the system gives a “remote controller
outside” warning by sounding the interior
and exterior buzzers and blinking the
immobilizer/keyless push start system
warning light.
Any door is opened and then closed
while the remote controller is not inside
the vehicle and the engine is running or
the ignition mode has been changed to
“ACC” or “ON” by pressing the engine
switch.
The remote controller is not inside the
vehicle when you attempt to start the
engine after changing the ignition mode
to “ACC” or “ON” by pressing the engine
switch.
79MH0315
(1) Immobilizer/keyless push start sys-
tem warning light (blinks)NOTE:
If the warning is given, locate the remote
controller as soon as possible.
Any attempt to start the engine will fail
while the warning is active. Blinking of
the immobilizer/keyless push start sys-
tem warning light in the instrument clus-
ter will indicate this condition. Refer to
“Warning and Indicator Lights” in the
“BEFORE DRIVING” section for details.
Blinking of the immobilizer/keyless push
start system warning light should stop
shortly after the remote controller is
brought back inside the vehicle. If they
do not stop blinking, change the ignition
mode to “LOCK” (OFF) by pressing the
engine switch and then perform the
engine starting operation.
Always keep the remote controller with
you as the driver.
Interior Workable Area for Engine
Starting, Ignition Mode Selection and
“Remote Controller Outside” WarningSwift
74LHT3002
Swift Dzire
74LHT3001
(1) Interior workable areaThe “interior workable area” for these functions
is defined as all the interior spaces except for
the space above the instrument panel.NOTE:
Even when the remote controller is in the
“interior workable area”, if it is in any of
the following conditions, you may not be
able to start the engine or select the igni-
tion modes, and the “remote controller
outside” warning may be given.
–The remote controller’s battery is low.
–The remote controller is affected by
strong radio signals or noise.
–The remote controller is in contact with
or covered by a metallic object.
–The remote controller is in stowage like
the glove box or a door pocket.
–The remote controller is in the sun visor
pocket or on the floor. Even when the remote controller is outside
the “interior workable area”, if it is in any of
the following conditions, you may be able
(1)
(1)
EXAMPLE
EXAMPLE
Braking: 6
Page 97 of 336
3-12
OPERATING YOUR VEHICLE
74LH0-74E
NOTE:
You do not need to keep the engine
switch pressed to start the engine.
The engine of a manual transaxle vehi-
cle will not start unless the clutch pedal
is depressed.
You should turn off such loads as the
headlights and air conditioning system to
facilitate starting of the engine.
Even if you fail to start the engine, the
starter motor will stop turning automati-
cally after a short time. After the starter
motor has stopped or if there is some
problem with the system, the starter
motor will rotate only while the engine
switch is being pressed.
Stopping the engine Depress the engine switch to stop the
engine after the vehicle stopped com-
pletely.
In case of emergency, you can stop the
engine by quickly pushing the engine
switch more than 3 times, or pushing
and holding the engine switch more than
2 seconds while the vehicle in motion.
NOTE:
Except in emergency, do not stop the
engine while the vehicle in motion.
The steering and braking operation will
require more efforts when the engine
stopped.
Refer to “Braking” in this section.
If the engine has been stopped and
stayed as it as for while after the engine
was stopped unexpectedly or was raced
before stopped, a clicking sound may be
heard from around the engine when
engine restarted. This is not a malfunc-
tion. In this case, always let the engine
idle before stop it.
Starting a Cold and Warm Engine(For Petrol Engine Model)
With your foot off the accelerator pedal,
crank the engine by pressing the engine
switch to change the ignition mode to
“START”.After pressing the engine switch to change the
ignition mode to “START”, the starter cranks
the engine for about 12 seconds before it can
start the engine. If the engine fails to start at
the first attempt, wait about 15 seconds, then
try again while keeping the engine switch
pressed while pressing down the accelerator
pedal to 1/3 of its travel. Release the accelera-
tor pedal when the engine starts.If the engine still does not start, try holding
the accelerator pedal all the way to the
floor while cranking. This should clear the
engine if it is flooded.
If you are unable to start the engine using
this procedure, consult your MARUTI
SUZUKI dealer.
NOTICE
Do not depress the accelerator
during the engine starting proce-
dure. If the engine does not respond
when you try to start it with the
engine switch or if the engine
switch repeats cycling through the
“LOCK”(OFF) - “ACC” - “ON” mode,
the vehicle battery may be dis-
charged. Check the voltage of the
vehicle battery before trying again.
NOTICE
Avoid stopping the engine while driv-
ing.
NOTICE
Do not crank the engine for more
than 12 seconds at a time.
If the engine doesn’t start on the first
try, wait about 15 seconds before try-
ing again.
Page 123 of 336
4-6
DRIVING TIPS
67LH3-74E
74LHM0408
Do’s and Dont’s for Safe
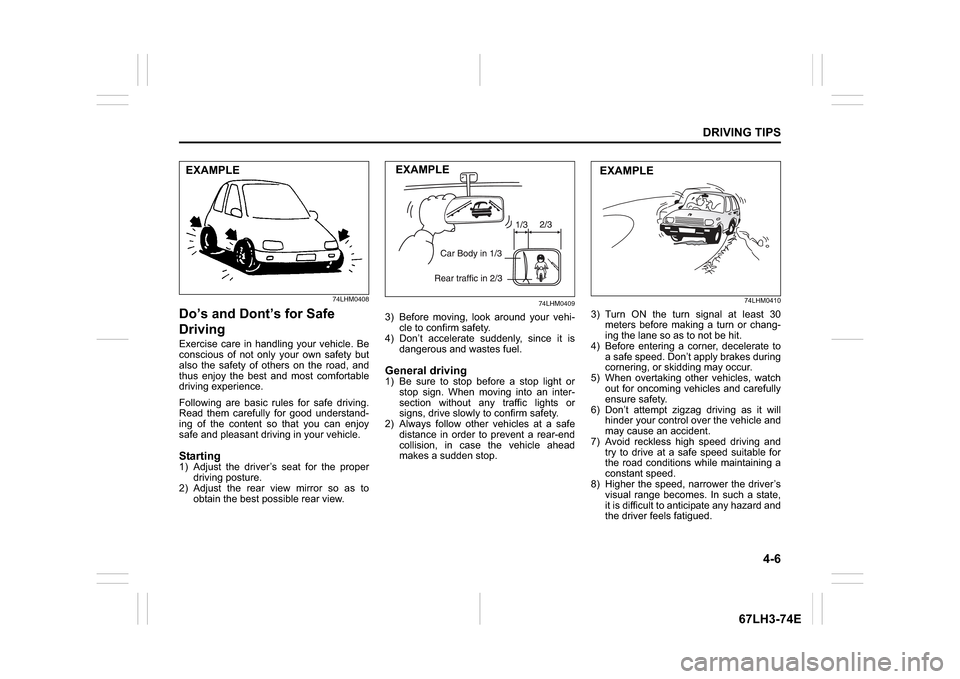
DrivingExercise care in handling your vehicle. Be
conscious of not only your own safety but
also the safety of others on the road, and
thus enjoy the best and most comfortable
driving experience.
Following are basic rules for safe driving.
Read them carefully for good understand-
ing of the content so that you can enjoy
safe and pleasant driving in your vehicle.Starting1) Adjust the driver’s seat for the proper driving posture.
2) Adjust the rear view mirror so as to obtain the best po ssible rear view.
74LHM0409
3) Before moving, look around your vehi-
cle to confirm safety.
4) Don’t accelerate suddenly, since it is
dangerous and wastes fuel.General driving1) Be sure to stop before a stop light orstop sign. When moving into an inter-
section without any traffic lights or
signs, drive slowly to confirm safety.
2) Always follow other vehicles at a safe
distance in order to prevent a rear-end
collision, in case the vehicle ahead
makes a sudden stop.
74LHM0410
3) Turn ON the turn signal at least 30meters before making a turn or chang-
ing the lane so as to not be hit.
4) Before entering a corner, decelerate to a safe speed. Don’t apply brakes during
cornering, or skidding may occur.
5) When overtaking other vehicles, watch out for oncoming vehicles and carefully
ensure safety.
6) Don’t attempt zigzag driving as it will hinder your control over the vehicle and
may cause an accident.
7) Avoid reckless high speed driving and try to drive at a safe speed suitable for
the road conditions while maintaining a
constant speed.
8) Higher the speed, narrower the driver’s visual range becomes. In such a state,
it is difficult to anticipate any hazard and
the driver feels fatigued.
EXAMPLE
EXAMPLE
EXAMPLE
Page 125 of 336
4-8
DRIVING TIPS
67LH3-74E
Night time driving
74LHM0414
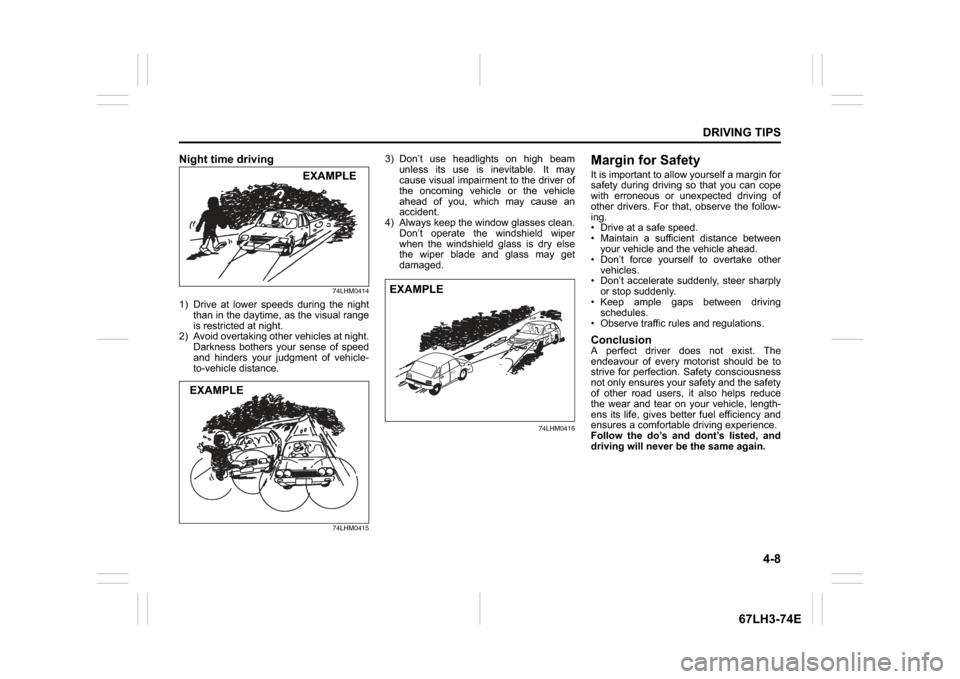
1) Drive at lower speeds during the nightthan in the daytime, as the visual range
is restricted at night.
2) Avoid overtaking other vehicles at night.
Darkness bothers your sense of speed
and hinders your judgment of vehicle-
to-vehicle distance.
74LHM0415
3) Don’t use headlights on high beamunless its use is inevitable. It may
cause visual impairment to the driver of
the oncoming vehicle or the vehicle
ahead of you, which may cause an
accident.
4) Always keep the window glasses clean.
Don’t operate the windshield wiper
when the windshield glass is dry else
the wiper blade and glass may get
damaged.
74LHM0416
Margin for SafetyIt is important to allow yourself a margin for
safety during driving so that you can cope
with erroneous or unexpected driving of
other drivers. For that, observe the follow-
ing.
Drive at a safe speed.
Maintain a sufficient distance betweenyour vehicle and the vehicle ahead.
Don’t force yourself to overtake other
vehicles.
Don’t accelerate suddenly, steer sharply or stop suddenly.
Keep ample gaps between driving schedules.
Observe traffic rules and regulations.ConclusionA perfect driver does not exist. The
endeavour of every motorist should be to
strive for perfection. Safety consciousness
not only ensures your safety and the safety
of other road users, it also helps reduce
the wear and tear on your vehicle, length-
ens its life, gives better fuel efficiency and
ensures a comfortable driving experience.
Follow the do’s and dont’s listed, and
driving will never be the same again.
EXAMPLE
EXAMPLE
EXAMPLE
Page 186 of 336
6-3VEHICLE LOADING AND TOWING
74LH0-74E
Additional Trailer Towing Warnings
WA R N I N G
Connect trailer lights and hook up
safety chains every time you tow.
NOTICE
Because towing a trailer puts addi-
tional stress on your vehicle, more
frequent maintenance will be
required than under normal driving
conditions.
WA R N I N G
Your vehicle will handle differently
when towing a trailer. For your safety
and the safety of others, you should
observe the following precautions:
Practice turning, stopping, and
reversing before you begin towing
in traffic. Do not tow in traffic until
you are confident that you can han-
dle the vehicle and trailer safely.
Never exceed towing speed limits
or 80 km/h (50 mph), whichever is
lower.
Never drive at a speed that causes
shaking or swaying of the trailer. If
you notice even the slightest sign
of shaking or swaying, slow down.
When roads are wet, slippery or
rough, drive at a slower speed than
you would on dry, smooth roads.
Failure to slow down when road
conditions are bad can result in
loss of control.
Always have someone guide you
when reversing.
Allow adequate stopping distance.
Stopping distance is increased
when you tow a trailer. For each 16
(Continued)
WA R N I N G
(Continued)
km/h (10 mph) of speed, allow at
least one vehicle and trailer length
between you and the vehicle ahead.
Follow at a greater distance if roads
are wet or slippery.
If the trailer has over-run brakes,
apply the brakes gradually to avoid
snatching caused by the trailer
wheels locking.
Slow down before corners and
maintain a steady speed while cor-
nering. Deceleration or accelera-
tion while cornering can result in
loss of control. Remember that a
larger than normal turning radius is
needed because the trailer wheels
will be closer than vehicle wheels
to the inside of the turn.
Avoid sudden acceleration and
stopping of the vehicle. Do not
make quick maneuvers unless they
are necessary.
Slow down in cross winds and be
prepared for gusts of wind from
large passing vehicles.
(Continued)
Page 215 of 336
7-24
INSPECTION AND MAINTENANCE
74LH0-74E
81A283
Bulb Replacement
(16) – Blank
(17) 15 A Horn
(18) 10 A Stop light
(19) 10 A Air bag
(20) 10 A Back-up light
(21) 15 A Rear wiper / Washer
(22) 25 A Front wiper
(23) 7.5 A Dome light
(24) – Blank
(25) 7.5 A RR fog lamp
(26) – Blank
(27) 7.5 A Ignition-1 signal
(28) 15 A Radio 2
(29) – Blank
(30) 15 A Radio
(31) 10 A Tail lamp
(32) 20 A D/L
(33) – Blank
(34) 10 A Meter
(35) 7.5 A Ignition-2 signal
(36) – Blank
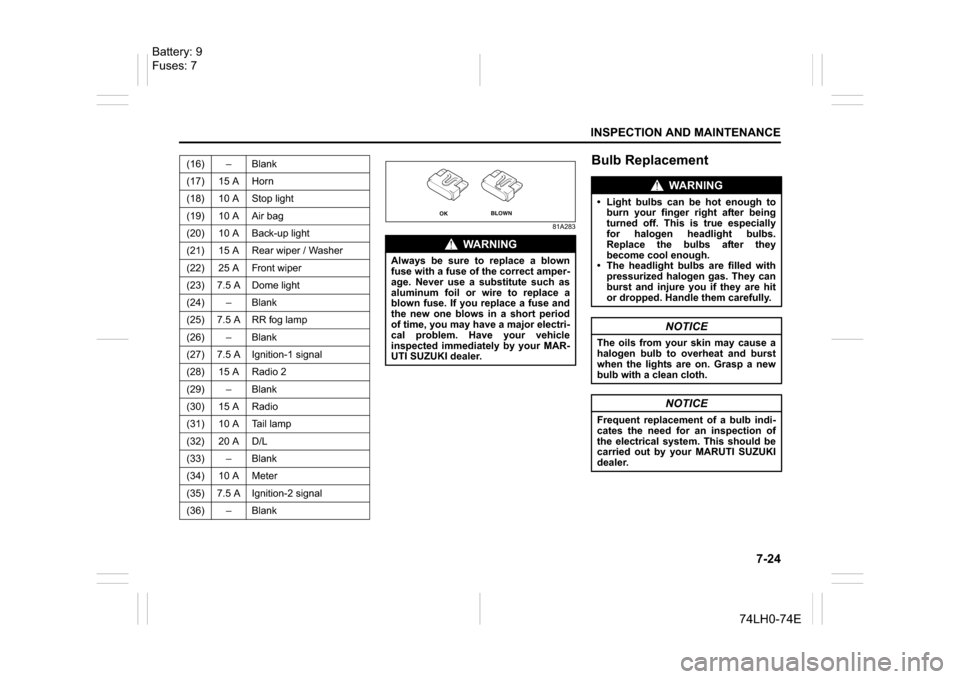
WA R N I N G
Always be sure to replace a blown
fuse with a fuse of the correct amper-
age. Never use a substitute such as
aluminum foil or wire to replace a
blown fuse. If you replace a fuse and
the new one blows in a short period
of time, you may have a major electri-
cal problem. Have your vehicle
inspected immediately by your MAR-
UTI SUZUKI dealer.
OK
BLOWN
WA R N I N G
Light bulbs can be hot enough to
burn your finger right after being
turned off. This is true especially
for halogen headlight bulbs.
Replace the bulbs after they
become cool enough.
The headlight bulbs are filled with
pressurized halogen gas. They can
burst and injure you if they are hit
or dropped. Handle them carefully.
NOTICE
The oils from your skin may cause a
halogen bulb to overheat and burst
when the lights are on. Grasp a new
bulb with a clean cloth.
NOTICE
Frequent replacement of a bulb indi-
cates the need for an inspection of
the electrical system. This should be
carried out by your MARUTI SUZUKI
dealer.
Battery: 9
Fuses: 7
Page 217 of 336
7-26
INSPECTION AND MAINTENANCE
74LH0-74E
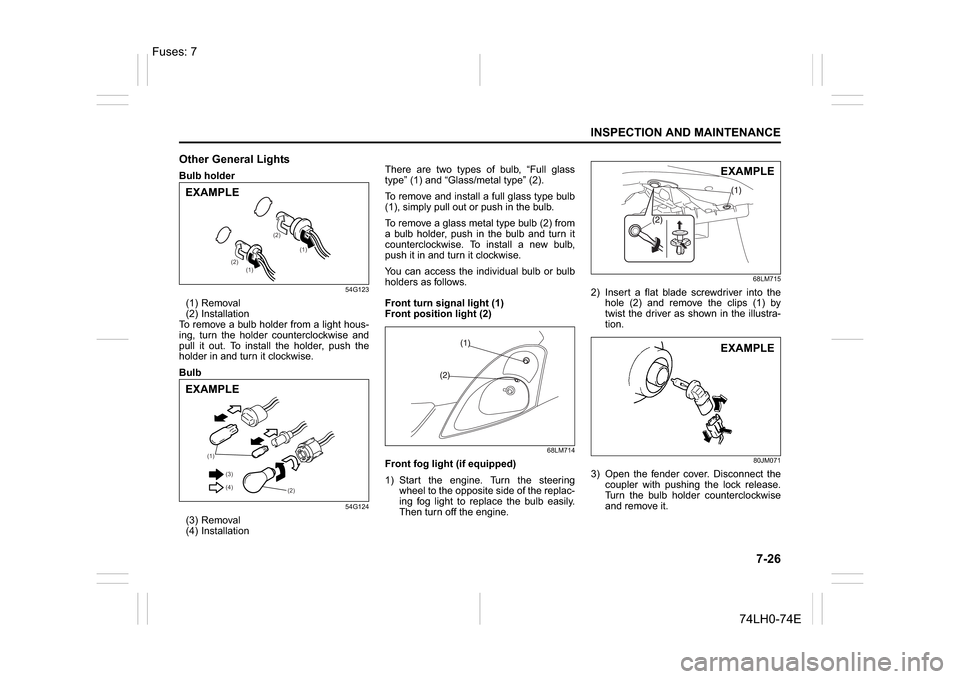
Other General LightsBulb holder
54G123
(1) Removal
(2) Installation
To remove a bulb holder from a light hous-
ing, turn the holder counterclockwise and
pull it out. To install the holder, push the
holder in and turn it clockwise.
Bulb
54G124
(3) Removal
(4) InstallationThere are two types of bulb, “Full glass
type” (1) and “Glass/metal type” (2).
To remove and install a full glass type bulb
(1), simply pull out or push in the bulb.
To remove a glass metal type bulb (2) from
a bulb holder, push in the bulb and turn it
counterclockwise. To install a new bulb,
push it in and turn it clockwise.
You can access the individual bulb or bulb
holders as follows.
Front turn signal light (1)
Front position light (2)
68LM714
Front fog light (if equipped)
1) Start the engine. Turn the steering
wheel to the opposite side of the replac-
ing fog light to replace the bulb easily.
Then turn off the engine.
68LM715
2) Insert a flat blade screwdriver into the
hole (2) and remove the clips (1) by
twist the driver as shown in the illustra-
tion.
80JM071
3) Open the fender cover. Disconnect the
coupler with pushing the lock release.
Turn the bulb holder counterclockwise
and remove it.
(1)
(1) (2)(2)
EXAMPLE
(1)
(2) (3)
(4)
EXAMPLE
EXAMPLEEXAMPLE
Fuses: 7
Page 228 of 336
8-5EMERGENCY SERVICE
74LH0-74E
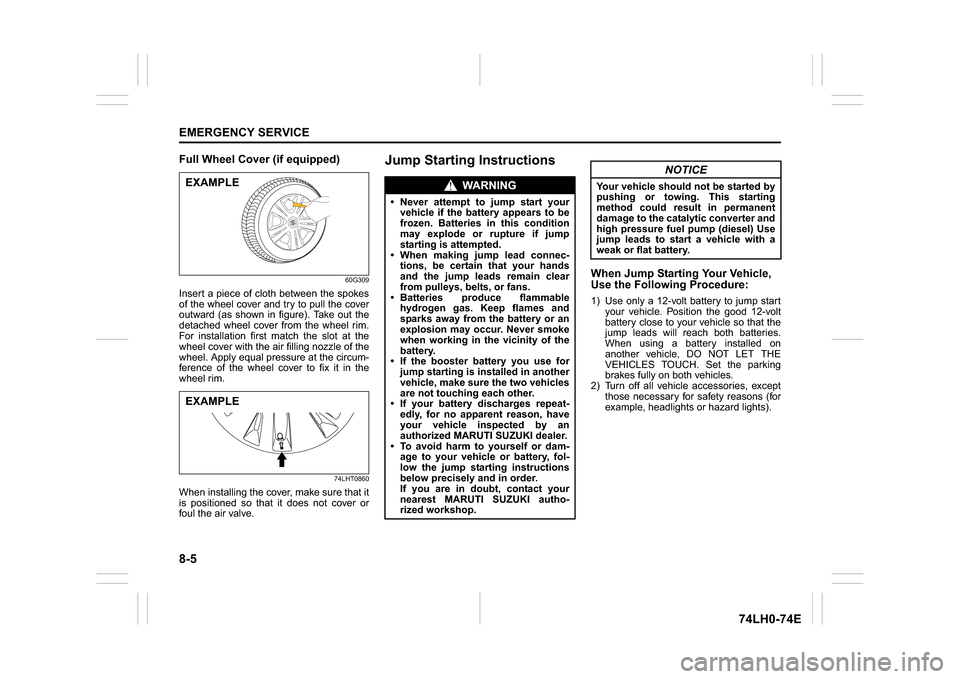
Full Wheel Cover (if equipped)
60G309
Insert a piece of cloth between the spokes
of the wheel cover and try to pull the cover
outward (as shown in figure). Take out the
detached wheel cover from the wheel rim.
For installation first match the slot at the
wheel cover with the air filling nozzle of the
wheel. Apply equal pressure at the circum-
ference of the wheel cover to fix it in the
wheel rim.
74LHT0860
When installing the cover, make sure that it
is positioned so that it does not cover or
foul the air valve.
Jump Starting Instructions
When Jump Starting Your Vehicle,
Use the Following Procedure:1) Use only a 12-volt battery to jump start
your vehicle. Position the good 12-volt
battery close to your vehicle so that the
jump leads will reach both batteries.
When using a battery installed on
another vehicle, DO NOT LET THE
VEHICLES TOUCH. Set the parking
brakes fully on both vehicles.
2) Turn off all vehicle accessories, except
those necessary for safety reasons (for
example, headlights or hazard lights).
EXAMPLEEXAMPLE
WA R N I N G
Never attempt to jump start your
vehicle if the battery appears to be
frozen. Batteries in this condition
may explode or rupture if jump
starting is attempted.
When making jump lead connec-
tions, be certain that your hands
and the jump leads remain clear
from pulleys, belts, or fans.
Batteries produce flammable
hydrogen gas. Keep flames and
sparks away from the battery or an
explosion may occur. Never smoke
when working in the vicinity of the
battery.
If the booster battery you use for
jump starting is installed in another
vehicle, make sure the two vehicles
are not touching each other.
If your battery discharges repeat-
edly, for no apparent reason, have
your vehicle inspected by an
authorized MARUTI SUZUKI dealer.
To avoid harm to yourself or dam-
age to your vehicle or battery, fol-
low the jump starting instructions
below precisely and in order.
If you are in doubt, contact your
nearest MARUTI SUZUKI autho-
rized workshop.
NOTICE
Your vehicle should not be started by
pushing or towing. This starting
method could result in permanent
damage to the catalytic converter and
high pressure fuel pump (diesel) Use
jump leads to start a vehicle with a
weak or flat battery.