acc SUZUKI SWIFT 2017 5.G Owner's Manual
[x] Cancel search | Manufacturer: SUZUKI, Model Year: 2017, Model line: SWIFT, Model: SUZUKI SWIFT 2017 5.GPages: 336, PDF Size: 6.24 MB
Page 54 of 336
2-35
BEFORE DRIVING
74LH0-74E
65D609
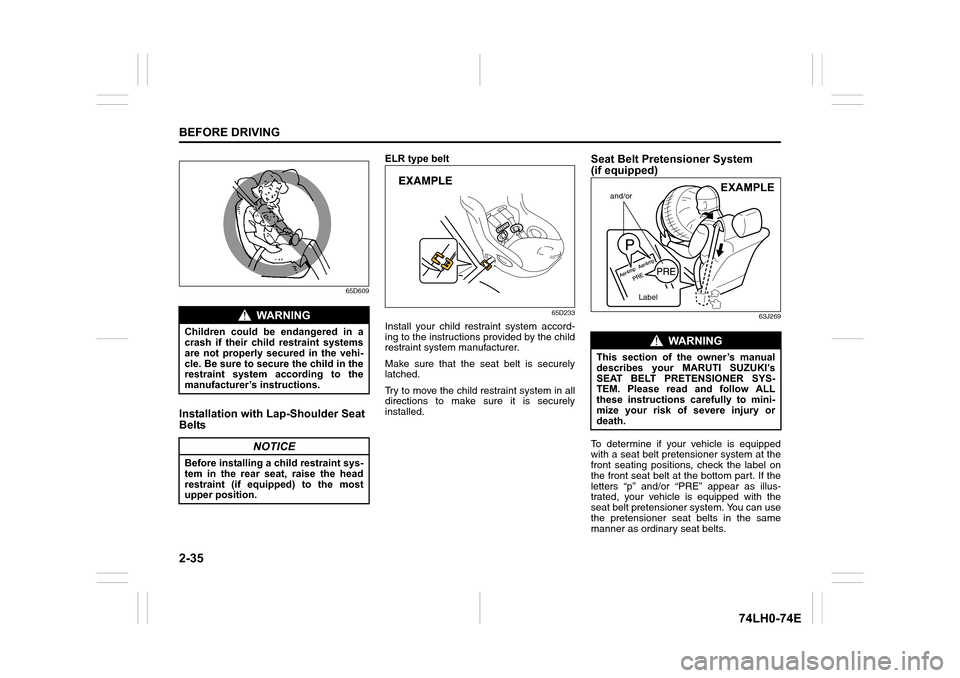
Installation with Lap-Shoulder Seat
Belts
ELR type belt
65D233
Install your child restraint system accord-
ing to the instructions provided by the child
restraint system manufacturer.
Make sure that the seat belt is securely
latched.
Try to move the child restraint system in all
directions to make sure it is securely
installed.
Seat Belt Pretensioner System
(if equipped)
63J269
To determine if your vehicle is equipped
with a seat belt pretensioner system at the
front seating positions, check the label on
the front seat belt at the bottom part. If the
letters “p” and/or “PRE” appear as illus-
trated, your vehicle is equipped with the
seat belt pretensioner system. You can use
the pretensioner seat belts in the same
manner as ordinary seat belts.
WA R N I N G
Children could be endangered in a
crash if their child restraint systems
are not properly secured in the vehi-
cle. Be sure to secure the child in the
restraint system according to the
manufacturer’s instructions.
NOTICE
Before installing a child restraint sys-
tem in the rear seat, raise the head
restraint (if equipped) to the most
upper position.
WA R N I N G
This section of the owner’s manual
describes your MARUTI SUZUKI’s
SEAT BELT PRETENSIONER SYS-
TEM. Please read and follow ALL
these instructions carefully to mini-
mize your risk of severe injury or
death.
and/or
Label
EXAMPLE
Page 58 of 336
2-39
BEFORE DRIVING
74LH0-74E
“AIR BAG” light (If equipped)
63J030
If the “AIR BAG” light on the instrument
cluster does not blink or come on when the
ignition switch is first turned to the “ON”
position, or the ignition mode is first
changed to “ON” or the “AIR BAG” light
stays on, or comes on while driving, the air
bag system (or the seat belt pretensioner
system) may not work properly. Have the
air bag system inspected by an authorized
MARUTI SUZUKI dealer as soon as possi-
ble.
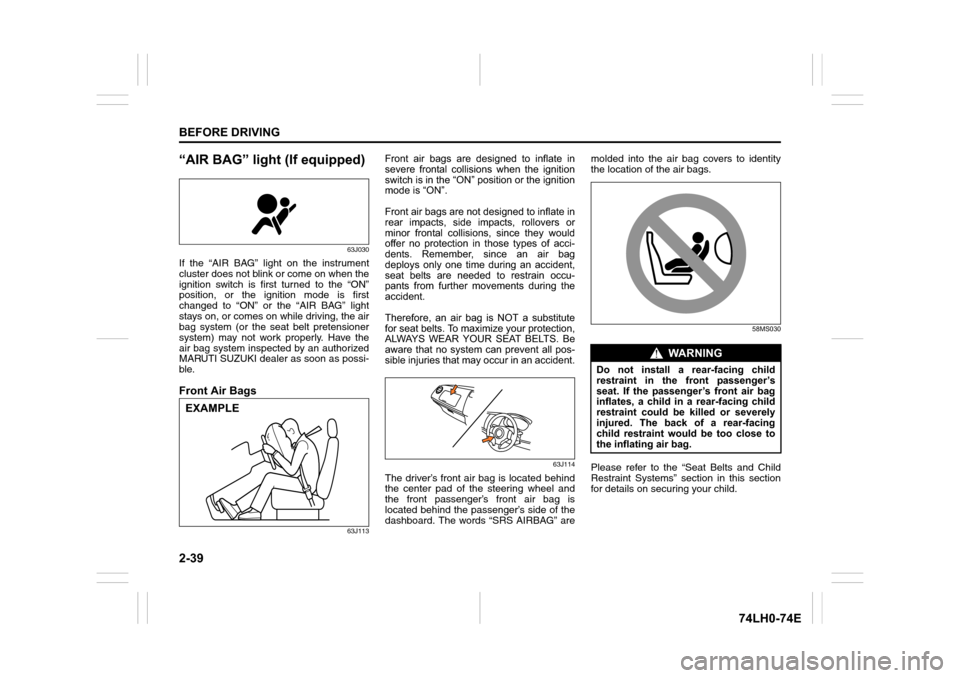
Front Air Bags
63J113
Front air bags are designed to inflate in
severe frontal collisions when the ignition
switch is in the “ON” position or the ignition
mode is “ON”.
Front air bags are not designed to inflate in
rear impacts, side impacts, rollovers or
minor frontal collisions, since they would
offer no protection in those types of acci-
dents. Remember, since an air bag
deploys only one time during an accident,
seat belts are needed to restrain occu-
pants from further movements during the
accident.
Therefore, an air bag is NOT a substitute
for seat belts. To maximize your protection,
ALWAYS WEAR YOUR SEAT BELTS. Be
aware that no system can prevent all pos-
sible injuries that may occur in an accident.
63J114
The driver’s front air bag is located behind
the center pad of the steering wheel and
the front passenger’s front air bag is
located behind the passenger’s side of the
dashboard. The words “SRS AIRBAG” aremolded into the air bag covers to identity
the location of the air bags.
58MS030
Please refer to the “Seat Belts and Child
Restraint Systems” section in this section
for details on securing your child.
EXAMPLE
WA R N I N G
Do not install a rear-facing child
restraint in the front passenger’s
seat. If the passenger’s front air bag
inflates, a child in a rear-facing child
restraint could be killed or severely
injured. The back of a rear-facing
child restraint would be too close to
the inflating air bag.
Page 62 of 336
2-43
BEFORE DRIVING
74LH0-74E
Note that even though your vehicle may be
moderately damaged in a collision, the col-
lision may not have been severe enough to
trigger the air bags to inflate. If your vehicle
sustains ANY front-end or side damage,
have the air bag system inspected by an
authorized MARUTI SUZUKI dealer to
ensure it is in proper working order.
Your vehicle is equipped with a diagnostic
module which records information about
the air bag system if the air bags deploy in
a crash. The module records information
about overall system status, which sensors
activated the deployment.
Servicing the air bag systemIf the air bags inflate, have the air bags and
related components replaced by an autho-
rized MARUTI SUZUKI dealer as soon as
possible.
If your vehicle ever gets in deep water and
the driver’s floor is submerged, the air bag
controller could be damaged. If it does,
have the air bag system inspected by the
MARUTI SUZUKI dealer as soon as possi-
ble.
Special procedures are required for servic-
ing or replacing an air bag. For that reason,
only an authorized MARUTI SUZUKI
dealer should be allowed to service or
replace your air bags. Please remind any-
one who services your MARUTI SUZUKI
that it has air bags.Service on or around air bag components
or wiring must be performed only by an
authorized MARUTI SUZUKI dealer.
Improper service could result in unin-
tended air bag deployment or could render
the air bag inoperative. Either of these two
conditions may result in severe injury.
To prevent damage or unintended inflation
of the air bag system, be sure the battery
is disconnected and the ignition switch has
been in the “LOCK” position or the ignition
mode has been “LOCK” (OFF) for at least
90 seconds before performing any electri-
cal service work on your MARUTI SUZUKI.
Do not touch air bag system components
or wires. The wires are wrapped with yel-
low tape or yellow tubing, and the couplers
are yellow for easy identification.
Scrapping a vehicle that has an uninflated
air bag can be hazardous. Ask your dealer,
body repair shop or scrap yard for help
with disposal.
According to accident statistics, children
are safer when properly restrained on rear
seats than front passenger’s seat when-
ever possible, MARUTI SUZUKI recom-
mends that child restraint systems be
installed the rear seat.
WA R N I N G
• The driver should not lean over the
steering wheel. The front passenger
should not rest his or her body against
the dashboard, or otherwise get too
close to the dashboard. In these situa-
tions, the out-of-position occupant
would be too close to an inflating air
bag, and may suffer severe injury.
• Do not attach any objects to, or place
any objects over, the steering wheel or
dashboard. Do not place any objects
between the air bag and the driver or
front passenger. These objects may
interfere with air bag operation or may
be propelled by the air bag in the event
of a crash. Either of these conditions
may cause severe injury.
Page 69 of 336
2-50
BEFORE DRIVING
74LH0-74E
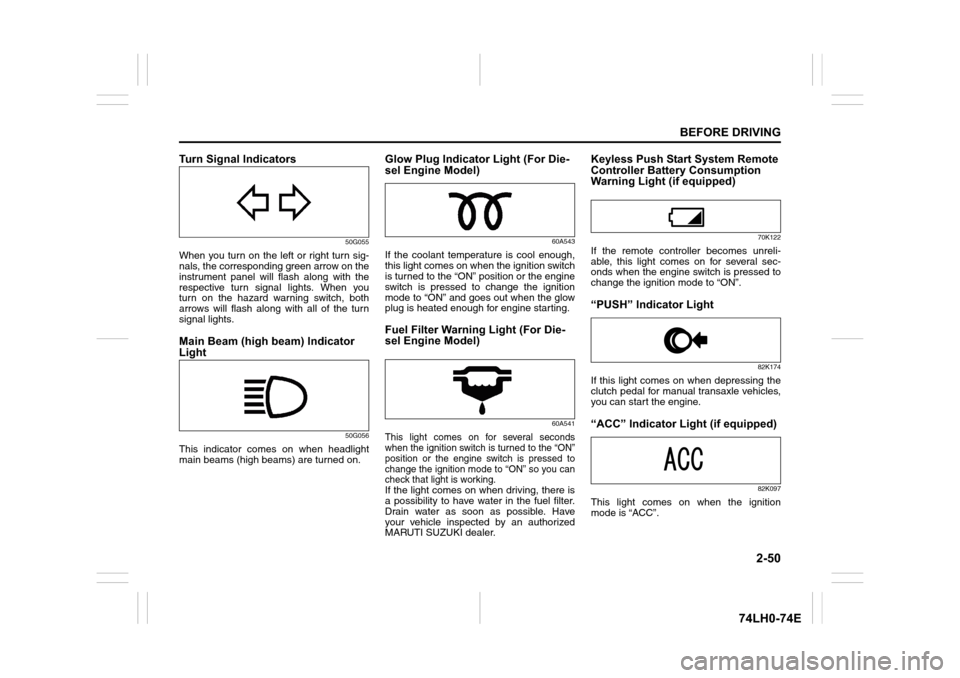
Turn Signal Indicators
50G055
When you turn on the left or right turn sig-
nals, the corresponding green arrow on the
instrument panel will flash along with the
respective turn signal lights. When you
turn on the hazard warning switch, both
arrows will flash along with all of the turn
signal lights.
Main Beam (high beam) Indicator
Light
50G056
This indicator comes on when headlight
main beams (high beams) are turned on.
Glow Plug Indicator Light (For Die-
sel Engine Model)
60A543
If the coolant temperature is cool enough,
this light comes on when the ignition switch
is turned to the “ON” position or the engine
switch is pressed to change the ignition
mode to “ON” and goes out when the glow
plug is heated enough for engine starting.
Fuel Filter Warning Light (For Die-
sel Engine Model)
60A541
This light comes on for several seconds
when the ignition switch is turned to the “ON”
position or the engine switch is pressed to
change the ignition mode to “ON” so you can
check that light is working.
If the light comes on when driving, there is
a possibility to have water in the fuel filter.
Drain water as soon as possible. Have
your vehicle inspected by an authorized
MARUTI SUZUKI dealer.
Keyless Push Start System Remote
Controller Battery Consumption
Warning Light (if equipped)
70K122
If the remote controller becomes unreli-
able, this light comes on for several sec-
onds when the engine switch is pressed to
change the ignition mode to “ON”.
“PUSH” Indicator Light
82K174
If this light comes on when depressing the
clutch pedal for manual transaxle vehicles,
you can start the engine.
“ACC” Indicator Light (if equipped)
82K097
This light comes on when the ignition
mode is “ACC”.
Page 70 of 336
2-51
BEFORE DRIVING
74LH0-74E
Ignition “ON” Indicator Light
(if equipped)
82K098
This light comes on when the ignition
mode is “ON” with the engine off.
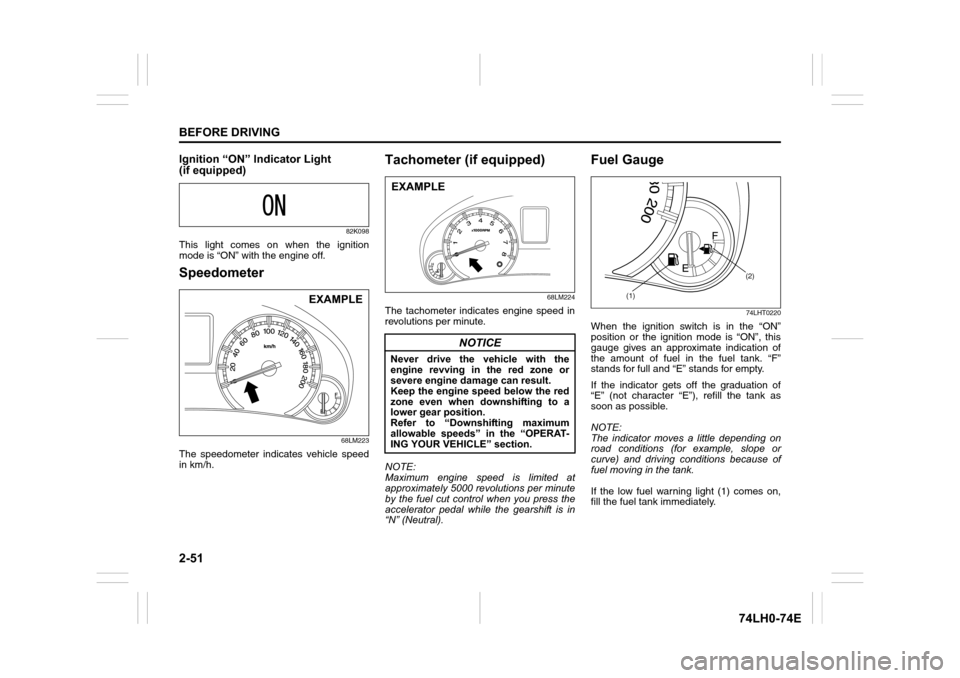
Speedometer
68LM223
The speedometer indicates vehicle speed
in km/h.
Tachometer (if equipped)
68LM224
The tachometer indicates engine speed in
revolutions per minute.
NOTE:
Maximum engine speed is limited at
approximately 5000 revolutions per minute
by the fuel cut control when you press the
accelerator pedal while the gearshift is in
“N” (Neutral).
Fuel Gauge
74LHT0220
When the ignition switch is in the “ON”
position or the ignition mode is “ON”, this
gauge gives an approximate indication of
the amount of fuel in the fuel tank. “F”
stands for full and “E” stands for empty.
If the indicator gets off the graduation of
“E” (not character “E”), refill the tank as
soon as possible.
NOTE:
The indicator moves a little depending on
road conditions (for example, slope or
curve) and driving conditions because of
fuel moving in the tank.
If the low fuel warning light (1) comes on,
fill the fuel tank immediately.
EXAMPLE
NOTICE
Never drive the vehicle with the
engine revving in the red zone or
severe engine damage can result.
Keep the engine speed below the red
zone even when downshifting to a
lower gear position.
Refer to “Downshifting maximum
allowable speeds” in the “OPERAT-
ING YOUR VEHICLE” section.
EXAMPLE
(1)(2)
Page 71 of 336
2-52
BEFORE DRIVING
74LH0-74E
When the low fuel warning light (1) comes
on, a ding sounds once to remind you to fill
the fuel.
If you do not fill the fuel, a ding sounds
every time when the ignition switch is
turned to “ON” position.
NOTE:
The activation point of the low fuel warning
light (1) varies depending on road condi-
tions (for example, slope or curve) and
driving conditions because of fuel moving
in the tank.
The mark (2) indicates that the fuel filler
door is located on the left side of the vehi-
cle.
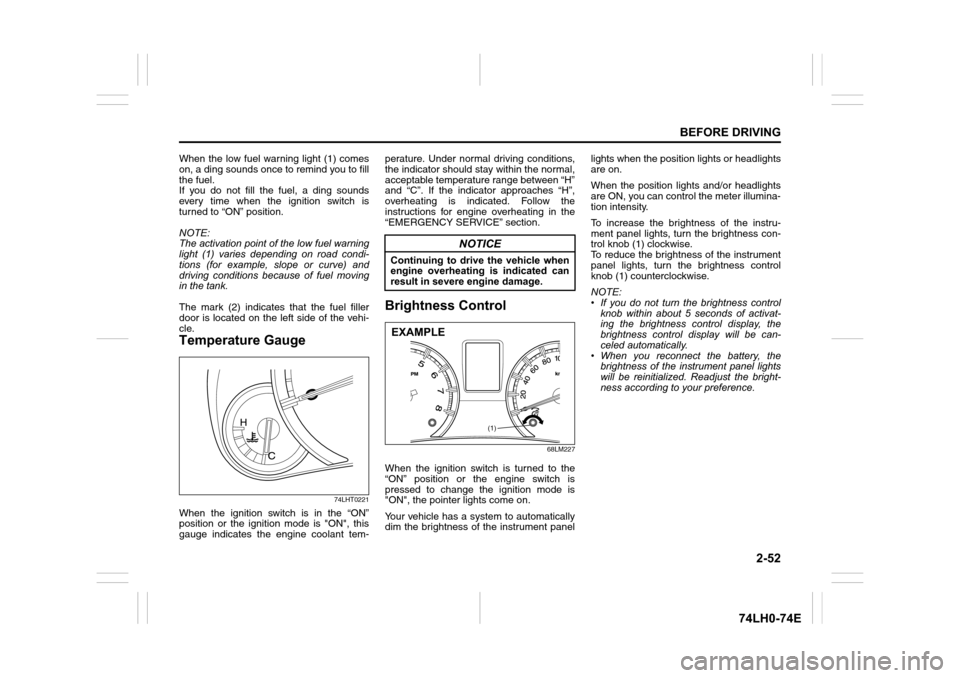
Temperature Gauge
74LHT0221
When the ignition switch is in the “ON”
position or the ignition mode is "ON", this
gauge indicates the engine coolant tem-perature. Under normal driving conditions,
the indicator should stay within the normal,
acceptable temperature range between “H”
and “C”. If the indicator approaches “H”,
overheating is indicated. Follow the
instructions for engine overheating in the
“EMERGENCY SERVICE” section.
Brightness Control
68LM227
When the ignition switch is turned to the
“ON” position or the engine switch is
pressed to change the ignition mode is
"ON", the pointer lights come on.
Your vehicle has a system to automatically
dim the brightness of the instrument panellights when the position lights or headlights
are on.
When the position lights and/or headlights
are ON, you can control the meter illumina-
tion intensity.
To increase the brightness of the instru-
ment panel lights, turn the brightness con-
trol knob (1) clockwise.
To reduce the brightness of the instrument
panel lights, turn the brightness control
knob (1) counterclockwise.
NOTE:
• If you do not turn the brightness control
knob within about 5 seconds of activat-
ing the brightness control display, the
brightness control display will be can-
celed automatically.
• When you reconnect the battery, the
brightness of the instrument panel lights
will be reinitialized. Readjust the bright-
ness according to your preference.
NOTICE
Continuing to drive the vehicle when
engine overheating is indicated can
result in severe engine damage.
(1)
EXAMPLE
Page 77 of 336
2-58
BEFORE DRIVING
74LH0-74E
NOTE:
Depending on vehicle’s specifications,
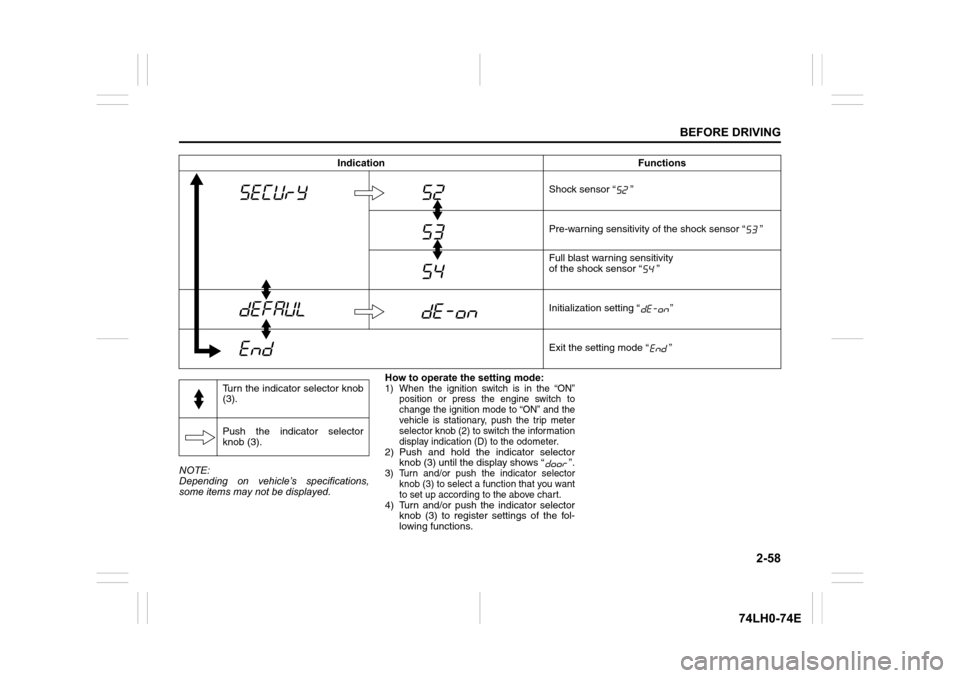
some items may not be displayed.How to operate the setting mode:
1) When the ignition switch is in the “ON”
position or press the engine switch to
change the ignition mode to “ON” and the
vehicle is stationary, push the trip meter
selector knob (2) to switch the information
display indication (D) to the odometer.
2) Push and hold the indicator selector
knob (3) until the display shows “ ”.
3) Turn and/or push the indicator selector
knob (3) to select a function that you want
to set up according to the above chart.
4) Turn and/or push the indicator selector
knob (3) to register settings of the fol-
lowing functions.Shock sensor “ ”
Pre-warning sensitivity of the shock sensor “ ”
Full blast warning sensitivity
of the shock sensor “ ”
Initialization setting “ ”
Exit the setting mode “ ” Indication Functions
Turn the indicator selector knob
(3).
Push the indicator selector
knob (3).
Page 80 of 336
2-61
BEFORE DRIVING
74LH0-74E
Light Reminder Buzzer
(if equipped)
A buzzer sounds to remind you to turn off
the lights if they are left on when the igni-
tion key is removed and the driver’s door is
opened.
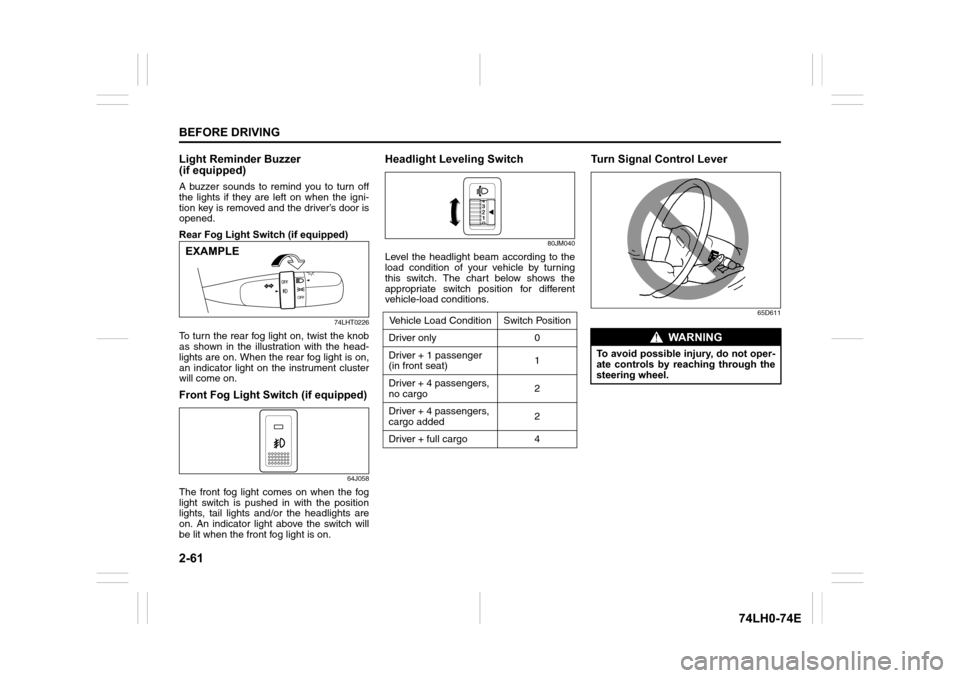
Rear Fog Light Switch (if equipped)
74LHT0226
To turn the rear fog light on, twist the knob
as shown in the illustration with the head-
lights are on. When the rear fog light is on,
an indicator light on the instrument cluster
will come on.
Front Fog Light Switch (if equipped)
64J058
The front fog light comes on when the fog
light switch is pushed in with the position
lights, tail lights and/or the headlights are
on. An indicator light above the switch will
be lit when the front fog light is on.
Headlight Leveling Switch
80JM040
Level the headlight beam according to the
load condition of your vehicle by turning
this switch. The chart below shows the
appropriate switch position for different
vehicle-load conditions.
Turn Signal Control Lever
65D611
EXAMPLE
Vehicle Load Condition Switch Position
Driver only 0
Driver + 1 passenger
(in front seat)1
Driver + 4 passengers,
no cargo2
Driver + 4 passengers,
cargo added2
Driver + full cargo 4
WA R N I N G
To avoid possible injury, do not oper-
ate controls by reaching through the
steering wheel.
Page 82 of 336
2-63
BEFORE DRIVING
74LH0-74E
mist or light rain. In the “LO” position, the
wipers operate at a steady low speed. In
the “HI” position, the wipers operate at a
steady high speed. To turn off the wipers,
move the lever back to the “OFF” position.
Move the lever up and hold it to the “MIST”
position, the windshield wipers will turn on
continuously at low speed.
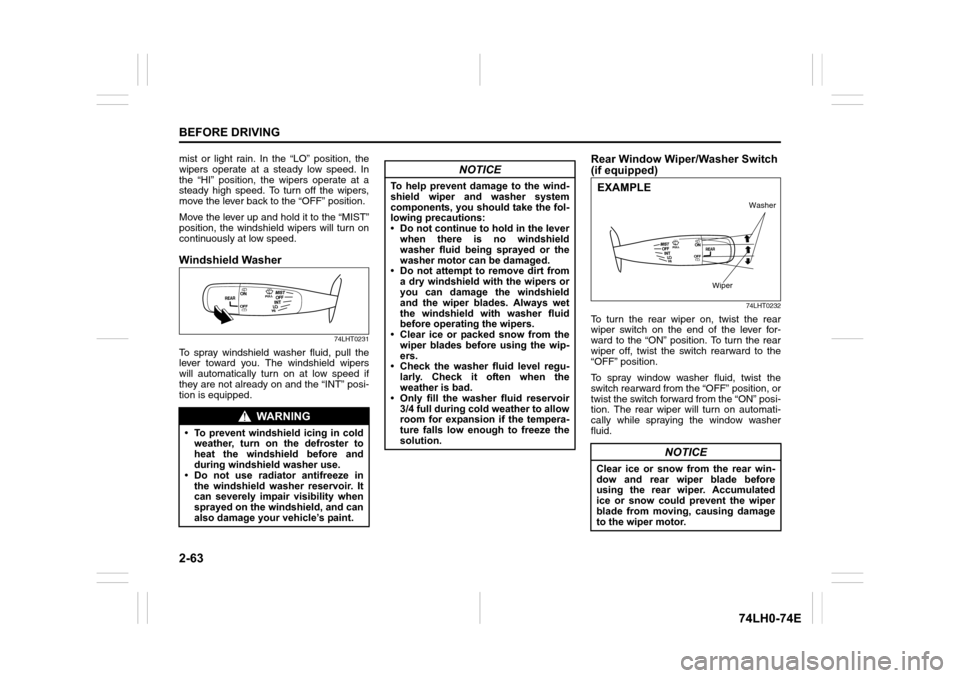
Windshield Washer
74LHT0231
To spray windshield washer fluid, pull the
lever toward you. The windshield wipers
will automatically turn on at low speed if
they are not already on and the “INT” posi-
tion is equipped.
Rear Window Wiper/Washer Switch
(if equipped)
74LHT0232
To turn the rear wiper on, twist the rear
wiper switch on the end of the lever for-
ward to the “ON” position. To turn the rear
wiper off, twist the switch rearward to the
“OFF” position.
To spray window washer fluid, twist the
switch rearward from the “OFF” position, or
twist the switch forward from the “ON” posi-
tion. The rear wiper will turn on automati-
cally while spraying the window washer
fluid.
WA R N I N G
• To prevent windshield icing in cold
weather, turn on the defroster to
heat the windshield before and
during windshield washer use.
• Do not use radiator antifreeze in
the windshield washer reservoir. It
can severely impair visibility when
sprayed on the windshield, and can
also damage your vehicle’s paint.
NOTICE
To help prevent damage to the wind-
shield wiper and washer system
components, you should take the fol-
lowing precautions:
• Do not continue to hold in the lever
when there is no windshield
washer fluid being sprayed or the
washer motor can be damaged.
• Do not attempt to remove dirt from
a dry windshield with the wipers or
you can damage the windshield
and the wiper blades. Always wet
the windshield with washer fluid
before operating the wipers.
• Clear ice or packed snow from the
wiper blades before using the wip-
ers.
• Check the washer fluid level regu-
larly. Check it often when the
weather is bad.
• Only fill the washer fluid reservoir
3/4 full during cold weather to allow
room for expansion if the tempera-
ture falls low enough to freeze the
solution.
NOTICE
Clear ice or snow from the rear win-
dow and rear wiper blade before
using the rear wiper. Accumulated
ice or snow could prevent the wiper
blade from moving, causing damage
to the wiper motor.
Washer
Wiper
EXAMPLE
Page 87 of 336
3-2
OPERATING YOUR VEHICLE
74LH0-74E
5) Check the headlights, turn signal lights,
brake lights and horn for proper opera-
tion.
6) Adjust the seat and adjustable head
restraint (if equipped).
7) Check the brake pedal and the parking
brake lever.
8) Adjust the mirrors.
9) Make sure that you and all passengers
have properly fastened your seat belts.
10)Make sure that all warning lights come
on as the key is turned to the “ON” posi-
tion or the engine is pressed to change
the ignition mode to “ON”.
11)Check all gauges.
12)Make sure that the BRAKE SYSTEM
WARNING light turns off when the
parking brake is released.
Once a week, or each time you fill your fuel
tank, perform the following under-hood
checks:
1) Engine oil level
2) Coolant level
3) Brake fluid level
4) Battery solution level
5) Windshield washer fluid level
6) Hood latch operation
Pull the bonnet hood release handle
inside the vehicle. Make sure that you
cannot open the hood all the way with-
out releasing the secondary latch. Be
sure to close the hood securely after
checking for proper latch operation.
See “All latches, hinges and locks” of“CHASSIS AND BODY” in the “Periodic
Maintenance Schedule” in the
“INSPECTION AND MAINTENANCE”
section for lubrication schedule.
Once a month, or each time you fill your
fuel tank, check the tire pressure using a
tire pressure gauge. Also check the tire
pressure of the spare tire.
Engine Oil ConsumptionIt is normal for the engine to consume
some engine oil during normal vehicle
operation.
The amount of engine oil consumed
depends on the viscosity of the oil, the
quality of the oil and the conditions the
vehicle is driven under.
More oil is consumed during high-speed
driving and when there is frequent acceler-
ation and deceleration. Under high loads,
your engine also will consume more oil.
A new engine also consumes more oil,
since its pistons, piston rings and cylinder
walls have not yet become conditioned.
New engines reach the normal level of oilconsumption only after approximately 5000
km driving.
Oil consumption:
Max. 1.0 L per 1000 km When judging the amount of oil consump-
tion, note that the oil may become diluted
and make it difficult to accurately judge the
true oil level.
As an example, if a vehicle is used for
repeated short trips, and consumes a nor-
mal amount of oil, the dipstick may not
show any drop in the oil level at all, even
after 1000 km or more of driving. This is
because the oil is gradually becoming
diluted with fuel or moisture, making it
appear that the oil level has not changed.
You should also be aware that the diluting
ingredients evaporate out when the vehicle
is subsequently driven at high speeds,
such as on an expressway, making it
appear that oil is excessively consumed
after high-speed driving.
WA R N I N G
Make sure the hood is fully closed
and latched before driving. If it is not,
it can fly up unexpectedly during
driving, obstructing your view and
resulting in an accident.
Daily Inspection Checklist: NO
Engine Oil Consumption: