change time SUZUKI SWIFT 2017 5.G Owner's Manual
[x] Cancel search | Manufacturer: SUZUKI, Model Year: 2017, Model line: SWIFT, Model: SUZUKI SWIFT 2017 5.GPages: 336, PDF Size: 6.24 MB
Page 97 of 336
3-12
OPERATING YOUR VEHICLE
74LH0-74E
NOTE:
You do not need to keep the engine
switch pressed to start the engine.
The engine of a manual transaxle vehi-
cle will not start unless the clutch pedal
is depressed.
You should turn off such loads as the
headlights and air conditioning system to
facilitate starting of the engine.
Even if you fail to start the engine, the
starter motor will stop turning automati-
cally after a short time. After the starter
motor has stopped or if there is some
problem with the system, the starter
motor will rotate only while the engine
switch is being pressed.
Stopping the engine Depress the engine switch to stop the
engine after the vehicle stopped com-
pletely.
In case of emergency, you can stop the
engine by quickly pushing the engine
switch more than 3 times, or pushing
and holding the engine switch more than
2 seconds while the vehicle in motion.
NOTE:
Except in emergency, do not stop the
engine while the vehicle in motion.
The steering and braking operation will
require more efforts when the engine
stopped.
Refer to “Braking” in this section.
If the engine has been stopped and
stayed as it as for while after the engine
was stopped unexpectedly or was raced
before stopped, a clicking sound may be
heard from around the engine when
engine restarted. This is not a malfunc-
tion. In this case, always let the engine
idle before stop it.
Starting a Cold and Warm Engine(For Petrol Engine Model)
With your foot off the accelerator pedal,
crank the engine by pressing the engine
switch to change the ignition mode to
“START”.After pressing the engine switch to change the
ignition mode to “START”, the starter cranks
the engine for about 12 seconds before it can
start the engine. If the engine fails to start at
the first attempt, wait about 15 seconds, then
try again while keeping the engine switch
pressed while pressing down the accelerator
pedal to 1/3 of its travel. Release the accelera-
tor pedal when the engine starts.If the engine still does not start, try holding
the accelerator pedal all the way to the
floor while cranking. This should clear the
engine if it is flooded.
If you are unable to start the engine using
this procedure, consult your MARUTI
SUZUKI dealer.
NOTICE
Do not depress the accelerator
during the engine starting proce-
dure. If the engine does not respond
when you try to start it with the
engine switch or if the engine
switch repeats cycling through the
“LOCK”(OFF) - “ACC” - “ON” mode,
the vehicle battery may be dis-
charged. Check the voltage of the
vehicle battery before trying again.
NOTICE
Avoid stopping the engine while driv-
ing.
NOTICE
Do not crank the engine for more
than 12 seconds at a time.
If the engine doesn’t start on the first
try, wait about 15 seconds before try-
ing again.
Page 98 of 336
3-13OPERATING YOUR VEHICLE
74LH0-74E
(For Diesel Engine Model)
Cold engine
Depress the clutch and brake pedals fully
and press the engine switch to crank the
engine. If the glow plug indicator light
comes on, the engine will start automati-
cally after the glow plug indicator light goes
off or 10 seconds past.
Warm engine
Crank the engine by pressing the engine
switch to change the ignition mode to
“START”.
Caution when stopping the engine with
turbocharger
When stopping the engine after climbing or
high speed driving, let the engine idle for
about one minute or more (if it is not pro-
hibited) to cool down the turbocharger and
engine oil. This is to prevent the engine oil
from over-deteriorating. Deteriorated
engine oil will damage the bearings of the
turbocharger.Restarting diesel engine after fuel-
empty stop
If the engine stops and the low fuel warn-
ing light and the malfunction indicator light
come on, use the following procedure:
1) Fill the fuel tank.
2) Press the engine switch to change the
ignition mode to “ON” for 5-10 seconds
to feed fuel.
3) Perform above engine starting proce-
dure to start the engine.
If the malfunction indicator light still comes
on after the engine started, there may be
some problem with the engine. Ask your
MARUTI SUZUKI dealer to have the
engine inspected.
If the “PUSH” indicator light blinks and
the engine cannot be started
Your keyless push start system remote
controller may not be sensed as being
within the “interior workable area”. Try
again after making sure that you have the
remote controller with you. If the engine
still cannot be started, the battery of the
remote controller may be discharged. You
must then use the following method to be
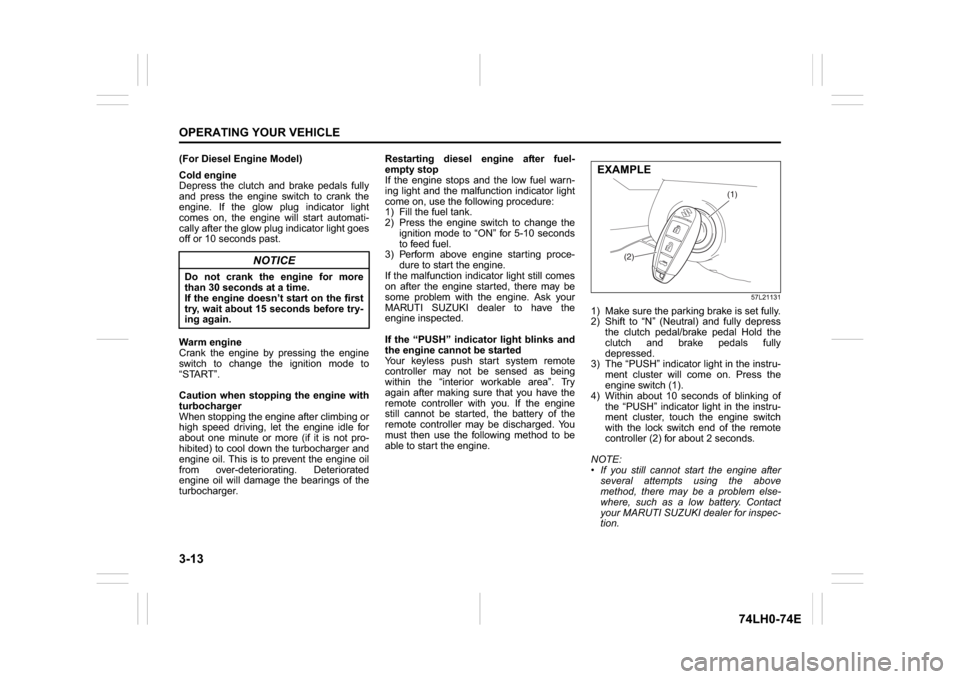
able to start the engine.
57L21131
1) Make sure the parking brake is set fully.
2) Shift to “N” (Neutral) and fully depress
the clutch pedal/brake pedal Hold the
clutch and brake pedals fully
depressed.
3) The “PUSH” indicator light in the instru-
ment cluster will come on. Press the
engine switch (1).
4) Within about 10 seconds of blinking of
the “PUSH” indicator light in the instru-
ment cluster, touch the engine switch
with the lock switch end of the remote
controller (2) for about 2 seconds.
NOTE:
If you still cannot start the engine after
several attempts using the above
method, there may be a problem else-
where, such as a low battery. Contact
your MARUTI SUZUKI dealer for inspec-
tion.
NOTICE
Do not crank the engine for more
than 30 seconds at a time.
If the engine doesn’t start on the first
try, wait about 15 seconds before try-
ing again.
(1)
(2)
EXAMPLE
Page 105 of 336
3-20
OPERATING YOUR VEHICLE
74LH0-74E
Starting off on an uphill/downhill:
Uphill1) Apply the parking brake firmly so that the
vehicle does not roll backwards.
2) Shift the gearshift lever to the “D” posi-
tion while depressing the brake pedal.
Make sure that the gear position indica-
tor in the instrumental cluster displays
1st gear.
3) Release the brake pedal and depress
the accelerator pedal gradually, and
when the vehicle starts to move, release
the parking brake and depress the accel-
erator pedal to start off.Downhill
1) Depress the brake pedal and shift the
gearshift lever to the “D” position. Make
sure that the gear is in 1st by checking
the gear position indicator.
2) Release the brake pedal and depress
the accelerator pedal slowly. Even if the
accelerator pedal is not depressed, the
clutch will be engaged when the vehicle
speed increases.Using engine braking:
When driving on a downhill slope, down-
shifting is recommended. So you can use
engine braking.
By placing the gearshift lever in the “M”
position, the Manual (M) mode is selected,
and you can shift to a lower gear manually.
For details of downshift operation, refer to
“Upshift and downshift” in the “Manual (M)
mode”.
Manual (M) mode
The gears are not shifted automatically. To
shift the transaxle, the driver must operate
the gearshift lever to the “+” or “–” direc-
tion. As for conventional manual transaxle
vehicles, releasing the accelerator pedal a
little may help the transaxle to shift
smoothly.
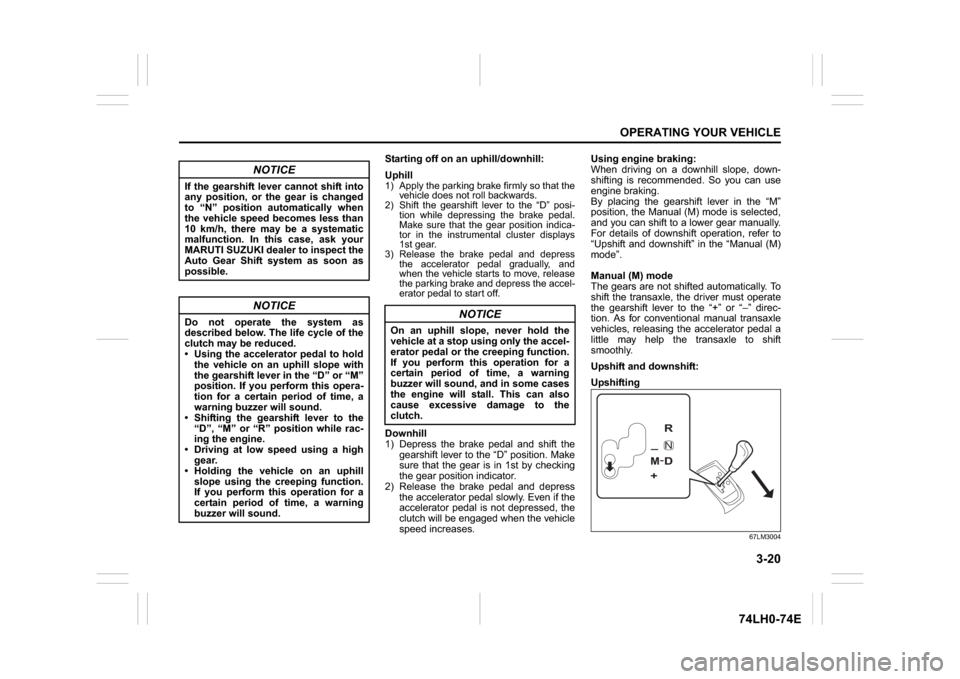
Upshift and downshift:
Upshifting
67LM3004
NOTICE
If the gearshift lever cannot shift into
any position, or the gear is changed
to “N” position automatically when
the vehicle speed becomes less than
10 km/h, there may be a systematic
malfunction. In this case, ask your
MARUTI SUZUKI dealer to inspect the
Auto Gear Shift system as soon as
possible.
NOTICE
Do not operate the system as
described below. The life cycle of the
clutch may be reduced.
Using the accelerator pedal to hold
the vehicle on an uphill slope with
the gearshift lever in the “D” or “M”
position. If you perform this opera-
tion for a certain period of time, a
warning buzzer will sound.
Shifting the gearshift lever to the
“D”, “M” or “R” position while rac-
ing the engine.
Driving at low speed using a high
gear.
Holding the vehicle on an uphill
slope using the creeping function.
If you perform this operation for a
certain period of time, a warning
buzzer will sound.
NOTICE
On an uphill slope, never hold the
vehicle at a stop using only the accel-
erator pedal or the creeping function.
If you perform this operation for a
certain period of time, a warning
buzzer will sound, and in some cases
the engine will stall. This can also
cause excessive damage to the
clutch.
-M+R
N
D-
Page 107 of 336
3-22
OPERATING YOUR VEHICLE
74LH0-74E
Starting off:
1) Start the engine as instructed in “Start-
ing the engine” in this section.
2) With your foot on the brake pedal, shift
the gearshift lever to the “M” position.
When the gearshift lever is shifted to
the “M” position, the gear will be shifted
to 1st. Before starting off, always make
sure that the intended gear is engaged
by checking the gear position indicator,
then depress the accelerator pedal.NOTE:
If 1st gear cannot be engaged even
though the gearshift lever has been
shifted from the “N” to the “M” position,
the system will re-try shifting automati-
cally. This will take some time, noise
may be heard from the gears, and shift-
ing gear shock may occur. However,
they do not indicate a malfunction.
The “N” indicator will flash, the depress
brake pedal indicator will come on and a
warning buzzer (long pulse sound) will
sound if any of the following cases
occur;
– If you shift the gearshift lever from the
“N” to the “M” position without
depressing the brake pedal
– If the system is unable to re-try shifting
You should depress the brake pedal and
shift the gearshift lever to “N” position,
then shift to “M” position again a few
seconds later.
3) Release the parking brake and brake
pedal. Depress the accelerator pedal
slowly for smooth starting.Starting off on an uphill/downhill slope:
Uphill
1) Apply the parking brake firmly so that
the vehicle does not roll backwards.
2) Shift the gearshift lever to the “M” posi-
tion while depressing the brake pedal.
Make sure that the gear position indica-
tor in the instrumental cluster displays
1st gear.
3) Release the brake pedal and depress
the accelerator pedal gradually, and
when the vehicle starts to move,
NOTICE
If the gearshift lever cannot shift
into any position, or the gear is
changed to “N” position automati-
cally when the vehicle speed
becomes less than 10 km/h, there
may be a systematic malfunction. In
this case, ask your MARUTI SUZUKI
dealer to inspect the Auto Gear Shift
system as soon as possible.
The manual (M) mode does not
upshift even if the engine speed
reaches the rev-limit.
The system will not allow shifting up
or down to a gear that would cause
engine over-revving or under-rev-
ving.
If frequently driving at low speed
using a high gear position, the life
cycle of the clutch may be reduced.
Frequent downshifting (more than 3
positions consecutively) causes the
reduction of transaxle life.
WA R N I N G
Always keep your foot on the brake
pedal or pull up the parking lever
while stopped with the engine run-
ning. These operations prevent the
vehicle from starting due to unin-
tended activation of the creeping
function.
NOTICE
Do not operate the system as
described below. The life cycle of the
clutch may be reduced.
Using the accelerator pedal to hold
the vehicle on an uphill slope oper-
ation with the gearshift lever in the
“M” or “D” position. If you perform
this operation for a certain period
of time, a warning buzzer will
sound.
Shifting the gearshift lever to the
“M”, “D” or “R” position while rac-
ing the engine.
Driving at low speed using a high
gear.
Stopping on a slope using the
creeping function. If you perform
this operation for a certain period
of time, a warning buzzer will
sound.
Page 109 of 336
3-24
OPERATING YOUR VEHICLE
74LH0-74E
Parking
Unlike an automatic transaxle, Auto Gear
Shift does not have a parking position. The
vehicle can be parked with the gearshift
lever at “D” or “R” position. Remember,
even though the transaxle is in gear, you
must set the parking brake firmly
1) Apply the parking brake and the brake
pedal firmly.
2) While depressing the brake pedal, shift
the gearshift lever to the “R” position on
a downhill slope, and to the 1st position
in the drive (D) mode or the “M(1)” posi-
tion in the manual (M) mode on an
uphill slope and confirm the gear posi-tion by checking the gear position indi-
cator.
3) Stop the engine completely.
4) In the case of uphill/downhill slope,
release the parking brake and brake
pedal slowly in order to check the gear
is engaged.
5) After check the vehicle stopped by the
gear engaged, Apply the parking brake
and the brake pedal firmly again.
6) Get out of the vehicle and put chocks
under the wheels.
When you return to your vehicle, you must
remember to remove the wheel chocks.
NOTE:
After the engine is stopped or ignition
switch is OFF, the gear in the transaxle
does not change even if you shift the
gearshift lever in any position. Always
shift the gearshift lever before turn igni-
tion switch OFF.
Check the transaxle gear position by
looking at the gear position indicator,
then turn the ignition switch off to stop
the engine.
WA R N I N G
When stopping, for example, at a
traffic light, be sure to depress the
brake pedal firmly. For your safety,
apply the parking brake, too, when
stopping on a hill.
When racing the engine, make sure
that the gear is in the “N” position
by checking the gear position indi-
cator. If the accelerator is operated
with the gear in any other position,
the vehicle may move resulting in
an unexpected accident.
Do not leave your vehicle unat-
tended while the engine is running.
When leaving the vehicle, stop the
engine and park the vehicle with a
gear engaged. Remember, even
though the transaxle is in gear, you
must set the parking brake firmly. If
you need to leave the vehicle with
the engine running, apply the park-
ing brakes firmly, and shift the
gearshift lever to the “N” position
and confirm the neutral position by
checking the gear position indica-
tor. However basically don’t leave
the vehicle with the engine running.
Otherwise, the vehicle may move
unexpectedly and may cause an
accident.
NOTICE
On a slope, never hold the vehicle
at a stop using only the accelerator
pedal or the creeping function. If
you perform this operation for a
certain period of time, a warning
buzzer will sound, and in some
cases the engine will stall. This can
also cause excessive damage to
the clutch.
If the gearshift lever is operated
more than necessary, the system
may not allow operation of the
gearshift lever for a certain period
of time, and the gear may not be
shifted appropriately. Therefore, do
not operate the gearshift lever if not
necessary.
Page 110 of 336
3-25OPERATING YOUR VEHICLE
74LH0-74E
Parking cancel
Depress the brake pedal, turn the ignition
switch to the “ON” position, and shift the
gearshift lever to the “N” position. The gear
will be disengaged.
Warning functions
A warning buzzer will sound or the indica-
tor will blink under the following conditions.Warning buzzer
The clutch is heated due to excessive
load.
The creeping function is being activated
for a long period of time.
The ignition switch is turned to the
“LOCK” position with the gear in 2nd,
3rd, 4th or 5th. In this case, turn the igni-
tion switch to the “ON” position and shift
the gearshift lever in the “N” position,
shift it to the “D” or “M” or “R” position,
then turn the ignition switch to “LOCK”.
During a stop, the driver’s door is
opened with the gearshift lever in the
“R”, “D” or “M” position while the engine
is running.
“N” indicator blinking
When the gear indicator lamp blinks “N”,
you should depress the brake pedal and
shift the gearshift lever to “N” position.
“1st” indicator blinking
When the gear indicator lamp blinks “1st”,
you should depress the brake pedal and
shift the gearshift lever to “N” position, then
shift to “D” or “M” position again a few sec-
onds later.“R” indicator blinking
When the gear indicator lamp blinks “R”,
you should depress the brake pedal and
shift the gearshift lever to “N” position, then
shift to “R” position again a few seconds
later.
Parking Sensors (if equipped) The parking sensor system uses ultra-
sonic sensors to detect obstacles near
the rear bumpers. If obstacles are
sensed while you are parking or moving
the vehicle slowly, the system warns you
by sounding a buzzer.
The system emits an ultrasonic wave
and the relevant sensor detects the
return of the wave reflected by an obsta-
cle. The system measures the time
taken by the ultrasonic wave to reach the
obstacle and return from it, from which it
determines the obstacle’s position.
The parking sensor function can be used
when the ignition switch is turned to the
“ON” or the engine switch is pressed to
change the ignition mode to “ON”, the
gearshift lever is in the “R” position and
the parking sensor switch is in the “ON”
position. This function is helpful in the
following cases: pulling over to the curb;
parallel-parking the vehicle; steering the
vehicle into a garage; driving along an
alley; and moving slowly in a place with
obstacles.
WARNING
If the gear is not engaged properly
and completely before the ignition
switch is turned off, the vehicle
may not be parked with the gear
engaged. Always confirm the gear
position by checking the gear posi-
tion indicator when parking.
Remember, even though the
transaxle is in gear, you must set
the parking brake firmly.
On a downhill slope, the gear
should be put in reverse, and in 1st
gear on an uphill slope. In the case
of uphill/downhill slope, after check
the vehicle stopped by the gear
engaged, put chocks under the
wheels. Otherwise, the vehicle may
move, and cause an unexpected
accident. If the gear is left in the
“N” position, the vehicle cannot be
parked with a gear engaged.
NOTICE
In the above cases, pull over to the
side of the road and stop the engine,
and then ask your MARUTI SUZUKI
dealer to inspect your vehicle. Other-
wise, the clutch disc may be dam-
aged.
Page 116 of 336
3-31OPERATING YOUR VEHICLE
74LH0-74E
How the ABS WorksA computer continuously monitors wheel
speed. The computer compares the
changes in wheel speed when braking. If
the wheels slow suddenly, indicating a
skidding situation, the computer will
change braking pressure several times
each second to prevent the wheels from
locking. When you start your vehicle after a
stop, you may hear a momentary motor or
clicking noise as the system resets or
checks itself.
WA R N I N G
The ABS may not work properly if
tyres or wheels other than those
specified in the owner’s manual are
used. This is because the ABS works
by comparing changes in wheel
speed. When replacing tyres or
wheels, use only the size and type
specified in this owner’s manual.
Page 130 of 336
5-3OTHER CONTROLS AND EQUIPMENT
74LH0-74E
Temperature-controlled air comes out of
the floor outlets and cooler air comes out
of the center and side outlets. When the
temperature selector (1) is in the fully
COLD position or fully HOT position, how-
ever, the air from the floor outlets and the
air from the center and side outlets will be
the same temperature.
Heat (c)
74LHT0506
Temperature-controlled air comes out of
the floor outlets and the side outlets, also
comes out of the windshield defroster out-
lets and the side demister outlets slightly.
Heat & defrost (d)
74LHT0507
Temperature-controlled air comes out of
the floor outlets, the windshield defroster
outlets, the side demister outlets and the
side outlets.Defrost (e)
74LHT0508
Temperature-controlled air comes out of
the windshield defroster outlets, the side
demister outlets and the side outlets.
Air intake selector (4)
68LM511
This selector is used to select the following
modes.
Fresh Air (f)
When this mode is selected, the indicator
light will go off and outside air is used.
Recirculated Air (g)
When this mode is selected, the indicator
light will come on, outside air is shut out
and inside air is recirculated. This mode is
suitable when driving through dusty or pol-
luted air such as in a tunnel, or when
attempting to quickly cool down the inte-
rior.“FRESH AIR” and “RECIRCULATED AIR”
are switched alternately each time the air
intake selector is pushed.
NOTE:
If you select “RECIRCULATED AIR” for an
extended period of time, the air in the vehi-
cle can become contaminated. Therefore,
you should occasionally select “FRESH
AIR”.
Air conditioning switch (5)
To turn on the air conditioning system,
push in the “A/C” switch and set the blower
speed selector to a position other than
“OFF”. With this “A/C” switch operation, a
indicator light will come on when the air
conditioning system is on. To turn off the
air conditioning system, push the “A/C”
switch again.
During operation of the air conditioner, you
may notice slight changes in engine
speed. These changes are normal, the
system is designed so that the compressor
turns on or off to maintain the desired tem-
perature.
Less operation of the compressor results
in better fuel economy.
System Operating InstructionsNatural ventilation
Select “VENTILATION” and “FRESH AIR”,
the temperature selector to the desired
temperature position, and the blower
(f) (g)
Gearshift Lever: 10
Fuel Filler Cap: 5
Page 131 of 336
5-4
OTHER CONTROLS AND EQUIPMENT
74LH0-74E
speed selector to “OFF”. Fresh air will flow
through the vehicle during driving.
Forced ventilation
The control settings are the same as for
natural ventilation except you set the
blower speed selector to a position other
than “OFF”.
Normal heating (using outside air)
Select “HEAT” and “FRESH AIR”, the tem-
perature selector to the desired tempera-
ture position and the blower speed selector
to the desired blower speed position. Set-
ting the blower speed selector to a higher
blower speed position increases heating
efficiency.
Quick heating (using recirculated air)
The control settings are the same as for
normal heating except you select “RECIR-
CULATED AIR”. If you use this heating
method for an extended period of time, the
air in the vehicle can become contami-
nated and the windows can become misty.
Therefore, use this method only for quick
heating and change to the normal heating
method as soon as possible.
Cool face/warm feet
Select “BI-LEVEL” and “FRESH AIR”, the
temperature selector to the desired tem-
perature position, and the blower speed
selector to the desired blower speed posi-
tion. Unless the temperature selector is in
the fully COLD position or fully HOT posi-
tion, the air that comes out of the centerand side outlets will be cooler than the air
that comes out of the floor outlets.
Normal cooling
Turn on the “A/C” switch, set the air flow
selector to “VENTILATION”, the tempera-
ture selector to the desired temperature
position and the blower speed selector to
the desired blower speed position. Setting
the blower speed selector to a higher
blower speed position increases cooling
efficiency.
You can switch the air intake selector to
either “FRESH AIR” or “RECIRCULATED
AIR” as you desire. Choosing “RECIRCU-
LATED AIR” increases cooling efficiency.
Quick cooling (using recirculated air)
The control settings are the same as for
normal cooling except you select “RECIR-
CULATED AIR” and the highest blower
speed.
NOTE:
If you select “RECIRCULATED AIR” for
an extended period of time, the air in the
vehicle can become contaminated.
Therefore, you should occasionally
select “FRESH AIR”.
If your vehicle has been left in the sun
with the windows closed, it will cool
faster if you open the windows briefly
while you operate the air conditioner with
the air intake selector at “FRESH AIR”
and the blower at high speed.Dehumidifying
Turn on the “A/C” switch, set the air flow
selector to a desired air flow selector posi-
tion, and select “FRESH AIR”, the tem-
perature selector to the desired
temperature position, and the blower
speed selector to the desired blower speed
position.
NOTE:
Because the air conditioner dehumidifies
the air, turning it on will help keep the win-
dows clear, even when blowing heated air
using the “DEMIST” or “HEAT & DEMIST”
functions.
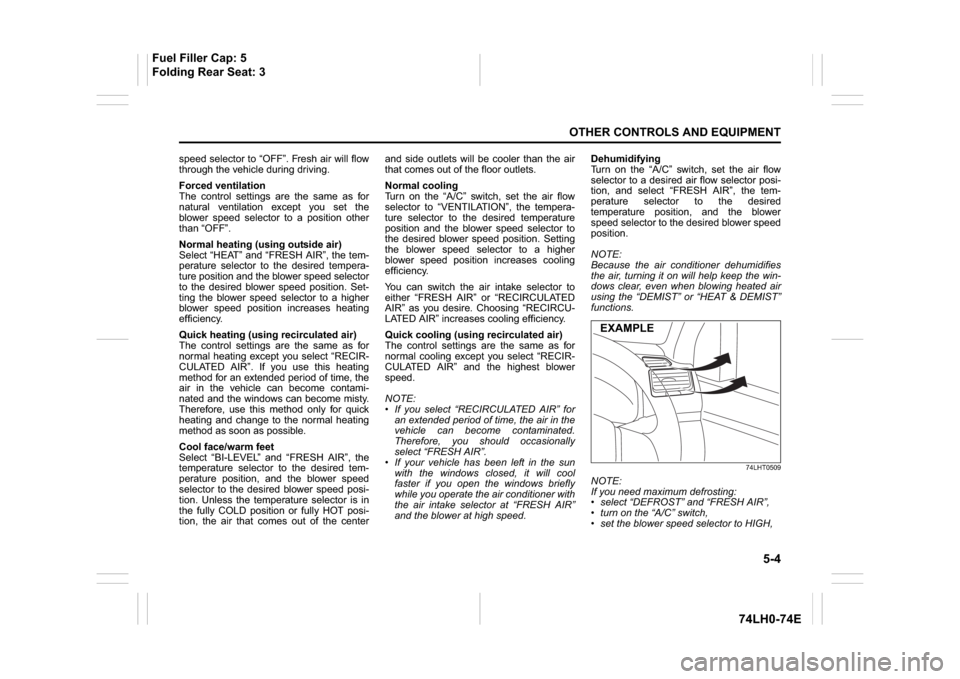
74LHT0509
NOTE:
If you need maximum defrosting:
select “DEFROST” and “FRESH AIR”,
turn on the “A/C” switch,
set the blower speed selector to HIGH,EXAMPLE
Fuel Filler Cap: 5
Folding Rear Seat: 3
Page 133 of 336
5-6
OTHER CONTROLS AND EQUIPMENT
74LH0-74E
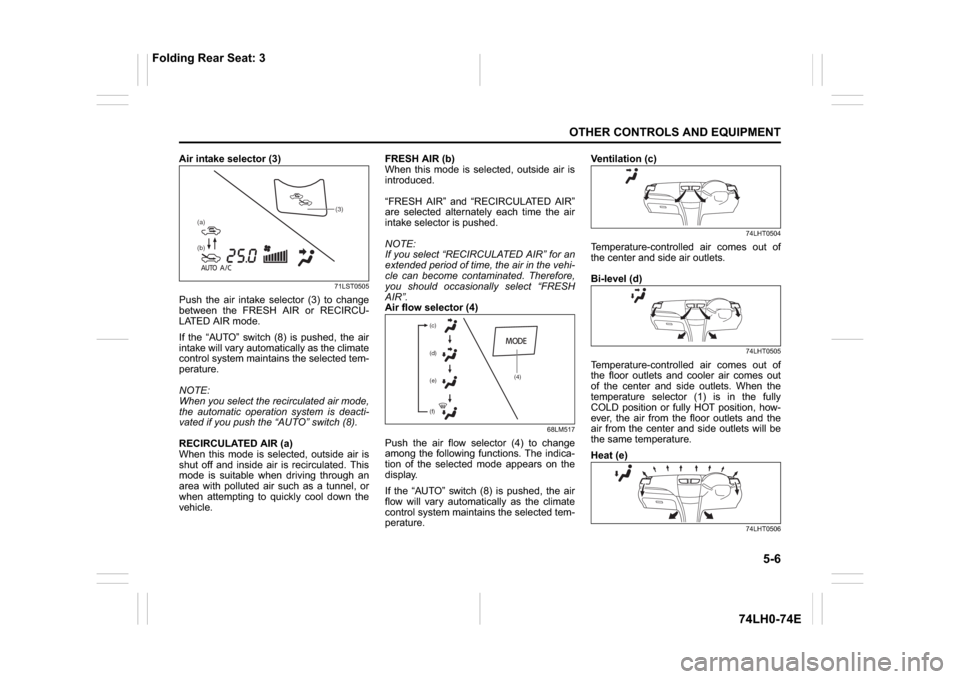
Air intake selector (3)
71LST0505
Push the air intake selector (3) to change
between the FRESH AIR or RECIRCU-
LATED AIR mode.
If the “AUTO” switch (8) is pushed, the air
intake will vary automatically as the climate
control system maintains the selected tem-
perature.
NOTE:
When you select the recirculated air mode,
the automatic operation system is deacti-
vated if you push the “AUTO” switch (8).
RECIRCULATED AIR (a)
When this mode is selected, outside air is
shut off and inside air is recirculated. This
mode is suitable when driving through an
area with polluted air such as a tunnel, or
when attempting to quickly cool down the
vehicle.FRESH AIR (b)
When this mode is selected, outside air is
introduced.
“FRESH AIR” and “RECIRCULATED AIR”
are selected alternately each time the air
intake selector is pushed.
NOTE:
If you select “RECIRCULATED AIR” for an
extended period of time, the air in the vehi-
cle can become contaminated. Therefore,
you should occasionally select “FRESH
AIR”.
Air flow selector (4)
68LM517
Push the air flow selector (4) to change
among the following functions. The indica-
tion of the selected mode appears on the
display.
If the “AUTO” switch (8) is pushed, the air
flow will vary automatically as the climate
control system maintains the selected tem-
perature.Ventilation (c)
74LHT0504
Temperature-controlled air comes out of
the center and side air outlets.
Bi-level (d)
74LHT0505
Temperature-controlled air comes out of
the floor outlets and cooler air comes out
of the center and side outlets. When the
temperature selector (1) is in the fully
COLD position or fully HOT position, how-
ever, the air from the floor outlets and the
air from the center and side outlets will be
the same temperature.
Heat (e)
74LHT0506
(b) (a)
(3)
(4) (c)
(d)
(e)
(f)
Folding Rear Seat: 3