key SUZUKI SWIFT 2017 5.G Owner's Manual
[x] Cancel search | Manufacturer: SUZUKI, Model Year: 2017, Model line: SWIFT, Model: SUZUKI SWIFT 2017 5.GPages: 336, PDF Size: 6.24 MB
Page 42 of 336
2-23
BEFORE DRIVING
74LH0-74E
NOTE:
If you drive with one of the rear windows
open, you may hear a loud sound caused
by air vibration. To reduce the sound, open
the driver’s or front passenger’s window, or
narrow the rear window opening.
Mirrors
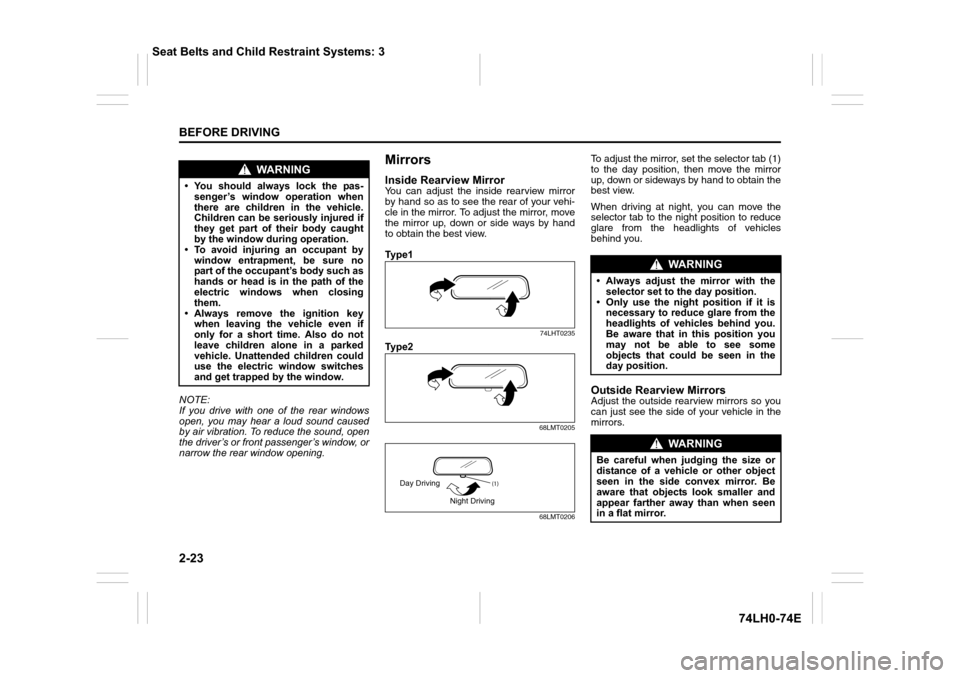
Inside Rearview MirrorYou can adjust the inside rearview mirror
by hand so as to see the rear of your vehi-
cle in the mirror. To adjust the mirror, move
the mirror up, down or side ways by hand
to obtain the best view.
Ty p e 1
74LHT0235
Ty p e 2
68LMT0205
68LMT0206
To adjust the mirror, set the selector tab (1)
to the day position, then move the mirror
up, down or sideways by hand to obtain the
best view.
When driving at night, you can move the
selector tab to the night position to reduce
glare from the headlights of vehicles
behind you.
Outside Rearview MirrorsAdjust the outside rearview mirrors so you
can just see the side of your vehicle in the
mirrors.
WA R N I N G
• You should always lock the pas-
senger’s window operation when
there are children in the vehicle.
Children can be seriously injured if
they get part of their body caught
by the window during operation.
• To avoid injuring an occupant by
window entrapment, be sure no
part of the occupant’s body such as
hands or head is in the path of the
electric windows when closing
them.
• Always remove the ignition key
when leaving the vehicle even if
only for a short time. Also do not
leave children alone in a parked
vehicle. Unattended children could
use the electric window switches
and get trapped by the window.
(1)Day Driving
Night Driving
WA R N I N G
• Always adjust the mirror with the
selector set to the day position.
• Only use the night position if it is
necessary to reduce glare from the
headlights of vehicles behind you.
Be aware that in this position you
may not be able to see some
objects that could be seen in the
day position.
WA R N I N G
Be careful when judging the size or
distance of a vehicle or other object
seen in the side convex mirror. Be
aware that objects look smaller and
appear farther away than when seen
in a flat mirror.
Seat Belts and Child Restraint Systems: 3
Page 51 of 336
2-32
BEFORE DRIVING
74LH0-74E
NOTE:
The word “CENTER” is molded on the
buckle and latch plate of the center lap
belt. The buckles are designed so a latch
plate can not be inserted into the wrong
buckle.
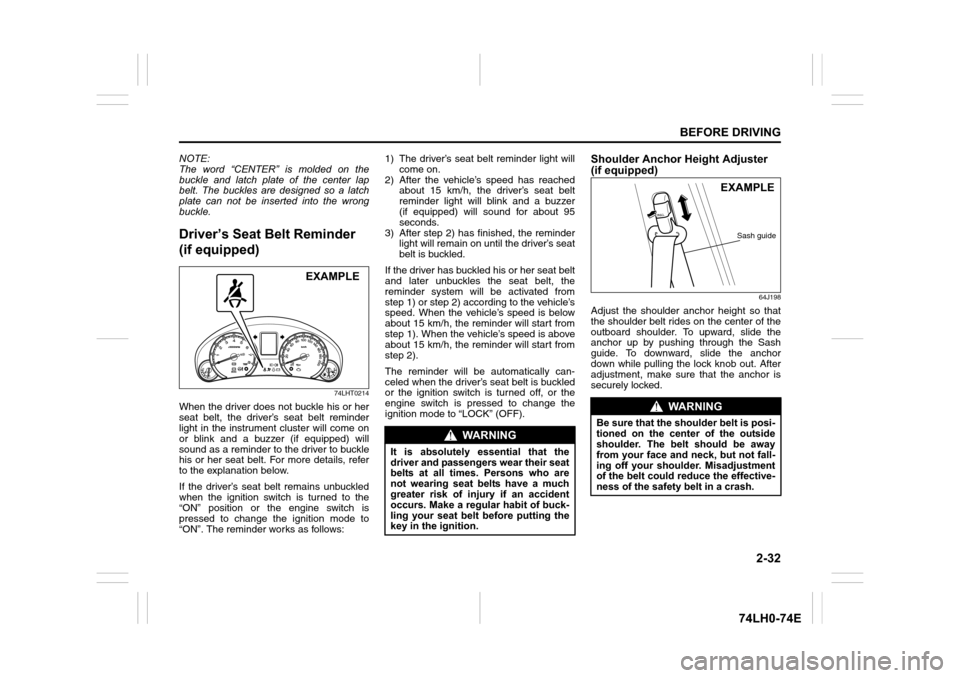
Driver’s Seat Belt Reminder
(if equipped)
74LHT0214
When the driver does not buckle his or her
seat belt, the driver’s seat belt reminder
light in the instrument cluster will come on
or blink and a buzzer (if equipped) will
sound as a reminder to the driver to buckle
his or her seat belt. For more details, refer
to the explanation below.
If the driver’s seat belt remains unbuckled
when the ignition switch is turned to the
“ON” position or the engine switch is
pressed to change the ignition mode to
“ON”. The reminder works as follows:1) The driver’s seat belt reminder light will
come on.
2) After the vehicle’s speed has reached
about 15 km/h, the driver’s seat belt
reminder light will blink and a buzzer
(if equipped) will sound for about 95
seconds.
3) After step 2) has finished, the reminder
light will remain on until the driver’s seat
belt is buckled.
If the driver has buckled his or her seat belt
and later unbuckles the seat belt, the
reminder system will be activated from
step 1) or step 2) according to the vehicle’s
speed. When the vehicle’s speed is below
about 15 km/h, the reminder will start from
step 1). When the vehicle’s speed is above
about 15 km/h, the reminder will start from
step 2).
The reminder will be automatically can-
celed when the driver’s seat belt is buckled
or the ignition switch is turned off, or the
engine switch is pressed to change the
ignition mode to “LOCK” (OFF).
Shoulder Anchor Height Adjuster
(if equipped)
64J198
Adjust the shoulder anchor height so that
the shoulder belt rides on the center of the
outboard shoulder. To upward, slide the
anchor up by pushing through the Sash
guide. To downward, slide the anchor
down while pulling the lock knob out. After
adjustment, make sure that the anchor is
securely locked.
EXAMPLE
WA R N I N G
It is absolutely essential that the
driver and passengers wear their seat
belts at all times. Persons who are
not wearing seat belts have a much
greater risk of injury if an accident
occurs. Make a regular habit of buck-
ling your seat belt before putting the
key in the ignition.
WA R N I N G
Be sure that the shoulder belt is posi-
tioned on the center of the outside
shoulder. The belt should be away
from your face and neck, but not fall-
ing off your shoulder. Misadjustment
of the belt could reduce the effective-
ness of the safety belt in a crash.
EXAMPLE
Sash guide
Page 56 of 336
2-37
BEFORE DRIVING
74LH0-74E
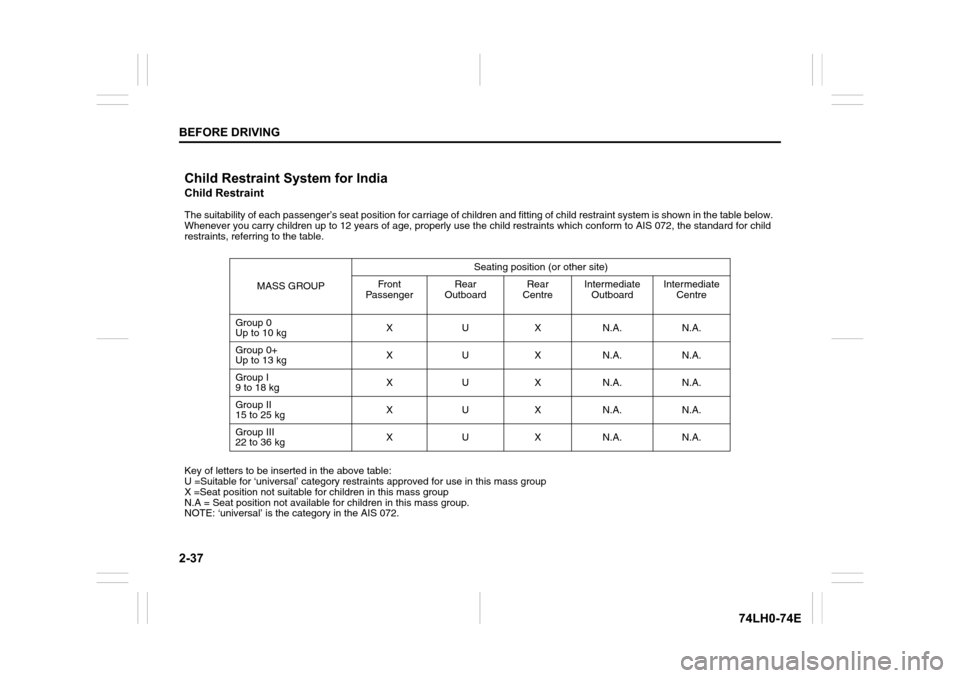
Child Restraint System for India
Child Restraint
The suitability of each passenger’s seat position for carriage of children and fitting of child restraint system is shown in the table below.
Whenever you carry children up to 12 years of age, properly use the child restraints which conform to AIS 072, the standard for child
restraints, referring to the table.
MASS GROUPSeating position (or other site)
Front
PassengerRear
OutboardRear
CentreIntermediate
OutboardIntermediate
Centre
Group 0
Up to 10 kgXUXN.A.N.A.
Group 0+
Up to 13 kgXUXN.A.N.A.
Group I
9 to 18 kgXUXN.A.N.A.
Group II
15 to 25 kgXUXN.A.N.A.
Group III
22 to 36 kgXUXN.A.N.A.
Key of letters to be inserted in the above table:
U =Suitable for ‘universal’ category restraints approved for use in this mass group
X =Seat position not suitable for children in this mass group
N.A = Seat position not available for children in this mass group.
NOTE: ‘universal’ is the category in the AIS 072.
Page 68 of 336
2-49
BEFORE DRIVING
74LH0-74E
SUZUKI dealer to have the system
inspected.
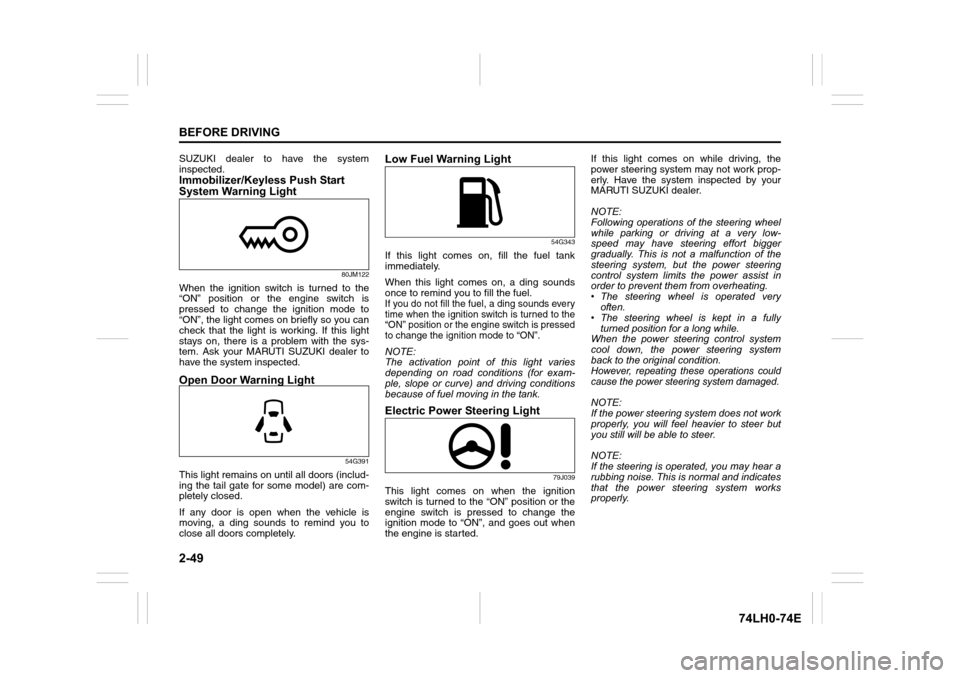
Immobilizer/Keyless Push Start
System Warning Light
80JM122
When the ignition switch is turned to the
“ON” position or the engine switch is
pressed to change the ignition mode to
“ON”, the light comes on briefly so you can
check that the light is working. If this light
stays on, there is a problem with the sys-
tem. Ask your MARUTI SUZUKI dealer to
have the system inspected.
Open Door Warning Light
54G391
This light remains on until all doors (includ-
ing the tail gate for some model) are com-
pletely closed.
If any door is open when the vehicle is
moving, a ding sounds to remind you to
close all doors completely.
Low Fuel Warning Light
54G343
If this light comes on, fill the fuel tank
immediately.
When this light comes on, a ding sounds
once to remind you to fill the fuel.
If you do not fill the fuel, a ding sounds every
time when the ignition switch is turned to the
“ON” position or the engine switch is pressed
to change the ignition mode to “ON”.
NOTE:
The activation point of this light varies
depending on road conditions (for exam-
ple, slope or curve) and driving conditions
because of fuel moving in the tank.
Electric Power Steering Light
79J039
This light comes on when the ignition
switch is turned to the “ON” position or the
engine switch is pressed to change the
ignition mode to “ON”, and goes out when
the engine is started.If this light comes on while driving, the
power steering system may not work prop-
erly. Have the system inspected by your
MARUTI SUZUKI dealer.
NOTE:
Following operations of the steering wheel
while parking or driving at a very low-
speed may have steering effort bigger
gradually. This is not a malfunction of the
steering system, but the power steering
control system limits the power assist in
order to prevent them from overheating.
• The steering wheel is operated very
often.
• The steering wheel is kept in a fully
turned position for a long while.
When the power steering control system
cool down, the power steering system
back to the original condition.
However, repeating these operations could
cause the power steering system damaged.
NOTE:
If the power steering system does not work
properly, you will feel heavier to steer but
you still will be able to steer.
NOTE:
If the steering is operated, you may hear a
rubbing noise. This is normal and indicates
that the power steering system works
properly.
Page 69 of 336
2-50
BEFORE DRIVING
74LH0-74E
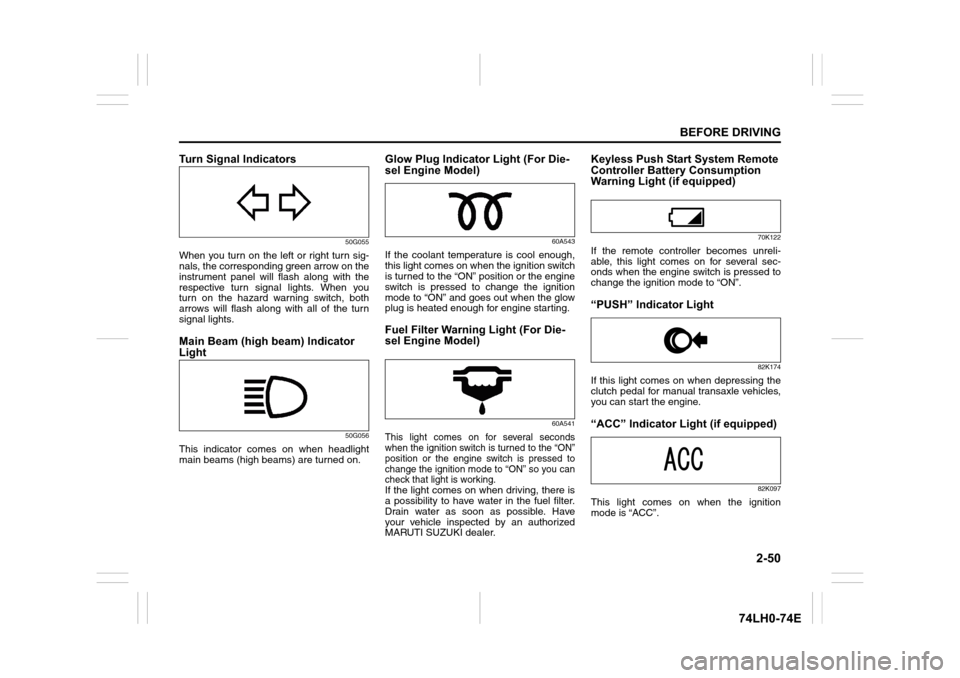
Turn Signal Indicators
50G055
When you turn on the left or right turn sig-
nals, the corresponding green arrow on the
instrument panel will flash along with the
respective turn signal lights. When you
turn on the hazard warning switch, both
arrows will flash along with all of the turn
signal lights.
Main Beam (high beam) Indicator
Light
50G056
This indicator comes on when headlight
main beams (high beams) are turned on.
Glow Plug Indicator Light (For Die-
sel Engine Model)
60A543
If the coolant temperature is cool enough,
this light comes on when the ignition switch
is turned to the “ON” position or the engine
switch is pressed to change the ignition
mode to “ON” and goes out when the glow
plug is heated enough for engine starting.
Fuel Filter Warning Light (For Die-
sel Engine Model)
60A541
This light comes on for several seconds
when the ignition switch is turned to the “ON”
position or the engine switch is pressed to
change the ignition mode to “ON” so you can
check that light is working.
If the light comes on when driving, there is
a possibility to have water in the fuel filter.
Drain water as soon as possible. Have
your vehicle inspected by an authorized
MARUTI SUZUKI dealer.
Keyless Push Start System Remote
Controller Battery Consumption
Warning Light (if equipped)
70K122
If the remote controller becomes unreli-
able, this light comes on for several sec-
onds when the engine switch is pressed to
change the ignition mode to “ON”.
“PUSH” Indicator Light
82K174
If this light comes on when depressing the
clutch pedal for manual transaxle vehicles,
you can start the engine.
“ACC” Indicator Light (if equipped)
82K097
This light comes on when the ignition
mode is “ACC”.
Page 78 of 336
2-59
BEFORE DRIVING
74LH0-74E
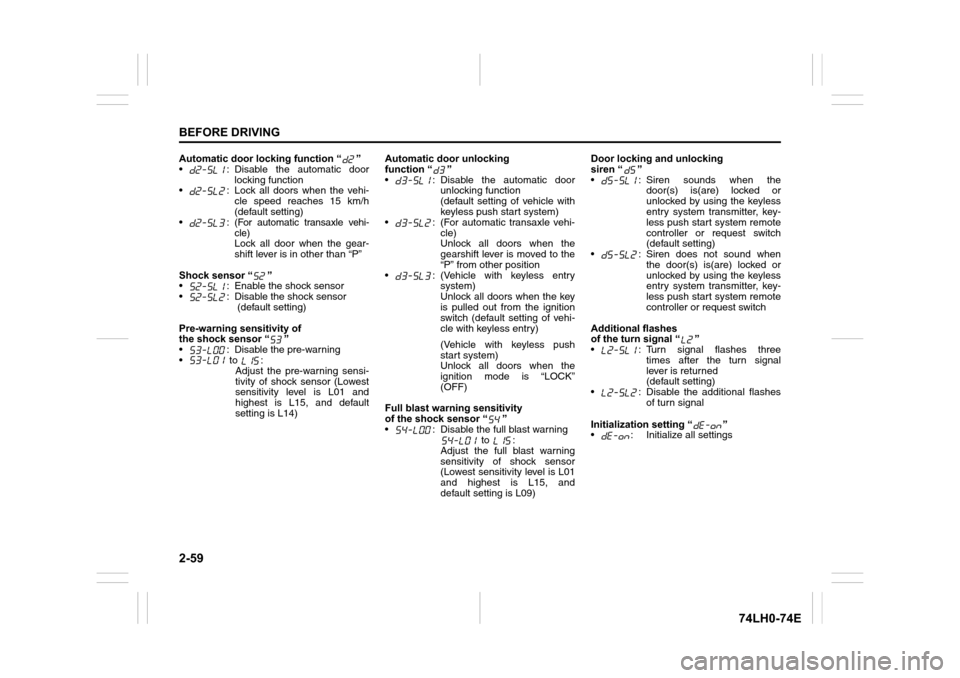
Automatic door locking function “ ”
• : Disable the automatic door
locking function
• : Lock all doors when the vehi-
cle speed reaches 15 km/h
(default setting)
•:
(For automatic transaxle vehi-
cle)
Lock all door when the gear-
shift lever is in other than “P”
Shock sensor “ ”
• : Enable the shock sensor
• : Disable the shock sensor
(default setting)
Pre-warning sensitivity of
the shock sensor “ ”
• : Disable the pre-warning
• to :
Adjust the pre-warning sensi-
tivity of shock sensor (Lowest
sensitivity level is L01 and
highest is L15, and default
setting is L14)Automatic door unlocking
function “ ”
• : Disable the automatic door
unlocking function
(default setting of vehicle with
keyless push start system)
• : (For automatic transaxle vehi-
cle)
Unlock all doors when the
gearshift lever is moved to the
“P” from other position
• : (Vehicle with keyless entry
system)
Unlock all doors when the key
is pulled out from the ignition
switch (default setting of vehi-
cle with keyless entry)
(Vehicle with keyless push
start system)
Unlock all doors when the
ignition mode is “LOCK”
(OFF)
Full blast warning sensitivity
of the shock sensor “ ”
• : Disable the full blast warning
to :
Adjust the full blast warning
sensitivity of shock sensor
(Lowest sensitivity level is L01
and highest is L15, and
default setting is L09)Door locking and unlocking
siren “ ”
• : Siren sounds when the
door(s) is(are) locked or
unlocked by using the keyless
entry system transmitter, key-
less push start system remote
controller or request switch
(default setting)
• : Siren does not sound when
the door(s) is(are) locked or
unlocked by using the keyless
entry system transmitter, key-
less push start system remote
controller or request switch
Additional flashes
of the turn signal “ ”
• : Turn signal flashes three
times after the turn signal
lever is returned
(default setting)
• : Disable the additional flashes
of turn signal
Initialization setting “ ”
• : Initialize all settings
Page 80 of 336
2-61
BEFORE DRIVING
74LH0-74E
Light Reminder Buzzer
(if equipped)
A buzzer sounds to remind you to turn off
the lights if they are left on when the igni-
tion key is removed and the driver’s door is
opened.
Rear Fog Light Switch (if equipped)
74LHT0226
To turn the rear fog light on, twist the knob
as shown in the illustration with the head-
lights are on. When the rear fog light is on,
an indicator light on the instrument cluster
will come on.
Front Fog Light Switch (if equipped)
64J058
The front fog light comes on when the fog
light switch is pushed in with the position
lights, tail lights and/or the headlights are
on. An indicator light above the switch will
be lit when the front fog light is on.
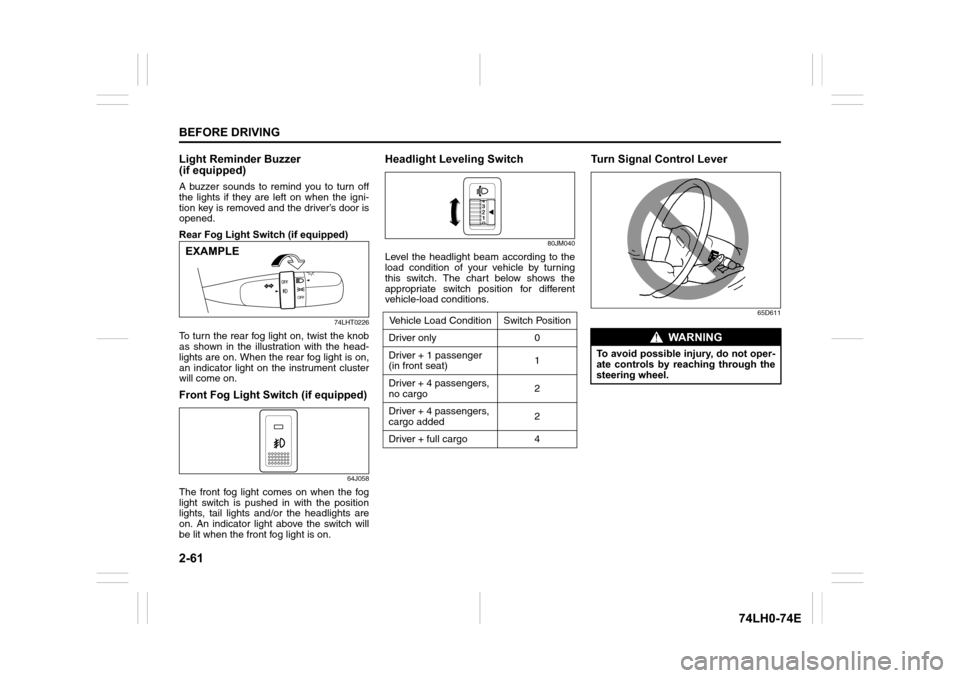
Headlight Leveling Switch
80JM040
Level the headlight beam according to the
load condition of your vehicle by turning
this switch. The chart below shows the
appropriate switch position for different
vehicle-load conditions.
Turn Signal Control Lever
65D611
EXAMPLE
Vehicle Load Condition Switch Position
Driver only 0
Driver + 1 passenger
(in front seat)1
Driver + 4 passengers,
no cargo2
Driver + 4 passengers,
cargo added2
Driver + full cargo 4
WA R N I N G
To avoid possible injury, do not oper-
ate controls by reaching through the
steering wheel.
Page 85 of 336
OPERATING YOUR VEHICLE
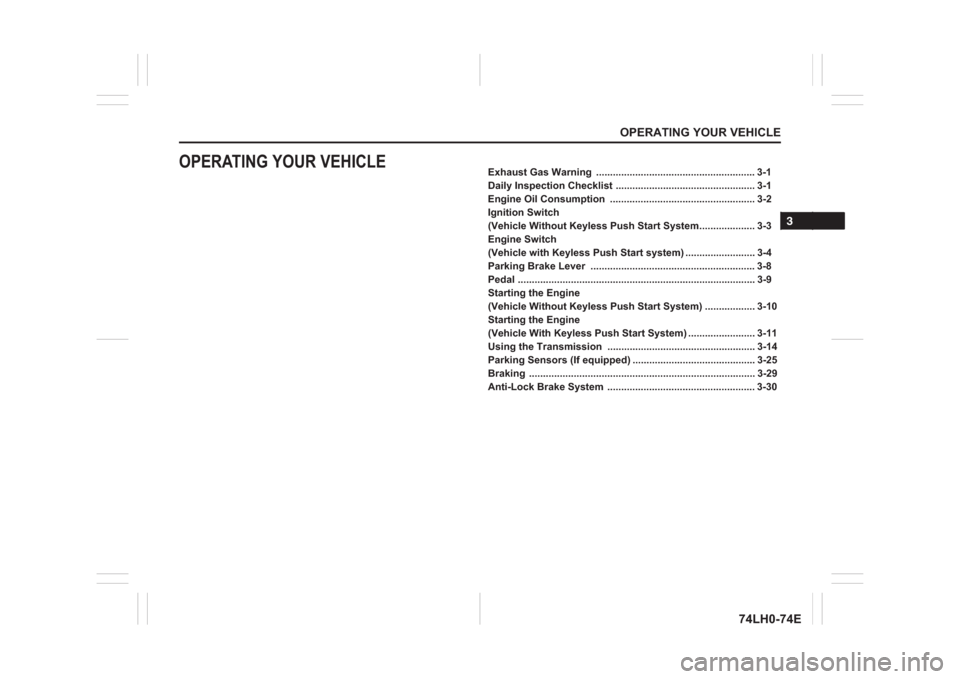
OPERATING YOUR VEHICLE
Exhaust Gas Warning ......................................................... 3-1
Daily Inspection Checklist .................................................. 3-1
Engine Oil Consumption .................................................... 3-2
Ignition Switch
(Vehicle Without Keyless Push Start System.................... 3-3
3
Engine Switch
(Vehicle with Keyless Push Start system) ......................... 3-4
Parking Brake Lever ........................................................... 3-8
Pedal ..................................................................................... 3-9
Starting the Engine
(Vehicle Without Keyless Push Start System) .................. 3-10
Starting the Engine
(Vehicle With Keyless Push Start System) ........................ 3-11
Using the Transmission ..................................................... 3-14
Parking Sensors (If equipped) ............................................ 3-25
Braking ................................................................................. 3-29
Anti-Lock Brake System ..................................................... 3-30
74LH0-74E
Page 87 of 336
3-2
OPERATING YOUR VEHICLE
74LH0-74E
5) Check the headlights, turn signal lights,
brake lights and horn for proper opera-
tion.
6) Adjust the seat and adjustable head
restraint (if equipped).
7) Check the brake pedal and the parking
brake lever.
8) Adjust the mirrors.
9) Make sure that you and all passengers
have properly fastened your seat belts.
10)Make sure that all warning lights come
on as the key is turned to the “ON” posi-
tion or the engine is pressed to change
the ignition mode to “ON”.
11)Check all gauges.
12)Make sure that the BRAKE SYSTEM
WARNING light turns off when the
parking brake is released.
Once a week, or each time you fill your fuel
tank, perform the following under-hood
checks:
1) Engine oil level
2) Coolant level
3) Brake fluid level
4) Battery solution level
5) Windshield washer fluid level
6) Hood latch operation
Pull the bonnet hood release handle
inside the vehicle. Make sure that you
cannot open the hood all the way with-
out releasing the secondary latch. Be
sure to close the hood securely after
checking for proper latch operation.
See “All latches, hinges and locks” of“CHASSIS AND BODY” in the “Periodic
Maintenance Schedule” in the
“INSPECTION AND MAINTENANCE”
section for lubrication schedule.
Once a month, or each time you fill your
fuel tank, check the tire pressure using a
tire pressure gauge. Also check the tire
pressure of the spare tire.
Engine Oil ConsumptionIt is normal for the engine to consume
some engine oil during normal vehicle
operation.
The amount of engine oil consumed
depends on the viscosity of the oil, the
quality of the oil and the conditions the
vehicle is driven under.
More oil is consumed during high-speed
driving and when there is frequent acceler-
ation and deceleration. Under high loads,
your engine also will consume more oil.
A new engine also consumes more oil,
since its pistons, piston rings and cylinder
walls have not yet become conditioned.
New engines reach the normal level of oilconsumption only after approximately 5000
km driving.
Oil consumption:
Max. 1.0 L per 1000 km When judging the amount of oil consump-
tion, note that the oil may become diluted
and make it difficult to accurately judge the
true oil level.
As an example, if a vehicle is used for
repeated short trips, and consumes a nor-
mal amount of oil, the dipstick may not
show any drop in the oil level at all, even
after 1000 km or more of driving. This is
because the oil is gradually becoming
diluted with fuel or moisture, making it
appear that the oil level has not changed.
You should also be aware that the diluting
ingredients evaporate out when the vehicle
is subsequently driven at high speeds,
such as on an expressway, making it
appear that oil is excessively consumed
after high-speed driving.
WA R N I N G
Make sure the hood is fully closed
and latched before driving. If it is not,
it can fly up unexpectedly during
driving, obstructing your view and
resulting in an accident.
Daily Inspection Checklist: NO
Engine Oil Consumption:
Page 88 of 336
3-3OPERATING YOUR VEHICLE
74LH0-74E
Ignition Switch
(Vehicle without Keyless
Push Start System)
65D611
60B041
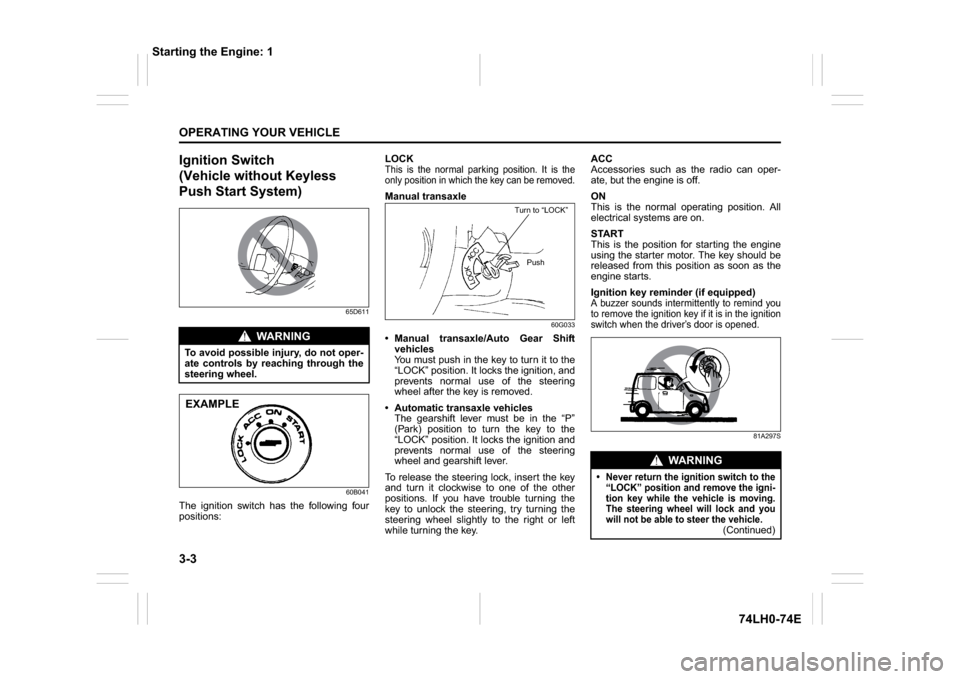
The ignition switch has the following four
positions:LOCK
This is the normal parking position. It is the
only position in which the key can be removed.Manual transaxle
60G033
Manual transaxle/Auto Gear Shift
vehicles
You must push in the key to turn it to the
“LOCK” position. It locks the ignition, and
prevents normal use of the steering
wheel after the key is removed.
Automatic transaxle vehicles
The gearshift lever must be in the “P”
(Park) position to turn the key to the
“LOCK” position. It locks the ignition and
prevents normal use of the steering
wheel and gearshift lever.
To release the steering lock, insert the key
and turn it clockwise to one of the other
positions. If you have trouble turning the
key to unlock the steering, try turning the
steering wheel slightly to the right or left
while turning the key.ACC
Accessories such as the radio can oper-
ate, but the engine is off.
ON
This is the normal operating position. All
electrical systems are on.
START
This is the position for starting the engine
using the starter motor. The key should be
released from this position as soon as the
engine starts.
Ignition key reminder (if equipped)
A buzzer sounds intermittently to remind you
to remove the ignition key if it is in the ignition
switch when the driver’s door is opened.
81A297S
WA R N I N G
To avoid possible injury, do not oper-
ate controls by reaching through the
steering wheel.EXAMPLE
Turn to “LOCK”
Push
WA R N I N G
Never return the ignition switch to the
“LOCK” position and remove the igni-
tion key while the vehicle is moving.
The steering wheel will lock and you
will not be able to steer the vehicle.
(Continued)
Starting the Engine: 1