Ac control SUZUKI SWIFT 2017 5.G Repair Manual
[x] Cancel search | Manufacturer: SUZUKI, Model Year: 2017, Model line: SWIFT, Model: SUZUKI SWIFT 2017 5.GPages: 336, PDF Size: 6.24 MB
Page 133 of 336
5-6
OTHER CONTROLS AND EQUIPMENT
74LH0-74E
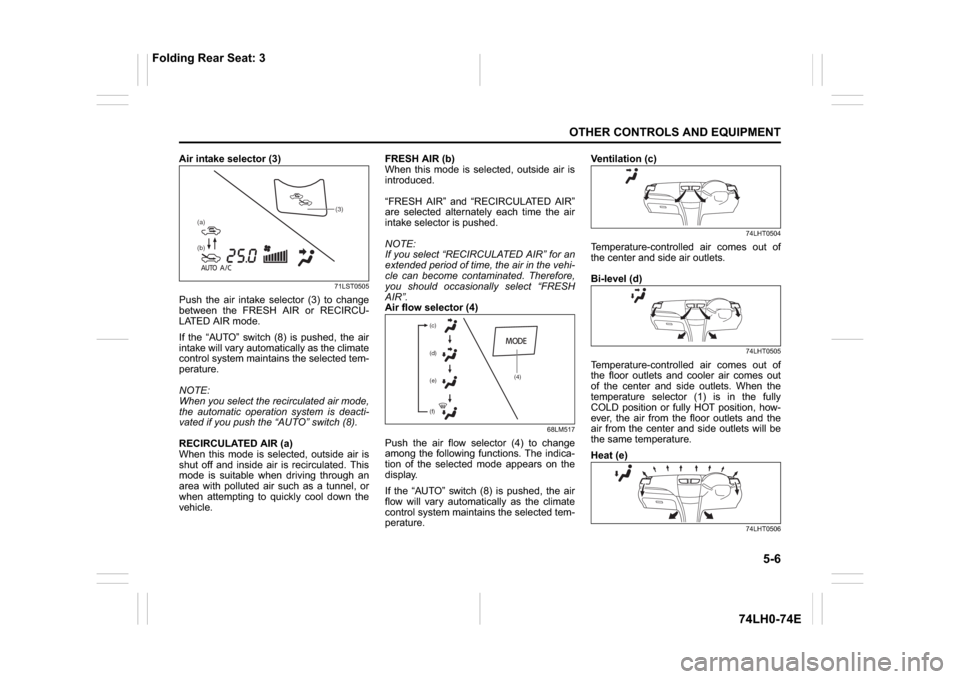
Air intake selector (3)
71LST0505
Push the air intake selector (3) to change
between the FRESH AIR or RECIRCU-
LATED AIR mode.
If the “AUTO” switch (8) is pushed, the air
intake will vary automatically as the climate
control system maintains the selected tem-
perature.
NOTE:
When you select the recirculated air mode,
the automatic operation system is deacti-
vated if you push the “AUTO” switch (8).
RECIRCULATED AIR (a)
When this mode is selected, outside air is
shut off and inside air is recirculated. This
mode is suitable when driving through an
area with polluted air such as a tunnel, or
when attempting to quickly cool down the
vehicle.FRESH AIR (b)
When this mode is selected, outside air is
introduced.
“FRESH AIR” and “RECIRCULATED AIR”
are selected alternately each time the air
intake selector is pushed.
NOTE:
If you select “RECIRCULATED AIR” for an
extended period of time, the air in the vehi-
cle can become contaminated. Therefore,
you should occasionally select “FRESH
AIR”.
Air flow selector (4)
68LM517
Push the air flow selector (4) to change
among the following functions. The indica-
tion of the selected mode appears on the
display.
If the “AUTO” switch (8) is pushed, the air
flow will vary automatically as the climate
control system maintains the selected tem-
perature.Ventilation (c)
74LHT0504
Temperature-controlled air comes out of
the center and side air outlets.
Bi-level (d)
74LHT0505
Temperature-controlled air comes out of
the floor outlets and cooler air comes out
of the center and side outlets. When the
temperature selector (1) is in the fully
COLD position or fully HOT position, how-
ever, the air from the floor outlets and the
air from the center and side outlets will be
the same temperature.
Heat (e)
74LHT0506
(b) (a)
(3)
(4) (c)
(d)
(e)
(f)
Folding Rear Seat: 3
Page 134 of 336
5-7OTHER CONTROLS AND EQUIPMENT
74LH0-74E
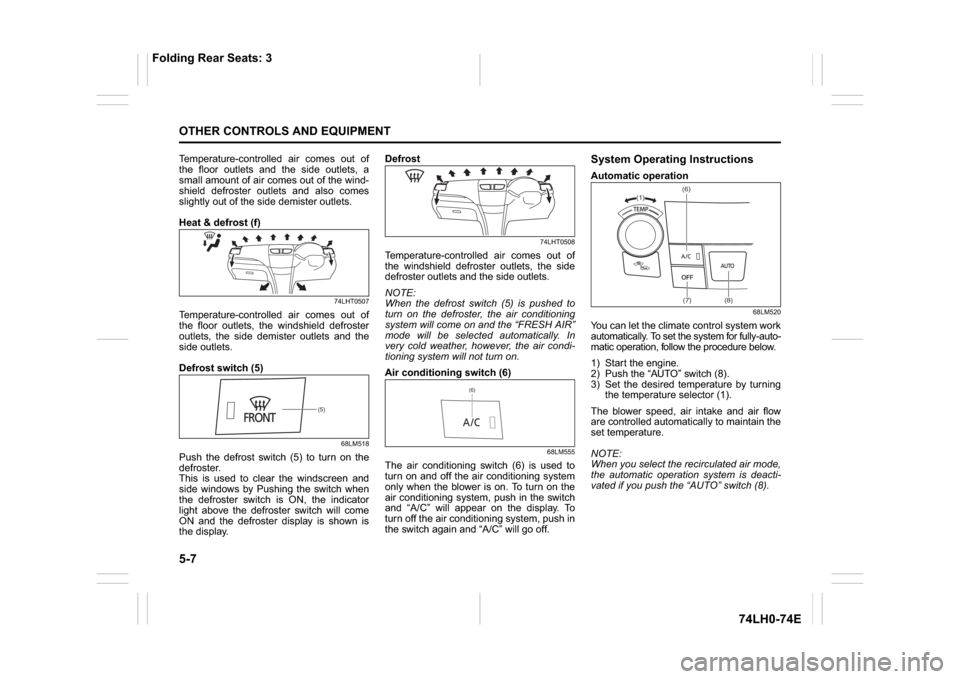
Temperature-controlled air comes out of
the floor outlets and the side outlets, a
small amount of air comes out of the wind-
shield defroster outlets and also comes
slightly out of the side demister outlets.
Heat & defrost (f)
74LHT0507
Temperature-controlled air comes out of
the floor outlets, the windshield defroster
outlets, the side demister outlets and the
side outlets.
Defrost switch (5)
68LM518
Push the defrost switch (5) to turn on the
defroster.
This is used to clear the windscreen and
side windows by Pushing the switch when
the defroster switch is ON, the indicator
light above the defroster switch will come
ON and the defroster display is shown is
the display.Defrost
74LHT0508
Temperature-controlled air comes out of
the windshield defroster outlets, the side
defroster outlets and the side outlets.
NOTE:
When the defrost switch (5) is pushed to
turn on the defroster, the air conditioning
system will come on and the “FRESH AIR”
mode will be selected automatically. In
very cold weather, however, the air condi-
tioning system will not turn on.
Air conditioning switch (6)
68LM555
The air conditioning switch (6) is used to
turn on and off the air conditioning system
only when the blower is on. To turn on the
air conditioning system, push in the switch
and “A/C” will appear on the display. To
turn off the air conditioning system, push in
the switch again and “A/C” will go off.
System Operating InstructionsAutomatic operation
68LM520
You can let the climate control system work
automatically. To set the system for fully-auto-
matic operation, follow the procedure below.
1) Start the engine.
2) Push the “AUTO” switch (8).
3) Set the desired temperature by turning
the temperature selector (1).
The blower speed, air intake and air flow
are controlled automatically to maintain the
set temperature.
NOTE:
When you select the recirculated air mode,
the automatic operation system is deacti-
vated if you push the “AUTO” switch (8).
(5)
(6)
(1)(6)
(7) (8)
Folding Rear Seats: 3
Page 135 of 336
5-8
OTHER CONTROLS AND EQUIPMENT
74LH0-74E
You can use the air conditioning switch (6)
to manually turn the air conditioner on or off
according to your preference. When you
turn the air conditioning switch off, the cli-
mate control system cannot lower the inside
temperature below outside temperature.
To turn the climate control system off, push
the “OFF” switch (7).
NOTE:
If the “AUTO” on the display blinks, there is
a problem in the heating system and/or air
conditioning system. You should have the
system inspected by an authorized MAR-
UTI SUZUKI dealer.
NOTE:
To find the temperature at which you are
most comfortable, start with the 25°C
(75°F) setting.
If you turn the temperature selector (1)
until “HI” or “LO” appears on the display,
the climate control system will operate at
maximum heating or cooling and the
blower will run at full speed.
To avoid blowing cold air in cold weather
or hot air in hot weather, the system will
delay turning on the blower until warmed
or chilled air is available.
If your vehicle has been left in the sun
with the windows closed, it will cool
faster if you open the windows briefly. Even under the automatic operation, you
can set individual selectors to the man-
ual mode. The manually selected func-
tions are maintained, and the other
functions remain under automatic opera-
tion.
To return the blower speed selector (2),
air intake selector (3), and air flow selec-
tor (4) to automatic operation, push the
“AUTO” switch (8).
74LHT0510
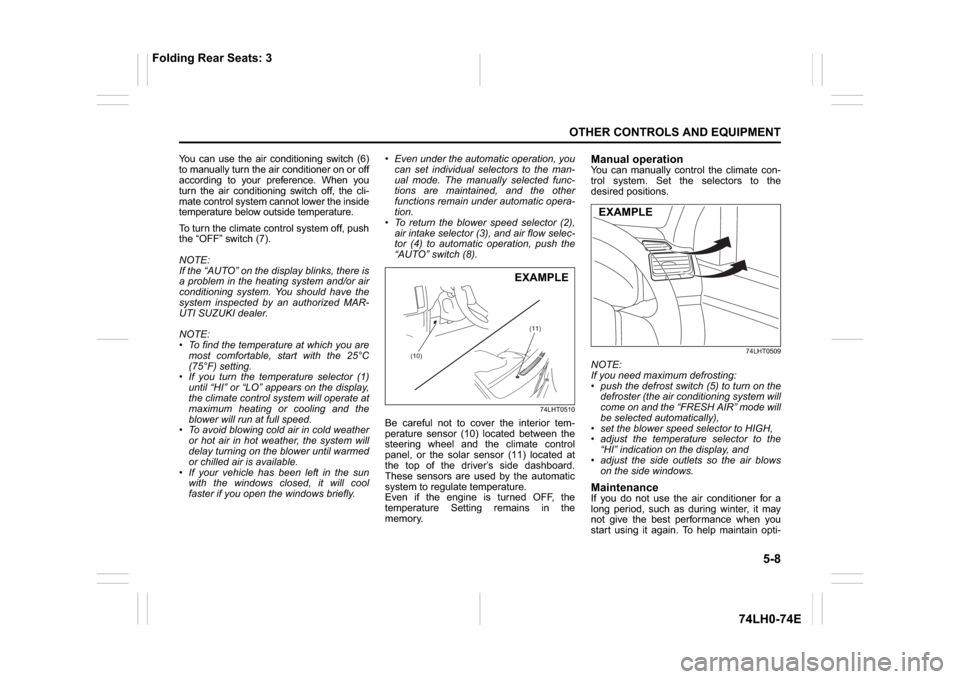
Be careful not to cover the interior tem-
perature sensor (10) located between the
steering wheel and the climate control
panel, or the solar sensor (11) located at
the top of the driver’s side dashboard.
These sensors are used by the automatic
system to regulate temperature.
Even if the engine is turned OFF, the
temperature Setting remains in the
memory.
Manual operationYou can manually control the climate con-
trol system. Set the selectors to the
desired positions.
74LHT0509
NOTE:
If you need maximum defrosting:
push the defrost switch (5) to turn on the
defroster (the air conditioning system will
come on and the “FRESH AIR” mode will
be selected automatically),
set the blower speed selector to HIGH,
adjust the temperature selector to the
“HI” indication on the display, and
adjust the side outlets so the air blows
on the side windows.MaintenanceIf you do not use the air conditioner for a
long period, such as during winter, it may
not give the best performance when you
start using it again. To help maintain opti-
(10)(11)
EXAMPLE
EXAMPLE
Folding Rear Seats: 3
Page 136 of 336
5-9OTHER CONTROLS AND EQUIPMENT
74LH0-74E
mum performance and durability of your air
conditioner, it needs to be run periodically.
Operate the air conditioner at least once a
month for one minute with the engine
idling. This circulates the refrigerant and oil
and helps protect the internal components.
NOTE:
Your vehicle uses the air conditioning
refrigerant HFC-134a, commonly called
“R-134a”. Only R-134a should be used in
your vehicle.Radio Antenna
63J055
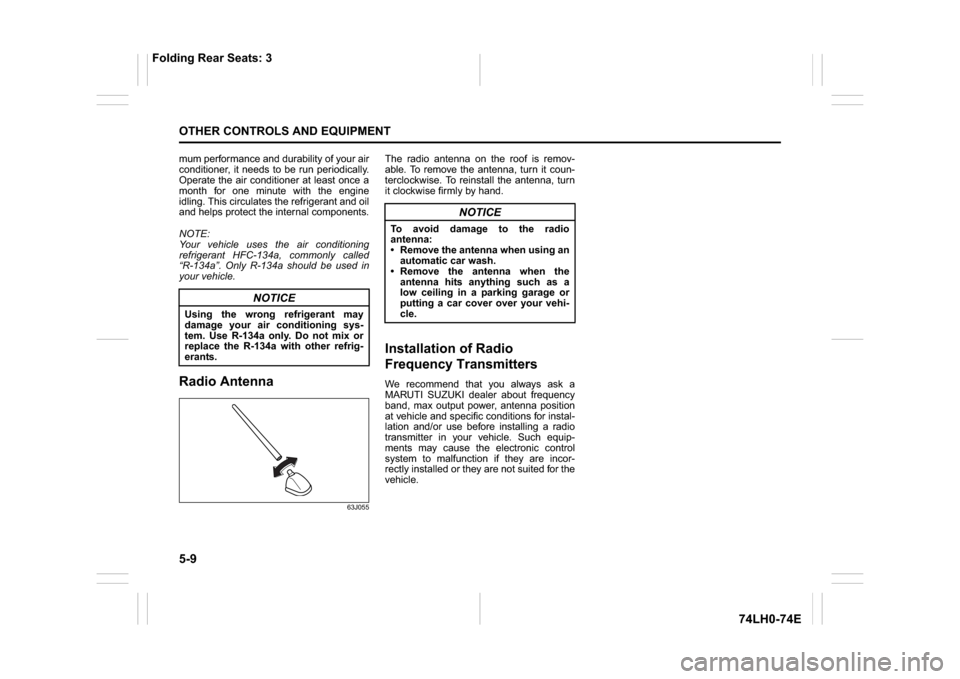
The radio antenna on the roof is remov-
able. To remove the antenna, turn it coun-
terclockwise. To reinstall the antenna, turn
it clockwise firmly by hand.Installation of Radio
Frequency TransmittersWe recommend that you always ask a
MARUTI SUZUKI dealer about frequency
band, max output power, antenna position
at vehicle and specific conditions for instal-
lation and/or use before installing a radio
transmitter in your vehicle. Such equip-
ments may cause the electronic control
system to malfunction if they are incor-
rectly installed or they are not suited for the
vehicle.
NOTICE
Using the wrong refrigerant may
damage your air conditioning sys-
tem. Use R-134a only. Do not mix or
replace the R-134a with other refrig-
erants.
NOTICE
To avoid damage to the radio
antenna:
Remove the antenna when using an
automatic car wash.
Remove the antenna when the
antenna hits anything such as a
low ceiling in a parking garage or
putting a car cover over your vehi-
cle.
Folding Rear Seats: 3
Page 137 of 336
5-10
OTHER CONTROLS AND EQUIPMENT
74LH0-74E
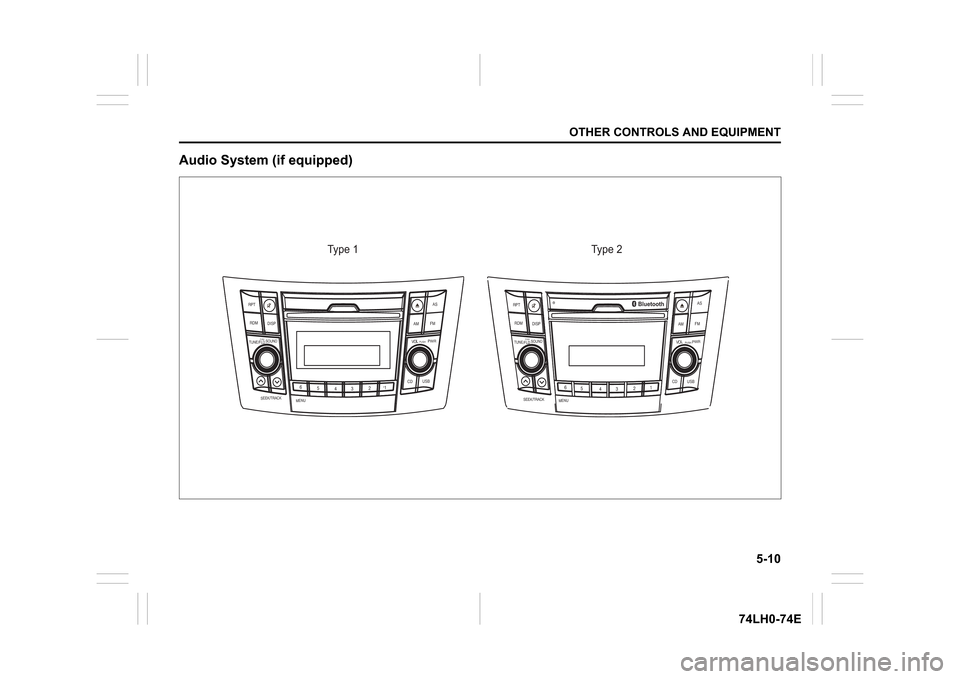
Audio System (if equipped)
B S U
CD
2
3 4 5 6
SEEK/TRACK
AS
AMFM RPT
RDM
DISP
PUSHSOUND
TUNE/FLD
VOL
PWRPUSH
1
B S U
CD
1
2
3 4 5 6
MENU
AMFM RPT
RDM
DISPAS
Bluetooth
R
1
L PWRPUSHVO
SEEK/TRACKPUSHSOUND
TUNE/FLD
MENU
Type 1 Type 2
Page 138 of 336
5-11OTHER CONTROLS AND EQUIPMENT
74LH0-74E
Safety Information Notes on Discs
Precautions
When the inside of the vehicle is very
cold and the player is used soon after
switching on the heater, condensation
may form on the disc or the optical parts
of the player and proper playback may
not be possible. If condensation forms
on the disc, wipe it off with a soft cloth. If
condensation forms on the optical parts
of the player, do not use the player for
about one hour. This will allow the con-
densation to disappear normally.
Driving on extremely bumpy roads which
cause severe vibrations may cause
sound to skip.
This unit uses a precision mechanism.
Even in the event that trouble arises,
never open the case, disassemble the
unit, or lubricate the rotating parts.
Please bring the unit to an authorized
MARUTI SUZUKI dealer.Cautions on Handling
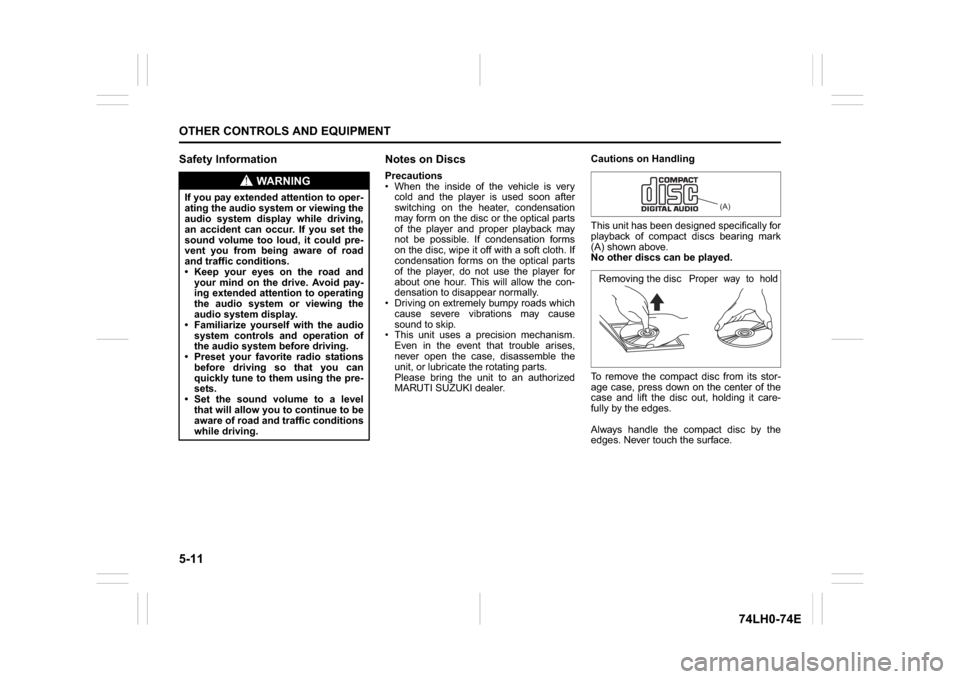
This unit has been designed specifically for
playback of compact discs bearing mark
(A) shown above.
No other discs can be played.
To remove the compact disc from its stor-
age case, press down on the center of the
case and lift the disc out, holding it care-
fully by the edges.
Always handle the compact disc by the
edges. Never touch the surface.
WA R N I N G
If you pay extended attention to oper-
ating the audio system or viewing the
audio system display while driving,
an accident can occur. If you set the
sound volume too loud, it could pre-
vent you from being aware of road
and traffic conditions.
Keep your eyes on the road and
your mind on the drive. Avoid pay-
ing extended attention to operating
the audio system or viewing the
audio system display.
Familiarize yourself with the audio
system controls and operation of
the audio system before driving.
Preset your favorite radio stations
before driving so that you can
quickly tune to them using the pre-
sets.
Set the sound volume to a level
that will allow you to continue to be
aware of road and traffic conditions
while driving.
(A)
Removing the disc
Proper way to hold
the compact disc
Page 139 of 336
5-12
OTHER CONTROLS AND EQUIPMENT
74LH0-74E
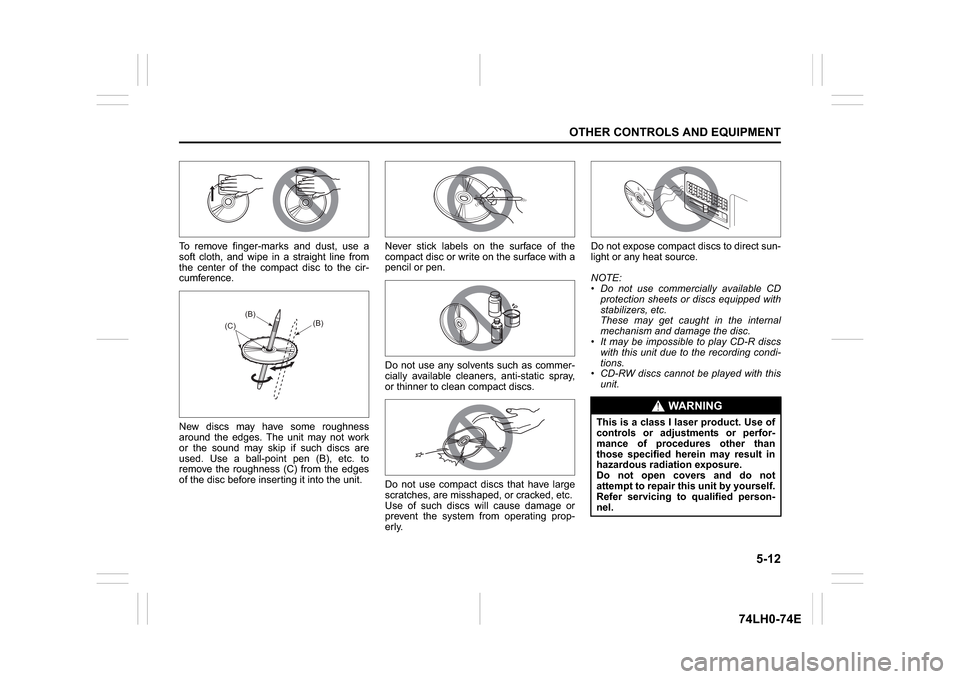
To remove finger-marks and dust, use a
soft cloth, and wipe in a straight line from
the center of the compact disc to the cir-
cumference.
New discs may have some roughness
around the edges. The unit may not work
or the sound may skip if such discs are
used. Use a ball-point pen (B), etc. to
remove the roughness (C) from the edges
of the disc before inserting it into the unit.Never stick labels on the surface of the
compact disc or write on the surface with a
pencil or pen.
Do not use any solvents such as commer-
cially available cleaners, anti-static spray,
or thinner to clean compact discs.
Do not use compact discs that have large
scratches, are misshaped, or cracked, etc.
Use of such discs will cause damage or
prevent the system from operating prop-
erly.Do not expose compact discs to direct sun-
light or any heat source.
NOTE:
Do not use commercially available CD
protection sheets or discs equipped with
stabilizers, etc.
These may get caught in the internal
mechanism and damage the disc.
It may be impossible to play CD-R discs
with this unit due to the recording condi-
tions.
CD-RW discs cannot be played with this
unit.
(B)
(B)
(C)
WA R N I N G
This is a class I laser product. Use of
controls or adjustments or perfor-
mance of procedures other than
those specified herein may result in
hazardous radiation exposure.
Do not open covers and do not
attempt to repair this unit by yourself.
Refer servicing to qualified person-
nel.
Page 140 of 336
5-13OTHER CONTROLS AND EQUIPMENT
74LH0-74E
(if equipped)
The
® word mark and logo are registered
trademarks and are owned by the SIG,
Ink.
Stop using this unit and a
® ready
device whenever requested.
This unit shares the communication fre-
quency with other private or public wireless
communication equipment such as a wire-
less LAN and other wireless communica-
tion radios.
You should stop using this unit whenever
you are notified that your unit disturbs
other wireless communication immediately.
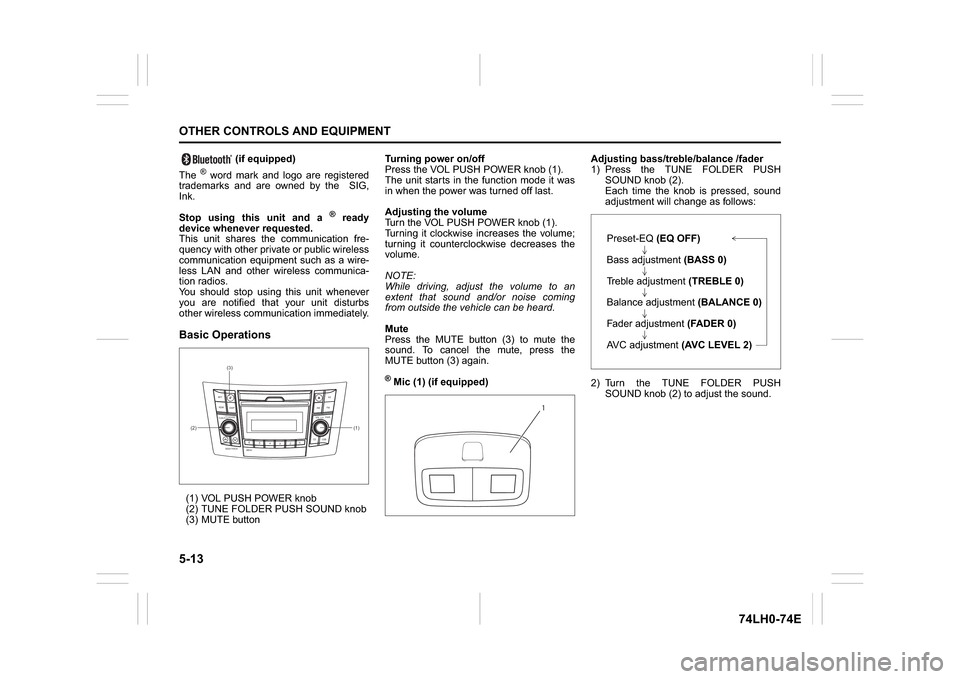
Basic Operations(1) VOL PUSH POWER knob
(2) TUNE FOLDER PUSH SOUND knob
(3) MUTE buttonTurning power on/off
Press the VOL PUSH POWER knob (1).
The unit starts in the function mode it was
in when the power was turned off last.
Adjusting the volume
Turn the VOL PUSH POWER knob (1).
Turning it clockwise increases the volume;
turning it counterclockwise decreases the
volume.
NOTE:
While driving, adjust the volume to an
extent that sound and/or noise coming
from outside the vehicle can be heard.
Mute
Press the MUTE button (3) to mute the
sound. To cancel the mute, press the
MUTE button (3) again.
® Mic (1) (if equipped)Adjusting bass/treble/balance /fader
1) Press the TUNE FOLDER PUSH
SOUND knob (2).
Each time the knob is pressed, sound
adjustment will change as follows:
2) Turn the TUNE FOLDER PUSH
SOUND knob (2) to adjust the sound.
(1) (2)(3)
B
S U
CD
2
3 4 5 6
SEEK/TRACK
AS
AMFM RPT
RDM
DISP
PUSHSOUND
TUNE/FLD
VOLPWRPUSH
11
MENU
1
Preset-EQ(EQ OFF)
Bass adjustment (BASS 0)
Treble adjustment (TREBLE 0)
Balance adjustment (BALANCE 0)
Fader adjustment (FADER 0)
AVC adjustment (AVC LEVEL 2)
Page 141 of 336
5-14
OTHER CONTROLS AND EQUIPMENT
74LH0-74E
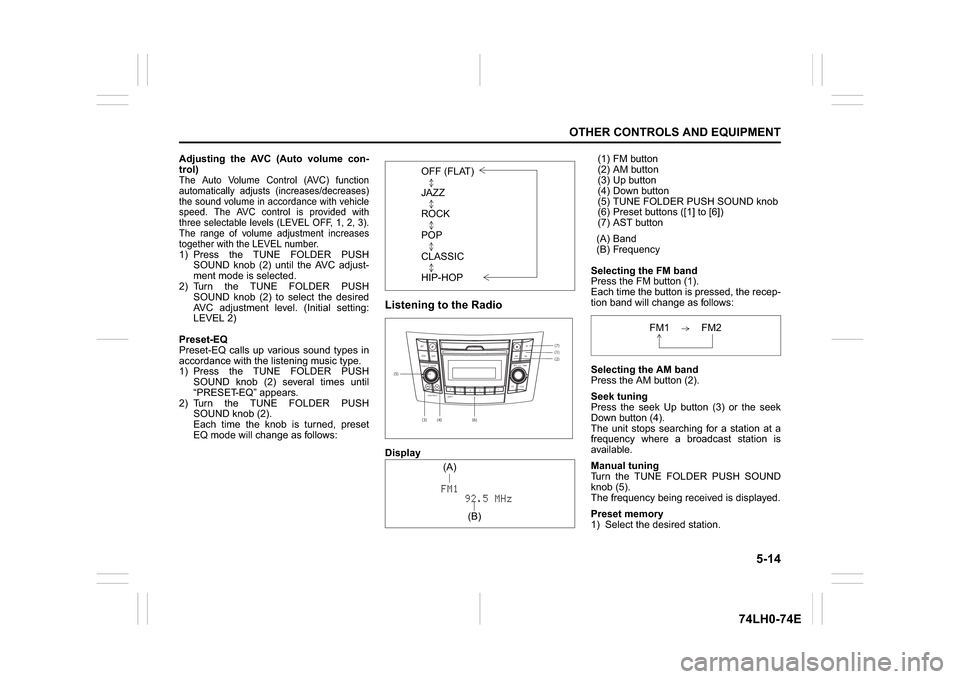
Adjusting the AVC (Auto volume con-
trol)The Auto Volume Control (AVC) function
automatically adjusts (increases/decreases)
the sound volume in accordance with vehicle
speed. The AVC control is provided with
three selectable levels (LEVEL OFF, 1, 2, 3).
The range of volume adjustment increases
together with the LEVEL number.1) Press the TUNE FOLDER PUSH
SOUND knob (2) until the AVC adjust-
ment mode is selected.
2) Turn the TUNE FOLDER PUSH
SOUND knob (2) to select the desired
AVC adjustment level. (Initial setting:
LEVEL 2)
Preset-EQ
Preset-EQ calls up various sound types in
accordance with the listening music type.
1) Press the TUNE FOLDER PUSH
SOUND knob (2) several times until
“PRESET-EQ” appears.
2) Turn the TUNE FOLDER PUSH
SOUND knob (2).
Each time the knob is turned, preset
EQ mode will change as follows:
Listening to the RadioDisplay(1) FM button
(2) AM button
(3) Up button
(4) Down button
(5) TUNE FOLDER PUSH SOUND knob
(6) Preset buttons ([1] to [6])
(7) AST button
(A) Band
(B) Frequency
Selecting the FM band
Press the FM button (1).
Each time the button is pressed, the recep-
tion band will change as follows:
Selecting the AM band
Press the AM button (2).
Seek tuning
Press the seek Up button (3) or the seek
Down button (4).
The unit stops searching for a station at a
frequency where a broadcast station is
available.
Manual tuning
Turn the TUNE FOLDER PUSH SOUND
knob (5).
The frequency being received is displayed.
Preset memory
1) Select the desired station. OFF (FLAT)
JAZZ
ROCK
POP
CLASSIC
HIP-HOP(5)
(6)(7)
B S U
CD
2
3 4 5 6
SEEK/TRACK
AS
AMFM RPT
RDM
DISP
PUSHSOUND
TUNE/FLD
VOL PWRPUSH
11
MENU
(1)(2)
(3)
(4)(A)
(B)
FM1 FM2
Page 142 of 336
![SUZUKI SWIFT 2017 5.G Repair Manual 5-15OTHER CONTROLS AND EQUIPMENT
74LH0-74E
2) Hold down a desired button ([1] to [6])
of the Preset buttons (6) to which you
want to store the station for 2 seconds
or longer.
Auto store
Hold down the SUZUKI SWIFT 2017 5.G Repair Manual 5-15OTHER CONTROLS AND EQUIPMENT
74LH0-74E
2) Hold down a desired button ([1] to [6])
of the Preset buttons (6) to which you
want to store the station for 2 seconds
or longer.
Auto store
Hold down the](/img/20/7603/w960_7603-141.png)
5-15OTHER CONTROLS AND EQUIPMENT
74LH0-74E
2) Hold down a desired button ([1] to [6])
of the Preset buttons (6) to which you
want to store the station for 2 seconds
or longer.
Auto store
Hold down the AST button (7) for 2 sec-
onds or longer.
Six stations in good reception will automat-
ically be stored to the Preset buttons (6) in
order, starting from a station whose fre-
quency is the lowest.
NOTE:
Auto store can be released by pressing
AST button (7) while auto store is under
way.
When the auto store is performed, the
station previously stored in the memory
at the position is overwritten.
When there are fewer than 6 stations
that can be stored even if 1 round of
auto store operation is performed, no
station will be stored at the remaining
Preset buttons (6).
6 stations can be preset for FM1 and
FM2 in common, and 6 stations for AM
in auto store mode.
Auto store mode on/off
Press the AST button (7).
Each time the button is pressed, the mode
is switched as follows:Radio Reception
Radio reception can be affected by environ-
ment, atmospheric conditions, or radio sig-
nal’s power and distance from the station.
Nearby mountains and buildings may inter-
fere or deflect radio reception, causing poor
reception. Poor reception or radio static can
also be caused by electric current from
overhead wires or high voltage power lines.Listening to a CD
74LHT5011
Display(1) Insertion slot
(2) Eject button
(3) CD button
(4) Up button
(5) Down button
(6) RPT button
(7) RDM button
(8) DISP button
(A) Track number
(B) Play time
NOTE:
This product does not support 8 cm CD
(sometimes called as “mini single CD”, “3-
inch CD”, “CD3”, etc.).
CDs or CD-ROMs carrying no mark (A)
cannot be used.
Some discs recorded in CD-R/CD-RW
format may sometimes be impossible to
use. AST mode on AST mode off
(7)
B S U
CD
2
3 4 5 6
SEEK/TRACK
AS
AMFM RPT
RDM
DISP
PUSHSOUND
TUNE/FLD
VOLPWRPUSH
11
MENU
(4)
(6)
(5) (8)(1)
(3)(2)
(B)(A)
(A)