clock SUZUKI SWIFT 2017 5.G Owners Manual
[x] Cancel search | Manufacturer: SUZUKI, Model Year: 2017, Model line: SWIFT, Model: SUZUKI SWIFT 2017 5.GPages: 336, PDF Size: 6.24 MB
Page 21 of 336
2-2
BEFORE DRIVING
74LH0-74E
Ignition Key Reminder (if equipped)
A buzzer sounds intermittently to remind
you to remove the ignition key if it is in the
ignition switch when the driver’s door is
opened.
Door Locks
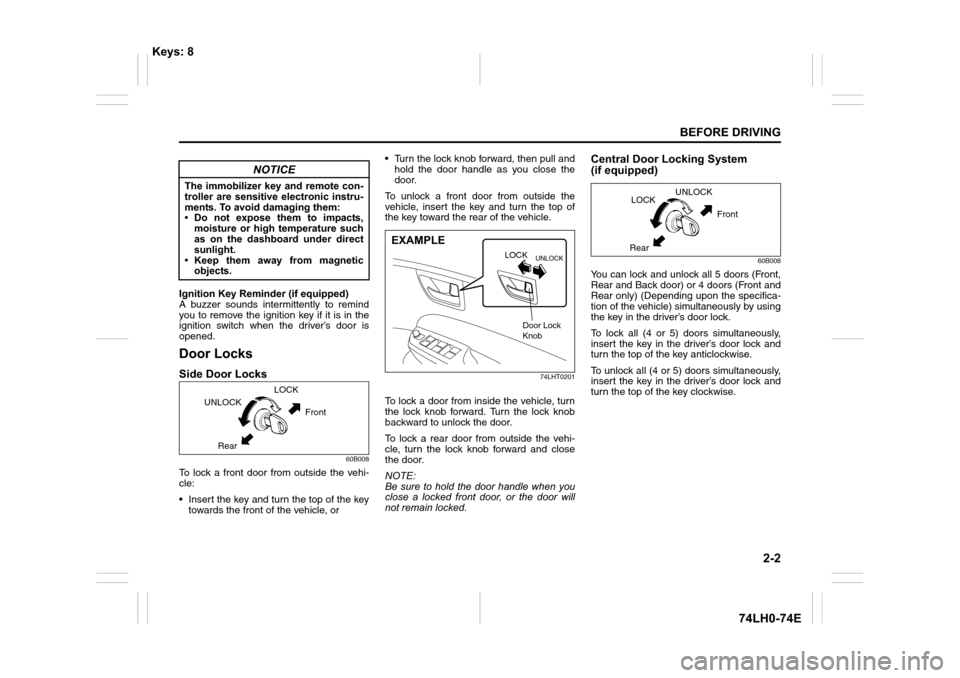
Side Door Locks
60B008
To lock a front door from outside the vehi-
cle:
• Insert the key and turn the top of the key
towards the front of the vehicle, or• Turn the lock knob forward, then pull and
hold the door handle as you close the
door.
To unlock a front door from outside the
vehicle, insert the key and turn the top of
the key toward the rear of the vehicle.
74LHT0201
To lock a door from inside the vehicle, turn
the lock knob forward. Turn the lock knob
backward to unlock the door.
To lock a rear door from outside the vehi-
cle, turn the lock knob forward and close
the door.
NOTE:
Be sure to hold the door handle when you
close a locked front door, or the door will
not remain locked.
Central Door Locking System
(if equipped)
60B008
You can lock and unlock all 5 doors (Front,
Rear and Back door) or 4 doors (Front and
Rear only) (Depending upon the specifica-
tion of the vehicle) simultaneously by using
the key in the driver’s door lock.
To lock all (4 or 5) doors simultaneously,
insert the key in the driver’s door lock and
turn the top of the key anticlockwise.
To unlock all (4 or 5) doors simultaneously,
insert the key in the driver’s door lock and
turn the top of the key clockwise.
NOTICE
The immobilizer key and remote con-
troller are sensitive electronic instru-
ments. To avoid damaging them:
• Do not expose them to impacts,
moisture or high temperature such
as on the dashboard under direct
sunlight.
• Keep them away from magnetic
objects.
UNLOCKLOCK
Front
Rear
UNLOCKLOCK
EXAMPLE
Door Lock
Knob
UNLOCK
LOCK
Front
Rear
Keys: 8
Page 23 of 336
2-4
BEFORE DRIVING
74LH0-74E
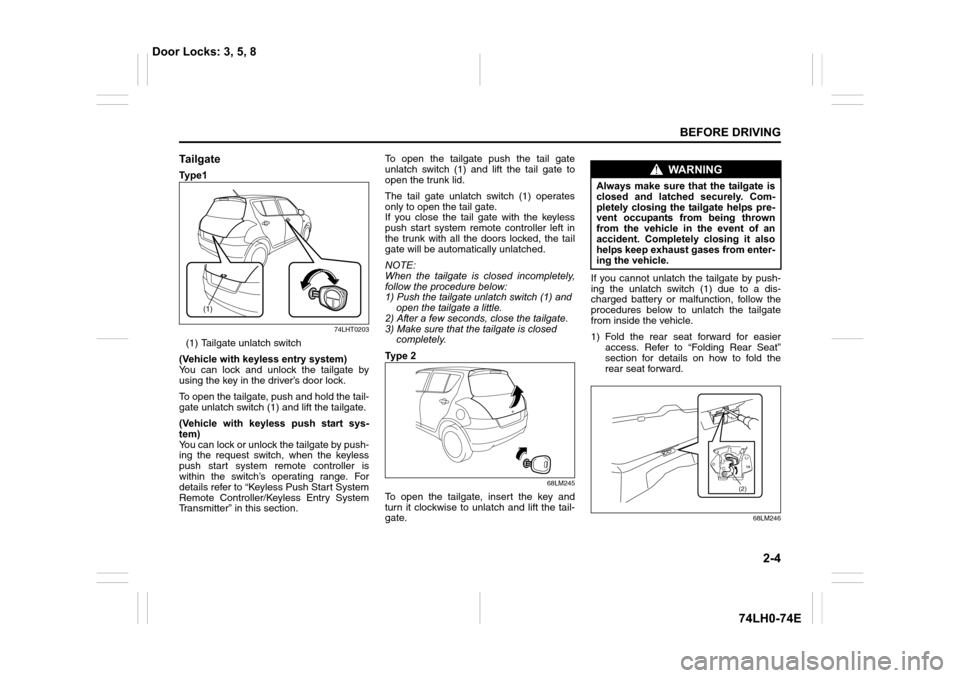
Ta i l g a t e
Ty p e 1
74LHT0203
(1) Tailgate unlatch switch
(Vehicle with keyless entry system)
You can lock and unlock the tailgate by
using the key in the driver’s door lock.
To open the tailgate, push and hold the tail-
gate unlatch switch (1) and lift the tailgate.
(Vehicle with keyless push start sys-
tem)
You can lock or unlock the tailgate by push-
ing the request switch, when the keyless
push start system remote controller is
within the switch’s operating range. For
details refer to “Keyless Push Start System
Remote Controller/Keyless Entry System
Transmitter” in this section.To open the tailgate push the tail gate
unlatch switch (1) and lift the tail gate to
open the trunk lid.
The tail gate unlatch switch (1) operates
only to open the tail gate.
If you close the tail gate with the keyless
push start system remote controller left in
the trunk with all the doors locked, the tail
gate will be automatically unlatched.
NOTE:
When the tailgate is closed incompletely,
follow the procedure below:
1) Push the tailgate unlatch switch (1) and
open the tailgate a little.
2) After a few seconds, close the tailgate.
3) Make sure that the tailgate is closed
completely.
Ty p e 2
68LM245
To open the tailgate, insert the key and
turn it clockwise to unlatch and lift the tail-
gate.If you cannot unlatch the tailgate by push-
ing the unlatch switch (1) due to a dis-
charged battery or malfunction, follow the
procedures below to unlatch the tailgate
from inside the vehicle.
1) Fold the rear seat forward for easier
access. Refer to “Folding Rear Seat”
section for details on how to fold the
rear seat forward.
68LM246
(1)
WA R N I N G
Always make sure that the tailgate is
closed and latched securely. Com-
pletely closing the tailgate helps pre-
vent occupants from being thrown
from the vehicle in the event of an
accident. Completely closing it also
helps keep exhaust gases from enter-
ing the vehicle.
(2)
Door Locks: 3, 5, 8
Page 24 of 336
2-5
BEFORE DRIVING
74LH0-74E
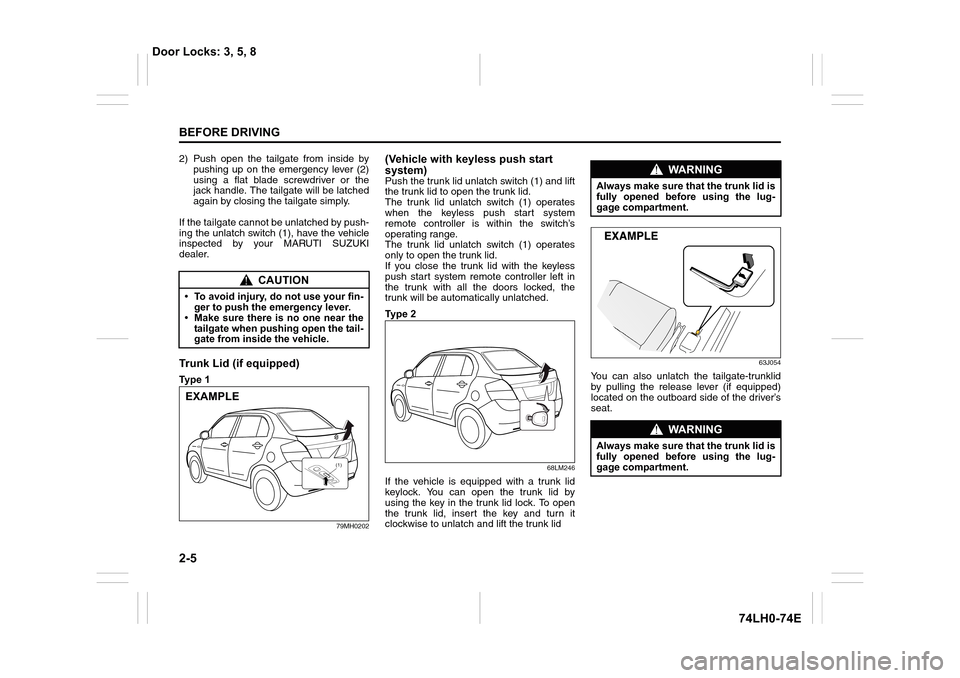
2) Push open the tailgate from inside by
pushing up on the emergency lever (2)
using a flat blade screwdriver or the
jack handle. The tailgate will be latched
again by closing the tailgate simply.
If the tailgate cannot be unlatched by push-
ing the unlatch switch (1), have the vehicle
inspected by your MARUTI SUZUKI
dealer.
Trunk Lid (if equipped)
Ty p e 1
79MH0202
(Vehicle with keyless push start
system)
Push the trunk lid unlatch switch (1) and lift
the trunk lid to open the trunk lid.
The trunk lid unlatch switch (1) operates
when the keyless push start system
remote controller is within the switch’s
operating range.
The trunk lid unlatch switch (1) operates
only to open the trunk lid.
If you close the trunk lid with the keyless
push start system remote controller left in
the trunk with all the doors locked, the
trunk will be automatically unlatched.
Ty p e 2
68LM246
If the vehicle is equipped with a trunk lid
keylock. You can open the trunk lid by
using the key in the trunk lid lock. To open
the trunk lid, insert the key and turn it
clockwise to unlatch and lift the trunk lid
63J054
You can also unlatch the tailgate-trunklid
by pulling the release lever (if equipped)
located on the outboard side of the driver’s
seat.
CAUTION
• To avoid injury, do not use your fin-
ger to push the emergency lever.
• Make sure there is no one near the
tailgate when pushing open the tail-
gate from inside the vehicle.
EXAMPLE
(1)
WA R N I N G
Always make sure that the trunk lid is
fully opened before using the lug-
gage compartment.
WA R N I N G
Always make sure that the trunk lid is
fully opened before using the lug-
gage compartment.
Door Locks: 3, 5, 8
Page 71 of 336
2-52
BEFORE DRIVING
74LH0-74E
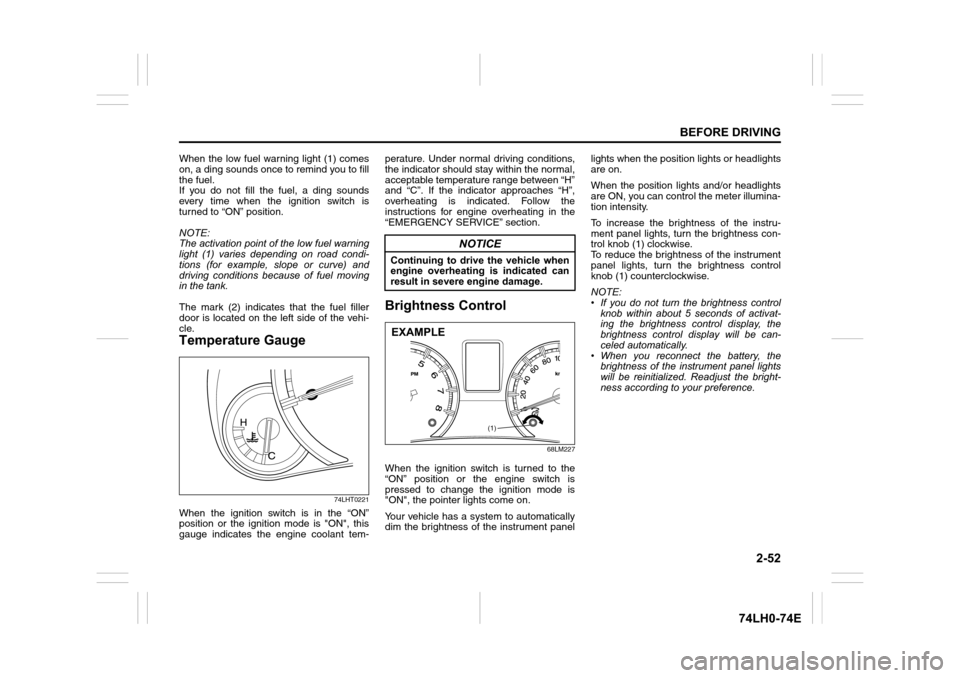
When the low fuel warning light (1) comes
on, a ding sounds once to remind you to fill
the fuel.
If you do not fill the fuel, a ding sounds
every time when the ignition switch is
turned to “ON” position.
NOTE:
The activation point of the low fuel warning
light (1) varies depending on road condi-
tions (for example, slope or curve) and
driving conditions because of fuel moving
in the tank.
The mark (2) indicates that the fuel filler
door is located on the left side of the vehi-
cle.
Temperature Gauge
74LHT0221
When the ignition switch is in the “ON”
position or the ignition mode is "ON", this
gauge indicates the engine coolant tem-perature. Under normal driving conditions,
the indicator should stay within the normal,
acceptable temperature range between “H”
and “C”. If the indicator approaches “H”,
overheating is indicated. Follow the
instructions for engine overheating in the
“EMERGENCY SERVICE” section.
Brightness Control
68LM227
When the ignition switch is turned to the
“ON” position or the engine switch is
pressed to change the ignition mode is
"ON", the pointer lights come on.
Your vehicle has a system to automatically
dim the brightness of the instrument panellights when the position lights or headlights
are on.
When the position lights and/or headlights
are ON, you can control the meter illumina-
tion intensity.
To increase the brightness of the instru-
ment panel lights, turn the brightness con-
trol knob (1) clockwise.
To reduce the brightness of the instrument
panel lights, turn the brightness control
knob (1) counterclockwise.
NOTE:
• If you do not turn the brightness control
knob within about 5 seconds of activat-
ing the brightness control display, the
brightness control display will be can-
celed automatically.
• When you reconnect the battery, the
brightness of the instrument panel lights
will be reinitialized. Readjust the bright-
ness according to your preference.
NOTICE
Continuing to drive the vehicle when
engine overheating is indicated can
result in severe engine damage.
(1)
EXAMPLE
Page 72 of 336
2-53
BEFORE DRIVING
74LH0-74E
Information Display
74LM02001
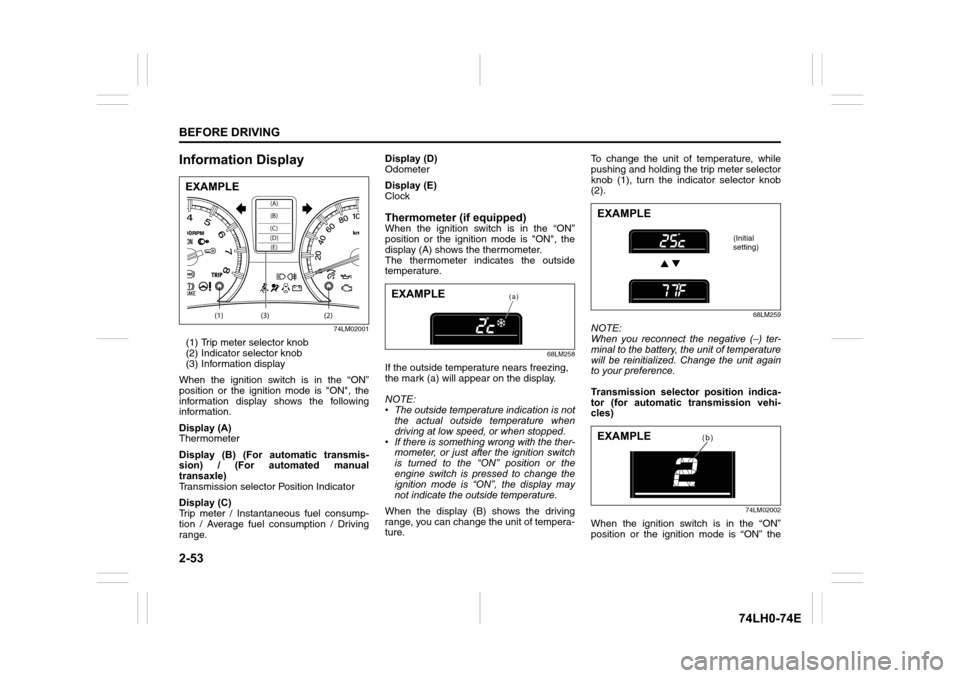
(1) Trip meter selector knob
(2) Indicator selector knob
(3) Information display
When the ignition switch is in the “ON”
position or the ignition mode is "ON", the
information display shows the following
information.
Display (A)
Thermometer
Display (B) (For automatic transmis-
sion) / (For automated manual
transaxle)
Transmission selector Position Indicator
Display (C)
Trip meter / Instantaneous fuel consump-
tion / Average fuel consumption / Driving
range.Display (D)
Odometer
Display (E)
Clock
Thermometer (if equipped)When the ignition switch is in the “ON”
position or the ignition mode is "ON", the
display (A) shows the thermometer.
The thermometer indicates the outside
temperature.
68LM258
If the outside temperature nears freezing,
the mark (a) will appear on the display.
NOTE:
• The outside temperature indication is not
the actual outside temperature when
driving at low speed, or when stopped.
• If there is something wrong with the ther-
mometer, or just after the ignition switch
is turned to the “ON” position or the
engine switch is pressed to change the
ignition mode is “ON”, the display may
not indicate the outside temperature.
When the display (B) shows the driving
range, you can change the unit of tempera-
ture.To change the unit of temperature, while
pushing and holding the trip meter selector
knob (1), turn the indicator selector knob
(2).
68LM259
NOTE:
When you reconnect the negative (–) ter-
minal to the battery, the unit of temperature
will be reinitialized. Change the unit again
to your preference.
Transmission selector position indica-
tor (for automatic transmission vehi-
cles)
74LM02002
When the ignition switch is in the “ON”
position or the ignition mode is “ON” the
(1) (2)(3)
(D)(B) (A)
(C)(E)
EXAMPLE
(a)EXAMPLE
EXAMPLE
(Initial
setting)
(b)EXAMPLE
Page 75 of 336
2-56
BEFORE DRIVING
74LH0-74E
• When you reconnect the negative (–)
terminal to the battery, the unit of the
average fuel consumption will be reini-
tialized. Change the unit again to your
preference.
Driving range
If you selected driving range the last time
you drove the vehicle, the display indicates
“---” for a few seconds and then indicates
the current driving range when the ignition
switch is turned to the “ON” position or the
engine switch is pressed to change the
ignition mode is “ON”.
The driving range shown in the display is
the approximate distance you can drive
until the fuel gauge indicates “E”, based on
current driving conditions.
When the low fuel warning light comes on,
the display “---” will appear.
If the low fuel warning light comes on, fill
the fuel tank immediately regardless of the
value of driving range shown in the display.
As the driving range after refueling is cal-
culated based on the most recent driving
condition, the value is different each time
you refuel.
NOTE:
• If you refuel when the ignition switch is in
the “ON” position or the ignition mode is
"ON", the driving range may not indicate
the correct value.
• When you reconnect the negative (–)
terminal to the battery, the value of driv-ing range will be shown after driving for a
while.
Odometer
When the ignition switch is in the “ON”
position or the ignition mode is "ON", the
display (C) shows the odometer.
The odometer records the total distance
the vehicle has been driven.
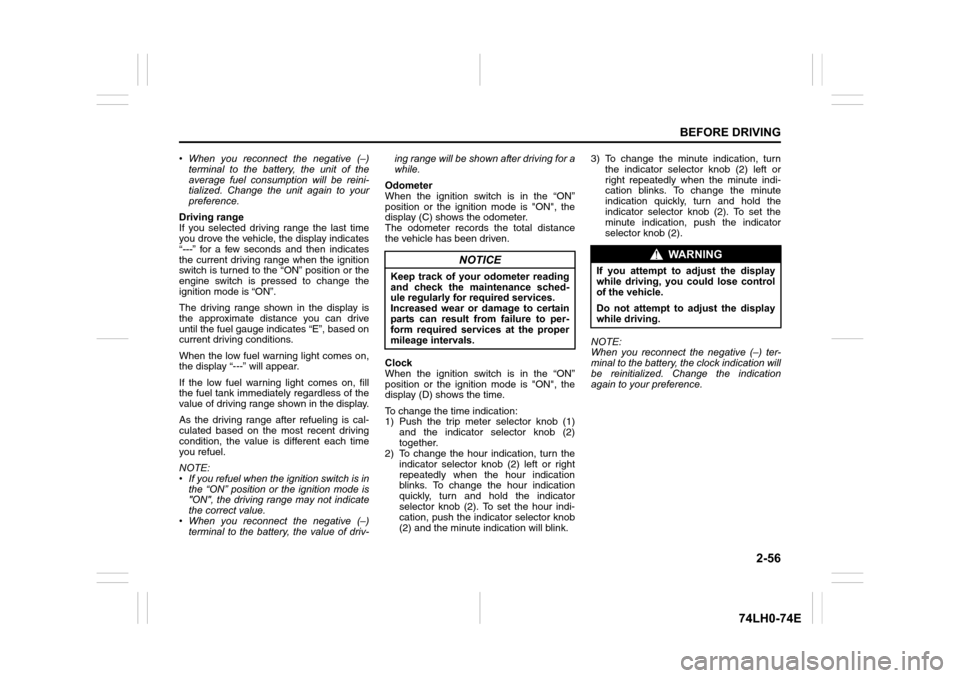
Clock
When the ignition switch is in the “ON”
position or the ignition mode is "ON", the
display (D) shows the time.
To change the time indication:
1) Push the trip meter selector knob (1)
and the indicator selector knob (2)
together.
2) To change the hour indication, turn the
indicator selector knob (2) left or right
repeatedly when the hour indication
blinks. To change the hour indication
quickly, turn and hold the indicator
selector knob (2). To set the hour indi-
cation, push the indicator selector knob
(2) and the minute indication will blink.3) To change the minute indication, turn
the indicator selector knob (2) left or
right repeatedly when the minute indi-
cation blinks. To change the minute
indication quickly, turn and hold the
indicator selector knob (2). To set the
minute indication, push the indicator
selector knob (2).
NOTE:
When you reconnect the negative (–) ter-
minal to the battery, the clock indication will
be reinitialized. Change the indication
again to your preference.
NOTICE
Keep track of your odometer reading
and check the maintenance sched-
ule regularly for required services.
Increased wear or damage to certain
parts can result from failure to per-
form required services at the proper
mileage intervals.
WA R N I N G
If you attempt to adjust the display
while driving, you could lose control
of the vehicle.
Do not attempt to adjust the display
while driving.
Page 88 of 336
3-3OPERATING YOUR VEHICLE
74LH0-74E
Ignition Switch
(Vehicle without Keyless
Push Start System)
65D611
60B041
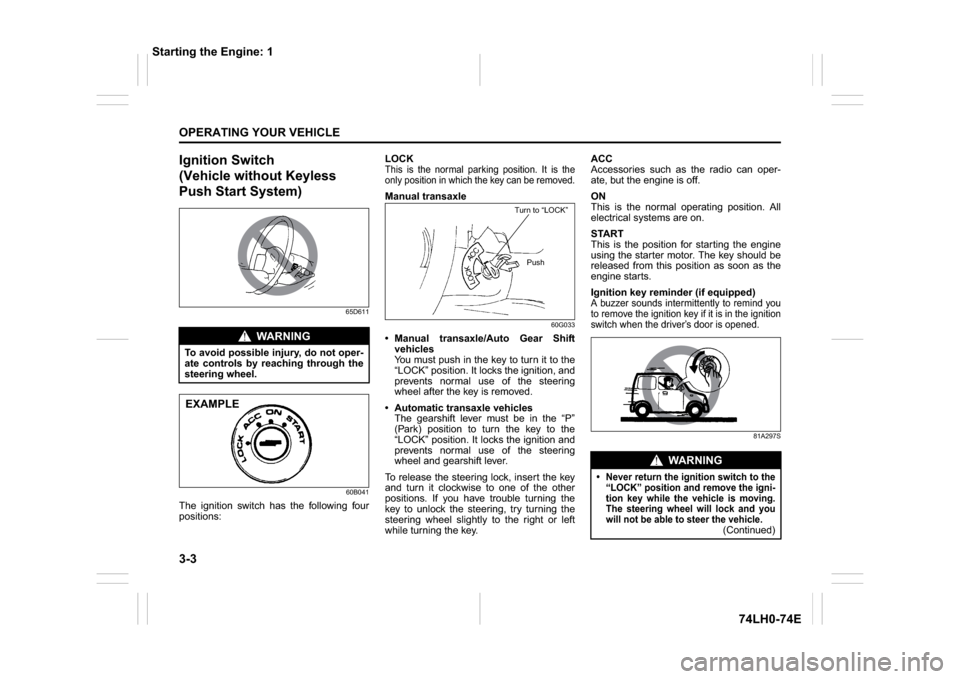
The ignition switch has the following four
positions:LOCK
This is the normal parking position. It is the
only position in which the key can be removed.Manual transaxle
60G033
Manual transaxle/Auto Gear Shift
vehicles
You must push in the key to turn it to the
“LOCK” position. It locks the ignition, and
prevents normal use of the steering
wheel after the key is removed.
Automatic transaxle vehicles
The gearshift lever must be in the “P”
(Park) position to turn the key to the
“LOCK” position. It locks the ignition and
prevents normal use of the steering
wheel and gearshift lever.
To release the steering lock, insert the key
and turn it clockwise to one of the other
positions. If you have trouble turning the
key to unlock the steering, try turning the
steering wheel slightly to the right or left
while turning the key.ACC
Accessories such as the radio can oper-
ate, but the engine is off.
ON
This is the normal operating position. All
electrical systems are on.
START
This is the position for starting the engine
using the starter motor. The key should be
released from this position as soon as the
engine starts.
Ignition key reminder (if equipped)
A buzzer sounds intermittently to remind you
to remove the ignition key if it is in the ignition
switch when the driver’s door is opened.
81A297S
WA R N I N G
To avoid possible injury, do not oper-
ate controls by reaching through the
steering wheel.EXAMPLE
Turn to “LOCK”
Push
WA R N I N G
Never return the ignition switch to the
“LOCK” position and remove the igni-
tion key while the vehicle is moving.
The steering wheel will lock and you
will not be able to steer the vehicle.
(Continued)
Starting the Engine: 1
Page 136 of 336
5-9OTHER CONTROLS AND EQUIPMENT
74LH0-74E
mum performance and durability of your air
conditioner, it needs to be run periodically.
Operate the air conditioner at least once a
month for one minute with the engine
idling. This circulates the refrigerant and oil
and helps protect the internal components.
NOTE:
Your vehicle uses the air conditioning
refrigerant HFC-134a, commonly called
“R-134a”. Only R-134a should be used in
your vehicle.Radio Antenna
63J055
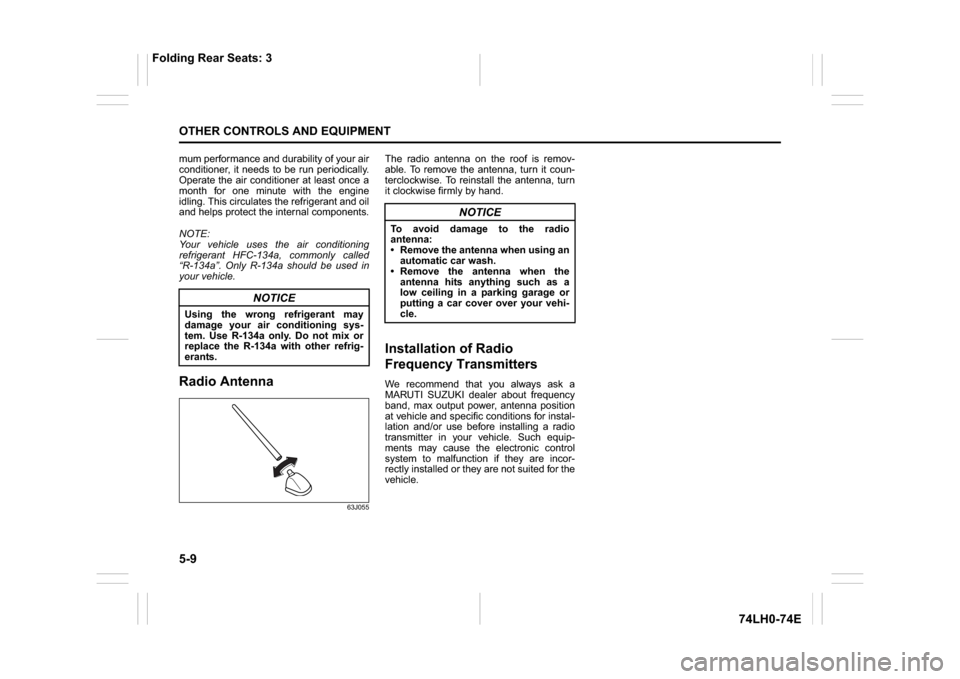
The radio antenna on the roof is remov-
able. To remove the antenna, turn it coun-
terclockwise. To reinstall the antenna, turn
it clockwise firmly by hand.Installation of Radio
Frequency TransmittersWe recommend that you always ask a
MARUTI SUZUKI dealer about frequency
band, max output power, antenna position
at vehicle and specific conditions for instal-
lation and/or use before installing a radio
transmitter in your vehicle. Such equip-
ments may cause the electronic control
system to malfunction if they are incor-
rectly installed or they are not suited for the
vehicle.
NOTICE
Using the wrong refrigerant may
damage your air conditioning sys-
tem. Use R-134a only. Do not mix or
replace the R-134a with other refrig-
erants.
NOTICE
To avoid damage to the radio
antenna:
Remove the antenna when using an
automatic car wash.
Remove the antenna when the
antenna hits anything such as a
low ceiling in a parking garage or
putting a car cover over your vehi-
cle.
Folding Rear Seats: 3
Page 140 of 336
5-13OTHER CONTROLS AND EQUIPMENT
74LH0-74E
(if equipped)
The
® word mark and logo are registered
trademarks and are owned by the SIG,
Ink.
Stop using this unit and a
® ready
device whenever requested.
This unit shares the communication fre-
quency with other private or public wireless
communication equipment such as a wire-
less LAN and other wireless communica-
tion radios.
You should stop using this unit whenever
you are notified that your unit disturbs
other wireless communication immediately.
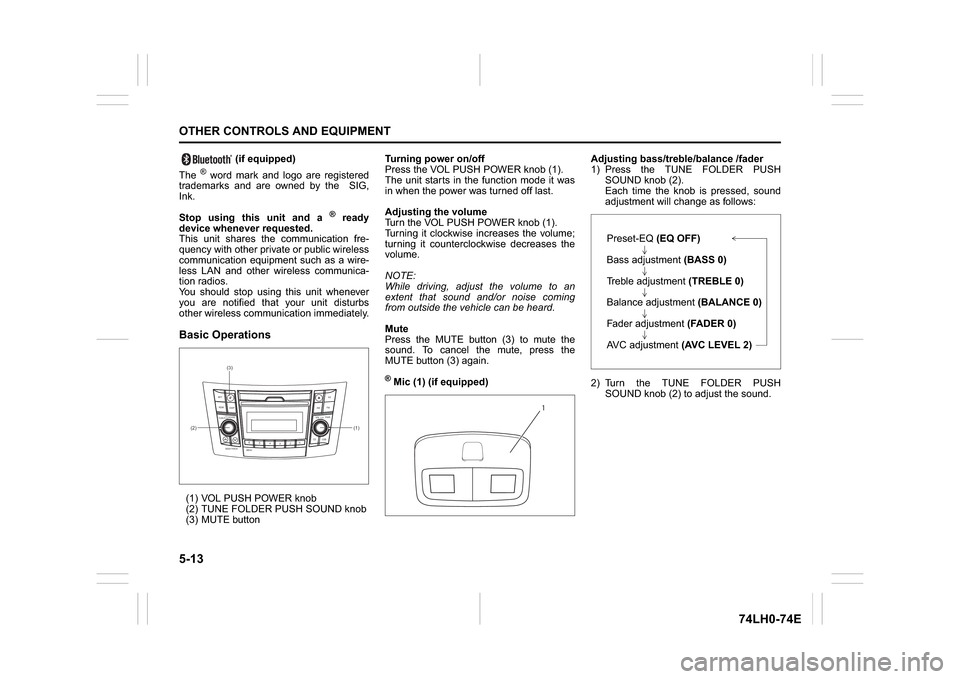
Basic Operations(1) VOL PUSH POWER knob
(2) TUNE FOLDER PUSH SOUND knob
(3) MUTE buttonTurning power on/off
Press the VOL PUSH POWER knob (1).
The unit starts in the function mode it was
in when the power was turned off last.
Adjusting the volume
Turn the VOL PUSH POWER knob (1).
Turning it clockwise increases the volume;
turning it counterclockwise decreases the
volume.
NOTE:
While driving, adjust the volume to an
extent that sound and/or noise coming
from outside the vehicle can be heard.
Mute
Press the MUTE button (3) to mute the
sound. To cancel the mute, press the
MUTE button (3) again.
® Mic (1) (if equipped)Adjusting bass/treble/balance /fader
1) Press the TUNE FOLDER PUSH
SOUND knob (2).
Each time the knob is pressed, sound
adjustment will change as follows:
2) Turn the TUNE FOLDER PUSH
SOUND knob (2) to adjust the sound.
(1) (2)(3)
B
S U
CD
2
3 4 5 6
SEEK/TRACK
AS
AMFM RPT
RDM
DISP
PUSHSOUND
TUNE/FLD
VOLPWRPUSH
11
MENU
1
Preset-EQ(EQ OFF)
Bass adjustment (BASS 0)
Treble adjustment (TREBLE 0)
Balance adjustment (BALANCE 0)
Fader adjustment (FADER 0)
AVC adjustment (AVC LEVEL 2)
Page 152 of 336
5-25OTHER CONTROLS AND EQUIPMENT
74LH0-74E
/Telephone setup mode can be entered
only during vehicle is stationary speed
less than ~ 8 kmph)
1) Press the
® setup button (4).
The
® setup menu will be displayed.
2) Turn the TUNE FOLDER PUSH
SOUND knob (1) to select “Setup ”, and
press the knob (1) to determine the
selection.
3) Turn the TUNE FOLDER PUSH
SOUND knob (1) to select “Pairing”,
and press the knob (1) to determine the
selection.
4) Select “CAR AUDIO” from the
® menu
of the phone and establish the pairing.
Refer to the manual of the phone in use
for further information.
5) Enter the Passkey displayed on the unit
to the phone.
6) Press the On Hook button (6).
NOTE:
When selecting “Go Back”, the previous
menu will be displayed.
When additionally registering a phone,
operate the same step from 1).
Receiving a call
Press the Off Hook button (5) to receive a
call.
Ending a call
Press the On Hook button (6) to end a call.
Rejecting a call (only for supported
models)Press the On Hook button (6) to reject a
incoming call.
Adjusting the listening volume
Turn the VOL PUSH POWER knob (2)
during a call.
Turning it clockwise increases the vol-
ume; turning it counterclockwise
decreases the volume.
Press the VOL switch (7) during a call.
Pressing “+” of the switch increases the
volume, pressing “-” of the switch
decreases the volume.
Adjusting the ring volume
Turn the VOL PUSH POWER knob (2)
while a call coming in.
Turning it clockwise increases the vol-
ume; turning it counterclockwise
decreases the volume.
Press the VOL switch (7) during a call.
Pressing “+” of the switch increases the
volume, pressing “-” of the switch
decreases the volume.
Adjusting the call or ringtone volume
Follow the instructions below to adjust the
call or ringtone volume.
1) Press the
® setup button (4).
The
® setup menu will be displayed.
2) Turn the TUNE FOLDER PUSH
SOUND knob (1) to select “Setup Tele-
phone”, and press the knob (1) to deter-
mine the selection.
3) Turn the TUNE FOLDER PUSH
SOUND knob (1) to select “Sound Set-ting”, and press the knob (1) to deter-
mine the selection.
4) Turn the TUNE FOLDER PUSH
SOUND knob (1) to select “Call Vol-
ume” or “Ringtone Volume”, and press
the knob (1) to determine the selection.
The current call or ringtone volume will
be displayed.
5) Turn the TUNE FOLDER PUSH
SOUND knob (1) to select desired call
or ringtone volume, and press the knob
(1) to determine the selection.
NOTE:
When selecting “Go Back”, the previous
menu will be displayed.
Selecting the Ringtone
Follow the instructions below to select a
ringtone.
1) Press the
® setup button (4).
The
® setup menu will be displayed.
2) Turn the TUNE FOLDER PUSH
SOUND knob (1) to select “Setup Tele-
phone”, and press the knob (1) to deter-
mine the selection.
3) Turn the TUNE FOLDER PUSH
SOUND knob (1) to select “Sound Set-
ting”, and press the knob (1) to deter-
mine the selection.
4) Turn the TUNE FOLDER PUSH SOUND
knob (1) to select “Ringtone”, and press
the knob (1) to determine the selection.
The current ringtone will be sounded.
5) Turn the TUNE FOLDER PUSH SOUND
knob (1) to select desired ringtone, and