brake SUZUKI SX4 2008 1.G User Guide
[x] Cancel search | Manufacturer: SUZUKI, Model Year: 2008, Model line: SX4, Model: SUZUKI SX4 2008 1.GPages: 278, PDF Size: 4.07 MB
Page 156 of 278
6-1OPERATING YOUR VEHICLE
80J21-03E
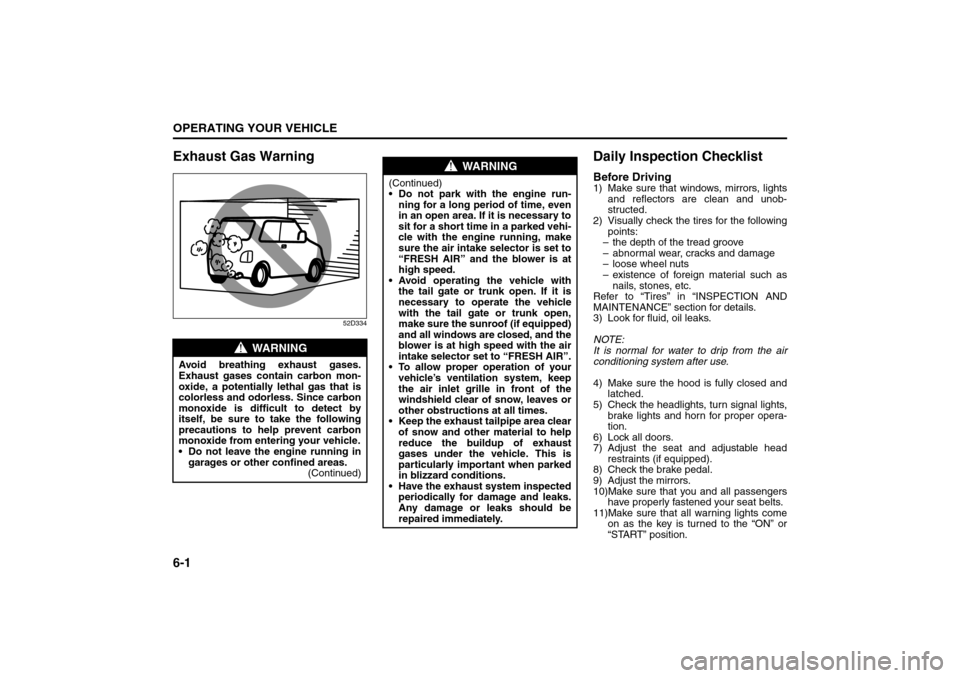
Exhaust Gas Warning
52D334
Daily Inspection ChecklistBefore Driving1) Make sure that windows, mirrors, lights
and reflectors are clean and unob-
structed.
2) Visually check the tires for the following
points:
– the depth of the tread groove
– abnormal wear, cracks and damage
– loose wheel nuts
– existence of foreign material such as
nails, stones, etc.
Refer to “Tires” in “INSPECTION AND
MAINTENANCE” section for details.
3) Look for fluid, oil leaks.
NOTE:
It is normal for water to drip from the air
conditioning system after use.
4) Make sure the hood is fully closed and
latched.
5) Check the headlights, turn signal lights,
brake lights and horn for proper opera-
tion.
6) Lock all doors.
7) Adjust the seat and adjustable head
restraints (if equipped).
8) Check the brake pedal.
9) Adjust the mirrors.
10)Make sure that you and all passengers
have properly fastened your seat belts.
11)Make sure that all warning lights come
on as the key is turned to the “ON” or
“START” position.
WARNING
Avoid breathing exhaust gases.
Exhaust gases contain carbon mon-
oxide, a potentially lethal gas that is
colorless and odorless. Since carbon
monoxide is difficult to detect by
itself, be sure to take the following
precautions to help prevent carbon
monoxide from entering your vehicle.
Do not leave the engine running in
garages or other confined areas.
(Continued)
WARNING
(Continued)
Do not park with the engine run-
ning for a long period of time, even
in an open area. If it is necessary to
sit for a short time in a parked vehi-
cle with the engine running, make
sure the air intake selector is set to
“FRESH AIR” and the blower is at
high speed.
Avoid operating the vehicle with
the tail gate or trunk open. If it is
necessary to operate the vehicle
with the tail gate or trunk open,
make sure the sunroof (if equipped)
and all windows are closed, and the
blower is at high speed with the air
intake selector set to “FRESH AIR”.
To allow proper operation of your
vehicle’s ventilation system, keep
the air inlet grille in front of the
windshield clear of snow, leaves or
other obstructions at all times.
Keep the exhaust tailpipe area clear
of snow and other material to help
reduce the buildup of exhaust
gases under the vehicle. This is
particularly important when parked
in blizzard conditions.
Have the exhaust system inspected
periodically for damage and leaks.
Any damage or leaks should be
repaired immediately.
Exhaust Gas Warning: NO
Daily Inspection Checklist: NO
Page 157 of 278
6-2
OPERATING YOUR VEHICLE
80J21-03E
12)Check all gauges.
13)Make sure that the BRAKE light turns
off when the parking brake is released.
Once a week, or each time you fill your fuel
tank, perform the following under-hood
checks:
1) Engine oil level
2) Coolant level
3) Brake fluid level
4) Power steering (if equipped) fluid level
5) Windshield washer fluid level
6) Hood latch operation
Pull the hood release handle inside the
vehicle. Make sure that you cannot
open the hood all the way without
releasing the secondary latch. Be sure
to close the hood securely after check-
ing for proper latch operation. See the
item “All latches, hinges and locks” of
“CHASSIS AND BODY” in the “Periodic
Maintenance Schedule” section in the
“INSPECTION AND MAINTENANCE”
section for lubrication schedule.
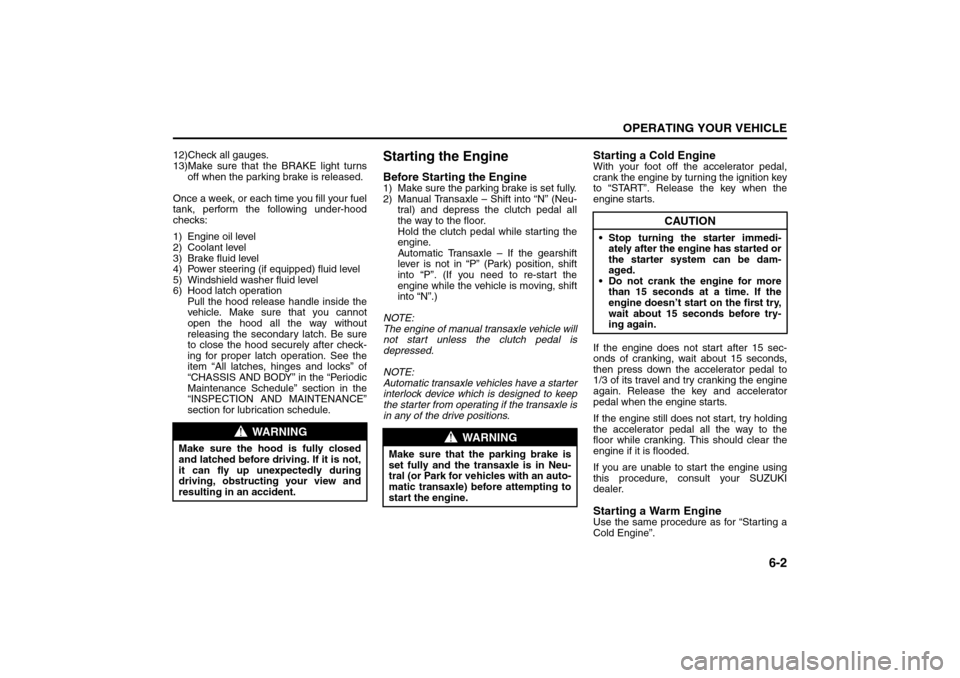
Starting the EngineBefore Starting the Engine1) Make sure the parking brake is set fully.
2) Manual Transaxle – Shift into “N” (Neu-
tral) and depress the clutch pedal all
the way to the floor.
Hold the clutch pedal while starting the
engine.
Automatic Transaxle – If the gearshift
lever is not in “P” (Park) position, shift
into “P”. (If you need to re-start the
engine while the vehicle is moving, shift
into “N”.)
NOTE:
The engine of manual transaxle vehicle will
not start unless the clutch pedal is
depressed.
NOTE:
Automatic transaxle vehicles have a starter
interlock device which is designed to keep
the starter from operating if the transaxle is
in any of the drive positions.
Starting a Cold EngineWith your foot off the accelerator pedal,
crank the engine by turning the ignition key
to “START”. Release the key when the
engine starts.
If the engine does not start after 15 sec-
onds of cranking, wait about 15 seconds,
then press down the accelerator pedal to
1/3 of its travel and try cranking the engine
again. Release the key and accelerator
pedal when the engine starts.
If the engine still does not start, try holding
the accelerator pedal all the way to the
floor while cranking. This should clear the
engine if it is flooded.
If you are unable to start the engine using
this procedure, consult your SUZUKI
dealer.Starting a Warm EngineUse the same procedure as for “Starting a
Cold Engine”.
WARNING
Make sure the hood is fully closed
and latched before driving. If it is not,
it can fly up unexpectedly during
driving, obstructing your view and
resulting in an accident.
WARNING
Make sure that the parking brake is
set fully and the transaxle is in Neu-
tral (or Park for vehicles with an auto-
matic transaxle) before attempting to
start the engine.
CAUTION
Stop turning the starter immedi-
ately after the engine has started or
the starter system can be dam-
aged.
Do not crank the engine for more
than 15 seconds at a time. If the
engine doesn’t start on the first try,
wait about 15 seconds before try-
ing again.
Daily Inspection Checklist: NO
Starting the Engine: 1
Page 160 of 278
6-5OPERATING YOUR VEHICLE
80J21-03E
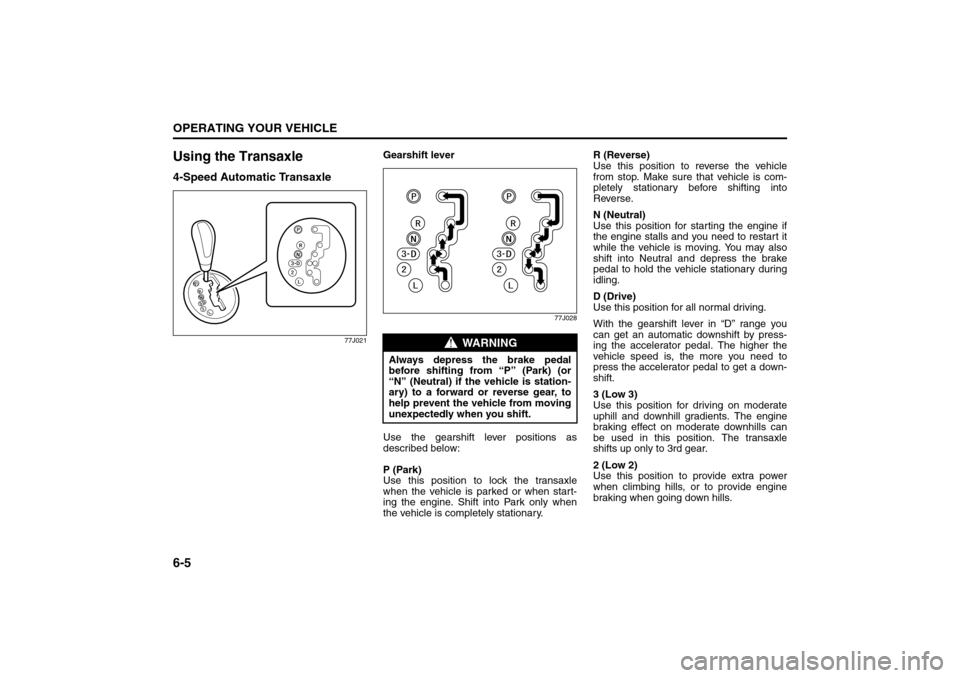
Using the Transaxle4-Speed Automatic Transaxle
77J021
Gearshift lever
77J028
Use the gearshift lever positions as
described below:
P (Park)
Use this position to lock the transaxle
when the vehicle is parked or when start-
ing the engine. Shift into Park only when
the vehicle is completely stationary.R (Reverse)
Use this position to reverse the vehicle
from stop. Make sure that vehicle is com-
pletely stationary before shifting into
Reverse.
N (Neutral)
Use this position for starting the engine if
the engine stalls and you need to restart it
while the vehicle is moving. You may also
shift into Neutral and depress the brake
pedal to hold the vehicle stationary during
idling.
D (Drive)
Use this position for all normal driving.
With the gearshift lever in “D” range you
can get an automatic downshift by press-
ing the accelerator pedal. The higher the
vehicle speed is, the more you need to
press the accelerator pedal to get a down-
shift.
3 (Low 3)
Use this position for driving on moderate
uphill and downhill gradients. The engine
braking effect on moderate downhills can
be used in this position. The transaxle
shifts up only to 3rd gear.
2 (Low 2)
Use this position to provide extra power
when climbing hills, or to provide engine
braking when going down hills.
WARNING
Always depress the brake pedal
before shifting from “P” (Park) (or
“N” (Neutral) if the vehicle is station-
ary) to a forward or reverse gear, to
help prevent the vehicle from moving
unexpectedly when you shift.
Using the Transaxle: 10
Page 161 of 278
6-6
OPERATING YOUR VEHICLE
80J21-03E
L (Low 1)
Use this position to provide maximum
power when climbing steep hills or driving
through deep snow or mud, or to provide
maximum engine braking when going
down steep hills.
NOTE:
If you move the gearshift lever to a lower
gear while driving faster than the maximum
allowable speed for the lower gear, the
transaxle will not actually downshift until
your speed drops below the maximum
speed for the lower gear.
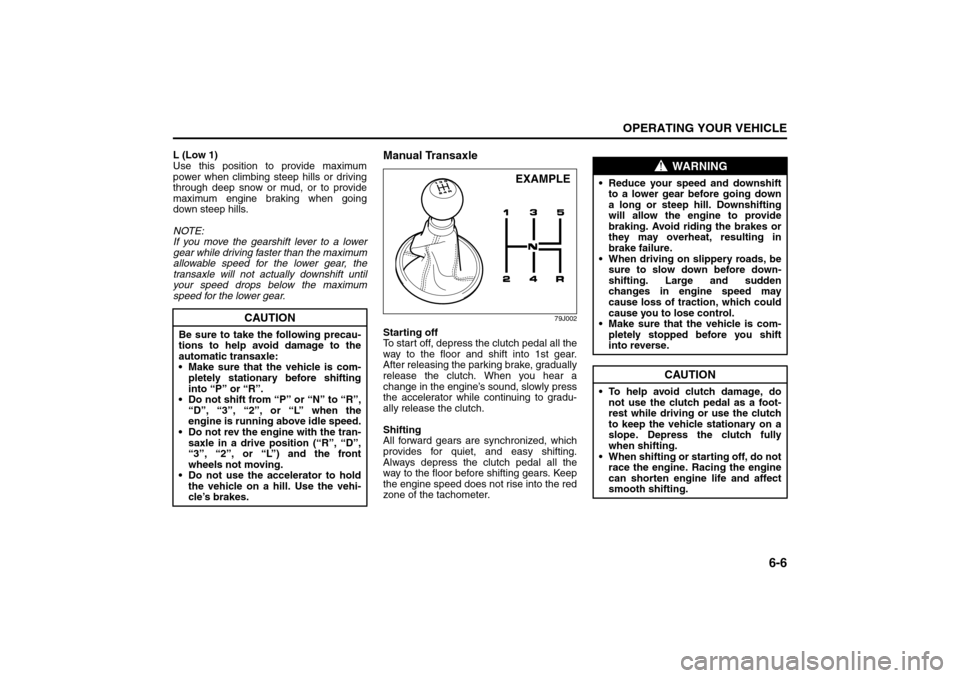
Manual Transaxle
79J002
Starting off
To start off, depress the clutch pedal all the
way to the floor and shift into 1st gear.
After releasing the parking brake, gradually
release the clutch. When you hear a
change in the engine’s sound, slowly press
the accelerator while continuing to gradu-
ally release the clutch.
Shifting
All forward gears are synchronized, which
provides for quiet, and easy shifting.
Always depress the clutch pedal all the
way to the floor before shifting gears. Keep
the engine speed does not rise into the red
zone of the tachometer.
CAUTION
Be sure to take the following precau-
tions to help avoid damage to the
automatic transaxle:
Make sure that the vehicle is com-
pletely stationary before shifting
into “P” or “R”.
Do not shift from “P” or “N” to “R”,
“D”, “3”, “2”, or “L” when the
engine is running above idle speed.
Do not rev the engine with the tran-
saxle in a drive position (“R”, “D”,
“3”, “2”, or “L”) and the front
wheels not moving.
Do not use the accelerator to hold
the vehicle on a hill. Use the vehi-
cle’s brakes.
EXAMPLE
WARNING
Reduce your speed and downshift
to a lower gear before going down
a long or steep hill. Downshifting
will allow the engine to provide
braking. Avoid riding the brakes or
they may overheat, resulting in
brake failure.
When driving on slippery roads, be
sure to slow down before down-
shifting. Large and sudden
changes in engine speed may
cause loss of traction, which could
cause you to lose control.
Make sure that the vehicle is com-
pletely stopped before you shift
into reverse.
CAUTION
To help avoid clutch damage, do
not use the clutch pedal as a foot-
rest while driving or use the clutch
to keep the vehicle stationary on a
slope. Depress the clutch fully
when shifting.
When shifting or starting off, do not
race the engine. Racing the engine
can shorten engine life and affect
smooth shifting.
Using the Transaxle: 10
Page 164 of 278
6-9OPERATING YOUR VEHICLE
80J21-03E
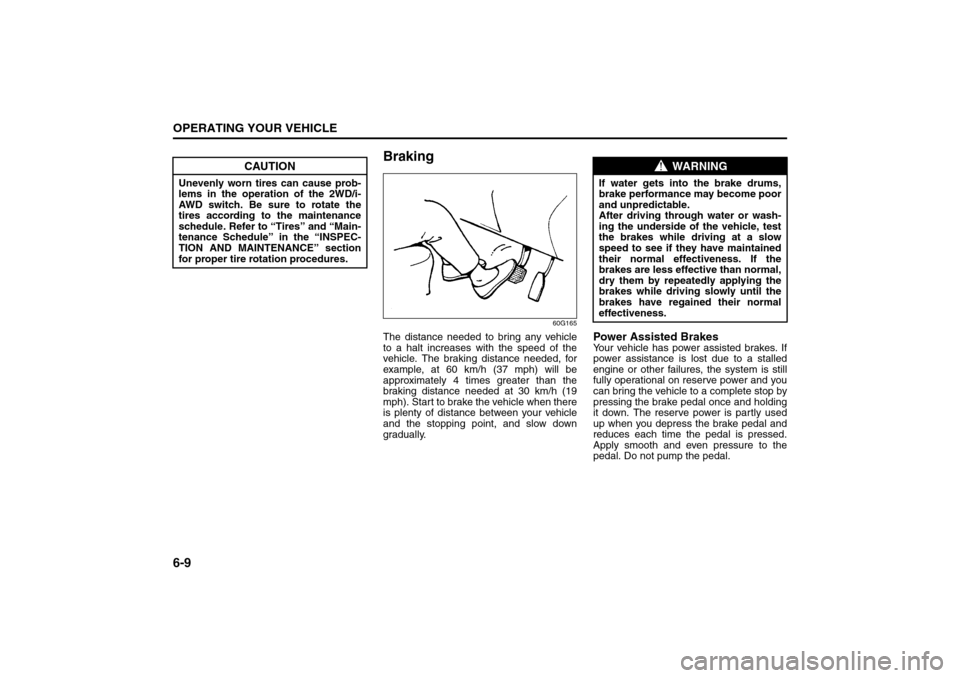
Braking
60G165
The distance needed to bring any vehicle
to a halt increases with the speed of the
vehicle. The braking distance needed, for
example, at 60 km/h (37 mph) will be
approximately 4 times greater than the
braking distance needed at 30 km/h (19
mph). Start to brake the vehicle when there
is plenty of distance between your vehicle
and the stopping point, and slow down
gradually.
Power Assisted BrakesYour vehicle has power assisted brakes. If
power assistance is lost due to a stalled
engine or other failures, the system is still
fully operational on reserve power and you
can bring the vehicle to a complete stop by
pressing the brake pedal once and holding
it down. The reserve power is partly used
up when you depress the brake pedal and
reduces each time the pedal is pressed.
Apply smooth and even pressure to the
pedal. Do not pump the pedal.
CAUTION
Unevenly worn tires can cause prob-
lems in the operation of the 2WD/i-
AWD switch. Be sure to rotate the
tires according to the maintenance
schedule. Refer to “Tires” and “Main-
tenance Schedule” in the “INSPEC-
TION AND MAINTENANCE” section
for proper tire rotation procedures.
WARNING
If water gets into the brake drums,
brake performance may become poor
and unpredictable.
After driving through water or wash-
ing the underside of the vehicle, test
the brakes while driving at a slow
speed to see if they have maintained
their normal effectiveness. If the
brakes are less effective than normal,
dry them by repeatedly applying the
brakes while driving slowly until the
brakes have regained their normal
effectiveness.
Braking: 6
Break-In: 6
Catalytic Converter: NO
Page 165 of 278
6-10
OPERATING YOUR VEHICLE
80J21-03E
Brake Assist SystemWhen you slam the brakes on, the brake
assist system judges as an emergency
stop and provides more powerful braking
for a driver who cannot hold down the
brake pedal firmly.
NOTE:
If you depress the brakes forcefully, you
may hear a clicking sound in the brake
pedal. This is normal and indicates that the
brake assist system is activated properly.
Anti-Lock Brake System (ABS)
(if equipped)ABS will help you avoid skidding by elec-
tronically controlling braking pressure. It
will also help you maintain steering control
when braking on slippery surfaces or when
braking hard.
The ABS works automatically, so you do
not need any special braking technique.
Just push the brake pedal down without
pumping. The ABS will operate whenever it
senses that the wheels are locking up.
You may feel the brake pedal pulsate while
the ABS is operating.
NOTE:
The ABS will not work if vehicle speed is
under 5 – 6 km/h (3 – 4 mph).
WARNING
Even without reserve power in the
brake system, you can still stop the
vehicle by pressing the brake pedal
harder than normally required. How-
ever, the stopping distance may be
longer.
WARNING
On some types of loose surfaces
(such as gravel, snow-covered
roads, etc.), the stopping distance
required for an ABS-equipped vehi-
cle may be slightly greater than for
a comparable vehicle with a con-
ventional brake system. With a
conventional brake system, skid-
ding tires are able to “plow” the
gravel or snow layer, shortening
the stopping distance. ABS mini-
mizes this resistance effect. Allow
for extra stopping distance when
driving on loose surfaces.
On regular paved roads, some driv-
ers may be able to obtain slightly
shorter stopping distances with
conventional brake systems than
with ABS.
In both of the above conditions,
ABS will still offer the advantage of
helping you maintain directional
control. However, remember that
ABS will not compensate for bad
road or weather conditions or poor
driver judgment. Use good judg-
ment and do not drive faster than
conditions will safely allow.
Catalytic Converter: NO
Improving Fuel Economy: NO
Page 166 of 278
6-11OPERATING YOUR VEHICLE
80J21-03E
54G140
65D451
How the ABS WorksA computer continuously monitors wheel
speed. The computer compares the
changes in wheel speed when braking. If
the wheels slow suddenly, indicating a
skidding situation, the computer will
change braking pressure several times
each second to prevent the wheels from
locking. When you start your vehicle or
when you accelerate after a hard stop, you
may hear a momentary motor or clicking
noise as the system resets or checks itself.
WARNING
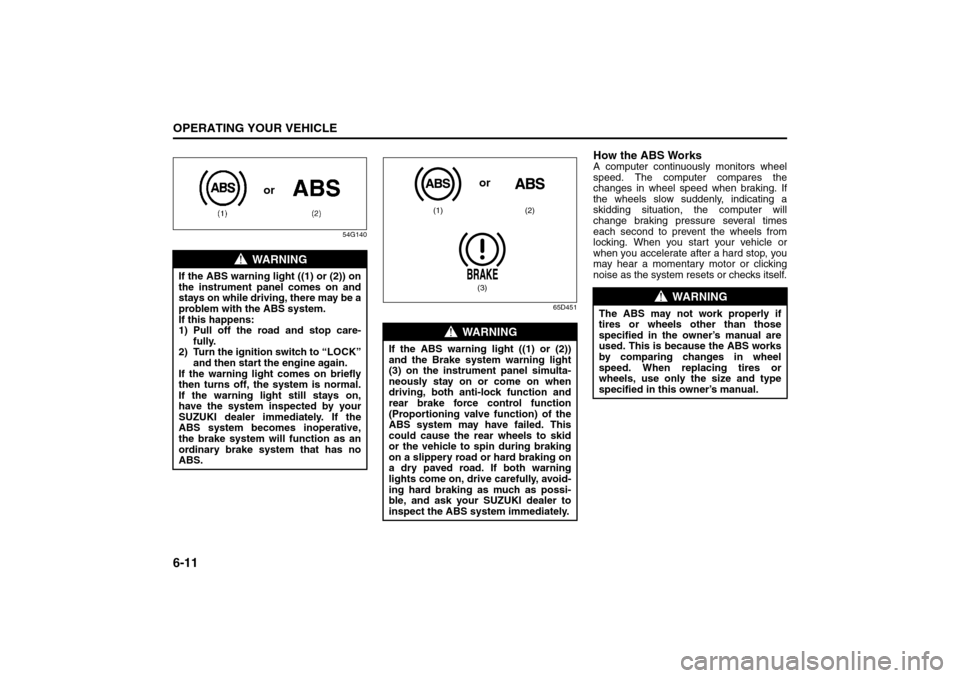
If the ABS warning light ((1) or (2)) on
the instrument panel comes on and
stays on while driving, there may be a
problem with the ABS system.
If this happens:
1) Pull off the road and stop care-
fully.
2) Turn the ignition switch to “LOCK”
and then start the engine again.
If the warning light comes on briefly
then turns off, the system is normal.
If the warning light still stays on,
have the system inspected by your
SUZUKI dealer immediately. If the
ABS system becomes inoperative,
the brake system will function as an
ordinary brake system that has no
ABS.
or
WARNING
If the ABS warning light ((1) or (2))
and the Brake system warning light
(3) on the instrument panel simulta-
neously stay on or come on when
driving, both anti-lock function and
rear brake force control function
(Proportioning valve function) of the
ABS system may have failed. This
could cause the rear wheels to skid
or the vehicle to spin during braking
on a slippery road or hard braking on
a dry paved road. If both warning
lights come on, drive carefully, avoid-
ing hard braking as much as possi-
ble, and ask your SUZUKI dealer to
inspect the ABS system immediately.
(1) (2)
(3)or
WARNING
The ABS may not work properly if
tires or wheels other than those
specified in the owner’s manual are
used. This is because the ABS works
by comparing changes in wheel
speed. When replacing tires or
wheels, use only the size and type
specified in this owner’s manual.
Improving Fuel Economy: NO
Page 167 of 278
6-12
OPERATING YOUR VEHICLE
80J21-03E
Electronic Stability Program
(ESP
®) (if equipped)
ESP
® is a registered trademark of
DaimlerChrysler AG.
The Electronic Stability Program (ESP
®)
helps to control the vehicle during corner-
ing if the vehicle is understeering or over-
steering. It also assists you in maintaining
traction while accelerating on loose or slip-
pery road surfaces. It does this by regulat-
ing the engine’s output, and by selectively
applying the brakes. In addition, ESP®
helps to avoid skidding by controlling brak-
ing pressure.The ESP
® has the following three systems:
Stability Control SystemThe vehicle stability control system helps
provide integrated control of systems such
as anti-lock brakes, traction control, engine
control, etc. This system automatically
controls the brakes and engine to help pre-
vent the vehicle from skidding when cor-
nering on a slippery road surface or when
turning the steering wheel abruptly.Traction Control SystemThe traction control system automatically
helps prevent the spinning of wheels when
the vehicle is started or accelerated on
slippery road surfaces. The system oper-
ates only if it senses that some of the
wheels are spinning or beginning to lose
traction. When this happens, the system
operates the front or rear brakes and
reduces engine power to limit wheel spin.
NOTE:
You may hear a clicking sound in the
engine compartment for a few seconds
when you start the engine or just after the
vehicle begins to move. This means that
the above systems are in the self-check
mode. This sound does not indicate a mal-
function.
Anti-Lock Braking System (ABS)ABS will help you avoid skidding by elec-
tronically controlling braking pressure. It
will also help you maintain steering control
when braking on slippery surfaces or when
braking hard. The ABS works automati-
cally, so you do not have to use any special
braking technique. Just push the brake
pedal down without pumping. The ABS will
operate whenever it senses that wheels
are locking up. You may feel the brake
pedal pulsate while the ABS is operating.
(For more information on ABS, see “Brak-
ing” in the “OPERATING YOUR VEHICLE”
section.)
NOTE:
If the ABS system is activated, you may
hear a clunking noise and/or feel pulsating
in the brake pedal. This is normal and indi-
cates that the brake fluid pressure is being
controlled properly.
WARNING
The ESP
® cannot enhance the vehi-
cle’s driving stability in all situations
and does not control your vehicle’s
entire braking system. The ESP
® can-
not prevent accidents, including
those resulting from excessive speed
in turns, or hydroplaning. Only a safe
and attentive driver can prevent acci-
dents. The capabilities of an ESP
®-
equipped vehicle must never be used
as a substitute for careful driving.
Page 168 of 278
6-13OPERATING YOUR VEHICLE
80J21-03E
The ESP
® indicator lights are described
below:
SLIP Indicator Light
66J033
When one of the ESP
® systems other than
ABS is activated, the SLIP indicator light in
the instrument cluster blinks 5 times per
second.
NOTE:
When the SLIP indicator light comes on
and stays on while driving, indicating a
malfunction of the ESP® systems (other
than ABS), the brake system will function
as an ordinary ABS with no additional
ESP
® functions.NOTE:
When you disconnect and re-connect the
battery, ESP
® system functions other than
ABS will be deactivated and the slip indica-
tor light will blink 1 time per second. In this
case, use the following procedure to re-
activate the ESP
® systems:
1) Drive your vehicle straight ahead with-
out tire slippage at a speed until the slip
indicator is turned off. (Drive straight for
approximately 35 km/h (22 mph) or
more and 10 seconds or more.)
2) The slip indicator light will go out and
the ESP
® systems (other than ABS) will
be re-activated.
It may take more than few seconds before
the slip indicator light goes out depending
on the road surface condition.
“ESP” Warning Light
66J031
When the ESP
® systems (other than ABS)
have a system malfunction, the “ESP”
warning light in the instrument cluster
comes on.
WARNING
The ESP
® may not work properly if
tires or wheels other than those
specified in the Owner’s Manual are
used. When replacing tires or
wheels, use only the size and type
specified in this Owner’s Manual.
The ESP® may not work properly if
tires are not inflated to the recom-
mended tire inflation pressure.
The ESP® may not work properly if
tires are fitted with tire chains.
The ESP® may not work properly if
the tires are excessively worn. Be
sure to replace tires when the tread
wear indicators in the grooves
appear on the tread surface.
The ESP® is not a substitute for
winter tires or tire chains on a snow
covered road.
WARNING
The ESP
® may not work properly if
engine related parts such as the
muffler are not equivalent to stan-
dard equipment or are extremely
deteriorated.
Do not modify the vehicle’s sus-
pension since the ESP
® may not
operate correctly.
CAUTION
If the SLIP indicator light comes on
and stays on while driving, there may
be a malfunction of the ESP
® sys-
tems (other than ABS). You should
have the systems inspected by an
authorized SUZUKI dealer.
Page 169 of 278
6-14
OPERATING YOUR VEHICLE
80J21-03E
NOTE:
When the “ESP” warning light comes on,
or stays on while driving, indicating a mal-
function of the ESP
® systems (other than
ABS), the brake system will function as an
ordinary ABS that has no additional ESP
®
functions.“ESP OFF” Indicator Light
66J032
You should turn the ESP
® on during your
ordinary driving, so that you have the ben-
efits of all of the ESP
® systems.
It may be required to turn the ESP
® sys-
tems (other than ABS) off if your vehicle is
stuck in sand, mud, or snow, where wheel
spin is necessary.“ESP OFF” switch
62J142
When the “ESP OFF” switch located at the
center console is pushed and held to turn
off the ESP
® systems (other than ABS),
the “ESP OFF” indicator light in the instru-
ment cluster comes on.
When you have turned the ESP
® systems
(other than ABS) off, make sure to turn
them back on before resuming ordinary
driving.
When you push the “ESP OFF” switch
again, the “ESP OFF” indicator light will go
out and all of the ESP
® systems will be
activated.
ABS Warning Light / Brake System
Warning LightSee “Braking” in the “OPERATING YOUR
VEHICLE” section.
Tire Pressure Monitoring
System (TPMS)The tire pressure monitoring system is
designed to alert you when one or more of
the tires on your vehicle is significantly
under-inflated. A Tire Pressure Monitoring
System (TPMS) sensor containing a
unique identification code is mounted on
each wheel. The TPMS sensors transmit
tire pressure signals to a central receiver
which relays the information to a tire pres-
sure monitoring system controller. When
the inflation pressure of one or more tires
indicates significant under-inflation, the low
tire pressure warning light shown below
comes on.
CAUTION
If the “ESP” warning light comes on,
or stays on while driving, there may
be a malfunction of the ESP
® sys-
tems (other than ABS). You should
have the systems inspected by an
authorized SUZUKI dealer.