fuel SUZUKI SX4 2008 1.G User Guide
[x] Cancel search | Manufacturer: SUZUKI, Model Year: 2008, Model line: SX4, Model: SUZUKI SX4 2008 1.GPages: 278, PDF Size: 4.07 MB
Page 84 of 278
4-7INSTRUMENT PANEL
80J21-03E
driver’s seat belt is buckled. After repeating
several times, the reminder will be can-
celed even if the driver’s seat belt remains
unbuckled.
For details about the seat belt reminder,
refer to “Seat Belts and Child Restraint
Systems” in the “BEFORE DRIVING” sec-
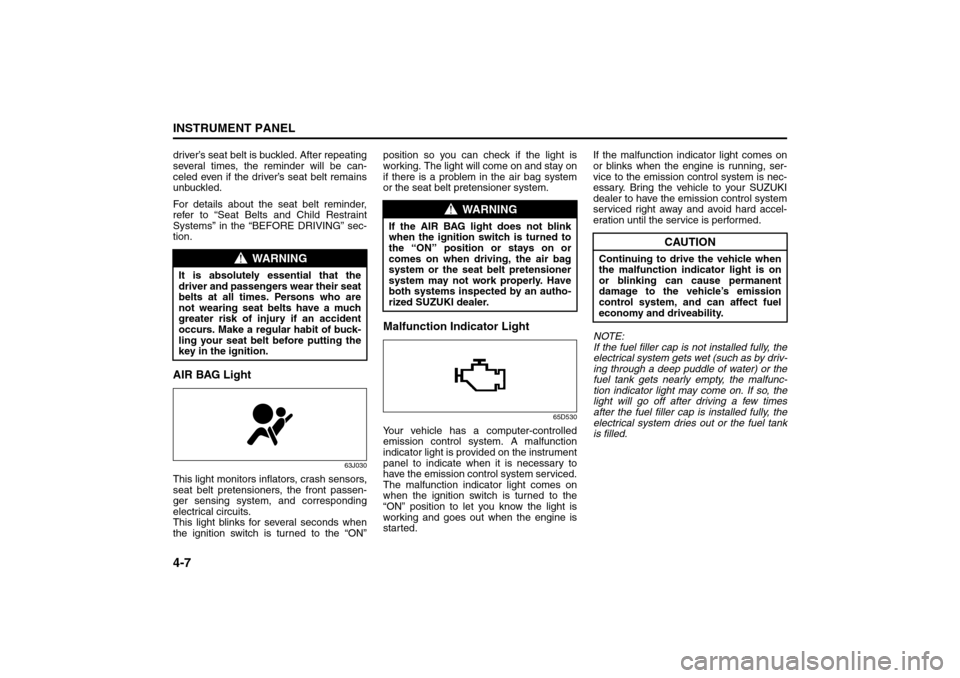
tion.AIR BAG Light
63J030
This light monitors inflators, crash sensors,
seat belt pretensioners, the front passen-
ger sensing system, and corresponding
electrical circuits.
This light blinks for several seconds when
the ignition switch is turned to the “ON”position so you can check if the light is
working. The light will come on and stay on
if there is a problem in the air bag system
or the seat belt pretensioner system.
Malfunction Indicator Light
65D530
Your vehicle has a computer-controlled
emission control system. A malfunction
indicator light is provided on the instrument
panel to indicate when it is necessary to
have the emission control system serviced.
The malfunction indicator light comes on
when the ignition switch is turned to the
“ON” position to let you know the light is
working and goes out when the engine is
started.If the malfunction indicator light comes on
or blinks when the engine is running, ser-
vice to the emission control system is nec-
essary. Bring the vehicle to your SUZUKI
dealer to have the emission control system
serviced right away and avoid hard accel-
eration until the service is performed.
NOTE:
If the fuel filler cap is not installed fully, the
electrical system gets wet (such as by driv-
ing through a deep puddle of water) or the
fuel tank gets nearly empty, the malfunc-
tion indicator light may come on. If so, the
light will go off after driving a few times
after the fuel filler cap is installed fully, the
electrical system dries out or the fuel tank
is filled.
WARNING
It is absolutely essential that the
driver and passengers wear their seat
belts at all times. Persons who are
not wearing seat belts have a much
greater risk of injury if an accident
occurs. Make a regular habit of buck-
ling your seat belt before putting the
key in the ignition.
WARNING
If the AIR BAG light does not blink
when the ignition switch is turned to
the “ON” position or stays on or
comes on when driving, the air bag
system or the seat belt pretensioner
system may not work properly. Have
both systems inspected by an autho-
rized SUZUKI dealer.
CAUTION
Continuing to drive the vehicle when
the malfunction indicator light is on
or blinking can cause permanent
damage to the vehicle’s emission
control system, and can affect fuel
economy and driveability.
Warning and Indicator Lights: 8
A/T Selector Position Indicator: 8
Speedometer/Odometer/Trip meter: 8
Page 85 of 278
4-8
INSTRUMENT PANEL
80J21-03E
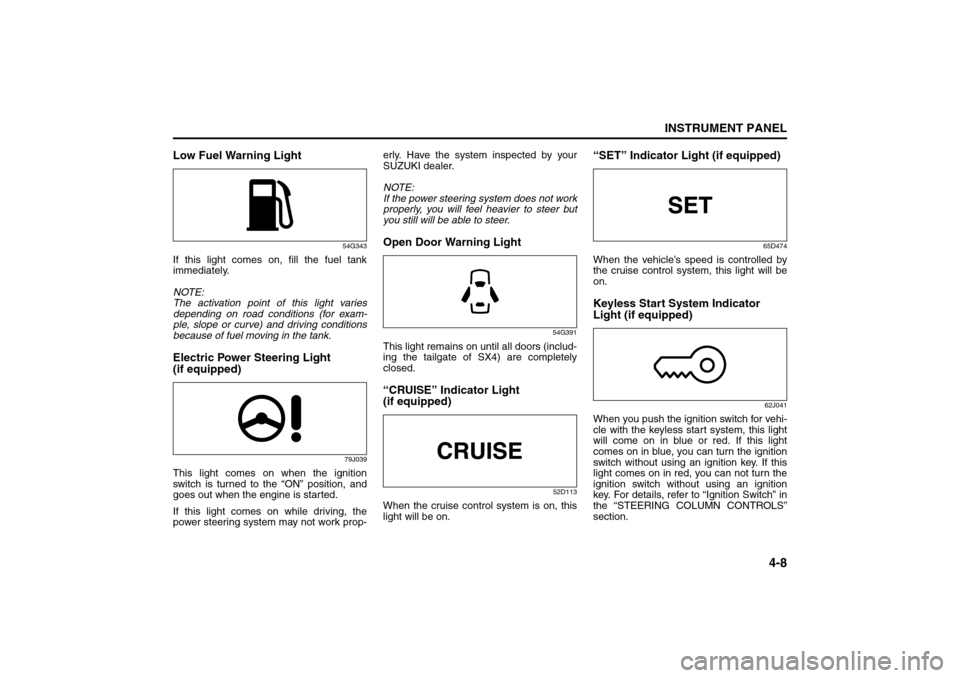
Low Fuel Warning Light
54G343
If this light comes on, fill the fuel tank
immediately.
NOTE:
The activation point of this light varies
depending on road conditions (for exam-
ple, slope or curve) and driving conditions
because of fuel moving in the tank.Electric Power Steering Light
(if equipped)
79J039
This light comes on when the ignition
switch is turned to the “ON” position, and
goes out when the engine is started.
If this light comes on while driving, the
power steering system may not work prop-erly. Have the system inspected by your
SUZUKI dealer.
NOTE:
If the power steering system does not work
properly, you will feel heavier to steer but
you still will be able to steer.
Open Door Warning Light
54G391
This light remains on until all doors (includ-
ing the tailgate of SX4) are completely
closed.“CRUISE” Indicator Light
(if equipped)
52D113
When the cruise control system is on, this
light will be on.
“SET” Indicator Light (if equipped)
65D474
When the vehicle’s speed is controlled by
the cruise control system, this light will be
on.Keyless Start System Indicator
Light (if equipped)
62J041
When you push the ignition switch for vehi-
cle with the keyless start system, this light
will come on in blue or red. If this light
comes on in blue, you can turn the ignition
switch without using an ignition key. If this
light comes on in red, you can not turn the
ignition switch without using an ignition
key. For details, refer to “Ignition Switch” in
the “STEERING COLUMN CONTROLS”
section.
Speedometer/Odometer/Trip meter: 8
Meter Illumination Control:
Page 86 of 278
4-9INSTRUMENT PANEL
80J21-03E
If this light blinks in red, it reminds you that
the remote controller is not in the vehicle.
For details, refer to “Keyless Start System
Remote Controller/Keyless Entry System
Transmitter” in the “BEFORE DRIVING”
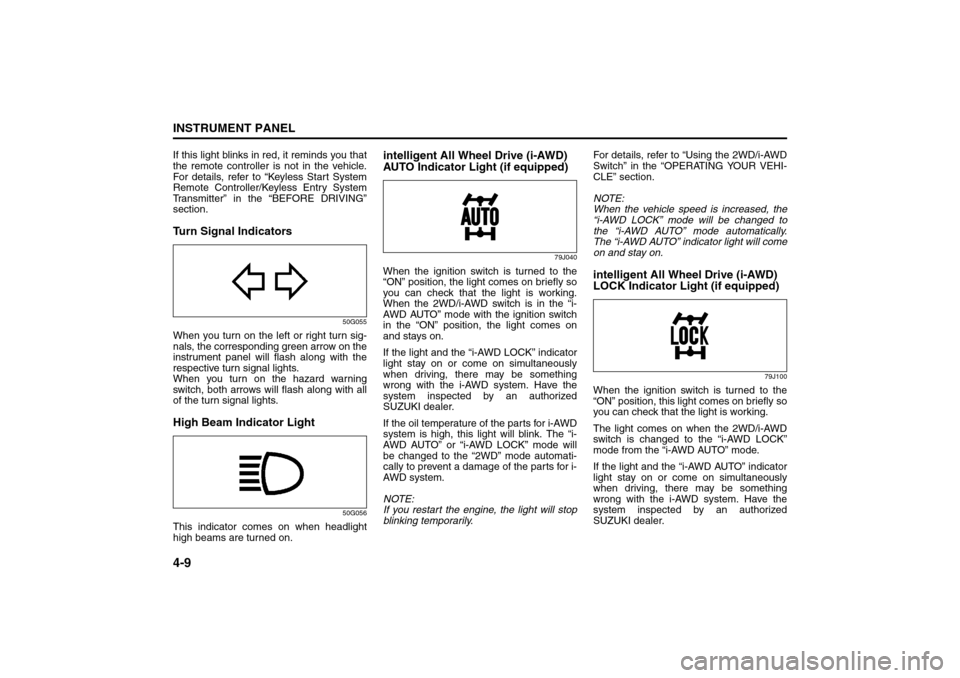
section.Turn Signal Indicators
50G055
When you turn on the left or right turn sig-
nals, the corresponding green arrow on the
instrument panel will flash along with the
respective turn signal lights.
When you turn on the hazard warning
switch, both arrows will flash along with all
of the turn signal lights.High Beam Indicator Light
50G056
This indicator comes on when headlight
high beams are turned on.
intelligent All Wheel Drive (i-AWD)
AUTO Indicator Light (if equipped)
79J040
When the ignition switch is turned to the
“ON” position, the light comes on briefly so
you can check that the light is working.
When the 2WD/i-AWD switch is in the “i-
AWD AUTO” mode with the ignition switch
in the “ON” position, the light comes on
and stays on.
If the light and the “i-AWD LOCK” indicator
light stay on or come on simultaneously
when driving, there may be something
wrong with the i-AWD system. Have the
system inspected by an authorized
SUZUKI dealer.
If the oil temperature of the parts for i-AWD
system is high, this light will blink. The “i-
AWD AUTO” or “i-AWD LOCK” mode will
be changed to the “2WD” mode automati-
cally to prevent a damage of the parts for i-
AWD system.
NOTE:
If you restart the engine, the light will stop
blinking temporarily.For details, refer to “Using the 2WD/i-AWD
Switch” in the “OPERATING YOUR VEHI-
CLE” section.
NOTE:
When the vehicle speed is increased, the
“i-AWD LOCK” mode will be changed to
the “i-AWD AUTO” mode automatically.
The “i-AWD AUTO” indicator light will come
on and stay on.
intelligent All Wheel Drive (i-AWD)
LOCK Indicator Light (if equipped)
79J100
When the ignition switch is turned to the
“ON” position, this light comes on briefly so
you can check that the light is working.
The light comes on when the 2WD/i-AWD
switch is changed to the “i-AWD LOCK”
mode from the “i-AWD AUTO” mode.
If the light and the “i-AWD AUTO” indicator
light stay on or come on simultaneously
when driving, there may be something
wrong with the i-AWD system. Have the
system inspected by an authorized
SUZUKI dealer.
Tachometer:
Fuel Gauge:
Page 88 of 278
4-11INSTRUMENT PANEL
80J21-03E
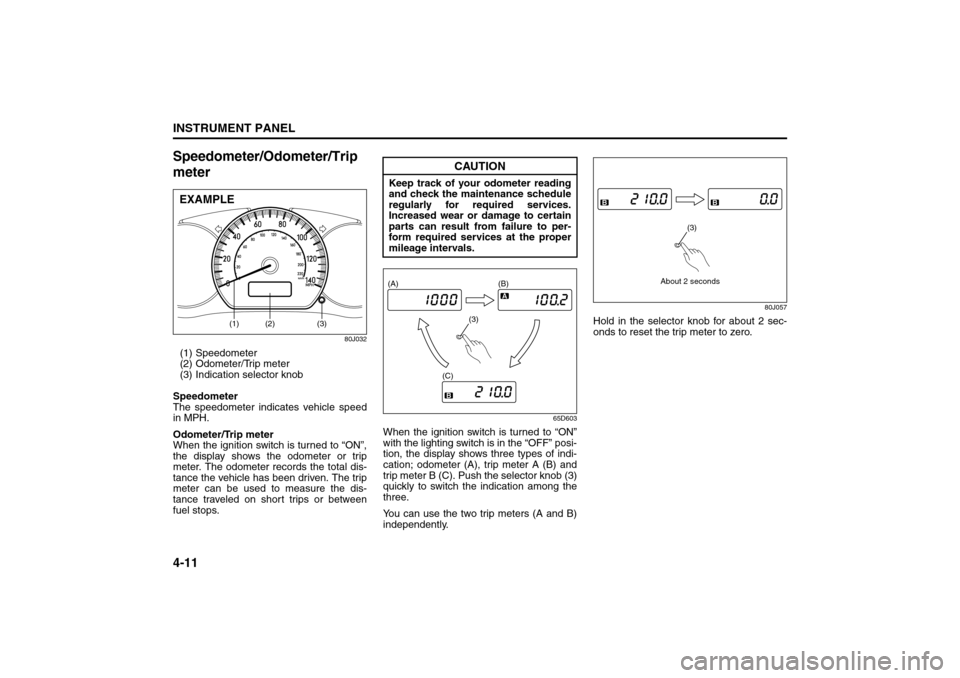
Speedometer/Odometer/Trip
meter
80J032
(1) Speedometer
(2) Odometer/Trip meter
(3) Indication selector knob
Speedometer
The speedometer indicates vehicle speed
in MPH.
Odometer/Trip meter
When the ignition switch is turned to “ON”,
the display shows the odometer or trip
meter. The odometer records the total dis-
tance the vehicle has been driven. The trip
meter can be used to measure the dis-
tance traveled on short trips or between
fuel stops.
65D603
When the ignition switch is turned to “ON”
with the lighting switch is in the “OFF” posi-
tion, the display shows three types of indi-
cation; odometer (A), trip meter A (B) and
trip meter B (C). Push the selector knob (3)
quickly to switch the indication among the
three.
You can use the two trip meters (A and B)
independently.
80J057
Hold in the selector knob for about 2 sec-
onds to reset the trip meter to zero.
(2)
(3)
(1)
EXAMPLE
CAUTION
Keep track of your odometer reading
and check the maintenance schedule
regularly for required services.
Increased wear or damage to certain
parts can result from failure to per-
form required services at the proper
mileage intervals.
(3) (A) (B)
(C)
About 2 seconds
(3)
Outside Rearview Mirrors Defroster Switch:
Fog Light Switch: 8
Cigarette Lighter and Ashtray: 3, 8
Page 89 of 278
4-12
INSTRUMENT PANEL
80J21-03E
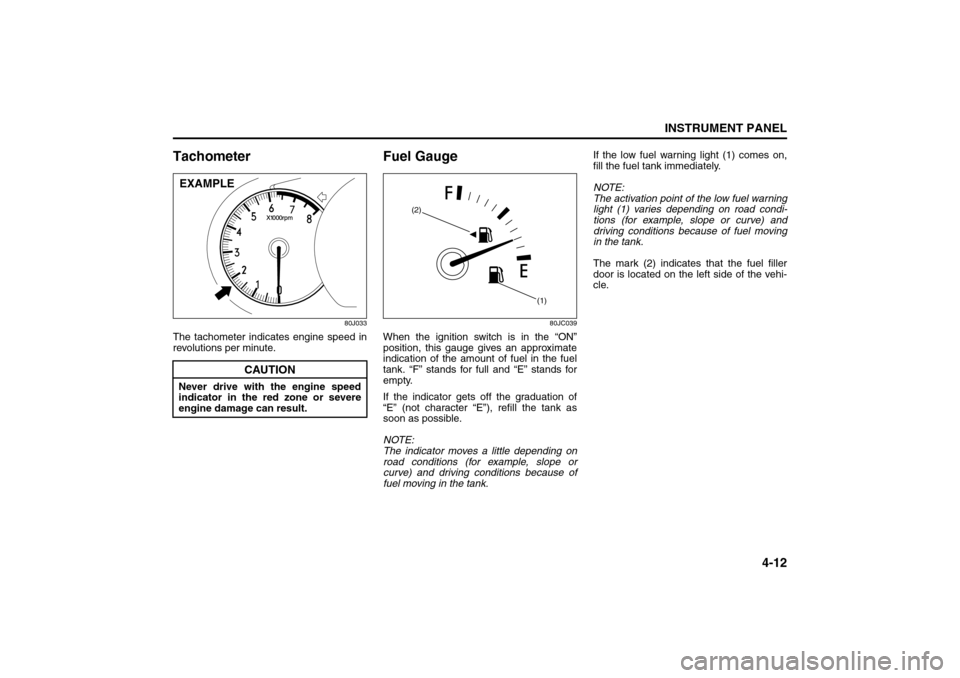
Tachometer
80J033
The tachometer indicates engine speed in
revolutions per minute.
Fuel Gauge
80JC039
When the ignition switch is in the “ON”
position, this gauge gives an approximate
indication of the amount of fuel in the fuel
tank. “F” stands for full and “E” stands for
empty.
If the indicator gets off the graduation of
“E” (not character “E”), refill the tank as
soon as possible.
NOTE:
The indicator moves a little depending on
road conditions (for example, slope or
curve) and driving conditions because of
fuel moving in the tank.If the low fuel warning light (1) comes on,
fill the fuel tank immediately.
NOTE:
The activation point of the low fuel warning
light (1) varies depending on road condi-
tions (for example, slope or curve) and
driving conditions because of fuel moving
in the tank.
The mark (2) indicates that the fuel filler
door is located on the left side of the vehi-
cle.
CAUTION
Never drive with the engine speed
indicator in the red zone or severe
engine damage can result.EXAMPLE
(1) (2)
Cigarette Lighter and Ashtray: 3, 8
Information Display:
Page 94 of 278
4-17INSTRUMENT PANEL
80J21-03E
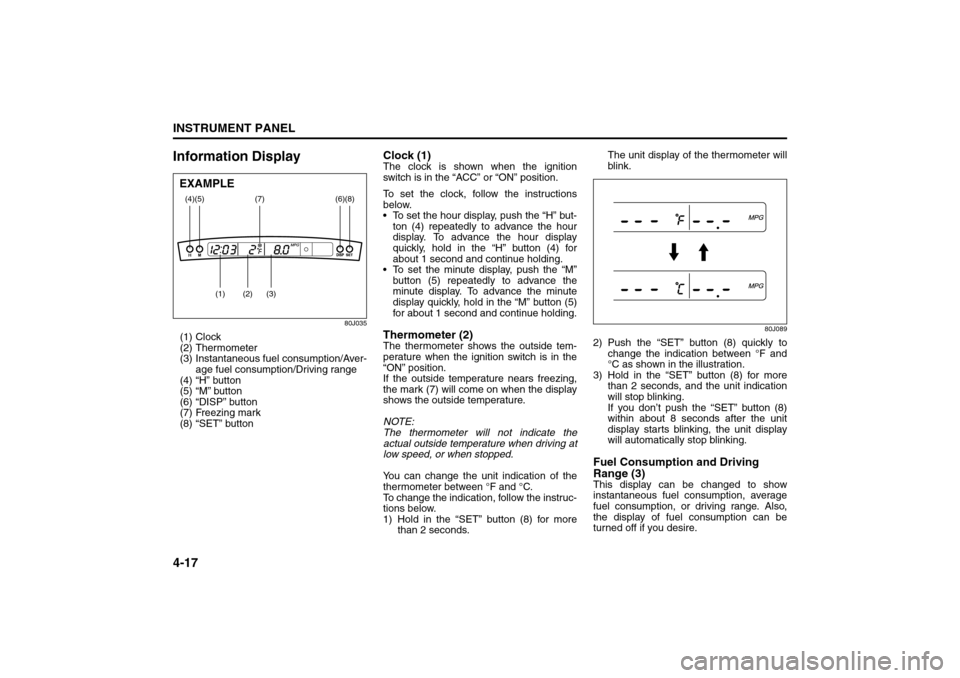
Information Display
80J035
(1) Clock
(2) Thermometer
(3) Instantaneous fuel consumption/Aver-
age fuel consumption/Driving range
(4) “H” button
(5) “M” button
(6) “DISP” button
(7) Freezing mark
(8) “SET” button
Clock (1)The clock is shown when the ignition
switch is in the “ACC” or “ON” position.
To set the clock, follow the instructions
below.
To set the hour display, push the “H” but-
ton (4) repeatedly to advance the hour
display. To advance the hour display
quickly, hold in the “H” button (4) for
about 1 second and continue holding.
To set the minute display, push the “M”
button (5) repeatedly to advance the
minute display. To advance the minute
display quickly, hold in the “M” button (5)
for about 1 second and continue holding.Thermometer (2)The thermometer shows the outside tem-
perature when the ignition switch is in the
“ON” position.
If the outside temperature nears freezing,
the mark (7) will come on when the display
shows the outside temperature.
NOTE:
The thermometer will not indicate the
actual outside temperature when driving at
low speed, or when stopped.
You can change the unit indication of the
thermometer between °F and °C.
To change the indication, follow the instruc-
tions below.
1) Hold in the “SET” button (8) for more
than 2 seconds.The unit display of the thermometer will
blink.
80J089
2) Push the “SET” button (8) quickly to
change the indication between °F and
°C as shown in the illustration.
3) Hold in the “SET” button (8) for more
than 2 seconds, and the unit indication
will stop blinking.
If you don’t push the “SET” button (8)
within about 8 seconds after the unit
display starts blinking, the unit display
will automatically stop blinking.Fuel Consumption and Driving
Range (3)This display can be changed to show
instantaneous fuel consumption, average
fuel consumption, or driving range. Also,
the display of fuel consumption can be
turned off if you desire.
(4)
(2)
(1)
(3)
(5)
(8)
(7)
(6)
EXAMPLE
Heating and Air Conditioning System: 4
Page 95 of 278
4-18
INSTRUMENT PANEL
80J21-03E
80J079
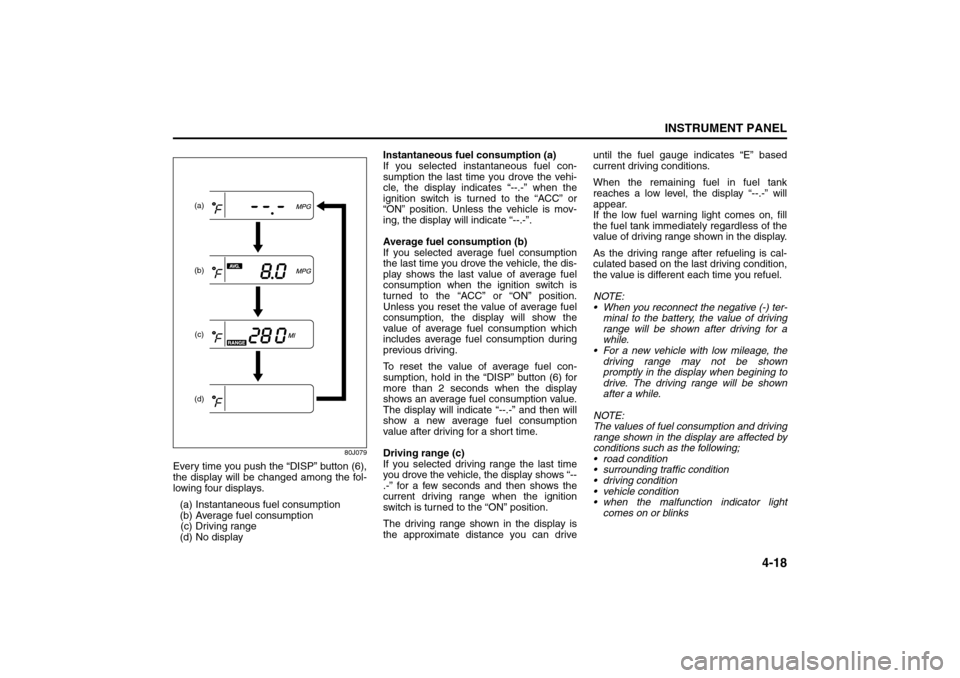
Every time you push the “DISP” button (6),
the display will be changed among the fol-
lowing four displays.
(a) Instantaneous fuel consumption
(b) Average fuel consumption
(c) Driving range
(d) No displayInstantaneous fuel consumption (a)
If you selected instantaneous fuel con-
sumption the last time you drove the vehi-
cle, the display indicates “--.-” when the
ignition switch is turned to the “ACC” or
“ON” position. Unless the vehicle is mov-
ing, the display will indicate “--.-”.
Average fuel consumption (b)
If you selected average fuel consumption
the last time you drove the vehicle, the dis-
play shows the last value of average fuel
consumption when the ignition switch is
turned to the “ACC” or “ON” position.
Unless you reset the value of average fuel
consumption, the display will show the
value of average fuel consumption which
includes average fuel consumption during
previous driving.
To reset the value of average fuel con-
sumption, hold in the “DISP” button (6) for
more than 2 seconds when the display
shows an average fuel consumption value.
The display will indicate “--.-” and then will
show a new average fuel consumption
value after driving for a short time.
Driving range (c)
If you selected driving range the last time
you drove the vehicle, the display shows “--
.-” for a few seconds and then shows the
current driving range when the ignition
switch is turned to the “ON” position.
The driving range shown in the display is
the approximate distance you can driveuntil the fuel gauge indicates “E” based
current driving conditions.
When the remaining fuel in fuel tank
reaches a low level, the display “--.-” will
appear.
If the low fuel warning light comes on, fill
the fuel tank immediately regardless of the
value of driving range shown in the display.
As the driving range after refueling is cal-
culated based on the last driving condition,
the value is different each time you refuel.
NOTE:
When you reconnect the negative (-) ter-
minal to the battery, the value of driving
range will be shown after driving for a
while.
For a new vehicle with low mileage, the
driving range may not be shown
promptly in the display when begining to
drive. The driving range will be shown
after a while.
NOTE:
The values of fuel consumption and driving
range shown in the display are affected by
conditions such as the following;
road condition
surrounding traffic condition
driving condition
vehicle condition
when the malfunction indicator light
comes on or blinks
(a)
(b)
(c)(d)
Heating and Air Conditioning System: 4
Page 96 of 278
4-19INSTRUMENT PANEL
80J21-03E
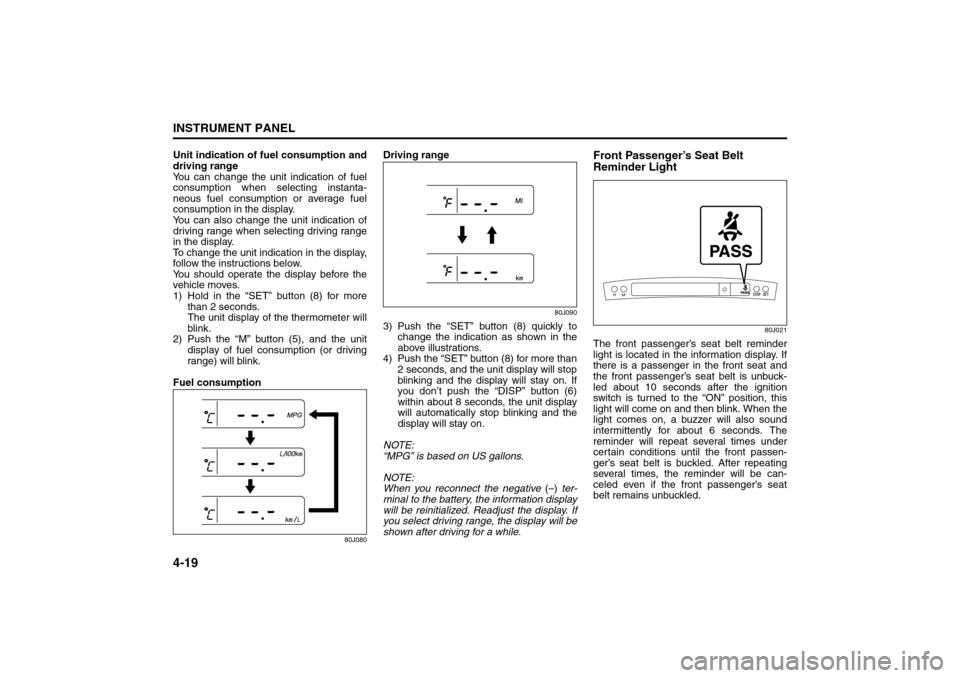
Unit indication of fuel consumption and
driving range
You can change the unit indication of fuel
consumption when selecting instanta-
neous fuel consumption or average fuel
consumption in the display.
You can also change the unit indication of
driving range when selecting driving range
in the display.
To change the unit indication in the display,
follow the instructions below.
You should operate the display before the
vehicle moves.
1) Hold in the “SET” button (8) for more
than 2 seconds.
The unit display of the thermometer will
blink.
2) Push the “M” button (5), and the unit
display of fuel consumption (or driving
range) will blink.
Fuel consumption
80J080
Driving range
80J090
3) Push the “SET” button (8) quickly to
change the indication as shown in the
above illustrations.
4) Push the “SET” button (8) for more than
2 seconds, and the unit display will stop
blinking and the display will stay on. If
you don’t push the “DISP” button (6)
within about 8 seconds, the unit display
will automatically stop blinking and the
display will stay on.
NOTE:
“MPG” is based on US gallons.
NOTE:
When you reconnect the negative (–) ter-
minal to the battery, the information display
will be reinitialized. Readjust the display. If
you select driving range, the display will be
shown after driving for a while.
Front Passenger’s Seat Belt
Reminder Light
80J021
The front passenger’s seat belt reminder
light is located in the information display. If
there is a passenger in the front seat and
the front passenger’s seat belt is unbuck-
led about 10 seconds after the ignition
switch is turned to the “ON” position, this
light will come on and then blink. When the
light comes on, a buzzer will also sound
intermittently for about 6 seconds. The
reminder will repeat several times under
certain conditions until the front passen-
ger’s seat belt is buckled. After repeating
several times, the reminder will be can-
celed even if the front passenger’s seat
belt remains unbuckled.
Heating and Air Conditioning System: 4
Page 103 of 278
4-26
INSTRUMENT PANEL
80J21-03E
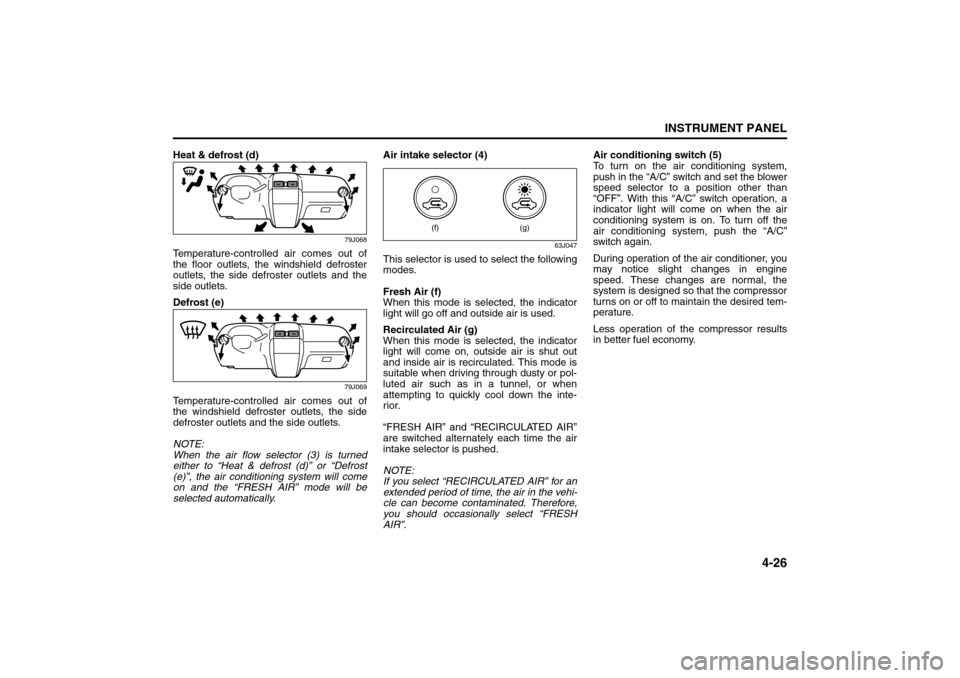
Heat & defrost (d)
79J068
Temperature-controlled air comes out of
the floor outlets, the windshield defroster
outlets, the side defroster outlets and the
side outlets.
Defrost (e)
79J069
Temperature-controlled air comes out of
the windshield defroster outlets, the side
defroster outlets and the side outlets.
NOTE:
When the air flow selector (3) is turned
either to “Heat & defrost (d)” or “Defrost
(e)”, the air conditioning system will come
on and the “FRESH AIR” mode will be
selected automatically.Air intake selector (4)
63J047
This selector is used to select the following
modes.
Fresh Air (f)
When this mode is selected, the indicator
light will go off and outside air is used.
Recirculated Air (g)
When this mode is selected, the indicator
light will come on, outside air is shut out
and inside air is recirculated. This mode is
suitable when driving through dusty or pol-
luted air such as in a tunnel, or when
attempting to quickly cool down the inte-
rior.
“FRESH AIR” and “RECIRCULATED AIR”
are switched alternately each time the air
intake selector is pushed.
NOTE:
If you select “RECIRCULATED AIR” for an
extended period of time, the air in the vehi-
cle can become contaminated. Therefore,
you should occasionally select “FRESH
AIR”.Air conditioning switch (5)
To turn on the air conditioning system,
push in the “A/C” switch and set the blower
speed selector to a position other than
“OFF”. With this “A/C” switch operation, a
indicator light will come on when the air
conditioning system is on. To turn off the
air conditioning system, push the “A/C”
switch again.
During operation of the air conditioner, you
may notice slight changes in engine
speed. These changes are normal, the
system is designed so that the compressor
turns on or off to maintain the desired tem-
perature.
Less operation of the compressor results
in better fuel economy.
(g)
(f)
Audio Systems:
Page 137 of 278
OTHER CONTROLS AND EQUIPMENT
5
80J21-03E
60G407
OTHER CONTROLS AND EQUIPMENTParking Brake Lever ........................................................... 5-1
Pedals ................................................................................... 5-1
Gearshift Lever .................................................................... 5-2
Fuel Filler Cap ..................................................................... 5-3
Folding Rear Seats (SX4) ................................................... 5-4
Sun Visor ............................................................................. 5-8
Interior Light Switch ........................................................... 5-8
Spot Light ............................................................................ 5-9
Assist Grips (if equipped) .................................................. 5-9
Eyeglasses Holder (if equipped) ........................................ 5-10
Engine Hood ........................................................................ 5-10
Cup Holder and Storage Area (if equipped) ..................... 5-11
Accessory Socket (if equipped) ......................................... 5-11
Frame Hooks ....................................................................... 5-12
Tire Changing Tool ............................................................. 5-13
Luggage Compartment Cover (if equipped) ..................... 5-14
Luggage Compartment Light (SX4) ................................... 5-15
Trunk Light (SX4 SEDAN) ................................................... 5-15
Radio Antenna ..................................................................... 5-16
Roof Rails or Roof Rack Anchors (if equipped) ............... 5-16