engine coolant TATA SAFARI 2015 User Guide
[x] Cancel search | Manufacturer: TATA, Model Year: 2015, Model line: SAFARI, Model: TATA SAFARI 2015Pages: 161, PDF Size: 2.55 MB
Page 106 of 161
106
Engine Cooling System Engine Cooling SystemEngine Cooling System Engine Cooling System
Engine Cooling System
If engine overheating occurs, there could be a fault in the
cooling system which may be on account of :
1. Less coolant in the cooling system or dirt/scale having
accumulated inside cooling water passages especially
in the radiator core.
2 . Choking of radiator passages due to foreign material or
damages.
3. Defective thermostat.
4. Defective coolant temperature sensor.
5 . Non operation of electrically operated fans (Controlled
by ECU).
6. Coolant leakage.
7. Radiator cap not sealing properly.
8 . A.C. condenser fan not working
9. Excessive refrigerant charging in the A.C. system.
10. No communication between auxiliary tank and radiator.
P PP P
P
r rr r
r
e ee e
e
v vv v
v
en enen en
en
tion of R tion of Rtion of R tion of R
tion of R
ust F ust Fust F ust F
ust F
or oror or
or
ma mama ma
ma
tion tiontion tion
tion
To prevent rust formation in the radiator use premixed
recommended anti-freeze coolant. This is sufficient to
operate the vehicle upto -40
oC.
C CC C
C
OOLING SY OOLING SYOOLING SY OOLING SY
OOLING SY
STEM STEMSTEM STEM
STEMM A I N T E N A N C E
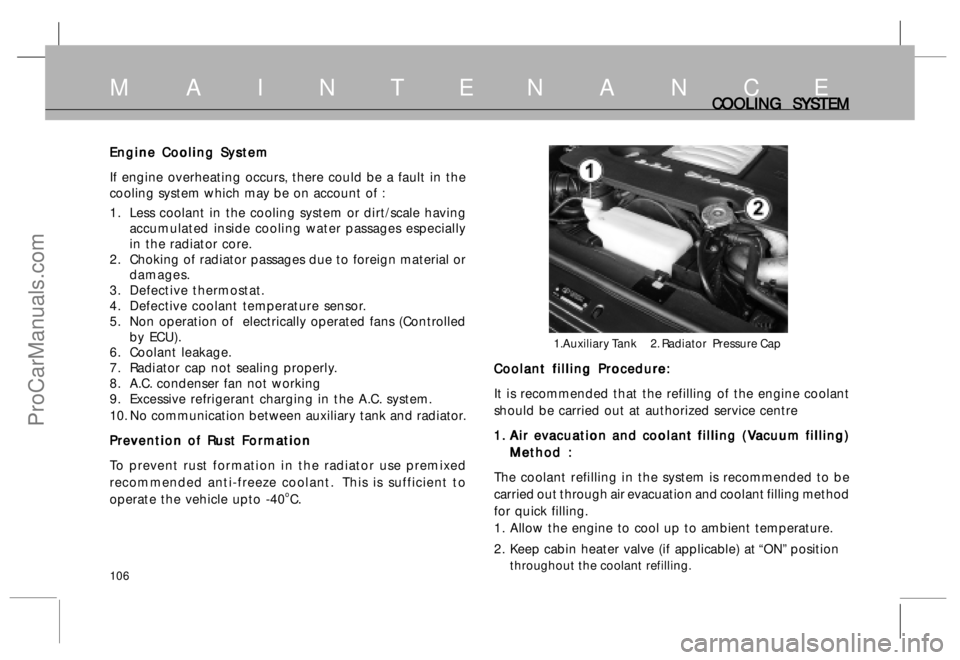
1.Auxiliary Tank 2. Radiator Pressure Cap
Coolant filling Procedure: Coolant filling Procedure:Coolant filling Procedure: Coolant filling Procedure:
Coolant filling Procedure:
It is recommended that the refilling of the engine coolant
should be carried out at authorized service centre
1. 1.1. 1.
1.
A A A A
A
ir e ir eir e ir e
ir e
v vv v
v
acua acuaacua acua
acua
tion and c tion and ction and c tion and c
tion and c
o oo o
o
olan olanolan olan
olan
t filling ( t filling (t filling ( t filling (
t filling (
V VV V
V
acuum filling) acuum filling)acuum filling) acuum filling)
acuum filling)
Method : Method :Method : Method :
Method :
The coolant refilling in the system is recommended to be
carried out through air evacuation and coolant filling method
for quick filling.
1 . Allow the engine to cool up to ambient temperature.
2 . Keep cabin heater valve (if applicable) at “ON” position
throughout the coolant refilling.
ProCarManuals.com
Page 107 of 161
107
C CC C
C
OOLING SY OOLING SYOOLING SY OOLING SY
OOLING SY
STEM STEMSTEM STEM
STEMM A I N T E N A N C E
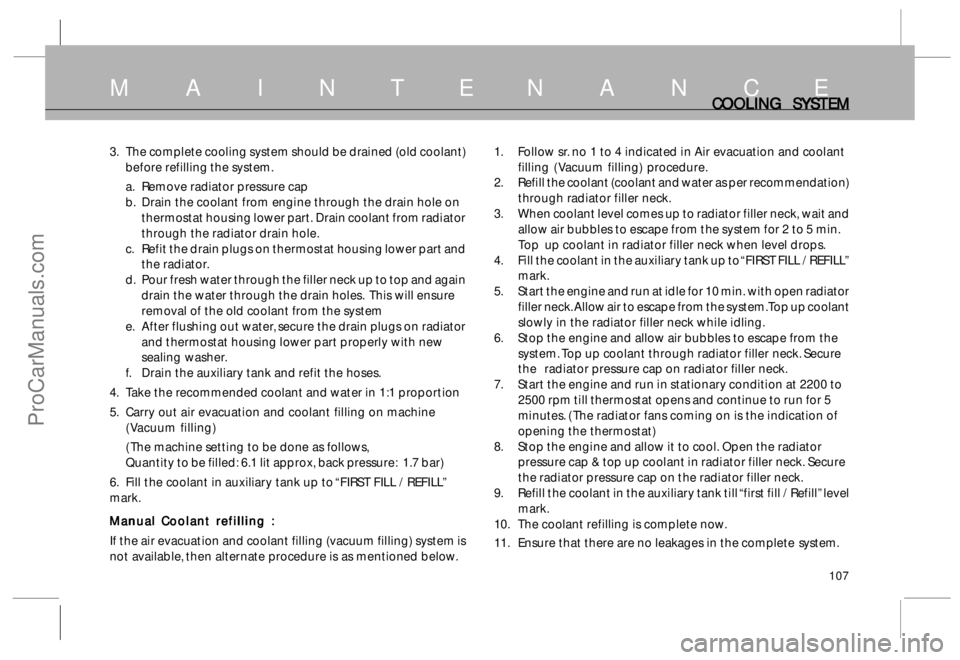
3. The complete cooling system should be drained (old coolant)
before refilling the system.
a. Remove radiator pressure cap
b. Drain the coolant from engine through the drain hole on
thermostat housing lower part. Drain coolant from radiator
through the radiator drain hole.
c. Refit the drain plugs on thermostat housing lower part and
the radiator.
d. Pour fresh water through the filler neck up to top and again
drain the water through the drain holes. This will ensure
removal of the old coolant from the system
e. After flushing out water, secure the drain plugs on radiator
and thermostat housing lower part properly with new
sealing washer.
f. Drain the auxiliary tank and refit the hoses.
4. Take the recommended coolant and water in 1:1 proportion
5. Carry out air evacuation and coolant filling on machine
( Vacuum filling)
( The machine setting to be done as follows,
Quantity to be filled: 6.1 lit approx, back pressure: 1.7 bar)
6. Fill the coolant in auxiliary tank up to “FIRST FILL / REFILL”
mark.
Manual Coolant refilling : Manual Coolant refilling :Manual Coolant refilling : Manual Coolant refilling :
Manual Coolant refilling :
If the air evacuation and coolant filling (vacuum filling) system is
not available, then alternate procedure is as mentioned below.1. Follow sr. no 1 to 4 indicated in Air evacuation and coolant
filling ( Vacuum filling) procedure.
2. Refill the coolant (coolant and water as per recommendation)
through radiator filler neck.
3. When coolant level comes up to radiator filler neck, wait and
allow air bubbles to escape from the system for 2 to 5 min.
Top up coolant in radiator filler neck when level drops.
4. Fill the coolant in the auxiliary tank up to “FIRST FILL / REFILL”
mark.
5. Start the engine and run at idle for 10 min. with open radiator
filler neck. Allow air to escape from the system.Top up coolant
slowly in the radiator filler neck while idling.
6. Stop the engine and allow air bubbles to escape from the
system. Top up coolant through radiator filler neck. Secure
the radiator pressure cap on radiator filler neck.
7. Start the engine and run in stationary condition at 2200 to
2500 rpm till thermostat opens and continue to run for 5
minutes. ( The radiator fans coming on is the indication of
opening the thermostat)
8. Stop the engine and allow it to cool. Open the radiator
pressure cap & top up coolant in radiator filler neck. Secure
the radiator pressure cap on the radiator filler neck.
9. Refill the coolant in the auxiliary tank till “first fill / Refill” level
mark.
10. The coolant refilling is complete now.
11. Ensure that there are no leakages in the completesystem.
ProCarManuals.com
Page 136 of 161
136
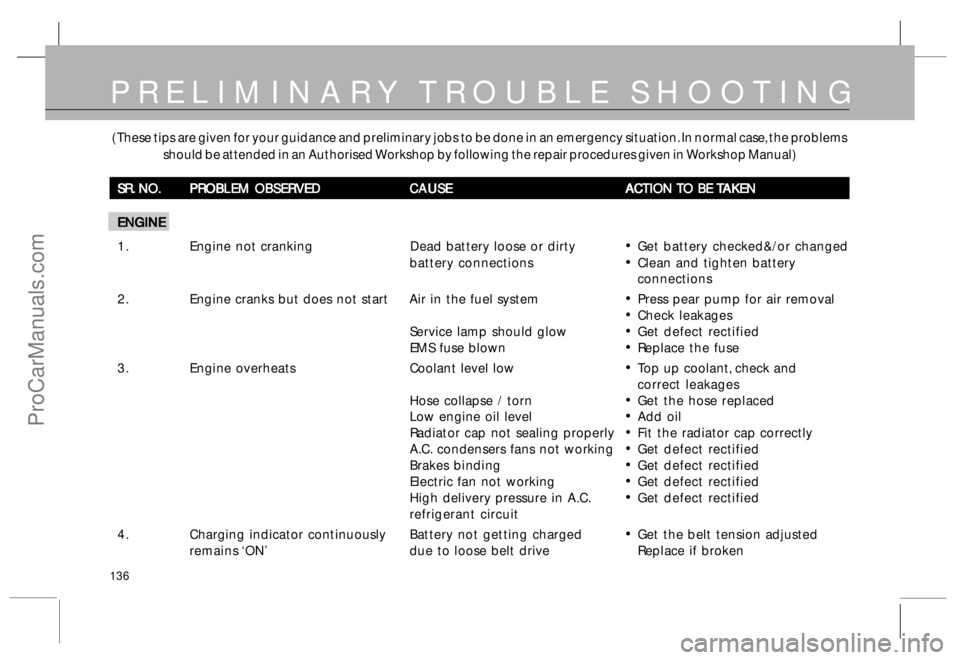
( These tips are given for your guidance and preliminary jobs to be done in an emergency situation. In normal case, the problems
should be attended in an Authorised Workshop by following the repair procedures given in Workshop Manual)
SR. NO. SR. NO.SR. NO. SR. NO.
SR. NO.
PROBLEM OBSERVED PROBLEM OBSERVEDPROBLEM OBSERVED PROBLEM OBSERVED
PROBLEM OBSERVED
CAUSE CAUSECAUSE CAUSE
CAUSE
A AA A
A
CTION CTION CTION CTION
CTION
T TT T
T
O BE O BE O BE O BE
O BE
T TT T
T
AKEN AKENAKEN AKEN
AKEN
ENGINE ENGINEENGINE ENGINE
ENGINE
1 . Engine not cranking Dead battery loose or dirty
•Get battery checked&/or changed
battery connections
•Clean and tighten battery
connections
2 . Engine cranks but does not start Air in the fuel system
•Press pear pump for air removal
•Check leakages
Service lamp should glow
•Get defect rectified
EMS fuse blown
•Replace the fuse
3. Engine overheatsCoolant level low
•Top up coolant, check and
correct leakages
Hose collapse / torn
•Get the hose replaced
Low engine oil level
•Add oil
Radiator cap not sealing properly
•Fit the radiator cap correctly
A.C. condensers fans not working
•Get defect rectified
Brakes binding
•Get defect rectified
Electric fan not working
•Get defect rectified
High delivery pressure in A.C.
•Get defect rectified
refrigerant circuit
4 . Charging indicator continuouslyBattery not getting charged
•Get the belt tension adjusted
remains ‘ON’due to loose belt drive Replace if broken
PRELIMINARY TROUBLE SHOOTING
ProCarManuals.com
Page 146 of 161
146
S E R V I C E S C H E D U L ESERVICE SCHEDULE SERVICE SCHEDULESERVICE SCHEDULE SERVICE SCHEDULE
SERVICE SCHEDULE
SR SRSR SR
SR
x 1000 km x 1000 kmx 1000 km x 1000 km
x 1000 km
NO NONO NO
NO
OPER OPEROPER OPER
OPER
A AA A
A
TIONS TIONSTIONS TIONS
TIONS
FREQUENCY FREQUENCYFREQUENCY FREQUENCY
FREQUENCY
1-1.5 1-1.51-1.5 1-1.5
1-1.5
15 1515 15
15
30 3030 30
30
45 4545 45
45
60 6060 60
60
75 7575 75
75
90 9090 90
90
105 105105 105
105
GENERAL GENERALGENERAL GENERAL
GENERAL
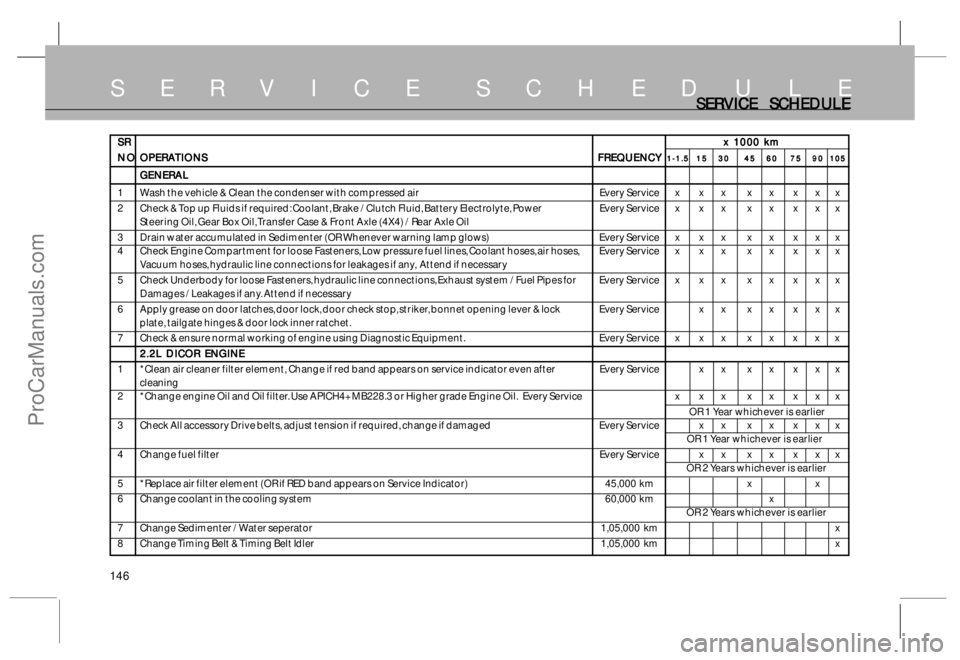
1 Wash the vehicle & Clean the condenser with compressed air Every Service x x x x x x x x
2 Check & Top up Fluids if required: Coolant, Brake / Clutch Fluid, Battery Electrolyte, Power Every Service x x x x x x x x
Steering Oil, Gear Box Oil, Transfer Case & Front Axle (4X4) / Rear Axle Oil
3 Drain water accumulated in Sedimenter (OR Whenever warning lamp glows) Every Service x x x x x x x x
4 Check Engine Compartment for loose Fasteners, Low pressure fuel lines, Coolant hoses, air hoses, Every Service x x x x x x x x
Vacuum hoses, hydraulic line connections for leakages if any, Attend if necessary
5 Check Underbody for loose Fasteners, hydraulic line connections, Exhaust system / Fuel Pipes for Every Service x x x x x x x x
Damages / Leakages if any. Attend if necessary
6 Apply grease on door latches, door lock, door check stop, striker, bonnet opening lever & lock Every Service x x x x x x x
plate, tailgate hinges & door lock inner ratchet.
7 Check & ensure normal working of engine using Diagnostic Equipment. Every Service x x x x x x x x
2.2L DICOR ENGINE 2.2L DICOR ENGINE2.2L DICOR ENGINE 2.2L DICOR ENGINE
2.2L DICOR ENGINE
1 *Clean air cleaner filter element, Change if red band appears on service indicator even after Every Service x x x x x x x
cleaning
2 *Change engine Oil and Oil filter. Use APICH4+MB228.3 or Higher grade Engine Oil.Every Service x x x x x x x x
OR 1 Year whichever is earlier
3 Check All accessory Drive belts, adjust tension if required, change if damaged Every Service x x x x x x x
OR 1 Year whichever is earlier
4 Change fuel filterEvery Service x x x x x x x
OR 2 Years whichever is earlier
5 *Replace air filter element (OR if RED band appears on Service Indicator) 45,000 km x x
6 Change coolant in the cooling system 60,000 km x
OR 2 Years whichever is earlier
7 Change Sedimenter / Water seperator1,05,000 km x
8 Change Timing Belt & Timing Belt Idler1,05,000 km x
ProCarManuals.com
Page 155 of 161
155
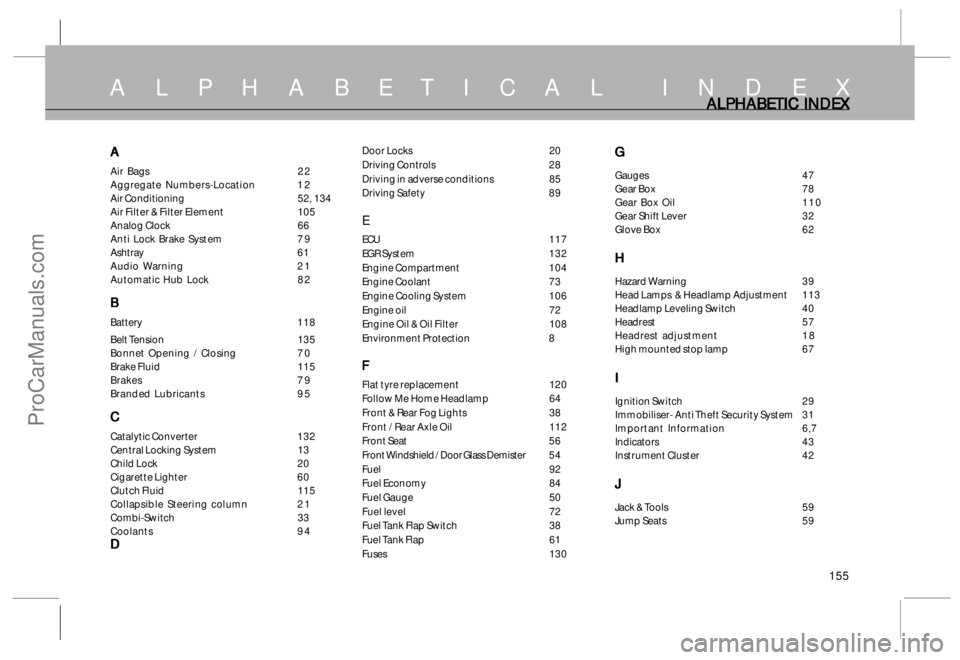
A L P H A B E T I C A L I N D E X ALPHABETIC INDEX ALPHABETIC INDEX ALPHABETIC INDEX ALPHABETIC INDEX
ALPHABETIC INDEX
A AA A
A
Air Bags 2 2
Aggregate Numbers-Location 1 2
Air Conditioning52, 134
Air Filter & Filter Element 105
Analog Clock 66
Anti Lock Brake System 7 9
Ashtray 6 1
Audio Warning 2 1
Automatic Hub Lock 8 2
B BB B
B
Battery 118
Belt Tension 135
Bonnet Opening / Closing 7 0
Brake Fluid 115
Brakes 7 9
Branded Lubricants 9 5
C CC C
C
Catalytic Converter 132
Central Locking System 13
Child Lock 20
Cigarette Lighter 60
Clutch Fluid 115
Collapsible Steering column 2 1
Combi-Switch 33
Coolants 9 4
D DD D
D
Door Locks 20
Driving Controls 28
Driving in adverse conditions 85
Driving Safety 89
E
ECU 1 1 7
EGR System 132
Engine Compartment 104
Engine Coolant 73
Engine Cooling System 106
Engine oil 72
Engine Oil & Oil Filter 108
Environment Protection 8
F FF F
F
Flat tyre replacement 120
Follow Me Home Headlamp 64
Front & Rear Fog Lights 38
Front / Rear Axle Oil 112
Front Seat 56
Front Windshield / Door Glass Demister 5 4
Fuel 92
Fuel Economy 84
Fuel Gauge 50
Fuel level 72
Fuel Tank Flap Switch 38
Fuel Tank Flap 61
Fuses 130
G GG G
G
Gauges 4 7
Gear Box 78
Gear Box Oil 1 1 0
Gear Shift Lever 32
Glove Box 62
H HH H
H
Hazard Warning 39
Head Lamps & Headlamp Adjustment 113
Headlamp Leveling Switch 40
Headrest 57
Headrest adjustment 1 8
High mounted stop lamp 67
I II I
I
Ignition Switch 29
Immobiliser- Anti Theft Security System 31
Important Information 6,7
Indicators 43
Instrument Cluster 42
J JJ J
J
Jack & Tools 59
Jump Seats 59
ProCarManuals.com