ESP TESLA MODEL 3 2021 Owner´s Manual
[x] Cancel search | Manufacturer: TESLA, Model Year: 2021, Model line: MODEL 3, Model: TESLA MODEL 3 2021Pages: 248, PDF Size: 7.76 MB
Page 101 of 248
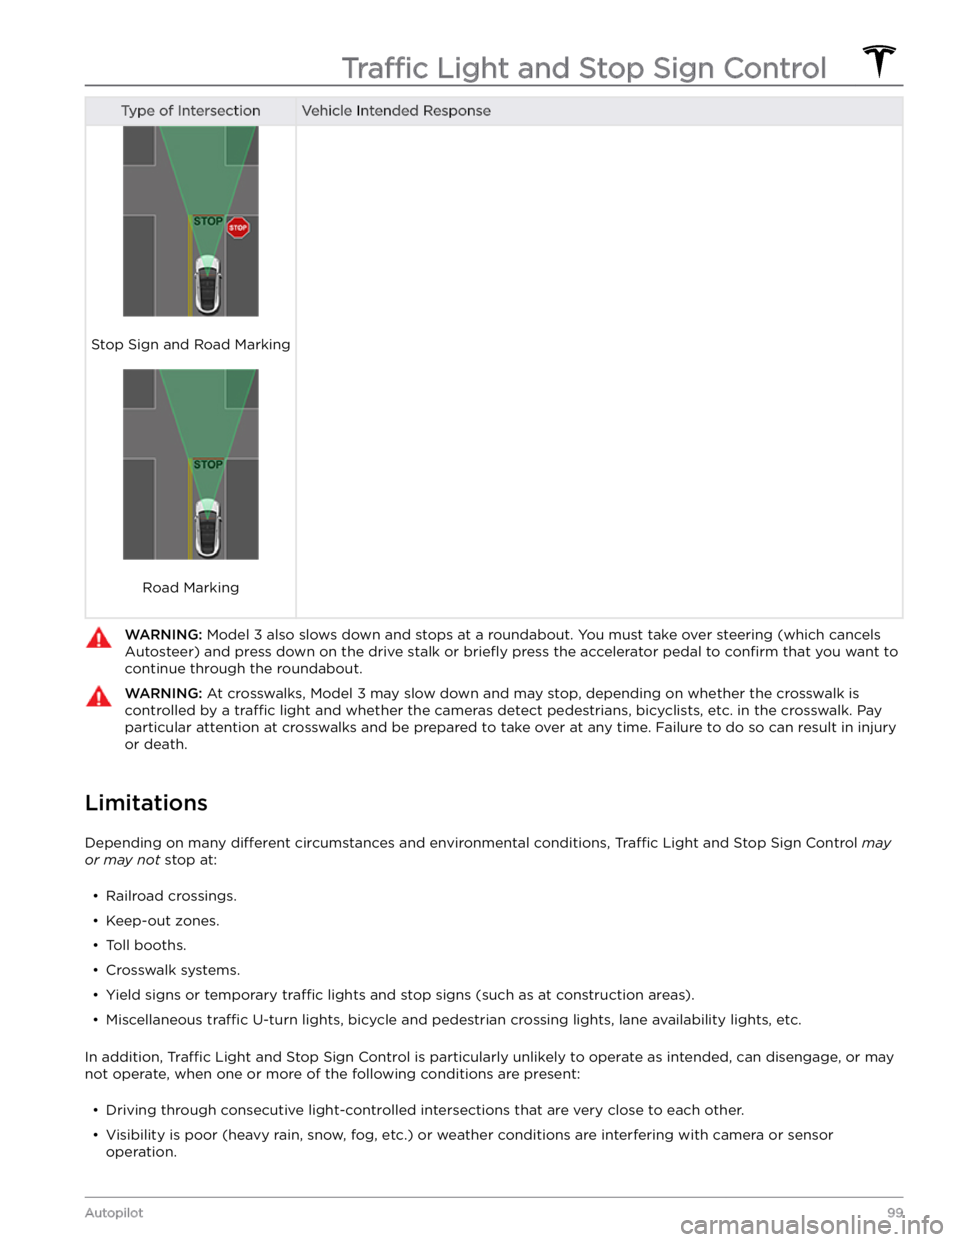
Type of IntersectionVehicle Intended Response
Stop Sign and Road Marking
Road Marking
WARNING: Model 3 also slows down and stops at a roundabout. You must take over steering (which cancels
Autosteer) and press down on the drive stalk or briefly press the accelerator pedal to confirm that you want to
continue through the roundabout.
WARNING: At crosswalks, Model 3 may slow down and may stop, depending on whether the crosswalk is
controlled by a traffic light and whether the cameras detect pedestrians, bicyclists, etc. in the crosswalk. Pay
particular attention at crosswalks and be prepared to take over at any time. Failure to do so can result in injury
or death.
Limitations
Depending on many different circumstances and environmental conditions, Traffic Light and Stop Sign Control may
or may not stop at:
Page 109 of 248

Immediately after initiating Smart Summon in either
mode, hazard lights
briefly flash, mirrors fold, and Model
3 shifts into the appropriate driving gear (Drive or
Reverse).
Model 3 then slowly moves to within 3 feet (1
meter) of you (COME TO ME) or your chosen destination
(GO TO TARGET), navigating obstacles as needed. As
Model 3 moves, the corresponding red arrow on the map
also moves to show the vehicle
Page 111 of 248
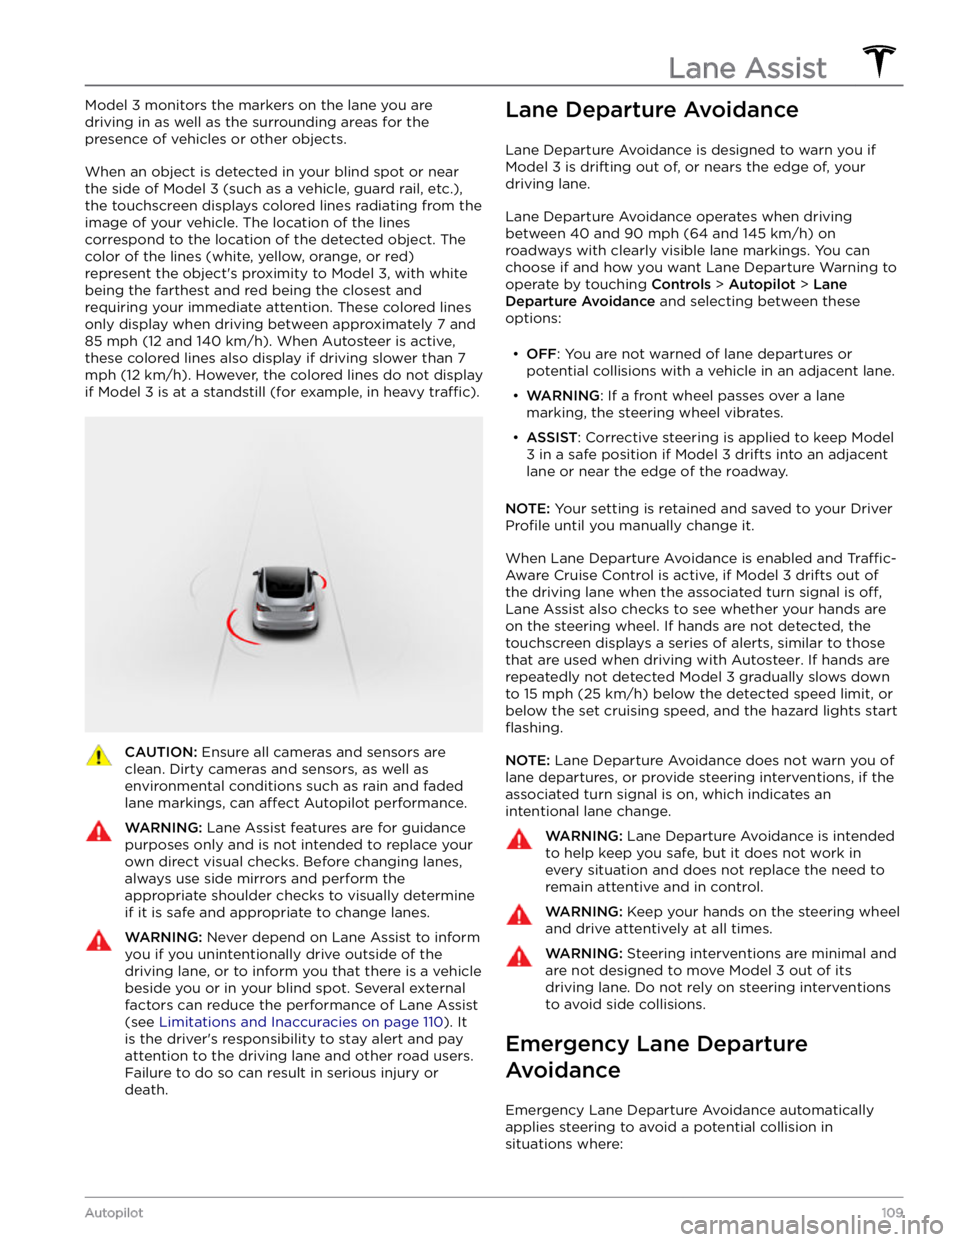
Model 3 monitors the markers on the lane you are
driving in as well as the surrounding areas for the presence of vehicles or other objects.
When an object is detected in your blind spot or near
the side of
Model 3 (such as a vehicle, guard rail, etc.),
the
touchscreen displays colored lines radiating from the
image of your vehicle. The location of the lines correspond to the location of the detected object. The color of the lines (white, yellow, orange, or red)
represent the object
Page 121 of 248
NOTE: When Chill is selected, Chill displays on the
touchscreen above the driving speed.
NOTE: If equipped with the Acceleration Upgrade
package, the modes of acceleration are
Chill and Sport.
Steering Mode: Adjust the amount of effort required to
turn the steering wheel.
Sport feels more responsive
whereas
Comfort feels easier to drive and park (see
Adjusting Steering Effort on page 45).
Stopping Mode: Choose how you want Model 3 to
behave once regenerative braking has reduced the driving speed to a very low speed, a driving gear is still
engaged, and both the accelerator and brake pedals are
released. See
Stopping Mode on page 59. You can adjust
this setting only when
Model 3 is in Park.
Track Mode: (available on Performance vehicles only)
when enabled, this mode
modifies the vehicle
Page 127 of 248
Operating Seat Heaters
To control the front seat heaters for the driver and passenger, touch the corresponding control on the main climate
control area at the bottom of the touchscreen.
To control the rear seat heaters (if equipped) or access duplicate
controls for the front seat heaters, touch the fan icon, then touch the seat heater icon followed by the seat for which
you want to adjust heating. Seat heaters operate at three setting levels from 3 (highest) to 1 (lowest). When
operating, the associated seat icon displays twisting lines that turn red to indicate the setting level. You can touch
All
Off to turn off all seat heaters simultaneously.
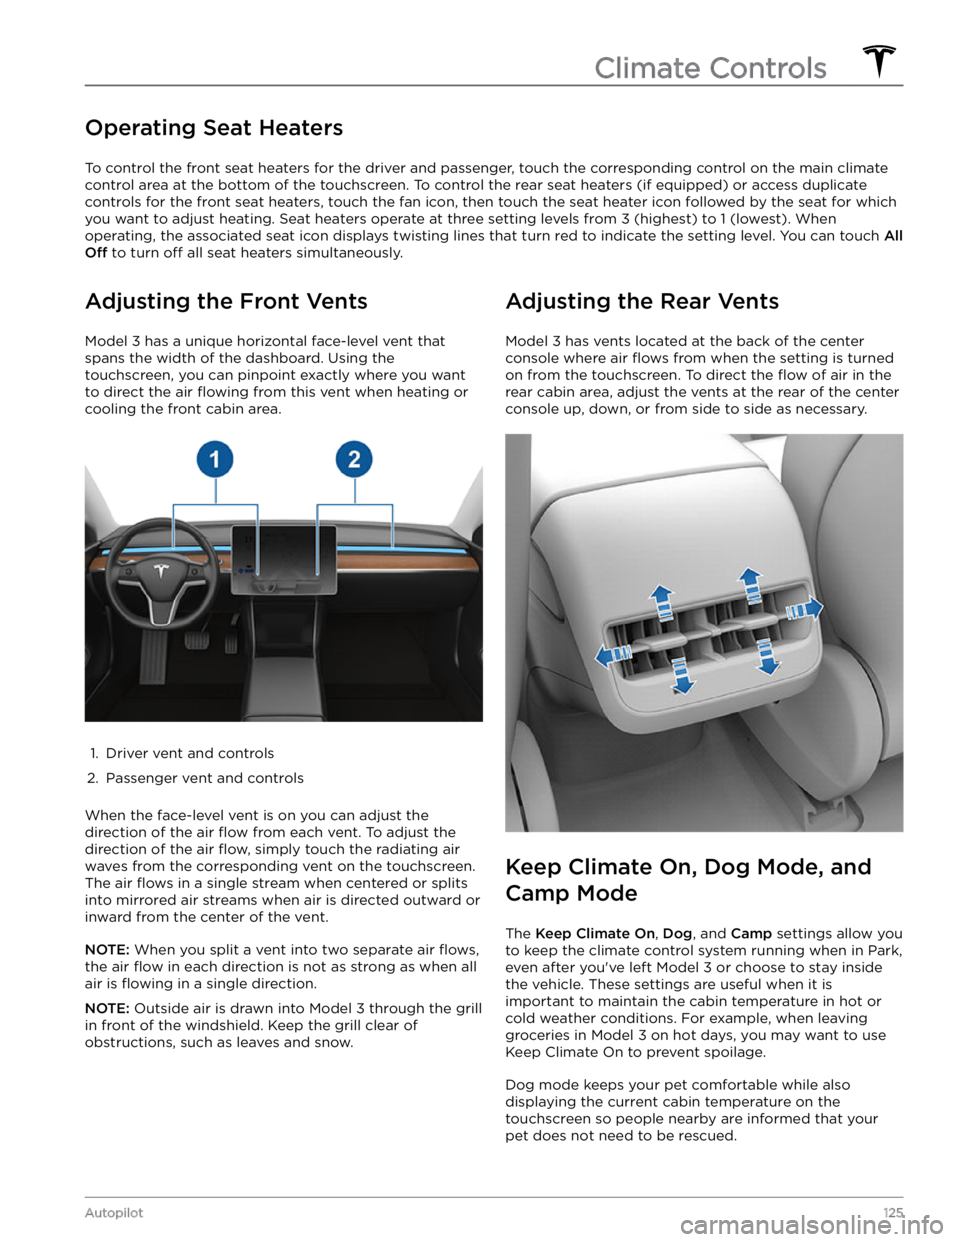
Adjusting the Front Vents
Model 3 has a unique horizontal face-level vent that
spans the width of the dashboard. Using the
touchscreen, you can pinpoint exactly where you want to direct the air
flowing from this vent when heating or
cooling the front cabin area.
1.
Driver vent and controls
2.
Passenger vent and controls
When the face-level vent is on you can adjust the direction of the air
flow from each vent. To adjust the
direction of the air
flow, simply touch the radiating air
waves from the corresponding vent on the touchscreen.
The air
flows in a single stream when centered or splits
into mirrored air streams when air is directed outward or inward from the center of the vent.
NOTE: When you split a vent into two separate air flows,
the air flow in each direction is not as strong as when all
air is
flowing in a single direction.
NOTE: Outside air is drawn into Model 3 through the grill
in front of the windshield. Keep the grill clear of
obstructions, such as leaves and snow.
Adjusting the Rear Vents
Model 3 has vents located at the back of the center
console where air
flows from when the setting is turned
on from the touchscreen. To direct the
flow of air in the
rear cabin area, adjust the vents at the rear of the center console up, down, or from side to side as necessary.
Keep Climate On, Dog Mode, and
Camp Mode
The Keep Climate On, Dog, and Camp settings allow you
to keep the climate control system running when in Park,
even after you
Page 149 of 248
Wi-Fi is available as a data connection method and is often faster than cellular data networks. Connecting to Wi-Fi is especially useful in areas with limited or no
cellular connectivity. To ensure fast, reliable delivery of software and map updates, Tesla recommends leaving your vehicle connected to a Wi-Fi network whenever
possible (for example, if parked in your garage
overnight).
To connect to a Wi-Fi network:
1.
Touch the cellular icon (usually LTE or 3G) on the top
corner of your touchscreen. Model 3 begins to scan
and display detected Wi-Fi networks that are within
range.
NOTE: If a known Wi-Fi network does not appear in
the list, move your vehicle closer to the access point or consider using a range extender to reach your
vehicle.
2.
Select the Wi-Fi network you want to use, enter the password (if necessary), then touch
Confirm.
3.
Your vehicle connects to the Wi-Fi network. Whenever the network is within range,
Model 3
automatically connects to it.
You can also connect to a hidden network that isn
Page 152 of 248

NOTE: Keyless Driving can be used when you do not
have your key or to bypass PIN to Drive in cases where you forgot your PIN or your touchscreen is unresponsive (see
PIN to Drive on page 140).
Page 153 of 248
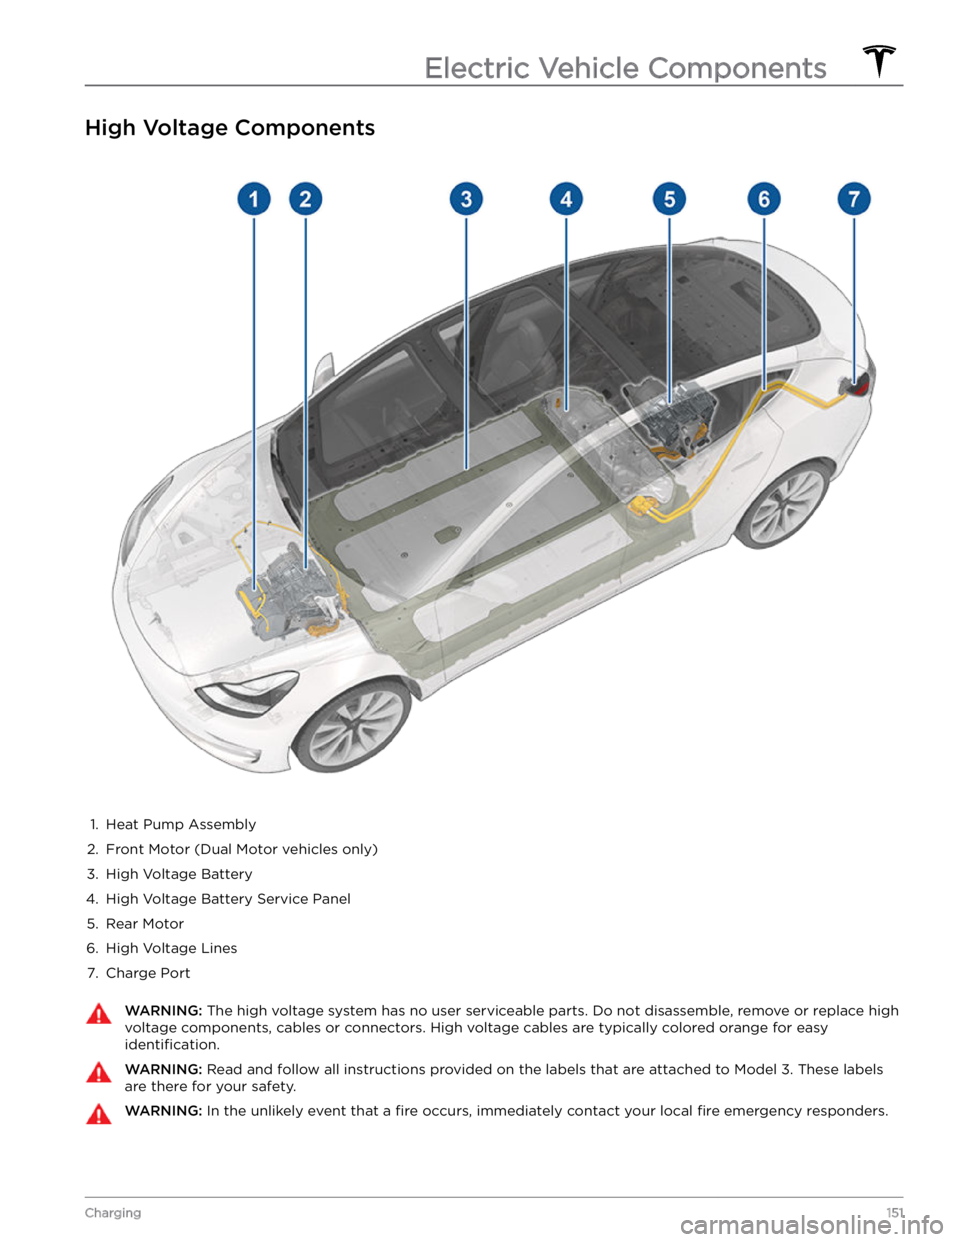
High Voltage Components
1.
Heat Pump Assembly
2.
Front Motor (Dual Motor vehicles only)
3.
High Voltage Battery
4.
High Voltage Battery Service Panel
5.
Rear Motor
6.
High Voltage Lines
7.
Charge Port
WARNING: The high voltage system has no user serviceable parts. Do not disassemble, remove or replace high
voltage components, cables or connectors. High voltage cables are typically colored orange for easy
identification.
WARNING: Read and follow all instructions provided on the labels that are attached to Model 3. These labels
are there for your safety.
WARNING: In the unlikely event that a fire occurs, immediately contact your local fire emergency responders.
Electric Vehicle Components
151Charging
Page 169 of 248
Cleaning the Exterior
To prevent damage to the paint, immediately remove
corrosive substances (bird droppings, tree resin, dead insects, tar spots, road salt, industrial fallout, etc.). Do not wait until
Model 3 is due for a complete wash. If
necessary, use denatured alcohol to remove tar spots
and stubborn grease stains, then immediately wash the area with water and a mild, non-detergent soap to remove the alcohol.
Keep the exterior cameras free of dirt, condensation, or obstructions. These substances can cause unclear pictures or Autopilot and safety features to stop working (see
Cleaning a Camera on page 167).
Follow these steps when washing the exterior of Model
3:
1.
Rinse Thoroughly
Before washing, flush grime and grit from the vehicle
using a hose. Flush away accumulations of mud in areas where debris easily collects (such as wheel wells and panel seams). If salt has been used on the highways (such as during winter months), thoroughly
rinse all traces of road salt from the underside of the
vehicle, wheel wells, and brakes.
2.
Hand Wash
Hand wash Model 3 using a clean soft cloth and cold
or lukewarm water containing a mild, high-quality car shampoo.
CAUTION: Some cleaners and car shampoos
contain chemicals that can cause damage or
discoloration, especially to plastic trim pieces,
lamps, or camera lenses. For example, some car
cleaning formulas contain hydroxide or other
highly alkaline or caustic ingredients that can
damage exterior components. Damage or
discoloration resulting from cleaning products
is not covered by the warranty.
3.
Rinse with Clean Water
After washing, rinse with clean water to prevent soap from drying on the surfaces.
4.
Dry Thoroughly and Clean Exterior Glass
After washing and rinsing, dry thoroughly with a chamois. If necessary, dry the brakes by going on a
short drive and applying the brakes multiple times.
Clean windows and mirrors using an automotive glass cleaner. Do not scrape, or use any abrasive cleaning
fluid on glass or mirrored surfaces.
Car Wash Mode
When taking Model 3 to a car wash, Car Wash Mode
closes all windows, locks the charge port door, and disables windshield wipers, Sentry Mode, walk-away door locking, and parking sensor chimes. To enable, touch
Controls > Service > Car Wash Mode. Your vehicle
must be in Park and not actively charging.
If using an automatic car wash, Enable Free Roll keeps
your vehicle in Neutral and prevents
Model 3 from
applying the Parking brake if you leave the driver
Page 176 of 248
Parts, Accessories, and
Modifications
Use only genuine Tesla parts and accessories. Tesla
performs rigorous testing on parts to ensure their
suitability, safety, and reliability. Purchase these parts
from Tesla, where they are professionally installed and
where you can receive expert advice about
modifications to Model 3. Accessories are available for
purchase from Tesla stores or online at
www.tesla.com.
NOTE: Some accessories may not be available in your
market region.
Tesla is unable to assess parts manufactured by other distributors and therefore accepts no responsibility if you use non-Tesla parts on
Model 3.
WARNING: Installing non-approved parts and
accessories, or performing non-approved
modifications, can affect the performance of
Model 3 and the safety of its occupants. Any
damage caused by using or installing non-
approved parts, or by performing non-approved
modifications, is not covered by the warranty.
WARNING: Tesla does not accept liability for
death, personal injury or damage that occurs if you
use or install non-approved accessories or make
non-approved modifications.
Accessory Wheels and Tires
If your Model 3 is fitted with Tesla accessory wheels or
tires, the Gross Axle Weight Rating (GAWR), wheel, tire, and loading information may be
different from the labels
shown on the vehicle. Refer to the relevant following
section for updated information.
NOTE: If your vehicle is not fitted with Tesla accessory
wheels or tires (it is
fitted with the factory original
wheels and tires, including Tesla genuine replacement
parts), refer to the labels attached to the center door pillar for the most accurate information for your
Model 3.
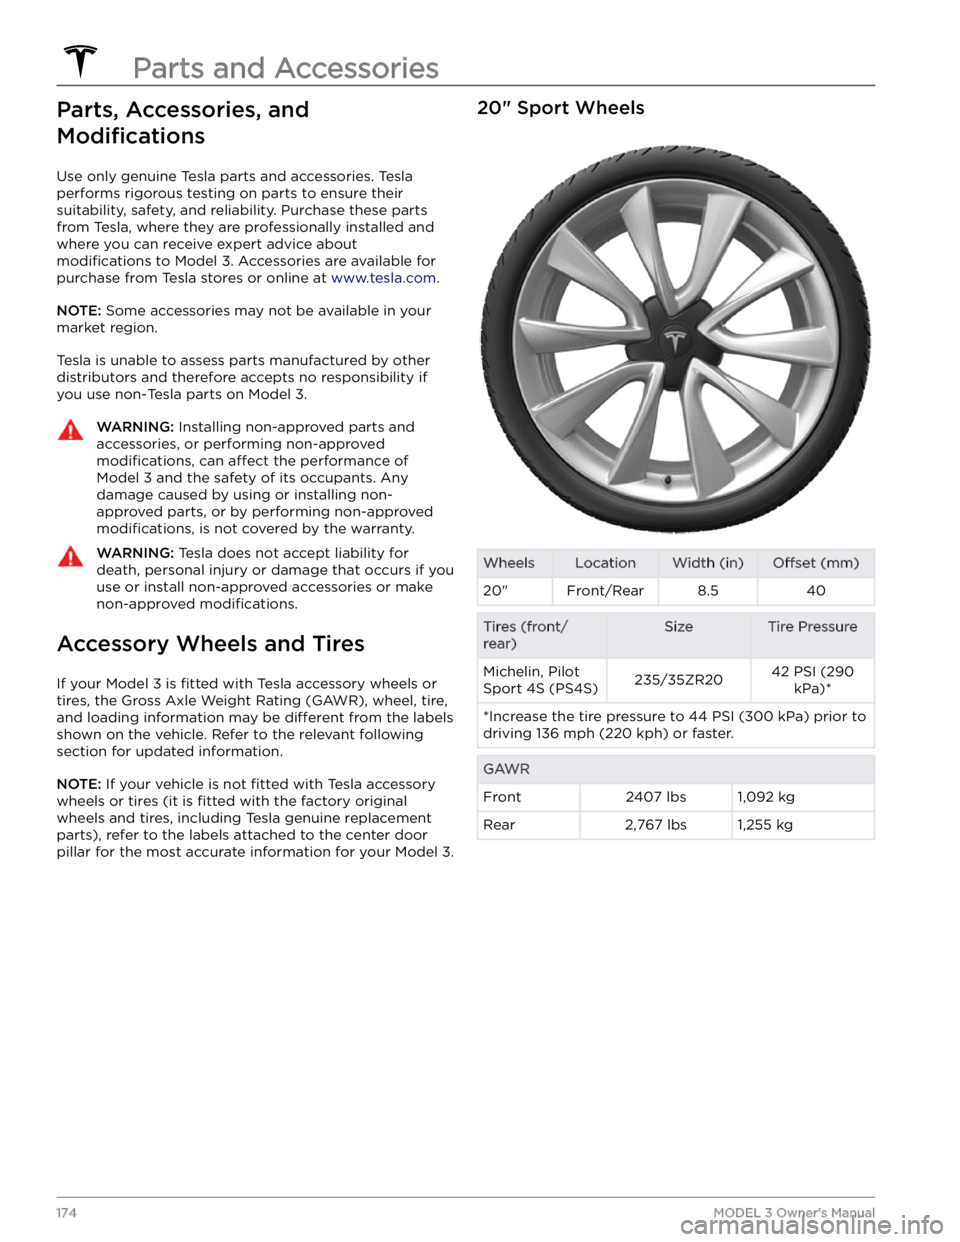
20" Sport WheelsWheelsLocationWidth (in)Offset (mm)20"Front/Rear8.540Tires (front/
rear)SizeTire PressureMichelin, Pilot
Sport 4S (PS4S)235/35ZR2042 PSI (290 kPa)**Increase the tire pressure to 44 PSI (300 kPa) prior to driving 136 mph (220 kph) or faster.GAWRFront2407 lbs1,092 kgRear2,767 lbs1,255 kg
Parts and Accessories
174MODEL 3 Owner