clock TESLA MODEL S 2015 Owner's Manual
[x] Cancel search | Manufacturer: TESLA, Model Year: 2015, Model line: MODEL S, Model: TESLA MODEL S 2015Pages: 164, PDF Size: 4.78 MB
Page 99 of 164

Loading New Software
Model S updates its software wirelessly,
providing new features throughout your term
of ownership. The first time you enter Model S after an update is made available, a
scheduling window displays on the
touchscreen.
Note: Some software updates can take from
two to three hours to complete. Model S must
be in P (Park) when the new software is being
installed. To ensure the fastest and most
reliable delivery of software updates, leave
the Wi-Fi turned on and connected whenever
possible (see Connecting to Wi-Fi on page
98).
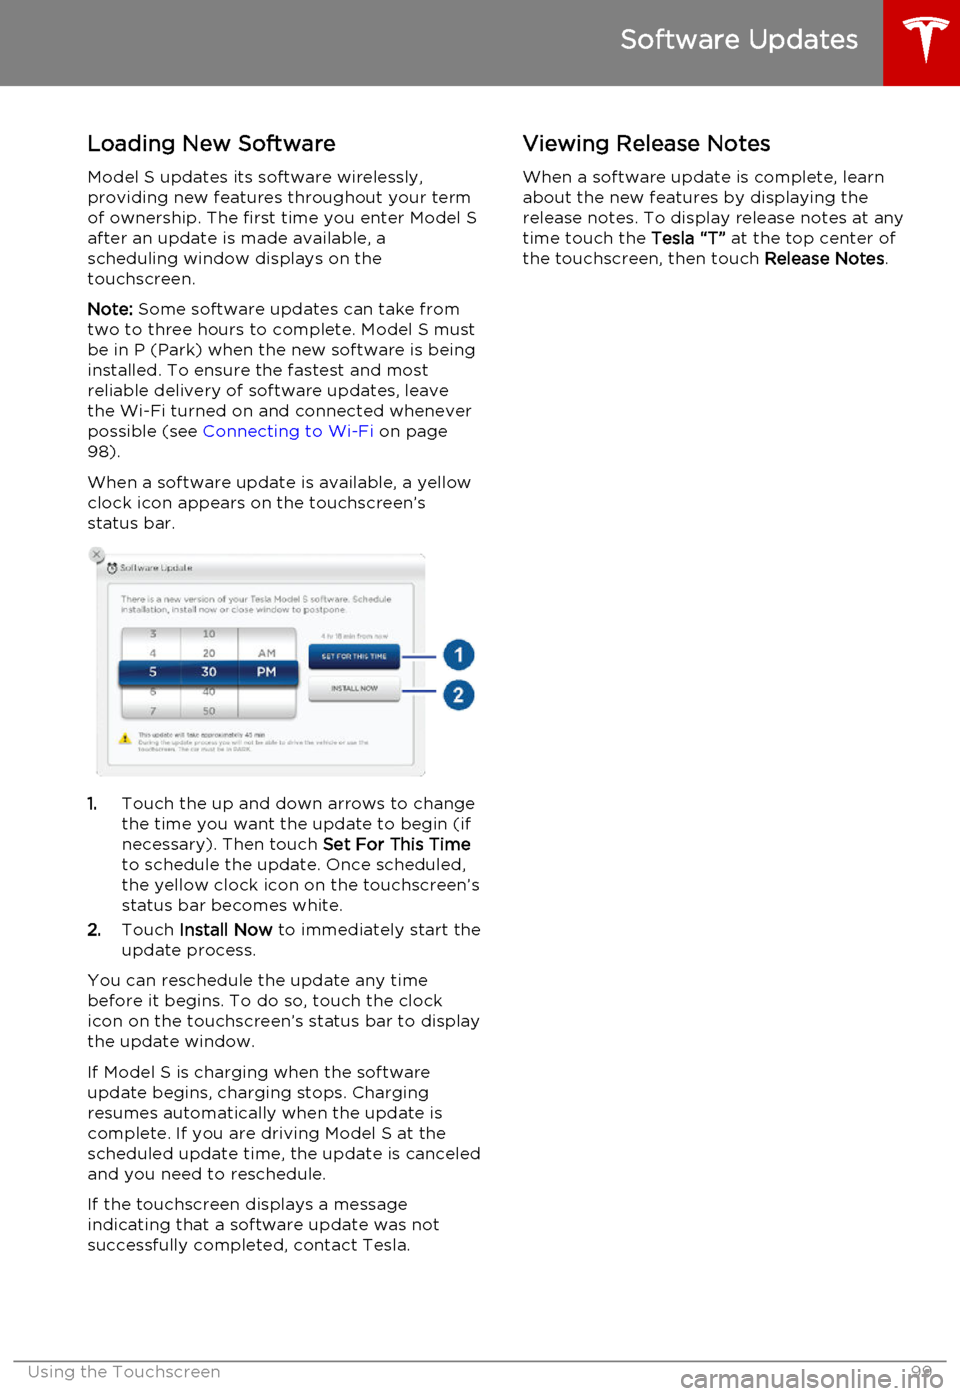
When a software update is available, a yellow clock icon appears on the touchscreen’sstatus bar.
1. Touch the up and down arrows to change
the time you want the update to begin (if
necessary). Then touch Set For This Time
to schedule the update. Once scheduled,
the yellow clock icon on the touchscreen’s
status bar becomes white.
2. Touch Install Now to immediately start the
update process.
You can reschedule the update any time
before it begins. To do so, touch the clock icon on the touchscreen’s status bar to displaythe update window.
If Model S is charging when the software
update begins, charging stops. Charging resumes automatically when the update is
complete. If you are driving Model S at the scheduled update time, the update is canceled
and you need to reschedule.
If the touchscreen displays a message
indicating that a software update was not successfully completed, contact Tesla.
Viewing Release Notes
When a software update is complete, learn
about the new features by displaying the
release notes. To display release notes at any time touch the Tesla “T” at the top center of
the touchscreen, then touch Release Notes.
Software Updates
Using the Touchscreen99
Page 151 of 164

Connect the Tow Chain
The method used to connect the tow chain depends on whether Model S is equipped with
a towing eye (located in the front trunk).
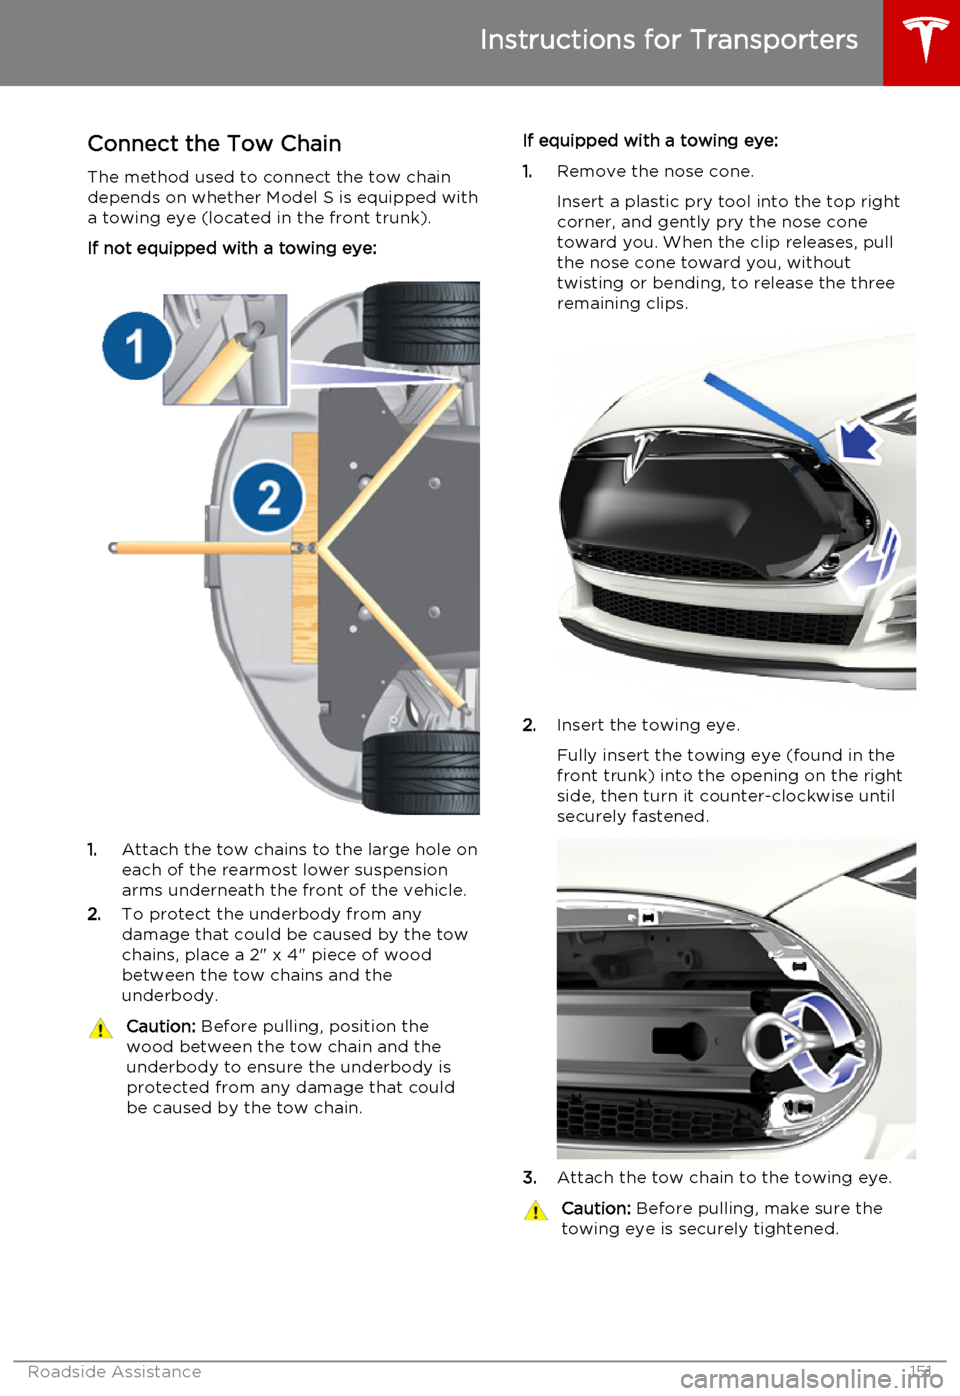
If not equipped with a towing eye:
1. Attach the tow chains to the large hole on
each of the rearmost lower suspension arms underneath the front of the vehicle.
2. To protect the underbody from any
damage that could be caused by the tow
chains, place a 2" x 4" piece of wood
between the tow chains and the
underbody.
Caution: Before pulling, position the
wood between the tow chain and the
underbody to ensure the underbody is protected from any damage that couldbe caused by the tow chain.If equipped with a towing eye:
1. Remove the nose cone.
Insert a plastic pry tool into the top right
corner, and gently pry the nose cone
toward you. When the clip releases, pull
the nose cone toward you, without
twisting or bending, to release the three
remaining clips.
2. Insert the towing eye.
Fully insert the towing eye (found in the
front trunk) into the opening on the right
side, then turn it counter-clockwise until securely fastened.
3. Attach the tow chain to the towing eye.
Caution:
Before pulling, make sure the
towing eye is securely tightened.
Instructions for Transporters
Roadside Assistance151