ECO mode TESLA MODEL S 2021 Owner´s Manual
[x] Cancel search | Manufacturer: TESLA, Model Year: 2021, Model line: MODEL S, Model: TESLA MODEL S 2021Pages: 281, PDF Size: 7.63 MB
Page 190 of 281
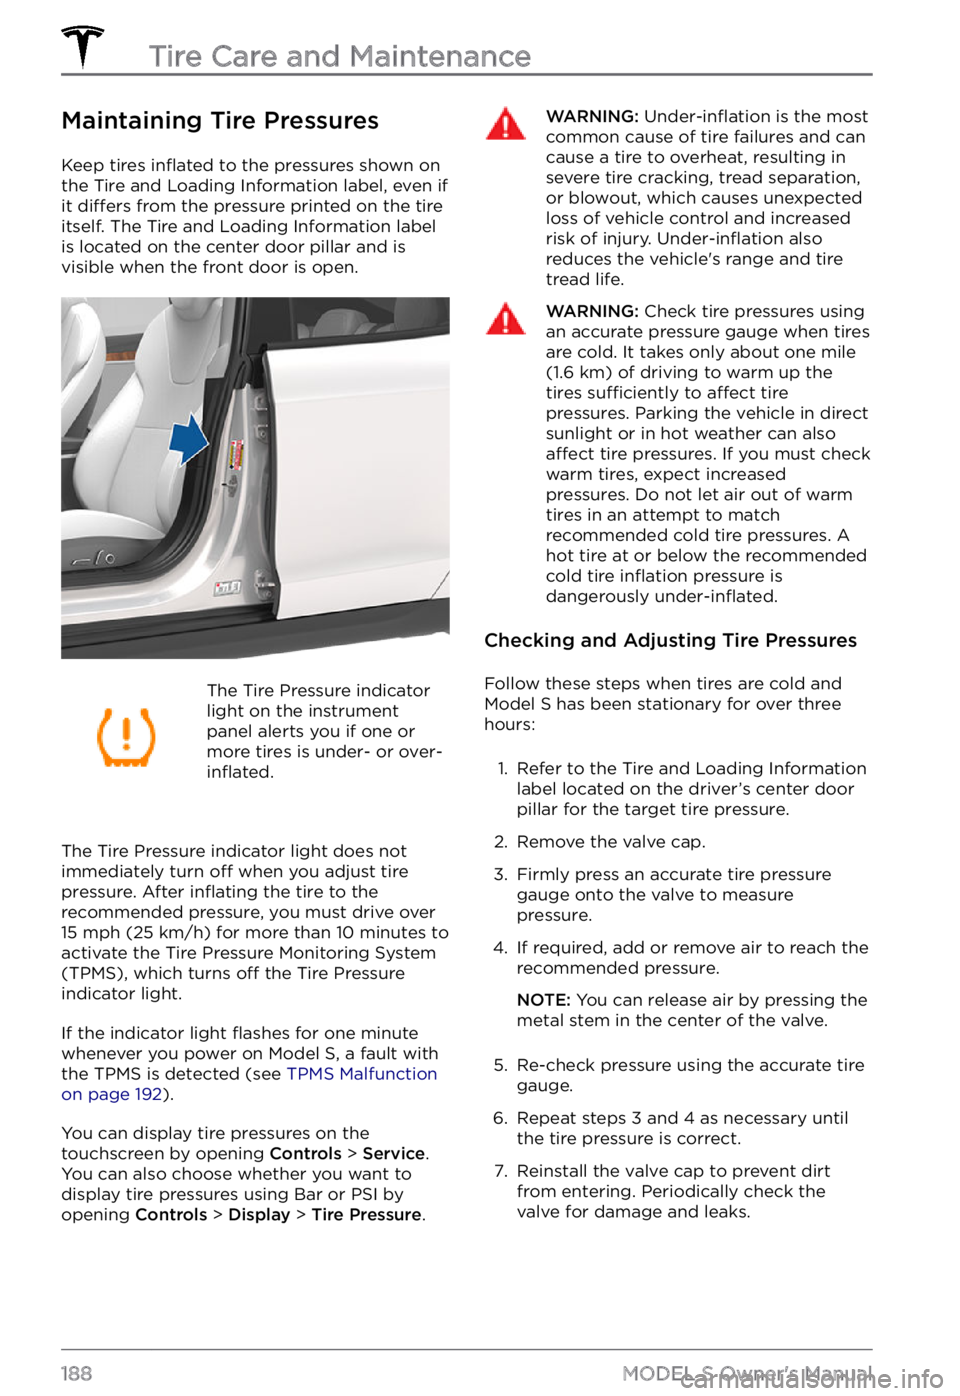
Maintaining Tire Pressures
Keep tires inflated to the pressures shown on
the Tire and Loading Information label, even if
it
differs from the pressure printed on the tire
itself. The Tire and Loading Information label is located on the center door pillar and is
visible when the front door is open.
The Tire Pressure indicator
light on the instrument panel alerts you if one or
more tires is under- or over-inflated.
The Tire Pressure indicator light does not immediately turn off when you adjust tire pressure. After inflating the tire to the
recommended pressure, you must drive over
15 mph (25 km/h) for more than 10 minutes to
activate the Tire Pressure Monitoring System
(TPMS), which turns
off the Tire Pressure
indicator light.
If the indicator light flashes for one minute
whenever you power on Model S, a fault with
the TPMS is detected (see TPMS Malfunction on page 192).
You can display tire pressures on the touchscreen by opening Controls > Service.
You can also choose whether you want to
display tire pressures using Bar or PSI by opening
Controls > Display > Tire Pressure.
WARNING: Under-inflation is the most common cause of tire failures and can cause a tire to overheat, resulting in severe tire cracking, tread separation, or blowout, which causes unexpected loss of vehicle control and increased risk of injury. Under-inflation also reduces the vehicle
Page 191 of 281
Inspecting and Maintaining
Tires
Regularly inspect the tread and side walls for
any sign of distortion (bulges), foreign
objects, cuts or wear.
WARNING: Do not drive Model S if a tire is damaged, excessively worn, or inflated to an incorrect pressure. Check tires regularly for wear, and ensure there are no cuts, bulges or exposure of the ply/cord structure.
Tire Wear
Adequate tread depth is important for proper
tire performance. Tires with a tread depth less
than
4/32” (3 mm) are more likely to
hydroplane in wet conditions and should not be used. Tires with a tread depth less than
5/32” (4 mm) do not perform well in snow
and slush and should not be used when driving in winter conditions.
Model S is originally fitted with tires that have
wear indicators molded into the tread
pattern. When the tread has been worn down
to
4/32” (3 mm), the indicators start to
appear at the surface of the tread pattern,
producing the
effect of a continuous band of
rubber across the width of the tire. For
optimal performance and safety, Tesla
recommends replacing tires before the wear indicators are visible.
Tire Rotation, Balance, and Wheel
Alignment
Tesla recommends rotating the tires every 6,250 miles (10,000 km) or if tread depth difference is 2/32 in (1.5 mm) or greater,
whichever comes first.
Unbalanced wheels (sometimes noticeable as
vibration through the steering yoke) affect
vehicle handling and tire life. Even with
regular use, wheels can get out of balance.
Therefore, they should be balanced as
required.
If tire wear is uneven (on one side of the tire
only) or becomes abnormally excessive,
check the alignment of wheels.
NOTE: When replacing only two tires, install
the new tires on the rear if your vehicle
Page 194 of 281
Replacing a Tire Sensor
If the Tire Pressure warning indicator displays
frequently, contact Tesla to determine if a tire
sensor needs to be replaced. If a non-Tesla
Service Center repairs or replaces a tire, the
tire sensor may not work until Tesla performs
the setup procedure.
TPMS Malfunction
Model S has also been equipped with a TPMS
malfunction indicator to indicate when the system is not operating properly.
The TPMS malfunction
indicator is combined with
the tire pressure indicator
light. When the system
detects a malfunction, the
indicator
flashes for
approximately one minute,
then remains continuously
lit. This sequence continues
upon subsequent vehicle
start-ups as long as the
malfunction exists. When
the TPMS malfunction
indicator is on, the system
might not be able to detect
or signal under-
or over-inflated tires as intended.
TPMS malfunctions can occur for a variety of reasons, including installing replacement or
alternate tires or wheels that prevent the
TPMS from functioning properly. Always
check the TPMS malfunction indicator light
after replacing one or more tires or wheels on
your vehicle to ensure that the replacement tires or wheels allow the TPMS to continue to
function properly.
NOTE: If a tire has been replaced or repaired
using a different tire sealant than the one
available from Tesla, and a low tire pressure is
detected, it is possible that the tire sensor has
been damaged. Contact Tesla to have the
fault repaired as soon as possible.
Seasonal Tire Types
Summer Tires
Your vehicle may be originally equipped with
high performance summer tires or all season
tires. Tesla recommends using winter tires if
driving in cold temperatures or on roads
where snow or ice may be present. Contact
Tesla for winter tire recommendations.
WARNING: In cold temperatures or on snow or ice, summer tires do not provide adequate traction. Selecting and installing the appropriate tires for winter conditions is important to ensure the safety and optimum performance of your Model S.
All-Season Tires
Your Model S may be originally equipped with
all-season tires. These tires are designed to
provide adequate traction in most conditions year-round, but may not provide the same level of traction as winter tires in snowy or icy
conditions. All-season tires can be
identified
by “ALL SEASON" and/or "M+S” (mud and
snow) on the tire sidewall.
Winter Tires
Use winter tires to increase traction in snowy
or icy conditions. When installing winter tires,
always install a complete set of four tires at
the same time. Winter tires must be the same
diameter, brand, construction and tread
pattern on all four wheels. Contact Tesla for
winter tire recommendations.
Winter tires can be identified by a mountain/snowflake symbol on the
tire
Page 197 of 281
CAUTION: Do not aim water hoses directly at windows, door, or hood seals or at electronic modules or exposed cabling.
CAUTION: To avoid corrosive damage that may not be covered by the warranty, rinse away any road salt from the underside of the vehicle, wheel wells, and brakes. After cleaning the vehicle, dry the brakes by going on a short drive and applying the brakes multiple times.
CAUTION: Avoid using tight-napped or rough cloths, such as washing mitts. A high-quality microfiber cleaning cloth is recommended.
CAUTION: If washing in an automatic car wash, use touchless car washes only. These car washes have no parts (brushes, etc.) that touch the surfaces of Model S. Some touchless car washes use caustic solutions that, over time, can cause discoloration of decorative exterior trim. Avoid exposure to soaps and chemicals above pH 13. If unsure, check the product label or ask the staff at the car wash. Damage caused by improper washing is not covered by the warranty.
CAUTION: If washing in an automatic car wash, make sure the vehicle is locked. In addition, avoid using controls on the touchscreen that can result in accidentally opening doors or trunks while the vehicle is being washed. Any damage caused is not covered by the warranty.
CAUTION: Ensure the wipers are off
before washing Model S to avoid the risk of damaging the wipers.
CAUTION: Do not use chemical based wheel cleaners or pre-wash products. These can damage the finish on the wheels.
WARNING: Never spray liquid at a high velocity (for example, if using a pressure washer) towards the charge port while Model S is charging. Failure to follow these instructions can result in serious injury or damage to the vehicle, charging equipment, or property.
Cleaning the Interior
Frequently inspect and clean the interior to
maintain its appearance and to prevent
premature wear. If possible, immediately wipe up spills and remove marks. For general cleaning, wipe interior surfaces using a soft cloth (such as
microfiber) dampened with a
mixture of warm water and mild non-
detergent cleaner (test all cleaners on a
concealed area before use). To avoid streaks,
dry immediately with a soft lint-free cloth.
Interior Glass
Do not scrape, or use any abrasive cleaning fluid on glass or mirrored surfaces. This can
damage the reflective surface of the mirror
and the heating elements in the rear window.
Airbags
Do not allow any substance to enter an airbag
cover. This could affect correct operation.
Dashboard and Plastic Surfaces
Do not polish the upper surfaces of the dashboard. Polished surfaces are reflective and could interfere with your driving view.
Seats
Wipe spills as soon as possible using a soft
cloth moistened with warm water and non- detergent soap. Wipe gently in a circular
motion. Then wipe dry using a soft, lint-free
cloth.
If equipped with leather seats, note that
leather is prone to dye-transfer which can
cause discoloration, particularly on light
colored leather. White and tan leather is
coated with an anti-soiling treatment. Using
detergents or commercially available leather
cleaners and conditioners is not
recommended because they can discolor or dry out the leather.
If equipped with polyurethane seats, be
careful with dyes, such as from clothing or
denim, that come into contact with the seats.
Over time, dyes can
diffuse into the seat
material and cause staining.
Vacuum cloth seats as needed to remove any
loose dirt.
Cleaning
195Maintenance
Page 199 of 281
CAUTION: Do not use cutting pastes, color restoration compounds, or polishes containing harsh abrasives. These can scour the surface and permanently damage the paint.
CAUTION: Do not use chrome polish or other abrasive cleaners.
Using a Car Cover
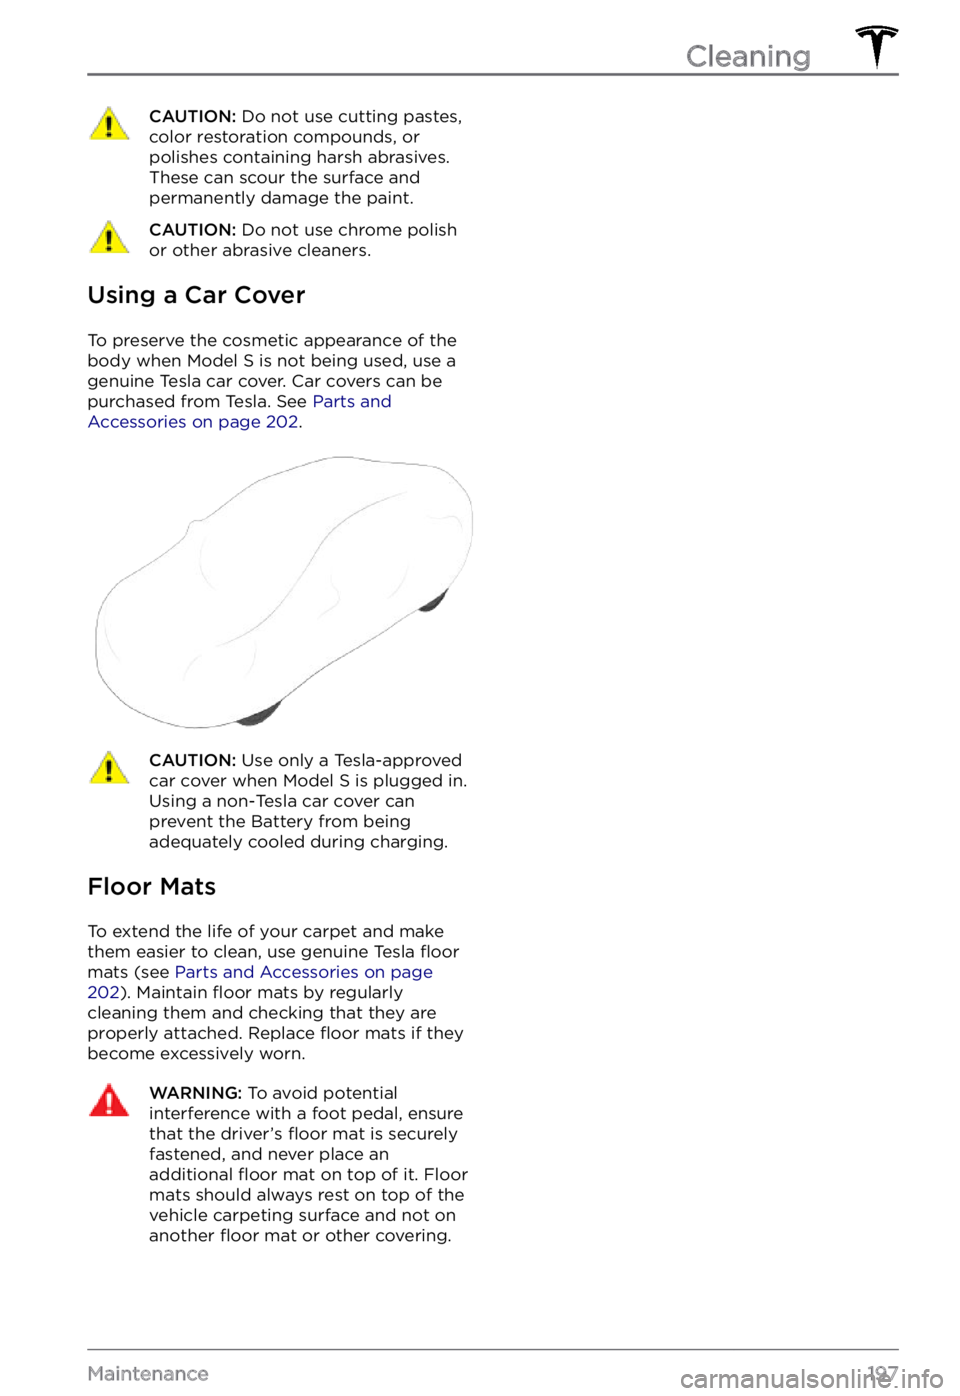
To preserve the cosmetic appearance of the
body when Model S is not being used, use a
genuine Tesla car cover. Car covers can be
purchased from Tesla. See
Parts and Accessories on page 202.
CAUTION: Use only a Tesla-approved car cover when Model S is plugged in. Using a non-Tesla car cover can prevent the Battery from being adequately cooled during charging.
Floor Mats
To extend the life of your carpet and make
them easier to clean, use genuine Tesla floor
mats (see Parts and Accessories on page 202). Maintain floor mats by regularly
cleaning them and checking that they are
properly attached. Replace
floor mats if they
become excessively worn.
WARNING: To avoid potential interference with a foot pedal, ensure that the driver
Page 201 of 281
Removing the Maintenance
Panel
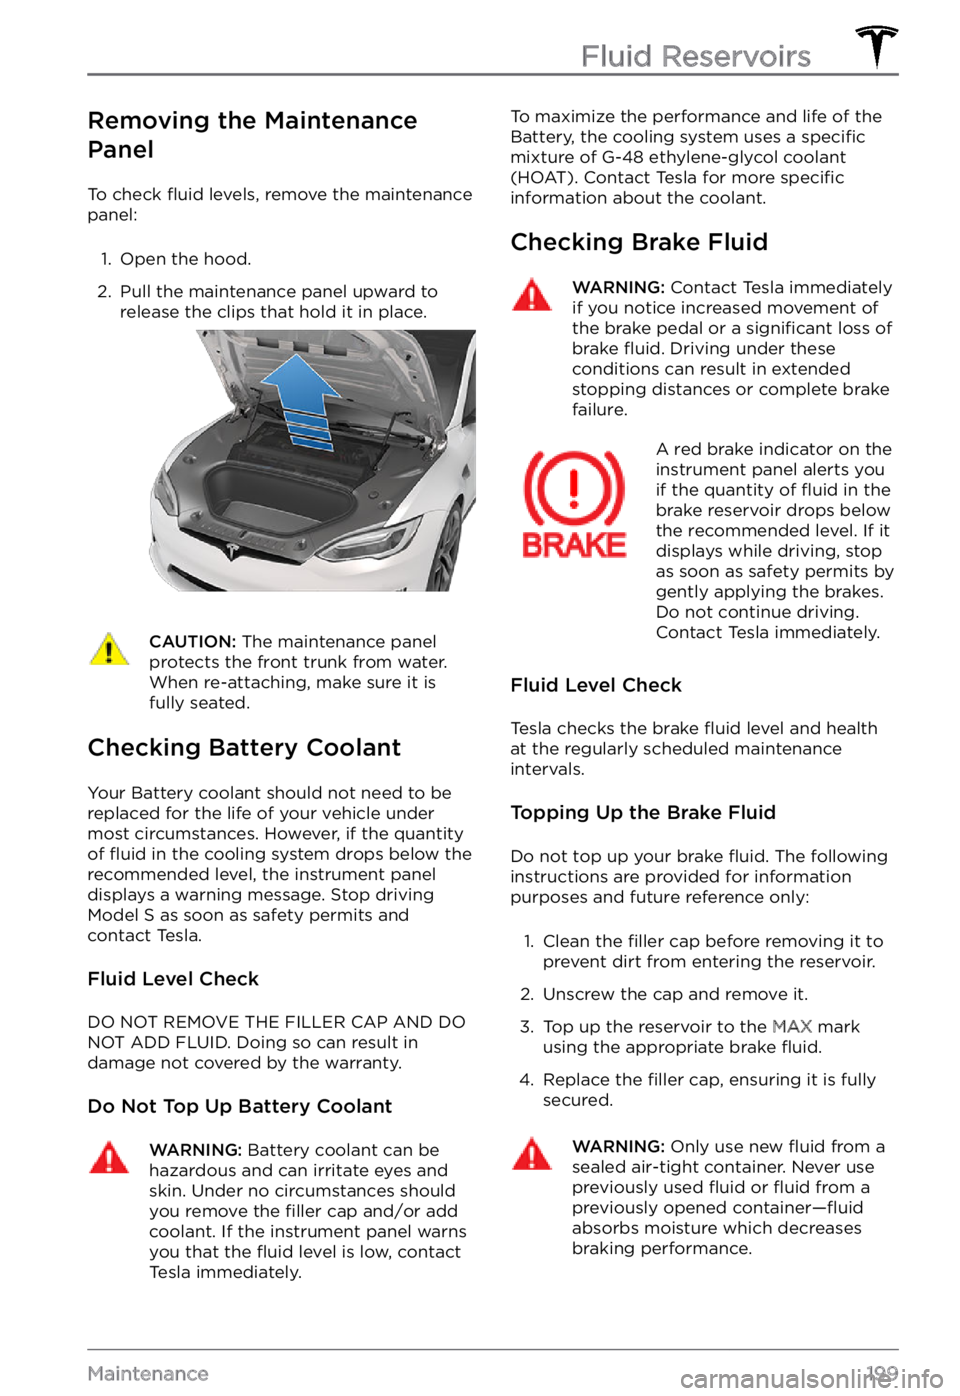
To check fluid levels, remove the maintenance
panel:
1.
Open the hood.
2.
Pull the maintenance panel upward to
release the clips that hold it in place.
CAUTION: The maintenance panel protects the front trunk from water. When re-attaching, make sure it is fully seated.
Checking Battery Coolant
Your Battery coolant should not need to be
replaced for the life of your vehicle under
most circumstances. However, if the quantity
of
fluid in the cooling system drops below the
recommended level, the instrument panel displays a warning message. Stop driving Model S as soon as safety permits and
contact Tesla.
Fluid Level Check
DO NOT REMOVE THE FILLER CAP AND DO NOT ADD FLUID. Doing so can result in damage not covered by the warranty.
Do Not Top Up Battery Coolant
WARNING: Battery coolant can be hazardous and can irritate eyes and skin. Under no circumstances should you remove the filler cap and/or add coolant. If the instrument panel warns you that the fluid level is low, contact Tesla immediately.
To maximize the performance and life of the
Battery, the cooling system uses a specific
mixture of G-48 ethylene-glycol coolant
(HOAT). Contact Tesla for more specific information about the coolant.
Checking Brake Fluid
WARNING: Contact Tesla immediately if you notice increased movement of the brake pedal or a significant loss of brake fluid. Driving under these conditions can result in extended stopping distances or complete brake failure.
A red brake indicator on the instrument panel alerts you
if the quantity of fluid in the
brake reservoir drops below
the recommended level. If it
displays while driving, stop
as soon as safety permits by
gently applying the brakes.
Do not continue driving.
Contact Tesla immediately.
Fluid Level Check
Tesla checks the brake fluid level and health
at the regularly scheduled maintenance intervals.
Topping Up the Brake Fluid
Do not top up your brake fluid. The following
instructions are provided for information purposes and future reference only:
1.
Clean the filler cap before removing it to
prevent dirt from entering the reservoir.
2.
Unscrew the cap and remove it.
3.
Top up the reservoir to the MAX mark
using the appropriate brake fluid.
4.
Replace the filler cap, ensuring it is fully
secured.
WARNING: Only use new fluid from a sealed air-tight container. Never use previously used fluid or fluid from a previously opened container
Page 220 of 281
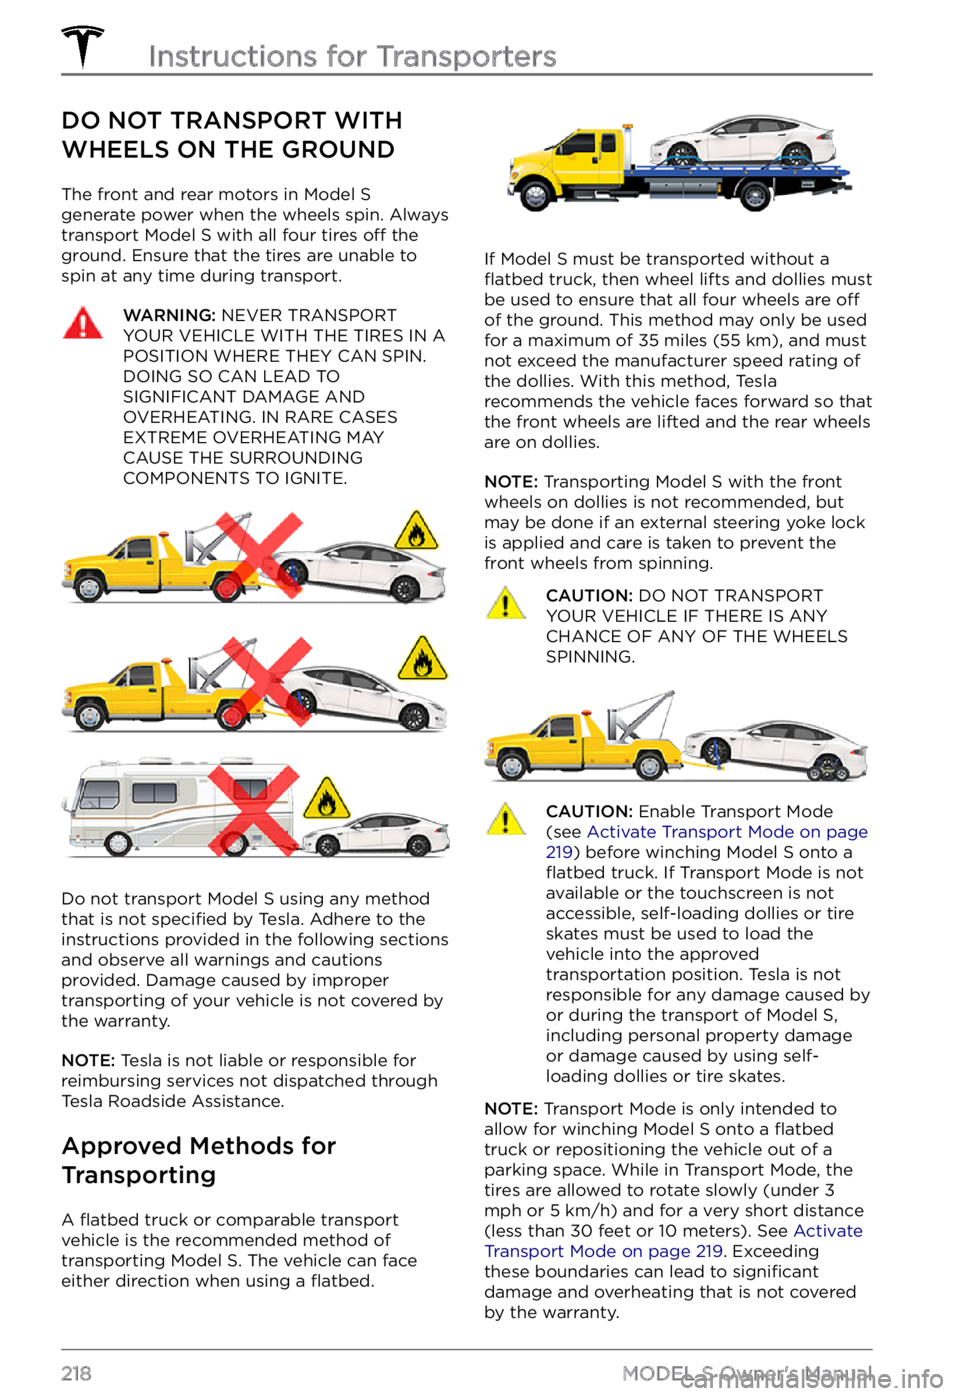
DO NOT TRANSPORT WITH
WHEELS ON THE GROUND
The front and rear motors in Model S generate power when the wheels spin. Always
transport Model S with all four tires off the
ground. Ensure that the tires are unable to
spin at any time during transport.
WARNING: NEVER TRANSPORT YOUR VEHICLE WITH THE TIRES IN A POSITION WHERE THEY CAN SPIN. DOING SO CAN LEAD TO SIGNIFICANT DAMAGE AND OVERHEATING. IN RARE CASES EXTREME OVERHEATING MAY CAUSE THE SURROUNDING COMPONENTS TO IGNITE.
Do not transport Model S using any method
that is not specified by Tesla. Adhere to the
instructions provided in the following sections
and observe all warnings and cautions provided. Damage caused by improper transporting of your vehicle is not covered by
the warranty.
NOTE: Tesla is not liable or responsible for
reimbursing services not dispatched through
Tesla Roadside Assistance.
Approved Methods for
Transporting
A flatbed truck or comparable transport
vehicle is the recommended method of
transporting
Model S. The vehicle can face
either direction when using a flatbed.
If Model S must be transported without a flatbed truck, then wheel lifts and dollies must
be used to ensure that all four wheels are off
of the ground. This method may only be used
for a maximum of 35 miles (55 km), and must
not exceed the manufacturer speed rating of
the dollies. With this method, Tesla
recommends the vehicle faces forward so that
the front wheels are lifted and the rear wheels
are on dollies.
NOTE: Transporting Model S with the front
wheels on dollies is not recommended, but
may be done if an external
steering yoke lock
is applied and care is taken to prevent the
front wheels from spinning.
CAUTION: DO NOT TRANSPORT YOUR VEHICLE IF THERE IS ANY CHANCE OF ANY OF THE WHEELS SPINNING.
CAUTION: Enable Transport Mode (see Activate Transport Mode on page 219) before winching Model S onto a flatbed truck. If Transport Mode is not available or the touchscreen is not accessible, self-loading dollies or tire skates must be used to load the vehicle into the approved transportation position. Tesla is not responsible for any damage caused by or during the transport of Model S, including personal property damage or damage caused by using self-loading dollies or tire skates.
NOTE: Transport Mode is only intended to
allow for winching Model S onto a flatbed truck or repositioning the vehicle out of a
parking space. While in Transport Mode, the
tires are allowed to rotate slowly (under
3 mph or 5 km/h) and for a very short distance
(less than 30 feet or 10 meters). See Activate Transport Mode on page 219. Exceeding
these boundaries can lead to significant
damage and overheating that is not covered
by the warranty.
Instructions for Transporters
218MODEL S Owner
Page 223 of 281
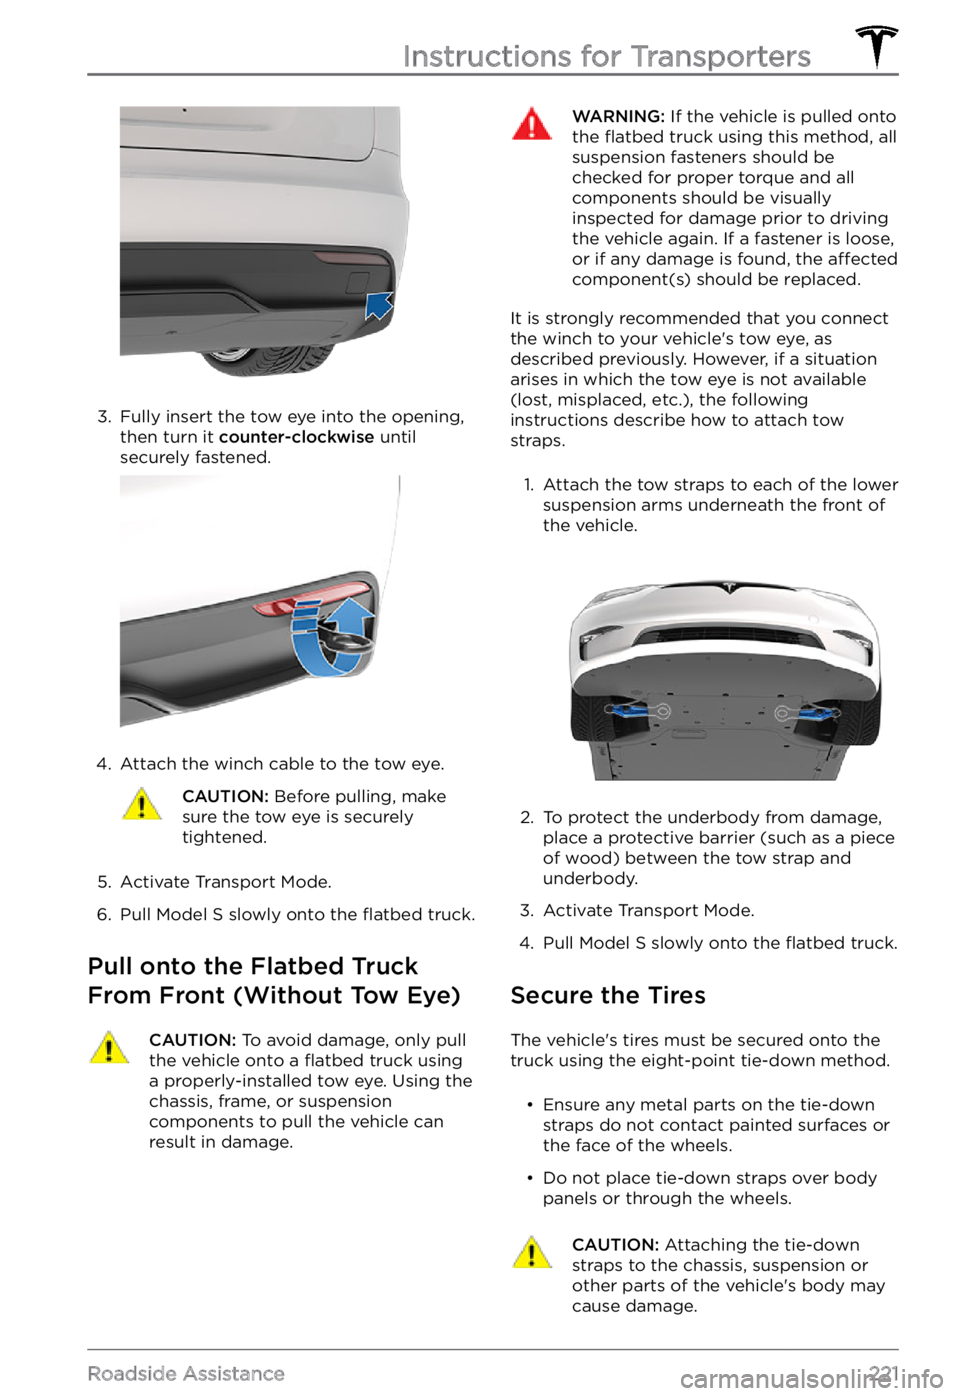
3.
Fully insert the tow eye into the opening,
then turn it counter-clockwise until
securely fastened.
4.
Attach the winch cable to the tow eye.
CAUTION: Before pulling, make sure the tow eye is securely tightened.
5.
Activate Transport Mode.
6.
Pull Model S slowly onto the flatbed truck.
Pull onto the Flatbed Truck
From Front (Without Tow Eye)
CAUTION: To avoid damage, only pull the vehicle onto a flatbed truck using a properly-installed tow eye. Using the chassis, frame, or suspension components to pull the vehicle can result in damage.
WARNING: If the vehicle is pulled onto the flatbed truck using this method, all suspension fasteners should be checked for proper torque and all components should be visually inspected for damage prior to driving the vehicle again. If a fastener is loose, or if any damage is found, the affected component(s) should be replaced.
It is strongly recommended that you connect
the winch to your vehicle
Page 228 of 281

Event Data Recorder (EDR)
Model S is equipped with an event data
recorder (EDR). The main purpose of an EDR is to record, in certain crash or near crash-like
situations, such as an air bag deployment or hitting a road obstacle, data to better
understand how the vehicle
Page 244 of 281

(CC_a019)
Unable to charge - Vehicle connection issue
Insert charge handle fully into charge port
What this alert means:
A communication error occurred between the Wall Connector and the vehicle.
What to do:
Try again by disconnecting the Wall Connector from the vehicle and reconnecting. If possible, plug the vehicle into another Wall Connector or a Mobile Connector to determine if the vehicle is able to communicate with other charging equipment. If the problem persists, contact Tesla.
(CC_a020)
Unable to charge - Wall Connector issue
Wall Connector needs service
What this alert means:
Wall Connector hardware issue. Possible issues include:
1.
Contactor not working
2.
Self-test of internal ground fault monitoring circuit failed
3.
Thermal sensor disconnected
4.
Other hardware component issues
What to do:
An internal issue was detected by the Wall Connector.
1.
Try charging again by disconnecting the Wall Connector from the vehicle and reconnecting.
2.
If the issue persists, turn OFF the circuit breaker for the Wall Connector, wait 10 seconds,
and turn the circuit breaker ON again. Then try reconnecting the Wall Connector to the
vehicle.
3.
If the issue persists, check for loose connections.
a.
Make sure there is no power to the Wall Connector.
b.
Remove the face plate and inspect the wiring terminals for any loose connections.
c.
Contact an electrician if necessary to make sure all wires are properly connected and
torqued according to the instructions in the Wall Connector Installation Manual.
4.
Once all connections have been checked and made secure, restore power to the Wall
Connector and try charging again by reconnecting to the vehicle.
5.
If the issue persists, the Wall Connector needs service. Schedule a service appointment
through your Mobile App.
(CC_a021)
Unable to charge - No primary Wall Connector
Check that primary unit is powered and available
What this alert means:
Troubleshooting Alerts
242MODEL S Owner