warning light TESLA MODEL X 2020 Owner's Manual
[x] Cancel search | Manufacturer: TESLA, Model Year: 2020, Model line: MODEL X, Model: TESLA MODEL X 2020Pages: 247, PDF Size: 6.48 MB
Page 3 of 247
Overview
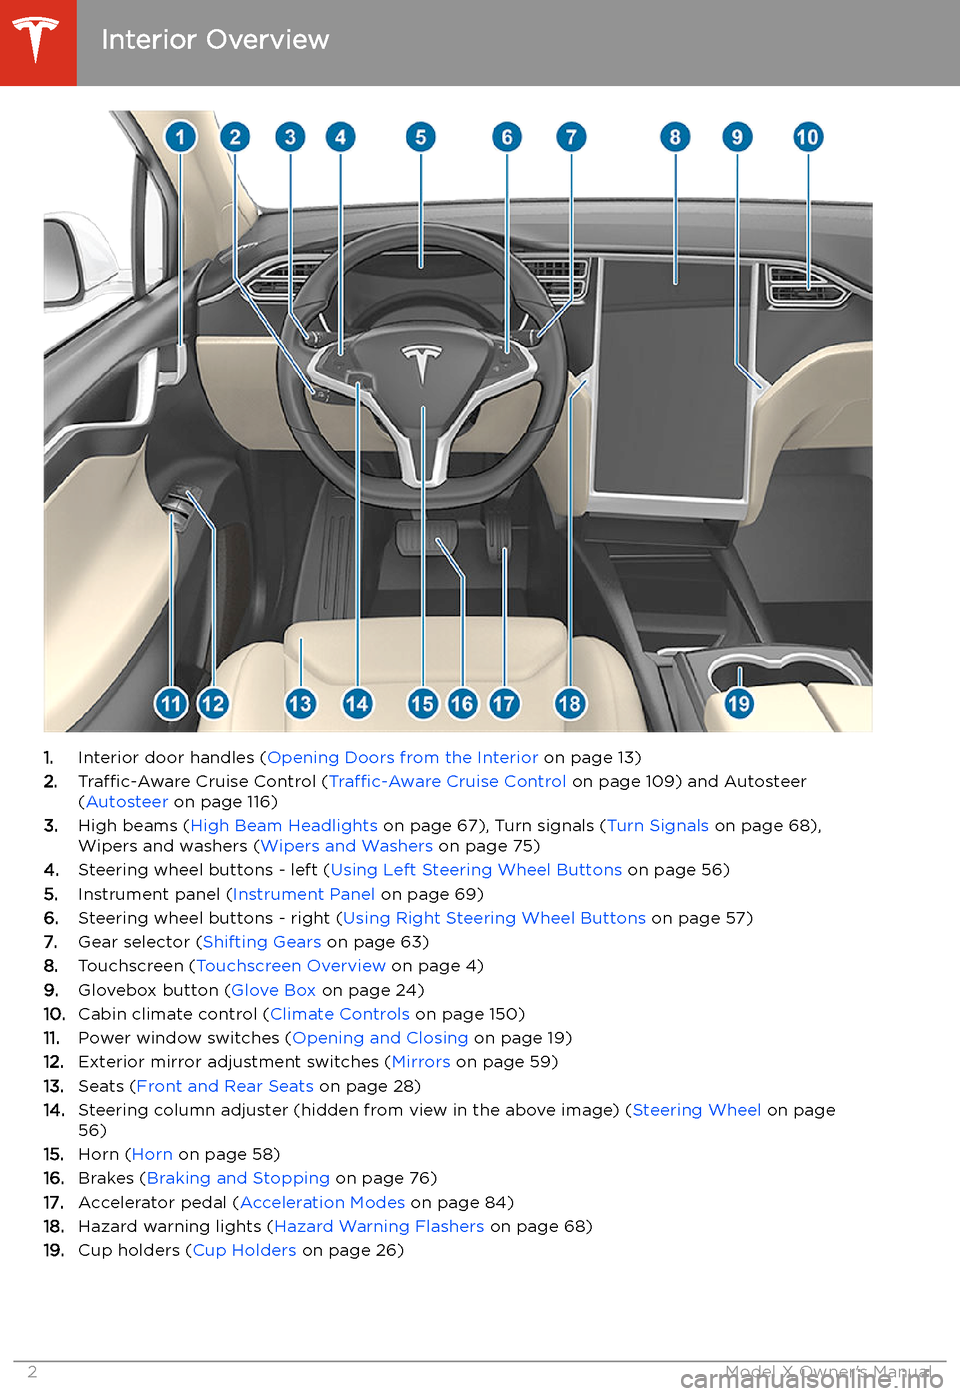
Interior Overview
1. Interior door handles ( Opening Doors from the Interior on page 13)
2. Traffic-Aware Cruise Control ( Traffic-Aware Cruise Control on page 109) and Autosteer
( Autosteer on page 116)
3. High beams ( High Beam Headlights on page 67), Turn signals ( Turn Signals on page 68),
Wipers and washers ( Wipers and Washers on page 75)
4. Steering wheel buttons - left ( Using Left Steering Wheel Buttons on page 56)
5. Instrument panel ( Instrument Panel on page 69)
6. Steering wheel buttons - right ( Using Right Steering Wheel Buttons on page 57)
7. Gear selector ( Shifting Gears on page 63)
8. Touchscreen ( Touchscreen Overview on page 4)
9. Glovebox button ( Glove Box on page 24)
10. Cabin climate control ( Climate Controls on page 150)
11. Power window switches ( Opening and Closing on page 19)
12. Exterior mirror adjustment switches ( Mirrors on page 59)
13. Seats ( Front and Rear Seats on page 28)
14. Steering column adjuster (hidden from view in the above image) ( Steering Wheel on page
56)
15. Horn ( Horn on page 58)
16. Brakes ( Braking and Stopping on page 76)
17. Accelerator pedal ( Acceleration Modes on page 84)
18. Hazard warning lights ( Hazard Warning Flashers on page 68)
19. Cup holders ( Cup Holders on page 26)
Interior Overview
2Model X Owner
Page 5 of 247

Touchscreen Overview
The main components of the touchscreen are shown here. The touchscreen is used to control
many features that, in traditional cars, are controlled using physical buttons (for example,
adjusting the heating and air conditioning, headlights, etc.). You can also use the touchscreen to
customize Model X to suit your preferences.
Warning: Always pay attention to road and traffic conditions when driving. To minimize driver
distraction and ensure the safety of vehicle occupants as well as other road users, avoid using
the touchscreen to adjust settings while the vehicle is in motion.
Note: The image below is provided for demonstration purposes only. Depending on vehicle
options, software version and market region, your touchscreen may appear slightly different.
Touchscreen Overview
4Model X Owner
Page 23 of 247
Front Trunk
Opening
To open the front trunk:
1. Ensure that the area around the hood is
free of obstacles.
2. Touch Controls > Quick Controls > FRONT
TRUNK on the touchscreen, touch the
front trunk button on the mobile app, or
double-click the front trunk button on the key.
3. Pull the hood up.
When a door or trunk/liftgate is
open, the instrument panel displays
the Door Open indicator light. The
image of your Model X on the
touchscreen also displays the open
front trunk.Warning: Before opening or closing the
hood, it is important to check that the area around the hood is free of obstacles
(people and objects). Failure to do so
may result in damage or serious injury.
Note: The front trunk locks whenever closed
and you lock Model X using either the
touchscreen or externally using the key or
mobile app, you leave Model X carrying your key (if Walk-Away Locking on page 17 is
turned on), or when Valet mode is active (see Valet Mode on page 54).
Closing
The Model X hood is not heavy enough to
latch under its own weight and applying pressure on the front edge or center of the
hood can cause damage.
To properly close the hood:
1. Lower the hood until the striker touches
the latches.
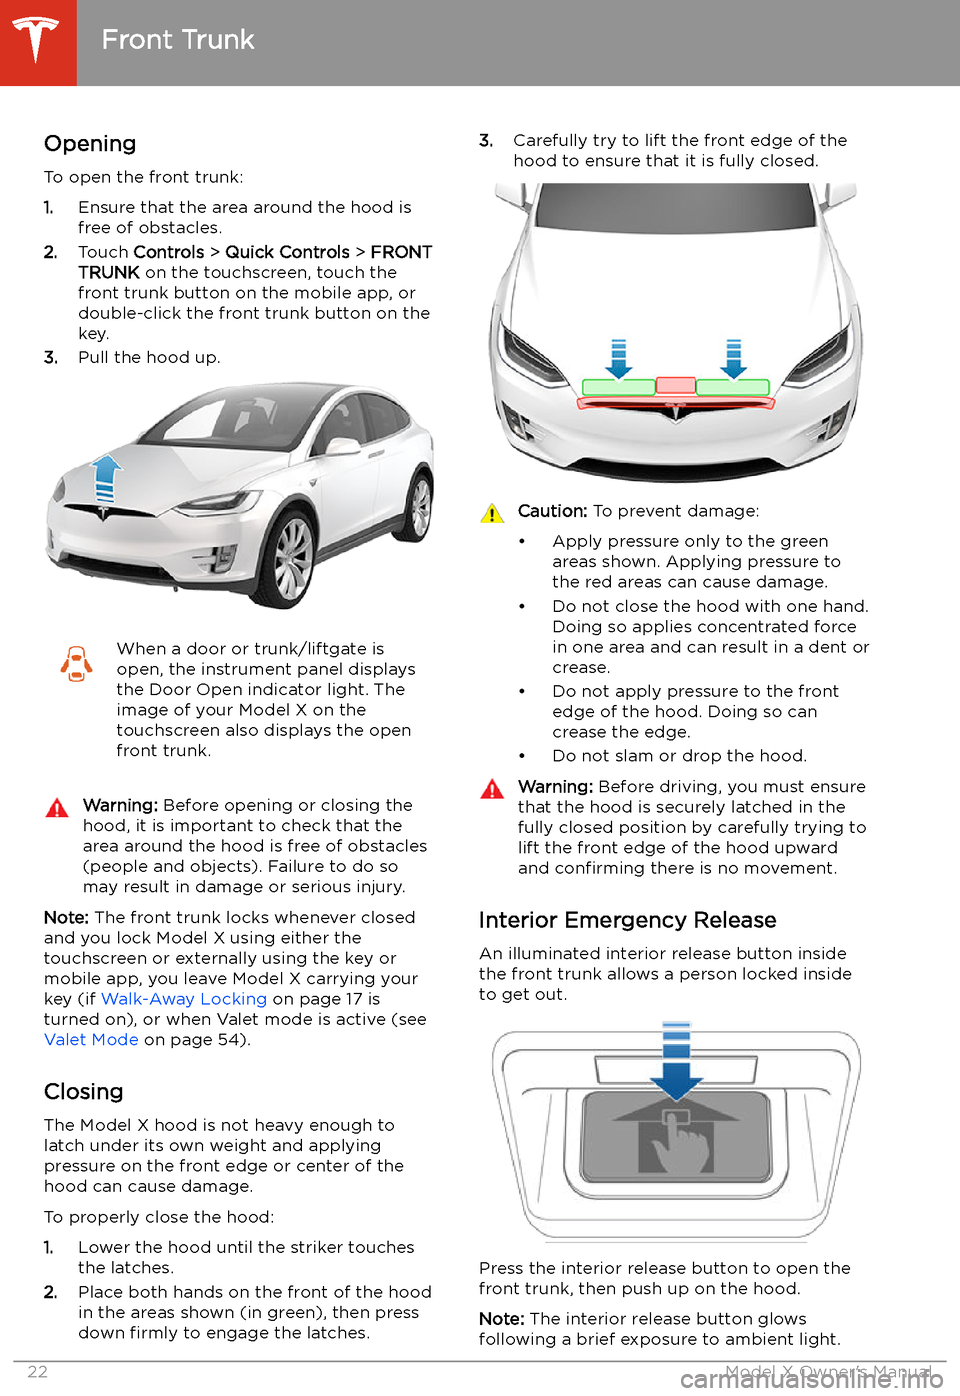
2. Place both hands on the front of the hood
in the areas shown (in green), then press
down firmly to engage the latches.
3.
Carefully try to lift the front edge of the
hood to ensure that it is fully closed.Caution: To prevent damage:
Page 41 of 247
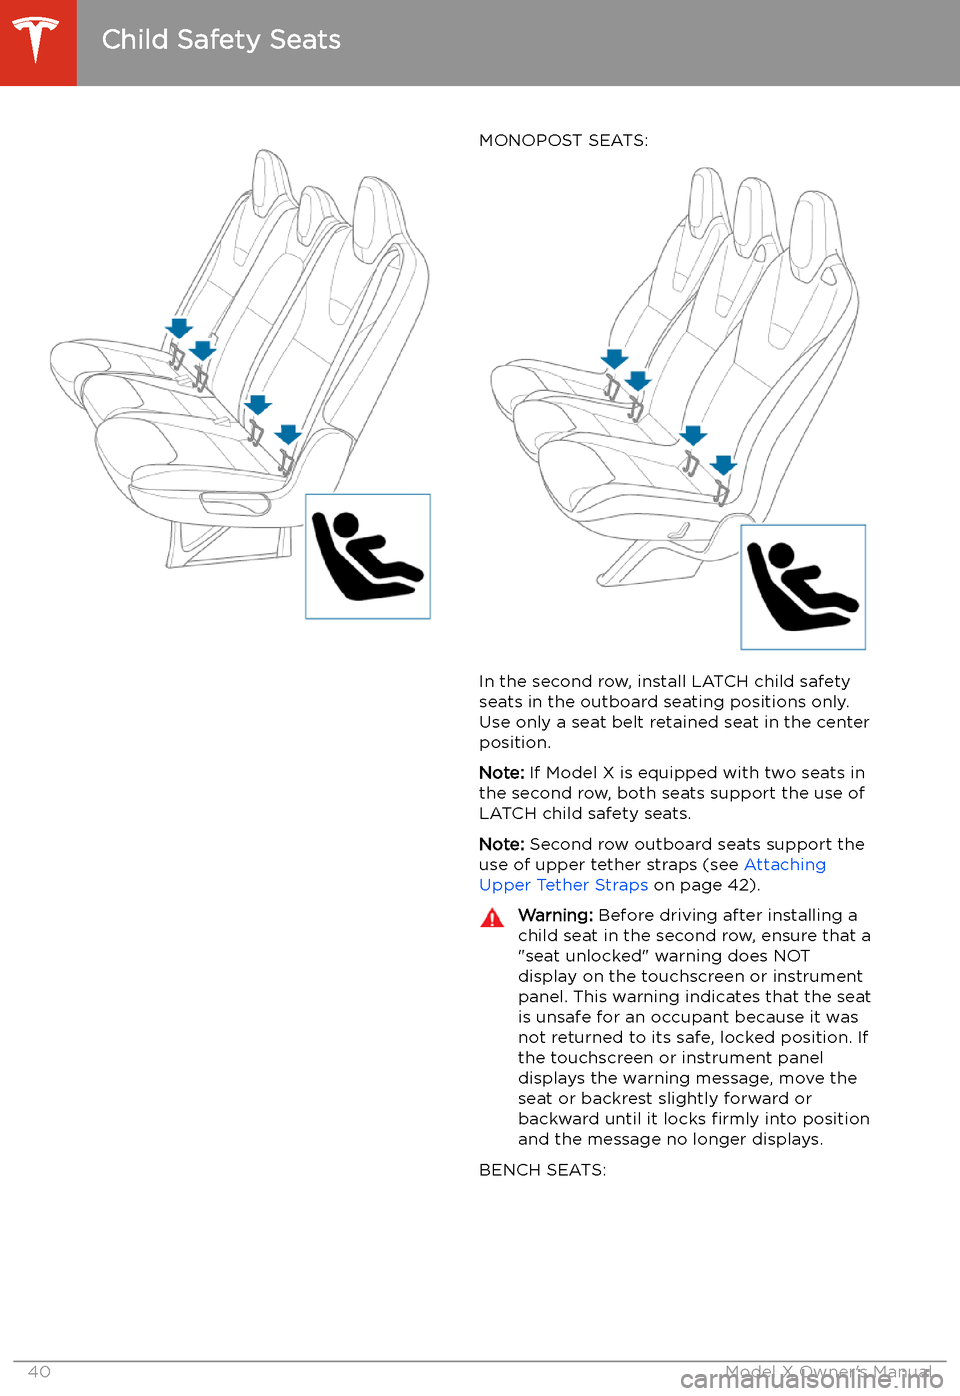
MONOPOST SEATS:
In the second row, install LATCH child safety
seats in the outboard seating positions only.
Use only a seat belt retained seat in the center position.
Note: If Model X is equipped with two seats in
the second row, both seats support the use of
LATCH child safety seats.
Note: Second row outboard seats support the
use of upper tether straps (see Attaching
Upper Tether Straps on page 42).
Warning:
Before driving after installing a
child seat in the second row, ensure that a
"seat unlocked" warning does NOT display on the touchscreen or instrument
panel. This warning indicates that the seat
is unsafe for an occupant because it was
not returned to its safe, locked position. If
the touchscreen or instrument panel displays the warning message, move the
seat or backrest slightly forward or
backward until it locks firmly into position
and the message no longer displays.
BENCH SEATS:
Child Safety Seats
40Model X Owner
Page 45 of 247
Testing a Child Safety Seat
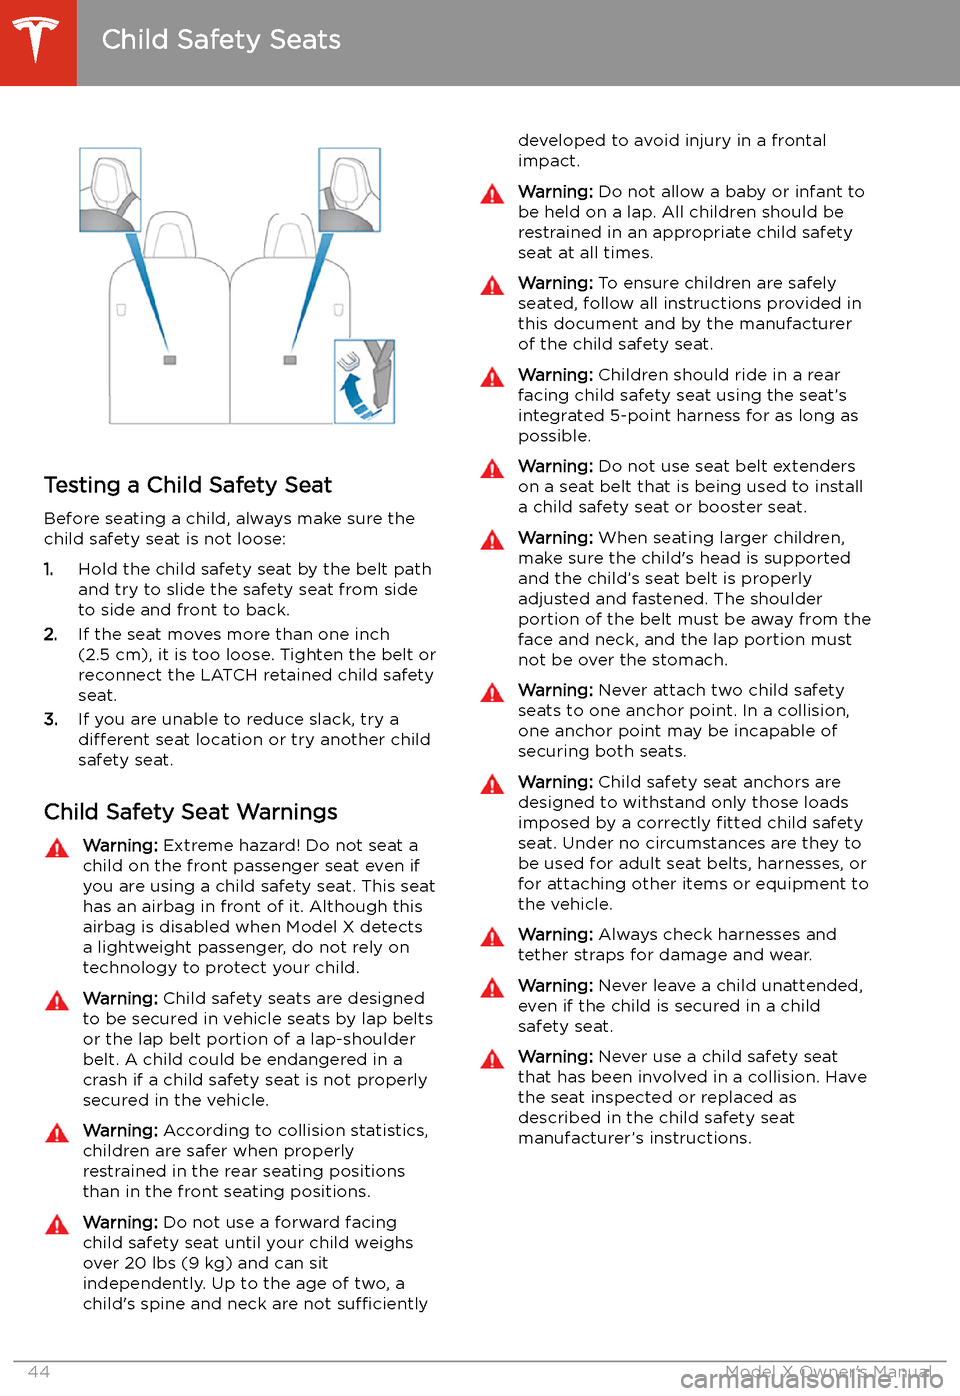
Before seating a child, always make sure the
child safety seat is not loose:
1. Hold the child safety seat by the belt path
and try to slide the safety seat from side
to side and front to back.
2. If the seat moves more than one inch
(2.5 cm), it is too loose. Tighten the belt or
reconnect the LATCH retained child safety
seat.
3. If you are unable to reduce slack, try a
different seat location or try another child
safety seat.
Child Safety Seat Warnings
Warning: Extreme hazard! Do not seat a
child on the front passenger seat even if
you are using a child safety seat. This seat
has an airbag in front of it. Although this airbag is disabled when Model X detects
a lightweight passenger, do not rely on technology to protect your child.Warning: Child safety seats are designed
to be secured in vehicle seats by lap belts or the lap belt portion of a lap-shoulderbelt. A child could be endangered in a
crash if a child safety seat is not properly
secured in the vehicle.Warning: According to collision statistics,
children are safer when properly
restrained in the rear seating positions
than in the front seating positions.Warning: Do not use a forward facing
child safety seat until your child weighs
over 20 lbs (9 kg) and can sit
independently. Up to the age of two, a
child
Page 78 of 247
Caution: If the brakes are not functioning
properly, stop the vehicle as soon as safety permits and contact Tesla Service.
See Park on page 63 for information on
using the Park button to stop the vehicle
in case of emergency.Warning: Always maintain a safe driving
distance from the vehicle in front of you
and be cautious in hazardous driving
conditions. Do not rely on brake disc
wiping or hydraulic fade compensation to act as a substitute for adequate braking.
Regenerative Braking
Whenever Model X is moving and your foot is
off the accelerator, regenerative braking slows
down Model X and feeds any surplus energy back to the Battery.
By anticipating your stops and reducing or
removing pressure from the accelerator pedal
to slow down, you can take advantage of regenerative braking to increase driving range.
Of course, this is no substitute for regular braking when needed for safety.
Note: If regenerative braking is aggressively
slowing Model X (such as when your foot is
completely off the accelerator pedal at
highway speeds), the brake lights turn on to
alert others that you are slowing down.
Warning: In snowy or icy conditions
Model X may experience traction loss
during regenerative braking, particularly
when in the Standard setting and/or not
using winter tires. Tesla recommends
using the Low setting (see To Set the
Regenerative Braking Level on page 77)
in snowy or icy conditions to help
maintain vehicle stability.
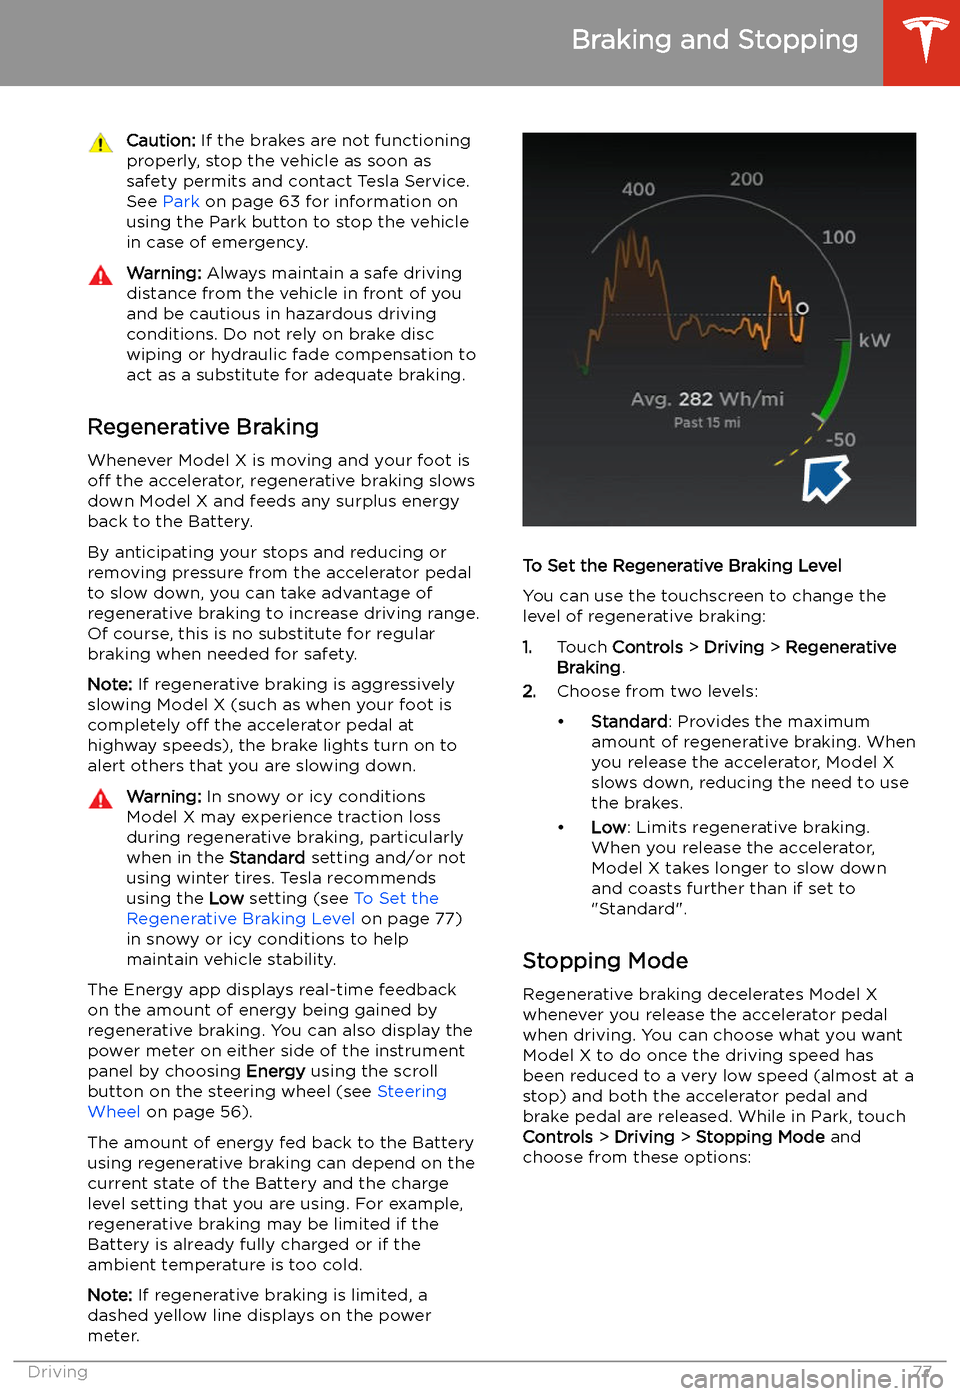
The Energy app displays real-time feedback
on the amount of energy being gained by
regenerative braking. You can also display the
power meter on either side of the instrument
panel by choosing Energy using the scroll
button on the steering wheel (see Steering
Wheel on page 56).
The amount of energy fed back to the Battery using regenerative braking can depend on thecurrent state of the Battery and the charge
level setting that you are using. For example,
regenerative braking may be limited if the Battery is already fully charged or if the
ambient temperature is too cold.
Note: If regenerative braking is limited, a
dashed yellow line displays on the power
meter.
To Set the Regenerative Braking Level
You can use the touchscreen to change the
level of regenerative braking:
1. Touch Controls > Driving > Regenerative
Braking .
2. Choose from two levels:
Page 80 of 247
Use the touchscreen to manually release the
parking brake (which also shifts Model X into Neutral):
1. Touch Controls > Safety & Security .
2. Press the brake pedal, then touch Parking
Brake . If Model X was previously in Park, it
shifts into Neutral.When you use the touchscreen to
manually apply the parking brake,
the red parking brake indicator lights
up on the instrument panel.If the parking brake experiences an
electrical issue, the amber parking brake indicator lights up and a fault
message displays at the top of the
instrument panel.Caution: In the unlikely event that
Model X loses electrical power, you
cannot access the touchscreen and are
therefore unable to release the parking
brake. Contact Tesla.
Brake Wear
Model X brake pads are equipped with wear indicators. A wear indicator is a thin metal
strip attached to the brake pad that squeals as
it rubs against the rotor when the pad wears
down. This squealing sound indicates that the
brake pads have reached the end of their service life and require replacement. To
replace the brake pads, contact Tesla Service.
Brakes must be periodically inspected visually by removing the tire and wheel. For detailed
specifications and service limits for rotors and
brake pads, see Subsystems on page 215.
Additionally, Tesla recommends cleaning and
lubricating the brake calipers every year or
12,500 miles (20,000 km) if in an area where
roads are salted during winter months.
Warning: Neglecting to replace worn
brake pads damages the braking system
and can result in a braking hazard.
Braking and Stopping
Driving79
Page 133 of 247
every situation and does not replace the need
to remain attentive and in control.Warning: Keep your hands on the steering
wheel at all times. If the vehicle senses your hands are not on the steering wheel,Model X sounds a chime and the hazard
warning lights
Page 188 of 247
Note: If Model X is locked, the charge port
light does not light up.
If the charge port light turns red while
charging, a fault is detected. Check the instrument panel or touchscreen for a
message describing the fault. A fault can
occur due to something as common as a power outage. If a power outage occurs,
charging resumes automatically when power
is restored.
Note: When charging, particularly at high
currents, the refrigerant compressor and fan
operate as needed to keep the Battery cool.
Therefore, it is normal to hear sounds during
charging.
Note: Air conditioning performance is
generally not affected by charging. However,
under certain circumstances (for example, you
are charging at high currents during a
particularly warm day), the air coming from
the vents may not be as cool as expected and
a message displays on the instrument panel.
This is normal behavior and ensures that the
Battery stays within an optimum temperature
range while charging to support longevity and
optimum performance.Warning: Never spray liquid at a high
velocity (for example, if using a pressure
washer) towards the charge port while
charging. Failure to follow these
instructions can result in serious injury or
damage to the vehicle, charging
equipment, or property.
Stopping Charging
Stop charging at any time by disconnecting
the charge cable or touching Stop Charging
on the touchscreen.
Note: To prevent unauthorized unplugging of
the charge cable, the charge cable latch remains locked and Model X must be unlockedor able to recognize your key before you can
disconnect the charge cable.
To disconnect the charge cable:
1. Press and hold the button on the
connector handle to release the latch.
Alternatively, unlock the vehicle by
opening a door, using a key fob, or
touching Stop Charging on the
touchscreen. These methods unlock the
charge port as well.
2. Pull the connector from the charge port.
3. Push the charge port door closed.
Note:
If Model X is equipped with a motorized
charge port door, it automatically closes shortly after you remove the charge cable.Caution: Tesla strongly recommends
leaving Model X plugged in when not in use. This maintains the Battery at the
optimum level of charge.
Manually Releasing Charge Cable
If the usual methods for releasing a charge
cable from the charge port (using the charge
handle release button, touchscreen, or mobile
app) do not work, carefully follow these steps:
1. Ensure that Model X is not actively
charging by displaying the charging
screen on the touchscreen. If necessary,
touch Stop Charging .
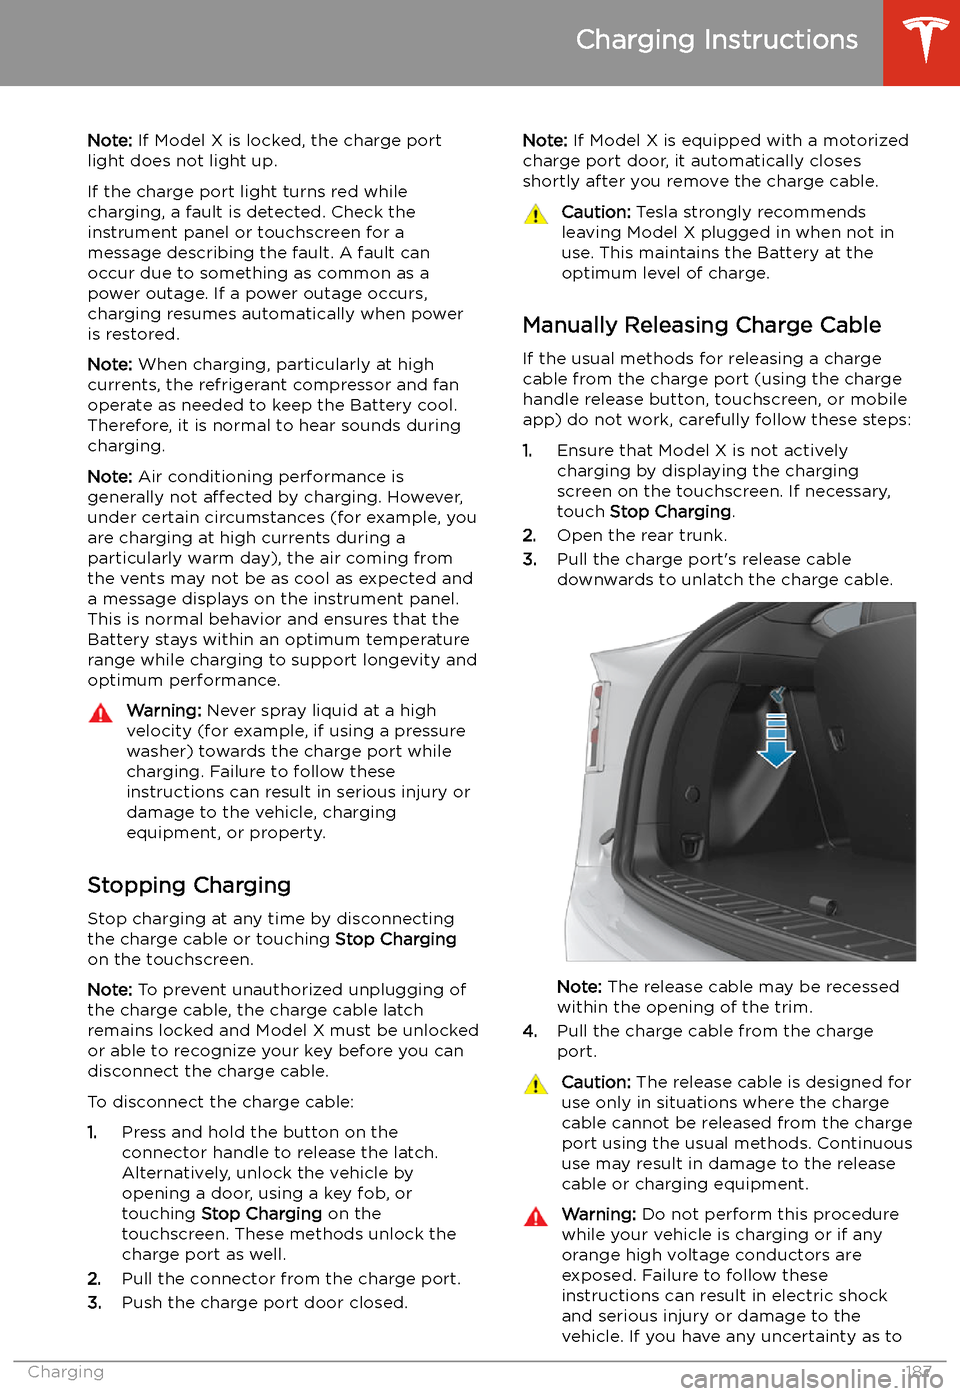
2. Open the rear trunk.
3. Pull the charge port
Page 189 of 247
how to safely perform this procedure,
contact your closest Service Center.Warning: Do not attempt to remove the
charge cable at the same exact time as
you begin to pull the release cable.
Always pull the release cable down and
hold it before you begin to remove the
charge cable from the charge port.
Failure to follow these instructions can
result in electric shock and serious injury.
Charge Port Light