air condition TOYOTA 4RUNNER 2009 N280 / 5.G User Guide
[x] Cancel search | Manufacturer: TOYOTA, Model Year: 2009, Model line: 4RUNNER, Model: TOYOTA 4RUNNER 2009 N280 / 5.GPages: 520, PDF Size: 10.74 MB
Page 155 of 520
155
2-2. Instrument cluster
2
When driving
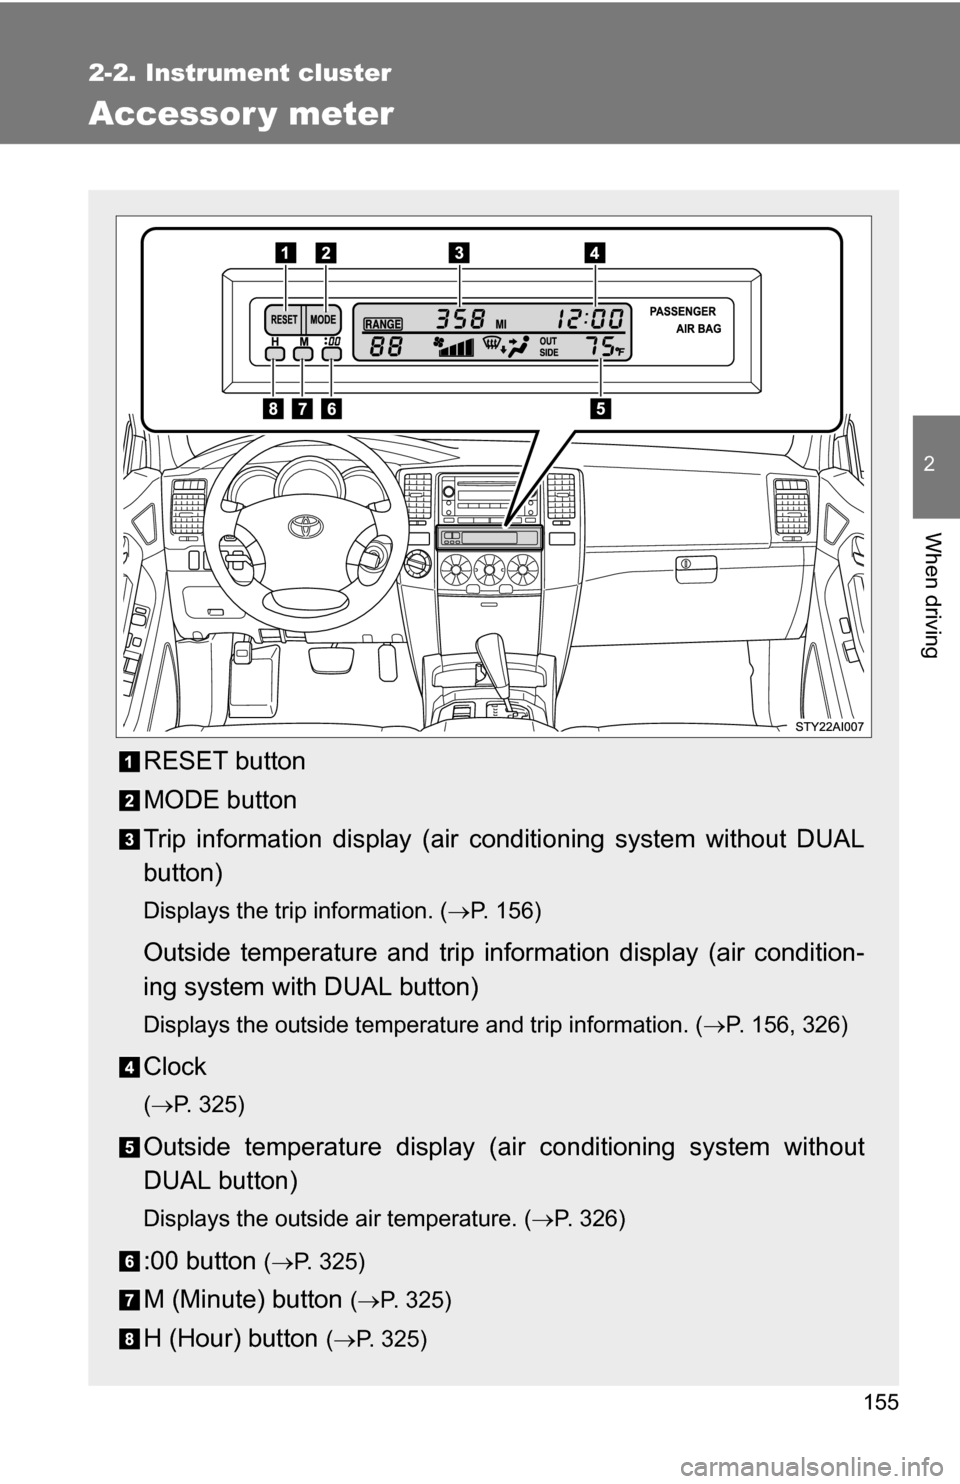
Accessor y meter
RESET button
MODE button
Trip information display (air conditioning system without DUAL
button)
Displays the trip information. ( P. 156)
Outside temperature and trip information display (air condition-
ing system with DUAL button)
Displays the outside temperature and trip information. ( P. 156, 326)
Clock
(P. 325)
Outside temperature display (air conditioning system without
DUAL button)
Displays the outside air temperature. ( P. 326)
:00 button (P. 325)
M (Minute) button ( P. 325)
H (Hour) button (P. 325)
Page 169 of 520
169
2-4. Using other driving systems
2
When driving
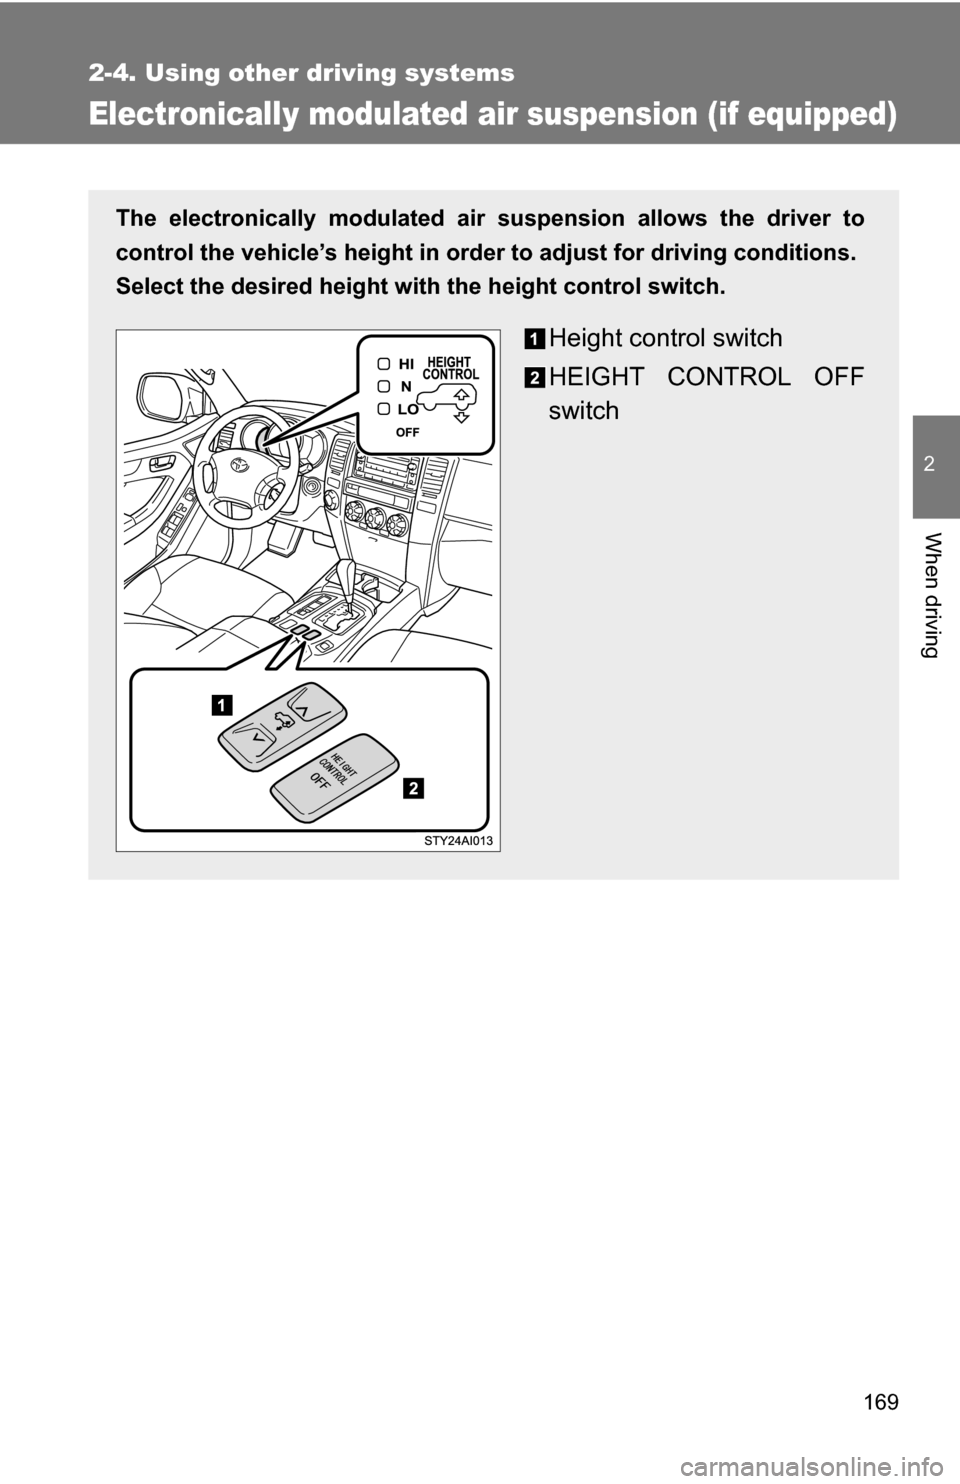
Electronically modulated air suspension (if equipped)
The electronically modulated air suspension allows the driver to
control the vehicle’s height in order to adjust for driving conditions.
Select the desired height with the height control switch.
Height control switch
HEIGHT CONTROL OFF
switch
Page 173 of 520
173
2-4. Using other
driving systems
2
When driving
CAUTION
■The electronically modulated air susp ension must be turned off in the
following circumstances:
Otherwise, the automatic leveling function may cause the vehicle’s height to
change, resulting in an unexpected accident.
● When driving through water such as shallow streams (Put the vehicle
height in HI mode and turn off the electronically modulated air suspension.
Drive at 18 mph [30 km/h] or slower.)
● When jacking up the vehicle, installing tire chains or tying the vehicle with
chains/wires for transportation via flat bed truck (Turn the system off and
stop the engine.)
● When the vehicle must be towed (Put the vehicle height in N mode and
turn the system off.)
● When the vehicle gets stuck (Turn the system off.)
● When disconnecting a trailer (Put the vehicle height in LO mode and turn
the system off.)
■ Selecting the correct height mode
Observe the following precautions to prevent accidents.
Failure to do so may cause damage to parts of the vehicle, as well as dan-
gerous handling characteristics, which may lead to fatal or injury accidents.
●Before you lower the vehicle’s height, check under the vehicle to make
sure that no one is there.
● The HI mode should be used for off-road driving conditions.
As the vehicle’s center of gravity is higher in this setting, the vehicle may
become unstable when turning abruptly.
● Do not select HI mode when you load cargo on the roof luggage carrier.
This may result in a loss of control or vehicle rollover.
Page 213 of 520
213
2-5. Driving information
2
When driving
Winter driving tips
Carry out the necessary preparations and inspections before driving
the vehicle in winter. Always drive the vehicle in a manner appropri-
ate to the prevailing weather conditions.
■ Pre-winter preparations
●Use fluids that are appropriate to the prevailing outside tem-
peratures.
• Engine oil
• Engine coolant
• Washer fluid
● Have a service technician inspect the level and specific grav-
ity of battery electrolyte.
● Have the vehicle fitted with four snow tires or purchase a set
of tire chains for the rear tires.
Ensure that all tires are the same size and brand, and that chains
match the size of the tires.
■Before driving the vehicle
Perform the following according to the driving conditions.
●Do not try to forcibly open a window, scrape an outside rear
view mirror surface or move a wiper or outside rear view mir-
ror that is frozen. Pour warm water over the frozen area to
melt the ice. Wipe away the water immediately to prevent it
from freezing.
● To ensure proper operation of th e climate control system fan,
remove any snow that has accumulated on the air inlet vents
in front of the windshield.
● Remove any ice that has accumu lated on the vehicle chassis.
● Periodically check for and remove any excess ice or snow
that may have accumulated in the wheel well or on the
brakes.
Page 222 of 520
222 2-5. Driving information
●Avoid sudden braking as you may skid, resulting in jackknifing and
loss of control. This is especiall y true on wet or slippery surfaces.
● Avoid jerky starts or sudden acceleration.
● Avoid jerky steering and sharp turns, and slow down before mak-
ing a turn.
● Note that when making a turn, th e trailer wheels will be closer than
the vehicle wheels to the inside of the turn. Compensate by making
a larger than normal turning radius.
● Crosswinds and rough roads will adversely affect handling of your
vehicle and trailer, causing sway . Periodically check the rear to
prepare for being passed by large trucks or buses, which may
cause your vehicle and trailer to sway. If swaying occurs, firmly grip
the steering wheel, reduce speed immediately but gradually, and
steer straight ahead. Never increase speed. If you make no
extreme correction with the stee ring or brakes, your vehicle and
trailer will stabilize.
● Take care when passing other v ehicles. Passing requires consider-
able distance. After passing a vehi cle, do not forget the length of
your trailer, and be sure you hav e plenty of room before changing
lanes.
● In order to maintain engine braking efficiency when driving on a
long steep downgrade, do not use the transmission in D.
Transmission shift position must be in 4.
● Due to the added load of the trailer, your vehicle’s engine may
overheat on hot days (at temper atures over 85°F [30°C]) when
driving up a long or steep grade. If the engine coolant temperature
gauge indicates overheating, immediately turn off the air condition-
ing (if in use), pull your vehicle off the road and stop in a safe spot.
( P. 463)
Page 229 of 520
3
229
Interior features
3-1. Using the air conditioning system and defogger
Air conditioning system .... 230
Rear window and outside rear view mirror defoggers .... 240
3-2. Using the audio system
Audio system (without navigation system)
.......... 241
Using the radio ................. 244
Using the CD player ......... 250
Playing back MP3 and WMA discs ..................... 257
Optimal use of the audio system ........................... 266
Using the AUX adapter .... 269
Using the steering wheel audio switches ............... 271
3-3. Using the rear audio/video system
Rear seat entertainment system ........................... 274
Using the DVD player (DVD video) ................... 280
Using the DVD player (video CD)...................... 288
Using the DVD player (audio CD/CD text) ........ 291
Using the DVD player (MP3 discs) .................... 292
Using the video mode ...... 294
Changing the Setup Menu settings .......................... 297 3-4. Using the interior lights
Interior lights list ............... 305
• Personal lights ............... 306
• Personal/interior lights ... 307
• Interior light .................... 307
3-5. Using the storage features
List of storage features .... 309
• Glove box....................... 310
• Coin holder .................... 311
• Console box ................... 312
• Tissue pocket ................. 313
• Trash holder................... 314
• Overhead console .......... 316
• Cup holders ................... 316
• Bottle holders ................. 321
• Auxiliary boxes ............... 322
3-6. Other interior features Sun visors ........................ 323
Vanity mirrors ................... 324
Clock ................................ 325
Outside temperature display............................ 326
Rear side-view mirrors ..... 328
Power outlets ................... 329
Seat heaters..................... 334
Armrest ............................ 336
Floor mat .......................... 337
Luggage compartment features .......................... 338
Garage door opener......... 345
Compass .......................... 350
Page 230 of 520
230
3-1. Using the air conditioning system and defogger
Air conditioning system
Airflow and outlets are automatically adjusted according to the tem-
perature setting.
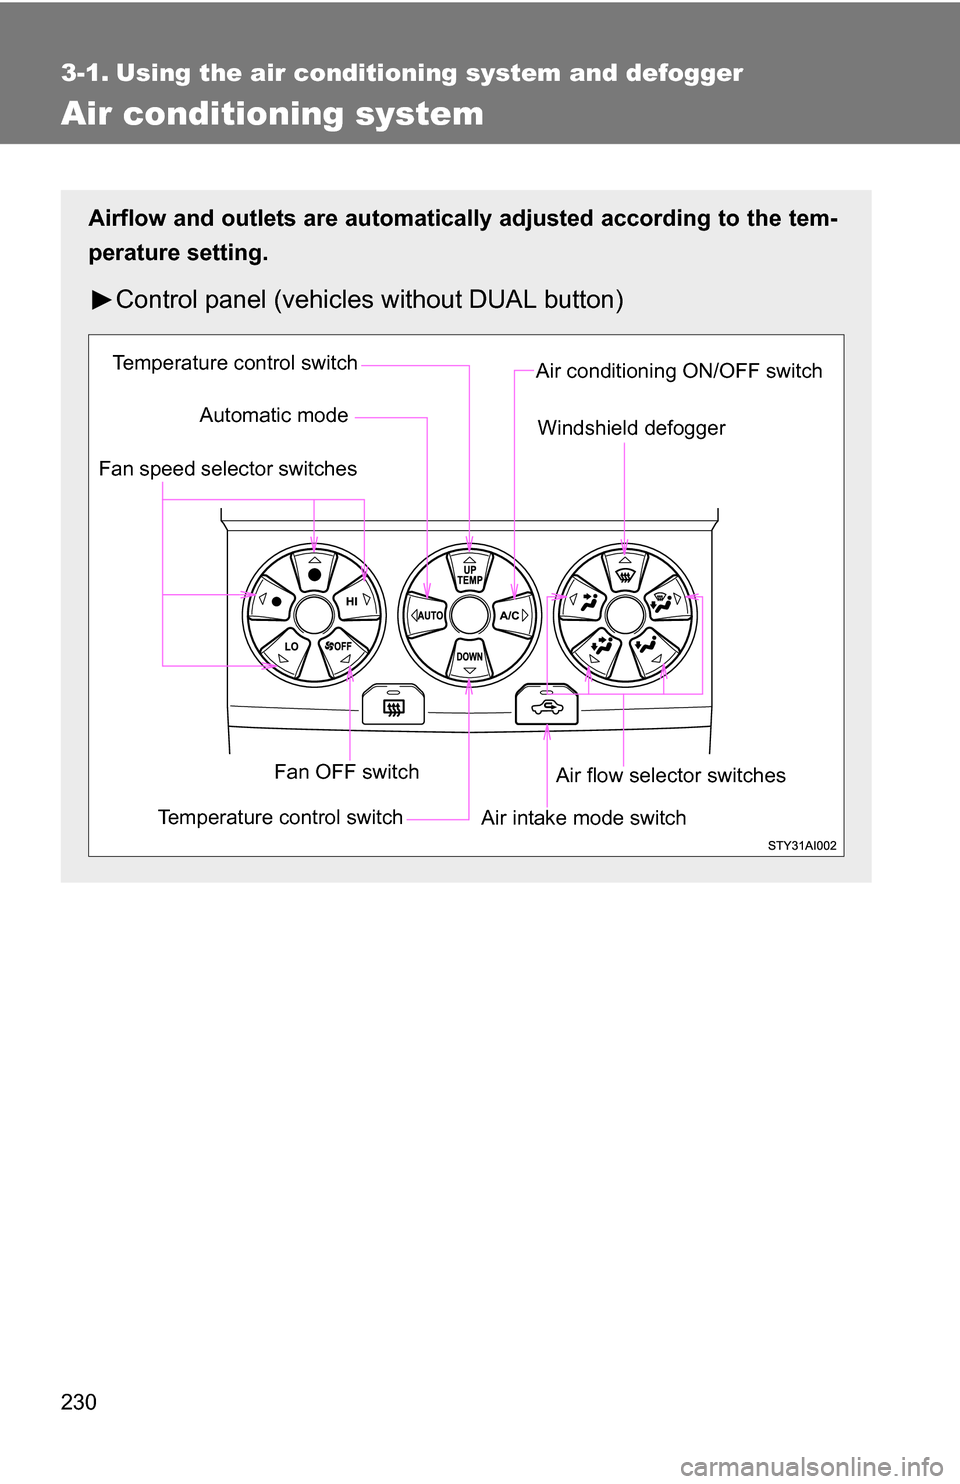
Control panel (vehicle s without DUAL button)
Temperature control switch
Automatic mode Air conditioning ON/OFF switch
Windshield defogger
Fan speed selector switches
Fan OFF switch
Temperature control switch Air flow selector switches
Air intake mode switch
Page 231 of 520
231
3-1. Using the air conditioning system
and defogger
3
Interior features
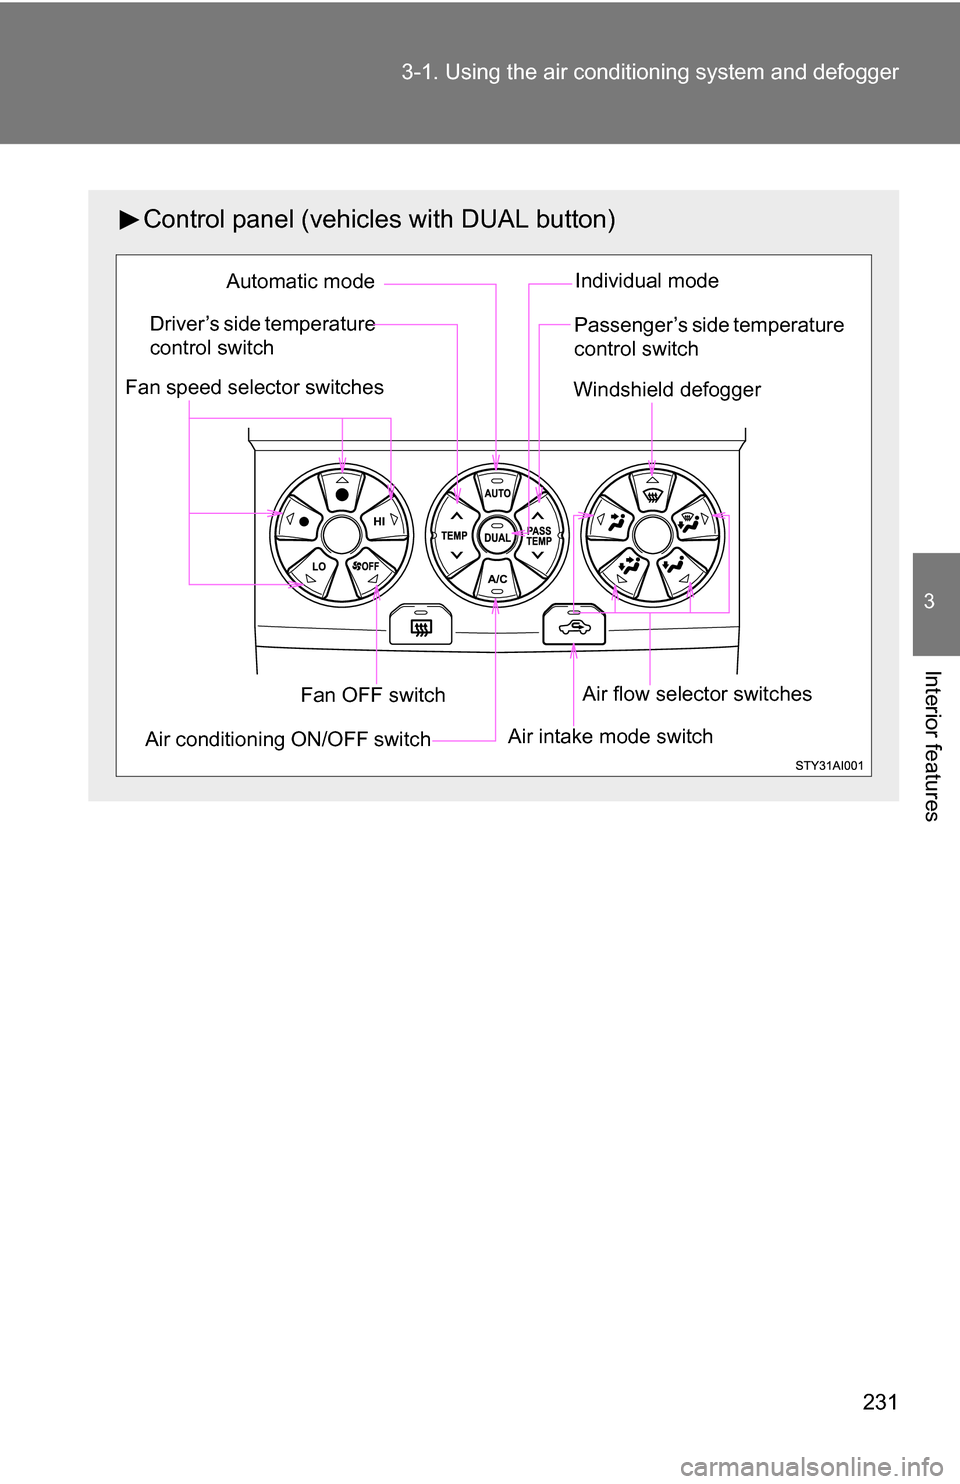
Control panel (vehicles with DUAL button)
Driver’s side temperature
control switchAutomatic mode
Passenger’s side temperature
control switch
Windshield defogger
Fan speed selector switches
Fan OFF switch
Air conditioning ON/OFF switch Air flow selector switches
Air intake mode switch
Individual mode
Page 232 of 520
232 3-1. Using the air conditioning system and defogger
Using the automatic mode
Press or .
The air conditioning system will begin to operate. Air outlets and fan
speed are automatically adjusted according to the temperature set-
ting.
Press or to increase the temperature and
or to decrease the temperature.
Vehicles with DUAL button:
The temperature for the driver and passenger seat can be set sepa-
rately.
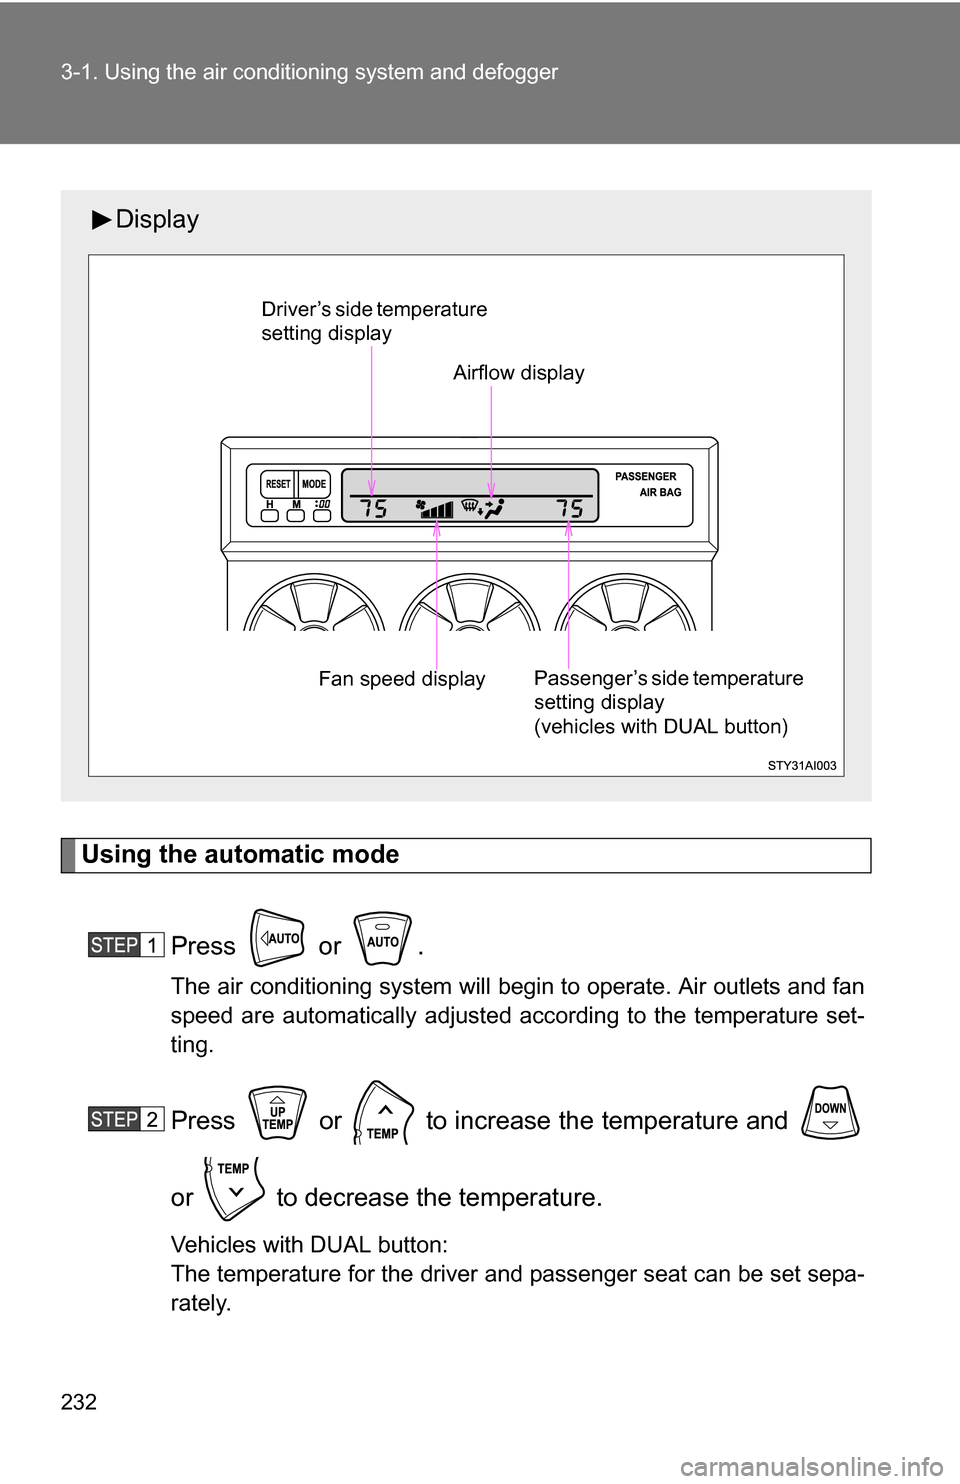
Display
Driver’s side temperature
setting display Airflow display
Fan speed display Passenger’s side temperature
setting display
(vehicles with DUAL button)
Page 233 of 520
233
3-1. Using the air conditioning system
and defogger
3
Interior features
Adjusting the settings
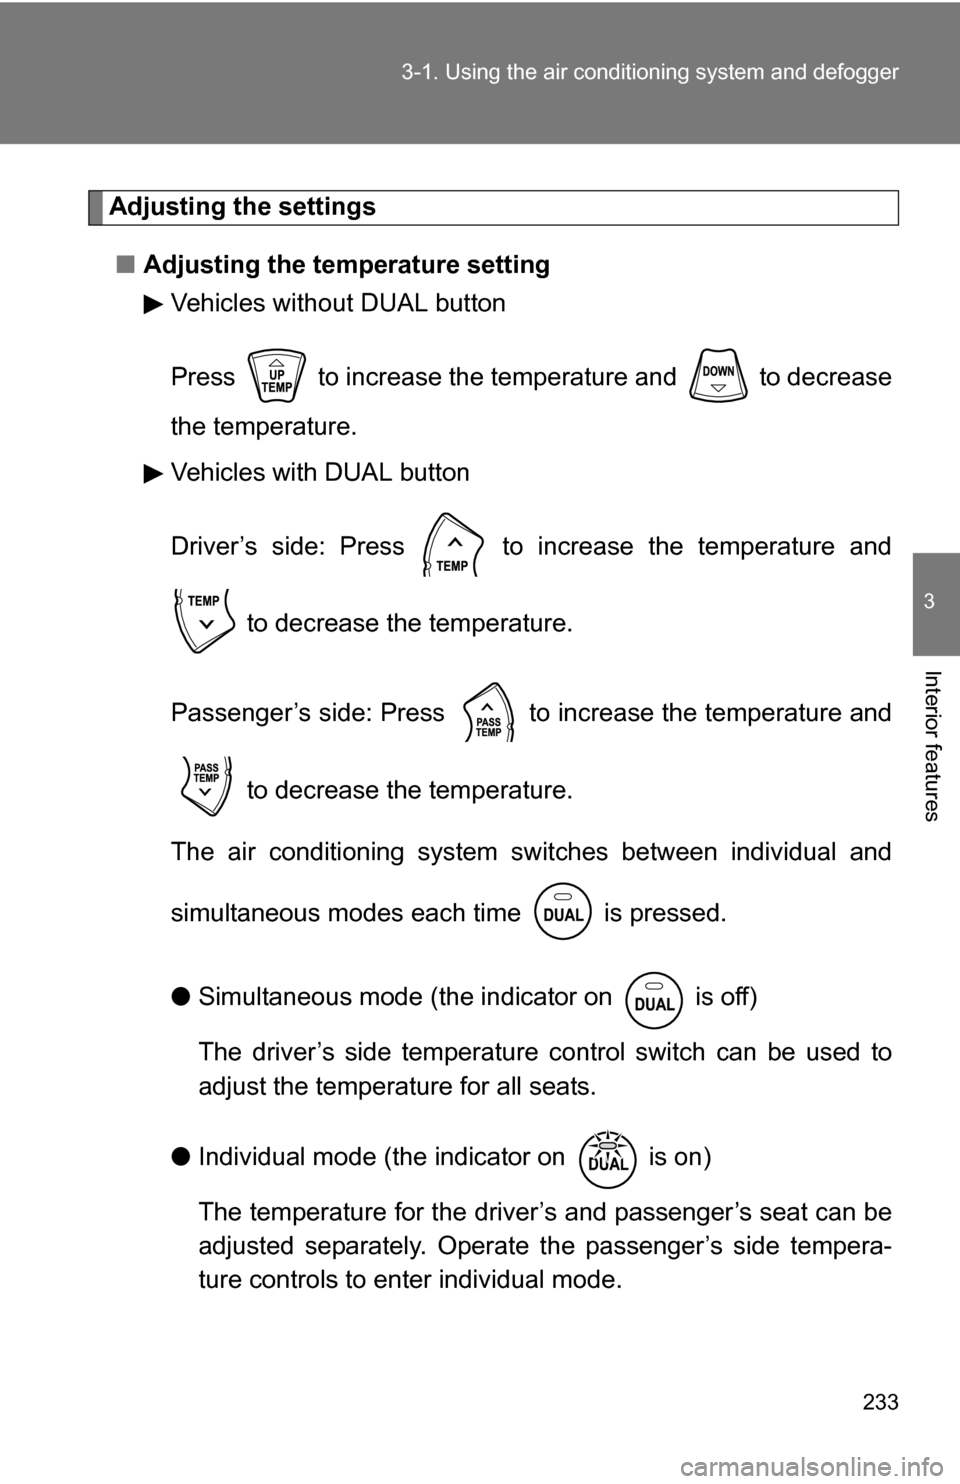
■ Adjusting the temperature setting
Vehicles without DUAL button
Press to increase the temperature and to decrease
the temperature.
Vehicles with DUAL button
Driver’s side: Press to increase the temperature and
to decrease the temperature.
Passenger’s side: Press to increase the temperature and to decrease the temperature.
The air conditioning system sw itches between individual and
simultaneous modes each time is pressed.
● Simultaneous mode (the indicator on is off)
The driver’s side temperature control switch can be used to
adjust the temperature for all seats.
● Individual mode (the indicator on is on)
The temperature for the driver’s and passenger’s seat can be
adjusted separately. Operate the passenger’s side tempera-
ture controls to enter individual mode.