TOYOTA 4RUNNER 2014 N280 / 5.G Owners Manual
4RUNNER 2014 N280 / 5.G
TOYOTA
TOYOTA
https://www.carmanualsonline.info/img/14/6115/w960_6115-0.png
TOYOTA 4RUNNER 2014 N280 / 5.G Owners Manual
Trending: air suspension, steering wheel, child restraint, key, fuel, cruise control, bulb
Page 121 of 530
1213-2. Opening, closing and locking the doors
3
Operation of each component
4RUNNER (U)_(OM35A83U)
CAUTION
●Do not pull on the back door damper stay to close the back door, and do
not hang on the back door damper stay.
Doing so may cause hands to be caught or the back door damper stay to
break, causing an accident.
● If a bicycle carrier or similar heavy object is attached to the back door, it
may suddenly shut again after being opened, causing someone’s hands,
head or neck to be caught and injured. When installing an accessory part
to the back door, using a genuine Toyota part is recommended.
NOTICE
■To prevent damage to the back door components
Do not allow more than one person to get on the rear step bumper at a time.
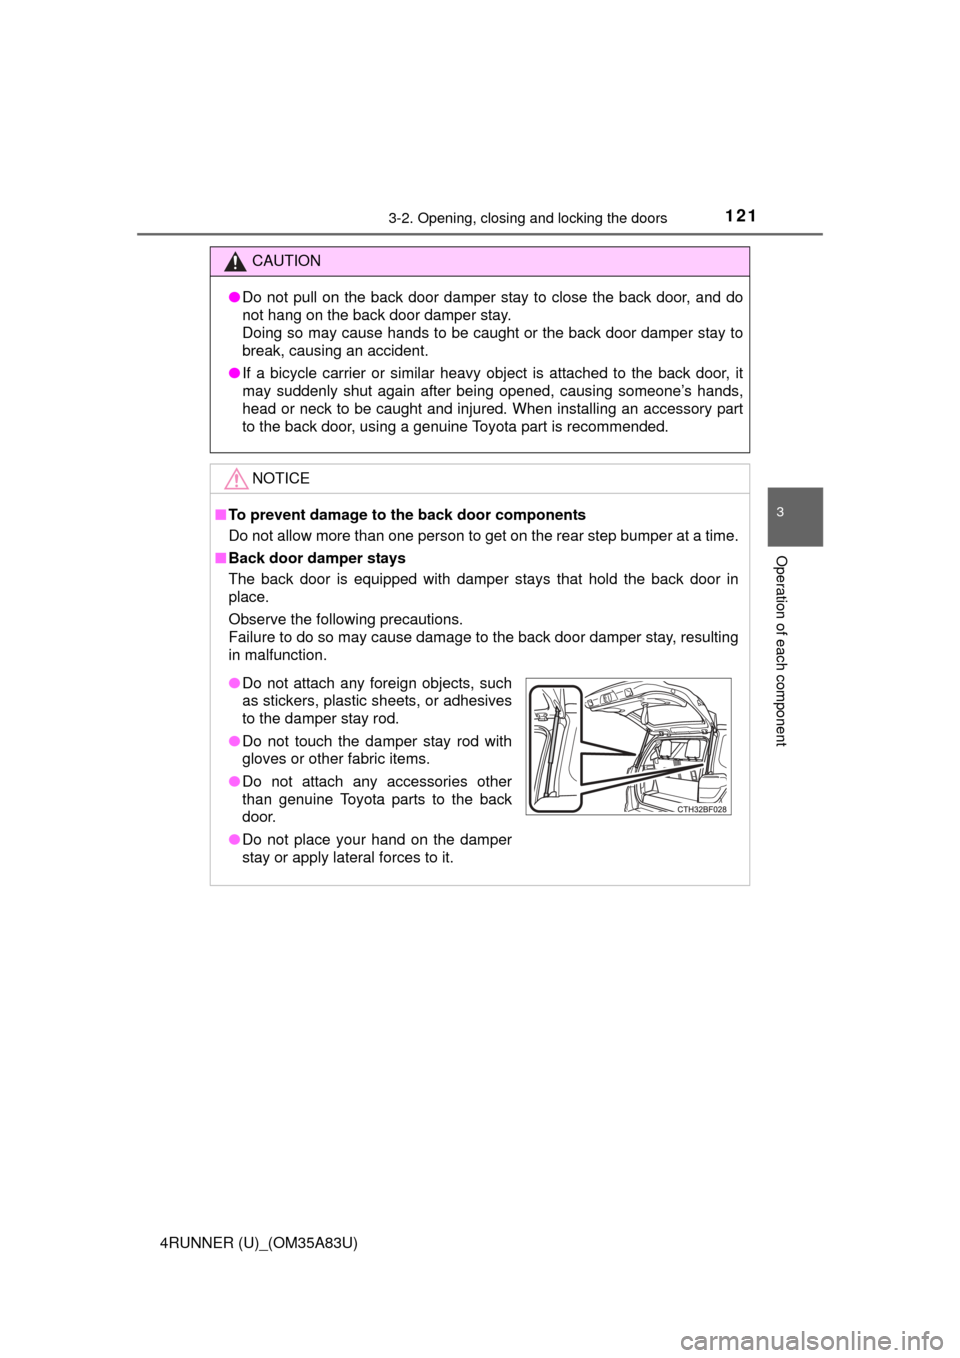
■ Back door damper stays
The back door is equipped with damper stays that hold the back door in
place.
Observe the following precautions.
Failure to do so may cause damage to the back door damper stay, resulting
in malfunction.
● Do not attach any foreign objects, such
as stickers, plastic sheets, or adhesives
to the damper stay rod.
● Do not touch the damper stay rod with
gloves or other fabric items.
● Do not attach any accessories other
than genuine Toyota parts to the back
door.
● Do not place your hand on the damper
stay or apply lateral forces to it.
Page 122 of 530
1223-2. Opening, closing and locking the doors
4RUNNER (U)_(OM35A83U)
Page 123 of 530
1233-2. Opening, closing and locking the doors
3
Operation of each component
4RUNNER (U)_(OM35A83U)
Page 124 of 530
122
4RUNNER (U)_(OM35A83U)
3-3. Adjusting the seats
Front seats
Adjustment procedure
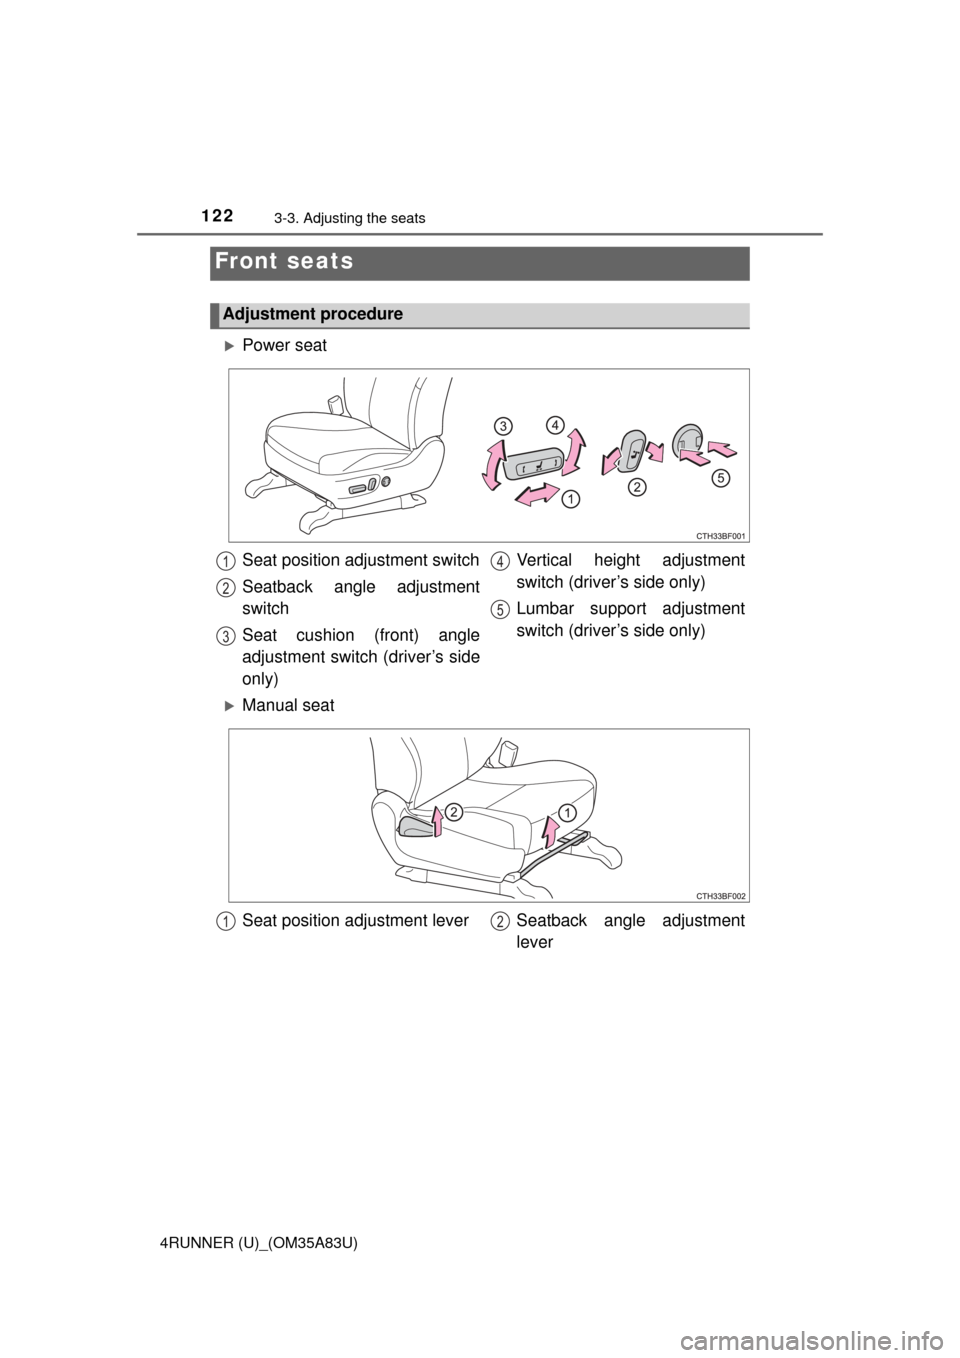
Power seat
Seat position adjustment switch
Seatback angle adjustment
switch
Seat cushion (front) angle
adjustment switch (driver’s side
only)Vertical height adjustment
switch (driver’s side only)
Lumbar support adjustment
switch (driver’s side only)
1
2
3
4
5
Manual seat
Seat position adjustment lever Seatback angle adjustment
lever
12
Page 125 of 530
1233-3. Adjusting the seats
3
Operation of each component
4RUNNER (U)_(OM35A83U)
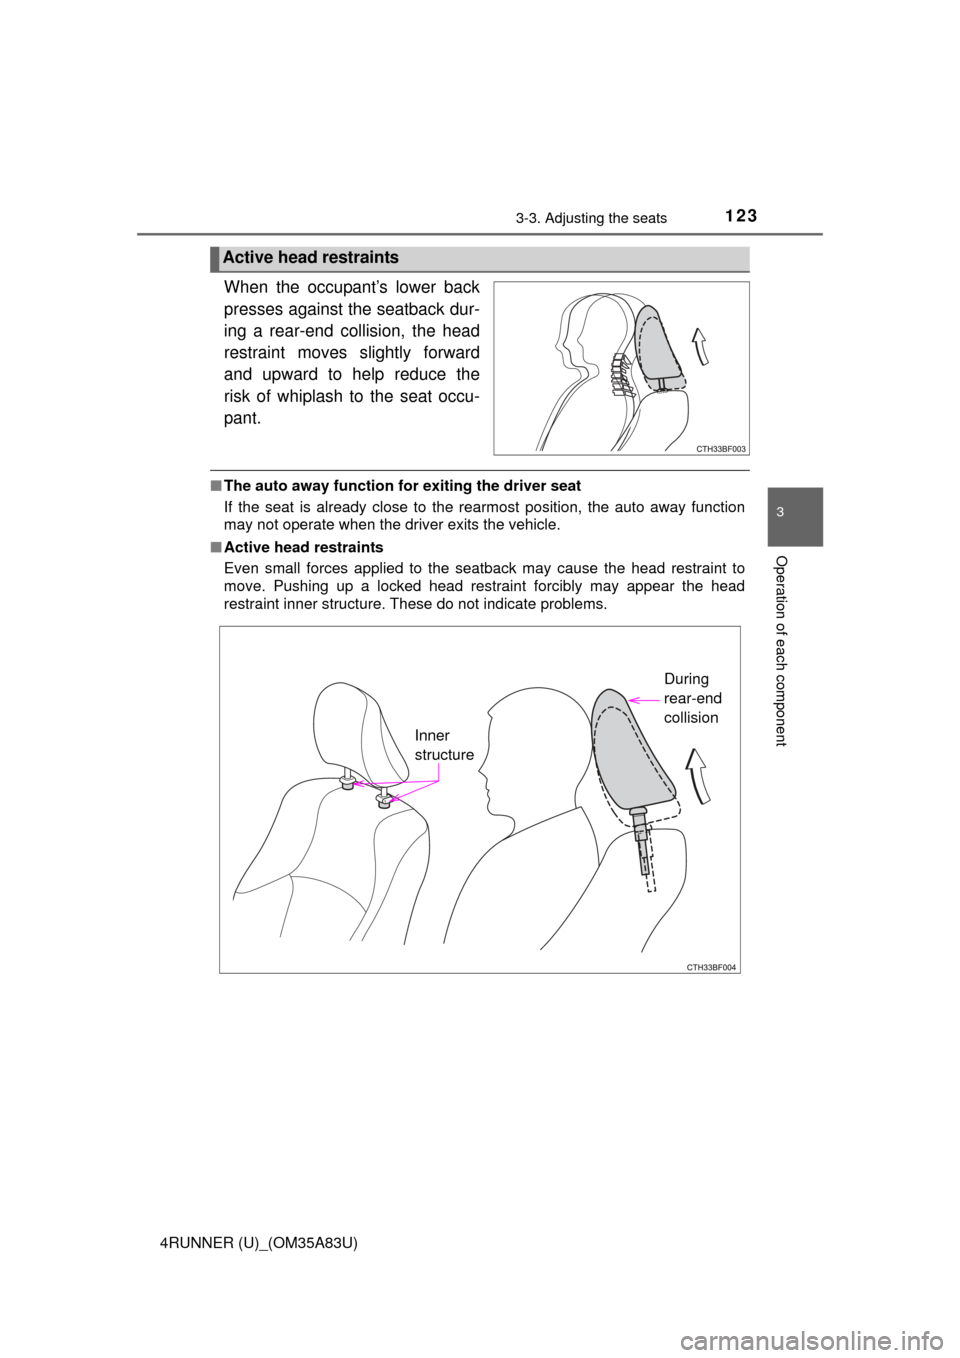
When the occupant’s lower back
presses against the seatback dur-
ing a rear-end collision, the head
restraint moves slightly forward
and upward to help reduce the
risk of whiplash to the seat occu-
pant.
■ The auto away function for exiting the driver seat
If the seat is already close to the rearmost position, the auto away function
may not operate when the driver exits the vehicle.
■ Active head restraints
Even small forces applied to the seatback may cause the head restraint to
move. Pushing up a locked head restraint forcibly may appear the head
restraint inner structure. These do not indicate problems.
Active head restraints
Inner
structure During
rear-end
collision
Page 126 of 530
1243-3. Adjusting the seats
4RUNNER (U)_(OM35A83U)
CAUTION
■When adjusting the seat position
● Take care when adjusting the seat position to ensure that other passen-
gers are not injured by the moving seat.
● Do not put your hands under the seat or near the moving parts to avoid
injury.
Fingers or hands may become jammed in the seat mechanism.
■ Seat adjustment
● To reduce the risk of sliding under the lap belt during a collision, do not
recline the seat more than necessary.
If the seat is too reclined, the lap belt may slide past the hips and apply
restraint forces directly to the abdomen, or your neck may contact the
shoulder belt, increasing the risk of death or serious injury in the event of
an accident.
Adjustments should not be made while driving as the seat may unexpect-
edly move and cause the driver to lose control of the vehicle.
● After adjusting the seat, make sure that the seat is locked in position.
(manual seat only)
■ When adjusting the seat positions
Make sure to leave enough space around the feet so they do not get stuck.
Page 127 of 530
1253-3. Adjusting the seats
3
Operation of each component
4RUNNER (U)_(OM35A83U)
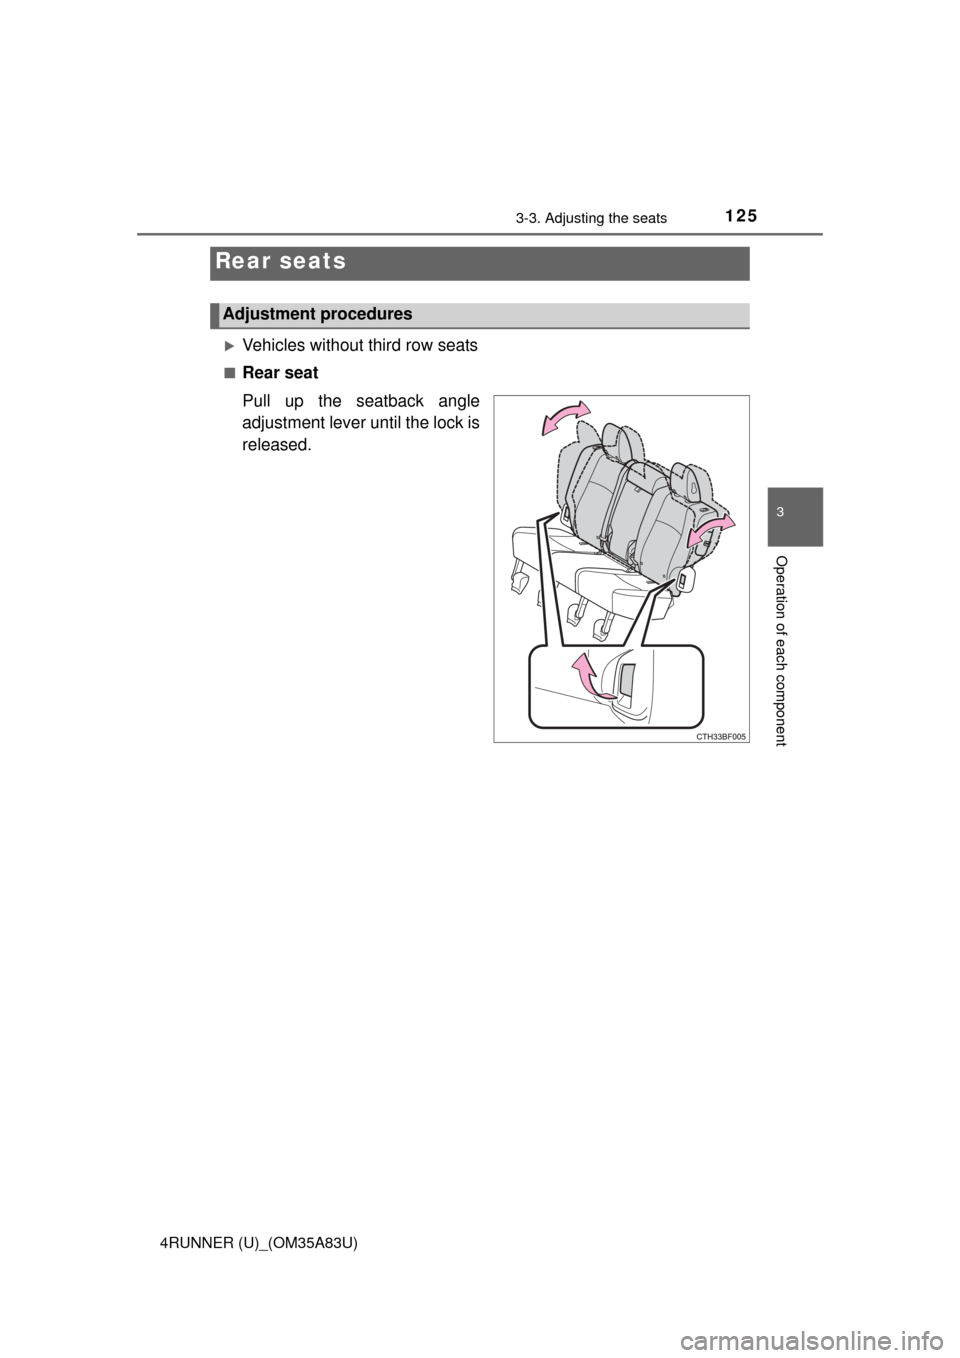
Vehicles without third row seats
■Rear seat
Pull up the seatback angle
adjustment lever until the lock is
released.
Rear seats
Adjustment procedures
Page 128 of 530
1263-3. Adjusting the seats
4RUNNER (U)_(OM35A83U)
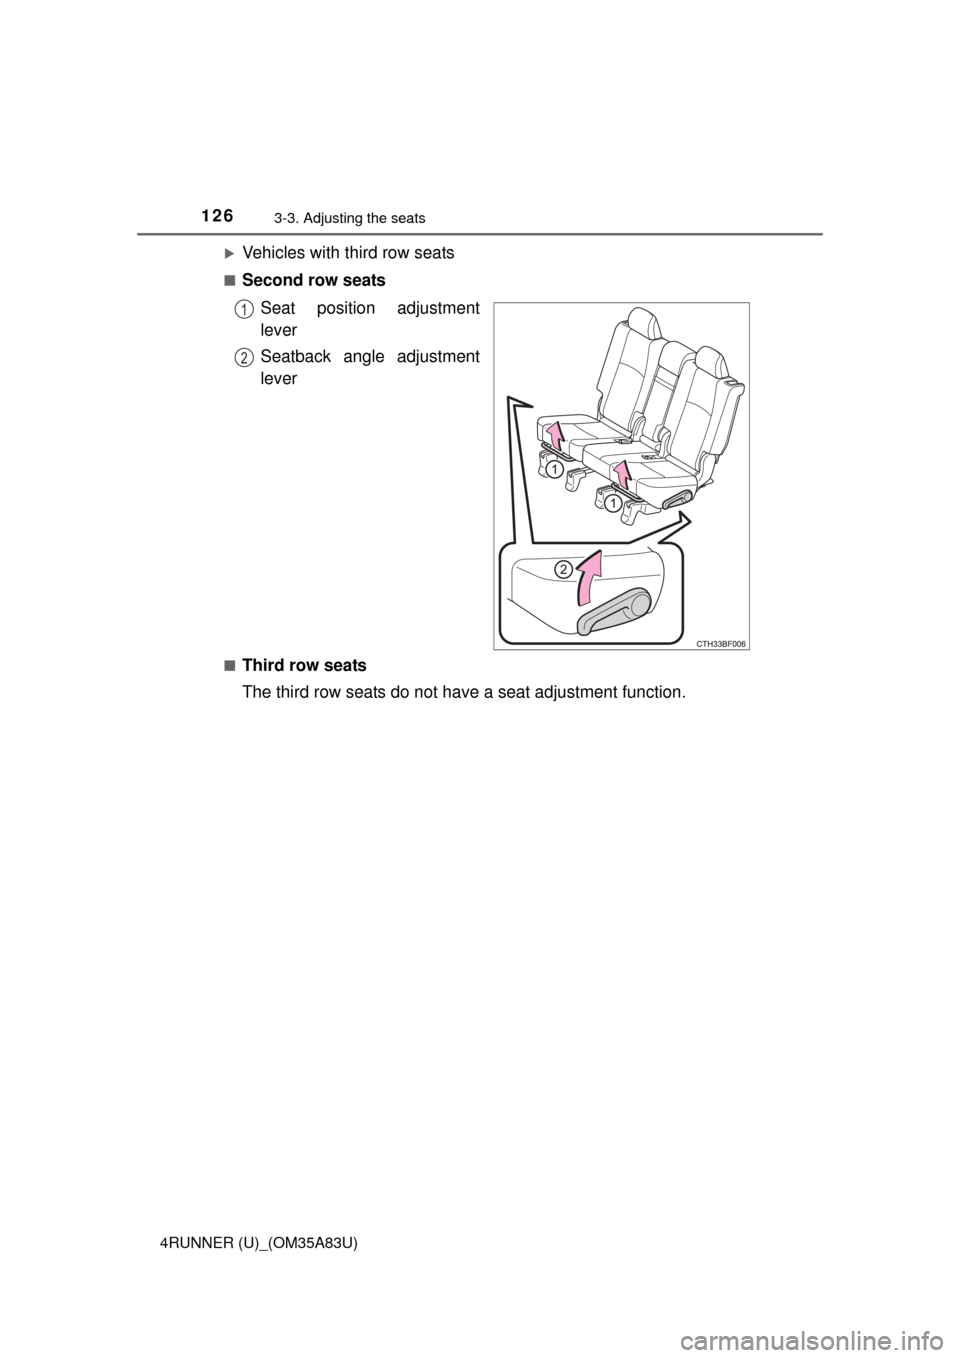
Vehicles with third row seats
■Second row seatsSeat position adjustment
lever
Seatback angle adjustment
lever
■Third row seats
The third row seats do not have a seat adjustment function.
1
2
Page 129 of 530
1273-3. Adjusting the seats
3
Operation of each component
4RUNNER (U)_(OM35A83U)■
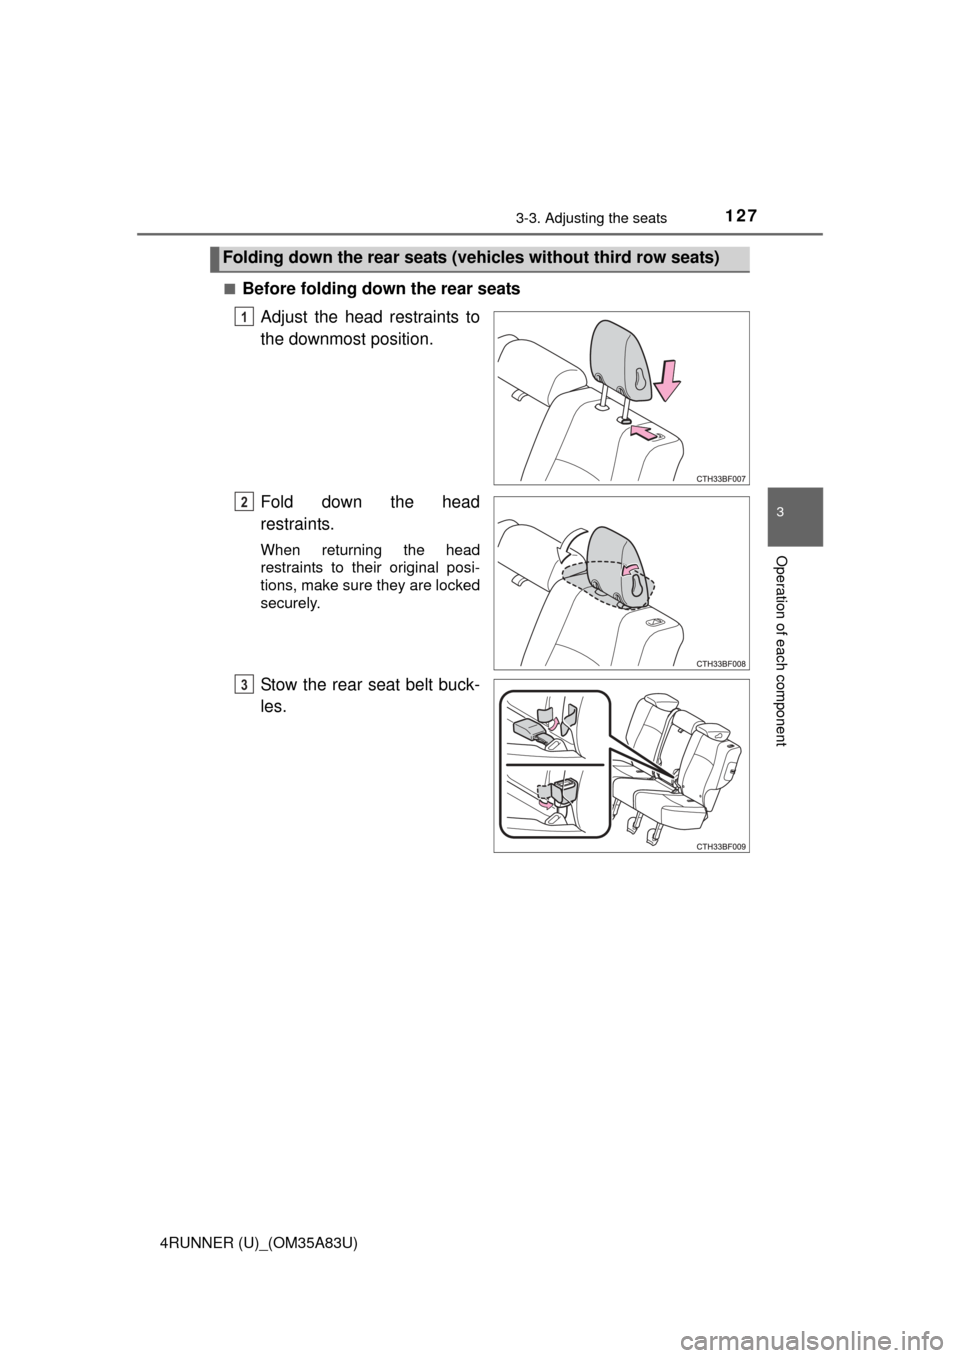
Before folding down the rear seats
Adjust the head restraints to
the downmost position.
Fold down the head
restraints.
When returning the head
restraints to their original posi-
tions, make sure they are locked
securely.
Stow the rear seat belt buck-
les.
Folding down the rear seats (veh icles without third row seats)
1
2
3
Page 130 of 530
1283-3. Adjusting the seats
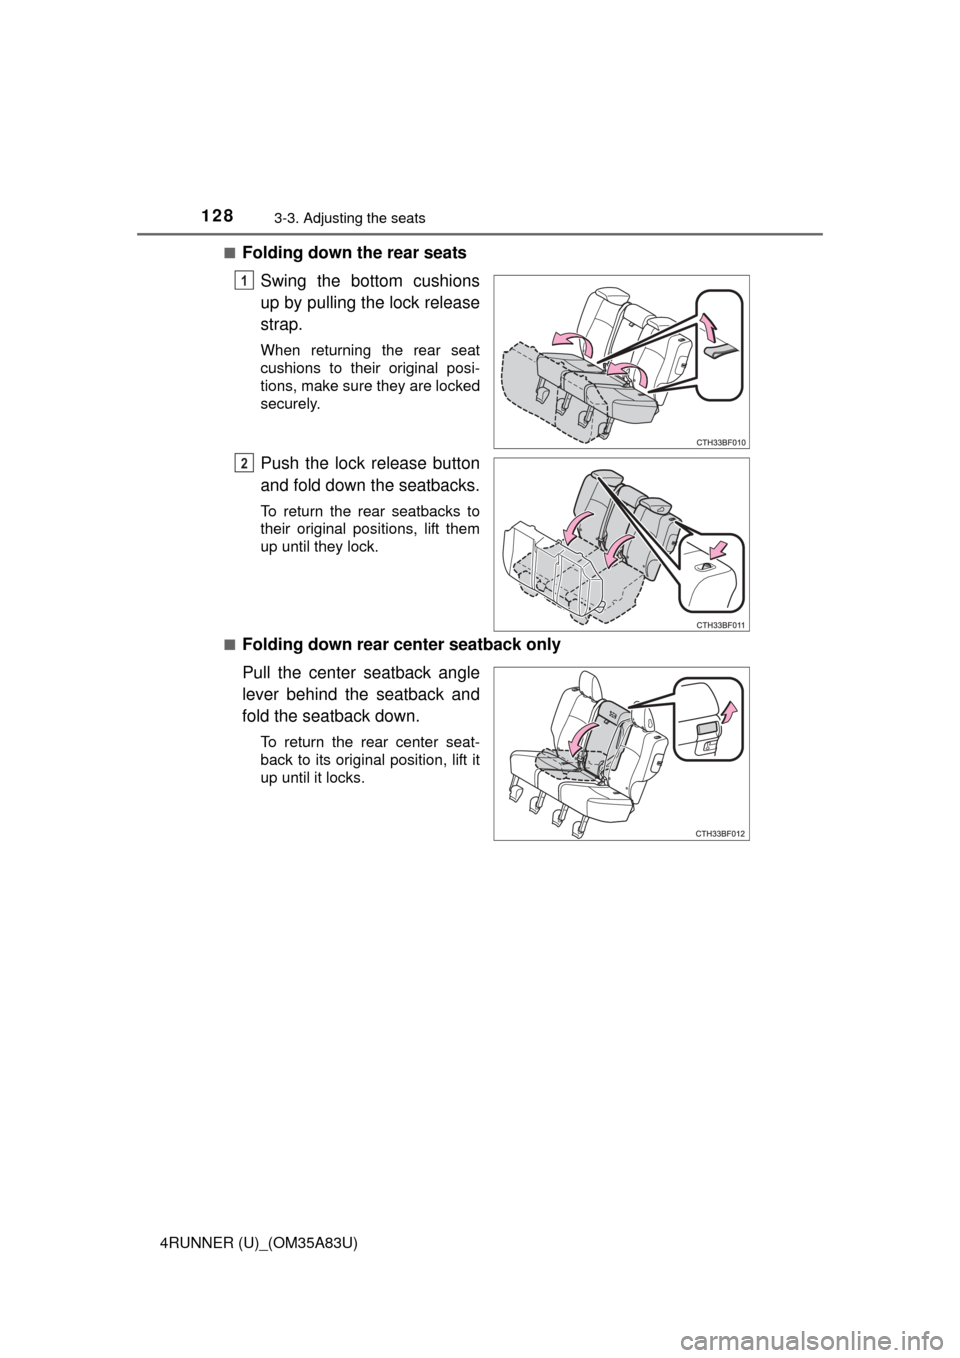
4RUNNER (U)_(OM35A83U)■
Folding down the rear seats
Swing the bottom cushions
up by pulling the lock release
strap.
When returning the rear seat
cushions to their original posi-
tions, make sure they are locked
securely.
Push the lock release button
and fold down the seatbacks.
To return the rear seatbacks to
their original positions, lift them
up until they lock.
■
Folding down rear center seatback only
Pull the center seatback angle
lever behind the seatback and
fold the seatback down.
To return the rear center seat-
back to its original position, lift it
up until it locks.
1
2
Trending: open hood, battery location, change key battery, clock reset, diagram, lane assist, roof rack


