parking brake TOYOTA 86 2023 Owner's Manual
[x] Cancel search | Manufacturer: TOYOTA, Model Year: 2023, Model line: 86, Model: TOYOTA 86 2023Pages: 449, PDF Size: 8.5 MB
Page 210 of 449
2104-5. EyeSight
• The vehicle speed is between approximately 20 mph (30
km/h) and 90 mph (145 km/h).
• Parking brake is released.
• The driving mode is set to normal mode or sport mode.
( P.258)
• Pre-Collision Braking System is not turned off during
TRACK mode. ( P.189, 263)
• TRAC and VSC system are not set to off. ( P.263)
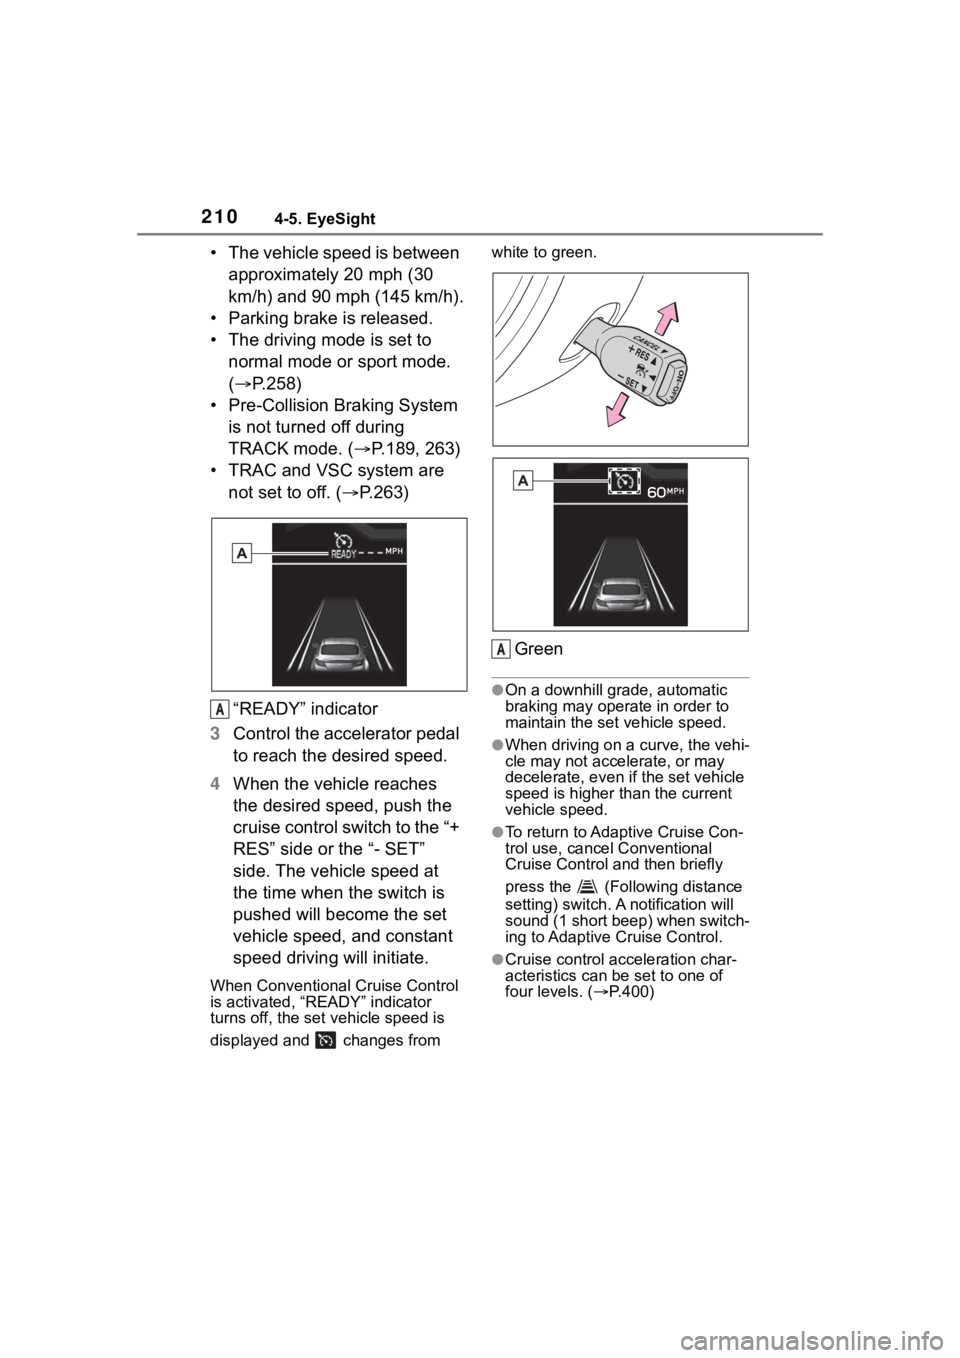
“READY” indicator
3 Control the accelerator pedal
to reach the desired speed.
4 When the vehicle reaches
the desired speed, push the
cruise control switch to the “+
RES” side or the “- SET”
side. The vehicle speed at
the time when the switch is
pushed will become the set
vehicle speed, and constant
speed driving will initiate.
When Conventional Cruise Control
is activated, “READY” indicator
turns off, the set vehicle speed is
displayed and changes from white to green.
Green
●On a downhill grade, automatic
braking may operate in order to
maintain the set vehicle speed.
●When driving on a curve, the vehi-
cle may not accelerate, or may
decelerate, e
ven if the set vehicle
speed is higher than the current
vehicle speed.
●To return to Adaptive Cruise Con-
trol use, cancel Conventional
Cruise Control and then briefly
press the (Following distance
setting) switch. A notification will
sound (1 short beep) when switch-
ing to Adaptive Cruise Control.
●Cruise control acceleration char-
acteristics can be set to one of
four levels. ( P.400)
A
A
Page 213 of 449
2134-5. EyeSight
4
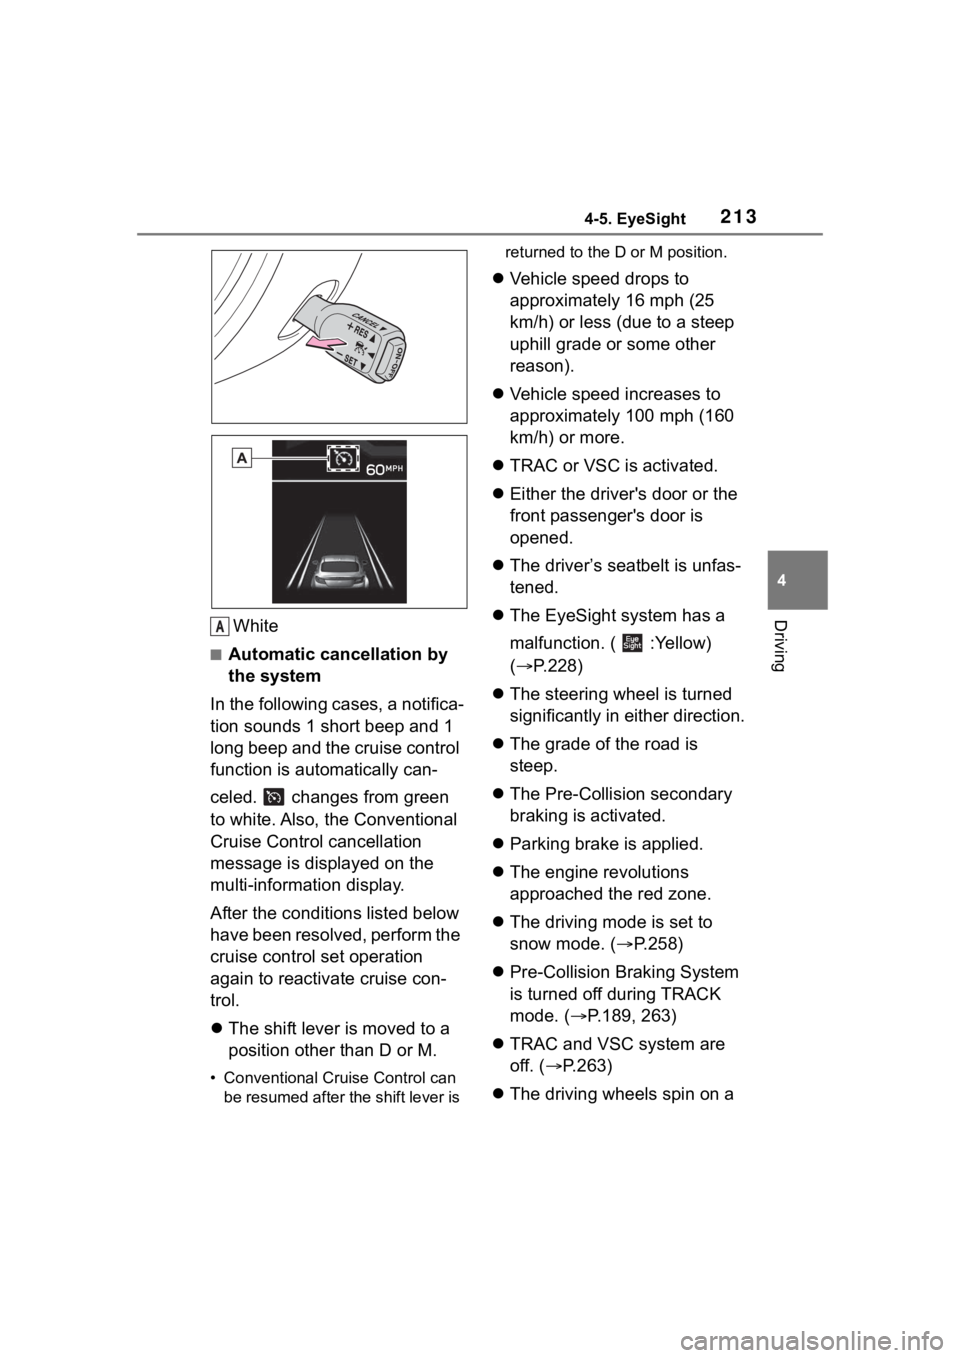
DrivingWhite
■Automatic cancellation by
the system
In the following cases, a notifica-
tion sounds 1 short beep and 1
long beep and the cruise control
function is automatically can-
celed. changes from green
to white. Also, the Conventional
Cruise Control cancellation
message is displayed on the
multi-information display.
After the conditi ons listed below
have been resolved, perform the
cruise control set operation
again to reactivate cruise con-
trol.
The shift lever is moved to a
position other than D or M.
• Conventional Cruise Control can
be resumed after the shift lever is returned to the D or M position.
Vehicle speed drops to
approximately 16 mph (25
km/h) or less (due to a steep
uphill grade or some other
reason).
Vehicle speed increases to
approximately 100 mph (160
km/h) or more.
TRAC or VSC is activated.
Either the driver's door or the
front passenger's door is
opened.
The driver’s seatbelt is unfas-
tened.
The EyeSight system has a
malfunction. ( :Yellow)
( P.228)
The steering wheel is turned
significantly in either direction.
The grade of the road is
steep.
The Pre-Collision secondary
braking is activated.
Parking brake is applied.
The engine revolutions
approached the red zone.
The driving mode is set to
snow mode. ( P.258)
Pre-Collision Braking System
is turned off during TRACK
mode. ( P.189, 263)
TRAC and VSC system are
off. ( P.263)
The driving wheels spin on a
A
Page 243 of 449
2434-6. Using other driving systems
4
Driving
nated.
●In the following cases, the
Reverse Automatic Braking (RAB)
system cannot be operated.
• The RAB OFF indicator is illumi-
nated.
●In the following cases, the func-
tions may not be able to properly
work. Promptly contact a Toyota
dealer to have the system
inspected.
• A sticker, paint, or a chemical is applied to the sonar sensors or
the rear bumper near the sonar
sensor.
• The rear bumper is modified.
• The rear bumper has been
removed and attached.
• The ground clearance is changed
due to the vehicle’s loading condi-
tion or modification.
• There is damage to the sonar sen-
sors or the rear bumper near the
sonar sensor.
• The rear bumper is exposed to
strong impact, or the rear bumper
is deformed.
●On a steep hill, t he system’s auto-
matic braking ability will be
reduced.
●The system is designed to avoid
collisions by automatic hard brak-
ing when the vehicle’s reversing
speed is less than approximately
3 mph (5 km/h). However, the sys-
tem does not guarantee that the
vehicle will be able to avoid colli-
sions in any situation.
●If the vehicle is reversed at an
extremely slow speed, the driver’s
operation may be prioritized. In
this case, automatic braking will
not operate.
●The system may not be able to
detect and apply the brake with
the following objects.
• Sharp or thin objects such as poles, fences and ropes which
may not reflect the sound wave
emitted from the sonar sensor.
• Objects that are t oo close to the
rear bumper when the shift lever is set to R.
• Objects with a su rface which may
not reflect the sound wave emitted
from the sonar sensor such as a
chain link fence.
●Objects the system is not
designed to detect and apply
brake.
• Pedestrians.
• Moving objects including moving vehicles.
• Objects which absorbs sound waves such as cloth or snow.
• Objects whose surface has a
diagonal angle.
• Objects that are low to the ground such as parking blocks.
• Objects that are high above the ground such as objects hanging
from above.
• Objects that are out of range of
the center of the vehicle in the
horizontal direction.
• Objects that are n ot in a vertical
direction.
• Objects which are not perpendicu-
lar to the ground.
• Objects which are not directly in the traveling direction of the vehi-
cle.
• Objects which a re uneven or
wavy.
●When reversing the vehicle, the
functions may not be able to work
properly or may cause a system
malfunction if the following condi-
tions exist.
High frequency so und from other
sources are nearby:
• Horn sound from another vehicle.
• Engine sound from other vehicles.
• Sound of an air brake.
• Vehicle detection equipment or a
sonar from another vehicle.
• A sound wave with a frequency similar to the veh icle’s system is
transmitted near by.
• A vehicle equipped with the same system is reversing toward your
reversing direction.
●Weather conditions:
• Extremely high or extremely low
Page 251 of 449
2514-6. Using other driving systems
4
Driving
When the shift lever is set to R,
the rear view camera automati-
cally displays the rear view
image from the vehicle. When
the lever is set to other posi-
tions, the image before setting
to R is displayed.
1Set the engine switch to ON.
2 Set the shift lever to R.
●The image of the rear view cam-
era is horizontally reversed as is
the case with the vehicle inside mirror or the outside mirror.
●When “Rear Camera Delay Con-
trol” is on, the r
ear view image
from the r ear view camera will be
displayed on the multimedia sys-
tem screen for a certain amount of
time after the shift lever is shifted
from R to another position. When
any of the following conditions are
met, the rear view image will be
canceled:
• The shift lever is shifted to P (vehi- cles with an automatic transmis-
sion)
• The vehicle speed becomes approximately 5 mph (8 km/h) or
more
• The parking brake is engaged
• 9 seconds have elapsed since the shift lever was shifted from R to
another position
To turn the function on and off, refer
to “MULTIMEDIA OWNER’S MAN-
UAL”.
●It may be difficult to see the image
of the rear view camera in the fol-
lowing cases. This is not a mal-
function of the camera.
• The vehicle is in a dark place (at night, in a tunnel, etc.).
• The vehicle is in an extremely hot or cold place.
• An object (such as raindrops,
snow, dirt, etc.) that disturbs the
view of the rear view camera
sticks to the lens of the camera.
• Strong light is shining directly on the camera lens ( occasionally,
there are vertical lines on the
screen).
The area from the rear end of
the bumper can be viewed.
Areas at both ends of the
bumper and areas just under the
bumper cannot be viewed.
NOTICE
●Since the camera is a precision
device, do not subject it to
strong impacts. Otherwise, mal-
function, fire or electric shock
may occur.
●If mud or snow sticks to or is fro-
zen on the camera, you must be
very careful when removing it.
Otherwise, damage to the cam-
era may cause a fire or electric
shock. Pour water or lukewarm
water over the camera to
remove mud and ice, and wipe
it with a soft, dry cloth.
●Do not put a flame close to the
camera or wirin g. Otherwise,
damage or fire may occur.
●When replacing the fuse, be
sure to use a fuse with the spec-
ified rating. Use of a fuse with a
different rating may result in a
malfunction.
●If you use the rear view camera
for a long time while the engine
is not operated, the battery may
become completely discharged.
How to use the rear view
camera
Viewing range on the
screen
Page 259 of 449
2594-6. Using other driving systems
4
Driving
Use snow mode for accelerating
and driving on slippery road sur-
faces such as snow.
The snow mode indicator comes
on.
■Sport mode
●In sport mode, lower gears are
used and gears change at a
higher engine speed.
●In the following situations, it may
not be possible to change to sport
mode. When the mode cannot be
changed to sport mode, a buzzer
will sound and a message will be
displayed on the multi-information
display.
• When the Adaptive Cruise Control or Conventional Cruise Control is
operating
• When the engine is cold
■Snow mode
To prevent slipping, 1st gear cannot
be selected when in snow mode.
■Automatic deactivation of sport
mode and snow mode
In the following si tuations, the driv-
ing mode is autom atically deacti-
vated:
●When the engine is turned off after
driving in sport mode or snow
mode.
●When the Adaptive Cruise Control
or Conventional Cruise Control is
activated while driving in sport
mode.
●When in sport mode and stop-
ping/starting off is automatically
performed in second gear.
( P.150)
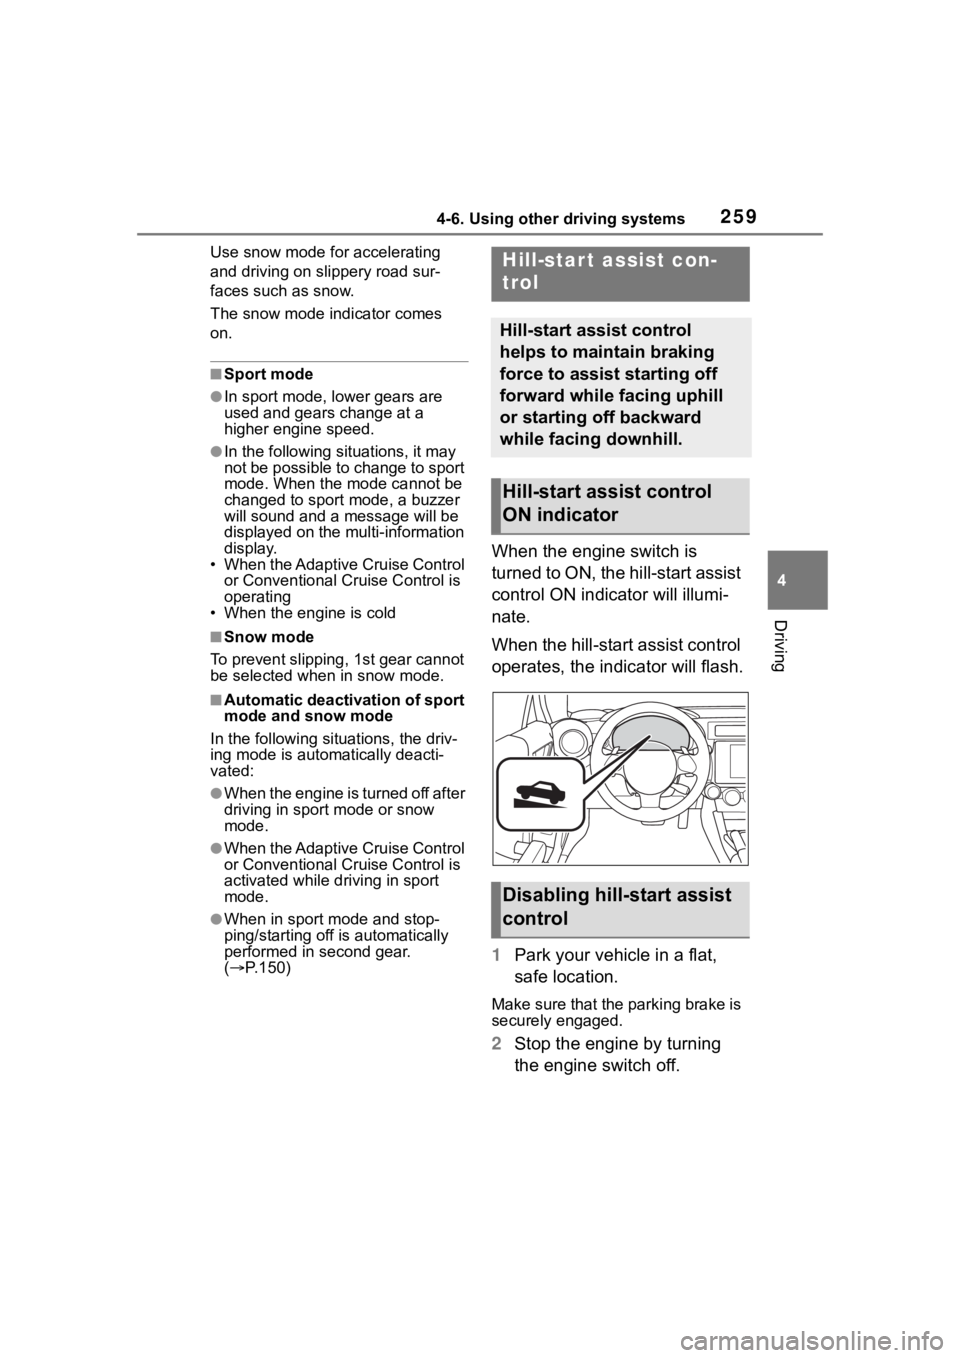
When the engine switch is
turned to ON, the hill-start assist
control ON indicator will illumi-
nate.
When the hill-start assist control
operates, the indicator will flash.
1 Park your vehicle in a flat,
safe location.
Make sure that the parking brake is
securely engaged.
2Stop the engine by turning
the engine switch off.
Hill-star t assist con-
trol
Hill-start assist control
helps to maintain braking
force to assist starting off
forward while facing uphill
or starting off backward
while facing downhill.
Hill-start assist control
ON indicator
Disabling hill-start assist
control
Page 260 of 449
2604-6. Using other driving systems
3Start the engine and check
that the ABS warning light
and slip indicator are off.
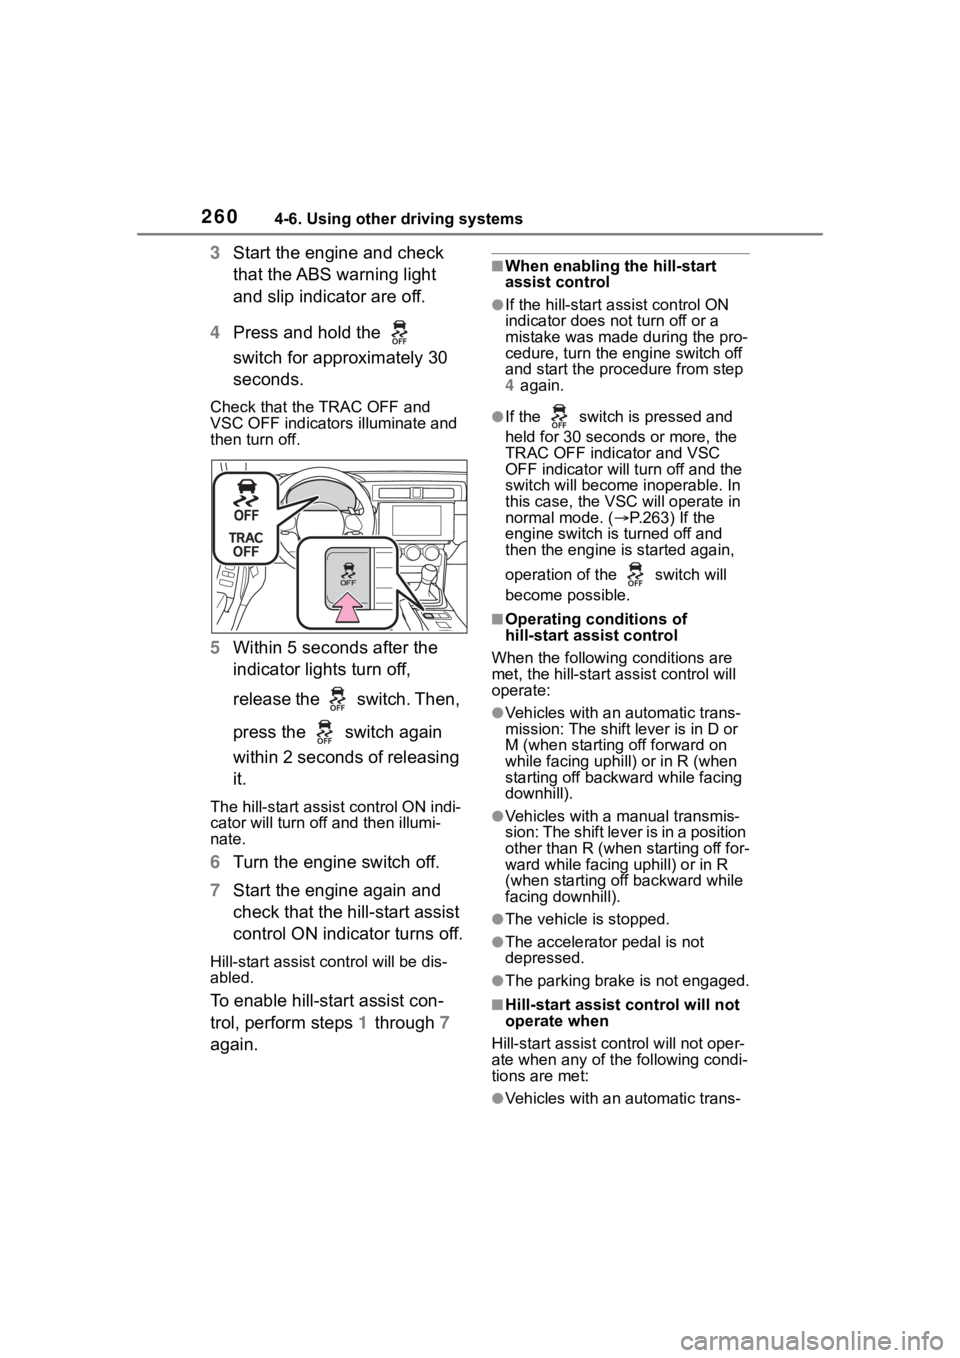
4 Press and hold the
switch for approximately 30
seconds.
Check that the TRAC OFF and
VSC OFF indicators illuminate and
then turn off.
5 Within 5 seconds after the
indicator lights turn off,
release the switch. Then,
press the switch again
within 2 seconds of releasing
it.
The hill-start assis t control ON indi-
cator will turn off and then illumi-
nate.
6 Turn the engine switch off.
7 Start the engine again and
check that the hill-start assist
control ON indicator turns off.
Hill-start assist control will be dis-
abled.
To enable hill-start assist con-
trol, perform steps 1 through 7
again.
■When enabling the hill-start
assist control
●If the hill-start assist control ON
indicator does n ot turn off or a
mistake was made during the pro-
cedure, turn the e ngine switch off
and start the procedure from step
4 again.
●If the switch is pressed and
held for 30 seconds or more, the
TRAC OFF indicator and VSC
OFF indicator will tu rn off and the
switch will become inoperable. In
this case, the VSC will operate in
normal mode. ( P.263) If the
engine switch is turned off and
then the engine is started again,
operation of the switch will
become possible.
■Operating conditions of
hill-start assist control
When the following conditions are
met, the hill-start assist control will
operate:
●Vehicles with an automatic trans-
mission: The shift lever is in D or
M (when starting off forward on
while facing uphill) or in R (when
starting off backward while facing
downhill).
●Vehicles with a manual transmis-
sion: The shift lever is in a position
other than R (when starting off for-
ward while facing uphill) or in R
(when starting off backward while
facing downhill).
●The vehicle is stopped.
●The accelerator pedal is not
depressed.
●The parking brake is not engaged.
■Hill-start assist control will not
operate when
Hill-start assist cont rol will not oper-
ate when any of the following condi-
tions are met:
●Vehicles with an automatic trans-
Page 261 of 449
2614-6. Using other driving systems
4
Driving
mission: The shift lever is in a
position other than D or M (when
facing uphill) or in a position other
than R (when facing downhill).
●Vehicles with a manual transmis-
sion: The shift lever is in R (when
facing uphill) or in a position other
than R (when facing downhill).
●Vehicles with an automatic trans-
mission: The accelerator pedal is
depressed.
●The parking brake is applied.
●Vehicles with a manual transmis-
sion: The clutch is engaged.
●Approximately 2 seconds have
elapsed since the brake pedal
was released.
●The hill-start assist control ON
indicator is not illuminated.
●The engine switch is turned to
ACC or OFF.
■Notes for hill-start assist con-
trol
●A slight jolt may be felt when start-
ing off backward with the shift
lever in R and then moving for-
ward.
●If the braking po wer of hill-start
assist control is insufficient,
depress the brake pedal.
●While the vehicle is stopped,
make sure to depress the brake
pedal.
■The system may be malfunc-
tioning when
In the following si tuations, the sys-
tem may be malfunctioning. Have
the vehicle inspected by your Toyota
dealer.
●The slip indicat or is illuminated.
●The hill-start assist control ON
indicator turns off and a buzzer
sounds.
WARNING
■Hill-start assist control pre-
cautions
●Do not overly rely on hill-start
assist control. Hill-start assist
control may not operate effec-
tively on steep inclines and
roads covered with ice.
●Unlike the parking brake,
hill-start assist control is not
intended to hold the vehicle sta-
tionary for an extended period
of time. Do not attempt to use
hill-start assist control to hold
the vehicle on an incline, as
doing so may lead to an acci-
dent.
●Do not stop the engine while
hill-start assist control is operat-
ing, as hill-start assist control
will stop operating, possibly
leading to an accident.
Page 267 of 449
2674-7. Driving tips
4
Driving
chassis, around the tires or on
the brakes.
Remove any snow or mud
from the bottom of your shoes
before getting in the vehicle.
If a door is opened and closed
when its side window is fro-
zen, the window safety device
will operate and the side win-
dow open/close function
linked to door operation may
not operate correctly.
If this occurs, perform the fol-
lowing after the ice has
melted.
1 Open the window to the
approximately half open posi-
tion with the door closed.
2 Press and hold the power
window switch in the
one-touch opening position.
After the window is fully
opened, continue pressing
the switch for approximately
1 second.
3 Pull and hold the power win-
dow switch in the one-touch
closing position. After the
window is fully closed, con-
tinue pulling the switch for
approximately 1 second.
The window position wil lbe reset
and the operation of the window
safety device will be canceled.
Accelerate the vehicle slowly,
keep a safe distance between you and the vehicle ahead, and
drive at a reduced speed suit-
able to road conditions.
Park the vehicle and shift the
shift lever to P (automatic
transmission), or 1 or R (man-
ual transmission) without set-
ting the parking brake. The
parking brake may freeze up,
preventing it from being
released. If the vehicle is
parked without setting the
parking brake, make sure to
block the wheels.
Failure to do so may be dan-
gerous because it may cause
the vehicle to move unexpect-
edly, possibly leading to an
accident.
Vehicles with an automatic
transmission: If the vehicle is
parked without setting the
parking brake, confirm that
the shift lever cannot be
moved out of P
*.
*: The shift lever will be locked if it is
attempted to be sh ifted from P to
any other position without
depressing the brake pedal. If the
shift lever can be shifted from P,
there may be a problem with the
shift lock system. Have the vehi-
cle inspected by your Toyota
dealer immediately.
When driving the vehicle
When parking the vehicle
Page 289 of 449

2896-1. Maintenance and care
6
Maintenance and care
with a diluted neutral detergent to
remove the dirt.
●To protect the matte paint from
damage, make sure to observe
the following precautions.
• Do not scrub or polish the wheels using a brush or dry cloth
• Do not use any wheel coatings or
abrasive detergents
■Brake pads and calipers
Rust may form if the vehicle is
parked with wet brake pads or disc
rotors, causing them to stick. Before
parking the vehicle after it is
washed, drive slow ly and apply the
brakes several times to dry the
parts.
■Bumpers
Do not scrub with abrasive cleaners.
■Plated portions
If dirt cannot be removed, clean the
parts as follows:
●Use a soft cloth dampened with an
approximately 5% solution of neu-
tral detergent and water to clean
the dirt off.
●Wipe the surface with a dry, soft
cloth to remove any remaining
moisture.
●To remove oily deposits, use alco-
hol wet wipes or a similar product.
WARNING
■When washing the vehicle
Do not apply water to the inside of
the engine compartment. Doing
so may cause the electrical com-
ponents, etc. to catch fire.
■Precautions regarding the
exhaust pipes
Exhaust gasses cause the
exhaust pipes and rear bumper
diffusers to become quite hot.
When washing the vehicle, be
careful not to touch the pipes and
diffusers until they have cooled
sufficiently, as touching hot
exhaust pipes and rear bumper
diffusers can cause burns.
■Precaution regarding the rear
bumper
If the paint of th e rear bumper is
chipped or scratched, the follow-
ing systems may not function cor-
rectly. If this occurs, consult your
Toyota dealer.
●BSD/RCTA (if equipped)
●RAB (if equipped)
NOTICE
■To prevent paint deteriora-
tion and corrosion on the
body and components (alumi-
num wheels, etc.)
●Wash the vehicle immediately in
the following cases:
• After driving nea r the sea coast
• After driving on salted roads
• If coal tar or tree sap is present on the paint surface
• If dead insects, insect droppings or bird droppings are present on
the paint surface
• After driving in an area contami- nated with soot, oily smoke,
mine dust, iron powder or chem-
ical substances
• If the vehicle becomes heavily soiled with d ust or mud
Page 298 of 449
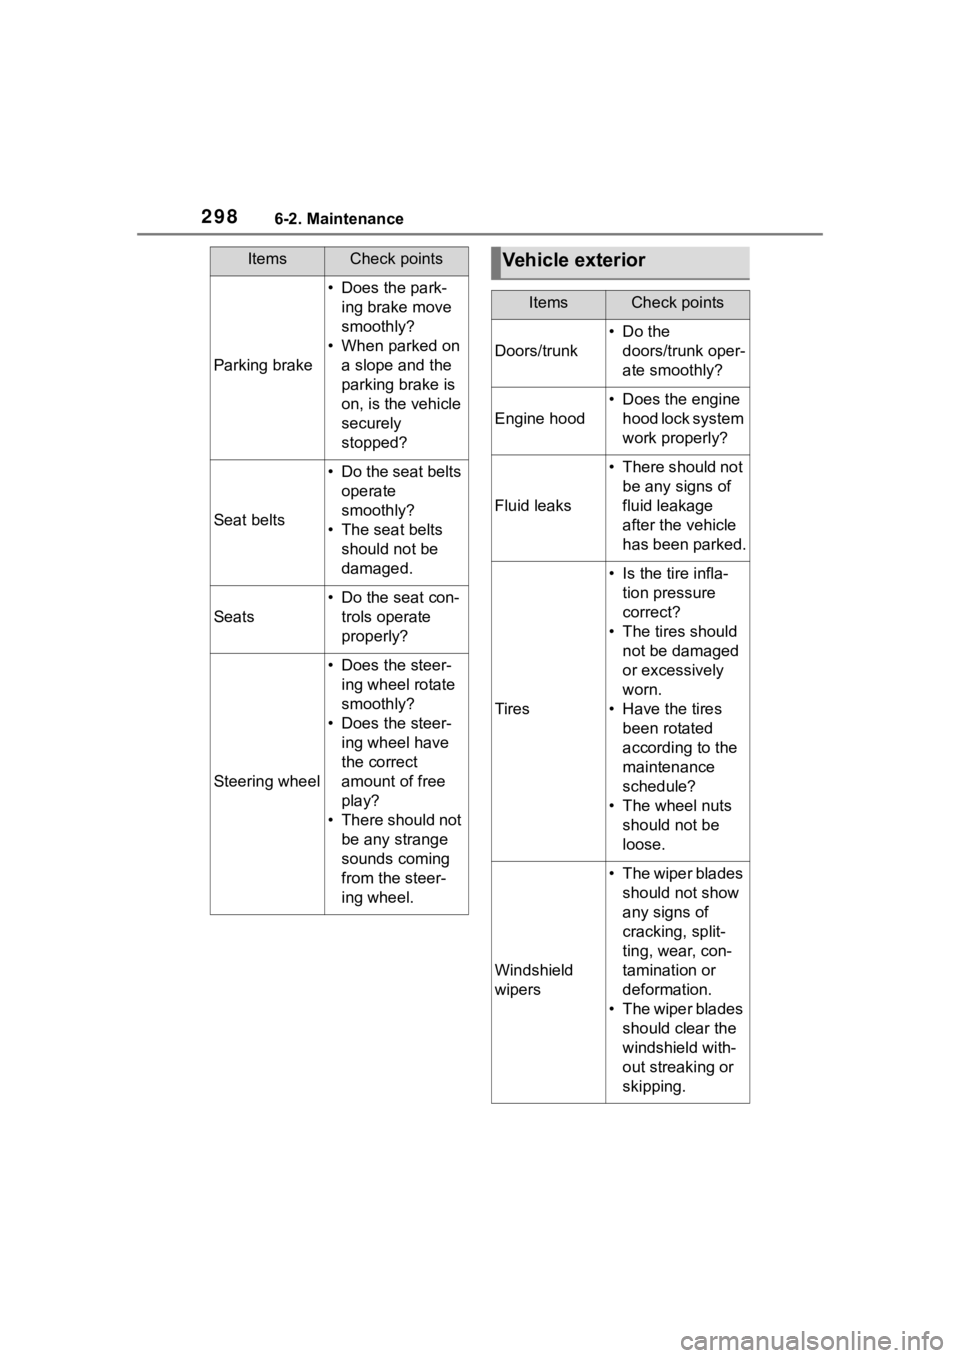
2986-2. Maintenance
Parking brake
• Does the park-ing brake move
smoothly?
• When parked on a slope and the
parking brake is
on, is the vehicle
securely
stopped?
Seat belts
• Do the seat belts operate
smoothly?
• The seat belts should not be
damaged.
Seats
• Do the seat con-trols operate
properly?
Steering wheel
• Does the steer-ing wheel rotate
smoothly?
• Does the steer- ing wheel have
the correct
amount of free
play?
• There should not be any strange
sounds coming
from the steer-
ing wheel.
ItemsCheck pointsVehicle exterior
ItemsCheck points
Doors/trunk
•Do the doors/trunk oper-
ate smoothly?
Engine hood
• Does the engine hood lock system
work properly?
Fluid leaks
• There should not be any signs of
fluid leakage
after the vehicle
has been parked.
Tires
• Is the tire infla-tion pressure
correct?
• The tires should not be damaged
or excessively
worn.
• Have the tires been rotated
according to the
maintenance
schedule?
• The wheel nuts should not be
loose.
Windshield
wipers
• The wiper blades should not show
any signs of
cracking, split-
ting, wear, con-
tamination or
deformation.
• The wiper blades should clear the
windshield with-
out streaking or
skipping.